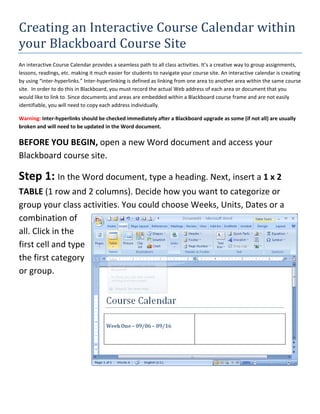
This document provides instructions for creating an interactive course calendar within a Blackboard course site using inter-hyperlinks. It explains that inter-hyperlinking involves linking between areas within the same course site. To do so, the document addresses must be copied from Blackboard. The instructions then outline a 6 step process for recording class activities and links in a Word document: 1) create a heading and table, 2) add categories and activities, 3) copy links from Blackboard, 4) insert links into the Word document, 5) paste the addresses, and 6) test the links. Users are warned that links may break during upgrades and need revising.

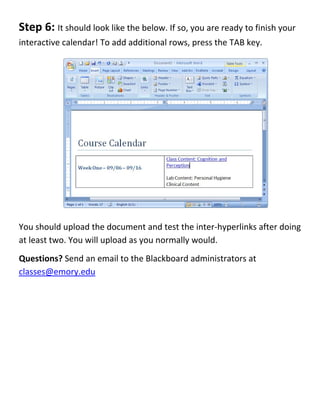
![Step 4: Return to the Word document. Highlight the text that this
copied address needs to be associated with and either use the Insert
menu to select [Hyper] Links or right mouse click on the highlighted text
and select Hyperlink.
Step 5:
Paste the
Address by
holding
down the
CTRL key
and
pressing V.
Click OK.](https://image.slidesharecdn.com/createinteractivecalendar-120606112111-phpapp01/85/Create-interactive-calendar-3-320.jpg)


![Final updated reference page-english[1]](https://cdn.slidesharecdn.com/ss_thumbnails/final-updatedreferencepageenglish1-110128101829-phpapp02-thumbnail.jpg?width=640&height=640&fit=bounds)


