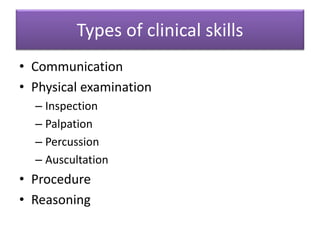
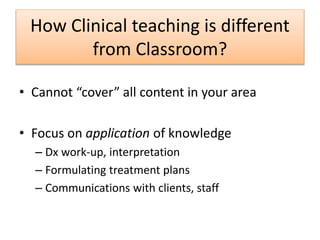
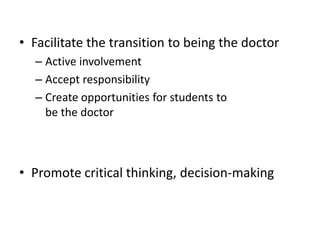
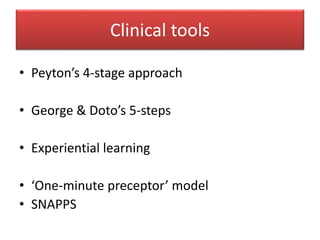
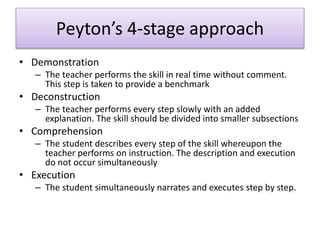
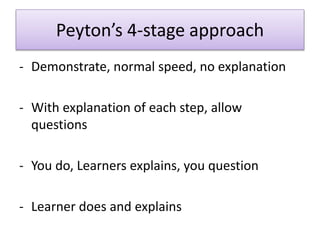
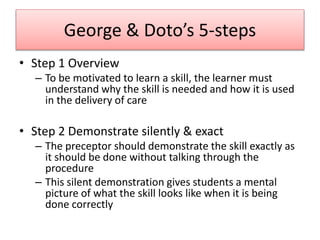
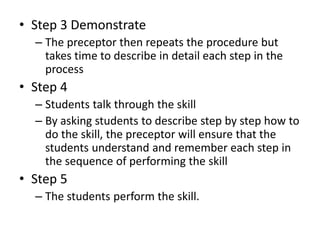
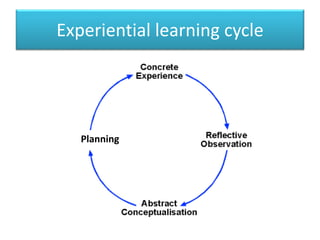
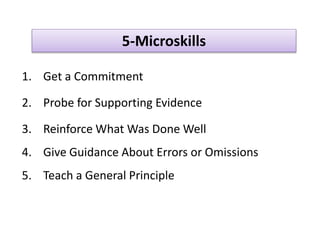
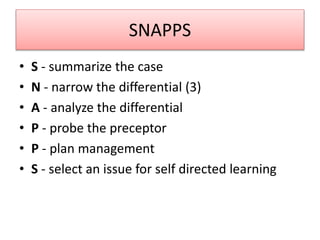
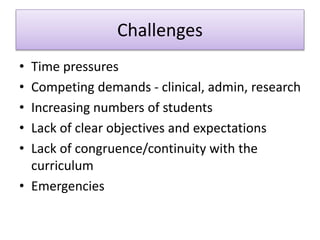
Clinical Skills Facilitation
Devender
MAMC
Objectives
• What are types of clinical skills?
• How Clinical teaching is different from
Classroom?
• What are the tools?
• Challenges / Problems in clinical teaching
• How to improve?
What do we do in Clinics?
• Structured and specific ?
• Clinical decisions in the context of patients’
lives
Types of clinical skills
• Communication
• Physical examination
– Inspection
– Palpation
– Percussion
– Auscultation
• Procedure
• Reasoning
How Clinical teaching is different
from Classroom?
• Cannot “cover” all content in your area
• Focus on application of knowledge
– Dx work-up, interpretation
– Formulating treatment plans
– Communications with clients, staff
• Facilitate the transition to being the doctor
– Active involvement
– Accept responsibility
– Create opportunities for students to
be the doctor
• Promote critical thinking, decision-making
Clinical tools
• Peyton’s 4-stage approach
• George & Doto’s 5-steps
• Experiential learning
• ‘One-minute preceptor’ model
• SNAPPS
• Demonstration
– The teacher performs the skill in real time without comment.
This step is taken to provide a benchmark
• Deconstruction
– The teacher performs every step slowly with an added
explanation. The skill should be divided into smaller subsections
• Comprehension
– The student describes every step of the skill whereupon the
teacher performs on instruction. The description and execution
do not occur simultaneously
• Execution
– The student simultaneously narrates and executes step by step.
Peyton’s 4-stage approach
- Demonstrate, normal speed, no explanation
- With explanation of each step, allow
questions
- You do, Learners explains, you question
- Learner does and explains
George & Doto’s 5-steps
• Step 1 Overview
– To be motivated to learn a skill, the learner must
understand why the skill is needed and how it is used
in the delivery of care
• Step 2 Demonstrate silently & exact
– The preceptor should demonstrate the skill exactly as
it should be done without talking through the
procedure
– This silent demonstration gives students a mental
picture of what the skill looks like when it is being
done correctly
• Step 3 Demonstrate
– The preceptor then repeats the procedure but
takes time to describe in detail each step in the
process
• Step 4
– Students talk through the skill
– By asking students to describe step by step how to
do the skill, the preceptor will ensure that the
students understand and remember each step in
the sequence of performing the skill
• Step 5
– The students perform the skill.
Experiential learning cycle
Planning
Questioning
Discussion
Presentation
10 Minutes of “Teaching Time”...
3 Minutes
6 Minutes
1 Minute
The One-minute Preceptor
1. Get a Commitment
2. Probe for Supporting Evidence
3. Reinforce What Was Done Well
4. Give Guidance About Errors or Omissions
5. Teach a General Principle
5-Microskills
SNAPPS
• S - summarize the case
• N - narrow the differential (3)
• A - analyze the differential
• P - probe the preceptor
• P - plan management
• S - select an issue for self directed learning
Challenges
• Time pressures
• Competing demands - clinical, admin, research
• Increasing numbers of students
• Lack of clear objectives and expectations
• Lack of congruence/continuity with the
curriculum
• Emergencies
Problems
• Inadequate demonstration
• Imprinting of past obsolete/incorrect
• Improper correction/reinforcement
• Affective factors (Behavior) ???
How to Improve?
• Go with an objective
• Make discussions relevant
• Teach a general principle/ competency
• Follow through with time commitments
– Rounds start at 8:15 a.m.
• Be cognizant of students’ other
responsibilities
– Fatigue
– Time of day
Conclusions…..
• Students as competent clinician
– Encourage students to become independent
learners
• Students - who are critical thinkers
• Students as explorer
– Give students the opportunity to figure out the
answers themselves

Clinical skills facilitation

  • 1.
  • 2.
    Objectives • What aretypes of clinical skills? • How Clinical teaching is different from Classroom? • What are the tools? • Challenges / Problems in clinical teaching • How to improve?
  • 3.
    What do wedo in Clinics? • Structured and specific ? • Clinical decisions in the context of patients’ lives
  • 4.
    Types of clinicalskills • Communication • Physical examination – Inspection – Palpation – Percussion – Auscultation • Procedure • Reasoning
  • 5.
    How Clinical teachingis different from Classroom? • Cannot “cover” all content in your area • Focus on application of knowledge – Dx work-up, interpretation – Formulating treatment plans – Communications with clients, staff
  • 6.
    • Facilitate thetransition to being the doctor – Active involvement – Accept responsibility – Create opportunities for students to be the doctor • Promote critical thinking, decision-making
  • 7.
    Clinical tools • Peyton’s4-stage approach • George & Doto’s 5-steps • Experiential learning • ‘One-minute preceptor’ model • SNAPPS
  • 8.
    • Demonstration – Theteacher performs the skill in real time without comment. This step is taken to provide a benchmark • Deconstruction – The teacher performs every step slowly with an added explanation. The skill should be divided into smaller subsections • Comprehension – The student describes every step of the skill whereupon the teacher performs on instruction. The description and execution do not occur simultaneously • Execution – The student simultaneously narrates and executes step by step. Peyton’s 4-stage approach
  • 9.
    Peyton’s 4-stage approach -Demonstrate, normal speed, no explanation - With explanation of each step, allow questions - You do, Learners explains, you question - Learner does and explains
  • 10.
    George & Doto’s5-steps • Step 1 Overview – To be motivated to learn a skill, the learner must understand why the skill is needed and how it is used in the delivery of care • Step 2 Demonstrate silently & exact – The preceptor should demonstrate the skill exactly as it should be done without talking through the procedure – This silent demonstration gives students a mental picture of what the skill looks like when it is being done correctly
  • 11.
    • Step 3Demonstrate – The preceptor then repeats the procedure but takes time to describe in detail each step in the process • Step 4 – Students talk through the skill – By asking students to describe step by step how to do the skill, the preceptor will ensure that the students understand and remember each step in the sequence of performing the skill • Step 5 – The students perform the skill.
  • 12.
  • 13.
    Questioning Discussion Presentation 10 Minutes of“Teaching Time”... 3 Minutes 6 Minutes 1 Minute The One-minute Preceptor
  • 14.
    1. Get aCommitment 2. Probe for Supporting Evidence 3. Reinforce What Was Done Well 4. Give Guidance About Errors or Omissions 5. Teach a General Principle 5-Microskills
  • 15.
    SNAPPS • S -summarize the case • N - narrow the differential (3) • A - analyze the differential • P - probe the preceptor • P - plan management • S - select an issue for self directed learning
  • 16.
    Challenges • Time pressures •Competing demands - clinical, admin, research • Increasing numbers of students • Lack of clear objectives and expectations • Lack of congruence/continuity with the curriculum • Emergencies
  • 17.
    Problems • Inadequate demonstration •Imprinting of past obsolete/incorrect • Improper correction/reinforcement • Affective factors (Behavior) ???
  • 19.
    How to Improve? •Go with an objective • Make discussions relevant • Teach a general principle/ competency • Follow through with time commitments – Rounds start at 8:15 a.m. • Be cognizant of students’ other responsibilities – Fatigue – Time of day
  • 20.
    Conclusions….. • Students ascompetent clinician – Encourage students to become independent learners • Students - who are critical thinkers • Students as explorer – Give students the opportunity to figure out the answers themselves

Editor's Notes

  • #14 First, a disclaimer: Is the “One Minute Preceptor” model going to help you do all your precepting in one minute? No. Studies have shown that the average teaching encounter takes 10 minutes: 6 minutes for the learner to present. 3 minutes for the preceptor to ask questions and clarify information. This leaves 1 minutes of discussion and teaching time. The One Minute Preceptor strategy still takes longer than a minute. But it provides a structure to the encounter that helps you maximize the amount of time for teaching.
  • #15 The “One Minute Preceptor” strategy is based on 5 steps that build on each other. [read them]
  • #17 Competing demands—clinical, (especially when needs of patients and students conflict); administrative; research Often opportunistic—makes planning more difficult Fewer patients (shorter hospital stays; patients too ill or frail; more patients refusing consent) Clinical environment not “teaching friendly” e.g., ward/OPD