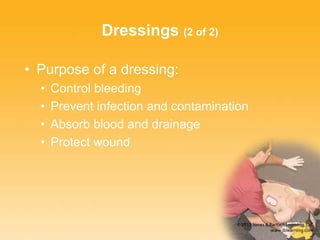
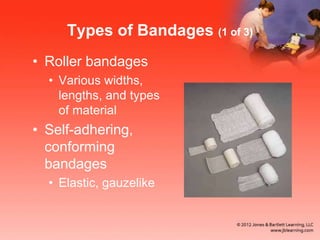
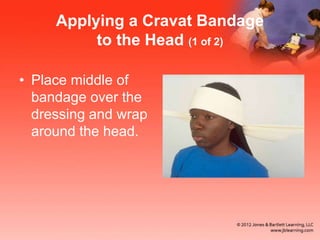
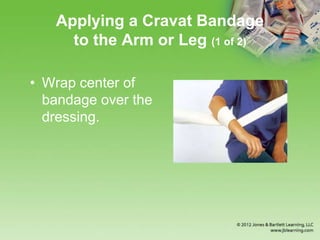
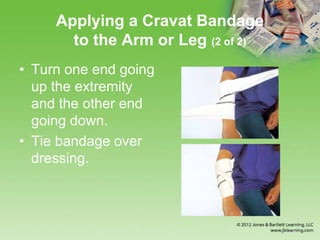
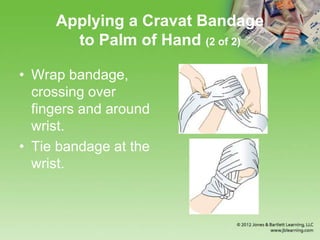
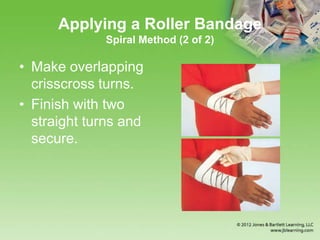
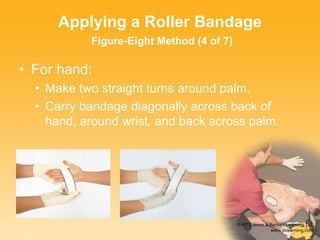
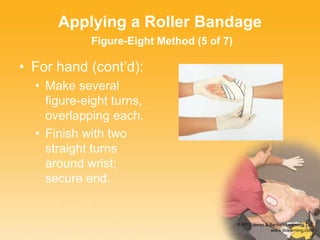
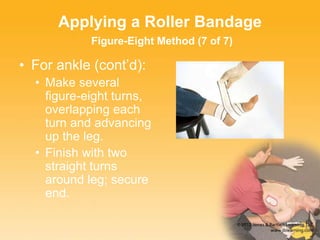
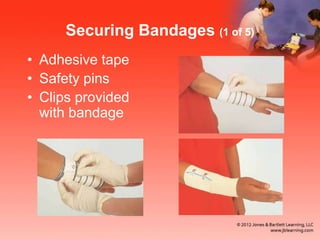
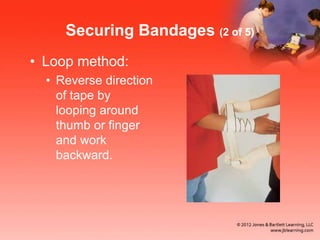
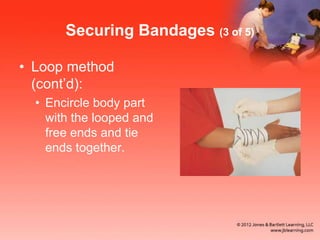
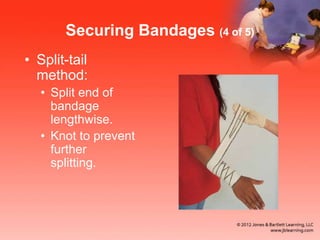
Chapter 10
Bandaging Wounds
Dressings (1 of 2)
• A dressing covers an open wound and
touches the wound.
• Whenever possible, a dressing should be:
• Sterile
• Larger than the wound
• Thick, soft, and compressible
• Lint free
Dressings (2 of 2)
• Purpose of a dressing:
• Control bleeding
• Prevent infection and contamination
• Absorb blood and drainage
• Protect wound
Types of Dressings (1 of 2)
• Gauze pads
• For small wounds
Types of Dressings (2 of 2)
• Adhesive strips
• Small cuts and
abrasions
• Trauma dressings
• Large, thick, absorbent
Improvised Dressings
• Should be:
• Clean
• Absorbent
• Soft
• As free of lint as possible
Applying a Sterile Dressing
• Wash hands and wear exam
gloves.
• Hold dressing by one corner and
place over wound.
• Do not slide over wound.
• Do not touch dressing.
• Cover with bandage.
Bandages (1 of 2)
• Should be clean but need not be sterile
• Can be used to:
• Hold a dressing in place
• Apply direct pressure
• Prevent or reduce swelling
• Provide support and stability for an
extremity or joint
Bandages (2 of 2)
• Signs that a bandage may be too tight:
• Blue tinge on fingernails or toenails
• Blue or pale skin color
• Tingling, loss of sensation
• Coldness
• Inability to move fingers or toes
• Inability to feel a pulse that could previously
be felt
Types of Bandages (1 of 3)
• Roller bandages
• Various widths,
lengths, and types
of material
• Self-adhering,
conforming
bandages
• Elastic, gauzelike
Types of Bandages (2 of 3)
• Gauze rollers
• Nonelastic cotton
• Elastic roller
bandages
• Provide
compression
Types of Bandages (3 of 3)
• Triangular
bandages
• Slings
• Cravats
• Adhesive tape and
strips
Applying a Cravat Bandage
to the Head (1 of 2)
• Place middle of
bandage over the
dressing and wrap
around the head.
Applying a Cravat Bandage
to the Head (2 of 2)
• Cross the two
ends snugly.
• Bring ends back
around and tie
knot.
Applying a Cravat Bandage
to the Arm or Leg (1 of 2)
• Wrap center of
bandage over the
dressing.
Applying a Cravat Bandage
to the Arm or Leg (2 of 2)
• Turn one end going
up the extremity
and the other end
going down.
• Tie bandage over
dressing.
Applying a Cravat Bandage
to Palm of Hand (1 of 2)
• Fill palm with bulky
dressing or pad,
and close fingers.
• Wrap one end
around fingers,
other around wrist.
Applying a Cravat Bandage
to Palm of Hand (2 of 2)
• Wrap bandage,
crossing over
fingers and around
wrist.
• Tie bandage at the
wrist.
Applying a Roller Bandage
Spiral Method (1 of 2)
• Make two
straight,
anchoring
turns.
Applying a Roller Bandage
Spiral Method (2 of 2)
• Make overlapping
crisscross turns.
• Finish with two
straight turns and
secure.
Applying a Roller Bandage
Figure-Eight Method (1 of 7)
• For elbow or knee:
• Make two straight turns
over joint.
• Make one turn above joint,
overlapping the first turn.
Applying a Roller Bandage
Figure-Eight Method (2 of 7)
• For elbow or knee (cont’d):
• Make one turn below joint,
overlapping first straight turn.
• Continue alternating turns.
Applying a Roller Bandage
Figure-Eight Method (3 of 7)
• For elbow or knee
(cont’d):
• Finish with two
straight turns to
secure end.
Applying a Roller Bandage
Figure-Eight Method (4 of 7)
• For hand:
• Make two straight turns around palm.
• Carry bandage diagonally across back of
hand, around wrist, and back across palm.
Applying a Roller Bandage
Figure-Eight Method (5 of 7)
• For hand (cont’d):
• Make several
figure-eight turns,
overlapping each.
• Finish with two
straight turns
around wrist;
secure end.
Applying a Roller Bandage
Figure-Eight Method (6 of 7)
• For ankle:
• Make two straight turns around instep.
• Make figure-eight turn across front of foot,
around ankle, and under arch.
Applying a Roller Bandage
Figure-Eight Method (7 of 7)
• For ankle (cont’d):
• Make several
figure-eight turns,
overlapping each
turn and advancing
up the leg.
• Finish with two
straight turns
around leg; secure
end.
Securing Bandages (1 of 5)
• Adhesive tape
• Safety pins
• Clips provided
with bandage
Securing Bandages (2 of 5)
• Loop method:
• Reverse direction
of tape by
looping around
thumb or finger
and work
backward.
Securing Bandages (3 of 5)
• Loop method
(cont’d):
• Encircle body part
with the looped and
free ends and tie
ends together.
Securing Bandages (4 of 5)
• Split-tail
method:
• Split end of
bandage
lengthwise.
• Knot to prevent
further
splitting.
Securing Bandages (5 of 5)
• Split-tail method
(cont’d):
• Pass ends in
opposite directions
around body part
and tie.
Applying an Adhesive Strip
• Remove wrapping, and
hold by protective
strips.
• Peel back protective
strips, and place on
wound.
• Pull away protective
strips, and press ends
and edges down.

Chapter 10 Bandaging Wounds

  • 1.
  • 2.
    Dressings (1 of2) • A dressing covers an open wound and touches the wound. • Whenever possible, a dressing should be: • Sterile • Larger than the wound • Thick, soft, and compressible • Lint free
  • 3.
    Dressings (2 of2) • Purpose of a dressing: • Control bleeding • Prevent infection and contamination • Absorb blood and drainage • Protect wound
  • 4.
    Types of Dressings(1 of 2) • Gauze pads • For small wounds
  • 5.
    Types of Dressings(2 of 2) • Adhesive strips • Small cuts and abrasions • Trauma dressings • Large, thick, absorbent
  • 6.
    Improvised Dressings • Shouldbe: • Clean • Absorbent • Soft • As free of lint as possible
  • 7.
    Applying a SterileDressing • Wash hands and wear exam gloves. • Hold dressing by one corner and place over wound. • Do not slide over wound. • Do not touch dressing. • Cover with bandage.
  • 8.
    Bandages (1 of2) • Should be clean but need not be sterile • Can be used to: • Hold a dressing in place • Apply direct pressure • Prevent or reduce swelling • Provide support and stability for an extremity or joint
  • 9.
    Bandages (2 of2) • Signs that a bandage may be too tight: • Blue tinge on fingernails or toenails • Blue or pale skin color • Tingling, loss of sensation • Coldness • Inability to move fingers or toes • Inability to feel a pulse that could previously be felt
  • 10.
    Types of Bandages(1 of 3) • Roller bandages • Various widths, lengths, and types of material • Self-adhering, conforming bandages • Elastic, gauzelike
  • 11.
    Types of Bandages(2 of 3) • Gauze rollers • Nonelastic cotton • Elastic roller bandages • Provide compression
  • 12.
    Types of Bandages(3 of 3) • Triangular bandages • Slings • Cravats • Adhesive tape and strips
  • 13.
    Applying a CravatBandage to the Head (1 of 2) • Place middle of bandage over the dressing and wrap around the head.
  • 14.
    Applying a CravatBandage to the Head (2 of 2) • Cross the two ends snugly. • Bring ends back around and tie knot.
  • 15.
    Applying a CravatBandage to the Arm or Leg (1 of 2) • Wrap center of bandage over the dressing.
  • 16.
    Applying a CravatBandage to the Arm or Leg (2 of 2) • Turn one end going up the extremity and the other end going down. • Tie bandage over dressing.
  • 17.
    Applying a CravatBandage to Palm of Hand (1 of 2) • Fill palm with bulky dressing or pad, and close fingers. • Wrap one end around fingers, other around wrist.
  • 18.
    Applying a CravatBandage to Palm of Hand (2 of 2) • Wrap bandage, crossing over fingers and around wrist. • Tie bandage at the wrist.
  • 19.
    Applying a RollerBandage Spiral Method (1 of 2) • Make two straight, anchoring turns.
  • 20.
    Applying a RollerBandage Spiral Method (2 of 2) • Make overlapping crisscross turns. • Finish with two straight turns and secure.
  • 21.
    Applying a RollerBandage Figure-Eight Method (1 of 7) • For elbow or knee: • Make two straight turns over joint. • Make one turn above joint, overlapping the first turn.
  • 22.
    Applying a RollerBandage Figure-Eight Method (2 of 7) • For elbow or knee (cont’d): • Make one turn below joint, overlapping first straight turn. • Continue alternating turns.
  • 23.
    Applying a RollerBandage Figure-Eight Method (3 of 7) • For elbow or knee (cont’d): • Finish with two straight turns to secure end.
  • 24.
    Applying a RollerBandage Figure-Eight Method (4 of 7) • For hand: • Make two straight turns around palm. • Carry bandage diagonally across back of hand, around wrist, and back across palm.
  • 25.
    Applying a RollerBandage Figure-Eight Method (5 of 7) • For hand (cont’d): • Make several figure-eight turns, overlapping each. • Finish with two straight turns around wrist; secure end.
  • 26.
    Applying a RollerBandage Figure-Eight Method (6 of 7) • For ankle: • Make two straight turns around instep. • Make figure-eight turn across front of foot, around ankle, and under arch.
  • 27.
    Applying a RollerBandage Figure-Eight Method (7 of 7) • For ankle (cont’d): • Make several figure-eight turns, overlapping each turn and advancing up the leg. • Finish with two straight turns around leg; secure end.
  • 28.
    Securing Bandages (1of 5) • Adhesive tape • Safety pins • Clips provided with bandage
  • 29.
    Securing Bandages (2of 5) • Loop method: • Reverse direction of tape by looping around thumb or finger and work backward.
  • 30.
    Securing Bandages (3of 5) • Loop method (cont’d): • Encircle body part with the looped and free ends and tie ends together.
  • 31.
    Securing Bandages (4of 5) • Split-tail method: • Split end of bandage lengthwise. • Knot to prevent further splitting.
  • 32.
    Securing Bandages (5of 5) • Split-tail method (cont’d): • Pass ends in opposite directions around body part and tie.
  • 33.
    Applying an AdhesiveStrip • Remove wrapping, and hold by protective strips. • Peel back protective strips, and place on wound. • Pull away protective strips, and press ends and edges down.