This presentation provides a comprehensive overview of bandaging techniques used in first aid and clinical practice, designed especially for BSc Nursing students and professionals in the Allied Health sector.
Purpose:
•To maintain dressingin position.
•To immobilize a part (e.g., fracture, sprain).
•To provide compression to control bleeding or reduce swelling.
•To support or relieve strain.
•To prevent and protect wounds from contamination.
•To promote healing.
4.
General Principles ofBandaging
•Wash hands and wear gloves before procedure.
•Explain the procedure to the patient.
•Ensure good lighting and comfortable position of patient.
•Always start bandaging from distal to proximal (e.g., from
fingers towards arm).
5.
General Principles ofBandaging
•Apply bandage with even pressure – not too tight, not too loose.
•Overlap turns by 2/3rd of the previous layer.
•Avoid wrinkles or folds (may cause pressure sores).
•Leave fingers or toes exposed (to check circulation).
•Secure bandage with clips, pins, or adhesive tape.
6.
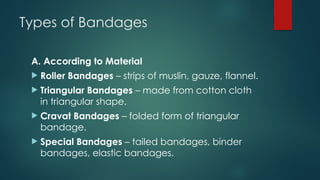
Types of Bandages
A.According to Material
Roller Bandages – strips of muslin, gauze, flannel.
Triangular Bandages – made from cotton cloth
in triangular shape.
Cravat Bandages – folded form of triangular
bandage.
Special Bandages – tailed bandages, binder
bandages, elastic bandages.
7.
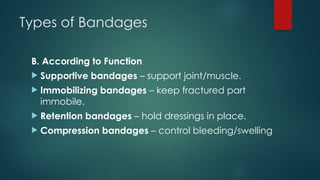
Types of Bandages
B.According to Function
Supportive bandages – support joint/muscle.
Immobilizing bandages – keep fractured part
immobile.
Retention bandages – hold dressings in place.
Compression bandages – control bleeding/swelling
8.
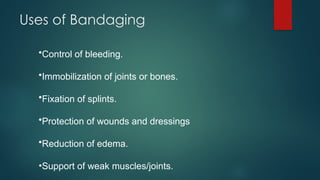
Uses of Bandaging
•Controlof bleeding.
•Immobilization of joints or bones.
•Fixation of splints.
•Protection of wounds and dressings
•Reduction of edema.
•Support of weak muscles/joints.
9.
Precautions in Bandaging
•Controlof bleeding.
•Immobilization of joints or bones.
•Fixation of splints.
•Protection of wounds and dressings.
•Reduction of edema.
•Support of weak muscles/joints.
10.
Complications of Improper
Bandaging
•Impairedcirculation → cyanosis, swelling, pain.
•Nerve damage → numbness, tingling.
•Skin maceration or ulcer formation.
•Slippage → ineffective immobilization.
•Infection (if sterile technique not maintained)
11.
Role of Nursein Bandaging
•Assess wound and surrounding area.
•Select correct size/type of bandage.
•Apply bandage skillfully following principles.
•Educate patient about care of bandage.
•Monitor for complications (swelling, pain, numbness).
•Document the procedure.
12.
Techniques of Bandaging
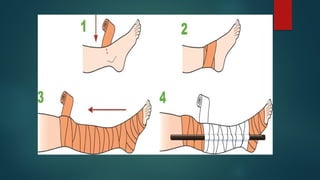
1.Roller Bandage Techniques
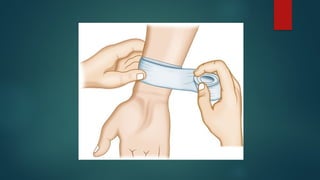
a) Circular Turn
Method:
The bandage is wrapped around the part in a circle, each
turn exactly covering the previous one.
Use:
To anchor the bandage at the beginning or end.
For small, uniformly shaped parts (wrist, ankle, forehead).
14.
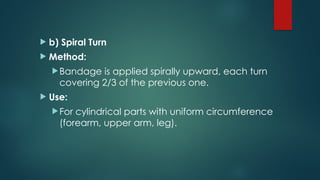
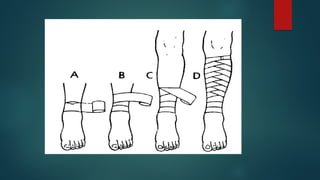
b) SpiralTurn
Method:
Bandage is applied spirally upward, each turn
covering 2/3 of the previous one.
Use:
For cylindrical parts with uniform circumference
(forearm, upper arm, leg).
16.
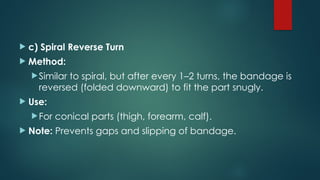
c) SpiralReverse Turn
Method:
Similar to spiral, but after every 1–2 turns, the bandage is
reversed (folded downward) to fit the part snugly.
Use:
For conical parts (thigh, forearm, calf).
Note: Prevents gaps and slipping of bandage.
18.
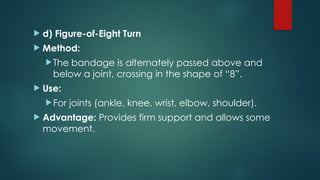
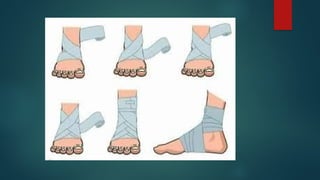
d) Figure-of-EightTurn
Method:
The bandage is alternately passed above and
below a joint, crossing in the shape of “8”.
Use:
For joints (ankle, knee, wrist, elbow, shoulder).
Advantage: Provides firm support and allows some
movement.
20.
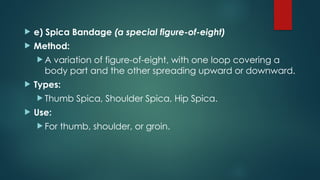
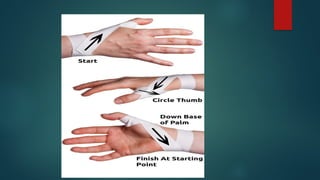
e) SpicaBandage (a special figure-of-eight)
Method:
A variation of figure-of-eight, with one loop covering a
body part and the other spreading upward or downward.
Types:
Thumb Spica, Shoulder Spica, Hip Spica.
Use:
For thumb, shoulder, or groin.
22.
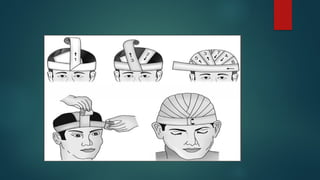
f) RecurrentTurn
Method:
Bandage is passed back and forth over the end of a
part, then secured by circular turns.
Use:
For head, finger, amputated stump.
24.
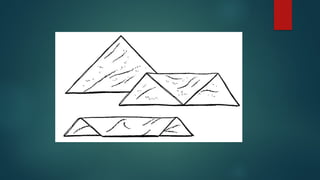
2. Triangular BandageTechniques
Made by folding a square cloth diagonally.
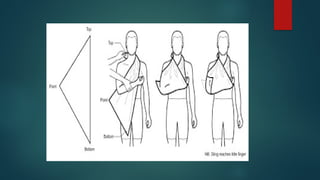
a) Arm Sling
Method:
Forearm is placed in sling, apex behind elbow, ends tied
behind neck.
Use:
Support of injured forearm, wrist, hand.
26.
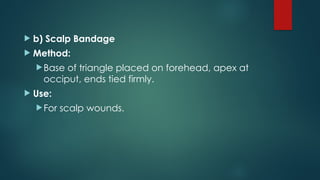
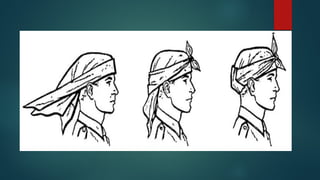
b) ScalpBandage
Method:
Base of triangle placed on forehead, apex at
occiput, ends tied firmly.
Use:
For scalp wounds.
28.
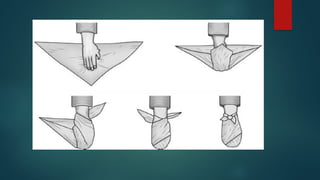
c) Handand Foot Bandage
Method:
Place hand/foot in the middle of bandage, cover with apex,
tie ends around wrist/ankle.
Use:
For covering hand or foot injuries.
30.
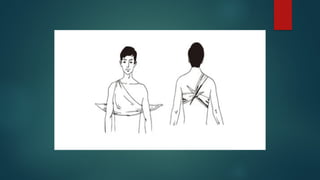
d) Chestor Back Bandage
Method:
Wide application of triangular bandage around
chest or back, knot secured on side.
Use:
To cover large wounds.
32.
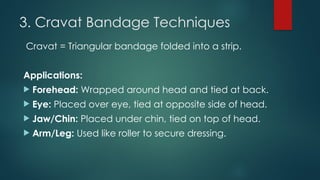
3. Cravat BandageTechniques
Cravat = Triangular bandage folded into a strip.
Applications:
Forehead: Wrapped around head and tied at back.
Eye: Placed over eye, tied at opposite side of head.
Jaw/Chin: Placed under chin, tied on top of head.
Arm/Leg: Used like roller to secure dressing.
34.
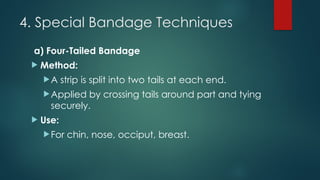
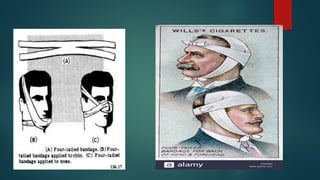
4. Special BandageTechniques
a) Four-Tailed Bandage
Method:
A strip is split into two tails at each end.
Applied by crossing tails around part and tying
securely.
Use:
For chin, nose, occiput, breast.
36.
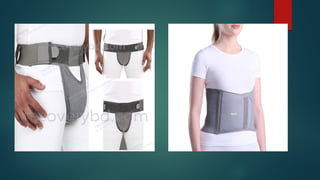
b) Binder
Types:
AbdominalBinder: Wide cloth wrapped around
abdomen to support after surgery.
Breast Binder: For compressing breasts (postpartum).
Scrotal/Perineal Binder: For genital or rectal area
support.
Use:
To provide support and retain dressing.
38.
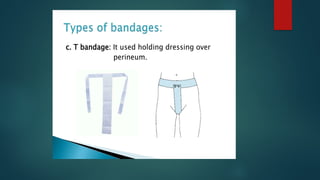
c) T-Bandage
Method:
Resembles“T” shape, horizontal belt around waist,
vertical strip between legs.
Use:
For rectum, perineum, vagina dressing.
40.
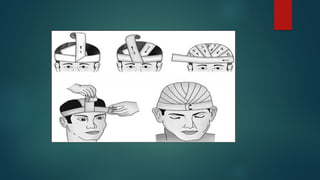
d) CapelineBandage (Double-headed roller bandage)
Method:
Bandage applied to cover scalp in recurrent turns
secured by circular turns.
Use:
For head wounds.
42.
Important Points inTechnique
Always start with circular anchoring turn.
Overlap bandage by 2/3rd.
Work distal to proximal.
Keep even pressure.
Check circulation (color, temperature, sensation)
after completion.
Secure bandage neatly with clip/tape.


![Bandages and Binders [Autosaved].pptx](https://cdn.slidesharecdn.com/ss_thumbnails/bandagesandbindersautosaved-230314063514-38348509-thumbnail.jpg?width=640&height=640&fit=bounds)


