WordPress
MATT BAER
MIKE LIVINGSTON
IGOR OGRIZEK
Introduction
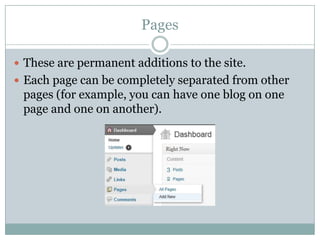
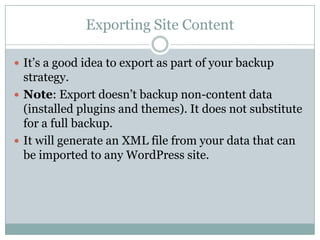
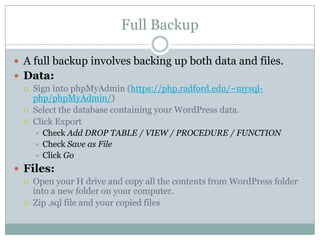
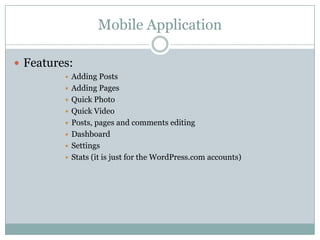
 WordPress started as a blogging platform in 2003, but

today it has grown to a fully-functional Content
Management System (CMS).

 WordPress.org:




Downloadable, free self-hosted version.
Requires setup and maintenance.
Fully customizable.

 WordPress.com:





Free (basic version) hosted blog service.
Minimal setup (theme and content).
Content restrictions apply.
http://www.youtube.com/watch?v=Fq39O_Rb-pY#t=01m04s
WordPress.com Demonstration

http://www.wordpress.com/
WordPress.org
 Download WordPress from

http://wordpress.org/download/
 Unzip all files into a new folder under dynamic_php
(we’ll use “wp”).
 Open PuTTY and set permissions of all the files in
your folder:


use chmod a+rx –R wp/ and then chmod 711 wp/

 In your browser enter the URL of your installed

directory
 Click Create a configuration file, then Let’s go!
Setting up MySQL
 https://php.radford.edu/~mysql-

php/mysql_setup/create.php
 Click “Continue”
 Enter RU username/password and CAPTCHA text
Installation
 Enter your MySQL database information:
 Database name: your RU username
 Username: your RU username
 Password: your database password
 Database host: php.radford.edu (localhost, if this doesn’t
work)
 Table prefix: leave the same
 Next it will tell us if it connected to the database.
 If everything went ok, we run the install process.
Installation
 Fill all information in for your new WordPress site.
 Hit Install WordPress.
 Login.
Important Settings
 Under Settings > General, set the timezone to

UTC-5
 Change the tagline to whatever you want
What is the Dashboard?
 The WordPress dashboard is the control panel for

your site.
 It gives you the ability to control anything without
coding or navigating to another page.
 You can see everything at a glance.
Dashboard Screen Options
 Click “Screen Options” to show/hide different

widgets on the current page.

 You can also change how many columns are shown.
Dashboard Help
 Click Help next to “Screen Options” for more

information on whichever page you’re using.
Dashboard: Right Now
 This is the main panel to control all happenings on

your site. It is controlled by the administrator(s).
 It gives statistics (which are clickable).
Dashboard: QuickPress
 You can make a simple post, with the ability to add

media, directly on your dashboard with the
QuickPress widget.
Dashboard: Comments
 View most recent comments and manage them,

directly on your dashboard.

 Hover over a comment to see more options.
Next class
 Posts
 Pages
 Links
 Import/Export Backup
 Android Application
Posts
 Posts automatically publish to the home page.
Pages
 These are permanent additions to the site.
 Each page can be completely separated from other

pages (for example, you can have one blog on one
page and one on another).
Links
 You can add any link you want to show up on the

sidebar of your site.
 Links can be categorized, as well.
Exporting Site Content
 It’s a good idea to export as part of your backup

strategy.
 Note: Export doesn’t backup non-content data
(installed plugins and themes). It does not substitute
for a full backup.
 It will generate an XML file from your data that can
be imported to any WordPress site.
Full Backup
 A full backup involves backing up both data and files.
 Data:




Sign into phpMyAdmin (https://php.radford.edu/~mysqlphp/phpMyAdmin/)
Select the database containing your WordPress data.
Click Export
Check Add DROP TABLE / VIEW / PROCEDURE / FUNCTION
 Check Save as File
 Click Go


 Files:



Open your H drive and copy all the contents from WordPress folder
into a new folder on your computer.
Zip .sql file and your copied files
Importing
 Open Tools on left menu bar and click Import.
 The best import tool to use is the WordPress

importer.
 Install then activate this plugin.
 Choose your .xml file and click Upload.
 After that, assign an author to imported content.
Mobile Application
 Available for:
iOS
 Android
 BlackBerry
 Windows Phone 7
 Nokia
 WebOS
 E-mail client posting


 Easy on the go posting.
Mobile Application
 Features:









Adding Posts
Adding Pages
Quick Photo
Quick Video
Posts, pages and comments editing
Dashboard
Settings
Stats (it is just for the WordPress.com accounts)

Ch1,2 install

  • 1.
  • 2.
    Introduction  WordPress startedas a blogging platform in 2003, but today it has grown to a fully-functional Content Management System (CMS).  WordPress.org:    Downloadable, free self-hosted version. Requires setup and maintenance. Fully customizable.  WordPress.com:     Free (basic version) hosted blog service. Minimal setup (theme and content). Content restrictions apply. http://www.youtube.com/watch?v=Fq39O_Rb-pY#t=01m04s
  • 3.
  • 4.
    WordPress.org  Download WordPressfrom http://wordpress.org/download/  Unzip all files into a new folder under dynamic_php (we’ll use “wp”).  Open PuTTY and set permissions of all the files in your folder:  use chmod a+rx –R wp/ and then chmod 711 wp/  In your browser enter the URL of your installed directory  Click Create a configuration file, then Let’s go!
  • 5.
    Setting up MySQL https://php.radford.edu/~mysql- php/mysql_setup/create.php  Click “Continue”  Enter RU username/password and CAPTCHA text
  • 6.
    Installation  Enter yourMySQL database information:  Database name: your RU username  Username: your RU username  Password: your database password  Database host: php.radford.edu (localhost, if this doesn’t work)  Table prefix: leave the same  Next it will tell us if it connected to the database.  If everything went ok, we run the install process.
  • 7.
    Installation  Fill allinformation in for your new WordPress site.  Hit Install WordPress.  Login.
  • 8.
    Important Settings  UnderSettings > General, set the timezone to UTC-5  Change the tagline to whatever you want
  • 9.
    What is theDashboard?  The WordPress dashboard is the control panel for your site.  It gives you the ability to control anything without coding or navigating to another page.  You can see everything at a glance.
  • 10.
    Dashboard Screen Options Click “Screen Options” to show/hide different widgets on the current page.  You can also change how many columns are shown.
  • 11.
    Dashboard Help  ClickHelp next to “Screen Options” for more information on whichever page you’re using.
  • 12.
    Dashboard: Right Now This is the main panel to control all happenings on your site. It is controlled by the administrator(s).  It gives statistics (which are clickable).
  • 13.
    Dashboard: QuickPress  Youcan make a simple post, with the ability to add media, directly on your dashboard with the QuickPress widget.
  • 14.
    Dashboard: Comments  Viewmost recent comments and manage them, directly on your dashboard.  Hover over a comment to see more options.
  • 15.
    Next class  Posts Pages  Links  Import/Export Backup  Android Application
  • 16.
    Posts  Posts automaticallypublish to the home page.
  • 17.
    Pages  These arepermanent additions to the site.  Each page can be completely separated from other pages (for example, you can have one blog on one page and one on another).
  • 18.
    Links  You canadd any link you want to show up on the sidebar of your site.  Links can be categorized, as well.
  • 19.
    Exporting Site Content It’s a good idea to export as part of your backup strategy.  Note: Export doesn’t backup non-content data (installed plugins and themes). It does not substitute for a full backup.  It will generate an XML file from your data that can be imported to any WordPress site.
  • 20.
    Full Backup  Afull backup involves backing up both data and files.  Data:    Sign into phpMyAdmin (https://php.radford.edu/~mysqlphp/phpMyAdmin/) Select the database containing your WordPress data. Click Export Check Add DROP TABLE / VIEW / PROCEDURE / FUNCTION  Check Save as File  Click Go   Files:   Open your H drive and copy all the contents from WordPress folder into a new folder on your computer. Zip .sql file and your copied files
  • 21.
    Importing  Open Toolson left menu bar and click Import.  The best import tool to use is the WordPress importer.  Install then activate this plugin.  Choose your .xml file and click Upload.  After that, assign an author to imported content.
  • 22.
    Mobile Application  Availablefor: iOS  Android  BlackBerry  Windows Phone 7  Nokia  WebOS  E-mail client posting   Easy on the go posting.
  • 23.
    Mobile Application  Features:         AddingPosts Adding Pages Quick Photo Quick Video Posts, pages and comments editing Dashboard Settings Stats (it is just for the WordPress.com accounts)

Editor's Notes