The document provides an overview of installing Windows 2000/XP, including:
1) Planning installation by verifying hardware compatibility, partitioning drives, and deciding on clean install, upgrade or dual boot.
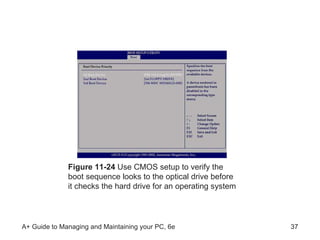
2) The installation process which involves booting from disc, partitioning drives, selecting components and creating user accounts.
3) Post-installation steps like configuring networks, installing updates and activating the software license.