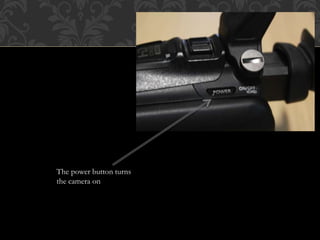
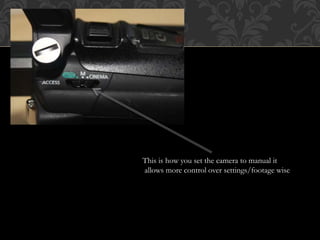
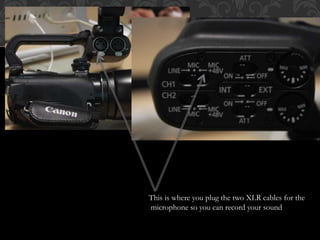
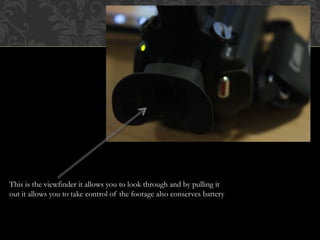
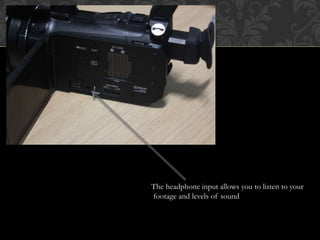
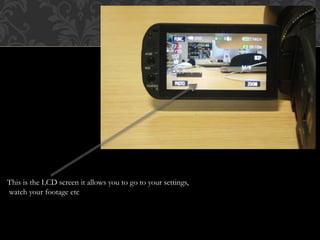
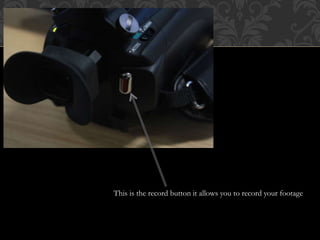
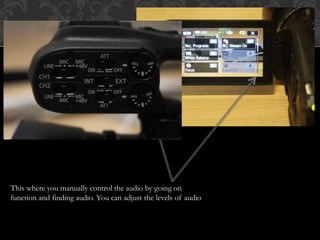
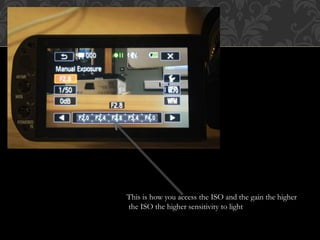
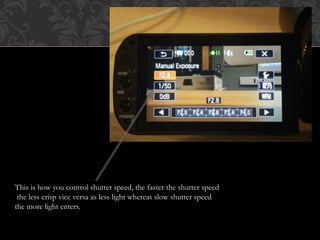
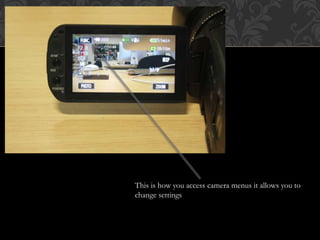
The power button turns
the camera on
This is how you set the camera to manual it
allows more control over settings/footage wise
These are the camera inputs they have HDMI remote and USB
which allow you to connect your camera onto a video source interface,
the USB port allows you to connect it to your laptop/computer to remove footage and the
remote port controls playback
This is where you plug the two XLR cables for the
microphone so you can record your sound
This is the viewfinder it allows you to look through and by pulling it
out it allows you to take control of the footage also conserves battery
The headphone input allows you to listen to your
footage and levels of sound
This is the LCD screen it allows you to go to your settings,
watch your footage etc
This is the record button it allows you to record your footage
This where you manually control the audio by going on
function and finding audio. You can adjust the levels of audio
This is how you control the white balance it focuses the footage from
the setting you are in due to the amount of lighting in that location
This is how you control exposure the more exposure the more
light making your footage over exposed
This is how you control focus and this is how you switch on
manual focus so you can focus on the object/person you want
This is how you alter the zoom digitally allows you
to zoom in and out
This is how you access the ISO and the gain the higher
the ISO the higher sensitivity to light
This is how you control shutter speed, the faster the shutter speed
the less crisp vice versa as less light whereas slow shutter speed
the more light enters.
This is how you access camera menus it allows you to
change settings
These are the memory cards these store your footage

Canon XA10

  • 2.
    The power buttonturns the camera on
  • 3.
    This is howyou set the camera to manual it allows more control over settings/footage wise
  • 4.
    These are thecamera inputs they have HDMI remote and USB which allow you to connect your camera onto a video source interface, the USB port allows you to connect it to your laptop/computer to remove footage and the remote port controls playback
  • 5.
    This is whereyou plug the two XLR cables for the microphone so you can record your sound
  • 6.
    This is theviewfinder it allows you to look through and by pulling it out it allows you to take control of the footage also conserves battery
  • 7.
    The headphone inputallows you to listen to your footage and levels of sound
  • 8.
    This is theLCD screen it allows you to go to your settings, watch your footage etc
  • 9.
    This is therecord button it allows you to record your footage
  • 10.
    This where youmanually control the audio by going on function and finding audio. You can adjust the levels of audio
  • 11.
    This is howyou control the white balance it focuses the footage from the setting you are in due to the amount of lighting in that location
  • 12.
    This is howyou control exposure the more exposure the more light making your footage over exposed
  • 13.
    This is howyou control focus and this is how you switch on manual focus so you can focus on the object/person you want
  • 14.
    This is howyou alter the zoom digitally allows you to zoom in and out
  • 15.
    This is howyou access the ISO and the gain the higher the ISO the higher sensitivity to light
  • 16.
    This is howyou control shutter speed, the faster the shutter speed the less crisp vice versa as less light whereas slow shutter speed the more light enters.
  • 17.
    This is howyou access camera menus it allows you to change settings
  • 18.
    These are thememory cards these store your footage