
Recommended
More Related Content
What's hot
What's hot (16)
Viewers also liked
Viewers also liked (20)
Similar to Digital Resources
Similar to Digital Resources (20)
More from grazio1grixti
Recently uploaded
Recently uploaded (20)
Digital Resources
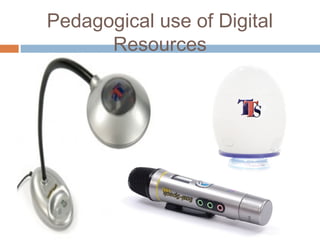
- 1. Pedagogical use of Digital Resources
- 2. Easi-View
- 3. Easi-View can be used to: View books on the interactive whiteboard View any document (e.g. handouts) Pupils can share work with the rest of the class Show-and-tell activities Save a picture of a document Create a video of a story by capturing the book and record the narration of the story
- 4. How to use Easi-View: Installation of the Easi-View driver Connect the Easi- view to your laptop through the USB cable. Insert the CD and install the software by following the
- 5. Project a document or a picture on the interactive whiteboard
- 6. Rotate
- 7. Taking a picture and saving it using Easi- View
- 8. Capture a video and saving it
- 9. Easi-Scope
- 10. Easi-Scope can be used to: Enlarge small objects like insects or flowers View enlarged objects on the interactive whiteboard Save a picture of the object Create a video of the object
- 11. How to use Easi-Scope: Installation of the Digital Viewer Insert the CD and install the software by following the instructions. Connect the Easi-Scope to your laptop through the USB cable.
- 12. How to use Easi-Scope: Using Easi-View to project a document or a picture on the interactive whiteboard Open the software by clicking on digital viewer shortcut on your desktop. Place the Easi-Scope on the object. You can use the adaptors available to help you focus on the object. Adjust focus by turning the top.
- 13. How to use Easi-Scope: Taking and saving an image of an object Take still images by clicking the shutter button. You may then choose where to save it.
- 14. How to use Easi-Scope: Capturing and saving a video Click on Capture and Start Capture. Locate where the video will be saved. Then click OK to start capturing video. Click on Capture and Stop Capture when ready. Open the video using Windows Media Players from the location where it has been
- 15. Easi-speak PRO
- 18. Recording your Track Switch on the Easi-Speak PRO by sliding the On-Off switch until the Status LED lights Orange (steady or flashing), indicating it is waiting in standby Press and release the Record button (Red ring). After a second or so, the Status LED will change to Red indicating it is recording Speak or sing clearly into the top of the microphone about 15cm to 30cm away for at
- 19. Recording your Track The recording can be paused at any time by pressing the Record button briefly. The Status LED will flash to show the recording has been paused. Simply press the Record button again to continue recording When you are finished Recording, press the Record button, and hold for 2 seconds, to stop the recording and save it as the last track. The Status LED will change to Orange (steady or flashing)
- 20. Recording & Playing your Track Alternatively you can press and hold the Record button during the whole of the recording and release it when you have finished recording Press the Play button (Green ring) to play your track. The Status LED will light Green while the track is playing
- 21. Playing your Track When the track is finished, Easi-Speak PRO will return to standby and the Status LED will be Orange The Easi-Speak PRO will not store recordings of less than 2 seconds, so ensure you record for longer than this Please note that the Easi-Speak Pro can only store a maximum of sixty two tracks, regardless of the length of track.