Downloaded 15 times

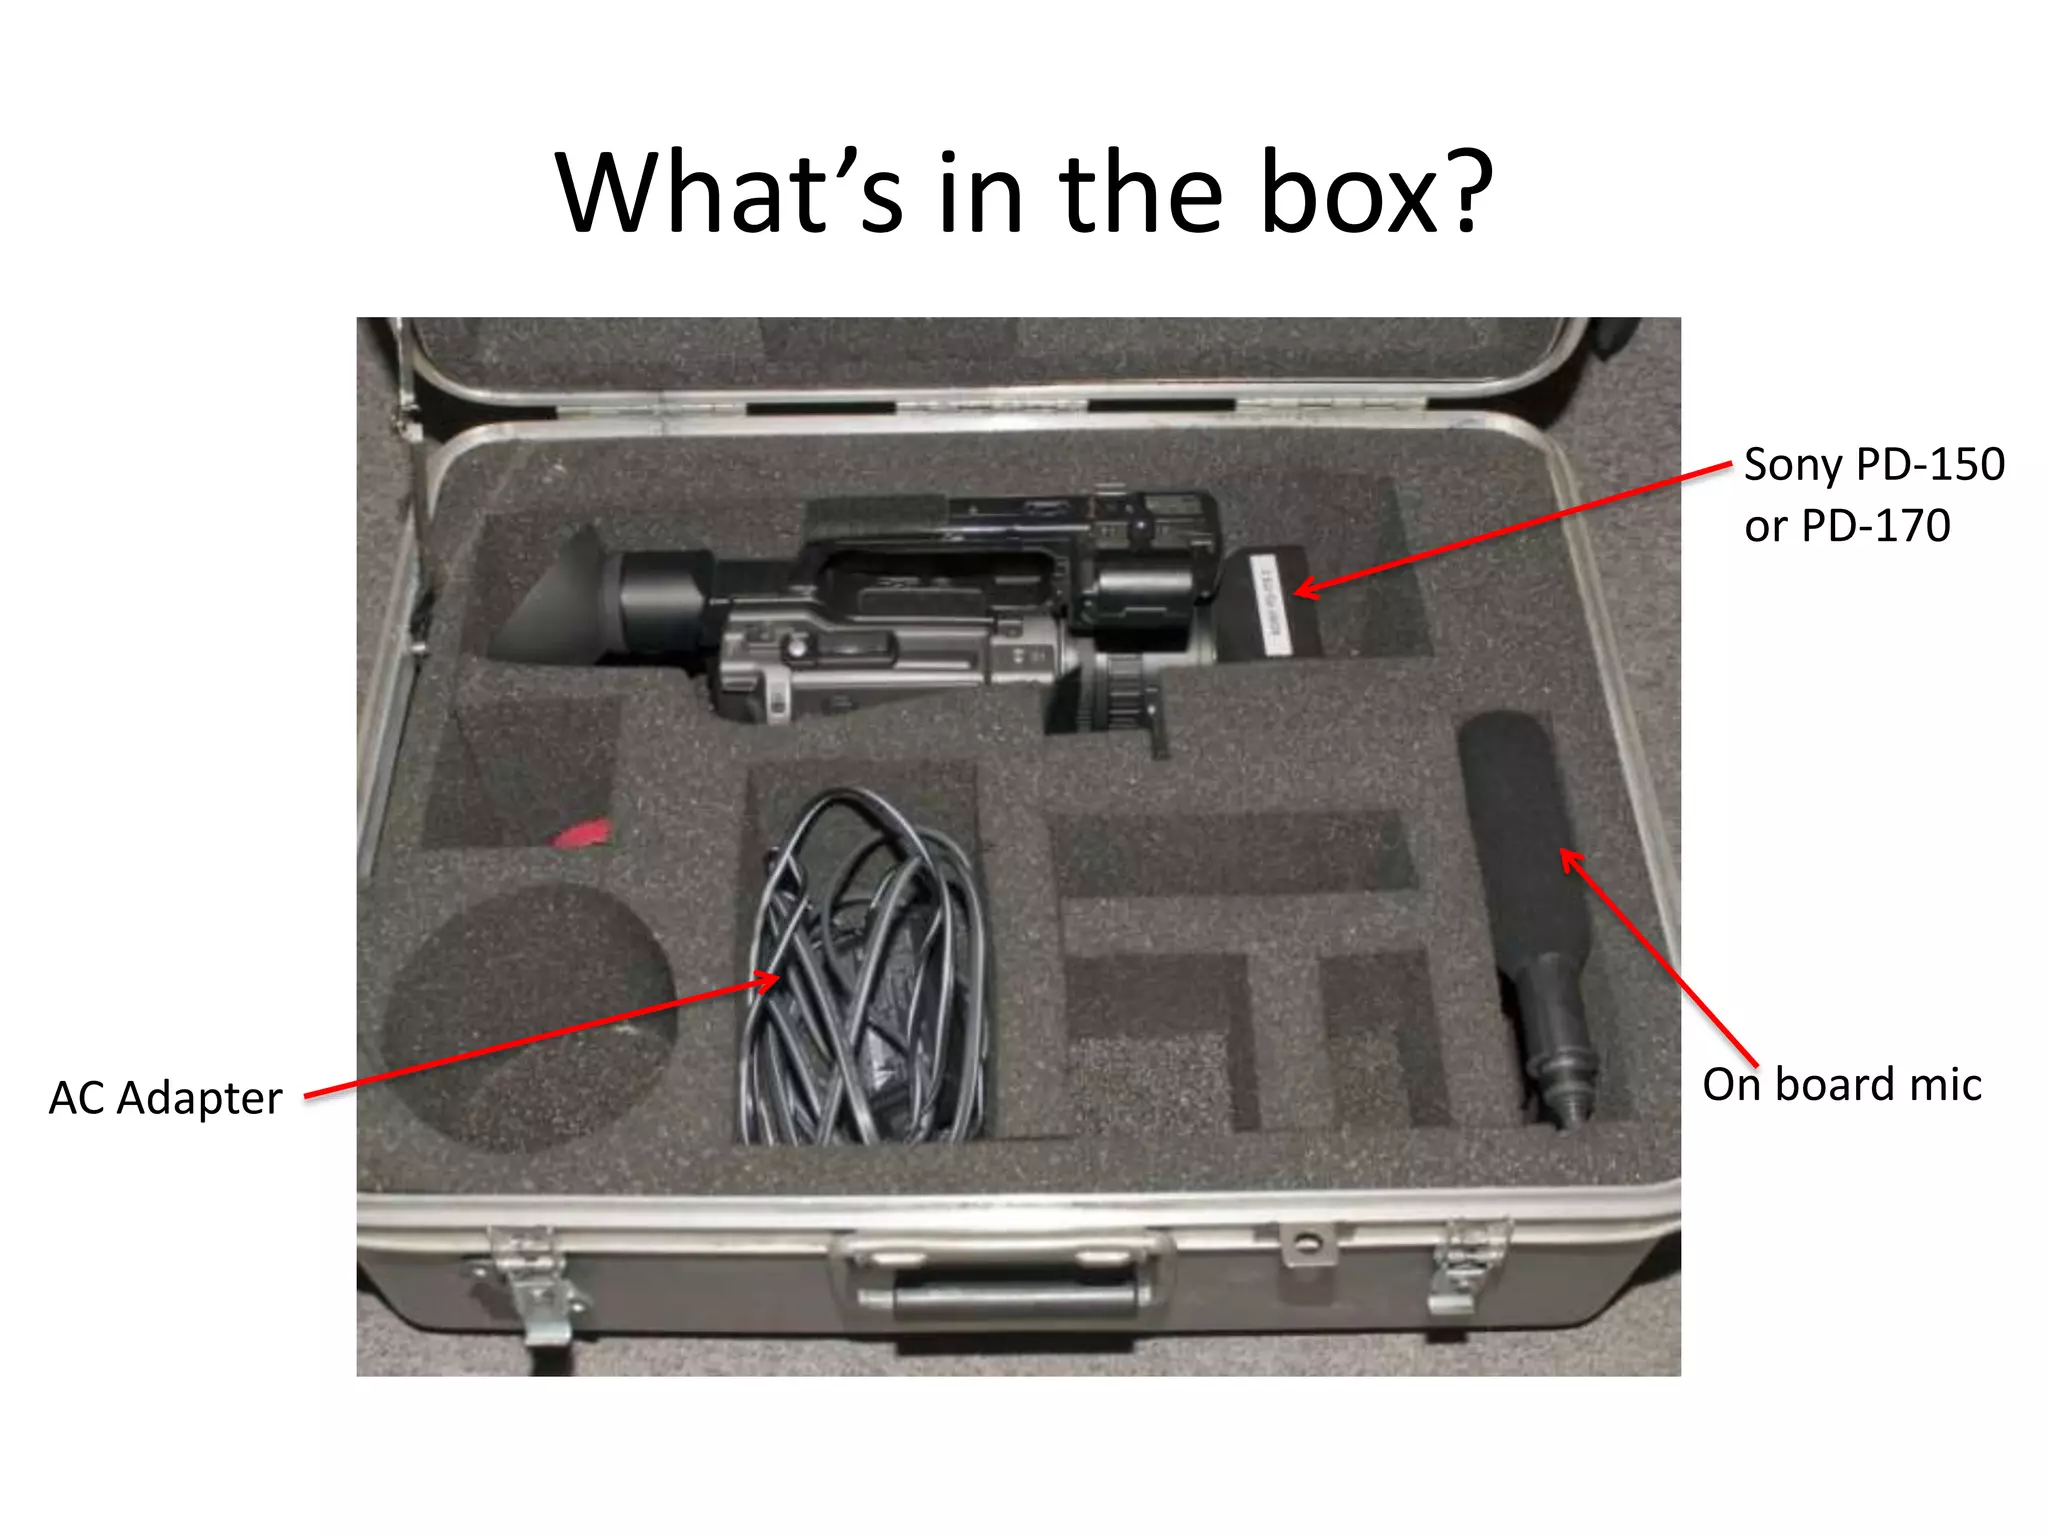
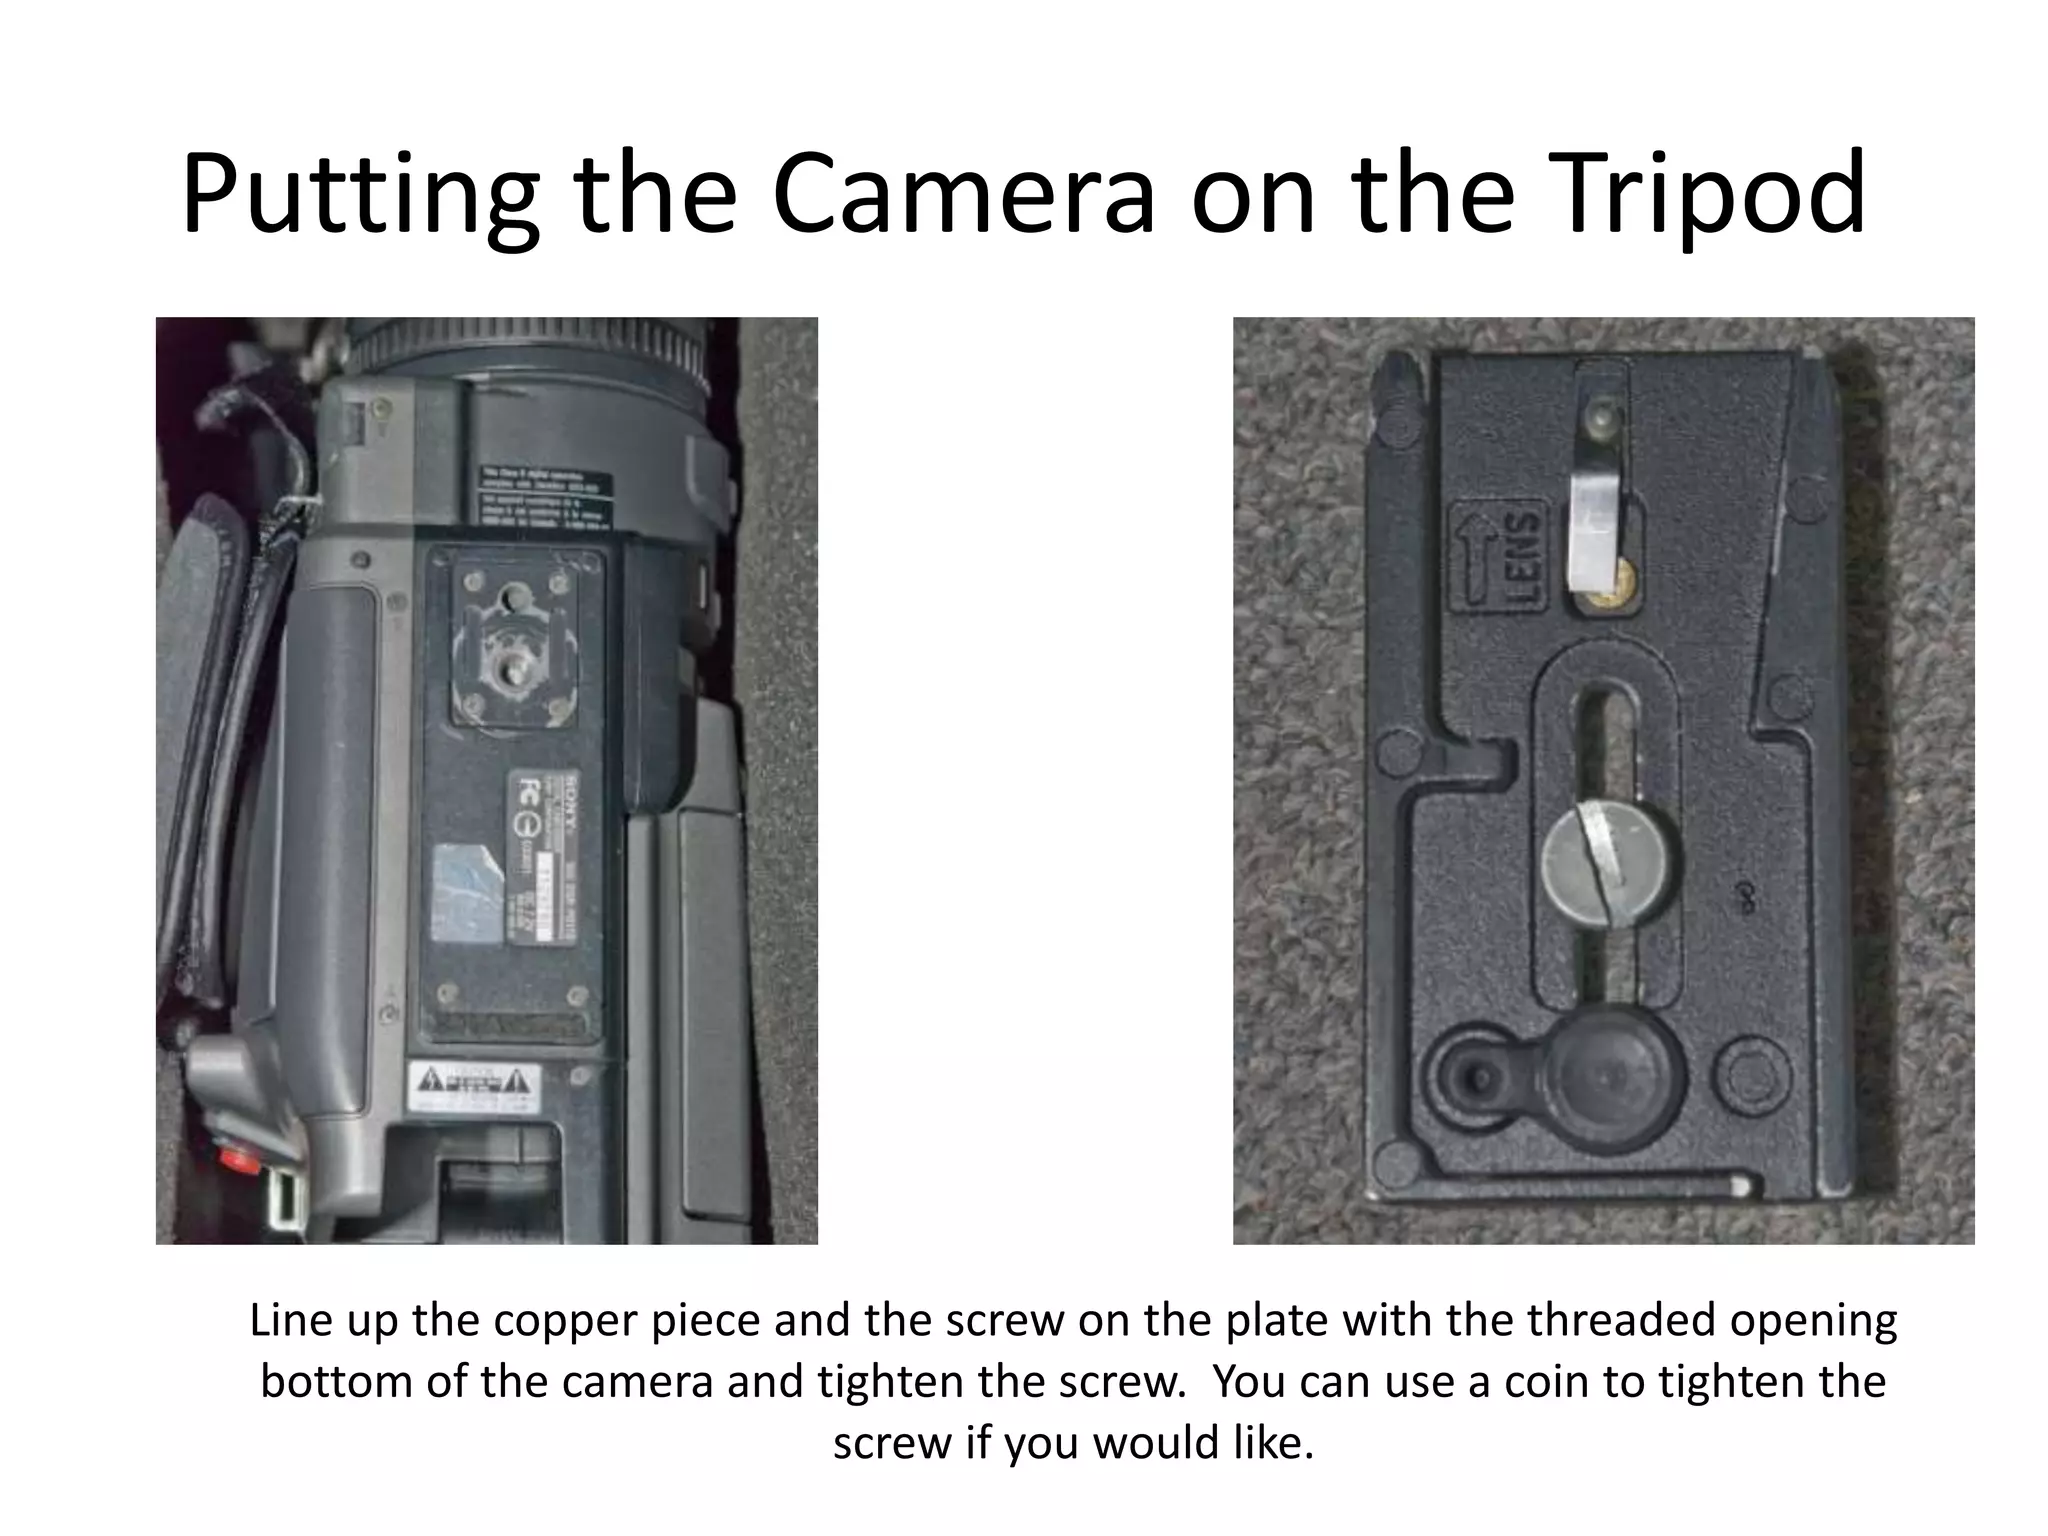
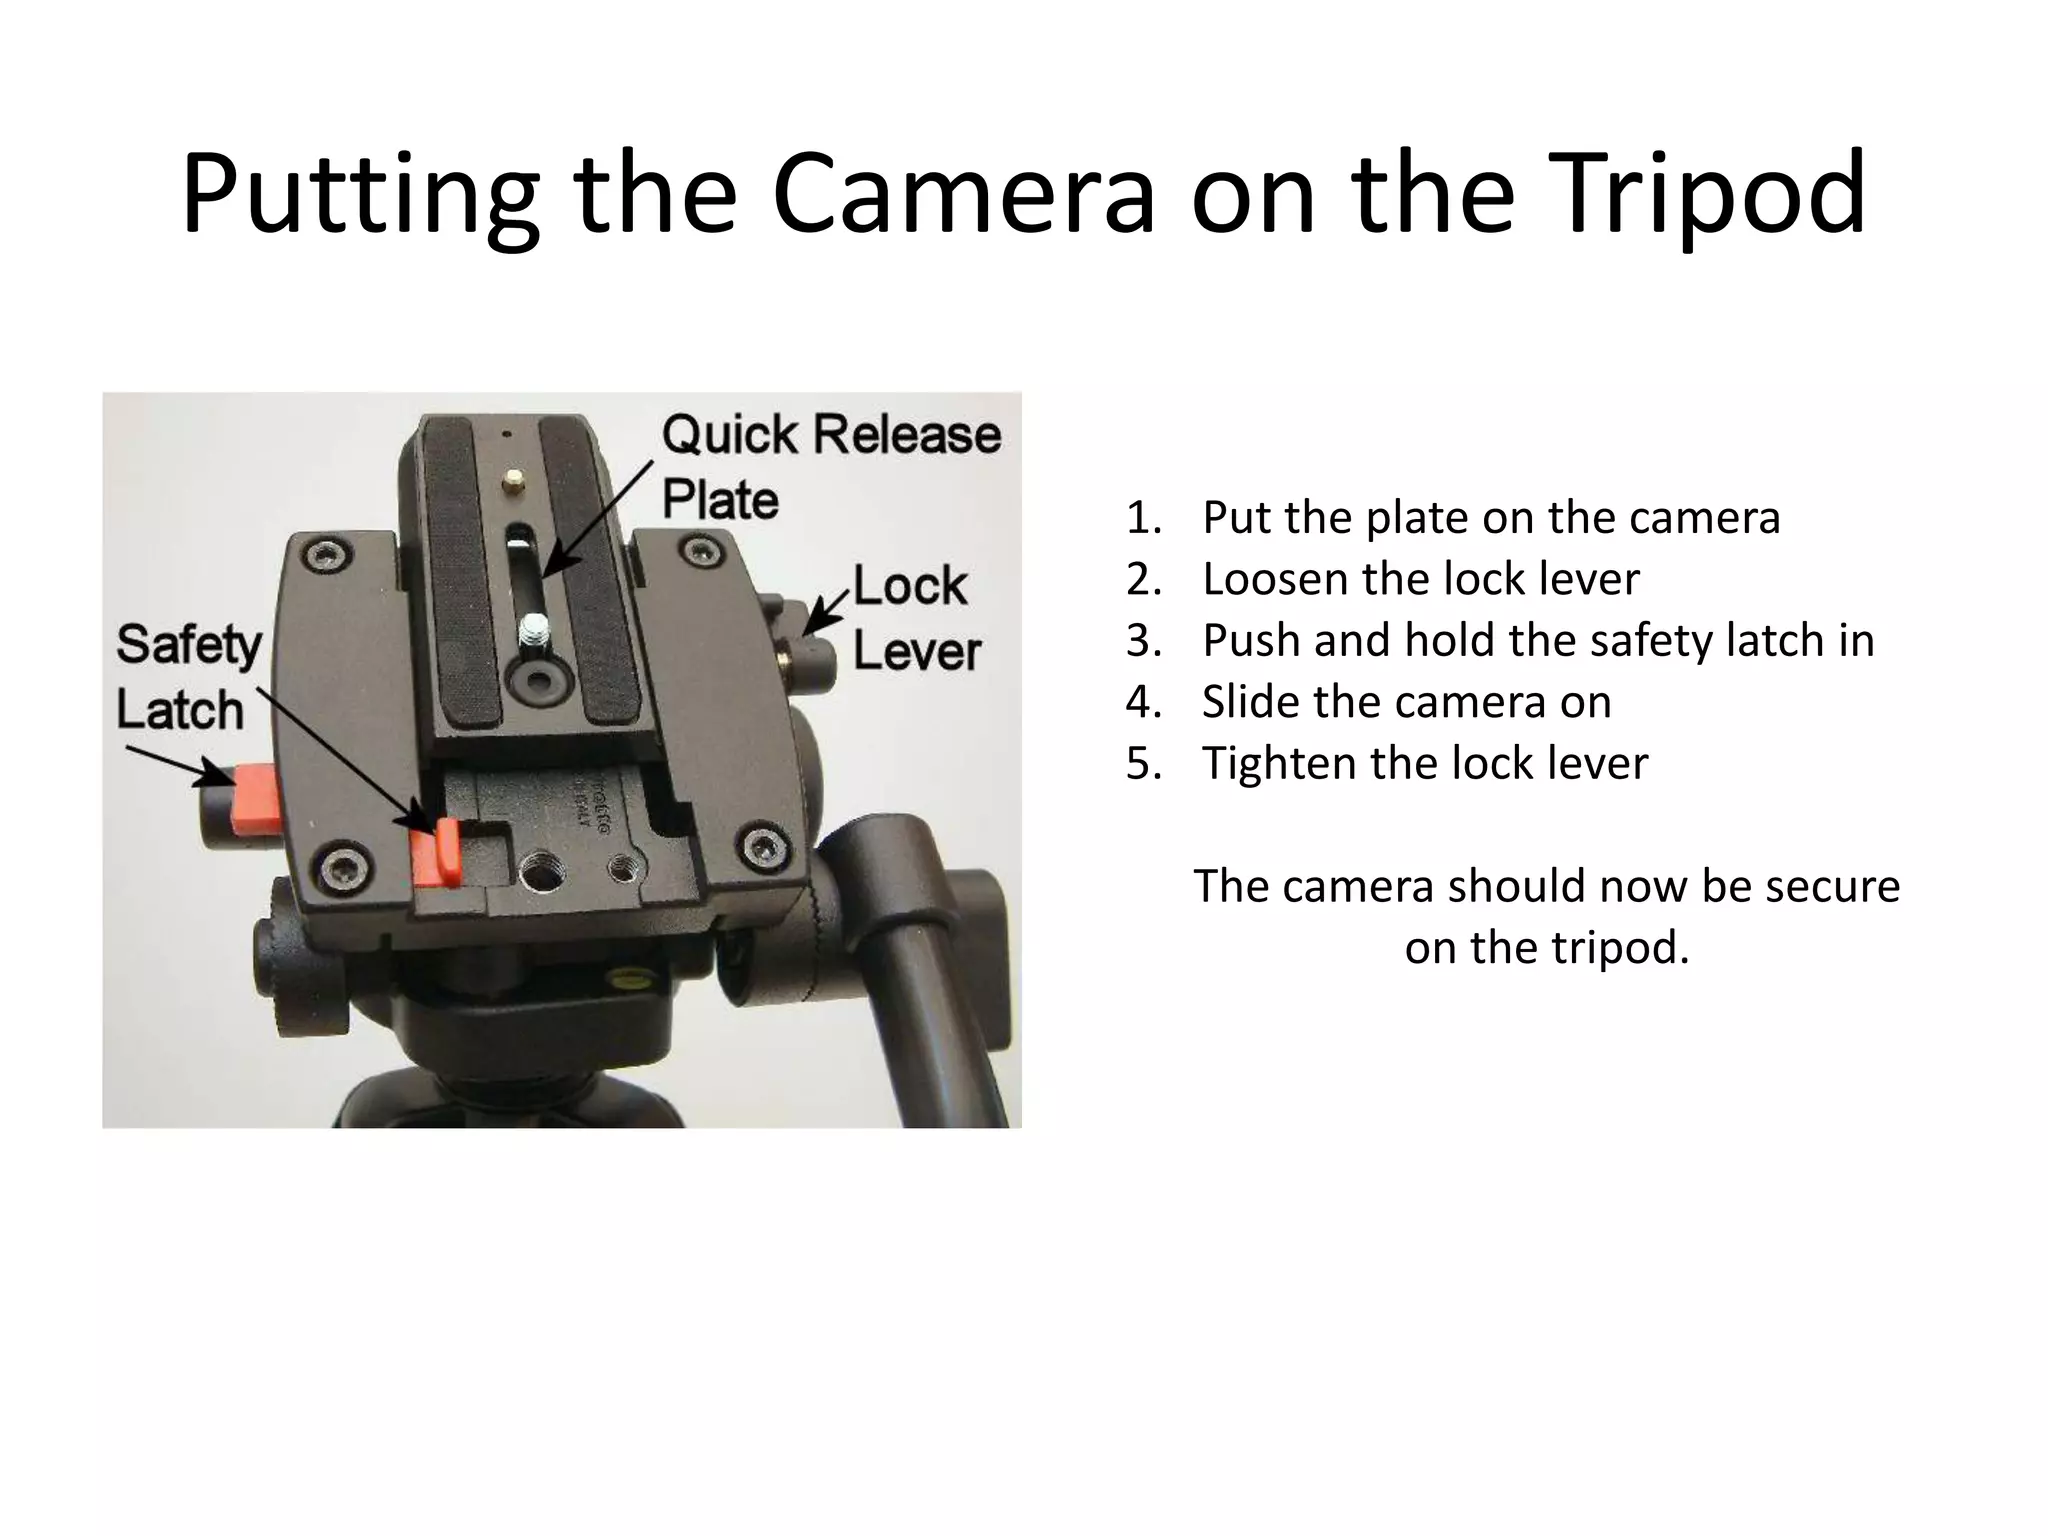
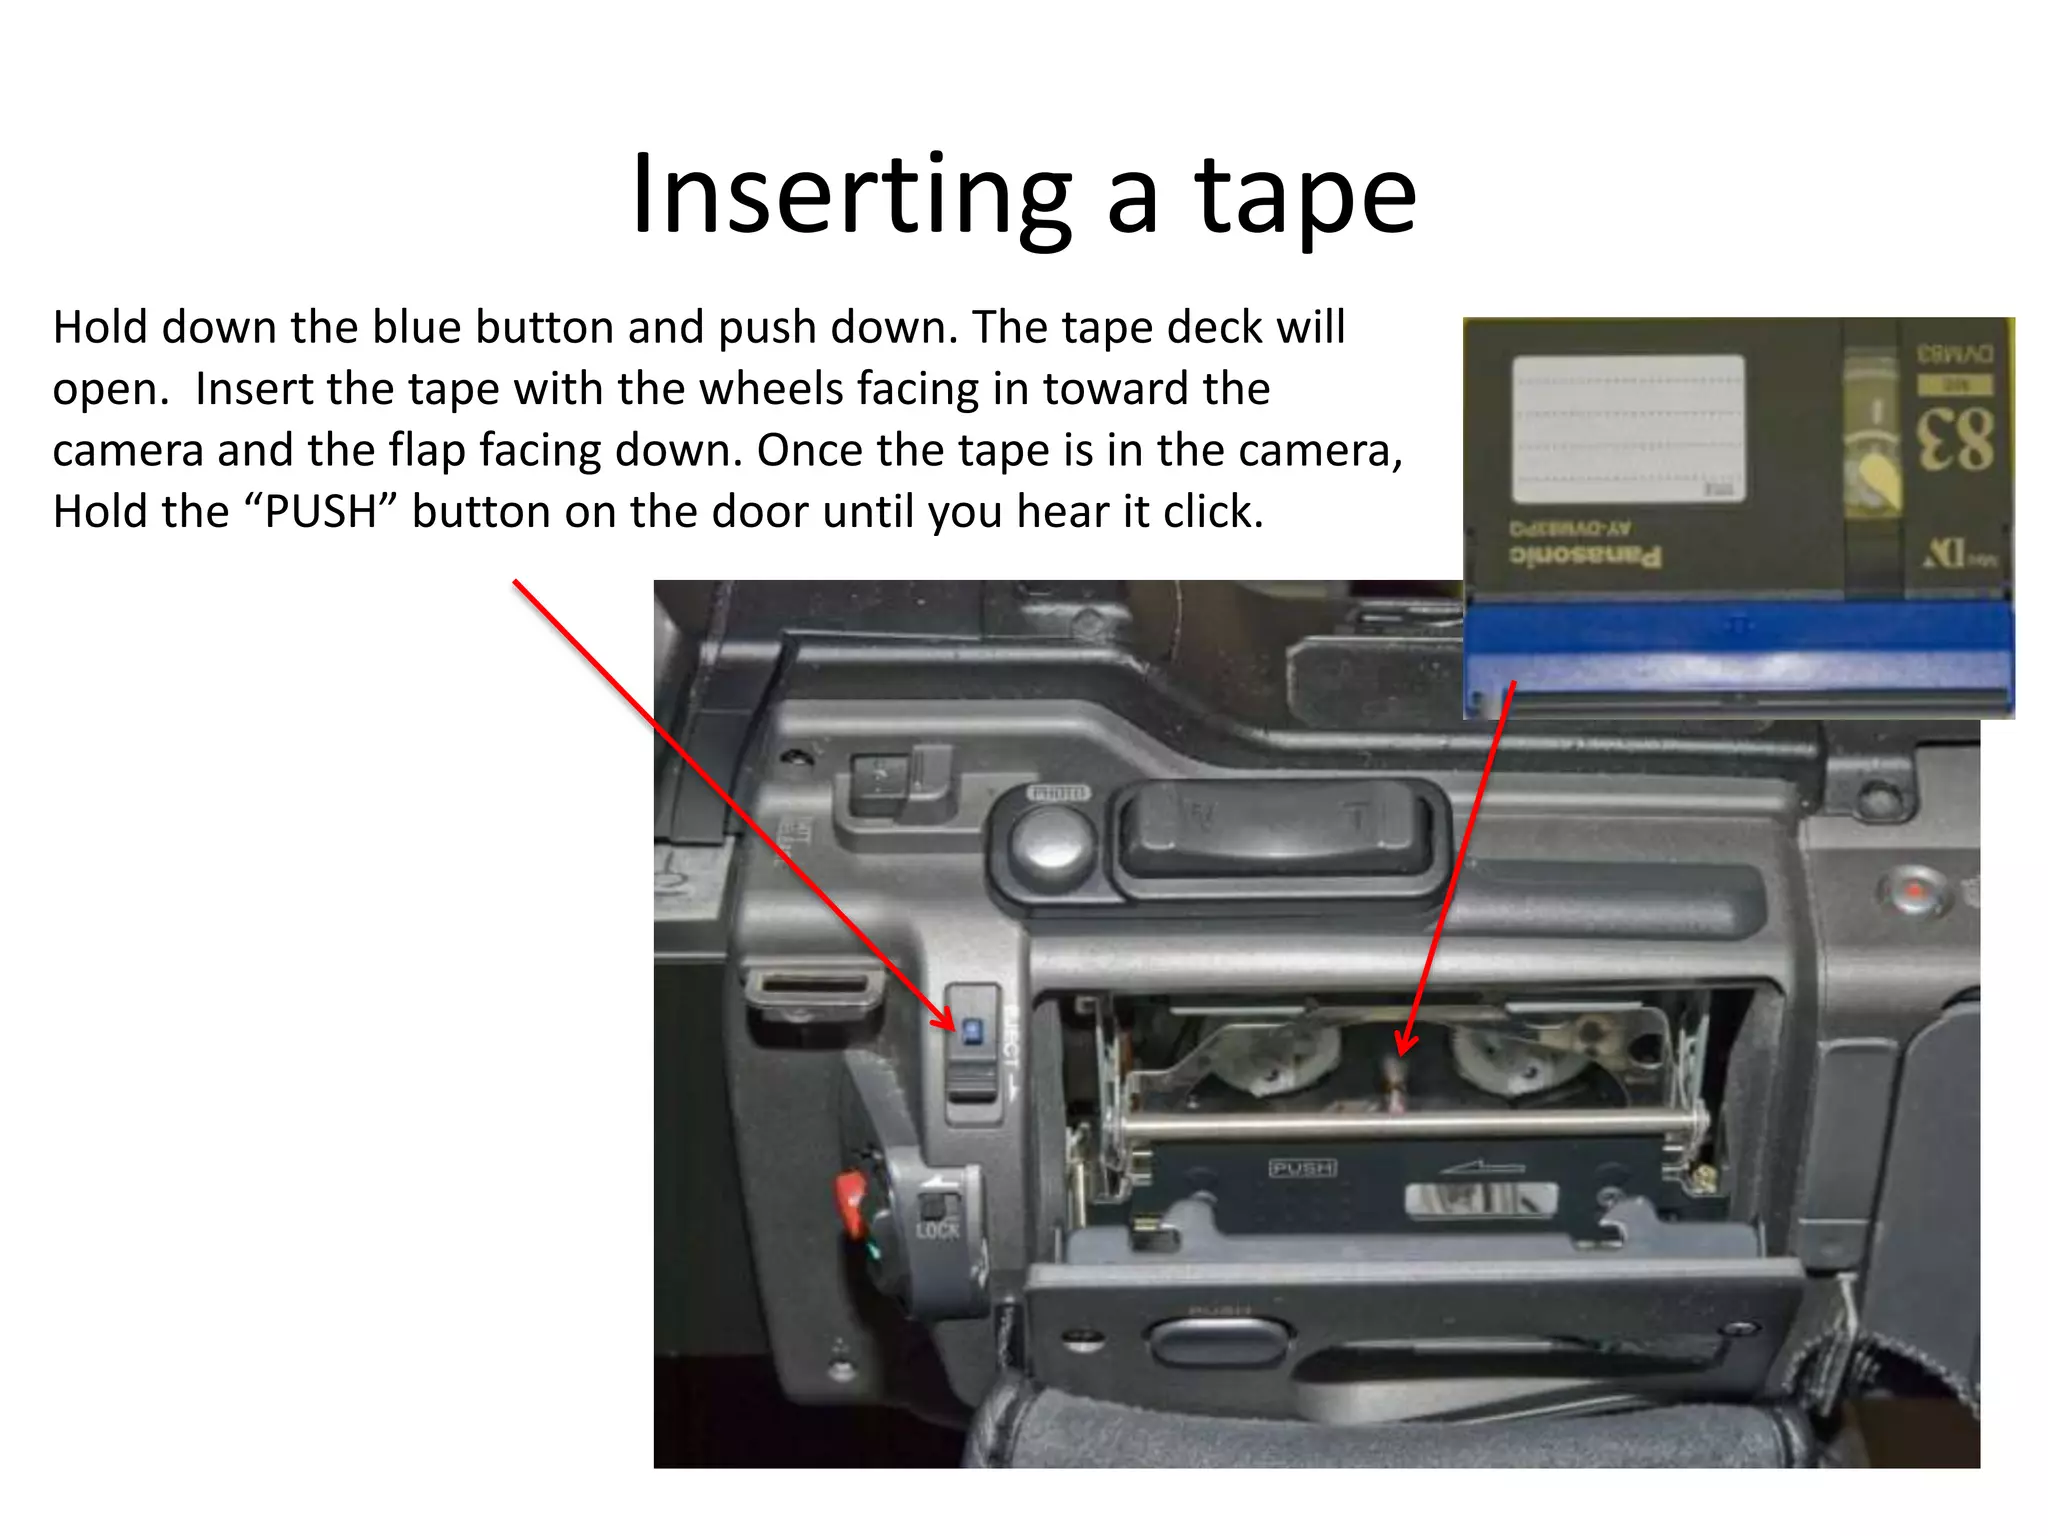
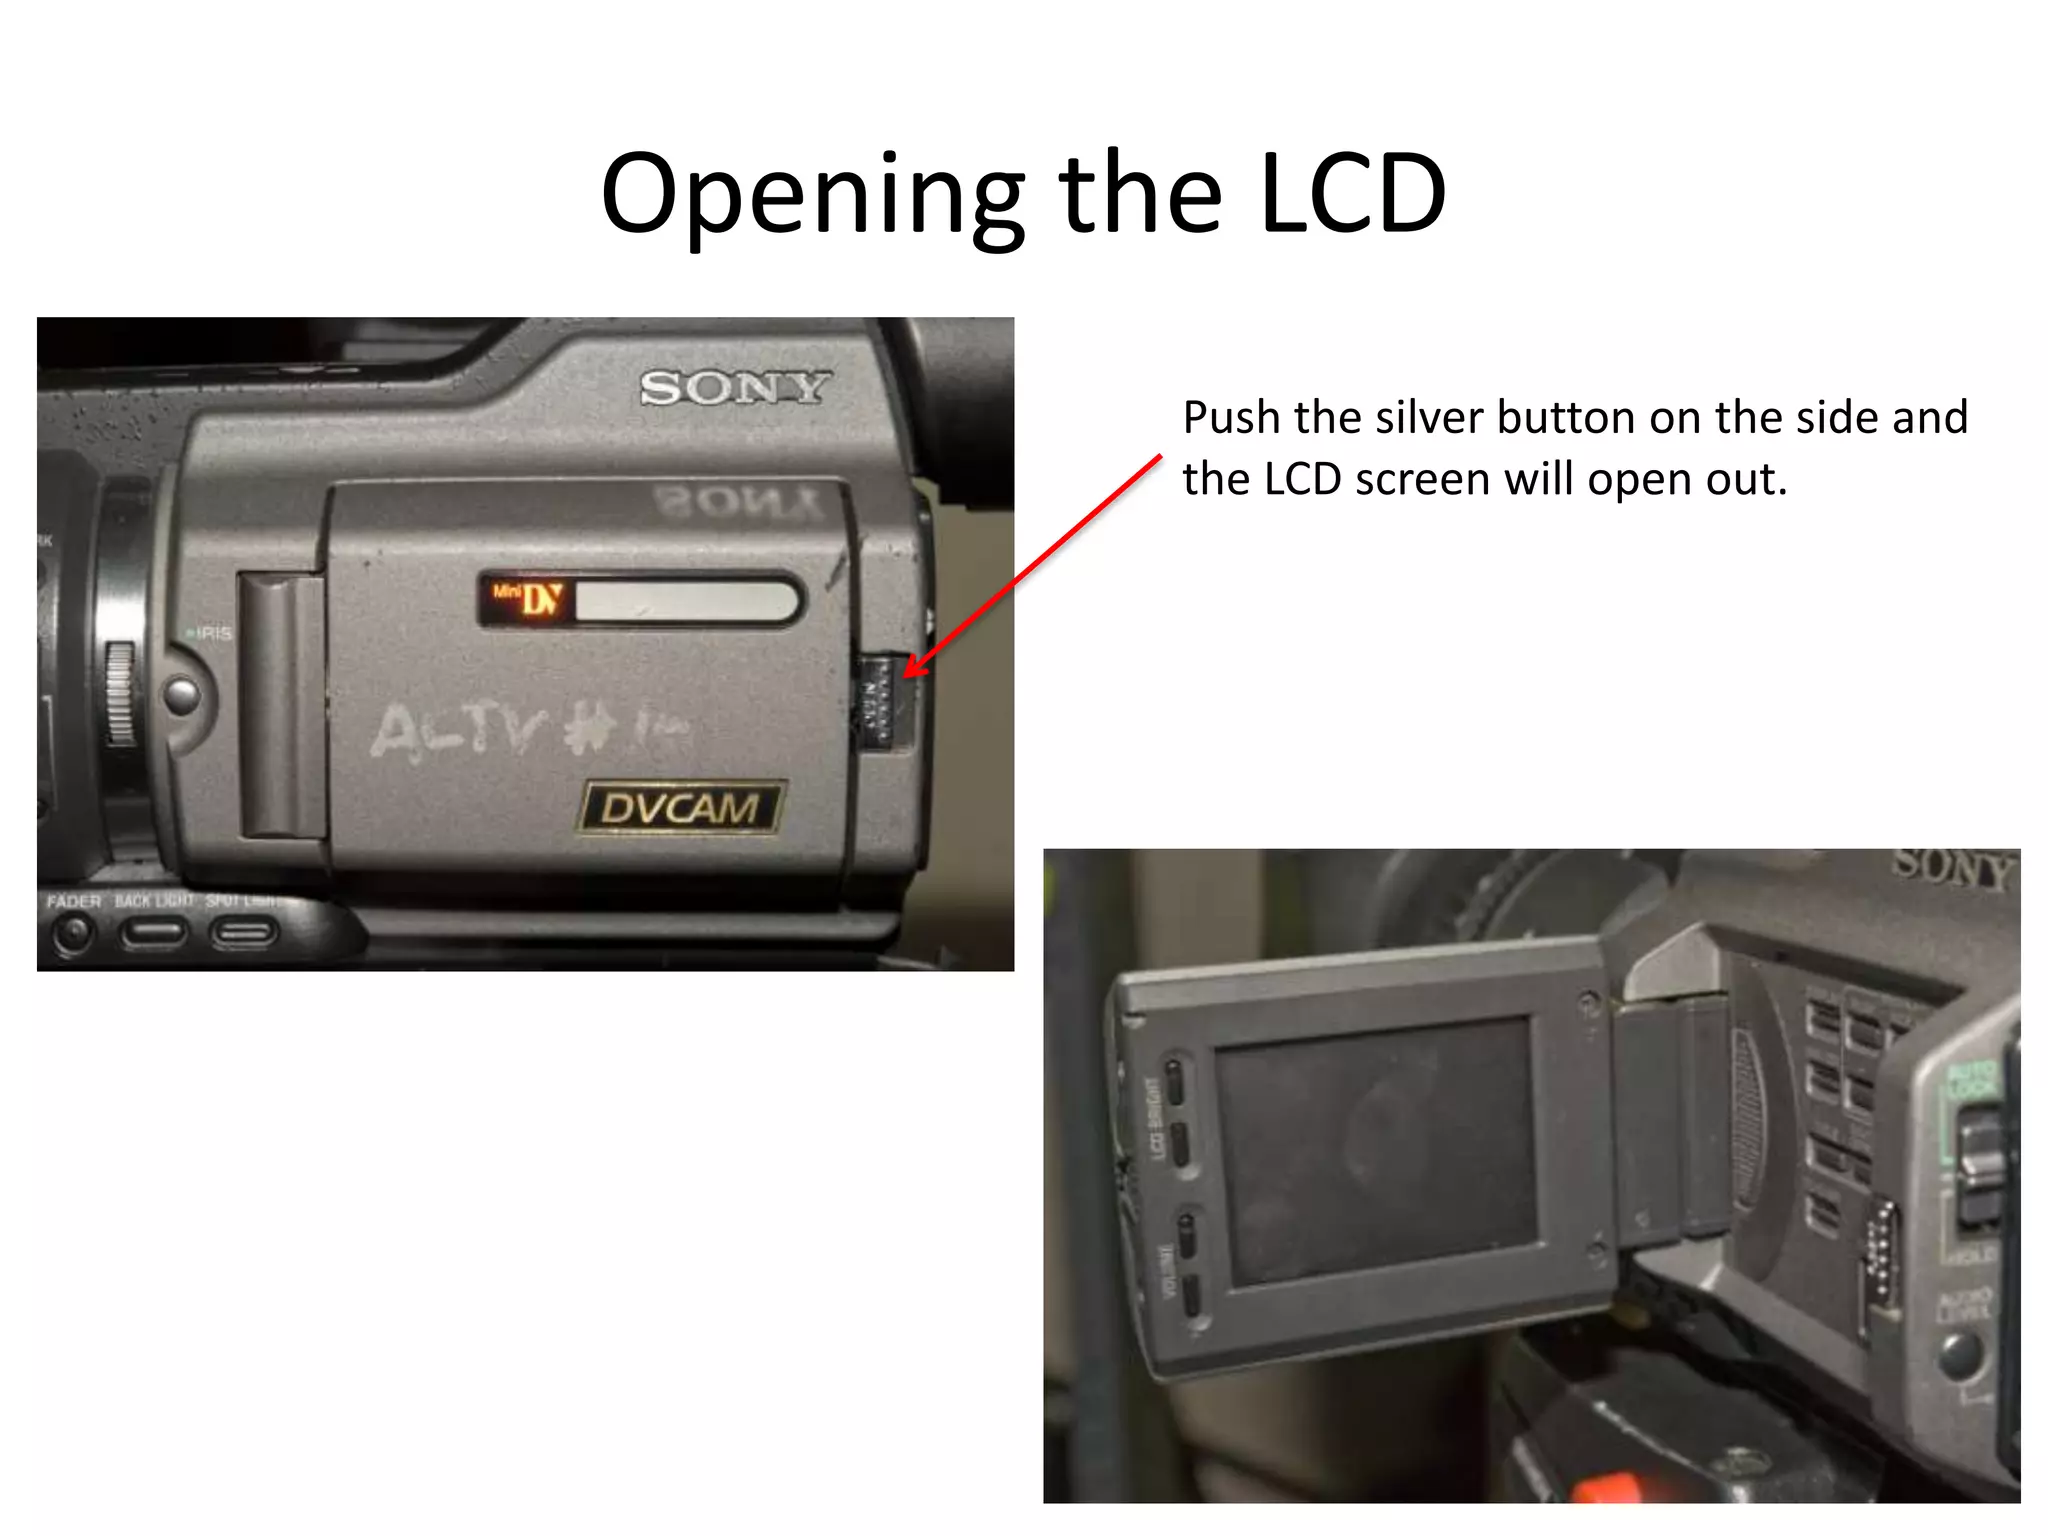
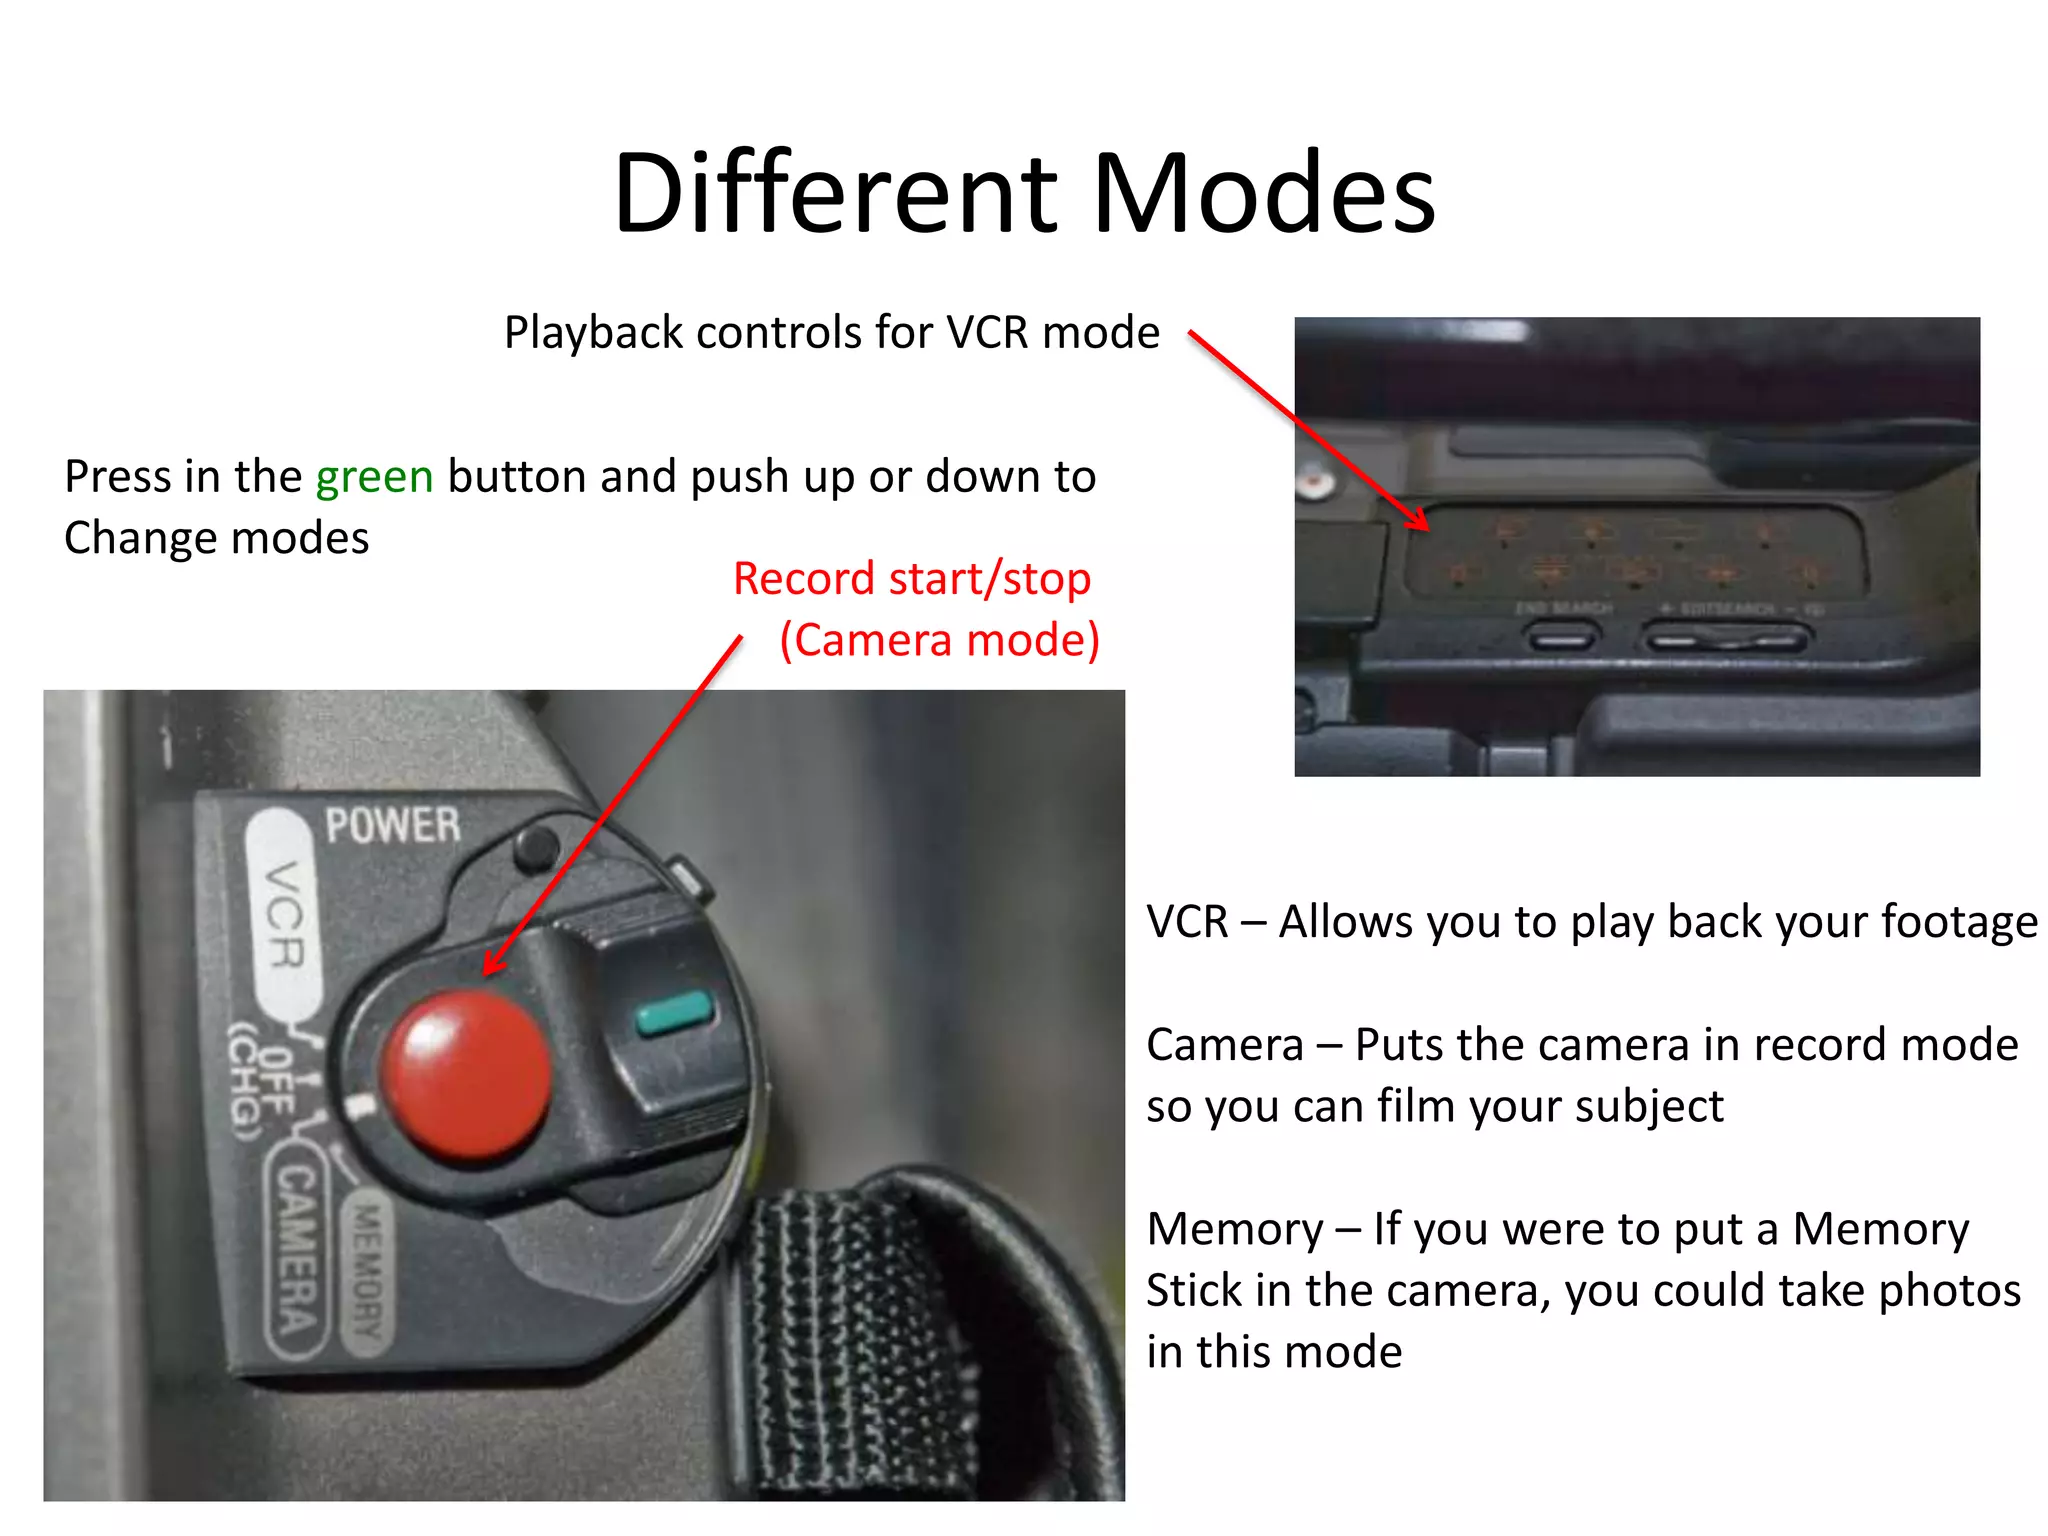
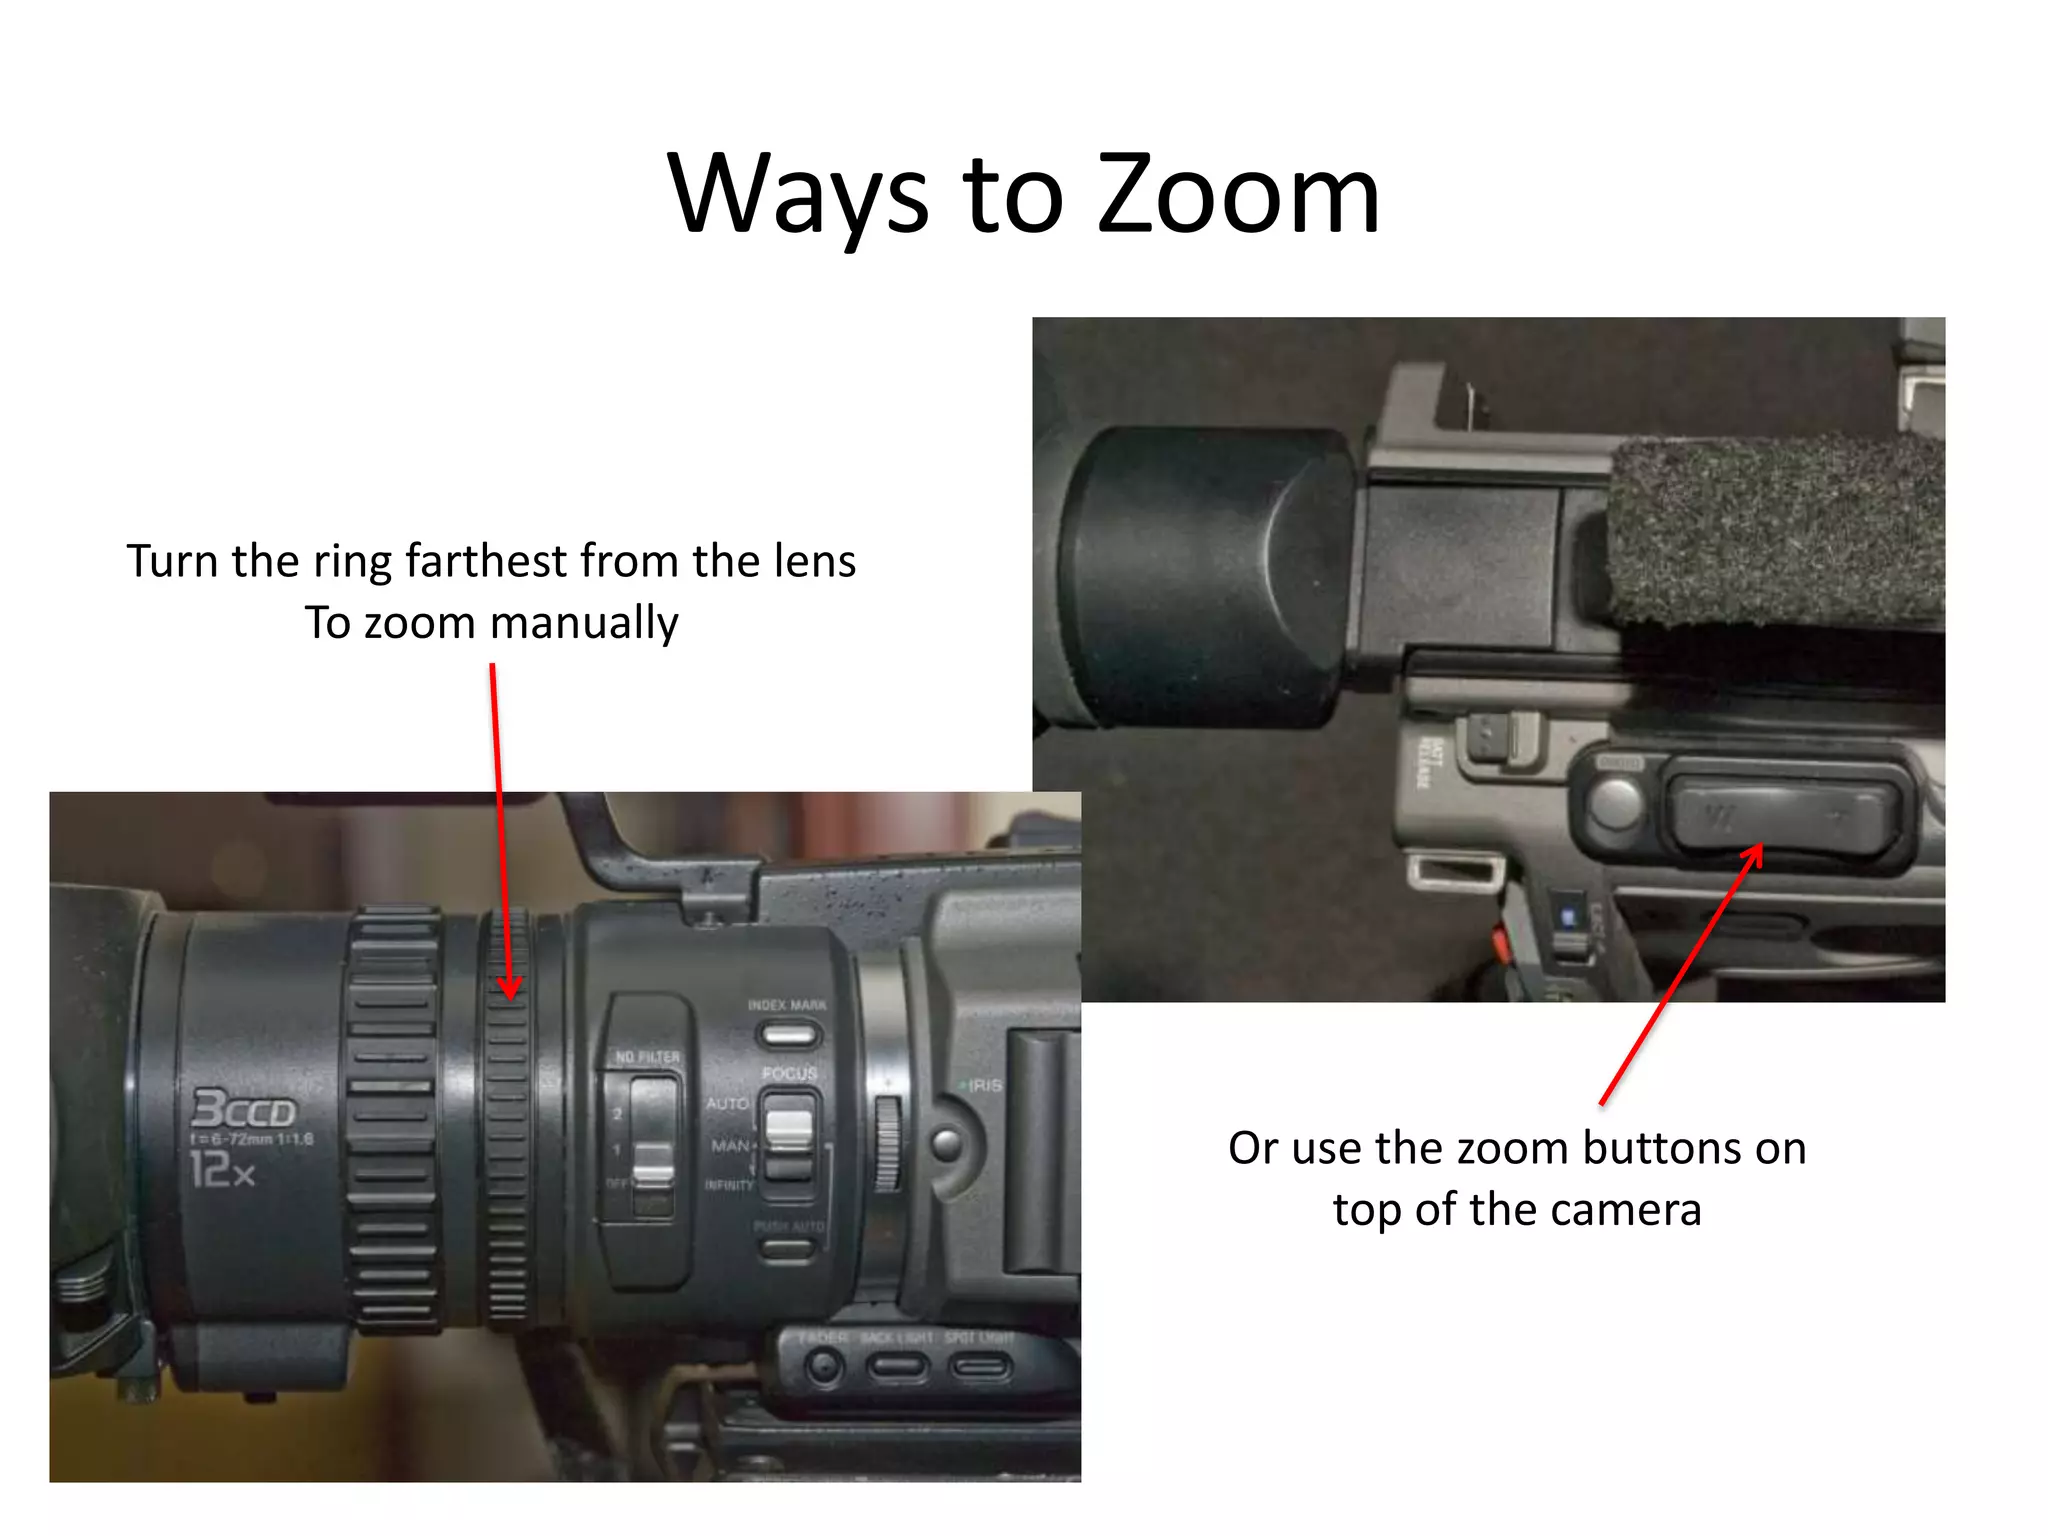
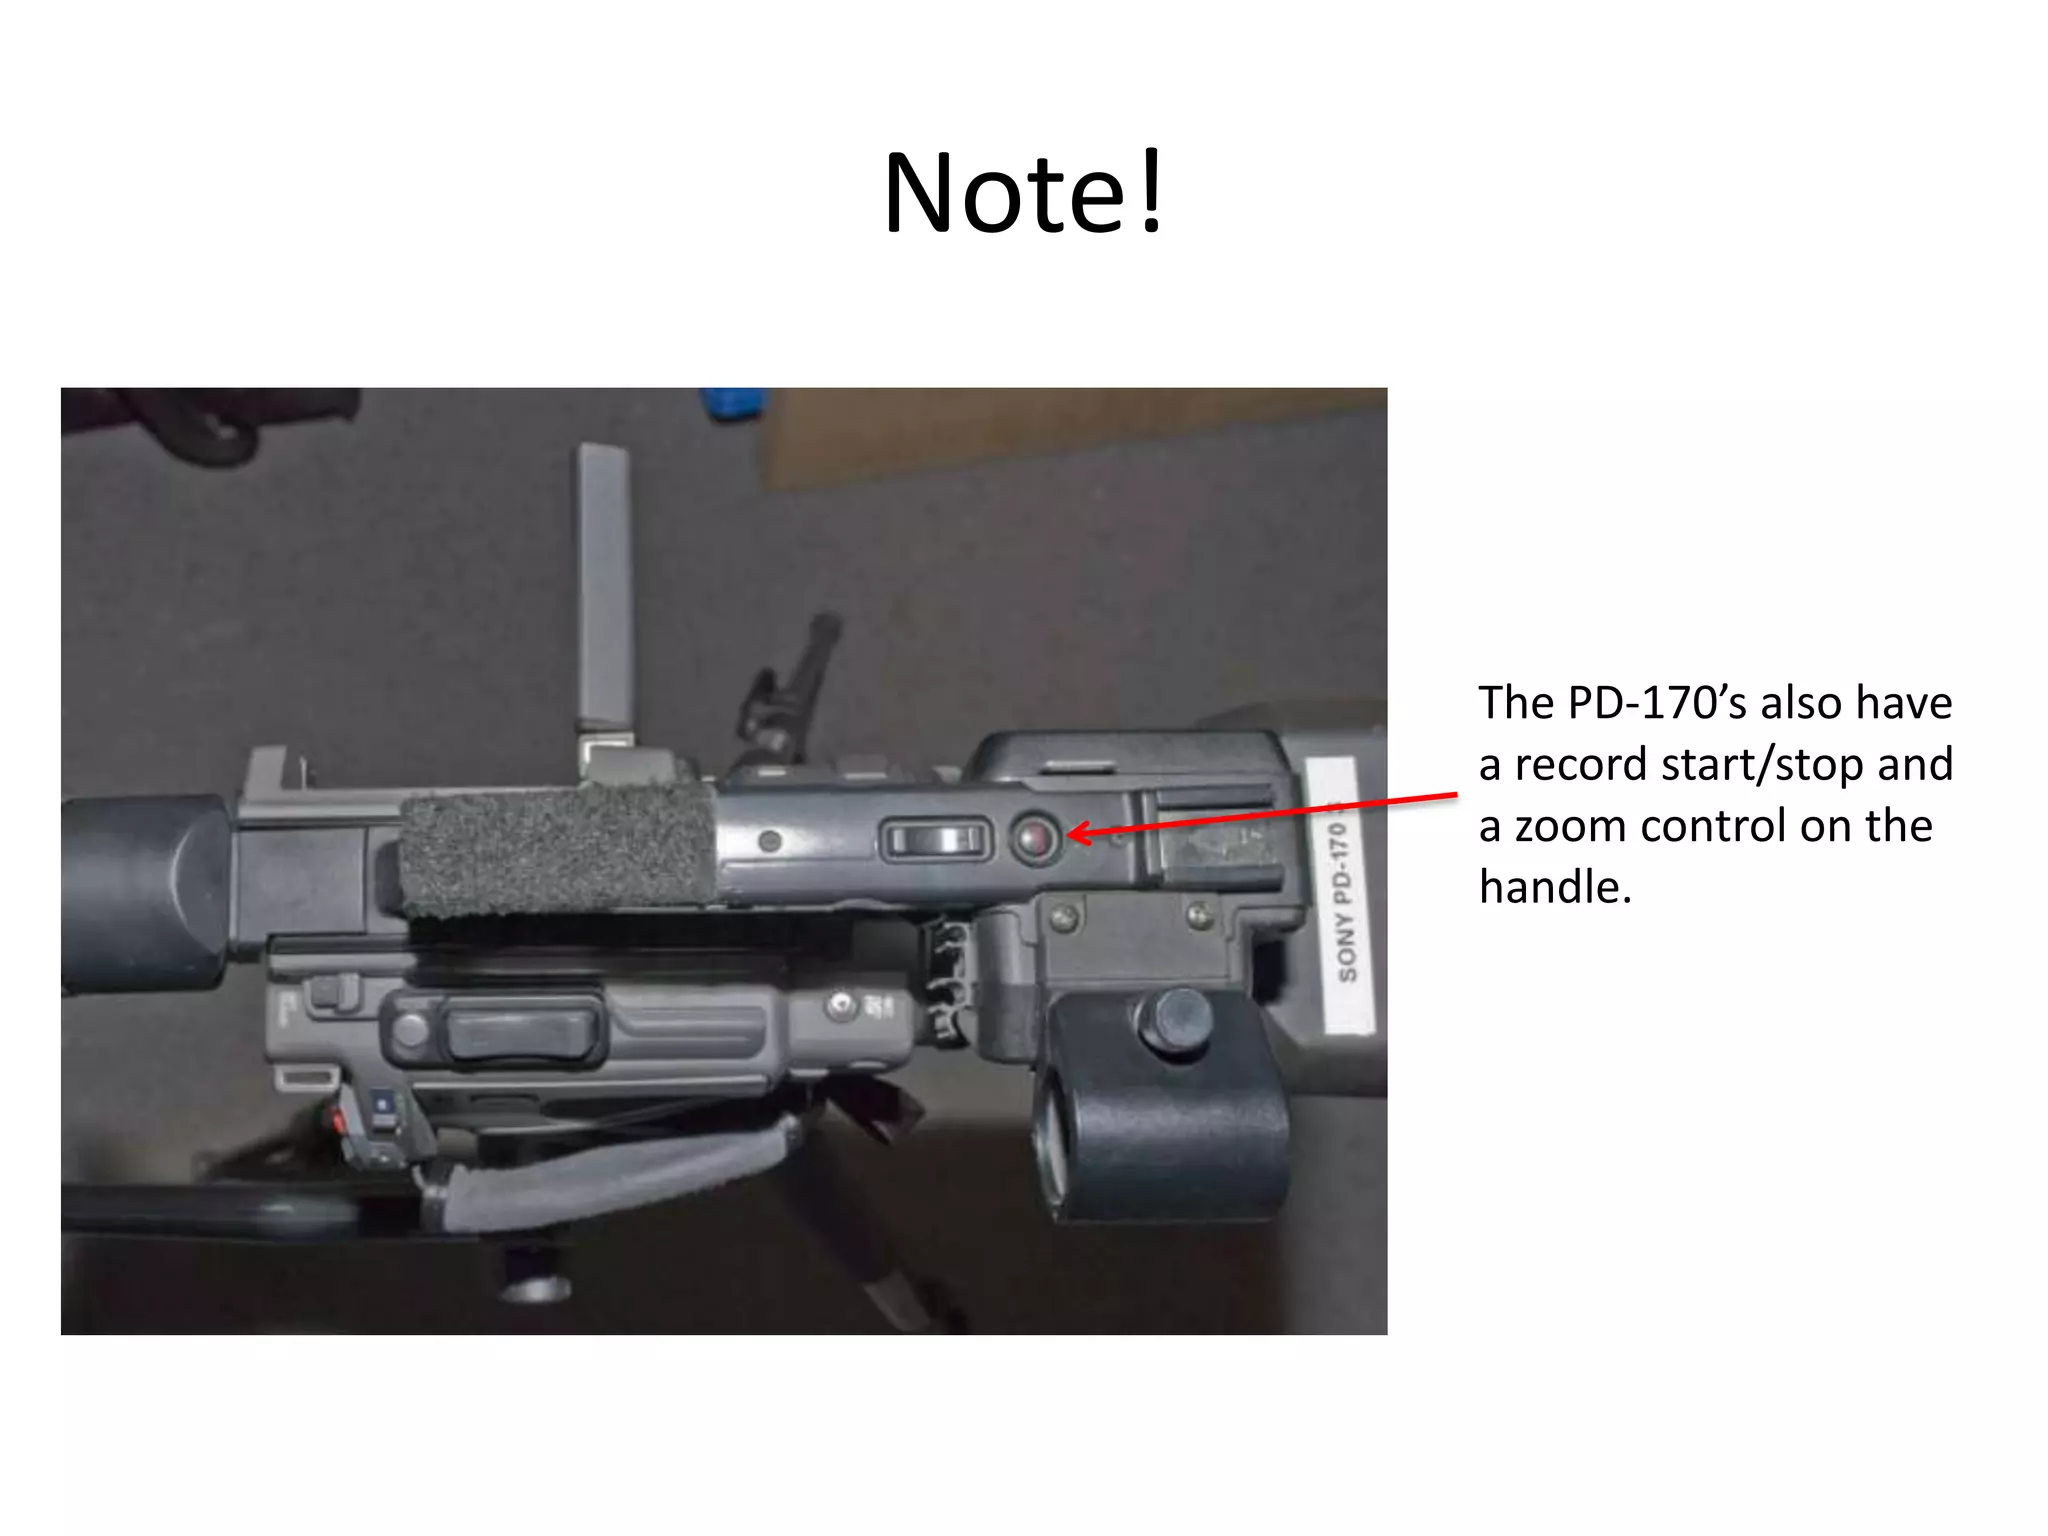
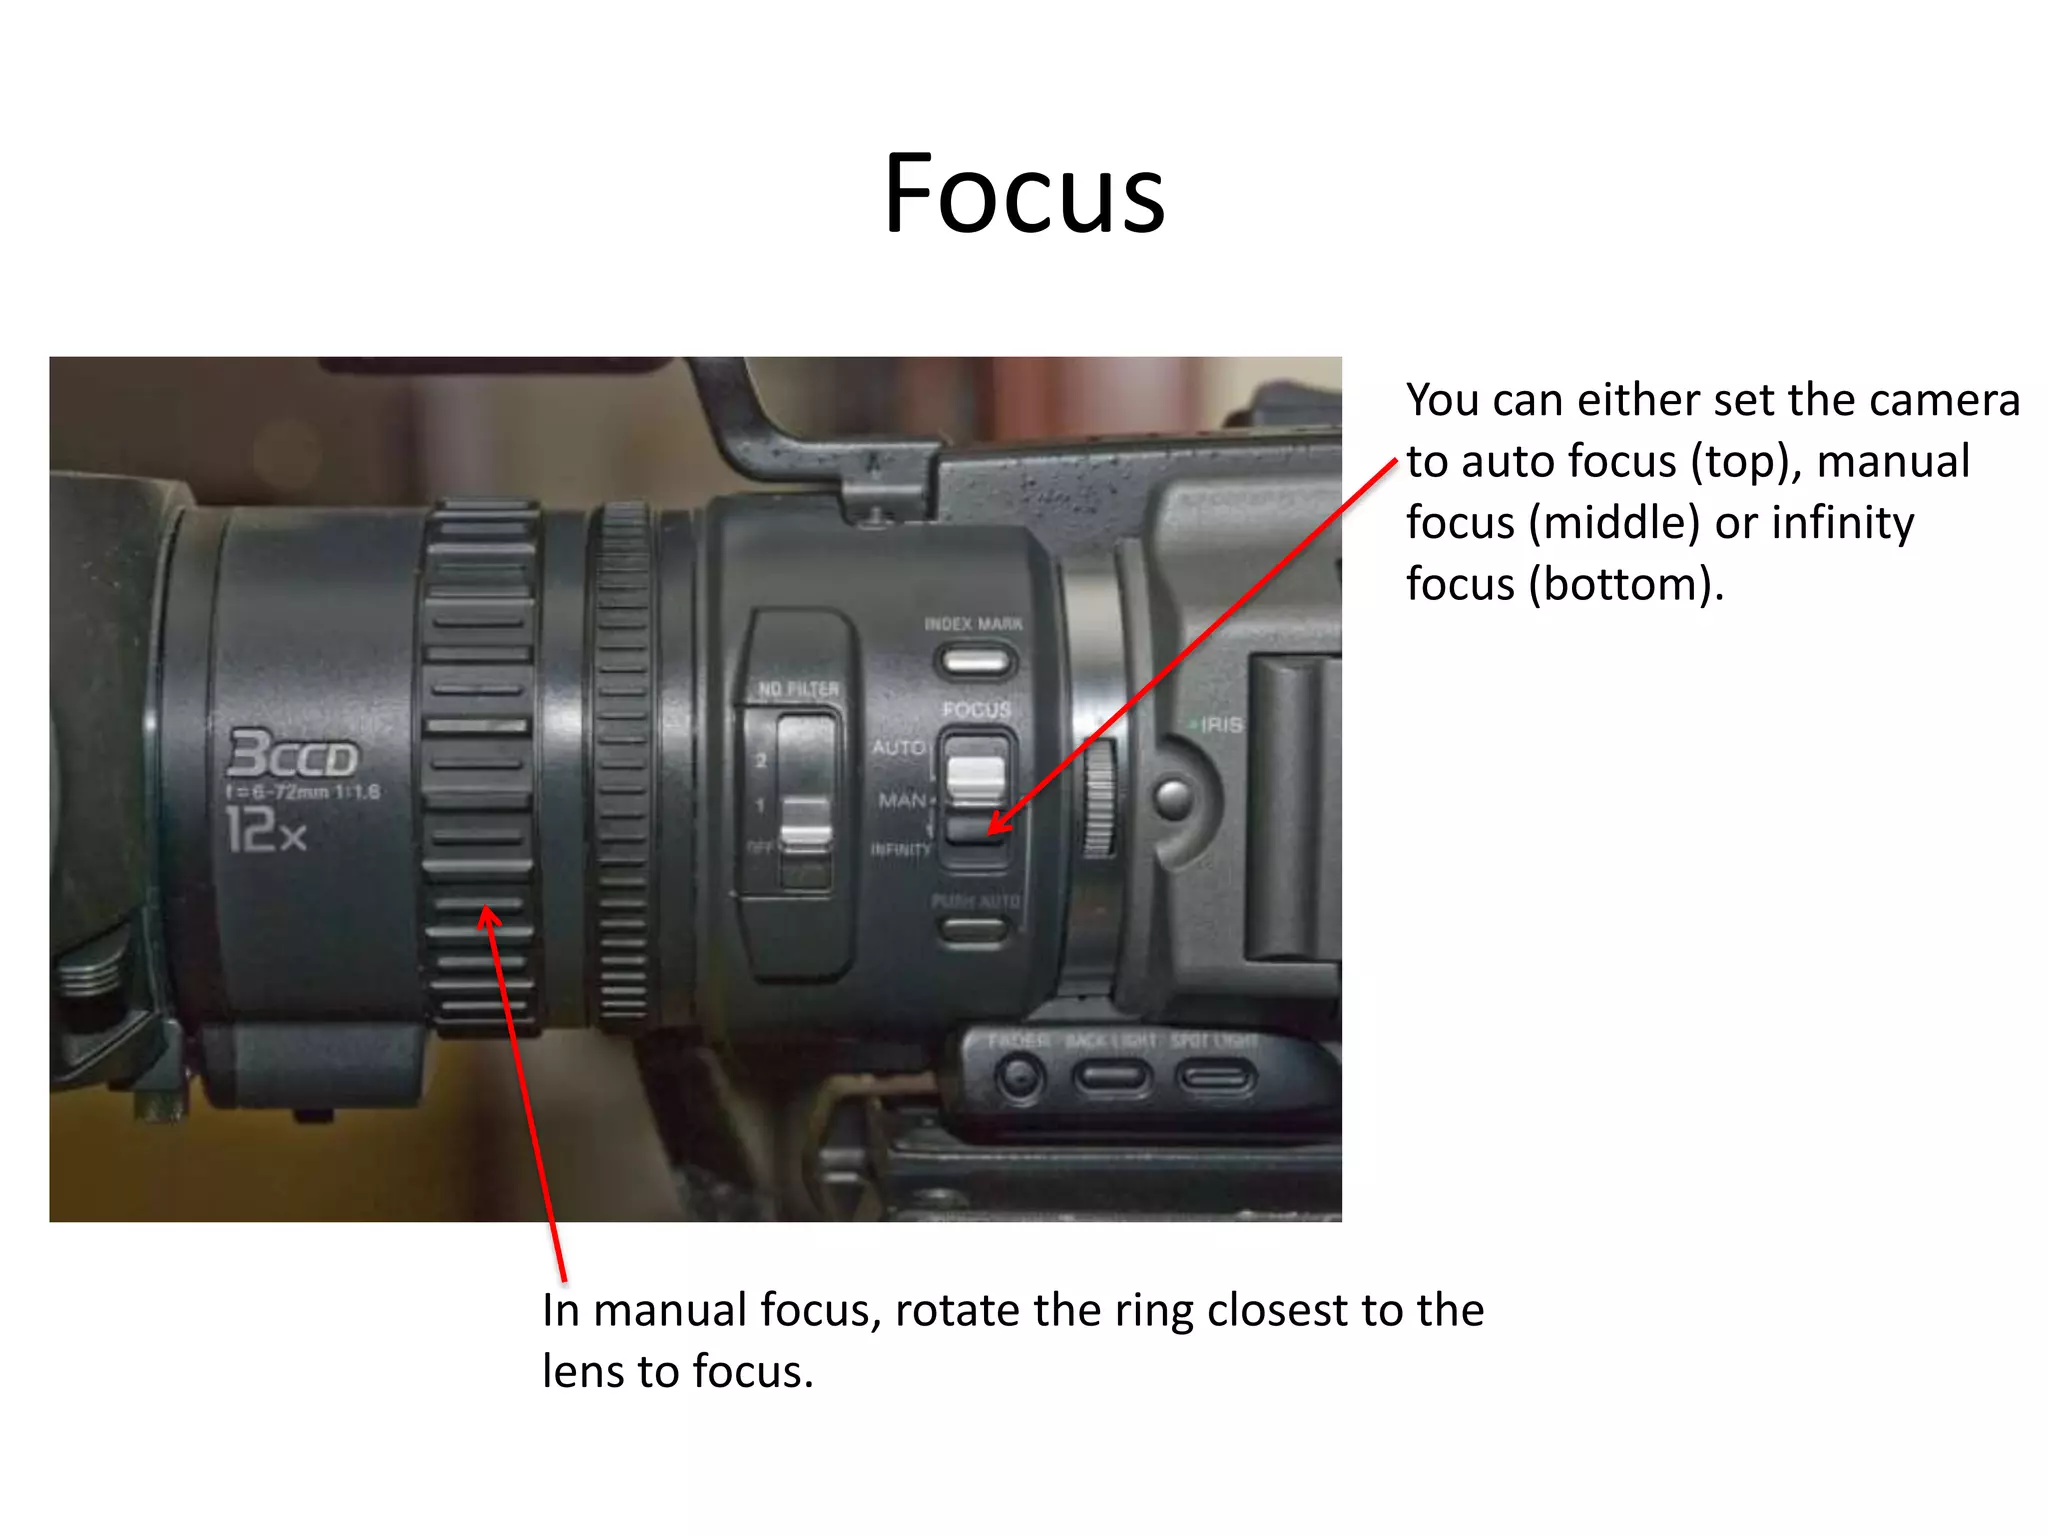
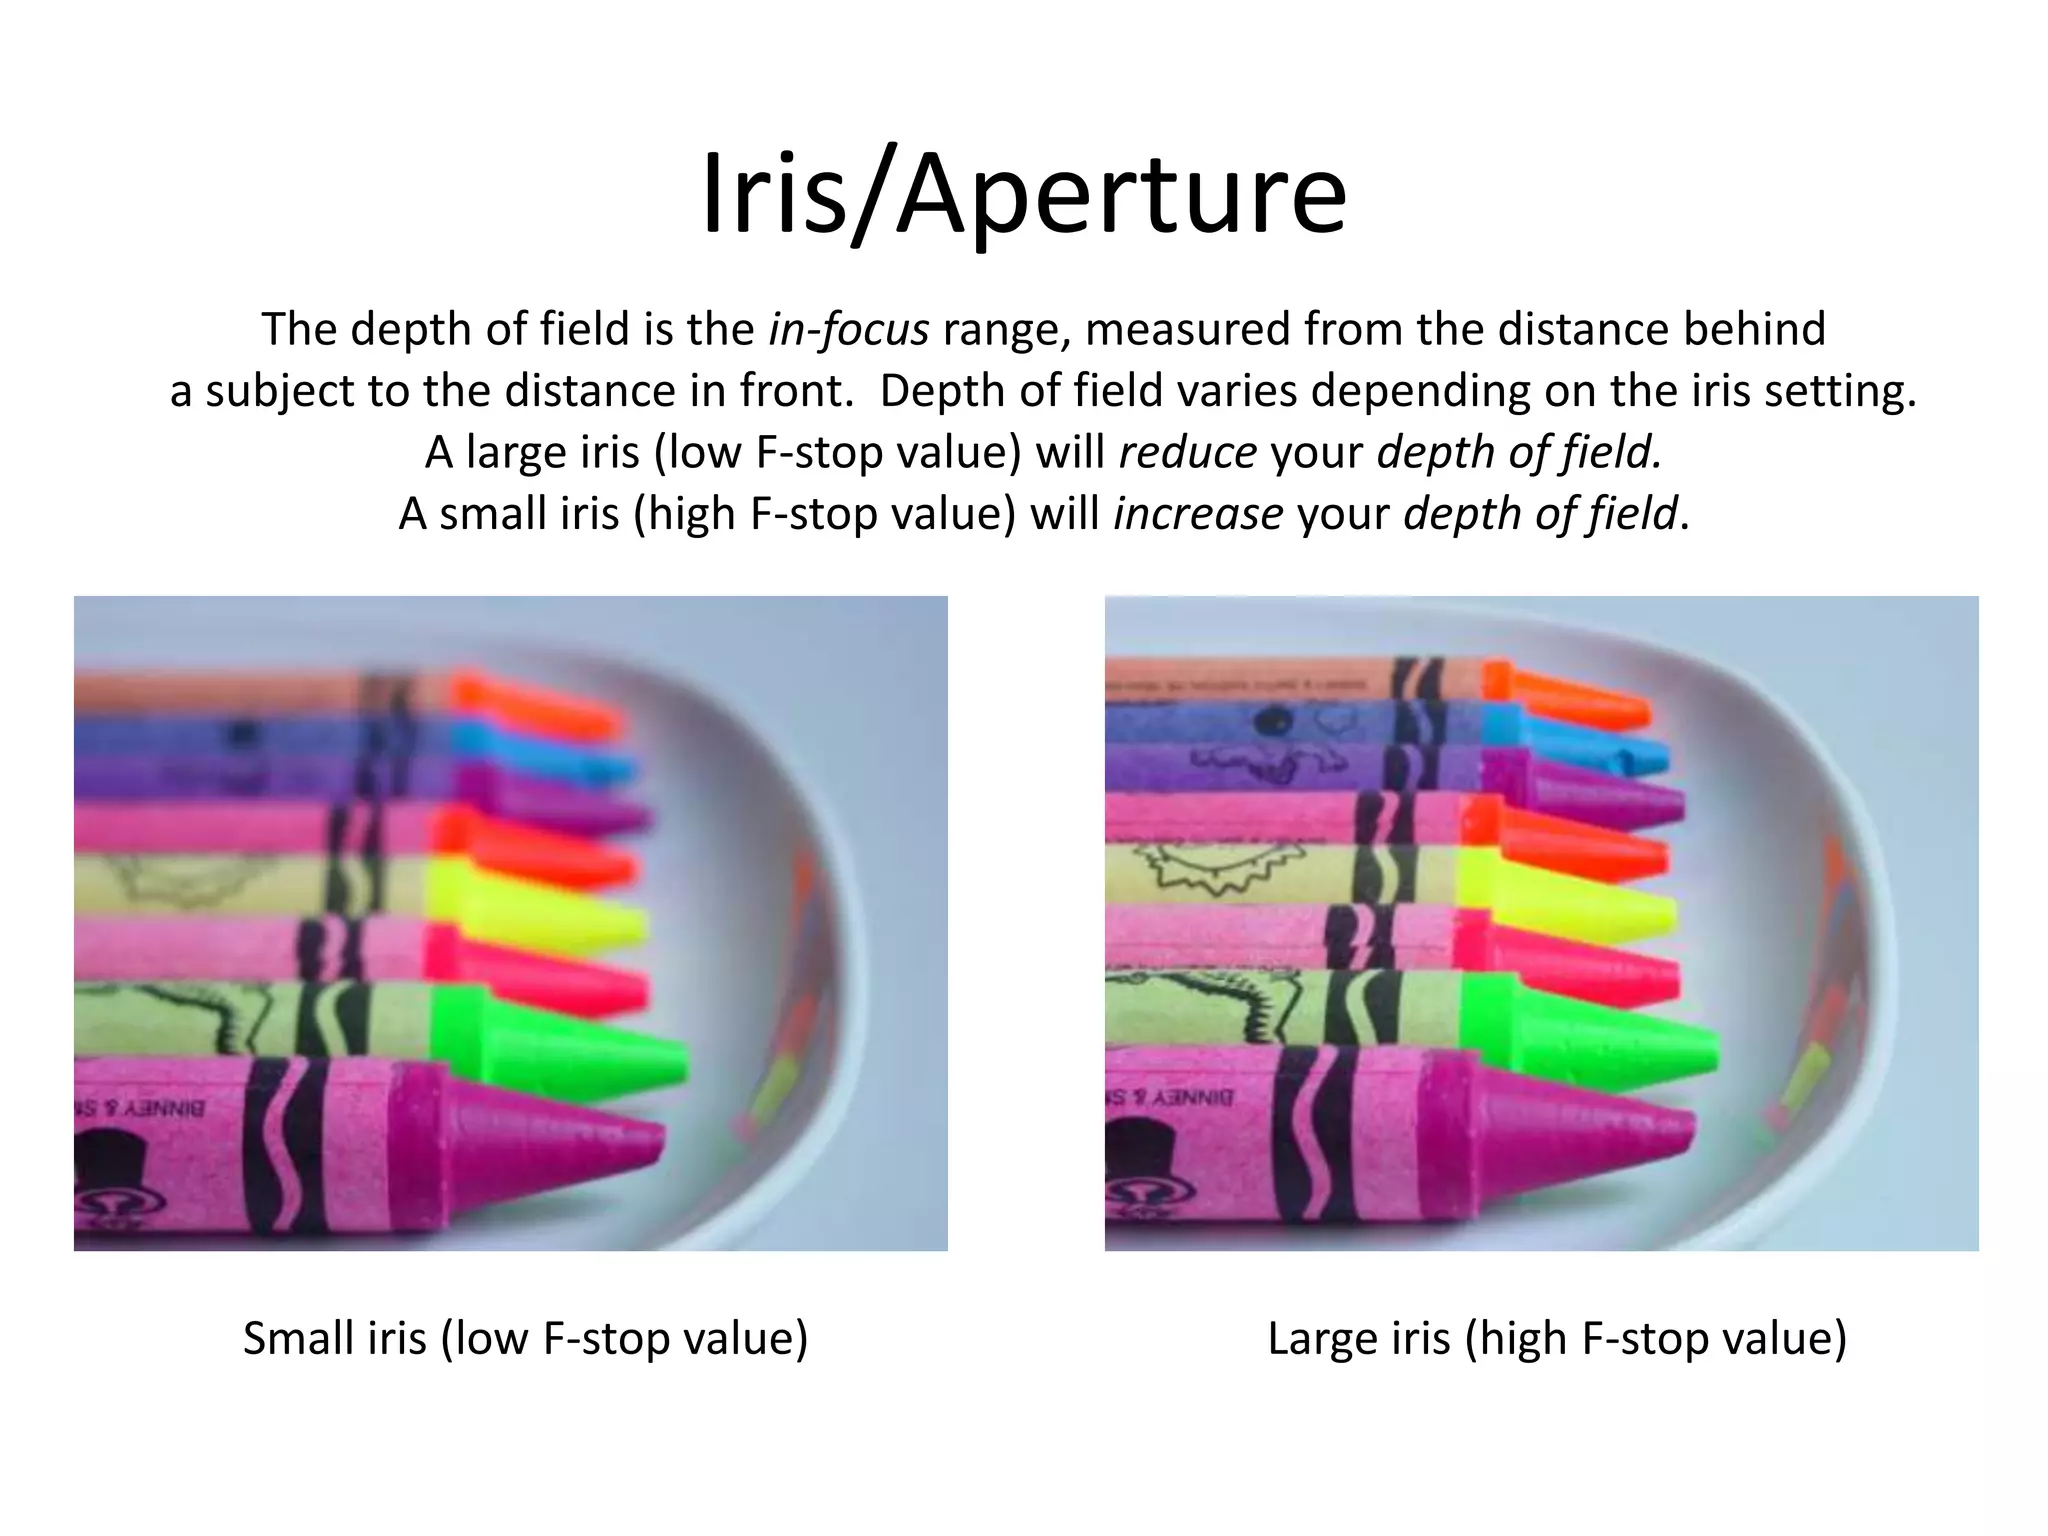

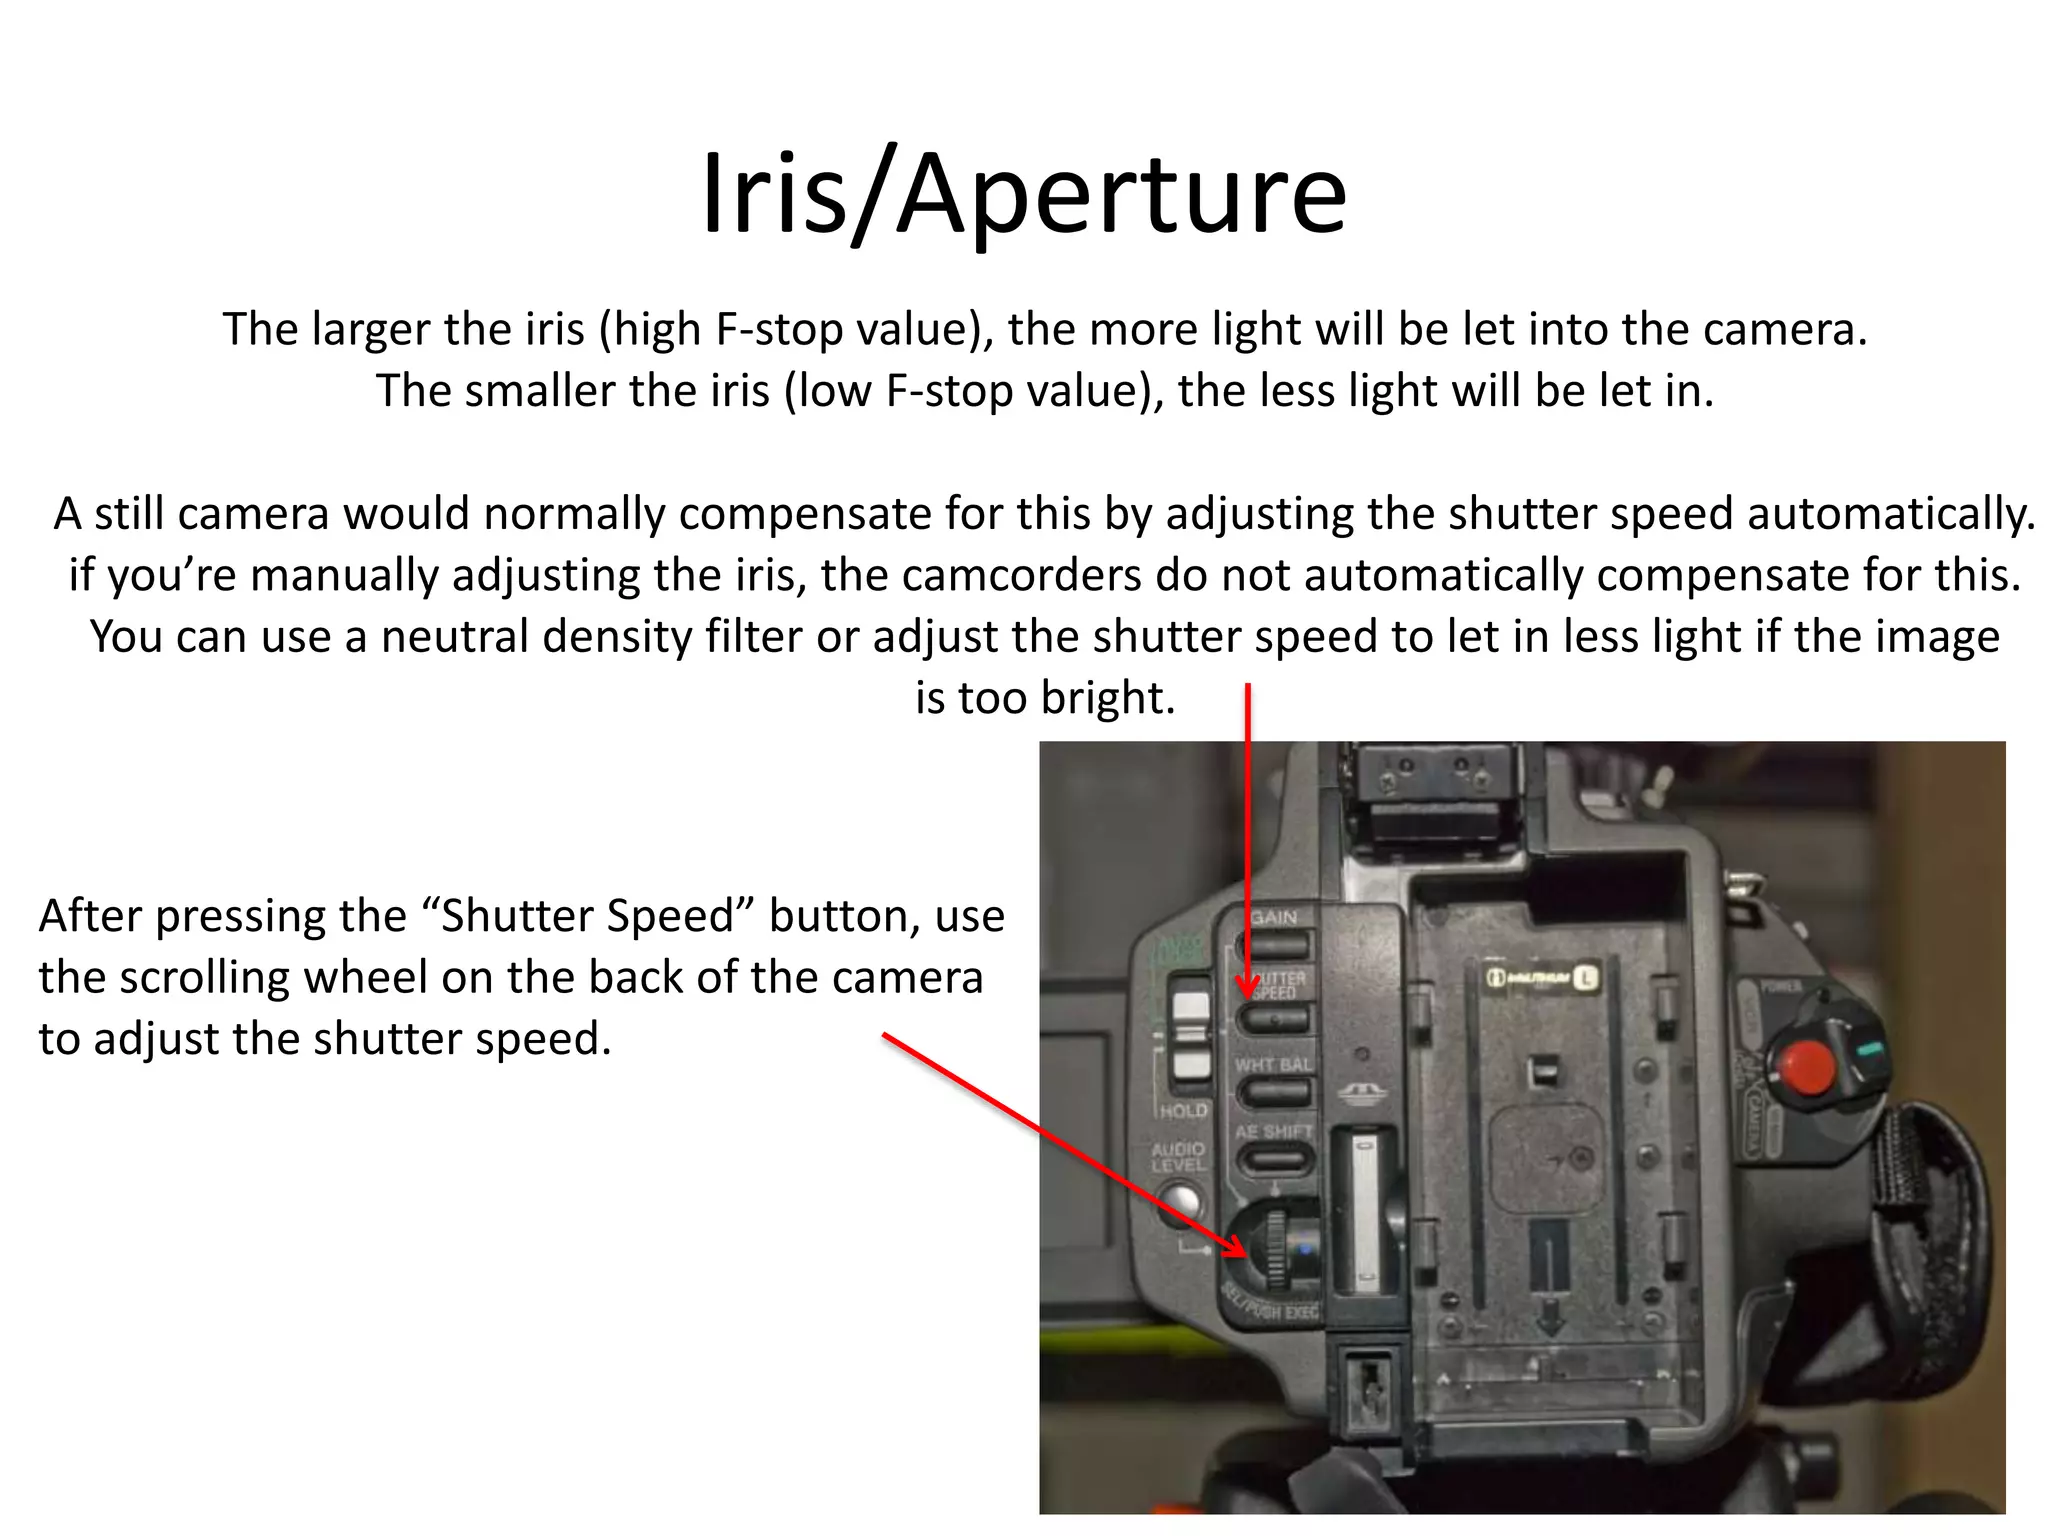

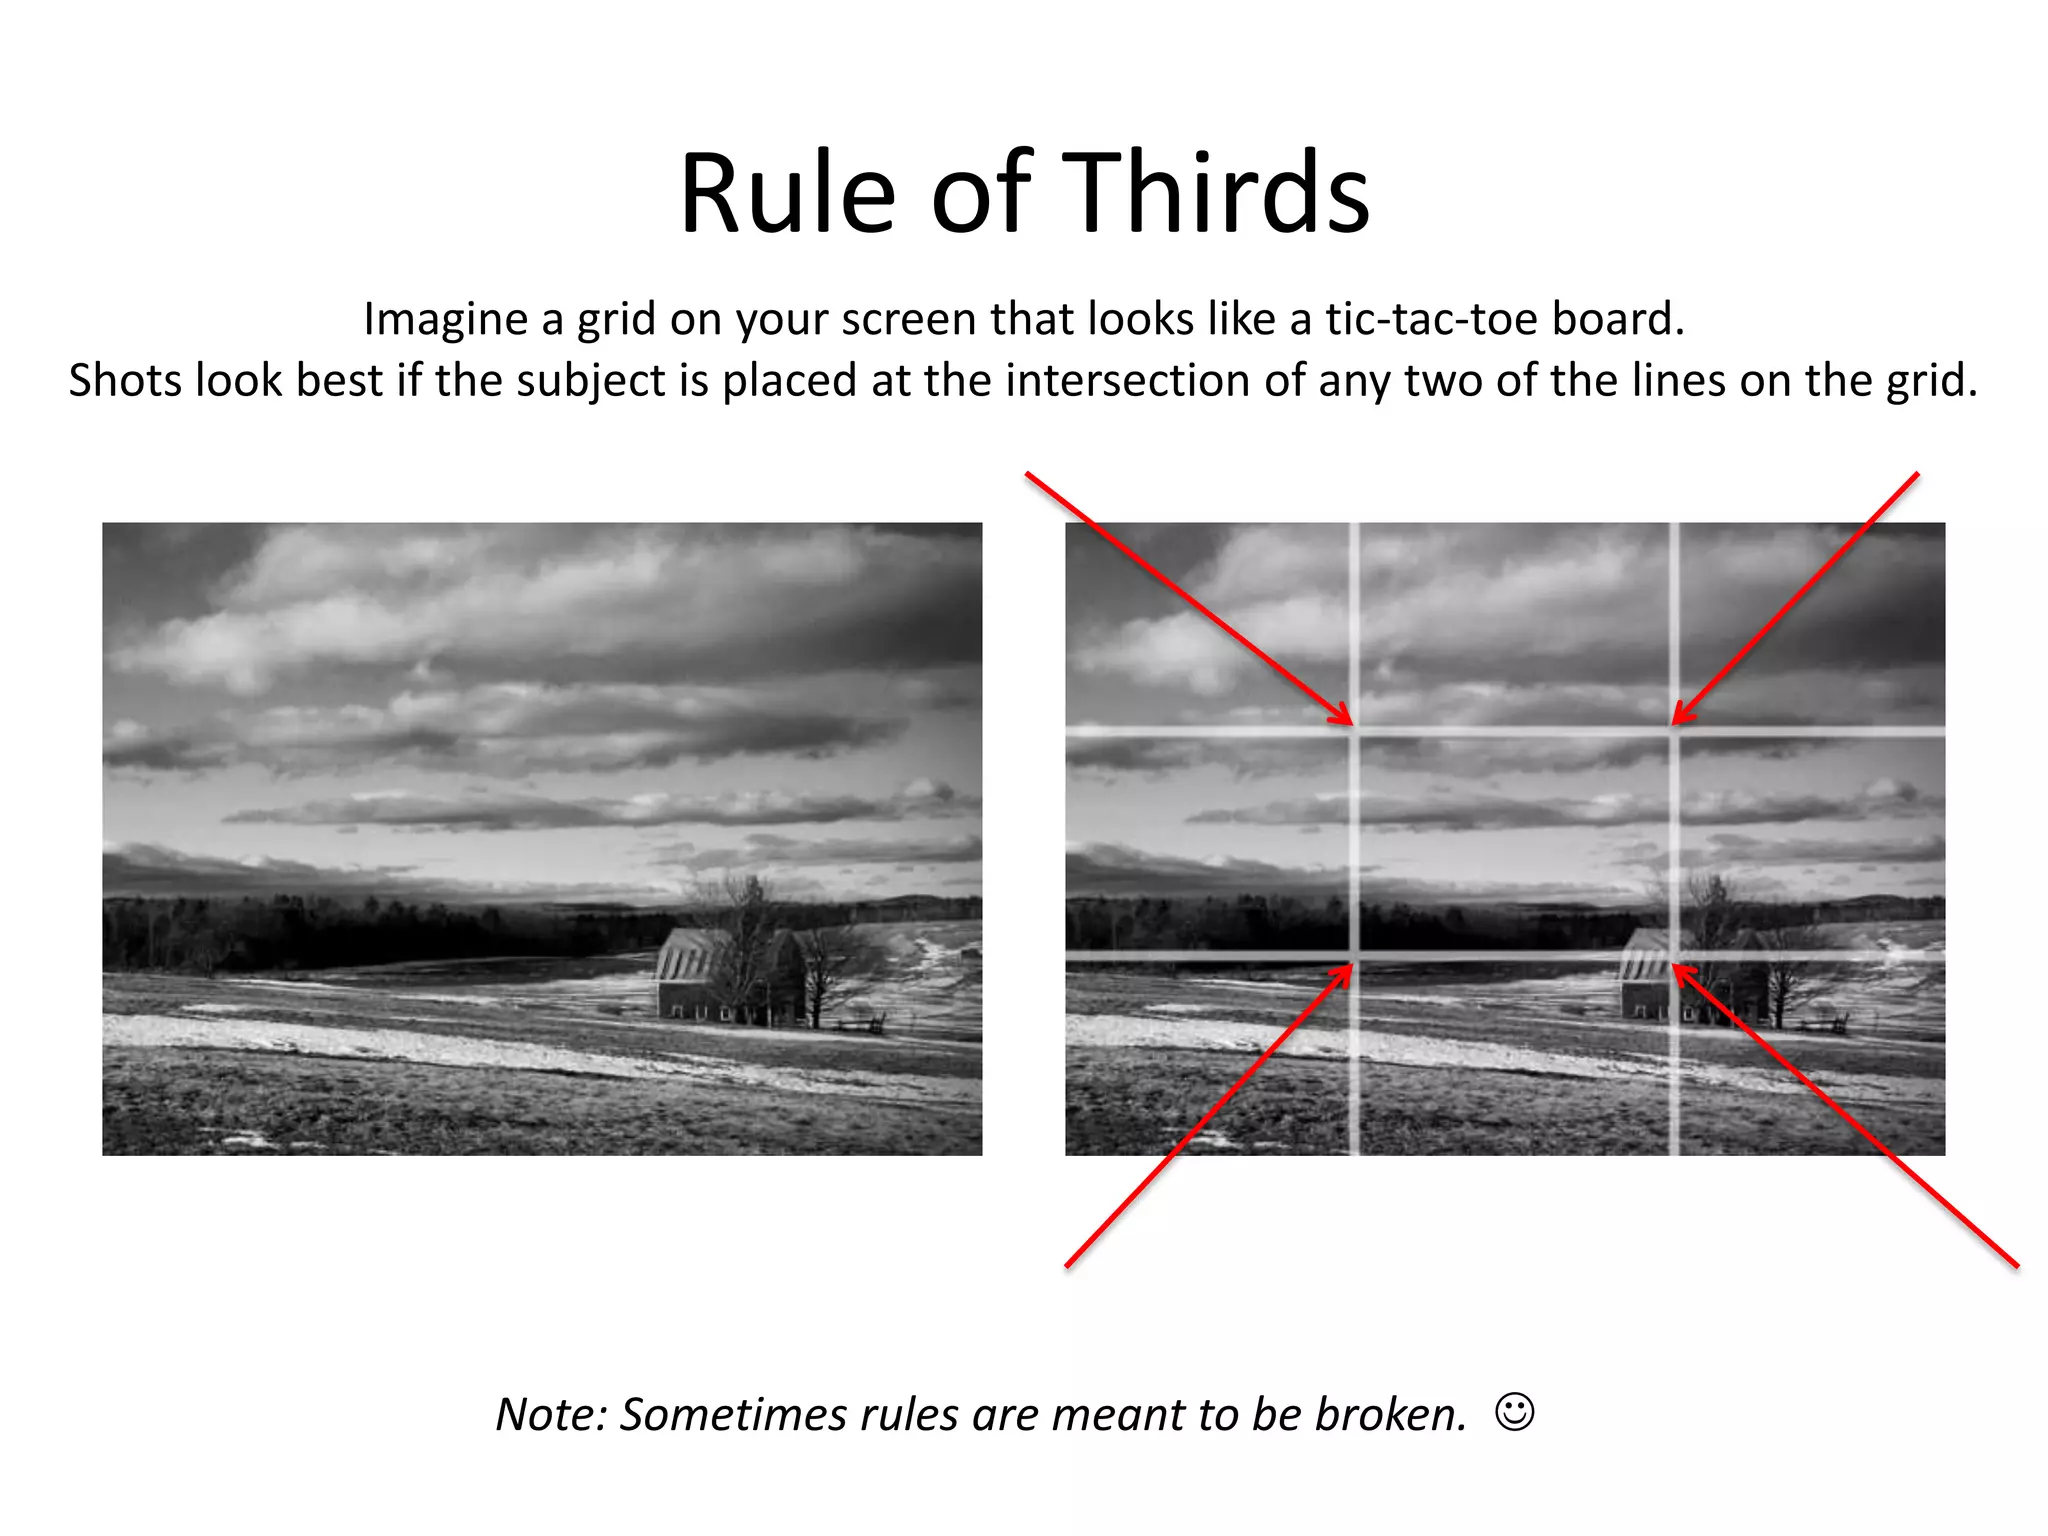
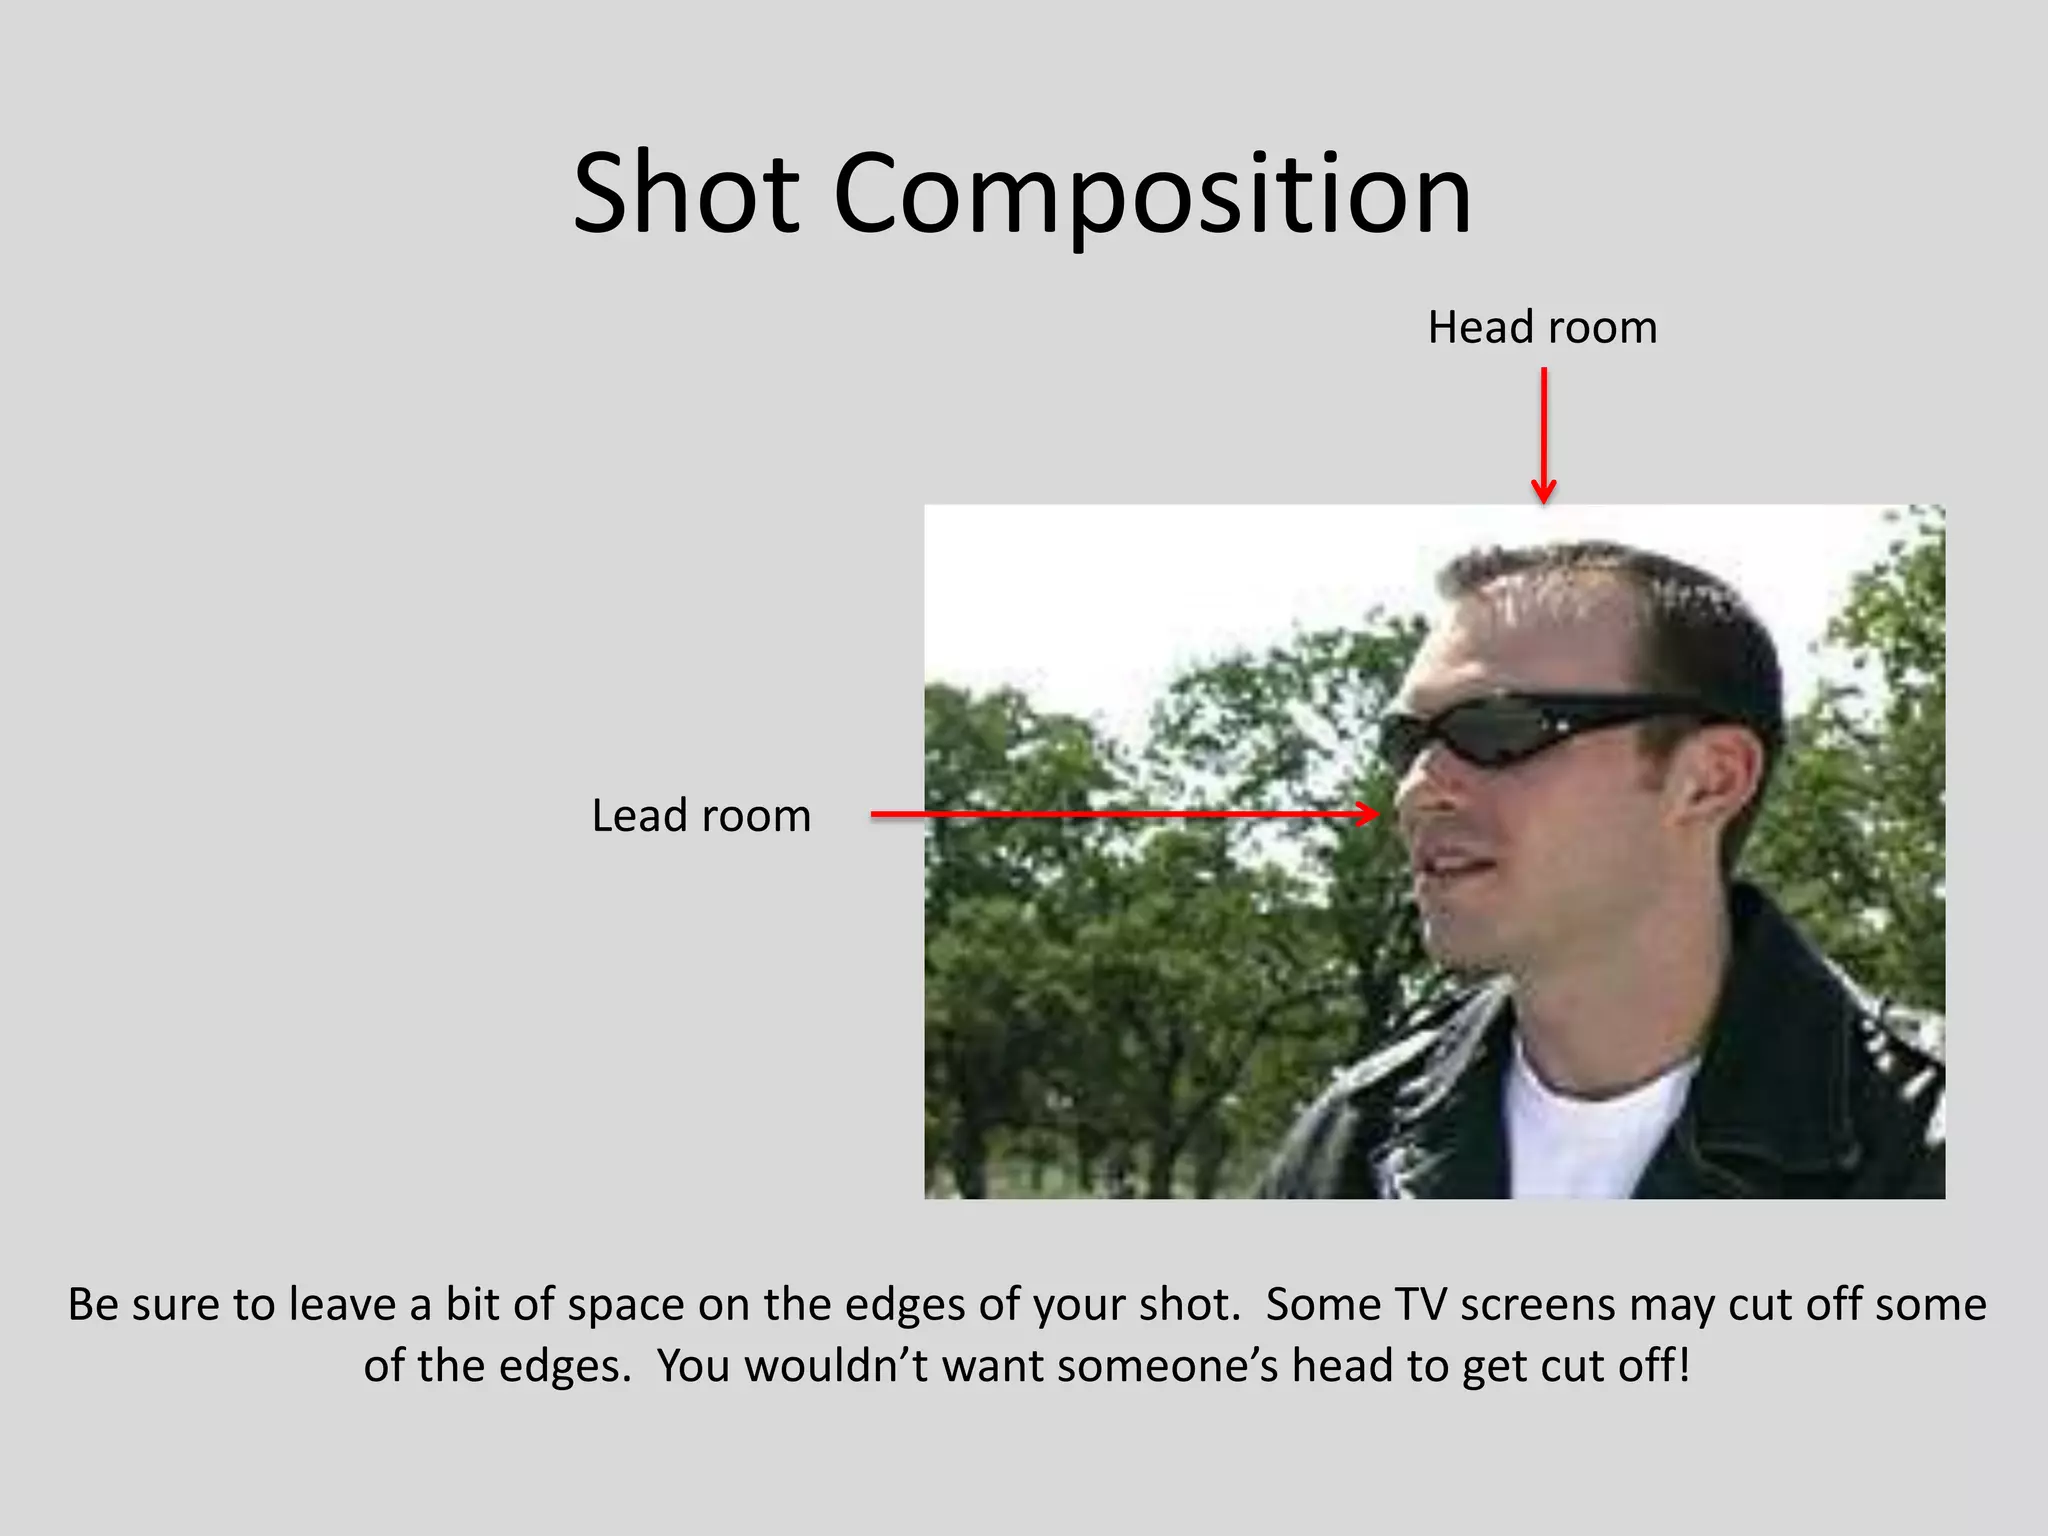
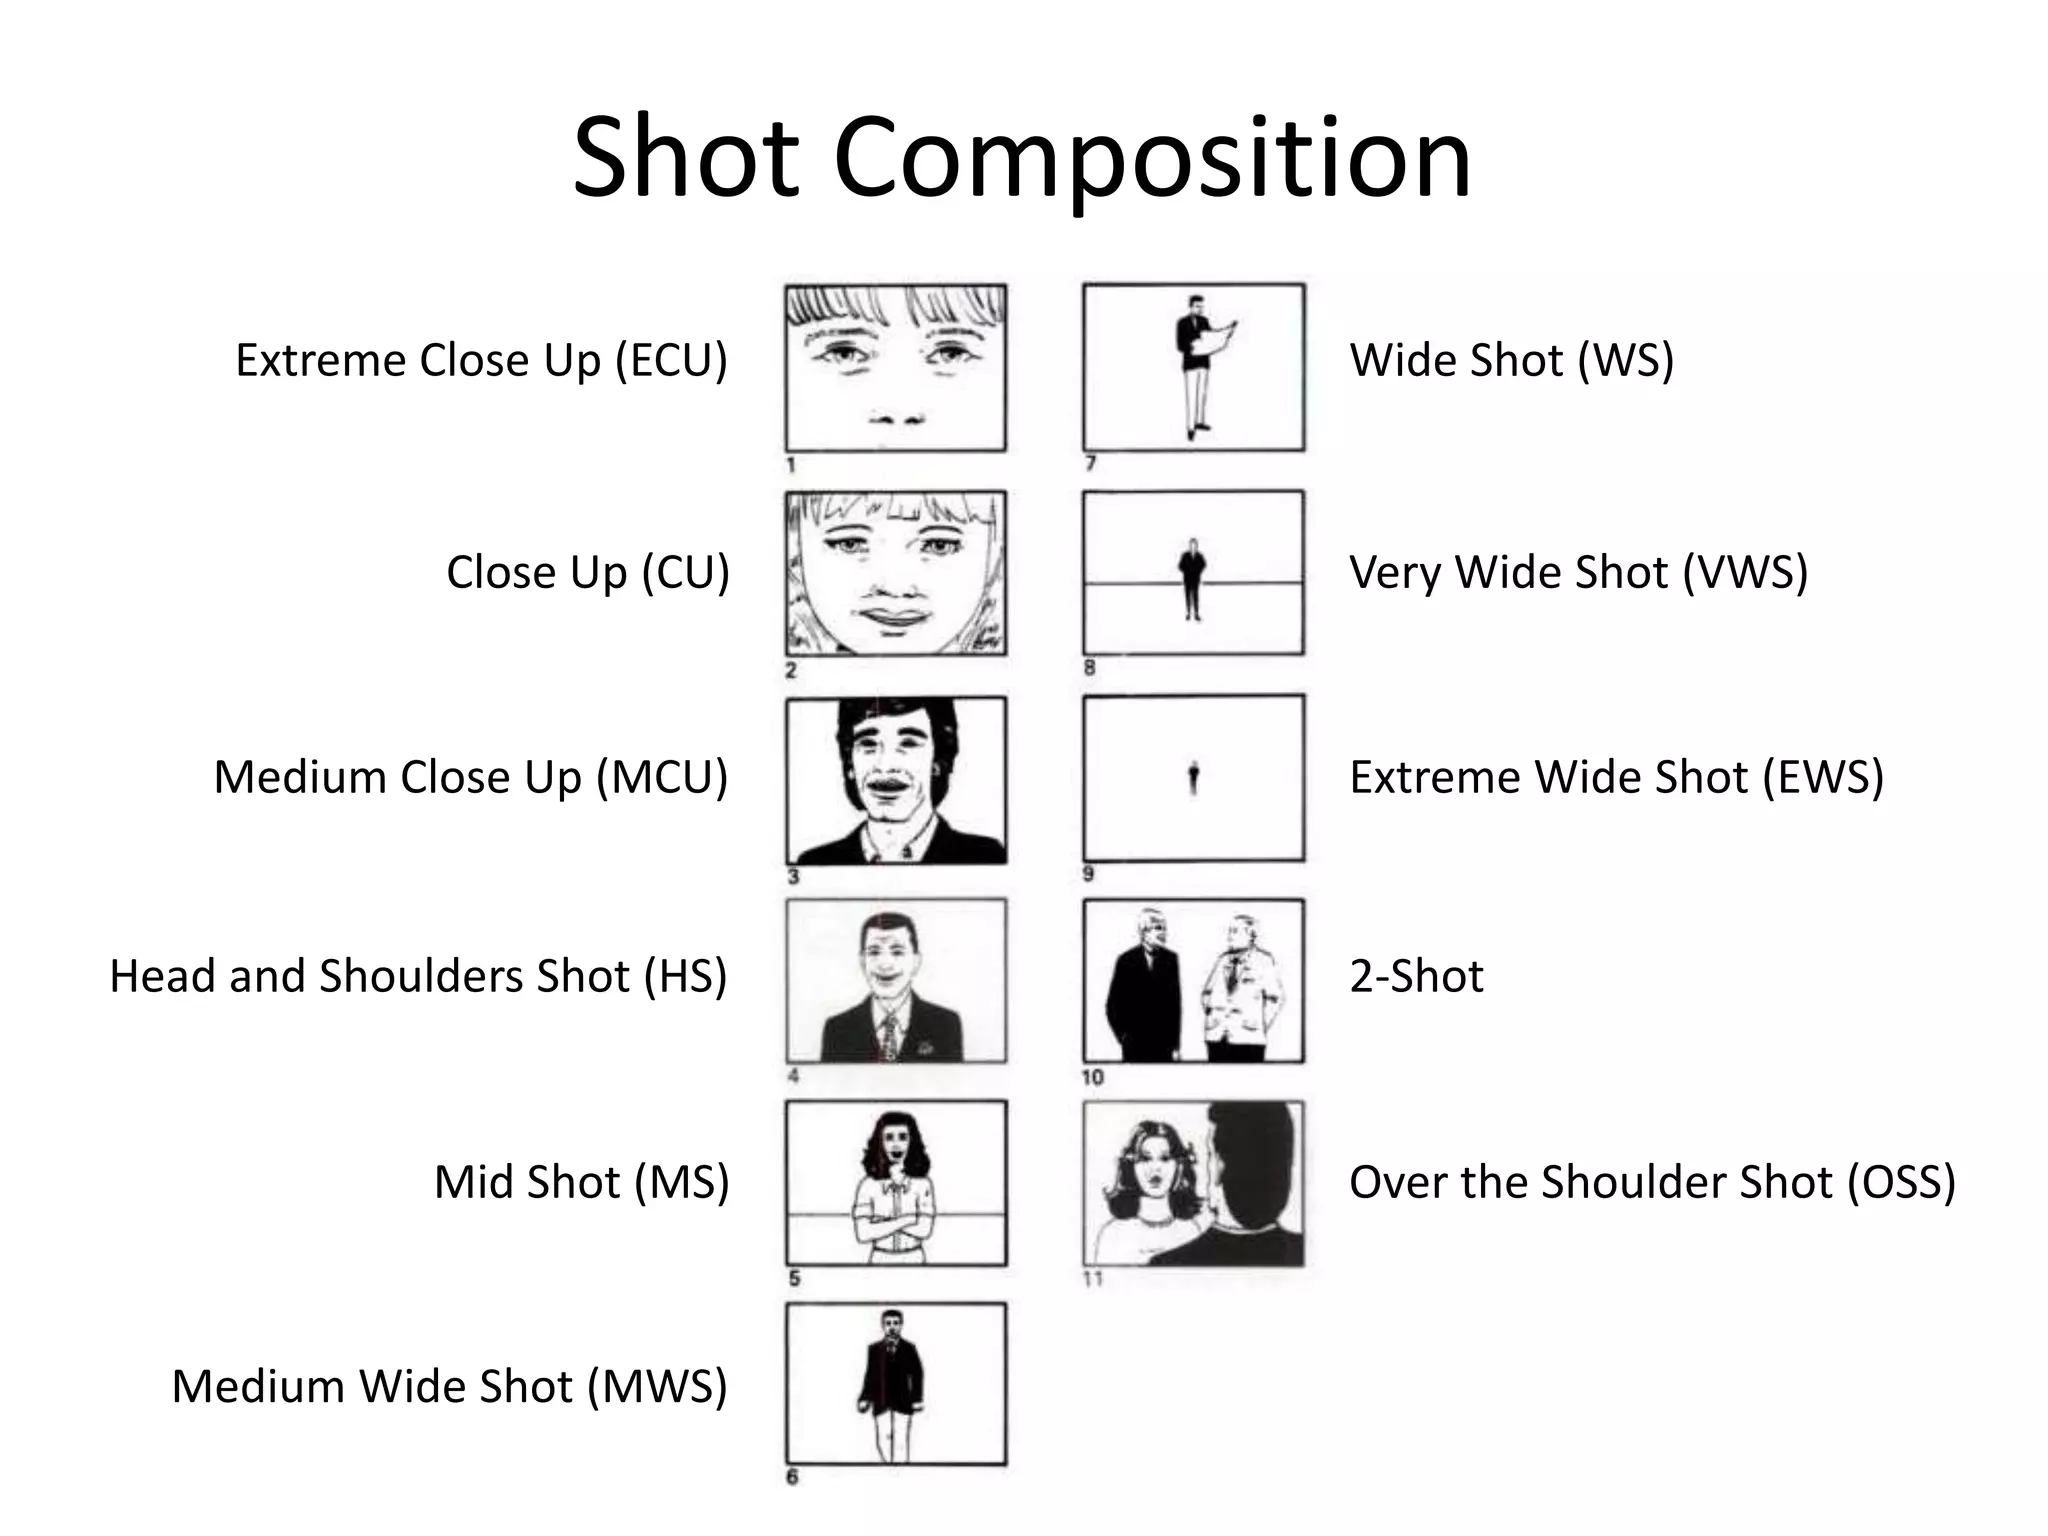
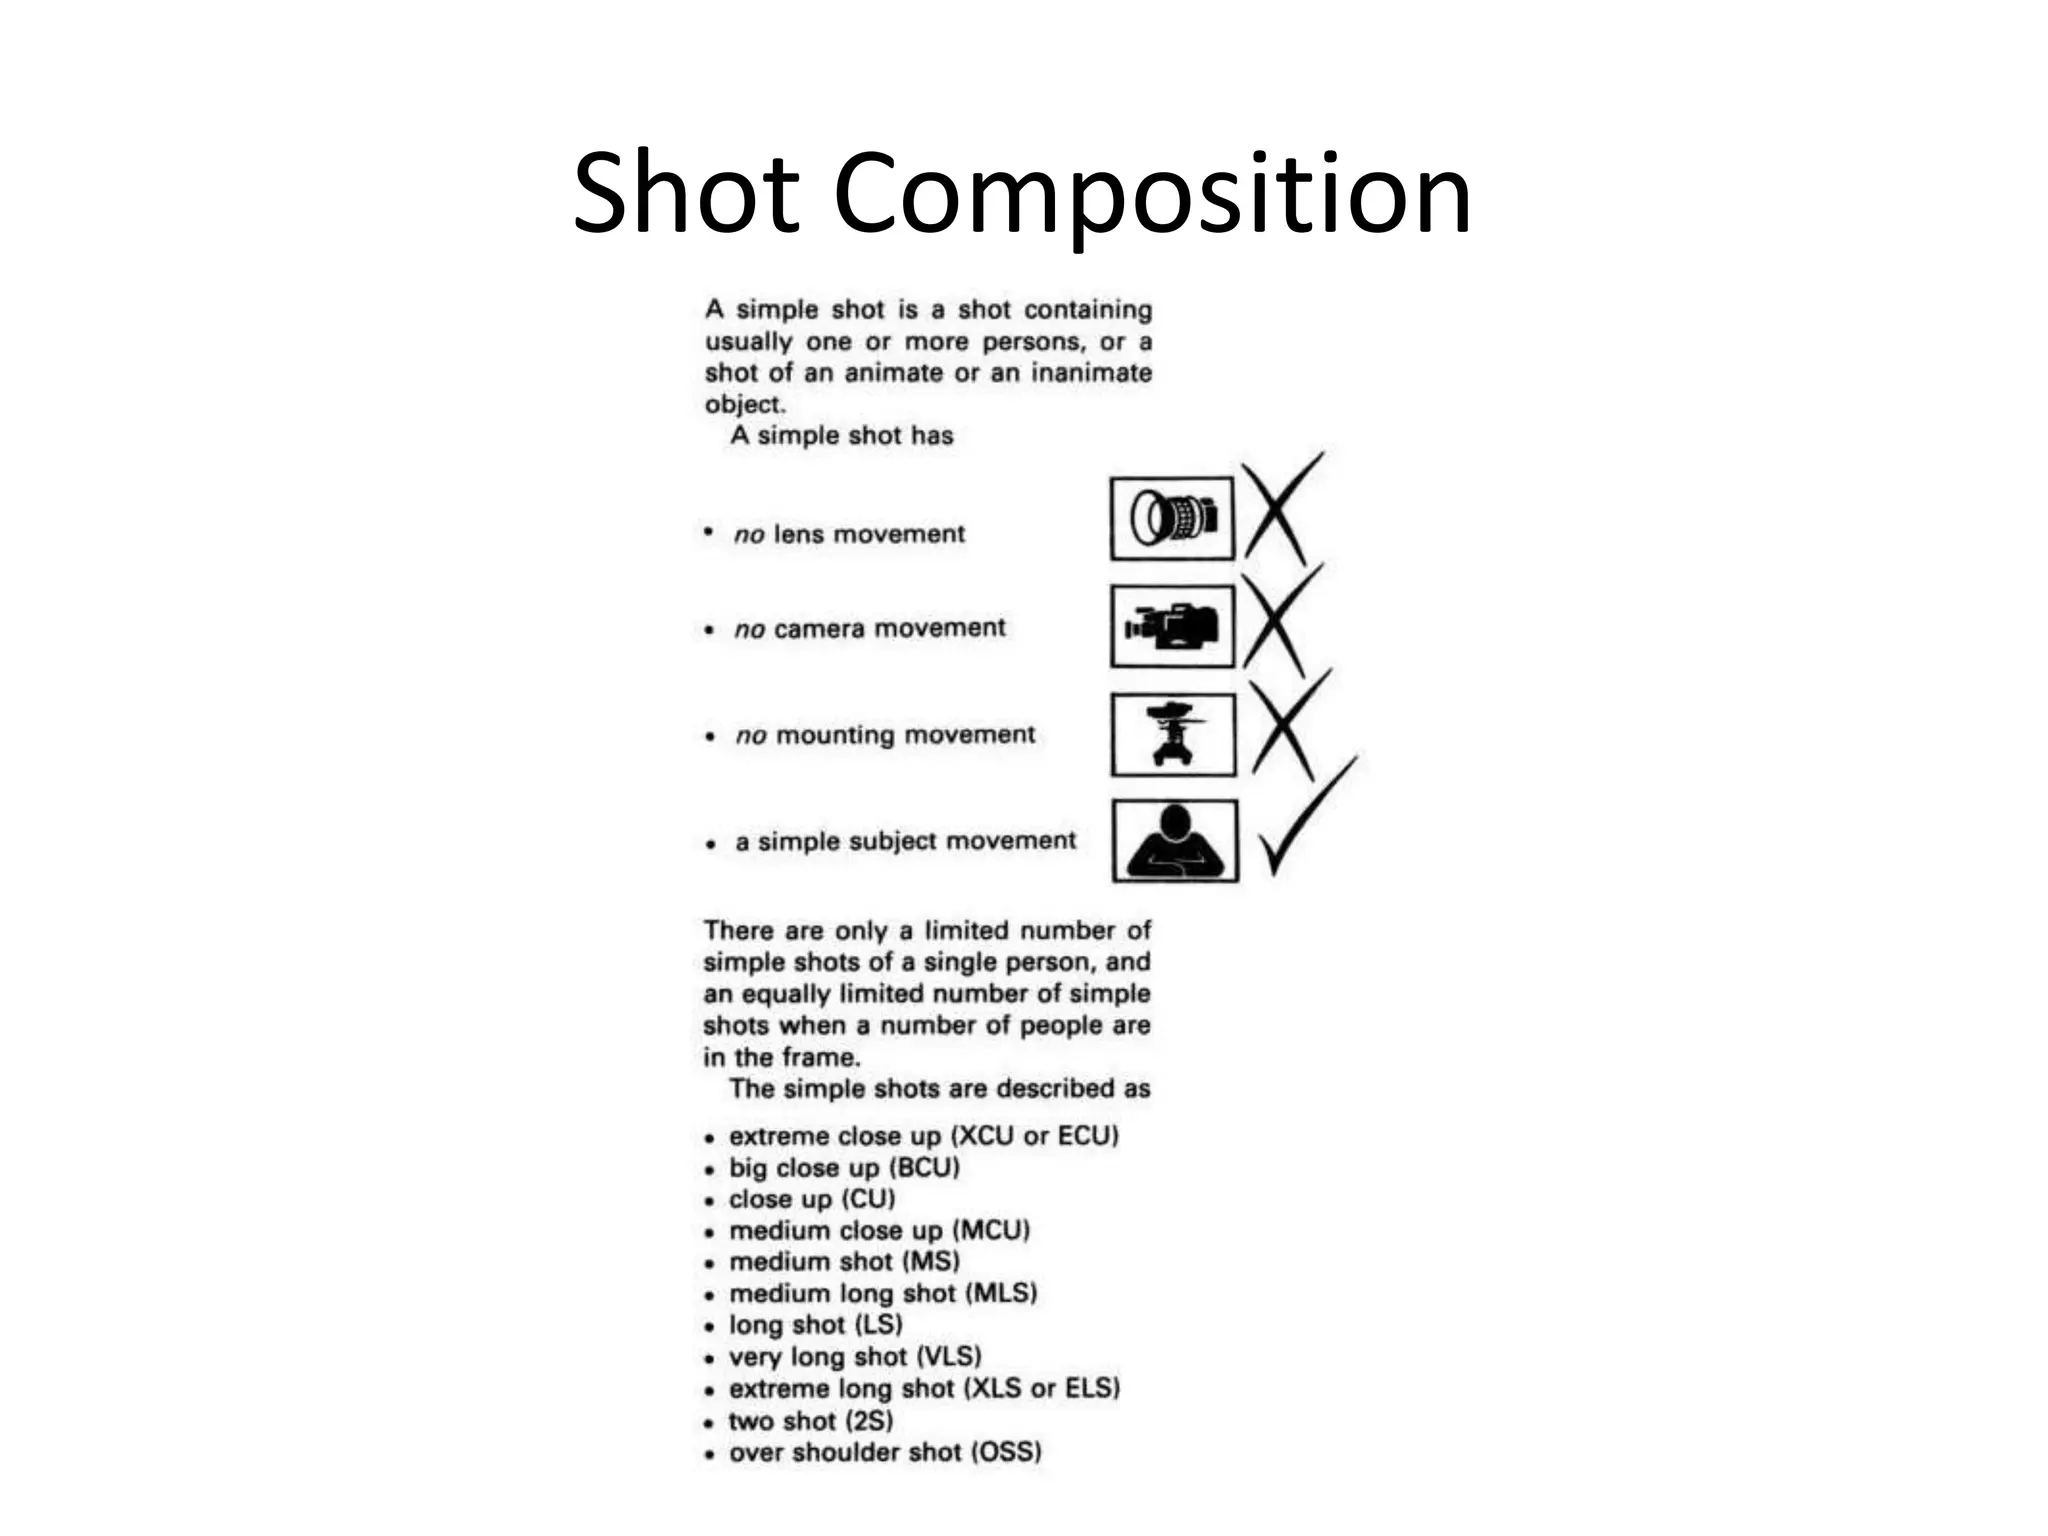


The document provides an overview and operational guide for the Sony PD-150/170 cameras, detailing setup, shooting techniques, and audio management. It covers essential parts like the tripod, camera modes, lens adjustments, and white balancing, as well as shot composition principles. Additionally, it highlights microphone setups and audio level adjustments for optimal video production.


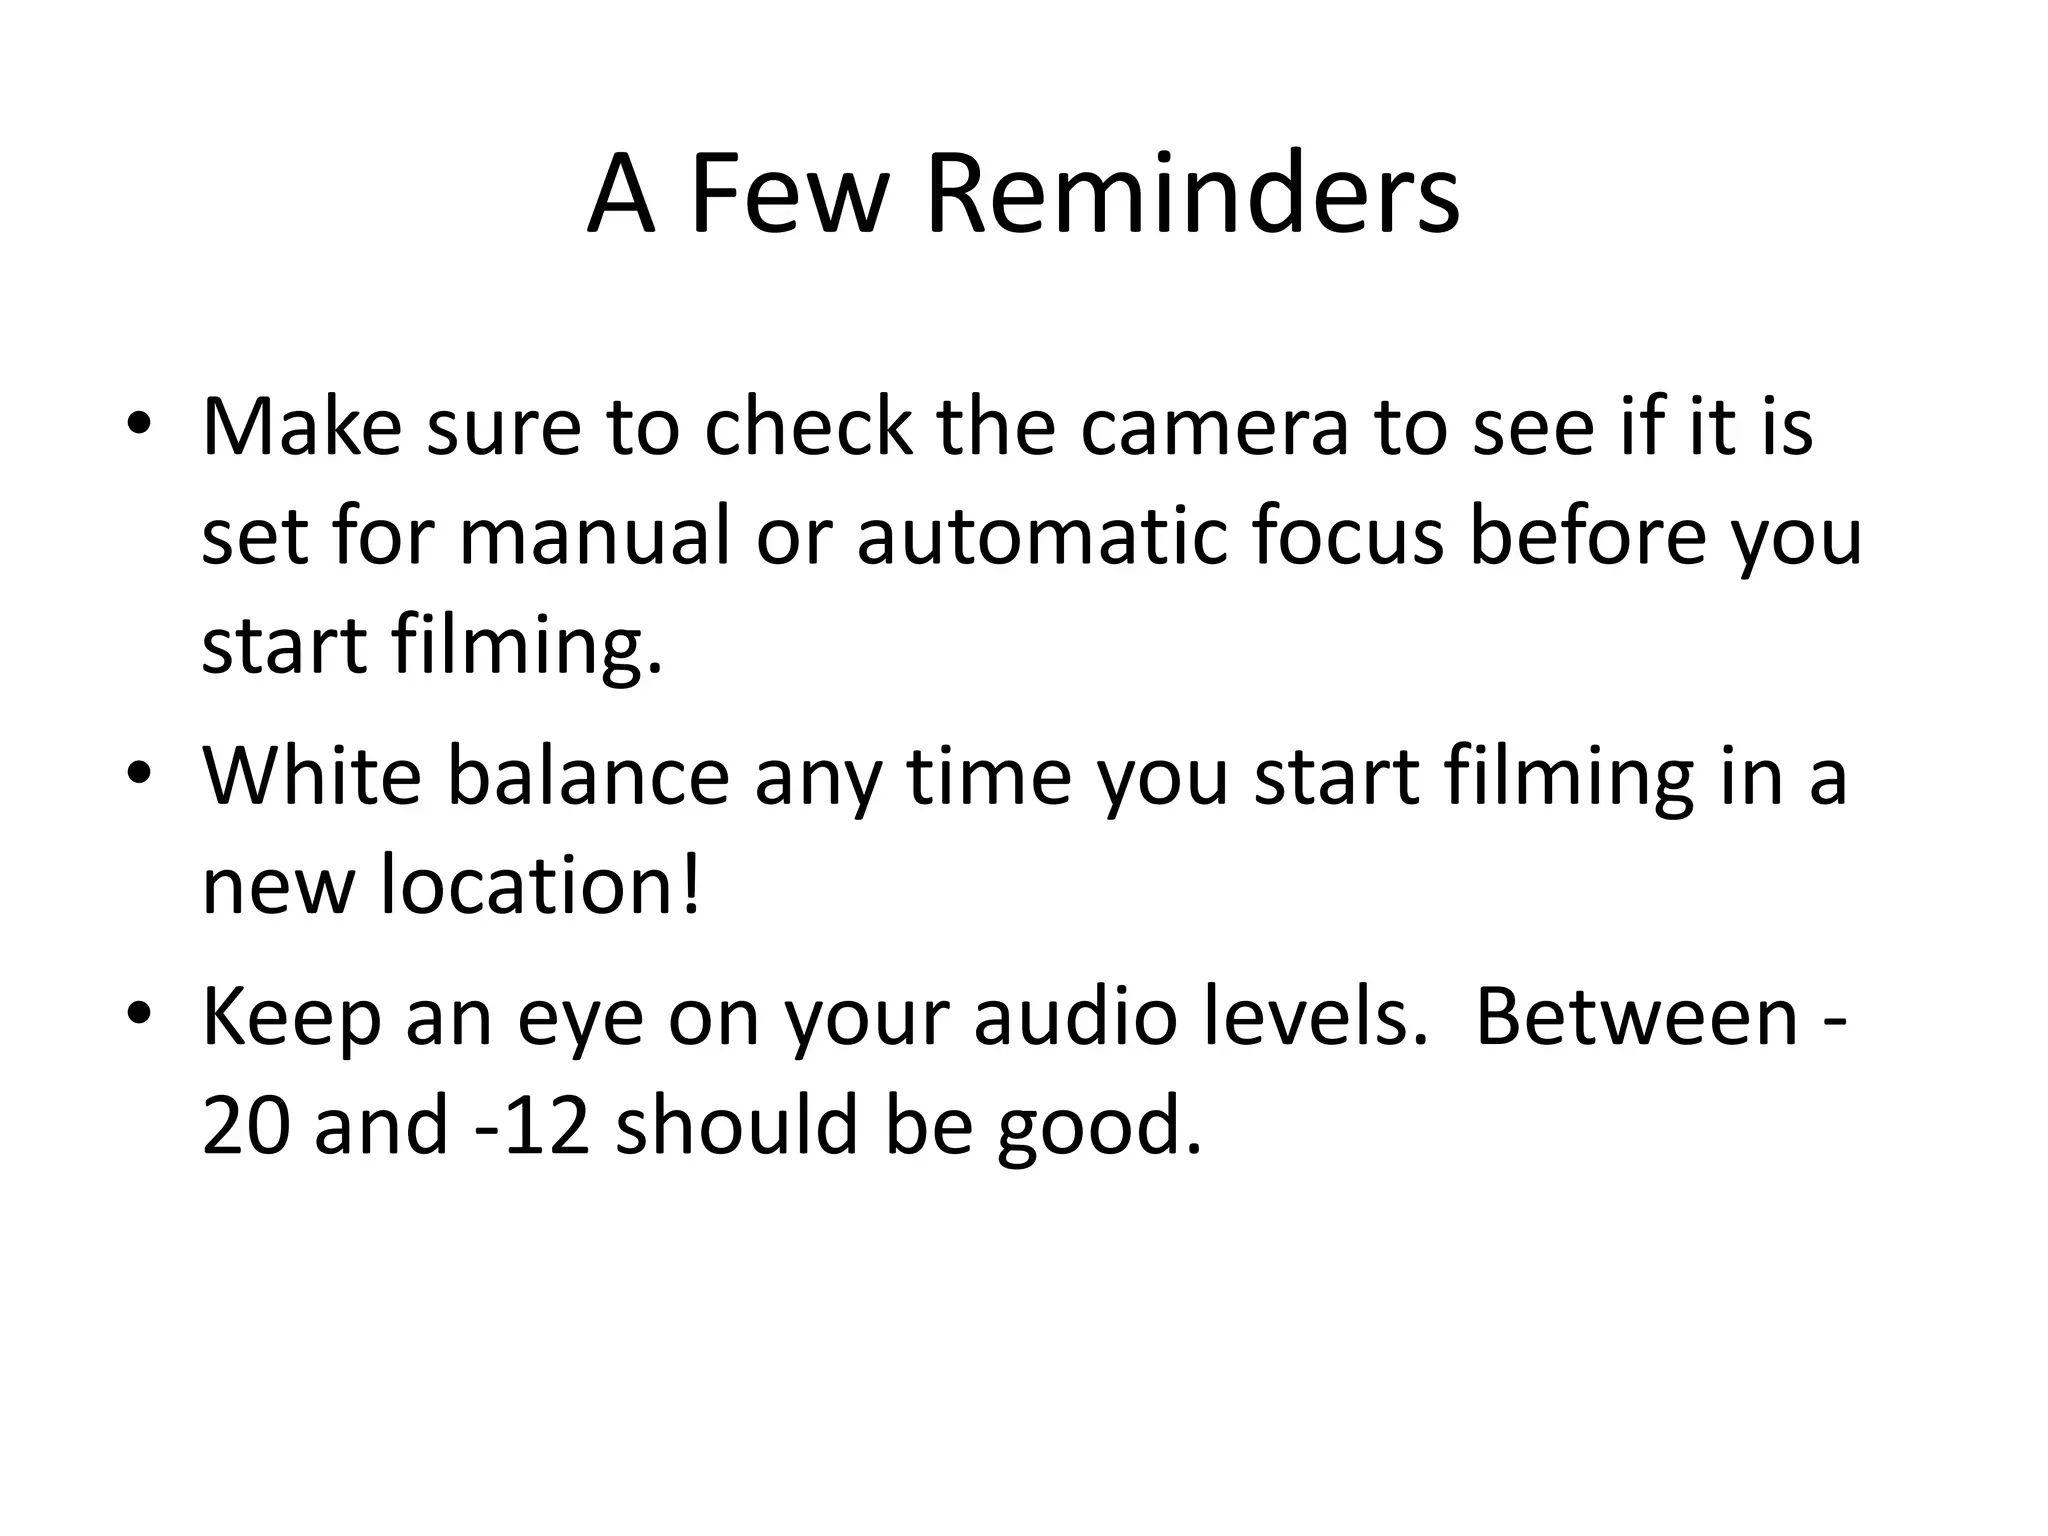
![Cam operation -_day_2[1]](https://cdn.slidesharecdn.com/ss_thumbnails/camoperation-day21-120812125748-phpapp02-thumbnail.jpg?width=640&height=640&fit=bounds)


