Download to read offline


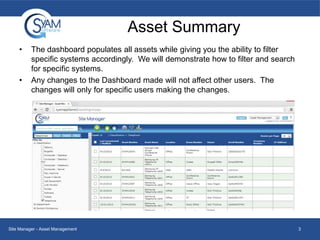


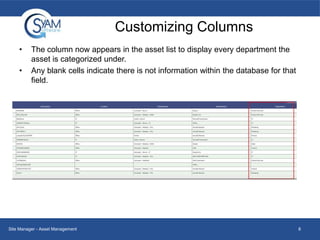


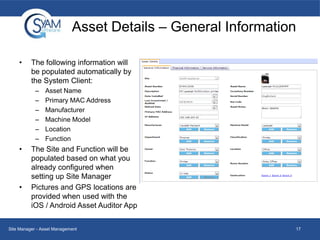


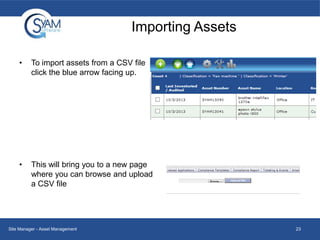
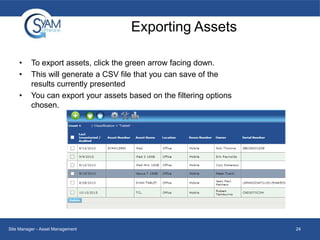


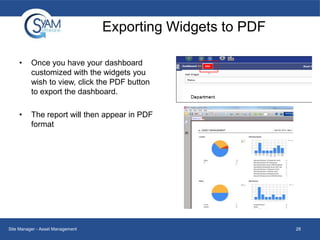


This document provides an overview of how to use the asset management features in Site Manager. It describes how to view asset summaries, filter assets, search for assets, customize asset columns, add assets manually, view and edit system details, import and export assets, use the asset dashboard widgets, and reconcile audit changes. The dashboard allows filtering assets by category and searching. Settings can customize columns displayed. Clicking an asset shows details across several tabs. Assets can be added, edited, imported or exported from files. The dashboard contains widgets for analyzing asset data which can be customized.