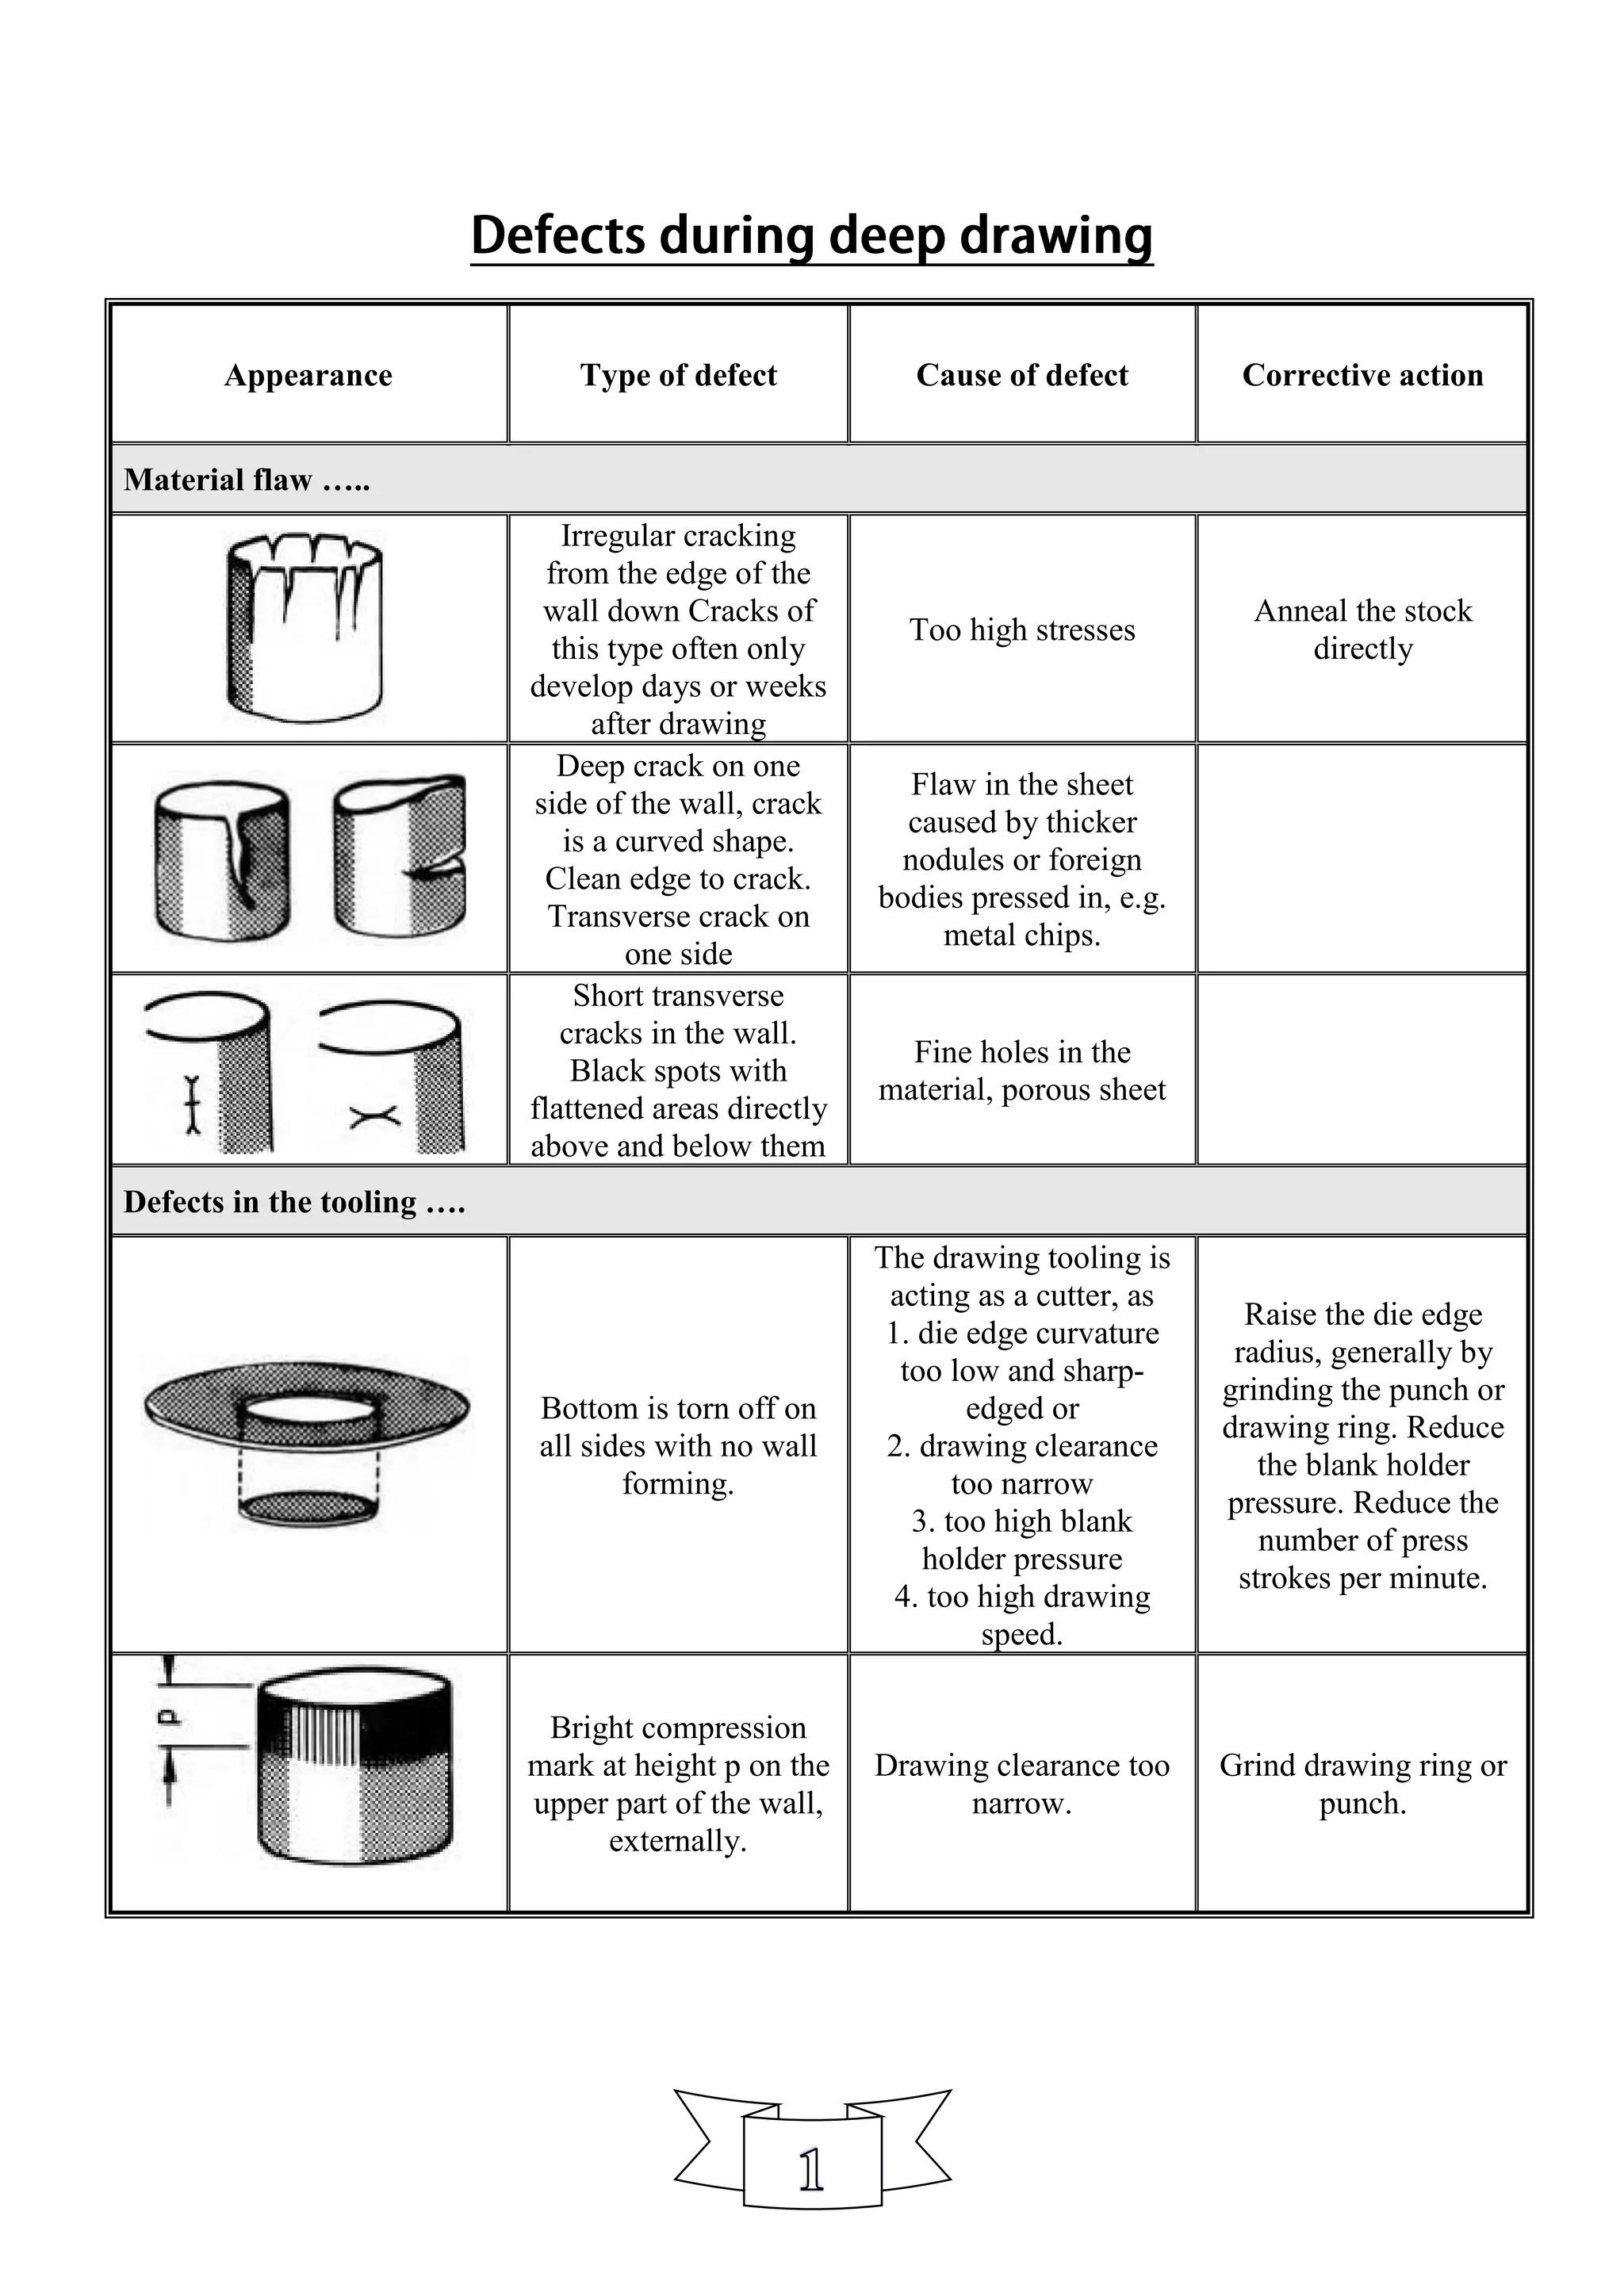
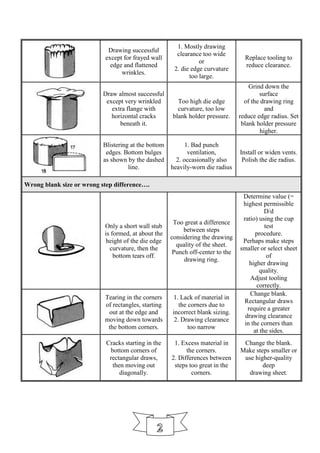
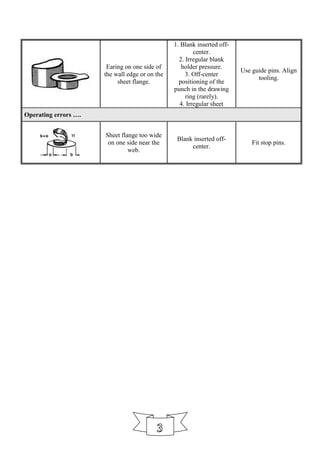
Appearance Type of defect Cause of defect Corrective action
Material flaw …..
Irregular cracking
from the edge of the
wall down Cracks of
this type often only
develop days or weeks
after drawing
Too high stresses
Anneal the stock
directly
Deep crack on one
side of the wall, crack
is a curved shape.
Clean edge to crack.
Transverse crack on
one side
Flaw in the sheet
caused by thicker
nodules or foreign
bodies pressed in, e.g.
metal chips.
Short transverse
cracks in the wall.
Black spots with
flattened areas directly
above and below them
Fine holes in the
material, porous sheet
Defects in the tooling ….
Bottom is torn off on
all sides with no wall
forming.
The drawing tooling is
acting as a cutter, as
1. die edge curvature
too low and sharp-
edged or
2. drawing clearance
too narrow
3. too high blank
holder pressure
4. too high drawing
speed.
Raise the die edge
radius, generally by
grinding the punch or
drawing ring. Reduce
the blank holder
pressure. Reduce the
number of press
strokes per minute.
Bright compression
mark at height p on the
upper part of the wall,
externally.
Drawing clearance too
narrow.
Grind drawing ring or
punch.
Drawing successful
except for frayed wall
edge and flattened
wrinkles.
1. Mostly drawing
clearance too wide
or
2. die edge curvature
too large.
Replace tooling to
reduce clearance.
Draw almost successful
except very wrinkled
extra flange with
horizontal cracks
beneath it.
Too high die edge
curvature, too low
blank holder pressure.
Grind down the
surface
of the drawing ring
and
reduce edge radius. Set
blank holder pressure
higher.
Blistering at the bottom
edges. Bottom bulges
as shown by the dashed
line.
1. Bad punch
ventilation,
2. occasionally also
heavily-worn die radius
Install or widen vents.
Polish the die radius.
Wrong blank size or wrong step difference….
Only a short wall stub
is formed, at about the
height of the die edge
curvature, then the
bottom tears off.
Too great a difference
between steps
considering the drawing
quality of the sheet.
Punch off-center to the
drawing ring.
Determine value (=
highest permissible
D/d
ratio) using the cup
test
procedure.
Perhaps make steps
smaller or select sheet
of
higher drawing
quality.
Adjust tooling
correctly.
Tearing in the corners
of rectangles, starting
out at the edge and
moving down towards
the bottom corners.
1. Lack of material in
the corners due to
incorrect blank sizing.
2. Drawing clearance
too narrow
Change blank.
Rectangular draws
require a greater
drawing clearance
in the corners than
at the sides.
Cracks starting in the
bottom corners of
rectangular draws,
then moving out
diagonally.
1. Excess material in
the corners.
2. Differences between
steps too great in the
corners.
Change the blank.
Make steps smaller or
use higher-quality
deep
drawing sheet.
Earing on one side of
the wall edge or on the
sheet flange.
1. Blank inserted off-
center.
2. Irregular blank
holder pressure.
3. Off-center
positioning of the
punch in the drawing
ring (rarely).
4. Irregular sheet
Use guide pins. Align
tooling.
Operating errors ….
Sheet flange too wide
on one side near the
web.
Blank inserted off-
center.
Fit stop pins.

All Defect of deep drawing process

  • 1.
    Appearance Type ofdefect Cause of defect Corrective action Material flaw ….. Irregular cracking from the edge of the wall down Cracks of this type often only develop days or weeks after drawing Too high stresses Anneal the stock directly Deep crack on one side of the wall, crack is a curved shape. Clean edge to crack. Transverse crack on one side Flaw in the sheet caused by thicker nodules or foreign bodies pressed in, e.g. metal chips. Short transverse cracks in the wall. Black spots with flattened areas directly above and below them Fine holes in the material, porous sheet Defects in the tooling …. Bottom is torn off on all sides with no wall forming. The drawing tooling is acting as a cutter, as 1. die edge curvature too low and sharp- edged or 2. drawing clearance too narrow 3. too high blank holder pressure 4. too high drawing speed. Raise the die edge radius, generally by grinding the punch or drawing ring. Reduce the blank holder pressure. Reduce the number of press strokes per minute. Bright compression mark at height p on the upper part of the wall, externally. Drawing clearance too narrow. Grind drawing ring or punch.
  • 2.
    Drawing successful except forfrayed wall edge and flattened wrinkles. 1. Mostly drawing clearance too wide or 2. die edge curvature too large. Replace tooling to reduce clearance. Draw almost successful except very wrinkled extra flange with horizontal cracks beneath it. Too high die edge curvature, too low blank holder pressure. Grind down the surface of the drawing ring and reduce edge radius. Set blank holder pressure higher. Blistering at the bottom edges. Bottom bulges as shown by the dashed line. 1. Bad punch ventilation, 2. occasionally also heavily-worn die radius Install or widen vents. Polish the die radius. Wrong blank size or wrong step difference…. Only a short wall stub is formed, at about the height of the die edge curvature, then the bottom tears off. Too great a difference between steps considering the drawing quality of the sheet. Punch off-center to the drawing ring. Determine value (= highest permissible D/d ratio) using the cup test procedure. Perhaps make steps smaller or select sheet of higher drawing quality. Adjust tooling correctly. Tearing in the corners of rectangles, starting out at the edge and moving down towards the bottom corners. 1. Lack of material in the corners due to incorrect blank sizing. 2. Drawing clearance too narrow Change blank. Rectangular draws require a greater drawing clearance in the corners than at the sides. Cracks starting in the bottom corners of rectangular draws, then moving out diagonally. 1. Excess material in the corners. 2. Differences between steps too great in the corners. Change the blank. Make steps smaller or use higher-quality deep drawing sheet.
  • 3.
    Earing on oneside of the wall edge or on the sheet flange. 1. Blank inserted off- center. 2. Irregular blank holder pressure. 3. Off-center positioning of the punch in the drawing ring (rarely). 4. Irregular sheet Use guide pins. Align tooling. Operating errors …. Sheet flange too wide on one side near the web. Blank inserted off- center. Fit stop pins.