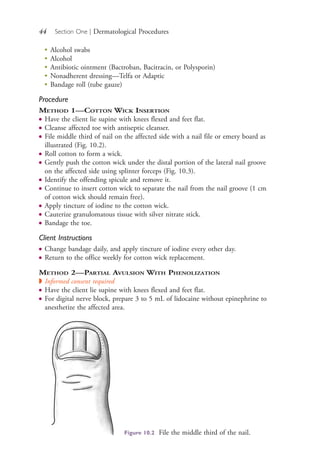
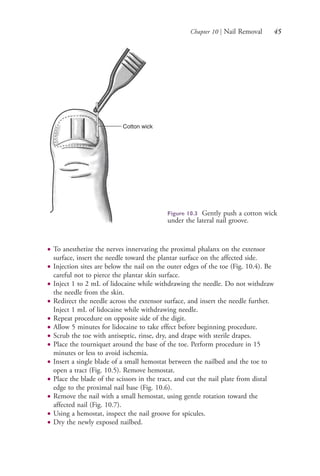
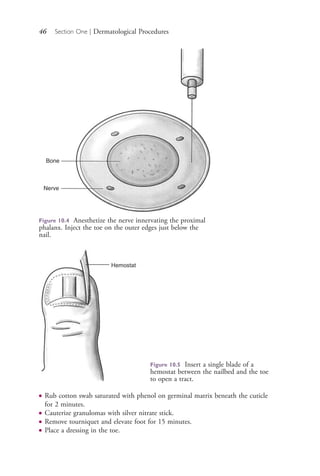
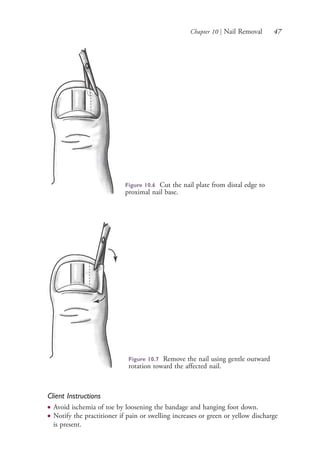
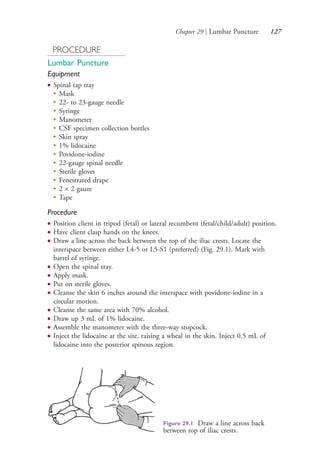
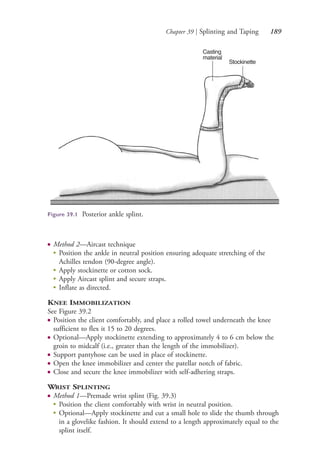
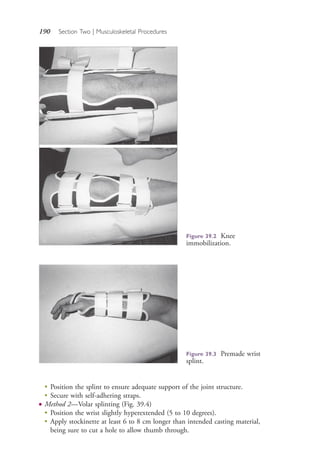
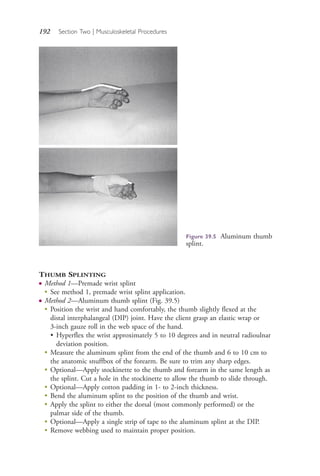
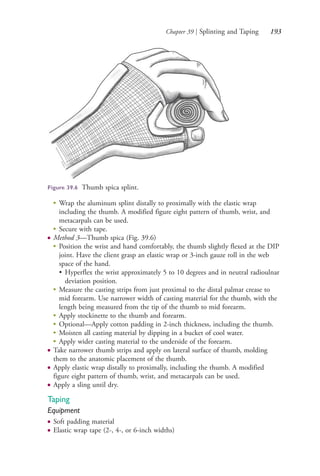
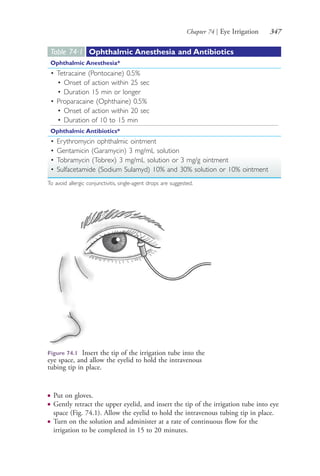
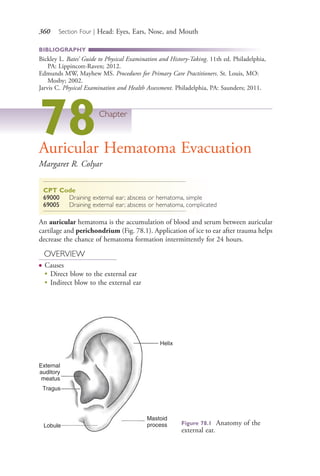
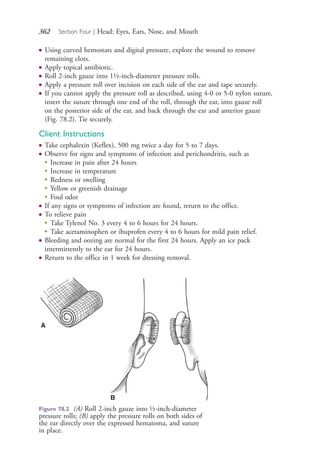
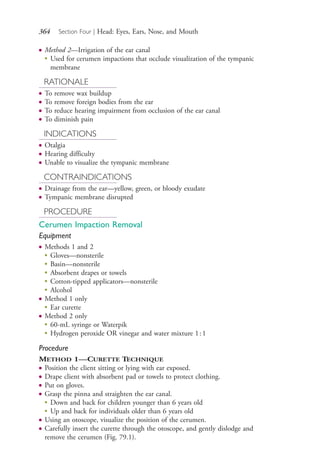
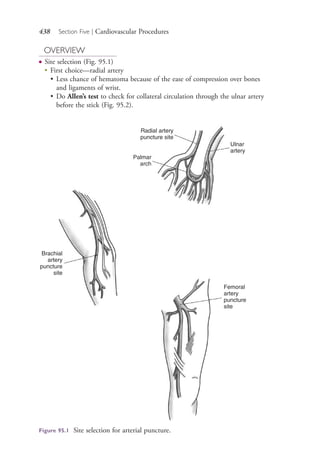
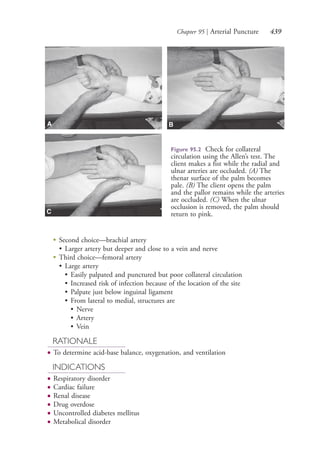
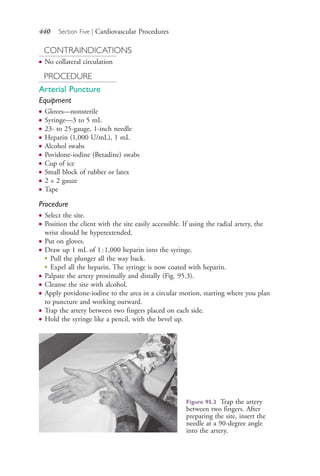
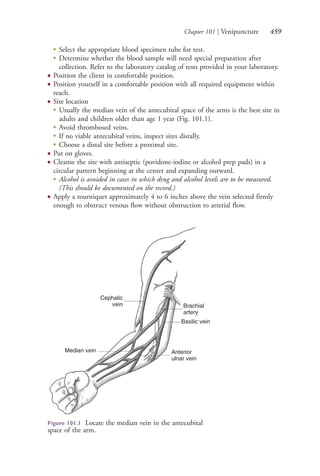
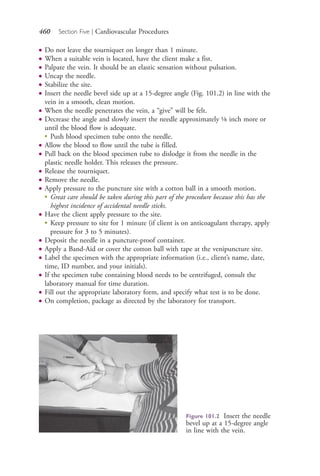
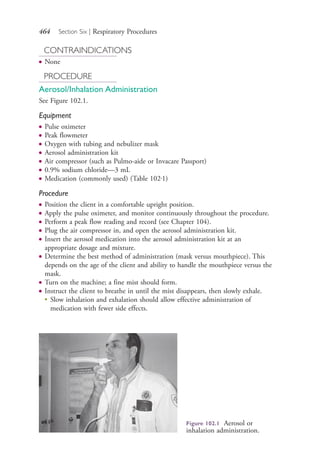
This document provides an overview and instructions for various nursing procedures performed in advanced practice. It begins with a dedication and preface describing the inspiration and intended use of the text. The text then provides contributors, acknowledgments, and contents. It is organized into sections covering dermatological, musculoskeletal, genitourinary/breast, and head/eye/ear/nose/mouth procedures. Each section includes diagnostic testing and specific procedures with detailed instructions intended to assist nurse practitioners.

![F. A. Davis Company
1915 Arch Street
Philadelphia, PA 19103
www.fadavis.com
Copyright © 2015 by F. A. Davis Company
Copyright © 2015 by F. A. Davis Company. All rights reserved. This book is protected by copyright.
No part of it may be reproduced, stored in a retrieval system, or transmitted in any form or by any
means, electronic, mechanical, photocopying, recording, or otherwise, without written permission from
the publisher.
Printed in the United States of America
Last digit indicates print number: 10 9 8 7 6 5 4 3 2 1
Publisher, Nursing: Joanne Patzek DaCunha, RN, MSN
Senior Acquisitions Editor: Susan R. Rhyner
Content Development Manager: Darlene Pedersen
Content Project Manager: Christina L. Snyder
Design and Illustration Manager: Carolyn O’Brien
As new scientific information becomes available through basic and clinical research, recommended
treatments and drug therapies undergo changes. The author(s) and publisher have done everything
possible to make this book accurate, up to date, and in accord with accepted standards at the time of
publication. The author(s), editors, and publisher are not responsible for errors or omissions or for
consequences from application of the book, and make no warranty, expressed or implied, in regard to
the contents of the book. Any practice described in this book should be applied by the reader in
accordance with professional standards of care used in regard to the unique circumstances that may
apply in each situation. The reader is advised always to check product information (package inserts) for
changes and new information regarding dose and contraindications before administering any drug.
Caution is especially urged when using new or infrequently ordered drugs.
Library of Congress Control Number 2014959076
Authorization to photocopy items for internal or personal use, or the internal or personal use of
specific clients, is granted by F. A. Davis Company for users registered with the Copyright Clearance
Center (CCC) Transactional Reporting Service, provided that the fee of $.25 per copy is paid directly
to CCC, 222 Rosewood Drive, Danvers, MA 01923. For those organizations that have been granted a
photocopy license by CCC, a separate system of payment has been arranged. The fee code for users of
the Transactional Reporting Service is: 978-0-8036-4206-5/15 0 + $.25.
4206_FM_i-xiv.indd ii4206_FM_i-xiv.indd ii 12/30/2014 10:56:42 AM12/30/2014 10:56:42 AM
Process CyanProcess CyanProcess MagentaProcess MagentaProcess YellowProcess YellowProcess BlackProcess Black
Proudly sourced and uploaded by [StormRG]
Kickass Torrents | TPB | ET | h33t](https://image.slidesharecdn.com/advancedpracticenursingprocedures-colyarmargaretsrg-150408034245-conversion-gate01/85/Advanced-practice-nursing-procedures-colyar-margaret-srg-3-320.jpg)


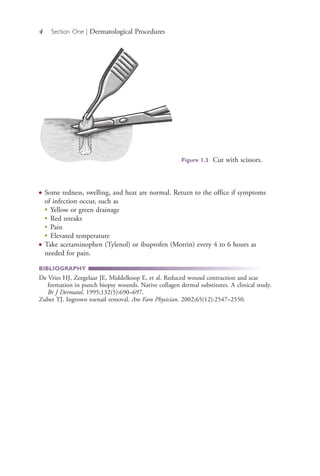
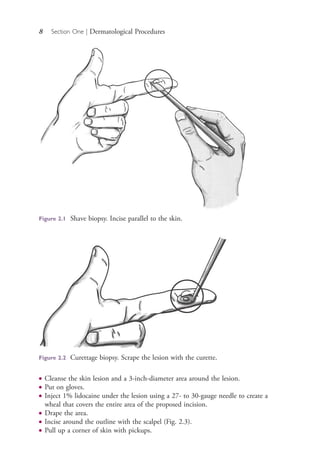
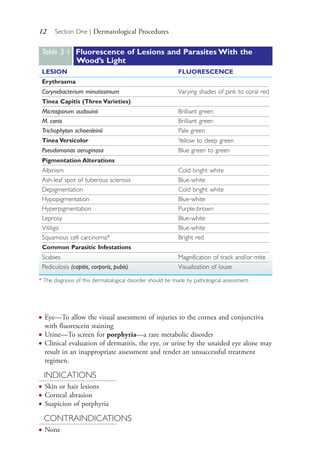
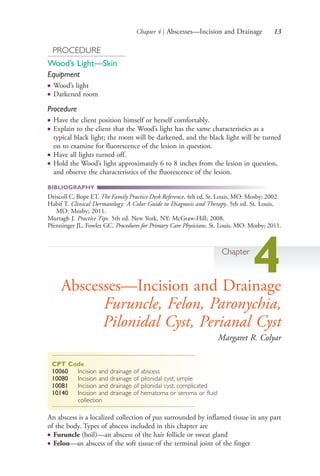
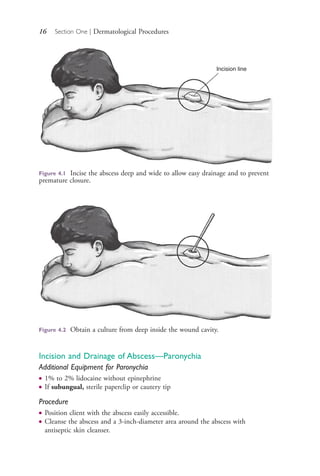
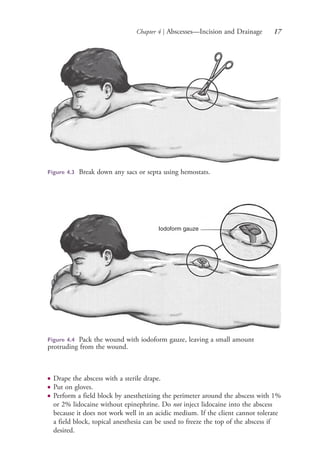
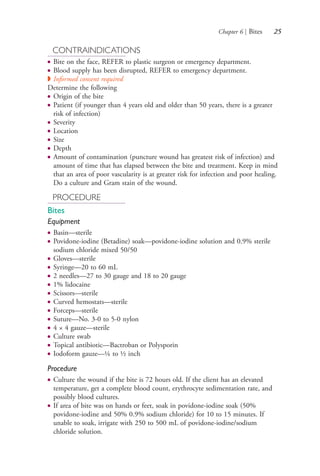
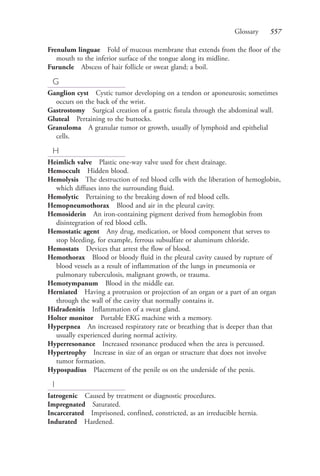
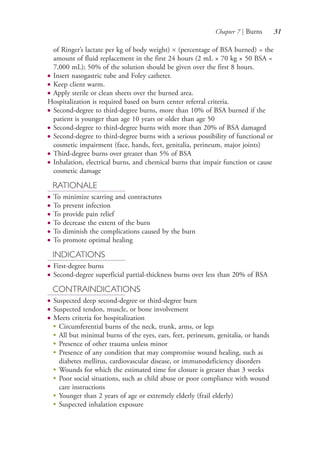
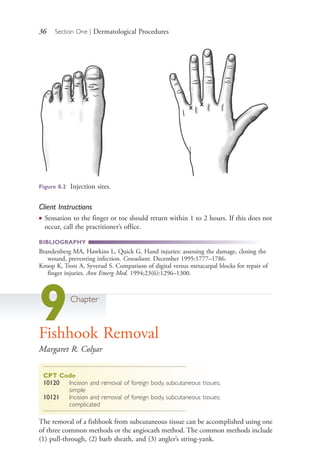
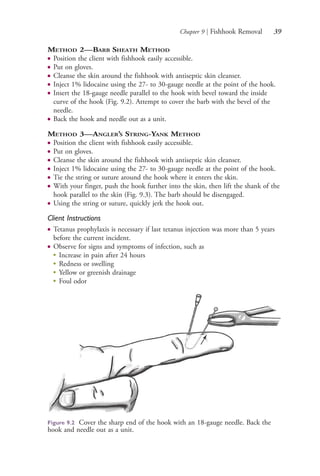
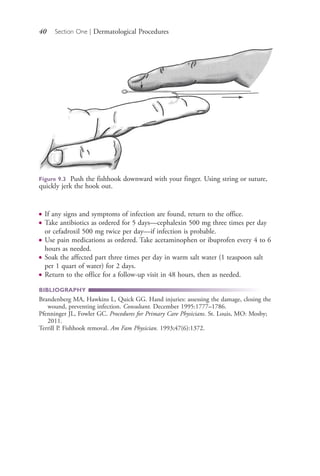
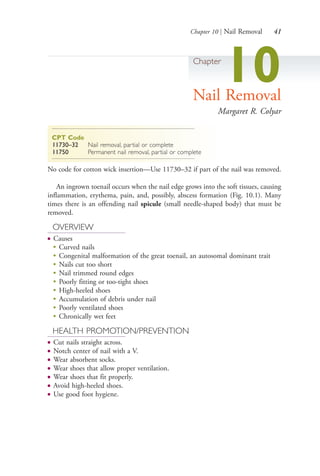
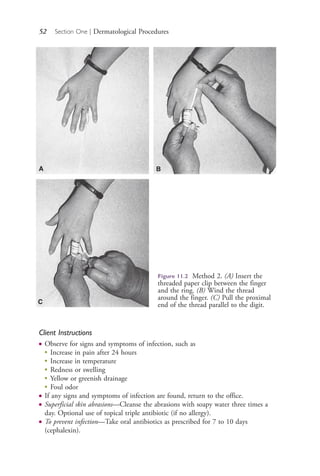
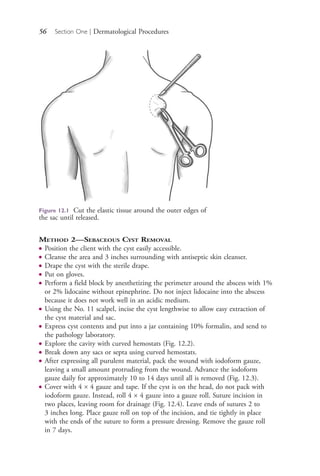
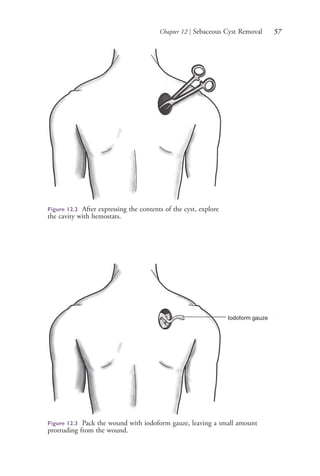
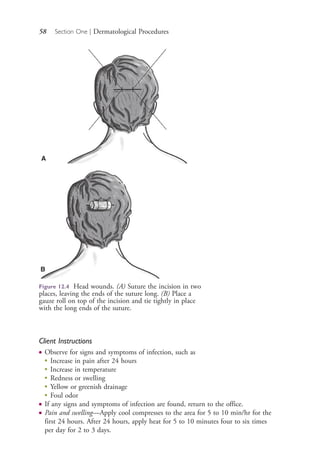
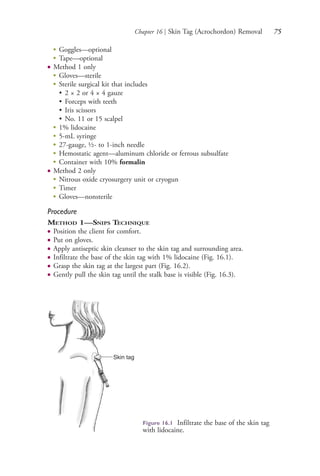
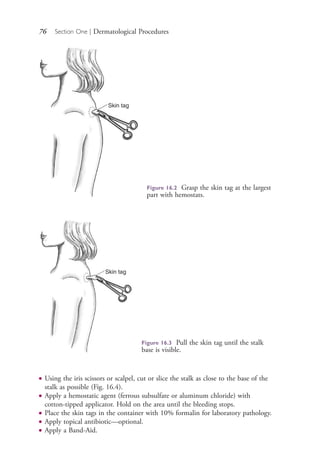
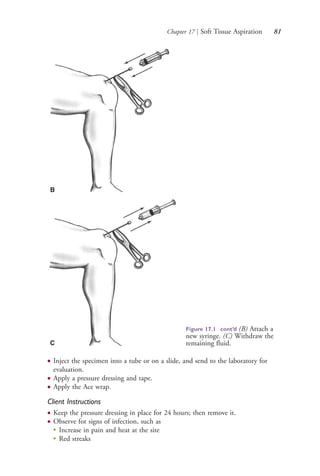
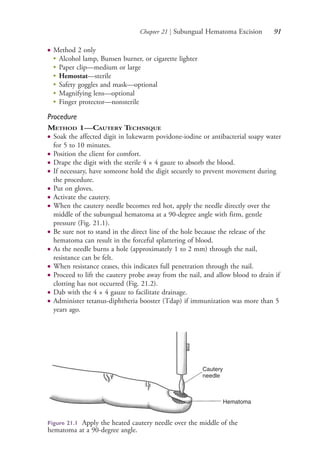
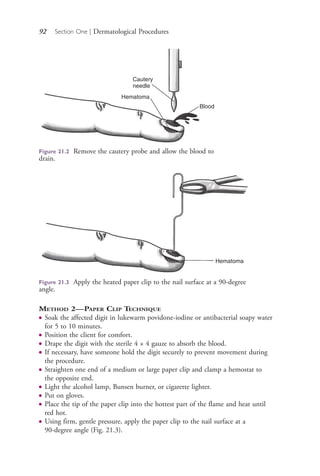
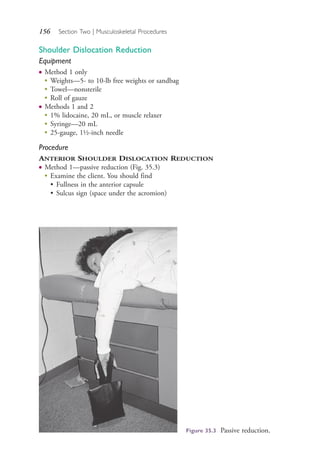
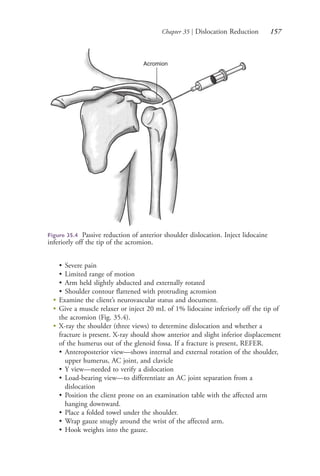
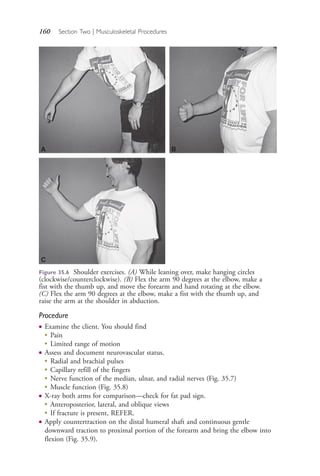
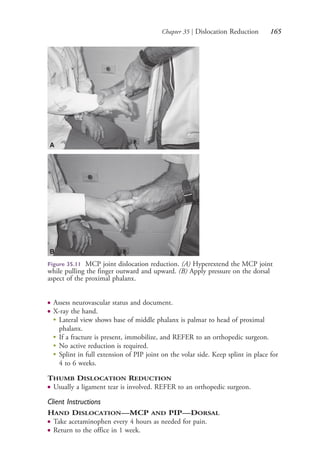
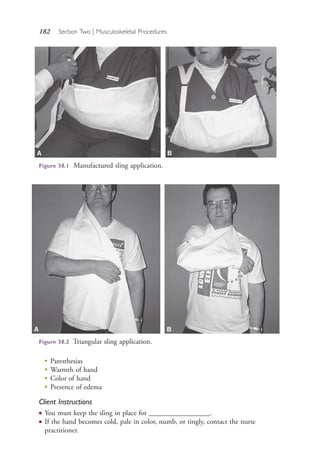
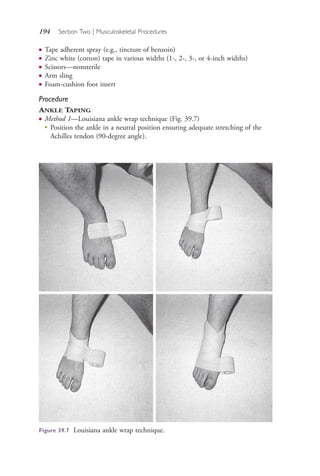
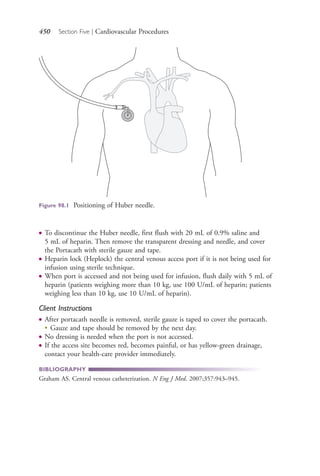
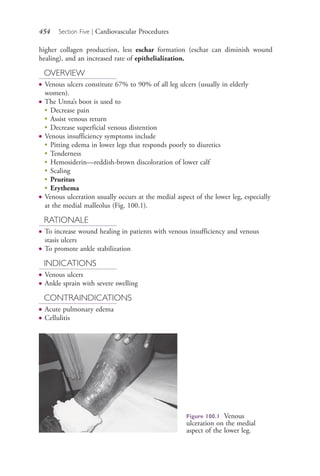
![26 Section One | Dermatological Procedures
● Anesthetize wound with 1% lidocaine.
● Position the patient for comfort with the injured part easily accessible.
● Cleanse the skin with antiseptic skin cleanser.
● Irrigate the wound with 100 to 500 mL of sterile sodium chloride vigorously,
using the syringe and 18-gauge needle.
● Put on gloves.
● Remove any devitalized tissue or foreign objects.
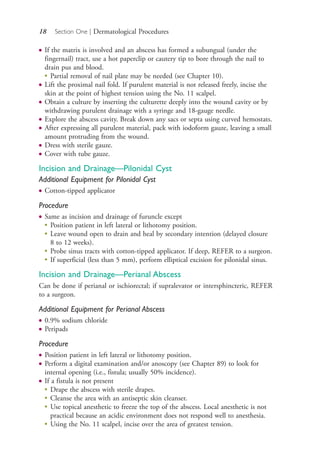
● Insert iodoform gauze snugly with a ½ inch protruding from the wound.
● Suture if the wound is clean and not a puncture.
● Apply topical antibiotic.
● Apply gauze dressing.
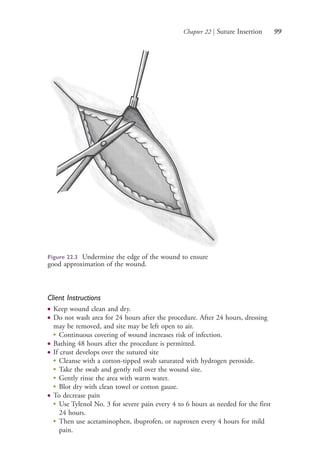
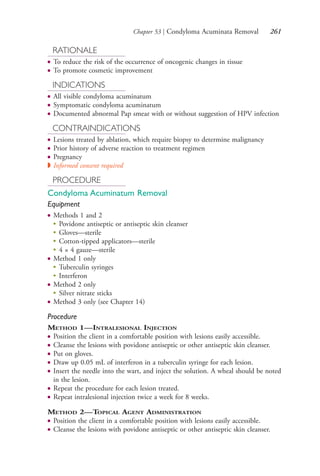
Client Instructions
● To prevent infection, abscess, cellulitis, septicemia, or osteomyelitis, take oral
antibiotics (penicillin, amoxicillin/clavulanate [Augmentin], or erythromycin as
prescribed) for 5 to 7 days.
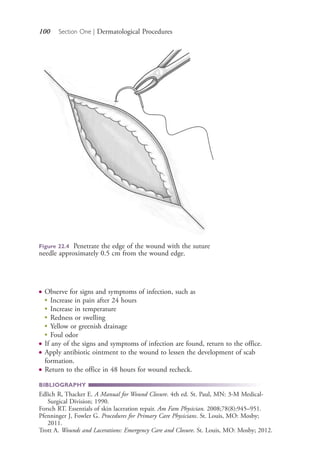
● Observe for signs and symptoms of infection, such as
●
Increase in pain after 24 hours
●
Increase in temperature
●
Redness or swelling
●
Yellow or greenish drainage
●
Foul odor
● If any of these symptoms develop, return to the office immediately.
● To relieve pain
●
Take Tylenol No. 3 every 4 to 6 hours for 24 hours, then acetaminophen or
ibuprofen every 4 to 6 hours for mild pain relief.
●
If fingers or toes are involved, exercise (wiggle) them frequently.
●
Elevate the wounded part above the heart for 48 hours or as long as possible.
●
Immobilize the wounded part for 48 hours.
●
Apply ice pack intermittently for the first 24 hours.
● Rabies—Consider rabies prophylaxis if the bite was from an animal.
● Tetanus—Tetanus prophylaxis (Tdap) is needed if not received within 10 years.
● Return to the office in 2 days for a recheck.
BIBLIOGRAPHY
Brandenberg MA, Quick G, et al. (1995). Hand injuries: assessing the damage, closing the
wound, preventing infection. Consultant. December 1995:1777–1786.
Lewis KT, Stiles M. Management of cat and dog bites. Am Fam Physician.
1995;52(2):479–485.
4206_Chapter 1_0001-0120.indd 264206_Chapter 1_0001-0120.indd 26 12/24/2014 2:01:15 PM12/24/2014 2:01:15 PM
Process CyanProcess CyanProcess MagentaProcess MagentaProcess YellowProcess YellowProcess BlackProcess Black](https://image.slidesharecdn.com/advancedpracticenursingprocedures-colyarmargaretsrg-150408034245-conversion-gate01/85/Advanced-practice-nursing-procedures-colyar-margaret-srg-41-320.jpg)
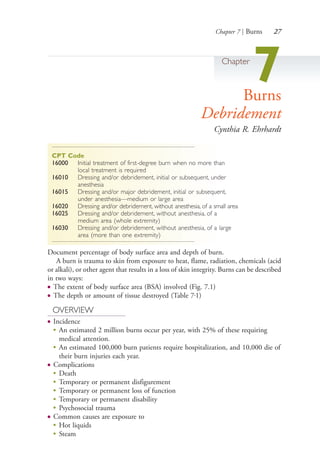


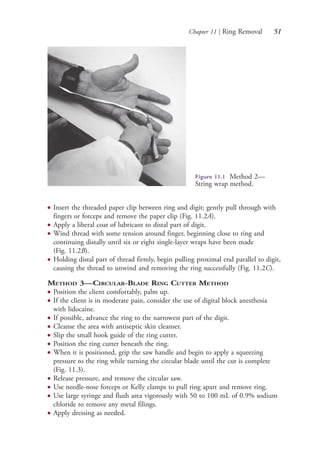
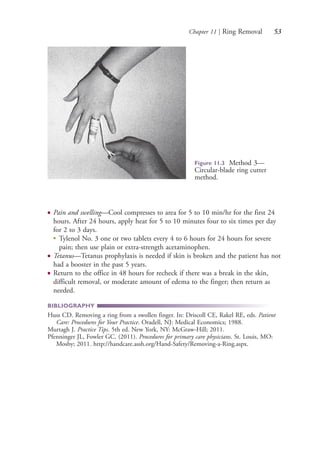


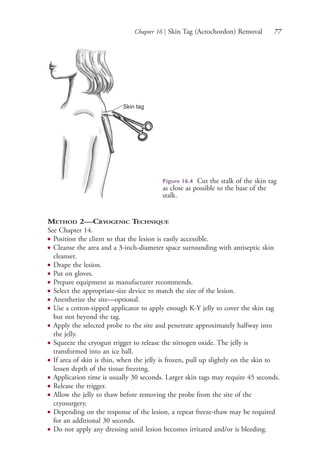


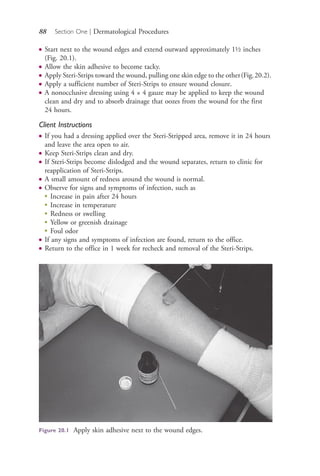
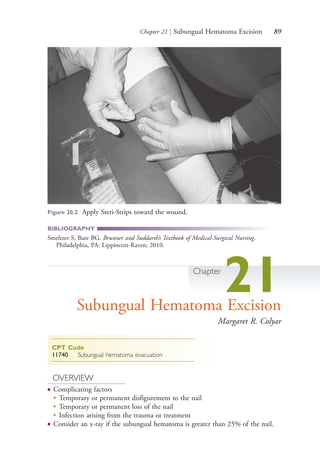
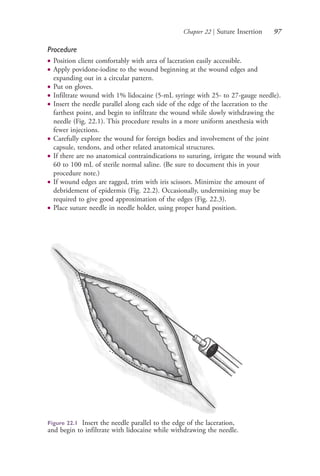
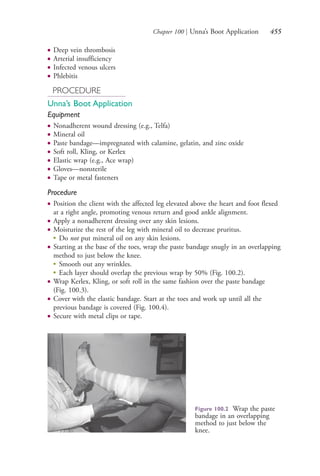
![Chapter 23 | Suture Selection 101
Chapter
23Suture Selection
Margaret R. Colyar
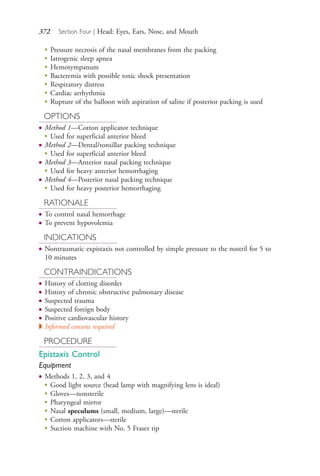
The ideal suture needle should be inexpensive, appropriate to the type of wound
repair, and of maximum sharpness and strength to complete the task with the least
amount of tissue injury. The ideal suture material should be inexpensive, strong,
form secure knots, handle easily, stretch and recoil easily during wound healing, and
cause minimal tissue inflammation. In order to reduce tissue trauma, sutures now
come with the needles firmly attached.
SELECTION OF SUTURE NEEDLES
● Point types include
●
Cutting (conventional, reverse, or side [spatula])
●
Taper-point (round)
●
Beveled, conventional cutting edge
● For most superficial and intermediate suture repair, use a P-1 to P-3 (Ethicon)
3⁄8- to ½-inch cutting circle.
● Deep suturing or buried sutures may require PS-1 or PS-2 (Ethicon) needle.
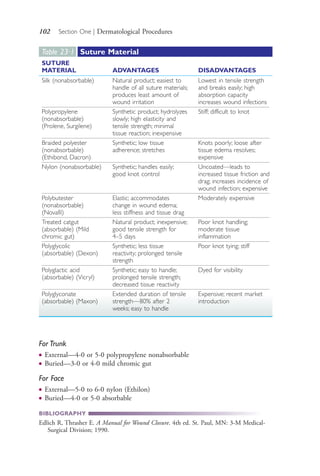
SELECTION OF SUTURE MATERIAL
● The advantages and disadvantages of each suture material should be taken into
consideration (Table 23.1).
GENERAL RECOMMENDATIONS FOR
SUTURE USE
● The larger the number of the suture is (e.g., 3-0 vs. 5-0), the smaller the
filament thickness will be.
● Absorbable sutures elicit more inflammatory reactions than do nonabsorbable
sutures.
● Monofilaments usually require more knots to prevent slippage.
● Braided sutures handle easily and knot easily, but may harbor bacteria.
● Fascia heals slowly—use bigger, stronger suture.
● Mucosa heals quickly—use small suture.
For Extremities
● External—4-0 or 5-0 polypropylene (Prolene) nonabsorbable
● Buried—3-0 or 4-0 mild chromic gut (Vicryl)
4206_Chapter 1_0001-0120.indd 1014206_Chapter 1_0001-0120.indd 101 12/24/2014 2:01:19 PM12/24/2014 2:01:19 PM
Process CyanProcess CyanProcess MagentaProcess MagentaProcess YellowProcess YellowProcess BlackProcess Black](https://image.slidesharecdn.com/advancedpracticenursingprocedures-colyarmargaretsrg-150408034245-conversion-gate01/85/Advanced-practice-nursing-procedures-colyar-margaret-srg-116-320.jpg)


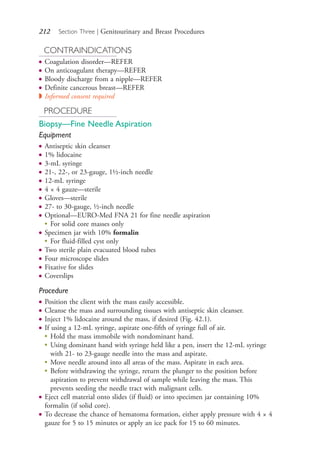


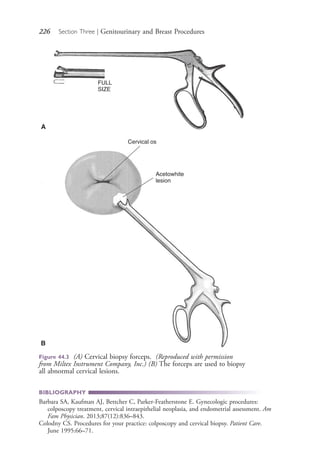


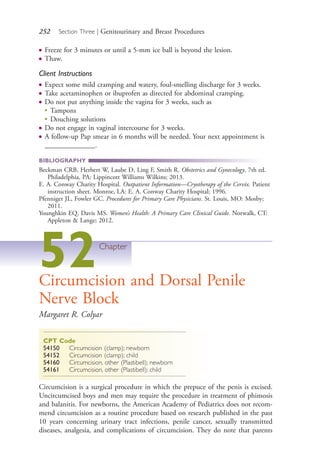
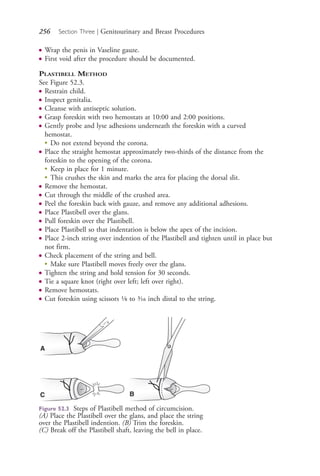
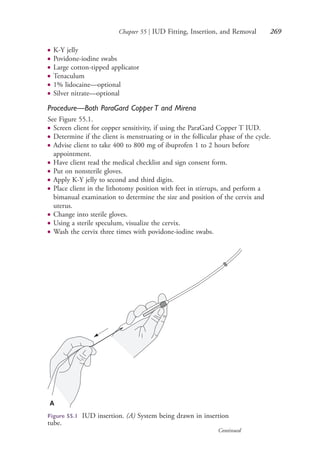
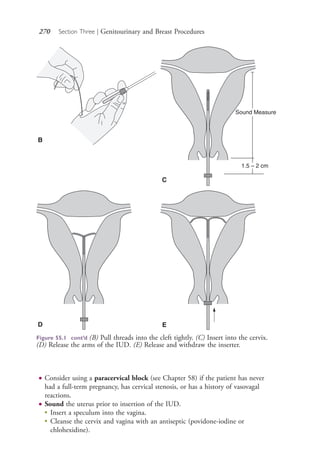


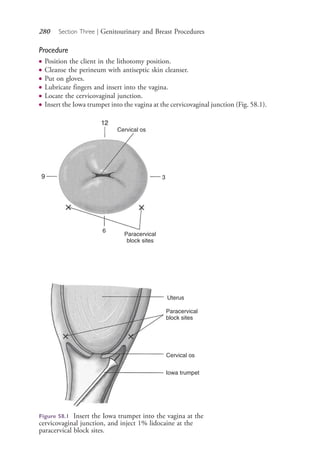
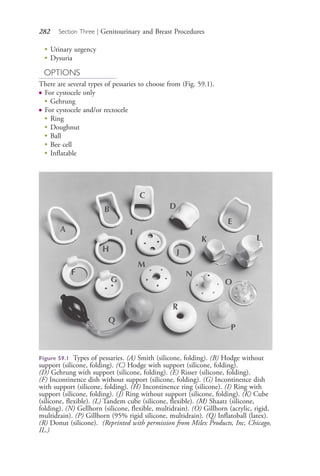
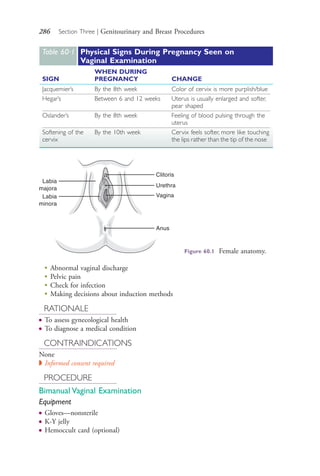


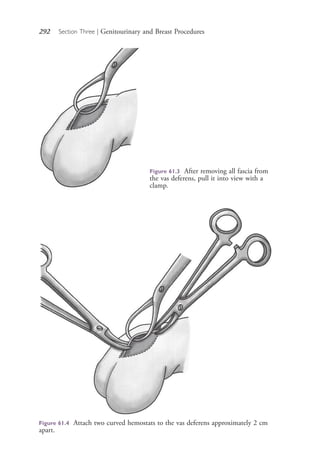
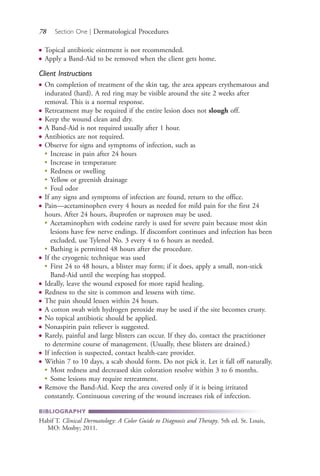
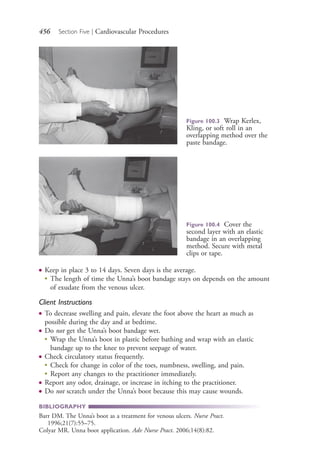
![294 Section Three | Genitourinary and Breast Procedures
62Chapter
At-Risk Fetal Assessment
Third Trimester Testing
Margaret R. Colyar
CPT Code
76818 Fetal biophysical profile with non-stress testing
76819 Fetal biophysical profile without non-stress testing
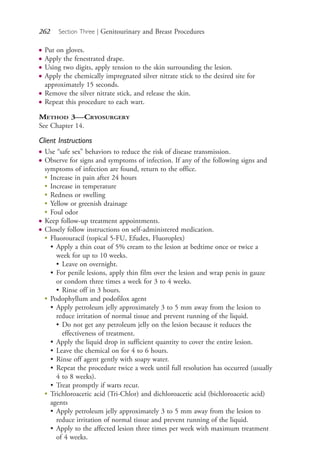
INTRODUCTION
Non-stress testing (NST), biophysical profile (amniotic fluid index [AFI], fetal
breathing movements, fetal movement, and fetal tone), and Doppler evaluation of
fetal circulation are all assessment tools used when a pregnancy is considered to be
at risk.
Non-stress testing is usually done during the third trimester to check for fetal
well-being. It is performed using an external fetal heart rate monitor to assess the
fetal heart rate response to fetal movements. NST is conducted when the baby is
overdue, the baby appears to be small or growing slowly, the baby is more or less
active than usual, there is a small or a large amount of fluid around the baby, or the
mother has a condition such as high blood pressure or diabetes or has abdominal
pain.
Amniotic fluid is the clear or slightly yellowish liquid surrounding the fetus in
the uterus and contains water, fetal wastes (mainly urine), and fetal skin cells. The
AFI is an ultrasound procedure used to assess the amount of amniotic fluid by divid-
ing the uterus into four imaginary quadrants using the linea nigra to divide the
uterus into right and left halves and the umbilicus as the dividing point for the upper
and lower halves.
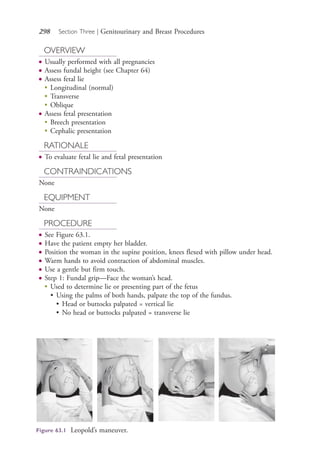
OVERVIEW
● Other fetal assessment is done by
●
Assessing fundal height (see Chapter 64)
●
Assessing fetal lie (see Chapter 63, Leopold’s Maneuver)
• Longitudinal (normal)
• Transverse
• Oblique
●
Assessing fetal presentation
• Breech presentation
• Cephalic presentation
4206_Chapter 3_0205-0312.indd 2944206_Chapter 3_0205-0312.indd 294 12/24/2014 2:01:44 PM12/24/2014 2:01:44 PM
Process CyanProcess CyanProcess MagentaProcess MagentaProcess YellowProcess YellowProcess BlackProcess Black](https://image.slidesharecdn.com/advancedpracticenursingprocedures-colyarmargaretsrg-150408034245-conversion-gate01/85/Advanced-practice-nursing-procedures-colyar-margaret-srg-309-320.jpg)


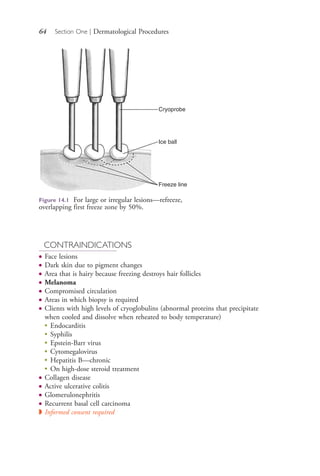
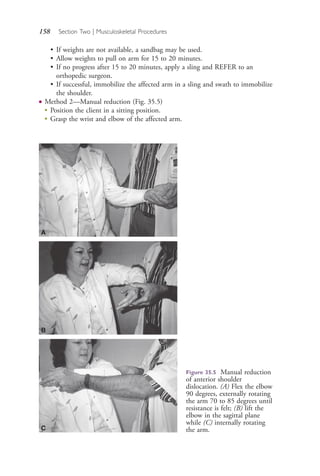
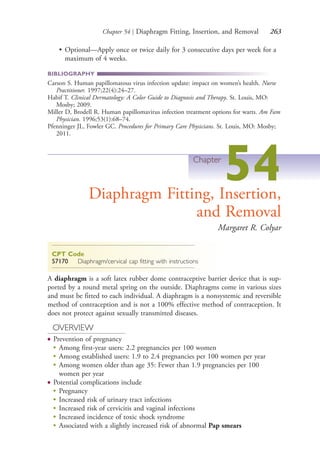
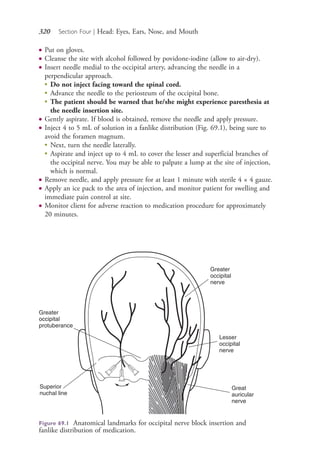
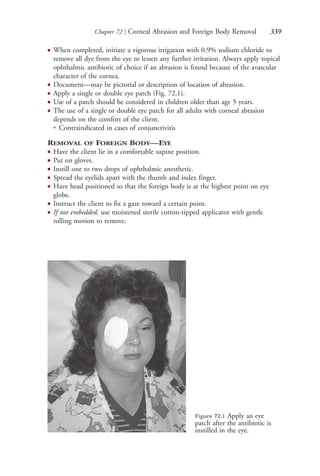
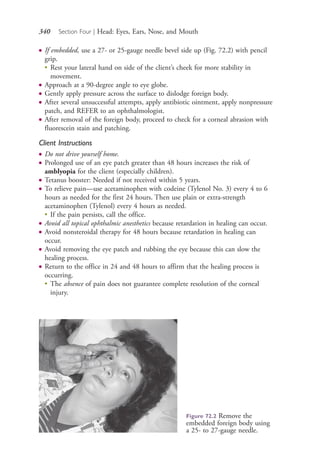
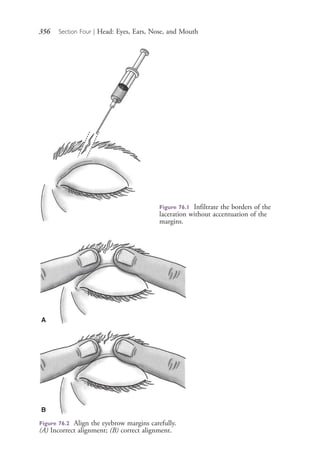
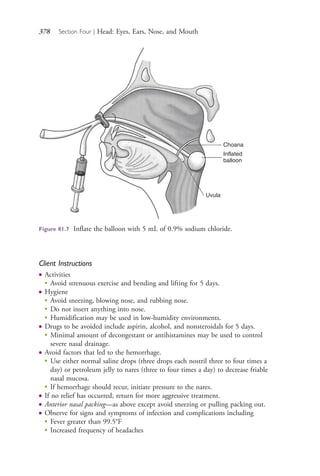
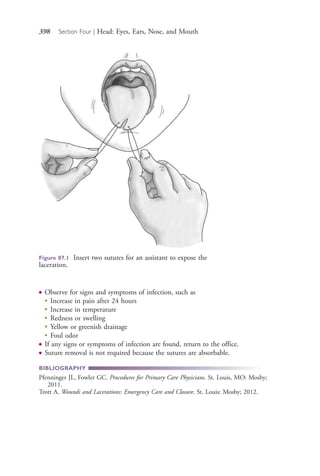
![314 Section Four | Head: Eyes, Ears, Nose, and Mouth
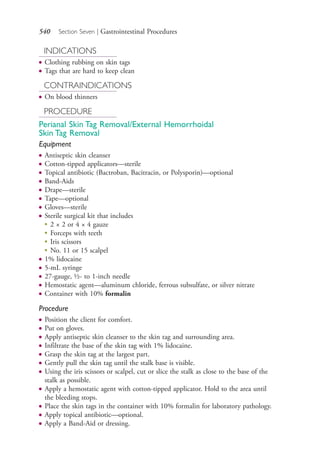
HEALTH PROMOTION/PREVENTION
Adults, Children, and Adolescents
● Avoid potential environmental circumstances that would produce severe loud
sounds such as
●
High-volume music with or without earphones
●
Explosions
●
Loud machinery
● Restrict agents that have ototoxic effects.
● Use decibel-reducing earplugs.
Infants and Toddlers
●
Prevent factors such as
• Prenatal infections (cytomegalovirus, rubella, syphilis, human
immunodeficiency virus [HIV], herpes)
• Maternal drug and alcohol abuse
• Low birth weight
• Newborn jaundice
• Meningitis
• Head trauma
• Exposure to loud noises
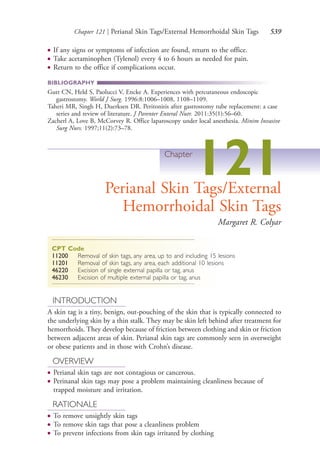
RATIONALE
● To detect hearing problems or loss
● To prevent delayed speech and language development
INDICATIONS
● Evaluation of hearing loss
● Routine screening for infants and children
● Routine adult well-care screening
● Occupational screening for individuals in noisy work settings
● Speech and language development delays in infants and children
● Poor academic progress in school-age children
● High-risk infants for preexisting hearing deficit
● Deterioration in interpersonal skills in home or work environment for the adult
● Unexplained behavior changes in the geriatric individual
● Complaints of tinnitus (ringing in the ears)
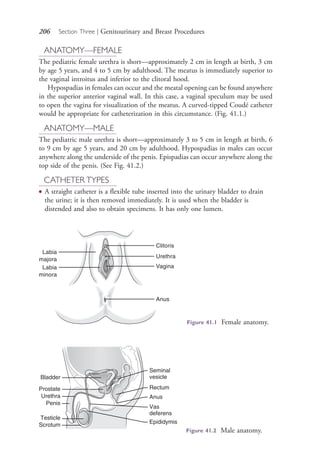
CONTRAINDICATIONS
● Cerumen obstruction
● Otitis externa
● Younger than 6 months (inaccurate readings)
4206_Chapter 4_0313-0402.indd 3144206_Chapter 4_0313-0402.indd 314 12/24/2014 2:01:51 PM12/24/2014 2:01:51 PM
Process CyanProcess CyanProcess MagentaProcess MagentaProcess YellowProcess YellowProcess BlackProcess Black](https://image.slidesharecdn.com/advancedpracticenursingprocedures-colyarmargaretsrg-150408034245-conversion-gate01/85/Advanced-practice-nursing-procedures-colyar-margaret-srg-329-320.jpg)


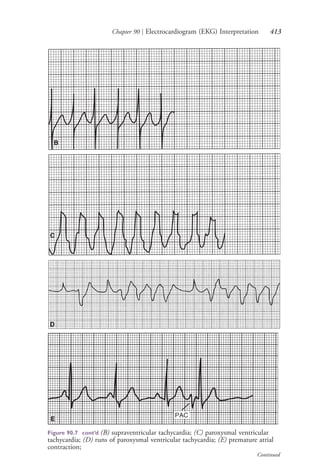
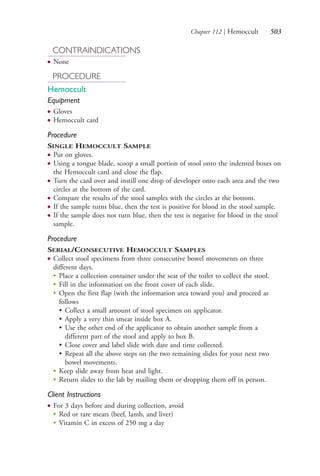
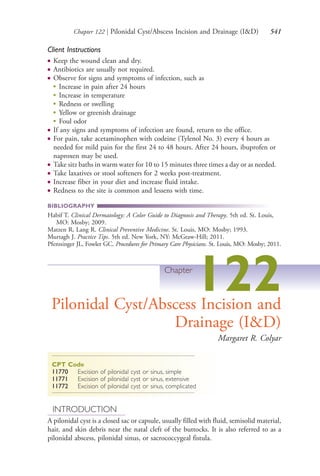
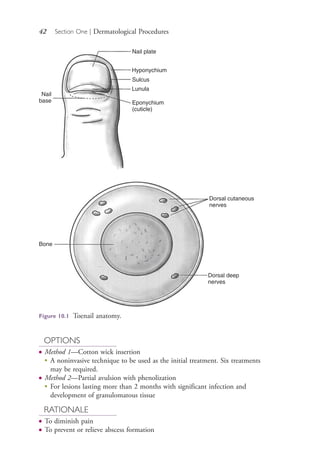
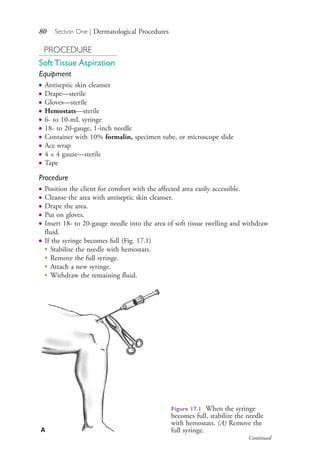
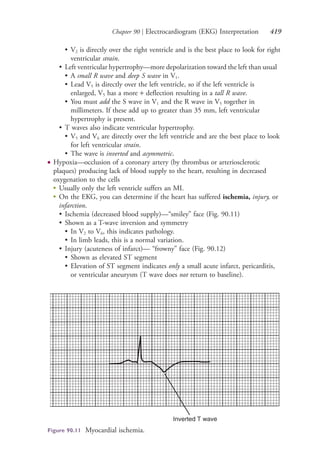
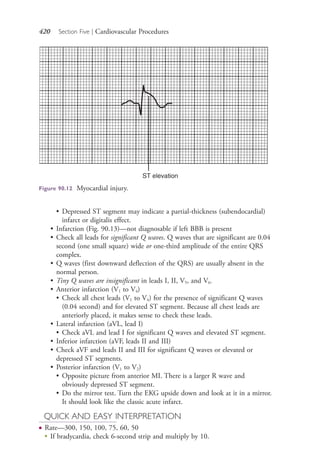
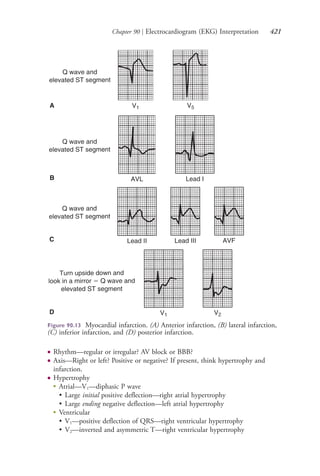
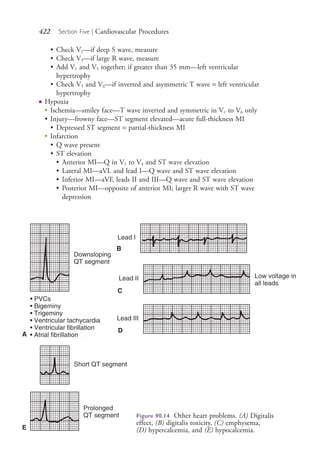
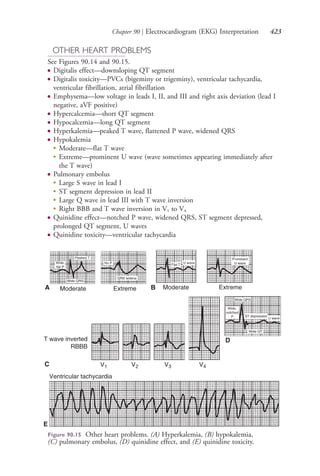
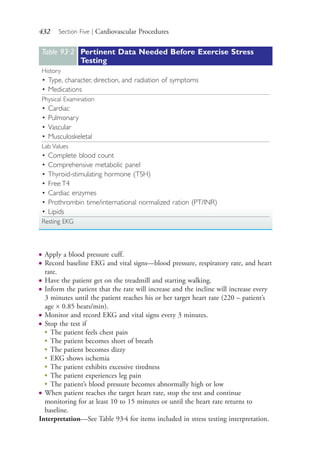
![Chapter 90 | Electrocardiogram (EKG) Interpretation 417
●
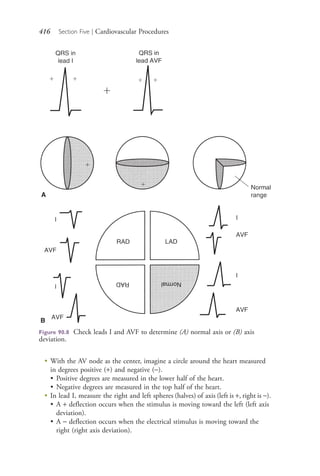
aVF measures the upper and lower spheres (halves) of axis (upper is −, lower is +).
• If the deflection is mainly +, the mean QRS vector is downward.
• If the deflection is mainly −, the mean QRS vector is upward.
●
Chest leads record axis on a horizontal plane.
• They should be − in leads V1 and V2 and + in leads V5 and V6.
• A progression from − in V1 to + in V6 is normal.
●
Lead V2, because of its position, projects through the anterior wall of the heart
to the posterior wall of the heart and gives the best information on anterior
and posterior wall MIs.
Things That Affect Axis
● Obesity—pushes the heart up, and the mean QRS vector is directed to the left
of +0 degrees
● Infarction—no electrical stimulus goes through dead tissue, and the mean QRS
vector turns away from the infarcted area of tissue
● Ventricular hypertrophy—has electrical activity, and the mean QRS vector
deviates toward the enlarged ventricle
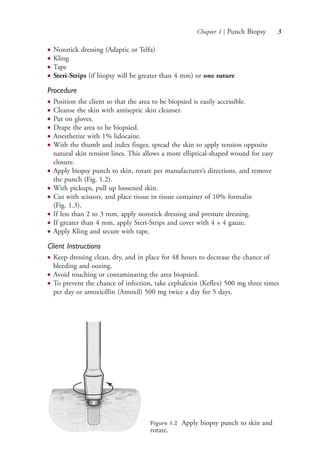
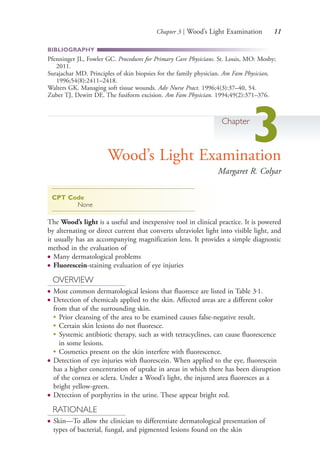
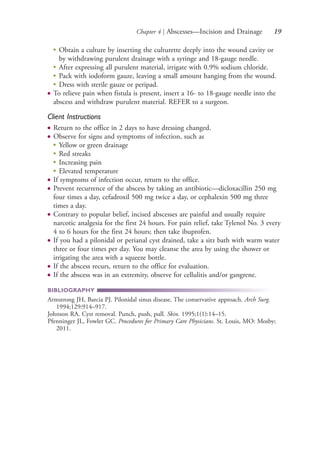
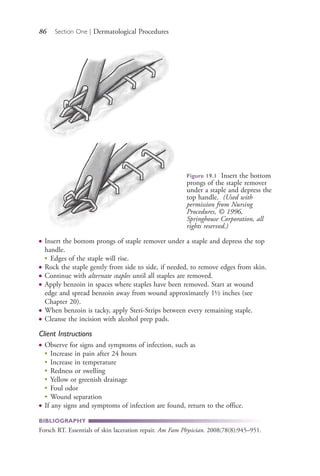
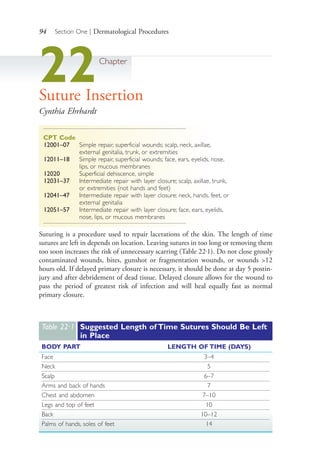
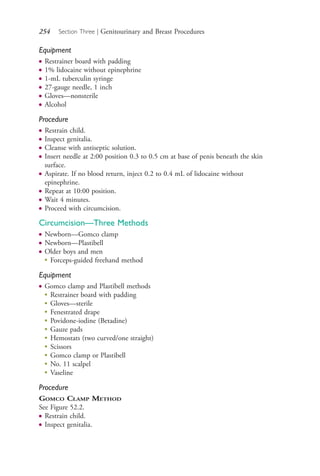
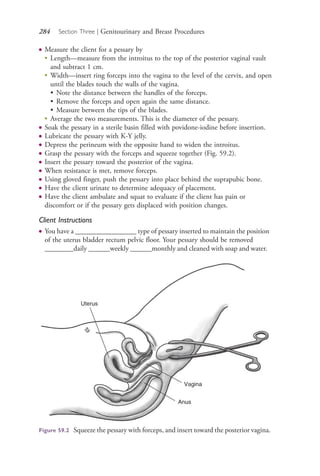
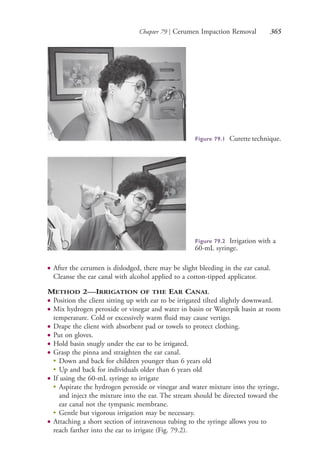
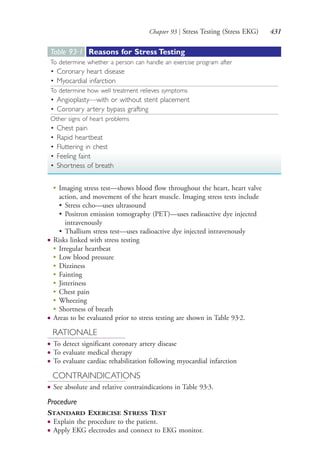
● Hypertrophy—increase in heart size or wall thickness because of an increased
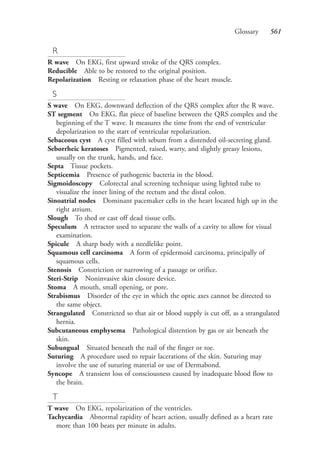
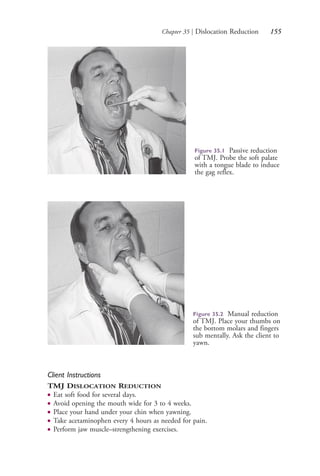
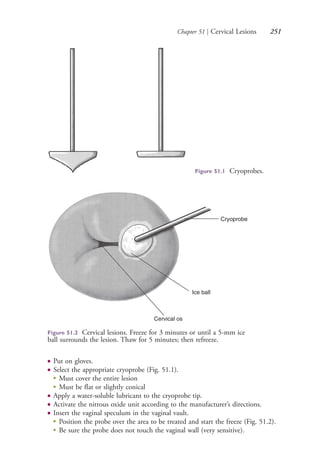
volume in the chambers of the heart (Fig. 90.9)
●
Atrial hypertrophy
• P wave depicts contraction of the atria.
• Lead V1 is placed directly over the atria (fourth intercostal space [ICS], right
sternal border).
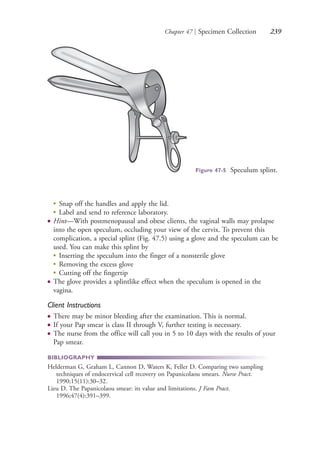
Figure 90.9 Atrial hypertrophy.
4206_Chapter 5_.indd 4174206_Chapter 5_.indd 417 12/24/2014 2:31:00 PM12/24/2014 2:31:00 PM
Process CyanProcess CyanProcess MagentaProcess MagentaProcess YellowProcess YellowProcess BlackProcess Black](https://image.slidesharecdn.com/advancedpracticenursingprocedures-colyarmargaretsrg-150408034245-conversion-gate01/85/Advanced-practice-nursing-procedures-colyar-margaret-srg-432-320.jpg)


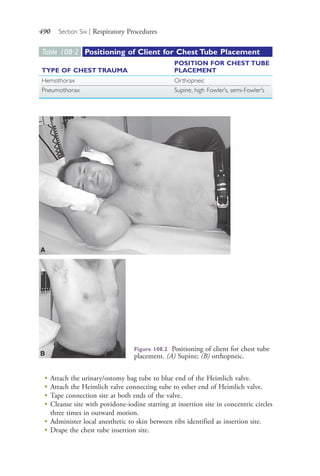
![472 Section Six | Respiratory Procedures
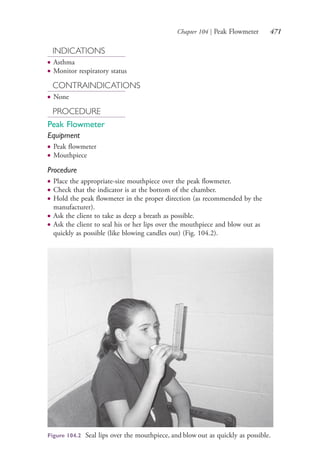
● Note the reading on the dial.
● Repeat the procedure three times, and record the highest reading.
BIBLIOGRAPHY
Hinkle JL, Cheever KH. Brunner & Suddarth’s Textbook of Medication-Surgical Nursing.
Philadelphia, PA: Lippincott Williams & Wilkins; 2012.
Hyatt RE. Interpretation of Pulmonary Function Tests. Philadelphia, PA: Lippincott Williams
& Wilkins; 2012.
Pfenninger JL, Fowler GC. Procedures of Primary Care Physicians. St. Louis, MO: Mosby;
2011.
105Chapter
Pulmonary Function Testing
(Spirometry)
Margaret R. Colyar
CPT Code
94010 Spirometry
INTRODUCTION
Pulmonary function testing is a physiological test that measures how well a person
inhales and exhales volumes of air based on time. Spirometry is a simple test to
measure how much (volume) and how fast (flow) air moves into and out of the
lungs. Through routine spirometry, lung diseases can often be diagnosed in the early
stages when treatment is most effective. Spirometry is used to establish baseline lung
function, evaluate dyspnea, detect pulmonary disease, monitor effects of therapies
used to treat respiratory disease, evaluate respiratory impairment, evaluate operative
risk, and perform surveillance for occupational-related lung disease.
OVERVIEW
● The National Health and Nutrition Examination Survey [NHANES] III
predicted set is used to provide specific equations for whites, African Americans,
and Mexican Americans (see http://www.cdc.gov/niosh/topics/spirometry/
nhanes.html).
● If the patient belongs to another ethnic group, the predicted values and lower
limits of what is considered normal provided for whites should be reduced by
12% by multiplying the predicted value by 0.88 before comparison with the
patient’s results.
4206_Chapter 6_.indd 4724206_Chapter 6_.indd 472 12/24/2014 2:30:44 PM12/24/2014 2:30:44 PM
Process CyanProcess CyanProcess MagentaProcess MagentaProcess YellowProcess YellowProcess BlackProcess Black](https://image.slidesharecdn.com/advancedpracticenursingprocedures-colyarmargaretsrg-150408034245-conversion-gate01/85/Advanced-practice-nursing-procedures-colyar-margaret-srg-487-320.jpg)


![Chapter 109 | Flail Chest Stabilization 493
• Decrease in intensity of point of maximal impulse, which can be associated
with cardiac tamponade, or shift in point of maximal impulse if mediastinal
shift occurs and congestive heart failure can be excluded
●
Percussion
• Dullness suggests hemothorax or pneumothorax
• Hyperresonance suggests pneumothorax
●
Auscultation
• Unilateral decreased breath sounds
OPTIONS
● Method 1—Flail chest stabilization without open chest wound
● Method 2—Flail chest stabilization with open chest wound
RATIONALE
● To prevent life-threatening complications
INDICATIONS
● Blunt trauma
● Penetrating chest wound
● Rib injuries
CONTRAINDICATIONS
● None
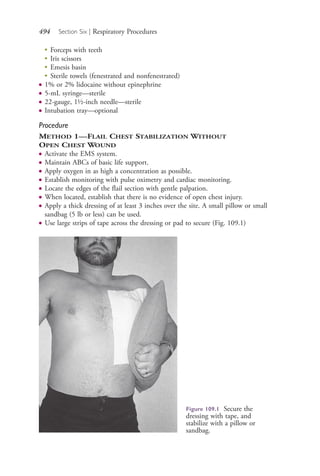
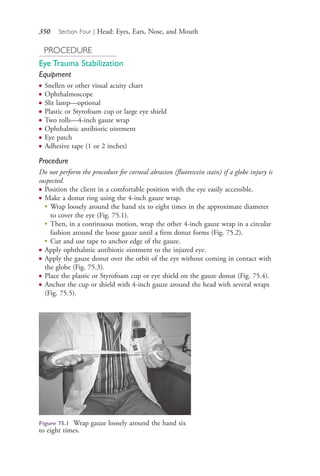
PROCEDURE
Flail Chest Stabilization
Equipment
● Pulse oximeter
● Oxygen with nasal cannula, mask, or rebreather mask
● Cardiac monitoring if available
● Intravenous solution kits of Ringer’s lactate or 0.9% sodium chloride
● Large-bore intravenous catheters (16- to 18-gauge for adults; 18- to 21-gauge
for children)
● 0.9% sodium chloride irrigation solution—500 mL—sterile
● Abdominal dressings (6 inch to 12 inch or larger)—sterile
● Gloves—sterile
● 4 × 4 gauze—sterile
● Occlusive dressing (petroleum or polytetrafluoroethylene [Teflon] base)—sterile
● 4-0 Ethicon suture material
● Adhesive tape rolls (1, 2, 4, or 6 inch)
● Pillow or sandbag
● Sterile dressing or suture tray including
●
Straight and curved hemostats
●
Needle holder
4206_Chapter 6_.indd 4934206_Chapter 6_.indd 493 12/24/2014 2:30:46 PM12/24/2014 2:30:46 PM
Process CyanProcess CyanProcess MagentaProcess MagentaProcess YellowProcess YellowProcess BlackProcess Black](https://image.slidesharecdn.com/advancedpracticenursingprocedures-colyarmargaretsrg-150408034245-conversion-gate01/85/Advanced-practice-nursing-procedures-colyar-margaret-srg-508-320.jpg)