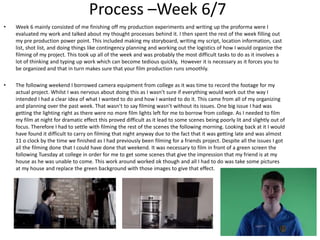
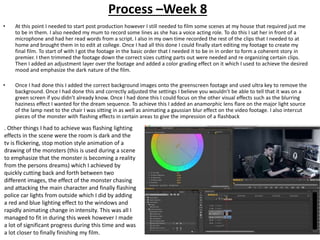
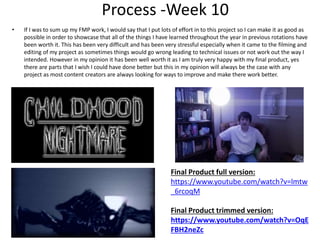
Production Reflection
Josh Eastham
Process –Week 1
• This was the first week we had to work on our FMP. To start of with we had a lecture at the start of class that
went through the basics of the rotation. We then went through the initial plans document as we were told
how we needed to use it and fill it in. As we had already done this four times on previous rotations we
already knew what to expect and how to fill in the pro forma. To start of we filled in the initial reaction slide
which logged our thoughts and feelings about the project. In this I talked about how I enjoyed creating a
short horror film in my previous film rotation and how I believed that I learned a lot about different
techniques such as how to create tension through use of sound and visuals. I also talked about how I learned
from my mistakes and how I was slightly disappointed at the camera quality not being so good and that I
thought it was something to do with the camera settings or something to do with how I set premier up in
post production. I now realise having done my final project that the reason for this is due to the quality that
the college cameras can record in as well as the type of lens we used. I found this part the easiest of the
whole slide as I knew that I had to state what I had learned in the previous project as well as how I thought I
would apply it in the new project.
• The second task was for us to produce a mind map which I initially thought was going to be hard however as
soon as I started I realised that if I set myself a guide of certain things I had to cover in each mind map then I
could work of that. The first thing I did was split the mind map into 3 different parts one for each genre of
film that I had an idea of. I then elaborated on each one and talked about possible plot elements and ideas
that I had for each genre as well as potential issues and drawbacks. I then created a further 3 mind maps one
for each genre that talked about it In greater detail. For each one I talked about possible locations, plot
elements and characters, problems and restrictions I may have as well as costume and props. I think this talk
was very helpful as it allowed me to develop certain plot elements for my film as I had to come up with ideas
on the sort of props and characters that I would have.
• The third and final task for this document was to create a mood board on different elements on of my mind
map such as the plot, props and locations. I actually found this the hardest task to do as I found it difficult to
find the right sort of images that would do a good job of representing my film online. This may sound absurd
however by that point I was getting a much clearer idea of how I wanted my film to pan out and as a result I
was getting very picky with the images I was trying to find. I then realized that at this point whilst it was good
that I was getting a clear idea at this point early on in the project I was still only supposed to be exploring
ideas. This therefore made it easier to pick images online to add to my mood board. We then had to analyze
our mood board talk about if there was any repetition in the images we had collected as well as how our
mood board will influence our final product. I found this part quite easy to do having just realized I was being
picky about the images I was collecting meaning they were very obviously going to influence my final
product.
Process –Week 2/3
• This was the week were we moved onto the research tasks. I usually find this the hardest part of the Pro Forma
simply because I find it difficult and tedious to compare and review similar products. Another part I find difficult
is to make sure I gather enough audience research and that I sufficiently organise it and analyse it. To find
existing products that I could compare my work to I searched YouTube and came across a YouTube channel
called Crypt TV which seemed dedicated to producing short horror filmed. After searching through there videos
I realised I had previously reviewed one of there films as an existing product in my previous short film rotation. I
then realised I could look at the work I had done previously and look at the feedback I had received from my
tutor on that work and use it as a guide for my current project. I then began to watch certain films from Crypt TV
that I liked the look of. I would then review the film and talk about its audience appeal, use of lighting, imagery
and composition as well as were it was filmed and why. I did this for four films and then analysed it by talking
about common features that the researched products have and what aspects of the research I will include
within my own production work. I also did the same with film posters of the horror genre as I was thinking of
producing a film poster to go along with my film. This proved very difficult to do and I ran out of lesson time to
finish it so I may end up doing it in my own time or not at all.
• The audience research took a while to do as there are so many areas that I needed to cover whilst doing this. To
start of we used survey monkey to create a survey questionnaire about horror films so we could get an idea of
peoples thoughts and views on horror films. As well as having my classmates answer it I got my mum to share in
on Facebook to I could get an idea of older peoples views on horror films. I found this information very helpful
as it gave me an idea of what a wide variety of people like and dislike about horror films and I could use this
information when producing my own in order to increase its audience appeal and attract people to watching it.
Every couple of slides I did on observation section were I briefly answered wrote down my thoughts and
opinions on on my survey results as well as noting down what the results say about my audience and how my
product will appeal to them. I initially was going to do this for each question but I realised that this would take
too long especially if I was going to go into a lot of detail. I then decided to summarise my results at the end of
my questionnaire slides.
Process –Week 3
• On the third week I began doing my research on the audience demographics both in the UK and in the
US. I used two horror films to do this, The Conjuring and Insidious. To do this I used YouGov Profiler and
searched up these two films on the UK and US websites respectively and took a screenshot of my results
and typed up a brief summary of them on the power point.
• At the end of the third week we finished up our audience research with 3 peer interviews. This is were
we write up 3 or four questions we want a couple of our classmates to answer. In my questions I asked;
what people believed were the most effective methods of caring someone in a horror film?, Do they
think horror films are becoming clichéd? And what they think Is the best horror film and why? The reason
I asked these questions is because I wanted to keep these in mind when I was making my own so I could
do my best to avoid issues such as clichés or other things that people tend to find annoying in horror
films. Once I had done this al I had left to do was sort out my Bibliography and make sure I had over 7
sources formatted correctly using Neil's Toolbox.
Process –Week 4/5
• This week was when the fun part started In that we began to work on our production experiments. I started of
basic by trying some work in Photoshop to produce a title card. I did this by looking at styles I liked such as the
text style used on 1980s Steven Kings Novels as well as the Stranger Things logo. The font is ITC Benguit. I looked
for it on DaFont however I couldn’t find it I did however find some other fonts that I liked the look of so I
downloaded and installed them. One of these font was called horroroid which I eventually used on my final
product. I did actually manage to find and install the font ITC Benguit from a different source. I used it for several
production experiments however the reason I didn't’t use it for my final project is because I had previously used
it on my last horror film project and I didn’t want to overuse it so I decided to use something different in the
end. I eventually decided to go with the font Horroroid as the font that I was going to use in my final product as I
liked the styling of it especially when it was in red as it looks like blood dripping down almost. However I didn’t
actually use the red colouring in the final product as I again decided that it was an overused style that was
synonymous with horror films. Eventually after playing around with the settings in photoshop I decided on the
final style of textured text with a dark greyish white glow outline. However for the production experiments I just
left the colouring at red. I also experimented with different resizing and warping of the individual letters in order
to achieve an iconic look and style that in my opinion was visually appealing. In terms of sound design I began to
research horror film music and I came upon something really interesting. It was a website that talked about how
horror films use ultrasound frequencies to create tension and fear within the audience.
• Link to article: https://news.avclub.com/some-of-the-scariest-sounds-in-horror-movies-are-the-on-1798253775
• This was something I found really fascinating so I began to wonder if I could successfully create a piece of
“music” by using different frequencies, bass hums and creepy sound effects. I thought my end result was quite
good and I thought it would go well at the start of my film whilst the character is opening the wardrobe.
However as this was a production experiment I decided to incorporate it into my production experiment film
instead.
Production Experiment screenshots
Process –Week 5
• Over the weekend I borrowed out some camera and film equipment from college and took them home
to film some production experiments. The first one I did was a horror style one that involved a character
being lured into a room by some supernatural force whereupon he is attacked by some ghostly
apparition. The film then ends. The reason I did this is because I wanted to see how good I was at
creating tension in a horror film through use of editing techniques such as colour correction, music and
visual effects. I think I did this pretty successfully as I had previous experience with doing this in my
short film rotation were I produced a 1 minuet long horror flick. Once I finished this I realized I had some
free time remaining and some footage left unused, I realised that I had only done one video experiment
in one genre I decided to then see how creative I good be and try and create some sort of science fiction
short with the remaining footage that I had left. These were all shots that had been done outside so I
had to really think about what I could do.
• To start of I played around with the colour corrector in premier for a while to see how drastically it
effected the mood of the video differently from how the video clips that were filmed inside were
effected. I eventually settled on a reddish orange hue as it gave the video a post apocalyptic radioactive
feel to it. I then had more of an idea of how this was going to pan out. One thing I noticed is that most of
the camera shots were pan/ zoom shots of the surrounding area which gave the impression that it was
from someone's point of view. I then had the idea to add science fiction style HUD to the video as if it
was from the point of view of a robot. I found these easily enough on YouTube as green screen animated
overlays. So I added them on and ultra keyed out the background. I then used keyframe animation to
have them move about on screen and shrink into the corner. One thing I did want is text to appear on
the screen which I was unsure of how to do on premier. I figured out how to do it quickly though
because I realised that it was relatively similar to adding and changing up an adjustment layer. I then
added some smoke and ash effects as well as some sounds and I thought the end product was really
good and looked very convincing that It was some kind of robotic drone in a radioactive wasteland
waking up and locking on to its target.
Process –Week 5
Process –Week 6/7
• Week 6 mainly consisted of me finishing off my production experiments and writing up the proforma were I
evaluated my work and talked about my thought processes behind it. I then spent the rest of the week filling out
my pre production power point. This included making my storyboard, writing my script, location information, cast
list, shot list, and doing things like contingency planning and working out the logistics of how I would organize the
filming of my project. This took up all of the week and was probably the most difficult tasks to do as it involves a
lot of thinking and typing up work which can become tedious quickly, However it is necessary as it forces you to
be organized and that in turn makes sure that your film production runs smoothly.
• The following weekend I borrowed camera equipment from college as it was time to record the footage for my
actual project. Whilst I was nervous about doing this as I wasn’t sure if everything would work out the way I
intended I had a clear idea of what I wanted to do and how I wanted to do it. This came from all of my organizing
and planning over the past week. That wasn’t to say filming wasn’t without its issues. One big issue I had was
getting the lighting right as there were no more film lights left for me to borrow from college. As I needed to film
my film at night for dramatic effect this proved difficult as it lead to some scenes being poorly lit and slightly out of
focus. Therefore I had to settle with filming the rest of the scenes the following morning. Looking back at it I would
have found it difficult to carry on filming that night anyway due to the fact that it was getting late and was almost
11 o clock by the time we finished as I had previously been filming for a friends project. Despite all the issues I got
all the filming done that I could have done that weekend. It was necessary to film in front of a green screen the
following Tuesday at college in order for me to get some scenes that give the impression that my friend is at my
house as he was unable to come. This work around worked ok though and all I had to do was take some pictures
at my house and replace the green background with those images to give that effect.
Process –Week 8
• At this point I needed to start post production however I still needed to film some scenes at my house that required just me
to be in them. I also needed my mum to record some lines as she has a voice acting role. To do this I sat her in front of a
microphone and had her read words from a script. I also in my own time recorded the rest of the clips that I needed to at
home and brought them in to edit at college. Once I had all this done I could finally start editing my footage to create my
final film. To start of with I got the footage in the basic order that I needed it to be in in order to form a coherent story in
premier. I then trimmed the footage down the correct sizes cutting parts out were needed and re organizing certain clips.
Then I added an adjustment layer over the footage and added a color grading effect on it which I used to achieve the desired
mood and emphasize the dark nature of the film.
• Once I had done this I added the correct background images onto the greenscreen footage and used ultra key to remove the
background. Once I had done this and correctly adjusted the settings I believe you wouldn’t be able to tell that it was on a
green screen if you didn’t already know. Once I had done this I could focus on the other visual effects such as the blurring
haziness effect I wanted for the dream sequence. To achieve this I added an anamorphic lens flare on the major light source
of the lamp next to the chair I was sitting in as well as animating a gaussian blur effect on the video footage. I also intercut
pieces of the monster with flashing effects in certain areas to give the impression of a flashback
. Other things I had to achieve was flashing lighting
effects in the scene were the room is dark and the
tv is flickering, stop motion style animation of a
drawing of the monsters (this is used during a scene
to emphasize that the monster is becoming a reality
from the persons dreams) which I achieved by
quickly cutting back and forth between two
different images, the effect of the monster chasing
and attacking the main character and finally flashing
police car lights from outside which I did by adding
a red and blue lighting effect to the windows and
rapidly animating change in intensity. This was all I
managed to fit in during this week however I made
a lot of significant progress during this time and was
a lot closer to finally finishing my film.
Process Week 9
• The previous week I had finished editing and creating all of the visual elements of my film. I could focus on the audio
elements. I started by adding sound effect such as basic roaring sounds for my monster. It took me a while but I finally
sourced a free to use sound effect of YouTube which I deemed to be good enough. I then began to add more natural
sound effects such as the alarm and door closing sounds, phone ringing and hang up sound, The voice of the police
dispatcher for which I used a realistic sounding text to speech website as well as things like jump scare stings. It took
me along time to source the effects which I thought were appropriate for me film as well as being free to use. It took
me even longer to edit them into my film as I would change my mind and remove them whilst adding a new one.
Eventually I had the audio editing of my film done. The most difficult part was still to come and that was finding the
correct music for my film. I quickly found the opening music pretty quickly as it was the first non copyright track that I
stumbled upon that I found really worked with the visuals of my film. For the second scene were the character wakes
up and is lured to opening the wardrobe I wanted to idea to have a mellow sounding tone that wouldn’t draw too
much attention to itself in order to create tension. I successfully found an ideal track after a while of searching however
once I did find it I found that it fit perfectly. The final track that I needed to find was one for climax of the film. I
eventually used two, one that builds up fear in the scene were the monster starts to become real and one that releases
fear in a chase type of music for the scene were the character is being attacked by the monster. This was almost
defiantly the hardest one for me to find as I wanted it to be as good as I could possibly make it which meant I was very
picky and critical of the non copyright tracks I was using. I did eventually find two good pieces of music to use though.
Once I had done that all I had to do was the credits which took me 5 minutes then I was able to render it out and I had
my completed film.
Process -Week 10
• This was the final week we had to work on our FMP. Having completed my production the previous week this
week focused on us doing our evaluation as well as improving and tweaking our previous documents. For my
evaluation I went over all of the previous work I had done such as my research and planning. I then noted down
my thoughts and feelings about my work, how It linked to my project and what I could have done better. I think I
actually did a good job with my evaluation as I have often found in the past that I struggle to concentrate as I
usually find the evaluation difficult and tedious. This time it was different however as I wanted this project to be
as good as I could possible make it. I made sure I included as much detail as I possibly thought I could when it
came to things like my rational for my work and my aesthetic and technical qualities as I was eager to explain
why I had made certain creative decisions as well as my inspiration for these creative decisions.
Process -Week 10
• I was also extremely eager and nervous to hear my peer feedback and what people thought of my film. I was
happy when I got the responses as people said they enjoyed the some of the creative decisions I had made such
as the use of sound and lighting to create atmosphere. I also found that I genuinely agree with the audience
feedback as some of the issues I was already aware of I just couldn’t fix them such as the choppy audio in some
places. I think that as long as I can acknowledge that these issues are present even if I can’t fix them it shows
that I am aware of these issues and that I am looking out for these things in the future and that as a result of
this my next project will always be better then the last. A few other things that some people pointed out were
that my film relied heavily on effects and that next time I should try composing my on music. This is something I
do agree with I think for my next project I will have a greater emphasis on the natural environment and maybe
film something predominantly outside so I don’t have to rely on visual effects as much. I also agree that I should
next time try to compose my own music however as I stated in my evaluation I was running out of time and it
would have involved me having to learn a new software which I didn’t have enough time to do. Another issue
with that is I have never composed music before so I am worried that it wouldn’t sound as good as a royalty free
soundtrack composed professionally however I think this is a risk I need to take next time as I do want to learn
about audio production as well as video. Therefore I will better plan my time during my next film project so I
have the opportunity to do this.
Process -Week 10
• If I was to sum up my FMP work, I would say that I put lots of effort in to this project so I can make it as good as
possible in order to showcase that all of the things I have learned throughout the year in previous rotations have
been worth it. This has been very difficult and has been very stressful especially when it came to the filming and
editing of my project as sometimes things would go wrong leading to technical issues or not work out the way I
intended. However in my opinion it has been well worth it as I am truly very happy with my final product, yes
there are parts that I wish I could have done better but this in my opinion will always be the case with any
project as most content creators are always looking for ways to improve and make there work better.
Final Product full version:
https://www.youtube.com/watch?v=lmtw
_6rcoqM
Final Product trimmed version:
https://www.youtube.com/watch?v=OqE
FBH2neZc

6. production reflection

  • 1.
  • 2.
    Process –Week 1 •This was the first week we had to work on our FMP. To start of with we had a lecture at the start of class that went through the basics of the rotation. We then went through the initial plans document as we were told how we needed to use it and fill it in. As we had already done this four times on previous rotations we already knew what to expect and how to fill in the pro forma. To start of we filled in the initial reaction slide which logged our thoughts and feelings about the project. In this I talked about how I enjoyed creating a short horror film in my previous film rotation and how I believed that I learned a lot about different techniques such as how to create tension through use of sound and visuals. I also talked about how I learned from my mistakes and how I was slightly disappointed at the camera quality not being so good and that I thought it was something to do with the camera settings or something to do with how I set premier up in post production. I now realise having done my final project that the reason for this is due to the quality that the college cameras can record in as well as the type of lens we used. I found this part the easiest of the whole slide as I knew that I had to state what I had learned in the previous project as well as how I thought I would apply it in the new project. • The second task was for us to produce a mind map which I initially thought was going to be hard however as soon as I started I realised that if I set myself a guide of certain things I had to cover in each mind map then I could work of that. The first thing I did was split the mind map into 3 different parts one for each genre of film that I had an idea of. I then elaborated on each one and talked about possible plot elements and ideas that I had for each genre as well as potential issues and drawbacks. I then created a further 3 mind maps one for each genre that talked about it In greater detail. For each one I talked about possible locations, plot elements and characters, problems and restrictions I may have as well as costume and props. I think this talk was very helpful as it allowed me to develop certain plot elements for my film as I had to come up with ideas on the sort of props and characters that I would have.
  • 3.
    • The thirdand final task for this document was to create a mood board on different elements on of my mind map such as the plot, props and locations. I actually found this the hardest task to do as I found it difficult to find the right sort of images that would do a good job of representing my film online. This may sound absurd however by that point I was getting a much clearer idea of how I wanted my film to pan out and as a result I was getting very picky with the images I was trying to find. I then realized that at this point whilst it was good that I was getting a clear idea at this point early on in the project I was still only supposed to be exploring ideas. This therefore made it easier to pick images online to add to my mood board. We then had to analyze our mood board talk about if there was any repetition in the images we had collected as well as how our mood board will influence our final product. I found this part quite easy to do having just realized I was being picky about the images I was collecting meaning they were very obviously going to influence my final product.
  • 4.
    Process –Week 2/3 •This was the week were we moved onto the research tasks. I usually find this the hardest part of the Pro Forma simply because I find it difficult and tedious to compare and review similar products. Another part I find difficult is to make sure I gather enough audience research and that I sufficiently organise it and analyse it. To find existing products that I could compare my work to I searched YouTube and came across a YouTube channel called Crypt TV which seemed dedicated to producing short horror filmed. After searching through there videos I realised I had previously reviewed one of there films as an existing product in my previous short film rotation. I then realised I could look at the work I had done previously and look at the feedback I had received from my tutor on that work and use it as a guide for my current project. I then began to watch certain films from Crypt TV that I liked the look of. I would then review the film and talk about its audience appeal, use of lighting, imagery and composition as well as were it was filmed and why. I did this for four films and then analysed it by talking about common features that the researched products have and what aspects of the research I will include within my own production work. I also did the same with film posters of the horror genre as I was thinking of producing a film poster to go along with my film. This proved very difficult to do and I ran out of lesson time to finish it so I may end up doing it in my own time or not at all. • The audience research took a while to do as there are so many areas that I needed to cover whilst doing this. To start of we used survey monkey to create a survey questionnaire about horror films so we could get an idea of peoples thoughts and views on horror films. As well as having my classmates answer it I got my mum to share in on Facebook to I could get an idea of older peoples views on horror films. I found this information very helpful as it gave me an idea of what a wide variety of people like and dislike about horror films and I could use this information when producing my own in order to increase its audience appeal and attract people to watching it. Every couple of slides I did on observation section were I briefly answered wrote down my thoughts and opinions on on my survey results as well as noting down what the results say about my audience and how my product will appeal to them. I initially was going to do this for each question but I realised that this would take too long especially if I was going to go into a lot of detail. I then decided to summarise my results at the end of my questionnaire slides.
  • 5.
    Process –Week 3 •On the third week I began doing my research on the audience demographics both in the UK and in the US. I used two horror films to do this, The Conjuring and Insidious. To do this I used YouGov Profiler and searched up these two films on the UK and US websites respectively and took a screenshot of my results and typed up a brief summary of them on the power point. • At the end of the third week we finished up our audience research with 3 peer interviews. This is were we write up 3 or four questions we want a couple of our classmates to answer. In my questions I asked; what people believed were the most effective methods of caring someone in a horror film?, Do they think horror films are becoming clichéd? And what they think Is the best horror film and why? The reason I asked these questions is because I wanted to keep these in mind when I was making my own so I could do my best to avoid issues such as clichés or other things that people tend to find annoying in horror films. Once I had done this al I had left to do was sort out my Bibliography and make sure I had over 7 sources formatted correctly using Neil's Toolbox.
  • 6.
    Process –Week 4/5 •This week was when the fun part started In that we began to work on our production experiments. I started of basic by trying some work in Photoshop to produce a title card. I did this by looking at styles I liked such as the text style used on 1980s Steven Kings Novels as well as the Stranger Things logo. The font is ITC Benguit. I looked for it on DaFont however I couldn’t find it I did however find some other fonts that I liked the look of so I downloaded and installed them. One of these font was called horroroid which I eventually used on my final product. I did actually manage to find and install the font ITC Benguit from a different source. I used it for several production experiments however the reason I didn't’t use it for my final project is because I had previously used it on my last horror film project and I didn’t want to overuse it so I decided to use something different in the end. I eventually decided to go with the font Horroroid as the font that I was going to use in my final product as I liked the styling of it especially when it was in red as it looks like blood dripping down almost. However I didn’t actually use the red colouring in the final product as I again decided that it was an overused style that was synonymous with horror films. Eventually after playing around with the settings in photoshop I decided on the final style of textured text with a dark greyish white glow outline. However for the production experiments I just left the colouring at red. I also experimented with different resizing and warping of the individual letters in order to achieve an iconic look and style that in my opinion was visually appealing. In terms of sound design I began to research horror film music and I came upon something really interesting. It was a website that talked about how horror films use ultrasound frequencies to create tension and fear within the audience. • Link to article: https://news.avclub.com/some-of-the-scariest-sounds-in-horror-movies-are-the-on-1798253775 • This was something I found really fascinating so I began to wonder if I could successfully create a piece of “music” by using different frequencies, bass hums and creepy sound effects. I thought my end result was quite good and I thought it would go well at the start of my film whilst the character is opening the wardrobe. However as this was a production experiment I decided to incorporate it into my production experiment film instead.
  • 7.
  • 8.
    Process –Week 5 •Over the weekend I borrowed out some camera and film equipment from college and took them home to film some production experiments. The first one I did was a horror style one that involved a character being lured into a room by some supernatural force whereupon he is attacked by some ghostly apparition. The film then ends. The reason I did this is because I wanted to see how good I was at creating tension in a horror film through use of editing techniques such as colour correction, music and visual effects. I think I did this pretty successfully as I had previous experience with doing this in my short film rotation were I produced a 1 minuet long horror flick. Once I finished this I realized I had some free time remaining and some footage left unused, I realised that I had only done one video experiment in one genre I decided to then see how creative I good be and try and create some sort of science fiction short with the remaining footage that I had left. These were all shots that had been done outside so I had to really think about what I could do. • To start of I played around with the colour corrector in premier for a while to see how drastically it effected the mood of the video differently from how the video clips that were filmed inside were effected. I eventually settled on a reddish orange hue as it gave the video a post apocalyptic radioactive feel to it. I then had more of an idea of how this was going to pan out. One thing I noticed is that most of the camera shots were pan/ zoom shots of the surrounding area which gave the impression that it was from someone's point of view. I then had the idea to add science fiction style HUD to the video as if it was from the point of view of a robot. I found these easily enough on YouTube as green screen animated overlays. So I added them on and ultra keyed out the background. I then used keyframe animation to have them move about on screen and shrink into the corner. One thing I did want is text to appear on the screen which I was unsure of how to do on premier. I figured out how to do it quickly though because I realised that it was relatively similar to adding and changing up an adjustment layer. I then added some smoke and ash effects as well as some sounds and I thought the end product was really good and looked very convincing that It was some kind of robotic drone in a radioactive wasteland waking up and locking on to its target.
  • 9.
  • 10.
    Process –Week 6/7 •Week 6 mainly consisted of me finishing off my production experiments and writing up the proforma were I evaluated my work and talked about my thought processes behind it. I then spent the rest of the week filling out my pre production power point. This included making my storyboard, writing my script, location information, cast list, shot list, and doing things like contingency planning and working out the logistics of how I would organize the filming of my project. This took up all of the week and was probably the most difficult tasks to do as it involves a lot of thinking and typing up work which can become tedious quickly, However it is necessary as it forces you to be organized and that in turn makes sure that your film production runs smoothly. • The following weekend I borrowed camera equipment from college as it was time to record the footage for my actual project. Whilst I was nervous about doing this as I wasn’t sure if everything would work out the way I intended I had a clear idea of what I wanted to do and how I wanted to do it. This came from all of my organizing and planning over the past week. That wasn’t to say filming wasn’t without its issues. One big issue I had was getting the lighting right as there were no more film lights left for me to borrow from college. As I needed to film my film at night for dramatic effect this proved difficult as it lead to some scenes being poorly lit and slightly out of focus. Therefore I had to settle with filming the rest of the scenes the following morning. Looking back at it I would have found it difficult to carry on filming that night anyway due to the fact that it was getting late and was almost 11 o clock by the time we finished as I had previously been filming for a friends project. Despite all the issues I got all the filming done that I could have done that weekend. It was necessary to film in front of a green screen the following Tuesday at college in order for me to get some scenes that give the impression that my friend is at my house as he was unable to come. This work around worked ok though and all I had to do was take some pictures at my house and replace the green background with those images to give that effect.
  • 11.
    Process –Week 8 •At this point I needed to start post production however I still needed to film some scenes at my house that required just me to be in them. I also needed my mum to record some lines as she has a voice acting role. To do this I sat her in front of a microphone and had her read words from a script. I also in my own time recorded the rest of the clips that I needed to at home and brought them in to edit at college. Once I had all this done I could finally start editing my footage to create my final film. To start of with I got the footage in the basic order that I needed it to be in in order to form a coherent story in premier. I then trimmed the footage down the correct sizes cutting parts out were needed and re organizing certain clips. Then I added an adjustment layer over the footage and added a color grading effect on it which I used to achieve the desired mood and emphasize the dark nature of the film. • Once I had done this I added the correct background images onto the greenscreen footage and used ultra key to remove the background. Once I had done this and correctly adjusted the settings I believe you wouldn’t be able to tell that it was on a green screen if you didn’t already know. Once I had done this I could focus on the other visual effects such as the blurring haziness effect I wanted for the dream sequence. To achieve this I added an anamorphic lens flare on the major light source of the lamp next to the chair I was sitting in as well as animating a gaussian blur effect on the video footage. I also intercut pieces of the monster with flashing effects in certain areas to give the impression of a flashback . Other things I had to achieve was flashing lighting effects in the scene were the room is dark and the tv is flickering, stop motion style animation of a drawing of the monsters (this is used during a scene to emphasize that the monster is becoming a reality from the persons dreams) which I achieved by quickly cutting back and forth between two different images, the effect of the monster chasing and attacking the main character and finally flashing police car lights from outside which I did by adding a red and blue lighting effect to the windows and rapidly animating change in intensity. This was all I managed to fit in during this week however I made a lot of significant progress during this time and was a lot closer to finally finishing my film.
  • 12.
    Process Week 9 •The previous week I had finished editing and creating all of the visual elements of my film. I could focus on the audio elements. I started by adding sound effect such as basic roaring sounds for my monster. It took me a while but I finally sourced a free to use sound effect of YouTube which I deemed to be good enough. I then began to add more natural sound effects such as the alarm and door closing sounds, phone ringing and hang up sound, The voice of the police dispatcher for which I used a realistic sounding text to speech website as well as things like jump scare stings. It took me along time to source the effects which I thought were appropriate for me film as well as being free to use. It took me even longer to edit them into my film as I would change my mind and remove them whilst adding a new one. Eventually I had the audio editing of my film done. The most difficult part was still to come and that was finding the correct music for my film. I quickly found the opening music pretty quickly as it was the first non copyright track that I stumbled upon that I found really worked with the visuals of my film. For the second scene were the character wakes up and is lured to opening the wardrobe I wanted to idea to have a mellow sounding tone that wouldn’t draw too much attention to itself in order to create tension. I successfully found an ideal track after a while of searching however once I did find it I found that it fit perfectly. The final track that I needed to find was one for climax of the film. I eventually used two, one that builds up fear in the scene were the monster starts to become real and one that releases fear in a chase type of music for the scene were the character is being attacked by the monster. This was almost defiantly the hardest one for me to find as I wanted it to be as good as I could possibly make it which meant I was very picky and critical of the non copyright tracks I was using. I did eventually find two good pieces of music to use though. Once I had done that all I had to do was the credits which took me 5 minutes then I was able to render it out and I had my completed film.
  • 13.
    Process -Week 10 •This was the final week we had to work on our FMP. Having completed my production the previous week this week focused on us doing our evaluation as well as improving and tweaking our previous documents. For my evaluation I went over all of the previous work I had done such as my research and planning. I then noted down my thoughts and feelings about my work, how It linked to my project and what I could have done better. I think I actually did a good job with my evaluation as I have often found in the past that I struggle to concentrate as I usually find the evaluation difficult and tedious. This time it was different however as I wanted this project to be as good as I could possible make it. I made sure I included as much detail as I possibly thought I could when it came to things like my rational for my work and my aesthetic and technical qualities as I was eager to explain why I had made certain creative decisions as well as my inspiration for these creative decisions.
  • 14.
    Process -Week 10 •I was also extremely eager and nervous to hear my peer feedback and what people thought of my film. I was happy when I got the responses as people said they enjoyed the some of the creative decisions I had made such as the use of sound and lighting to create atmosphere. I also found that I genuinely agree with the audience feedback as some of the issues I was already aware of I just couldn’t fix them such as the choppy audio in some places. I think that as long as I can acknowledge that these issues are present even if I can’t fix them it shows that I am aware of these issues and that I am looking out for these things in the future and that as a result of this my next project will always be better then the last. A few other things that some people pointed out were that my film relied heavily on effects and that next time I should try composing my on music. This is something I do agree with I think for my next project I will have a greater emphasis on the natural environment and maybe film something predominantly outside so I don’t have to rely on visual effects as much. I also agree that I should next time try to compose my own music however as I stated in my evaluation I was running out of time and it would have involved me having to learn a new software which I didn’t have enough time to do. Another issue with that is I have never composed music before so I am worried that it wouldn’t sound as good as a royalty free soundtrack composed professionally however I think this is a risk I need to take next time as I do want to learn about audio production as well as video. Therefore I will better plan my time during my next film project so I have the opportunity to do this.
  • 15.
    Process -Week 10 •If I was to sum up my FMP work, I would say that I put lots of effort in to this project so I can make it as good as possible in order to showcase that all of the things I have learned throughout the year in previous rotations have been worth it. This has been very difficult and has been very stressful especially when it came to the filming and editing of my project as sometimes things would go wrong leading to technical issues or not work out the way I intended. However in my opinion it has been well worth it as I am truly very happy with my final product, yes there are parts that I wish I could have done better but this in my opinion will always be the case with any project as most content creators are always looking for ways to improve and make there work better. Final Product full version: https://www.youtube.com/watch?v=lmtw _6rcoqM Final Product trimmed version: https://www.youtube.com/watch?v=OqE FBH2neZc

Editor's Notes

  • #3 Discuss the tools and processes used in your production. Log your thoughts and feelings about your work.
  • #5 Discuss the tools and processes used in your production. Log your thoughts and feelings about your work.
  • #6 Discuss the tools and processes used in your production. Log your thoughts and feelings about your work.
  • #7 Discuss the tools and processes used in your production. Log your thoughts and feelings about your work.
  • #9 Discuss the tools and processes used in your production. Log your thoughts and feelings about your work.