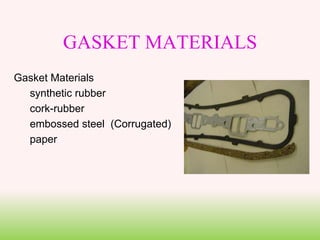
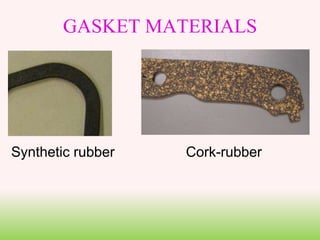
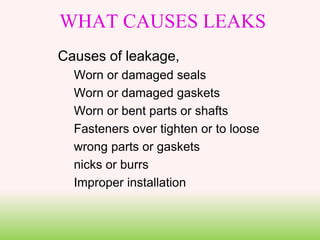
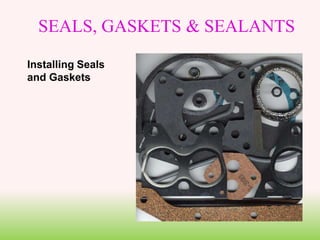
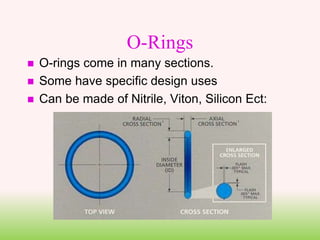
Seals and Gaskets
OBJECTIVES
Identify common gaskets and seals
Properly install common engine gaskets including
cylinder head & valve cover gaskets.
Properly install typical lip seals.
PURPOSE OF A GASKET
 Purpose of a Gasket
– To confine; gas, oil, water, vacuum or exhaust
– Seal out foreign objects such as; Dirt, Water
– Must withstand heat, cold, pressure, erosion,
corrosion, moisture and oil
GASKET MATERIALS
Gasket Materials
synthetic rubber
cork-rubber
embossed steel (Corrugated)
paper
GASKET MATERIALS
Cork-rubber
Synthetic rubber
GASKET MATERIALS
Embossed steel
(Corrugated)
Paper
WHAT CAUSES LEAKS
Causes of leakage,
Worn or damaged seals
Worn or damaged gaskets
Worn or bent parts or shafts
Fasteners over tighten or to loose
wrong parts or gaskets
nicks or burrs
Improper installation
SEALS, GASKETS & SEALANTS
Installing Seals
and Gaskets
When Replacing gaskets ask yourself , "Why did this
gasket fail"
List different things to look for.
Did the gasket fail suddenly or over a period of time?
Check the Torque
is it to Tight
is it to Loose
Gasket Replacement
Check for warp is the valve cover bent or the bolt holes
pulled through
Do both surfaces match up
Examine the gasket very close, are the holes in the
same spot
If you just replace the gasket it may go
out again. Clean off all of the old
gasket. Clean and dry the parts, Use
sealer if needed. Tighten in steps
Also some Bolts need to be checked
for torque for example some head
gaskets need to be retorqued when
using some gaskets check the
manufactures instructions.
Gasket Replacement
Torque to yield (TTY) bolts are used in many engines
today, they need to be replaced. When installing them
you need to have them clean and oiled then tighten to
manufacture’s preload setting. Then tightened them in a
series of stages usually about 90 degree’s at a time.
Also never retorque a torque to yield bolt. They are
beyond their elastic range, past their yield point and will
break.
Torque to Yield Bolts
A example would be for a Torque to yield
(TTY) bolt when installing them you would
torque them down to 35 foot pounds then
tighten an additional 70 degrees.
Torque to Yield Bolts
GASKET INSTALLATION
Follow instructions.
Thoroughly clean the mating surface.
Match to old gasket.
Check for proper fit. Right shape, bolt holes all
line up
Never reuse gaskets.
Ask yourself, Do you need Sealer
GASKET INSTALLATION
Use alcohol or brake clean on a clean
rag to wipe the oil off of the gasket
surface
Is the surface dry
Tighten in steps
Use the torque pattern when tightening
Torque to proper specs
Use a quality gasket, saving a buck or
two on a cheap gasket is not worth it.
CYLINDER HEAD GASKET
When tightening a component gasket that is not
torque to Yield it is best to tighten in steps. How
much should you go, my rule of thumb has been
if under 60 lbs. Tighten in 2 steps. If over 60
lbs. tighten in three steps. For example if it is to
be tighten to 100 foot lbs. Take it to 35 - 70 –
100.
Many other bolts are to be tighten in steps check
the specs for the machine.
CYLINDER HEAD GASKET
Must be capable of withstanding tremendous
heat and pressure.
CYLINDER HEAD GASKET
Follow gasket makers instructions on whether or
not to use sealant.
What type of sealant and how much? Most
head gaskets do not want any sealant. If you
have an aluminum head and a cast iron block it
will expand at different rates, if you use a sealant
you are going to have a leak.
CYLINDER HEAD GASKET
Run a tap or thread chaser in bolt holes.
Multi-layer steel gasket
USING STRAIGHTEDGE
Check in several directions what is the specifications?
How much can be taken off?
VALVE COVER GASKETS
 Check cover flanges for straightness.
 Use load spreaders when available.
 Use a sealant only when necessary and
not to much.
VALVE COVER GASKETS
INTAKE MANIFOLD
GASKETS
Steel
Paper
EXHAUST GASKETS
Exhaust Rings called
Exhaust Doughnuts
fiber facing material on one side
and perforated steel on the other.
Fiber surface against the head,
Steel on the manifold.
OIL PAN GASKETS
Rear main seal Molded gaskets oil pan and intake manifold
VALVE STEM SEALS
 Deflector seals usually called umbrella seals
that move with the valve and Positive Seals
attach to the valve boss and GM O-rings
VALVE STEM SEALS
umbrella seals
Deflect the oil
valve
VALVE STEM SEALS
Positive Seals attach to the valve guide.
SEALS
We have come along way from the old felt & leather seal. Most
seals today are made of Nitrile. Some Seals are made of Viton,
Silicone, or Polyacrylics. For more information on what seals
are made of go to the CR website to find out.
The first job of the seal is to keep the oil in and the dirt out but it
can also be used to separate fluids and to with stand different
pressures. Proper installation and inspection is very important
SEALS
Seals can be
Spring-loaded
Springless
Single-lip
Multi-lip
SEALS
SKF New web site
SEALS
 A. The flexible material component of the seal which produces the
lip. In this design there is only one lip, the primary sealing lip.
B. The outer shell of the seal holds the seal in place.
C. The garter spring (found in most seal designs) is a coiled wire
spring that provides a controlled radial load over time.
Mechanical seals
These comprise of 2 main components
• Static The part on the machine
• Dynamic The part on the shaft
Inspect the shaft that the seal rides on
it might be bent or damaged. You
may have to install a sleeve or clean
up with emery cloth or replace with a
new part
SEAL INSTALLATION
SEAL INSTALLATION
 Install with lip (and garter spring) toward
liquid.
 Lubricate lip before installation.
 Use sealant on the outside of steel seals.
 Use a seal installer.
USING SEALANTS
 Use correct sealant for the application.
 Do not use a sealant unless specified in
service manual or by gasket manufacturer.
 Types of sealants
– Hard drying like 3M Weatherstripping or a
glue to keep a gasket in place
– Aerobic (Hylomar)cures when exposed to air
– Anaerobic cure after the components are put
together (Loctite)
Aerobic (Hylomar)
 Room Temperature Vulcanizing
 Sometimes called Silicone Sealant
 Replaces most gaskets ??????
 Forms a rubber seal by absorbing
moisture in the air
 Sets in about ten minutes Dries in about 2
hours fully cures in 24 hours.
 Cure times will vary with Temperature,
Humidity, and size of the gap
Aerobic
 Blue is the most common color but also
comes in Black,Gray,Red
Aerobic
 Make sure that it is O2 Sensor safe if
used around the engine
 Do not use on fuel seals
 Clean and dry surface before using
 When using around bolt holes go all the
way around the hole.
Thread lockers (loctite)
 Anaerobic cures after the components
are put together
 # 242 Able to Remove with hand tools Blue
 # 271 Hard to Remove may require heat Red
 # 290 Wicking Grade for Preassembled Parts Green
 # could be different due to size of bottle
Blue Thread lockers
 Medium Strength for all bolts 6mm
or larger
 Able to Remove with hand tools
 Prevents parts from loosening from
vibration
 Protects threads from corrosion
 Applied BEFORE Assembly
Red Thread lockers
 High Strength Hard to
Remove
 Works well for studs and
press fit
 Locks against heavy
vibration
 Requires extra effort to
remove or special tools
like heat
 Applied BEFORE
Assembly
Green Thread lockers
 Wicking Grade for
Pre-assembled Parts
 Use on Calibration and
adjustment screws
 Applied AFTER Assembly
 There is also a Green High
Strength for sleeves
Thread / Pipe Sealant
 Thread Sealant for metal
tapered pipe threads and
fittings replaces PTFE tape
PTFE Tape
 Poly Tetra Flouro Ethylene
 Prevents leaks Just wrap
tape around threads
O-Rings
 O-rings come in many sections.
 Some have specific design uses
 Can be made of Nitrile, Viton, Silicon Ect:
O-Rings
 O-Rings come in several shapes an O
being the most common but you can
find others in D shape, Square-ring and
a modified X.
 O-Rings also come in different types of
materials make sure what you are using
is compatible with the fluid it is next to.

4 Seals and gaskets

  • 1.
  • 2.
    OBJECTIVES Identify common gasketsand seals Properly install common engine gaskets including cylinder head & valve cover gaskets. Properly install typical lip seals.
  • 3.
    PURPOSE OF AGASKET  Purpose of a Gasket – To confine; gas, oil, water, vacuum or exhaust – Seal out foreign objects such as; Dirt, Water – Must withstand heat, cold, pressure, erosion, corrosion, moisture and oil
  • 4.
    GASKET MATERIALS Gasket Materials syntheticrubber cork-rubber embossed steel (Corrugated) paper
  • 5.
  • 6.
  • 7.
    WHAT CAUSES LEAKS Causesof leakage, Worn or damaged seals Worn or damaged gaskets Worn or bent parts or shafts Fasteners over tighten or to loose wrong parts or gaskets nicks or burrs Improper installation
  • 8.
    SEALS, GASKETS &SEALANTS Installing Seals and Gaskets
  • 9.
    When Replacing gasketsask yourself , "Why did this gasket fail" List different things to look for. Did the gasket fail suddenly or over a period of time? Check the Torque is it to Tight is it to Loose Gasket Replacement
  • 10.
    Check for warpis the valve cover bent or the bolt holes pulled through Do both surfaces match up Examine the gasket very close, are the holes in the same spot
  • 11.
    If you justreplace the gasket it may go out again. Clean off all of the old gasket. Clean and dry the parts, Use sealer if needed. Tighten in steps Also some Bolts need to be checked for torque for example some head gaskets need to be retorqued when using some gaskets check the manufactures instructions. Gasket Replacement
  • 12.
    Torque to yield(TTY) bolts are used in many engines today, they need to be replaced. When installing them you need to have them clean and oiled then tighten to manufacture’s preload setting. Then tightened them in a series of stages usually about 90 degree’s at a time. Also never retorque a torque to yield bolt. They are beyond their elastic range, past their yield point and will break. Torque to Yield Bolts
  • 13.
    A example wouldbe for a Torque to yield (TTY) bolt when installing them you would torque them down to 35 foot pounds then tighten an additional 70 degrees. Torque to Yield Bolts
  • 14.
    GASKET INSTALLATION Follow instructions. Thoroughlyclean the mating surface. Match to old gasket. Check for proper fit. Right shape, bolt holes all line up Never reuse gaskets. Ask yourself, Do you need Sealer
  • 15.
    GASKET INSTALLATION Use alcoholor brake clean on a clean rag to wipe the oil off of the gasket surface Is the surface dry Tighten in steps Use the torque pattern when tightening Torque to proper specs Use a quality gasket, saving a buck or two on a cheap gasket is not worth it.
  • 16.
    CYLINDER HEAD GASKET Whentightening a component gasket that is not torque to Yield it is best to tighten in steps. How much should you go, my rule of thumb has been if under 60 lbs. Tighten in 2 steps. If over 60 lbs. tighten in three steps. For example if it is to be tighten to 100 foot lbs. Take it to 35 - 70 – 100. Many other bolts are to be tighten in steps check the specs for the machine.
  • 17.
    CYLINDER HEAD GASKET Mustbe capable of withstanding tremendous heat and pressure.
  • 18.
    CYLINDER HEAD GASKET Followgasket makers instructions on whether or not to use sealant. What type of sealant and how much? Most head gaskets do not want any sealant. If you have an aluminum head and a cast iron block it will expand at different rates, if you use a sealant you are going to have a leak.
  • 19.
    CYLINDER HEAD GASKET Runa tap or thread chaser in bolt holes. Multi-layer steel gasket
  • 20.
    USING STRAIGHTEDGE Check inseveral directions what is the specifications? How much can be taken off?
  • 21.
    VALVE COVER GASKETS Check cover flanges for straightness.  Use load spreaders when available.  Use a sealant only when necessary and not to much.
  • 22.
  • 23.
  • 24.
    EXHAUST GASKETS Exhaust Ringscalled Exhaust Doughnuts fiber facing material on one side and perforated steel on the other. Fiber surface against the head, Steel on the manifold.
  • 25.
    OIL PAN GASKETS Rearmain seal Molded gaskets oil pan and intake manifold
  • 26.
    VALVE STEM SEALS Deflector seals usually called umbrella seals that move with the valve and Positive Seals attach to the valve boss and GM O-rings
  • 27.
    VALVE STEM SEALS umbrellaseals Deflect the oil valve
  • 28.
    VALVE STEM SEALS PositiveSeals attach to the valve guide.
  • 29.
    SEALS We have comealong way from the old felt & leather seal. Most seals today are made of Nitrile. Some Seals are made of Viton, Silicone, or Polyacrylics. For more information on what seals are made of go to the CR website to find out. The first job of the seal is to keep the oil in and the dirt out but it can also be used to separate fluids and to with stand different pressures. Proper installation and inspection is very important
  • 30.
  • 31.
  • 32.
    SEALS  A. Theflexible material component of the seal which produces the lip. In this design there is only one lip, the primary sealing lip. B. The outer shell of the seal holds the seal in place. C. The garter spring (found in most seal designs) is a coiled wire spring that provides a controlled radial load over time.
  • 33.
    Mechanical seals These compriseof 2 main components • Static The part on the machine • Dynamic The part on the shaft
  • 35.
    Inspect the shaftthat the seal rides on it might be bent or damaged. You may have to install a sleeve or clean up with emery cloth or replace with a new part SEAL INSTALLATION
  • 36.
    SEAL INSTALLATION  Installwith lip (and garter spring) toward liquid.  Lubricate lip before installation.  Use sealant on the outside of steel seals.  Use a seal installer.
  • 37.
    USING SEALANTS  Usecorrect sealant for the application.  Do not use a sealant unless specified in service manual or by gasket manufacturer.  Types of sealants – Hard drying like 3M Weatherstripping or a glue to keep a gasket in place – Aerobic (Hylomar)cures when exposed to air – Anaerobic cure after the components are put together (Loctite)
  • 38.
    Aerobic (Hylomar)  RoomTemperature Vulcanizing  Sometimes called Silicone Sealant  Replaces most gaskets ??????  Forms a rubber seal by absorbing moisture in the air  Sets in about ten minutes Dries in about 2 hours fully cures in 24 hours.  Cure times will vary with Temperature, Humidity, and size of the gap
  • 39.
    Aerobic  Blue isthe most common color but also comes in Black,Gray,Red
  • 40.
    Aerobic  Make surethat it is O2 Sensor safe if used around the engine  Do not use on fuel seals  Clean and dry surface before using  When using around bolt holes go all the way around the hole.
  • 41.
    Thread lockers (loctite) Anaerobic cures after the components are put together  # 242 Able to Remove with hand tools Blue  # 271 Hard to Remove may require heat Red  # 290 Wicking Grade for Preassembled Parts Green  # could be different due to size of bottle
  • 42.
    Blue Thread lockers Medium Strength for all bolts 6mm or larger  Able to Remove with hand tools  Prevents parts from loosening from vibration  Protects threads from corrosion  Applied BEFORE Assembly
  • 43.
    Red Thread lockers High Strength Hard to Remove  Works well for studs and press fit  Locks against heavy vibration  Requires extra effort to remove or special tools like heat  Applied BEFORE Assembly
  • 44.
    Green Thread lockers Wicking Grade for Pre-assembled Parts  Use on Calibration and adjustment screws  Applied AFTER Assembly  There is also a Green High Strength for sleeves
  • 45.
    Thread / PipeSealant  Thread Sealant for metal tapered pipe threads and fittings replaces PTFE tape
  • 46.
    PTFE Tape  PolyTetra Flouro Ethylene  Prevents leaks Just wrap tape around threads
  • 47.
    O-Rings  O-rings comein many sections.  Some have specific design uses  Can be made of Nitrile, Viton, Silicon Ect:
  • 48.
    O-Rings  O-Rings comein several shapes an O being the most common but you can find others in D shape, Square-ring and a modified X.  O-Rings also come in different types of materials make sure what you are using is compatible with the fluid it is next to.