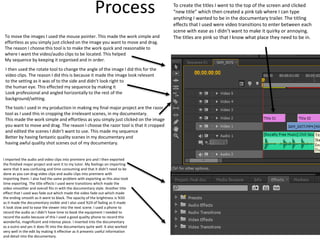
2. Process
The tools I used to crop out the images from the internet, are located on the bottom of the page which was the first tool
I used and was called the “lasso tool”. I used the lasso tool to crop the images. I then went around the image and got rid
of the irreverent background of bear Grllys and used the most appealing aspects of the image to gather more
customers/audience. I used this tool because it simple let me choose what parts I didn’t need/want. This helped save
time and patience by using the lasso tool. I then used the blending option to change and adapt the text to my needs. I
used this tool because it gave me multiple tools to use on my text. This helped by saving time and choosing the perfect
style for my poster. Another tool I used was the mouse pointer to move the objects/images into the right place, this was
simple and easy to do however it did auto lock on to different angles and shifting to the right or left when trying to fit
the image/objects in the place I wanted. This helped by saving time and choosing the perfect style for my poster. The
process what a bit delicate and time consuming as I had to edit every single image to my liking. Therefore It would be
great if there was a easy text editor such as InDesign. I then decided to give the text a bit of fabulous colouring and
styling. Therefore grabbing the customers/audiences attention, therefore getting audience interested in the survival
poster.
The process that I went through to create this poster are selecting the right images such as appealing images to grab the
audiences attention as the Bear Grllys image is interesting and mysterious to the customer. I then changed the size of
the image to my needs as I had to get the right placement to show of the famous survivalist. I then found a logo which
hosts Bear Grllys which is discovery channel as this popular and noticeable among a lot of people. I then cropped the
discovery channel logo as it wouldn’t give a smooth look to the survival poster. I then moved it and changed the shape
of the logo. I then needed a quote to sell this poster to the audience, by describing the show as a “must watch
documentary”. Therefore this will intrigue the audience as someone is quoting it as a amazing documentary. I then
added in a another logo which I had to change as the background image was interfering with the logo. I did this by
editing the logo with the blending tool to make it stand out from the background. Therefore this will attract customers
as the bright blue imagery lights up the poster. The title has a amazing/fabulous font style to make the poster unique
and interesting as this will gather attention towards the survival poster. I then added a grey box towards the
background as it will also cause attention as its eye catching towards walking customers. Therefore it will widen the
target market as it would gather more people towards the survival type documentary poster.
The poster is advertising a reflexive documentary as they are usually a more personal documentary where the film
maker may do pieces to camera. It also shows their experiences through the journey of the documentary. These types
of documentaries focus on realism and try to show the subject as it happens. So this may mean more raw and uncut
footage than a usual documentary. An example of this type of documentary is Edd Stafford as he makes the
documentary more personal than any others. He does this by keeping to no crew as he is the camera operator. He does
this by talking to the audience on how to survive in the great wild. The audience sometimes can see the behind the
scenes by seeing the equipment he uses around the island/beach. This type of documentary tends to be more
experimental than any other. Some more tools I used to edit that made my poster magnificent is the crop tool as this
effected my poster massively as it made my images smooth and in perfect quality. Another tool that I used is the lasso
tool, this effected my product as it made it. I edited the font as the I wanted it to standout out to the audience and
thought making the title bold with the colour the black did the job nicely. I then edited the banner to fit in with the
background the burning/destruction behind him. Another thing I edited was the discovery channel logo as I needed it to
be small and generally laid out presentable to the audience. I then edited Bear Grylls logo to be blue rather than orange
as I wanted to go down a different path to draw the audience in. The Quantitative data that I have gathered told me
both sides the documentary poster could in. This give me different options to choose from, because of this I could take
aspects of different ideas from the feedback I was given. The Qualitative section of this was time consuming as I had to
gather a lot of feedback on my documentary poster, however I have gathered information that helped me in making the
poster.
3. Process
I shot this footage because it shows how majestic and clean the editing can be. It also shows some scenes unfocused, the reason because of this is that its unique and catches of the eye of people passing by. Which
makes the footage different, therefore it will become more noticeable. The tools I used to edit this footage was the razor tool. I used this to get rid off unwanted footage to make my edited version neat and tidy. The
reason I used this is to make cutting the footage nice and simple to save time and let me choose what parts I didn’t need/want. I then used the speed up tool to create a smooth increase and decrease on what the
viewer should focus on and what not to focus on. This helped by saving time and choosing the perfect speed for my footage. I then used a sudden/smooth transition to show how dramatic yet elegant the footage can
be. I did this by selecting the scene I wanted and double clicked therefore it came up with amazing options where I decided to choose my transitions. The filming was hard as I had to find the right hedges and designs
of trees to fit nicely in the experiment footage. I then edited the footage using premiere pro, which was confusing as it was the updated version and couldn’t remember where the were as the layout was changed, this
resulted in me losing time. I did this by selecting the right tools which were hard to find such as the mouse tool and delete tool, but eventually I found the tools and I then proceed to get rid of unsuitable and not
relevant footage. To move the images I used the mouse pointer. This made the work simple and effortless as you simply just clicked on the image you want to move and drag. The reason I choose this tool is to make
the work quick and reasonable to ware they are located. I then used the rotate tool to change the angle of the image I did this for the video clips. The reason I did this is because it made the image look relevant to the
setting. I choose sharp colours because it gave a sharp and attention grabber towards any customers who notice the documentary trailer. I feel I could improve the design of the spaceships by making a better edge. I
could do this by using the magic wand tool to create a smoother and sharper image that would stand out to the viewer. I imported the audio and video clips into premiere pro and I then exported the finished major
project and sent it to my tutor. My feelings on importing were that it was confusing and time consuming and that it didn’t need to be done as you can drag video clips and audio clips into premiere with importing
them. I also had the same problem with exporting as this also took time exporting. The title effects I used were transitions which made the video smoother and overall fits in with the documentary style. Another title
effect that I used was fade out which made the video fade out which made the ending smooth as it went to black. The opacity of the brightness is %50 as it made the documentary visible and I also used %24 of fading
as it made it look slow and to ease the viewer into the next scene. I used a phone to record the audio as I didn’t have time to book the equipment I needed to record the audio because of this I used a good quality
phone to record this wonderful, magnificent and intense piece. I inserted into the documentary as a outro and yes it does fit into the documentary quite well. It also worked very well in the edit by making it effective
as it presents useful information and detail into the documentary. I edited the videos to be in order from scene 1 to scene 10 from start to finish as the audience wouldn’t be able to understand what's going on. I then
edited in sound effects to create that documentary feel by adding nature music and animal noises to get the audience really interested in my documentary. Another thing I edited was the transitions and effects in this
video. The reason I added in effects and transitions is make the documentary run smoother, as the transitions ease the audience into the next scene. Another part I edited is the movement speed as the video clips
were moving to quick for the human eye to understand what's happening. The solution to sort this problem out is the “speed” tool which lets you choose what sort of movement speed I wanted, in which case I
wanted to slow down the video. For example I turned it down about %40. The qualitative data has helped me, as is easy to present and to the interviewee however you have to expand upon their idea, this can cause
time being lost but it helped my project as I had a lot of information to this magnificent project and shape it into something the audience will like based upon my interview. I also did some Quantitative research which
made it simple as you can get feedback either way, however they can be short answers which hurt my project as I didn't’t get enough information to expand the ideas.
4. Process
The tools I used in my production in making my final major project are the razor
tool as I used this in cropping the irrelevant scenes, in my documentary.
This made the work simple and effortless as you simply just clicked on the image
you want to move and drag. The reason I choose the razor tool is that it cropped
and edited the scenes I didn’t want to use. This made my sequence
Better by having fantastic quality scenes in my documentary and
having awful quality shot scenes out of my documentary.
To move the images I used the mouse pointer. This made the work simple and
effortless as you simply just clicked on the image you want to move and drag.
The reason I choose this tool is to make the work quick and reasonable to
where I want the video/audio clips to be located. This helped
My sequence by keeping it organised and in order.
I then used the rotate tool to change the angle of the image I did this for the
video clips. The reason I did this is because it made the image look relevant
to the setting as it was of to the side and didn’t look right to
the human eye. This effected my sequence by making it
Look professional and angled horizontally to the rest of the
background/setting.
I imported the audio and video clips into premiere pro and I then exported
the finished major project and sent it to my tutor. My feelings on importing
were that it was confusing and time consuming and that it didn’t need to be
done as you can drag video clips and audio clips into premiere with
importing them. I also had the same problem with exporting as this also took
time exporting. The title effects I used were transitions which made the
video smoother and overall fits in with the documentary style. Another title
effect that I used was fade out which made the video fade out which made
the ending smooth as it went to black. The opacity of the brightness is %50
as it made the documentary visible and I also used %24 of fading as it made
it look slow and to ease the viewer into the next scene. I used a phone to
record the audio as I didn’t have time to book the equipment I needed to
record the audio because of this I used a good quality phone to record this
wonderful, magnificent and intense piece. I inserted into the documentary
as a outro and yes it does fit into the documentary quite well. It also worked
very well in the edit by making it effective as it presents useful information
and detail into the documentary.
To create the titles I went to the top of the screen and clicked
“new title” which then created a pink tab where I can type
anything I wanted to be in the documentary trailer. The titling
effects that I used were video transitions to enter between each
scene with ease as I didn’t want to make it quirky or annoying.
The titles are pink so that I know what place they need to be in.
5. Reflection
• What elements of your experiments will you include in your final product?
– I will include narration in my final product because it will describe information to the viewer
so therefore it will make the documentary more understandable for the viewer.
– I will include effects in my final product such as making the screen with a slight green tinge. I
will do this because it will make the viewer feel as if they are in the documentary and as if
there surviving with the host as the nature is green.
– I will use premiere in my final product to edit the video such as editing the film with premiere
and editing out the scenes I don’t want in my documentary. I will do this because It will make
the viewer interested in my documentary by adding the most interesting scenes, therefore the
viewer will be fully focused on my documentary.
– I will include the background music as it was smooth and enjoyable listen to, as it will stop
awkward pauses and background noise from interrupting the survival documentary.
My audience stated that to achieve an outstanding documentary trailer I need to address the
audience with a survival tip and ease them into the documentary trailer to give them a taste of
what to aspect when seeing the survival documentary.
Plan:
My trailer will include narration, effects and I will premiere to edit my product. The trailer will be
about surviving in the wild and filming potential threats such as snakes e.g. Adders. The trailer will
grab the readers attention and want them to know more.
Editor's Notes
Discuss the tools and processes used in your experiments