
Recommended
More Related Content
What's hot
What's hot (20)
Viewers also liked
Viewers also liked (20)
Similar to How Did You Use Media Technologies In Your Construction, Research and Evaluation Stages?
Similar to How Did You Use Media Technologies In Your Construction, Research and Evaluation Stages? (20)
Recently uploaded
Recently uploaded (20)
How Did You Use Media Technologies In Your Construction, Research and Evaluation Stages?
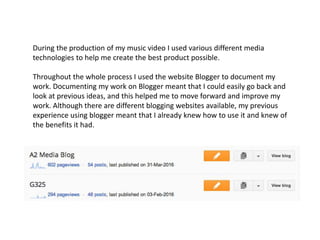
- 1. During the production of my music video I used various different media technologies to help me create the best product possible. Throughout the whole process I used the website Blogger to document my work. Documenting my work on Blogger meant that I could easily go back and look at previous ideas, and this helped me to move forward and improve my work. Although there are different blogging websites available, my previous experience using blogger meant that I already knew how to use it and knew of the benefits it had.
- 2. Before I started to create my music video, my group and I thought it would be beneficial to us if we created a prelim video. This allowed us to experiment with different technologies and gain experience. We used iMovie to create the video, and quickly learned that there was a lot to learn. We learned how to speed clips up and cut clips and this allowed us to make a quick prelim video to get us use to the program. During the process of creating our prelim, we used three different cameras. A cannon, iPhone 5 camera and a camera from the Library. We noticed there was a huge difference in quality between them all, and therefore decided it was vital to use the Cannon, as this had the best quality and ultimately made our video look more professional.
- 3. During the process of planning and creating our music video we used the search engine Google. This meant we could find inspiration and learn how to develop our iMovie skills further. Another website that greatly helped my group and I was YouTube. We were able to watch videos that taught us how to add effects to our video. For example, we learned how to add an overlay effect, and I then used this effect during the creation of my digi-pack.
- 4. The main program that we used was iMovie. We ended up with over an hour of video footage, and iMovie allowed us to cut this down so that our footage fit perfectly with the chosen song. iMovie also allowed us to add our chosen music video over the top of the video, which meant it was easy to create a final product with both the music and footage perfectly in time. Another great factor about iMovie was how it allowed us to change the speed of our clips. For example, this meant that when the tempo of the song changed, we were able to change the tempo of our video footage in order for it to flow well.
- 5. After the success of using Google to research for my music video, I decided to use Google again to find information and inspiration when starting the creation of my digi-pack. I got images of professional posters and used these as an example when creating my own poster. Google also allowed me to quickly find measurements for the digi-pack, as they had to be the perfect size.
- 6. Photoshop was very helpful after taking my photographs. I uploaded the photographs of my models onto Photoshop, and from there was able to use a lasso tool, and the magnetic lasso tool to cut out my models. Cutting out my models meant that I could remove the background, and then paste my new images of my models onto my product. For example I was able to remove the background from my model images, and then paste them onto my poster. This left a clean product.
- 7. I started creating my CD cover and disc on Photoshop, however I discovered a program called InDesign. InDesign has various templates that I could work from, and this helped with the basic layout. Although InDesign proved harder to use than other programs I had previously used such as Photoshop, it did allow me to create a more professional looking product. I used InDesign for the creation of both my CD disc and CD back cover, as the program made it easier for the products to be the perfect size.
- 8. For the construction of my CD cover, I decided to use Photoshop. My reasoning behind this was that during the creation stage of my Music video I had learned how to overlay images, and the overlay effect was something that I was keen to include on my CD cover. I used Google search engine to make sure that the cover was of the right size, and I am happy with the way that it has tuned out.
- 9. The final program I used was called Pages. Like InDesign, pages had templates that I was able to work from, and had a variety of posters. Although the final product was shown on Pages, I also used Photoshop to edit my images. For example I changed the opacity of my image and made my models blacked out. This was done on Photoshop, and then transferred the image onto Microsoft PowerPoint, and from there onto Pages.