
Recommended
More Related Content
What's hot
What's hot (19)
Similar to Cmp induction project 2019 student fom
Similar to Cmp induction project 2019 student fom (19)
More from bronparsons
More from bronparsons (20)
Recently uploaded
Recently uploaded (20)
Cmp induction project 2019 student fom
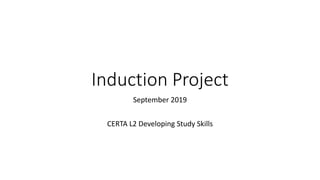
- 1. Induction Project September 2019 CERTA L2 Developing Study Skills
- 2. OP art summary “OP art is short for optical art and is a visual art style that uses optical illusions… OP art works are abstract with many better pieces created in black and white. Usually they give the viewer the impression of movement”-Wikipedia Title/Weblink/Date accessed: https://en.wikipedia.org/wiki/Op_art 2.2 2.3 Movement in squares by Bridget Riley in 1961 Intrinsic Harmony by Richard Anuszkiewicz Byss-Victor Vasarely 1978 The term was first coined at a exhibition in the 1960s but it was created in 1938 by Viktor Vasarely’s painting “Zebra”–Thoughtco Shelley Esaak
- 3. Brigdet Riley • Bridget Riley is a noteworthy OP artist who has moved achromatic to chromatic pieces. She has created OP from its beginning to the present day. –Thoughtco Shelley Esaak • Began painting figure objects in a semi-impressionist manner, then changed to pointillism around 1958 and mainly focused on landscapes. • In 1960 she evoled a style in which she explored the dynamic potentialities of optical phenomera. • An Example of her Art is “fall” (1963) shown below which produces a disorienting physical effect on the eye.-Tate Gallery
- 4. Richard Allen Richard Allen was a britsh minimalist, abstract painter. He worked from 1960 until his death in 1999 • In the early 1960s Richard Allen became involved with op art. A fascination with interferometry Influenced his work. 2.2 2.3 Title/Weblink/Date accessed:
- 5. Victor Vasarely • Frech-Hungarian artist • His piece “Zebra” is considered one the earliest works of op art • Victor worked on OP art from 1929 to 1967 “Zebra” by victor vasarely 1937
- 6. Task 1 – Research – Book source Book title/Author + Library location: 2.2 2.3 • Optical Art: Theory and Practice Rene Parola • Introducing OP art- John Lancaster • OP ART- Frances Follin, Claus Pias, Martina Weinhart However wasn’t able to find any books at College so these are just books I found online.
- 7. Task 2a – Idea Generation [individual] • Black and White Letters next to each other to look similar to the art • Use colours that contrast with each other and quite large front on title • Use images of the art work as the background (could also use the location as a background) • Make sure the background and text stand out from each other though. • Give brief description of the art style and include name of artist in the exhibition
- 8. Task 2a – Idea Generation [group] • Minimalist • Surrealist • Black and white
- 9. Task 2b – Action Plan/Schedule Session Activity Who is responsibile 1 Group tutorial 2 Whole group 3 Planning complete, production start Individual 4 Production -non digital Erin 5 production Individual 6 production inidividual 7 Evaluation, check for errors 3.1 Complete playing
- 10. Task 2b – Action Plan/Schedule 3.1 • Add notes here on how you stuck to your plan/had to change your plan and why I had to reconsider font size so that all the words fit on the poster I to get rid of the summary of op art because there wasn’t enough room and I had to change font colour because the otherwise the writing would be too close together. Used 3D options to make text stand out I used Erin’s drawing of a pin for the non-digital part and put it on the poster I used A4 size when I was making the poster as that is generally the standard size posters that advertise events because they are big enough to stand out but are also quite so they can be pinned up easily.
- 11. Task 2c – Planning 3.2
- 12. Task 4 – Production/Final Products 3.2 3.4 This is the Art exhibition poster Link to my blog is here: https://www.blogger.com/blogger.g?blogID=742426524396 7093997#editor/target=post;postID=4861468060446956761;onPublishedMenu=allpo sts;onClosedMenu=allposts;postNum=0;src=link
- 13. Task 5 – Evaluation – Problem Solving • Describe three problems you faced in your project and how you solved these • 1 I had to make fonts a lot smaller than planned and scrap the summary of OP art otherwise the text wouldn’t have fit on the poster • 2 Due the text being smaller the word were hard to see properly. I fixed this by changing the colour of the font. • 3 The title didn’t standout that much so I made it 3D, warped the text and add an outline 3.3
- 14. Task 5 – Evaluation – Working with others • Choose three aspects of your production where you worked well with your team and this benefited the project • 1 The group members were helpful for instance we helped each other with using the photoshop software. • 2 There wasn’t any arguing or disagreements • 3 Everybody was helpful when we were researching and communicated information well. 1.2b
- 15. Task 5 – Evaluation - Feedback • Discuss the feedback you received from your tutor during the project and how you used this to improve the project 3.5
- 16. Task 5 – Evaluation – Active Engagement • Define active engagement in your studies and briefly explain how you used it in this project 1.2a
- 17. Task 5 – Evaluation Accessing and storing information • Explain where the books/resources are for your area in the LC • Explain how to take a book/resource out of the LC 2.1
- 18. Task 5 – Evaluation Accessing and storing information • Explain where to store electronic information on the college network • Explain where you upload work when it is completed 2.1
- 19. Task 5 – Evaluation Accessing and storing information • Explain where to store electronic information on the college network • Explain where you upload work when it is completed 2.1
- 20. Task 6 - How do you learn best? • Explain some of the ways you think you learn best [refer to the VAK questionnaire results in tutorial]: 1.1
- 21. Task 6 - How do you learn best? • What makes it hard for you to study? • What strategies do you think would benefit your studies? 1.1