1. IT 202 Web Authoring Han Chiang College
Basic HTML tutorial- basic tags
Here is your first script again:
<HTML>
<HEAD>
<TITLE>My first HTML page</TITLE>
</HEAD>
<BODY>
This is my first HTML page.
</BODY>
</HTML>
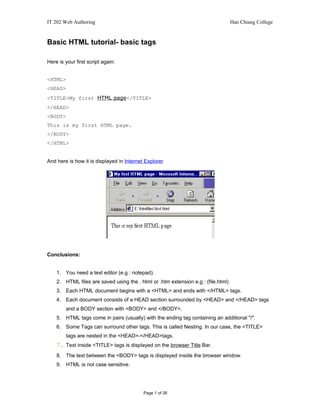
And here is how it is displayed in Internet Explorer
Conclusions:
1. You need a text editor (e.g : notepad).
2. HTML files are saved using the . html or .htm extension e.g : (file.html)
3. Each HTML document begins with a <HTML> and ends with </HTML> tags.
4. Each document consists of a HEAD section surrounded by <HEAD> and </HEAD> tags
and a BODY section with <BODY> and </BODY>.
5. HTML tags come in pairs (usually) with the ending tag containing an additional "/".
6. Some Tags can surround other tags. This is called Nesting. In our case, the <TITLE>
tags are nested in the <HEAD>-</HEAD>tags.
7. Text inside <TITLE> tags is displayed on the browser Title Bar.
8. The text between the <BODY> tags is displayed inside the browser window.
9. HTML is not case sensitive.
Page 1 of 26
2. IT 202 Web Authoring Han Chiang College
Headings
There are six levels of headings in HTML specified by <H1>, <H2>, <H3>, <H4>, <H5> and <H6>
tags.
<HTML>
<HEAD>
<TITLE>My fist HTML page with headings</TITLE>
</HEAD>
<BODY>
<H1>I am heading 1</H1>
<H2>I am heading 2</H2>
<H3>I am heading 3</H3>
<H4>I am heading 4</H4>
<H5>I am heading 5</H5>
<H6>I am heading 6</H6>
</BODY>
</HTML>
The ALIGN attribute
The 'ALIGN' attribute takes one of the four values: LEFT, RIGHT, CENTER, or JUSTIFY.
<H3 align="left">I am aligned to the left</H3> yields:
I am aligned to the left
<H3 align="right">I am aligned to the right</H3> yields:
I am aligned to the right
<H3 align="center">I am centrally aligned</H3> yields:
I am centrally aligned
Page 2 of 26
3. IT 202 Web Authoring Han Chiang College
HTML Comment Tags
The starting comment tag is <!-- (that's the 'lesser than' sign followed by an exclamation mark
and two dashes) and the ending tag is -->. The browser does not display any text placed between
these tags.
<HTML>
<HEAD>
<TITLE>Testing Comment tags in HTMLs</TITLE>
</HEAD>
<BODY>
I am visible.
<!-- I am not displayed by the browser -->
</BODY>
</HTML>
Your comments can span multiple lines as in:
<!--
This comment
spans multiple lines
making the code easy to read
after a few months.
-->
Comment tags are invaluable if you work (or are planning to work) in a group. Your colleagues
will be able to understand and decipher your code faster if you have used comment tags
judiciously.
Page 3 of 26
4. IT 202 Web Authoring Han Chiang College
The <BR> (break) Tag
Let's try out an experiment. Open Notepad and type in the following code exactly as I have
written. Check the results in a browser.
Without <br> tag:
<HTML>
<HEAD>
<TITLE>Testing the BR tag</TITLE>
</HEAD>
<BODY>
This is a long piece of text consisting of three [ENTER]
sentences and shows you the functions of the [ENTER]
Line Break tag. This tag is used quite frequently [ENTER]
to add line breaks in the HTML code. It is also used [ENTER]
to add blank lines to a document.
</BODY>
</HTML>
Note : [ENTER] use the ENTER key on your keyboard.
With <br> tag
<HTML>
<HEAD>
<TITLE>Testing the BR tag</TITLE>
</HEAD>
<BODY>
This is a long piece of text consisting of three<BR>
sentences and shows you the functions of the<BR>
Line Break tag. This tag is used quite frequently<BR>
to add line breaks in the HTML code. It is also used<BR>
to add blank lines to a document.<BR>
</BODY>
</HTML>
Page 4 of 26
5. IT 202 Web Authoring Han Chiang College
The <BR> tag has no end tag because it doesn't need too. Just the presence of <BR> adds a line
break.
The opposite of the <BR> tag is the <NOBR> tag. It has an ending </NOBR> tag. Text placed
between these tags will be displayed in a single line, which might result in horizontal scrolling if
the text too is long. Try this out with the following code.
<HTML>
<HEAD>
<TITLE>Testing the BR tag</TITLE>
</HEAD>
<BODY>
<NOBR>
This is a long piece of text consisting of three
sentences and shows you the functions of the
NOBR tag. This tag is causes the text between it
to be displayed in a single line and will result
in horizontal scrolling in the browser if the text
is too long and continues and continues and continues
and continues and continues and continues and continues
and continues and continues and continues and continues
and continues and continues and continues and continues
and continues and continues and continues and continues
and continues and continues and continues and continues
and continues and continues and continues and continues
and continues and continues and continues and continues
and finally ends here.
</NOBR>
</BODY>
</HTML>
Page 5 of 26
6. IT 202 Web Authoring Han Chiang College
Physical Tags
There are 10 physical tags each requiring a closing tag:
• <I> Italics: I am in italics
• <B> Bold: I am in bold
• <U> Underline: I am underlined
• <STRIKE> Strikethrough: I am struck!
superscript
• <SUP> Superscript: My
• <SUB> Subscript: My subscript
• <TT> Typewriter: I am in typewriter form
• <BIG> Bigger font: I am bigger
• <SMALL> Smaller font: I am smaller
• <S> Strikethrough alternative: I am also struck!
Example:
<HTML>
<HEAD>
<TITLE>Physical Tags</TITLE>
</HEAD>
<BODY>
<I>Text in Italics</I>
<BR><BR>
<B>Text in Bold</B>
<BR><BR>
<U>Underlined Text</U>
<BR><BR>
<STRIKE>Text Struck-through</STRIKE>
<BR><BR>
Text with <SUP>Superscript</SUP>
<BR><BR>
Text with <SUB>Subscript</SUB>
<BR><BR>
<TT>Typewriter Text</TT>
<BR><BR>
<BIG>Bigger text</BIG>
Page 6 of 26
7. IT 202 Web Authoring Han Chiang College
<BR><BR>
<SMALL>Smaller text</SMALL>
<BR><BR>
<S>Text Struck-through</S>
<BR><BR>
<U><B>Bold and Underlined</B></U>
<BR><BR>
<I><U><B>Bold, Underlined and in Italics</B></U></I>
</BODY>
</HTML>
The <HR> Tag
To separate blocks of text in a document you can use the simple but useful <HR> tag, which puts
a straight line across the page. There is no ending tag for the horizontal rule. The very inclusion
of <HR> introduces the separating line.
Some important points to remember when using this tag:
• The browser starts the horizontal rule from a new line and any text after this tag is also
displayed on a new line.
• The browser introduces some space before and after this tag.
An <HR> tag without any attributes introduces a separator that looks like the one below.
You can change the length, width, size, color and alignment of the horizontal rule using various
attributes. Lets examine them.
Page 7 of 26
8. IT 202 Web Authoring Han Chiang College
WIDTH Attribute
This attribute defines the length of the rule. A value is required for this attribute. This value can be
expressed in pixel numbers or percentage, which determines the length based on the width of the
browser window.
<HR width="50"> presents a rule which is 50 pixels in length as:
<HR width="70%"> specifies that the length of the rule should be 70% of the page's width as:
SIZE Attribute
The SIZE defines the thickness of the horizontal rule. You can change the thickness by specifying
the number of pixels with the value.
<HR SIZE="1">: 1 pixel thick.
<HR SIZE="8">: 8 pixels thick.
<HR SIZE="30">: 30 pixels thick.
ALIGN Attribute
You can align horizontal rules using one of the three values for ALIGN attribute, "CENTER",
Page 8 of 26
9. IT 202 Web Authoring Han Chiang College
"LEFT", or "RIGHT". The default value for this attribute is "CENTER". This means that if you skip
using this attribute, the horizontal rule will always be centrally aligned.
<HR align="center" width="50%">:
<HR align="left" width="50%">: Aligned to the left.
<HR align="right" width="50%">: Aligned to the right.
NOSHADE Attribute
You would have noticed that the horizontal rules are shaded, they have this 3D kind of effect. If
you don't want this, use the NOSHADE attribute. NOSHADE takes no values.
<HR width="50%" NOSHADE SIZE="5">
<HR width="50%" NOSHADE SIZE="15">
The rendering of rules using NOSHADE differs in Internet Explorer and Netscape Communicator.
Communicator tends to put rounded edges to rules if their thickness is more than 5 pixels.
COLOR Attribute
The COLOR attribute of <HR> is NOT recognized by Netscape Communicator (Communicator
displays the non-shaded rules in a dull gray color only). The attribute takes a hexadecimal color
Page 9 of 26
10. IT 202 Web Authoring Han Chiang College
notation or the name of the color.
<HR COLOR="BLUE" SIZE="4" NOSHADE>: Blue colored rule, 4 pixels in thickness.
<HR COLOR="RED" SIZE="10" width="50%" NOSHADE>: Red colored rule, 10 pixels in
thickness.
Example:
<HTML>
<HEAD>
<TITLE>Horizontal Rules</TITLE>
</HEAD>
<BODY>
Modify the attributes of these horizontal rules.
<BR><BR>
<HR WIDTH="50">
<HR SIZE="3">
<HR ALIGN="RIGHT" WIDTH="50%">
<HR ALIGN="LEFT" COLOR="GREEN" WIDTH="80%">
<HR WIDTH="50%" NOSHADE SIZE="5">
<HR COLOR="RED" SIZE="10" WIDTH="50%">
</BODY>
</HTML>
The Paragraph Tag
The important Attribute of this tag is ALIGN which can take one of the four values; "LEFT",
"RIGHT", "CENTER", "JUSTIFY". LEFT is the default value.
Page 10 of 26
11. IT 202 Web Authoring Han Chiang College
<P> is aligned to the left.</P>
<P align="right"> is aligned to the right.</P>
<P align="center"> is centrally aligned.</P>
<DIV> tag
Enclosing text and other HTML elements inside <DIV> and </DIV> tags divides the document
into sections. It's especially useful with Cascading Style Sheets usage, when a whole section can
adopt a certain formatting style. You can use the ALIGN attribute of this tag to align the text
surrounded by these tags.
<DIV align="left"> aligns elements inside it, to the left.</DIV>
<DIV align="right"> aligns elements inside it, to the right.</DIV>
<DIV align="center"> aligns elements inside it, to the center.</DIV>
<CENTER> tag
According to W3C (the World Wide Web Consortium) the <CENTER> tag is now deprecated and
is to be replaced by <DIV align="center"> but since its use has been prevalent, it does not seem
to be superceded so soon.
<CENTER>Centrally aligns this text</CENTER>
Blockquote
If you wish to introduce some large body of text and make it stand out from the rest, you should
put it between <BLOCKQUOTE> - </BLOCKQUOTE>. The enclosed text will be indented from
Page 11 of 26
12. IT 202 Web Authoring Han Chiang College
the left and right margins and also adds space at the top and bottom quite like this paragraph.
Many web designers have been guilty in the past of placing various HTML elements inside
<BLOCKQUOTE> tags to take advantage of the indenting. This is not a good practice and should
be avoided. A better choice would be to use Style Sheets.
Address
The <Address> - </Address> tag is a logical formatting element. You should use this to include
any addresses. This should NEVER be used for physical layout as it may be rendered differently
by the browsers. Text between these tags looks like:
Johnny Bravo,<BR>
Hubba Hubba Street<BR>
Aaron City<BR>
In Internet Explorer and Netscape Communicator, the text inside <Address> tag is italicized.
Preformatted Text
Text within <PRE> - </PRE> is rendered along with any
spaces, tabs, returns. So there is no need of using the <BR>
tag and I can introduce tabs quite like this or
spaces like this. Text within these tags is displayed
as monospace (Courier Font in Windows). A monospace font
is one in which the width of each character whether its
the wide 'm' or the thin 'i' is equal.
Example:
<HTML>
<HEAD>
<TITLE>Text Controlling Tags Part 1</TITLE>
</HEAD>
Page 12 of 26
13. IT 202 Web Authoring Han Chiang College
<BODY>
<P ALIGN="JUSTIFY">This is some paragraph which has no particular
meaning and has been placed here so that you can modify its contents and
view the results.</P>
<P ALIGN="RIGHT">This is some paragraph which has no particular meaning
and has been placed here so that you can modify its contents and view
the results.</P>
<DIV ALIGN="CENTER">This is some text which has no particular meaning
and has been placed here so that you can modify its contents and view
the results.</DIV>
<CENTER>
Try changing this text
</CENTER>
<BLOCKQUOTE>
See how this looks when placed inside a Blockquote.
</BLOCKQUOTE>
<ADDRESS>
Put your address here.
</ADDRESS>
<PRE>
Tabs, new lines, space are all preserved in this text. Try it out.
</PRE>
</BODY>
</HTML>
<MARQUEE>
The <MARQUEE> tag provides some animated text to the page. Unfortunately, it is supported
Page 13 of 26
14. IT 202 Web Authoring Han Chiang College
only by Internet Explorer (and WebTV). It provides an easy way to put some dynamic text in
otherwise static pages (scripting languages are another story).
Example:
<HTML>
<HEAD>
<TITLE>Text Controlling Tags - Part 2</TITLE>
</HEAD>
<BODY>
<BR><BR>
<MARQUEE DIRECTION="LEFT" BGCOLOR="BLUE" INFINITE WIDTH="400">Scrolling
Text</MARQUEE>
</BODY>
</HTML>
It has many attributes:
• BEHAVIOUR = ALTERNATE, SCROLL OR SLIDE
• BGCOLOR = #RRGGBB (The RGB code, explained in the color session) or Color-Name
such as "Blue", "Green" etc.
• DIRECTION = DOWN, LEFT, RIGHT OR UP
• HEIGHT = in pixels or percentage
• HSPACE = in pixels (the amount of horizontal space left)
• LOOP = number or INFINITE
• SCROLLAMOUNT = in pixels
• SCROLLDELAY = in milliseconds
• TITLE = some advisory text
• TRANSPARENCY = 0 to 100 (number)
• VSPACE = in pixels (amount of vertical space left)
• WIDTH = in pixels or percentage
• and the CLASS, ID and STYLE attributes if you use style sheets
FACE
Page 14 of 26
15. IT 202 Web Authoring Han Chiang College
Face attribute takes the name of the font you want to use. Common fonts on the Windows system
are Verdana, Arial, Times New Roman and Comic Sans MS.
<FONT FACE="Times New Roman">This should be displayed in Times New
Roman</FONT>
<FONT FACE="Arial">This should be displayed in Arial</FONT>
<FONT FACE="Verdana">This should be displayed in Verdana</FONT>
<FONT FACE="Comic Sans MS">This should be displayed in Comic Sans
MS</FONT>
<FONT FACE="Arial, Verdana, Comic Sans MS, Sans-serif">
COLOR
The attribute takes either the hexadecimal color value or just the color name. We shall leave the
(lengthy) discussions on hexadecimal values for later and use color names here. Some common
color names are Blue, Green, Red, Yellow, White, Black, Cyan, Magenta, Pink etc.
<FONT COLOR="RED">Red Text</FONT>
<FONT COLOR="BLUE">Blue Text</FONT>
<FONT COLOR="GREEN">Green Text</FONT>
SIZE
Page 15 of 26
16. IT 202 Web Authoring Han Chiang College
The size attribute takes a number from 1 to 7 as its value with 1 as the smallest and 3 the default.
<FONT SIZE="1">Some Text</FONT>
<FONT SIZE="2">Some Text</FONT>
<FONT SIZE="3">Some Text</FONT>
<FONT SIZE="4">Some Text</FONT>
<FONT SIZE="5">Some Text</FONT>
Also, you can use relative values, + and -, for increasing or decreasing font size relative to the
current size. For increasing relative font size use values +1 to +6 and for decreasing use -1 to -6.
Example:
<HTML>
<HEAD>
<TITLE>Text Controlling Tags - Part 3</TITLE>
</HEAD>
<BODY>
<FONT FACE="Arial">Text in Arial</FONT>
<FONT FACE="Times New Roman">Text in Times New Roman</FONT>
<FONT SIZE="4">Size 4 text</FONT>
<FONT SIZE="2" COLOR="BLUE">Size 2, blue colored text</FONT>
</BODY>
</HTML>
HTML Lists
Page 16 of 26
17. IT 202 Web Authoring Han Chiang College
• <OL> - </OL>: Ordered List
• <UL> - </UL>: Unordered List
• <DL> - </DL>: Definition List
ORDERED LIST
If the ranking of items is desired, we employ ordered lists. To place individual list items, you use
the <LI> tag as
<OL>
<LI>Item One
<LI>Item Two
<LI>Item Three
<LI>Item Four
</OL>
The code above is displayed by the browser as
1. Item One
2. Item Two
3. Item Three
4. Item Four
Numbers are the default bullets in ordered lists but you can change this using the TYPE attribute
of <OL> tag. This attribute takes one of the five values:
• TYPE="a": Lowercase alphabet
• TYPE="A": Uppercase Alphabet
• TYPE="i": Lowercase Roman Numerals
• TYPE="I": Uppercase Roman Numerals
• TYPE="1": Regular number (default)
Thus,
<OL TYPE="A">
Page 17 of 26
18. IT 202 Web Authoring Han Chiang College
<LI>Item One
<LI>Item Two
<LI>Item Three
</OL>
is displayed as
A. Item One
B. Item Two
C. Item Three
UNORDERED LIST
<UL> - </UL> are the starting and ending tags of Unordered lists. List items are included using
the <LI> tag.
Unordered lists also support the TYPE attribute that takes disc, circle or square as its value.
<UL>
<LI>Item One
<LI>Item Two
<LI>Item Three
<LI>Item Four
</UL>
is displayed as
• Item One
• Item Two
• Item Three
• Item Four
Using TYPE="square" on the list above will result in
Item One
Item Two
Page 18 of 26
19. IT 202 Web Authoring Han Chiang College
Item Three
Item Four
DEFINITION LISTS
These lists are great for making glossaries. As you know, a glossary consists of a term and a
definition. For HTML Definition lists, which are enclosed between <DL> and </DL>, you have to
use <DT> to indicate the Term and <DD> to denote the definition.
<DL>
<DT>webdevelopersnotes.com
<DD>A great place to learn web development.
<DT>fontmagic.com
<DD>One of the largest font sites on the Internet.
</DL>
will be shown by the browser as:
webdevelopersnotes.com
A great place to learn web development.
fontmagic.com
One of the largest font sites on the Internet.
Note that the definitions are indented.
Example:
<HTML>
Page 19 of 26
20. IT 202 Web Authoring Han Chiang College
<HEAD>
<TITLE>Logical Tags</TITLE>
</HEAD>
<BODY>
<OL TYPE="A">
<LI>Item One
<LI>Item Two
<LI>Item Three
</OL>
<UL TYPE="square">
<LI>Item One
<LI>Item Two
<LI>Item Three
<LI>Item Four
</UL>
<DL>
<DT>webdevelopersnotes.com
<DD>A great place to learn web development.
<DT>yahoo.com
<DD>A great site to begin surfing the Internet.
</DL>
</BODY>
</HTML>
Creating hyperlinks on web pages
Page 20 of 26
21. IT 202 Web Authoring Han Chiang College
Its code is:
<A HREF="http://www.webdevelopersnotes.com"
TITLE="This takes you to webdevelopersnotes.com's mainpage"
>Homepage</A>
Linking in the same document
Target / Anchor:
<a name = “targetName”>Text</a>
Link:
<A HREF = "#targetName">Click here to go to the top</A>.
How to include images in web pages
The code:
<IMG SRC="pic1.jpg">
Three kinds of images files .gif, .jpg and .png are used on the Internet. The <IMG> tag has
many attributes
• WIDTH: used for specifying the width of the image
• HEIGHT: specifies height
• BORDER: displays a border around the image
• ALT: helps to insert a descriptive text for users using text based browsers or for visitors
with visual disabilities.
• HSPACE: inserts space at the left and right of the image
• VSPACE: inserts space at the top and bottom of the image
• NAME: gives a name to the image; necessary for client-side scripting using JavaScript
• LOWSRC: provides a method through which a low quality alternate of the image is
displayed first before the final one starts to load.
• ALIGN: aligns other HTML elements such as text around the image.
Example:
Page 21 of 26
22. IT 202 Web Authoring Han Chiang College
<IMG SRC="hat.gif" width="150" height="100" border="1" alt="A green
colored hat">
Result:
<IMG SRC="fish.gif" width="160" height="124" align="right">
Result:
<IMG SRC="fish.gif" width="160" height="124" align="left">
Result:
<IMG SRC="fish.gif" width="160" height="124" alt="Fish" hspace="30">
will put 30 pixel space on the left and the right side of the image.
Result:
Page 22 of 26
23. IT 202 Web Authoring Han Chiang College
Creating hyperlinks using images
Text placed between <A> - </A> tags becomes a hot spot providing a link to another document or
to some anchor on the same page.
Images can also be used as hot spots if they are inserted between the anchor tags.
Let's see how this works:
<A HREF="../../index.html"><IMG SRC="backtohome.gif"
WIDTH="150" HEIGHT="30" ALT="Takes you back to homepage"></A>
The anchor tag places a colored border around the image. You can remove this border by
specifying "0" as the value of the BORDER attribute in the <IMG> tag.
<A HREF="../../index.html"><IMG SRC="backtohome.gif"
WIDTH="150" HEIGHT="30" ALT="Takes you back to homepage"
BORDER="0"></A>
Any image, whether .gif, .jpg, .png or animated gif can be made into a hot spot using this
technique.
The <BODY> tag attributes
This session looks at some important attributes of the <BODY> tag. These attributes control the
properties of the document as a whole. Some of these properties are:
Page 23 of 26
24. IT 202 Web Authoring Han Chiang College
• TEXT: specifies color of normal text in a page
• LINK: determines link color
• VLINK: determines color of link that has been visited
• ALINK: specifies color of link when clicked
• BGCOLOR: controls the background color of the document
• BACKGROUND: enables us to use an image as background for the page.
The first five take hexadecimal color code or color name as their value. The last takes the URL of
the image to be used.
TEXT
The color of text which is not surrounded by <A> tags is specified by this attribute. The default is
black (hexadecimal code #000000).
LINK
Link color should be different from normal text color so that visitor recognizes it from its display.
The default color is blue (#0000FF).
VLINK
It is good HTML practice to use a different color for visited links. This informs the visitor that the
page/site has already been seen.
ALINK
This attribute specifies a color that is displayed as long as the mouse button is held pressed. On
release of the mouse button, the link color will be changed to VLINK color. Since a mouse click
takes almost an instant to play, this color is shown only momentarily.
BGCOLOR
Determines the background color of the document. The default is white (#FFFFFF) and you can
change it to any color you want. Be sure to test this, because many a web developer has been
guilty of using background colors that make it difficult to read foreground text.
BACKGROUND
Takes a URL of an image as value and puts this image as the background. Background images
are tiled by browsers.
<BODY TEXT="white" LINK="red" VLINK="yellow" ALINK="green"
BGCOLOR="black">
Example:
Page 24 of 26
25. IT 202 Web Authoring Han Chiang College
<HTML>
<HEAD>
<TITLE>BODY attributes</TITLE>
</HEAD>
<BODY TEXT="white" LINK="red" VLINK="yellow" ALINK="green"
BGCOLOR="black">
I am normal text displayed in white.
<BR><BR>
<A HREF="nowhere.html">Since I am a link, I should be colored red.</A>
<BR><BR>
<A HREF="free_html_the_body_tag_attributes.php3">I should be yellow
which denotes I have been visited.</A>
</BODY>
</HTML>
mailto: enabling emailing on your web site
Using the mailto value along with an email address in the HREF attribute of the anchor tag will
create a link, which when clicked will open the default email client.
Page 25 of 26
26. IT 202 Web Authoring Han Chiang College
<A HREF="mailto:manish@simplygraphix.com">
Send me your feedback on this tutorial</A>
Page 26 of 26