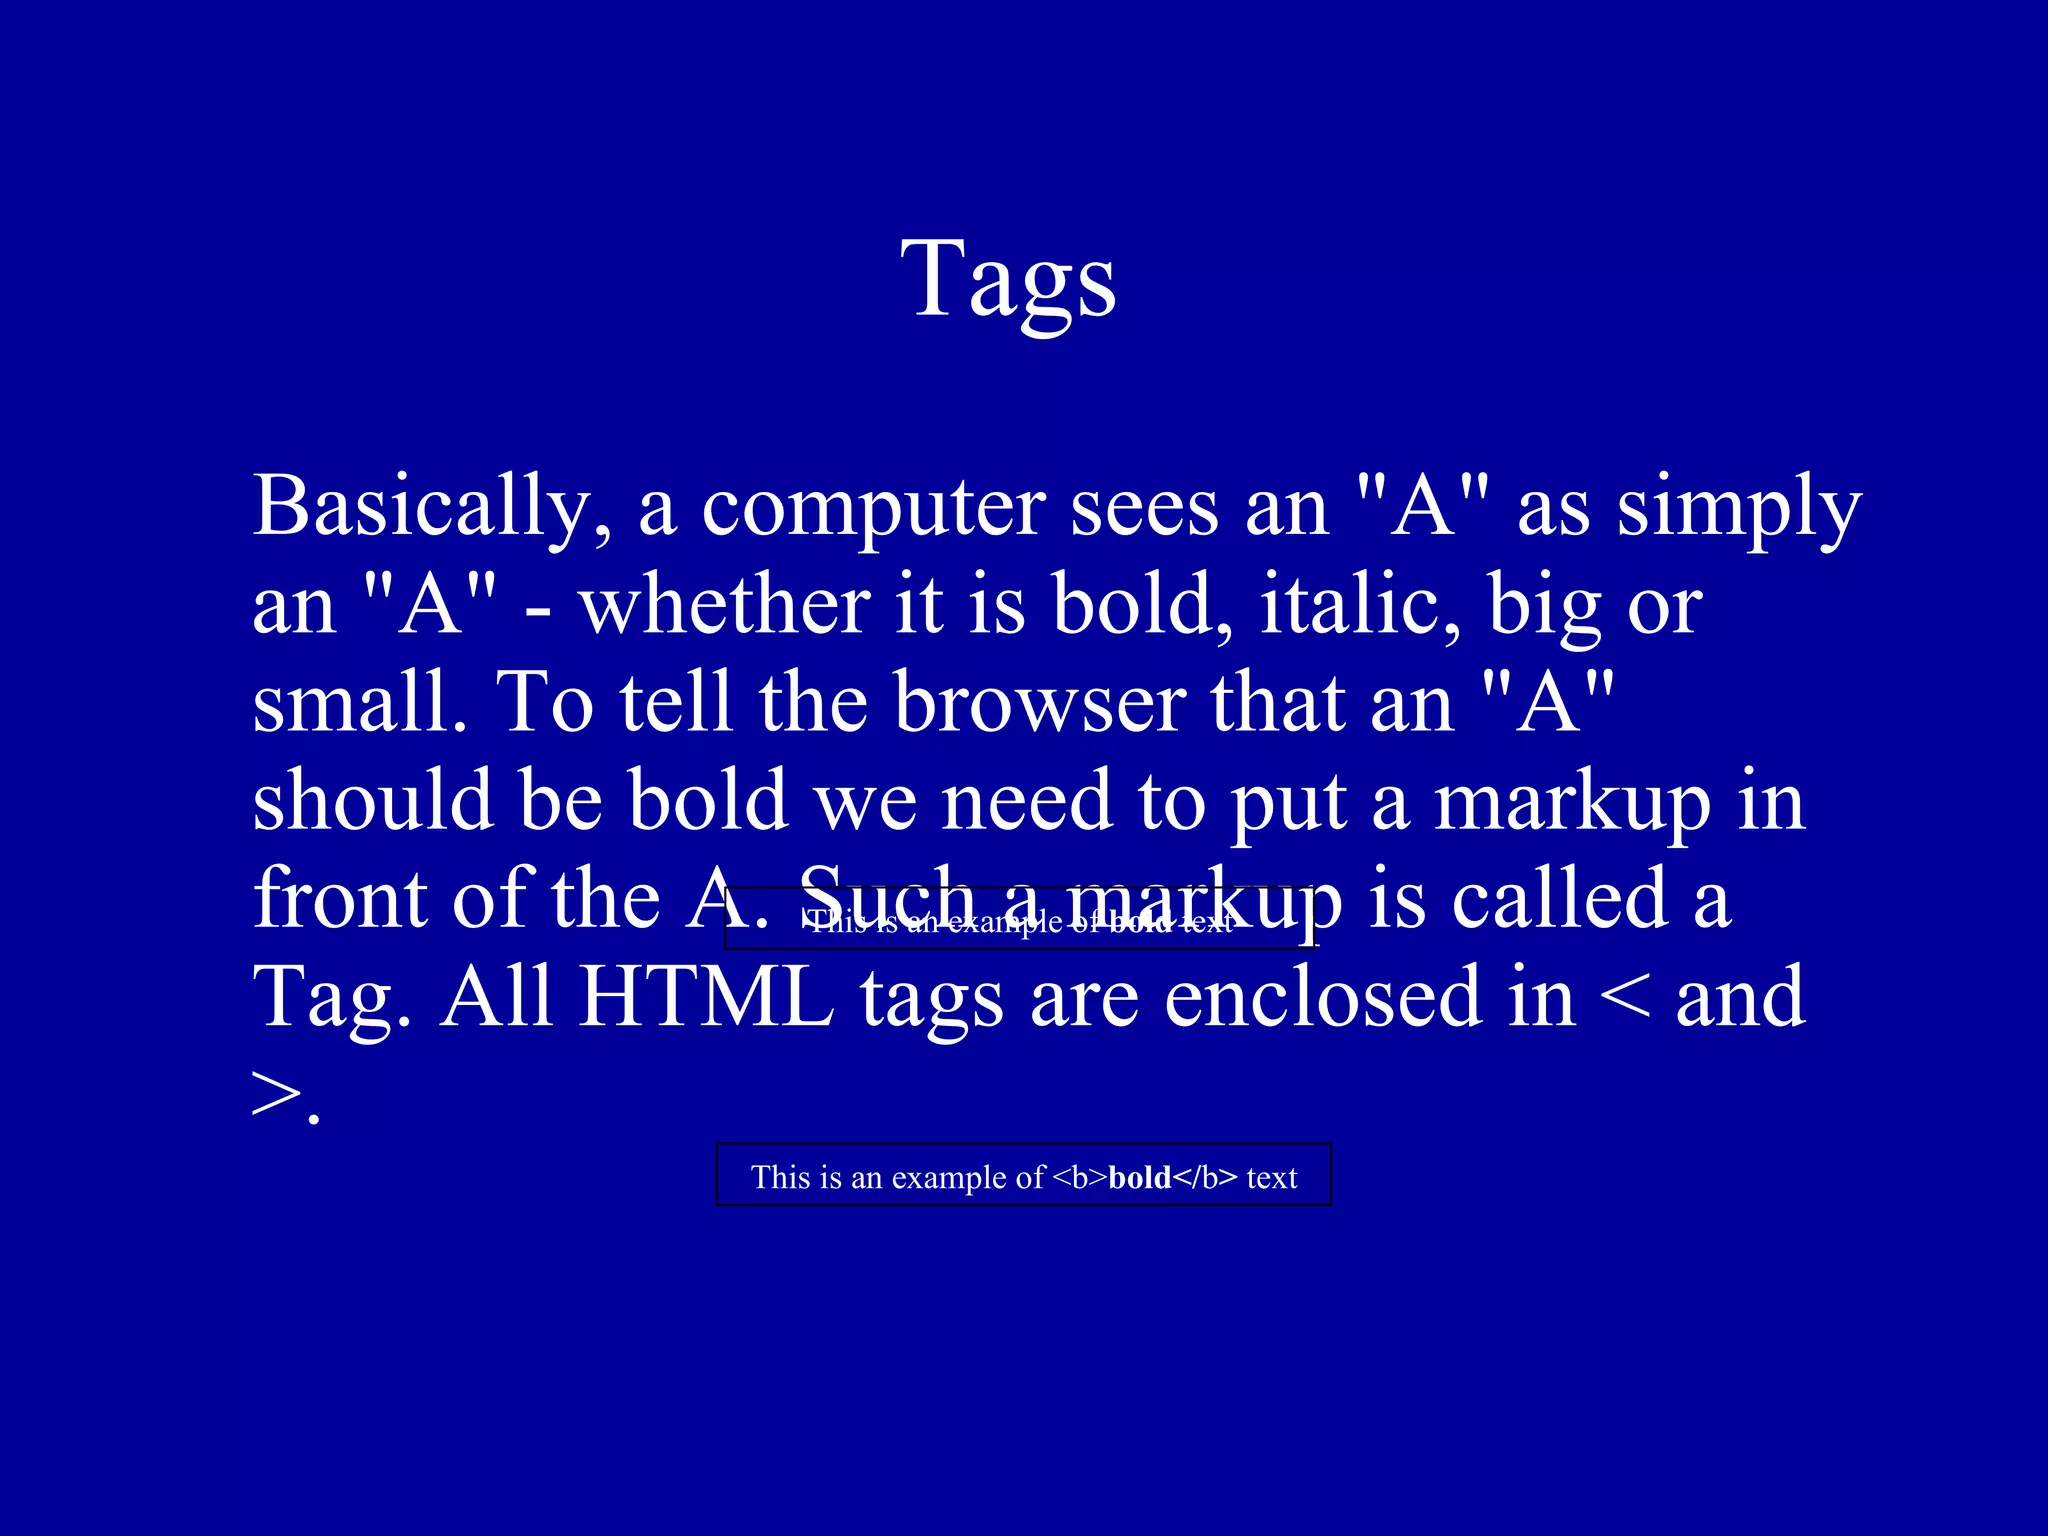
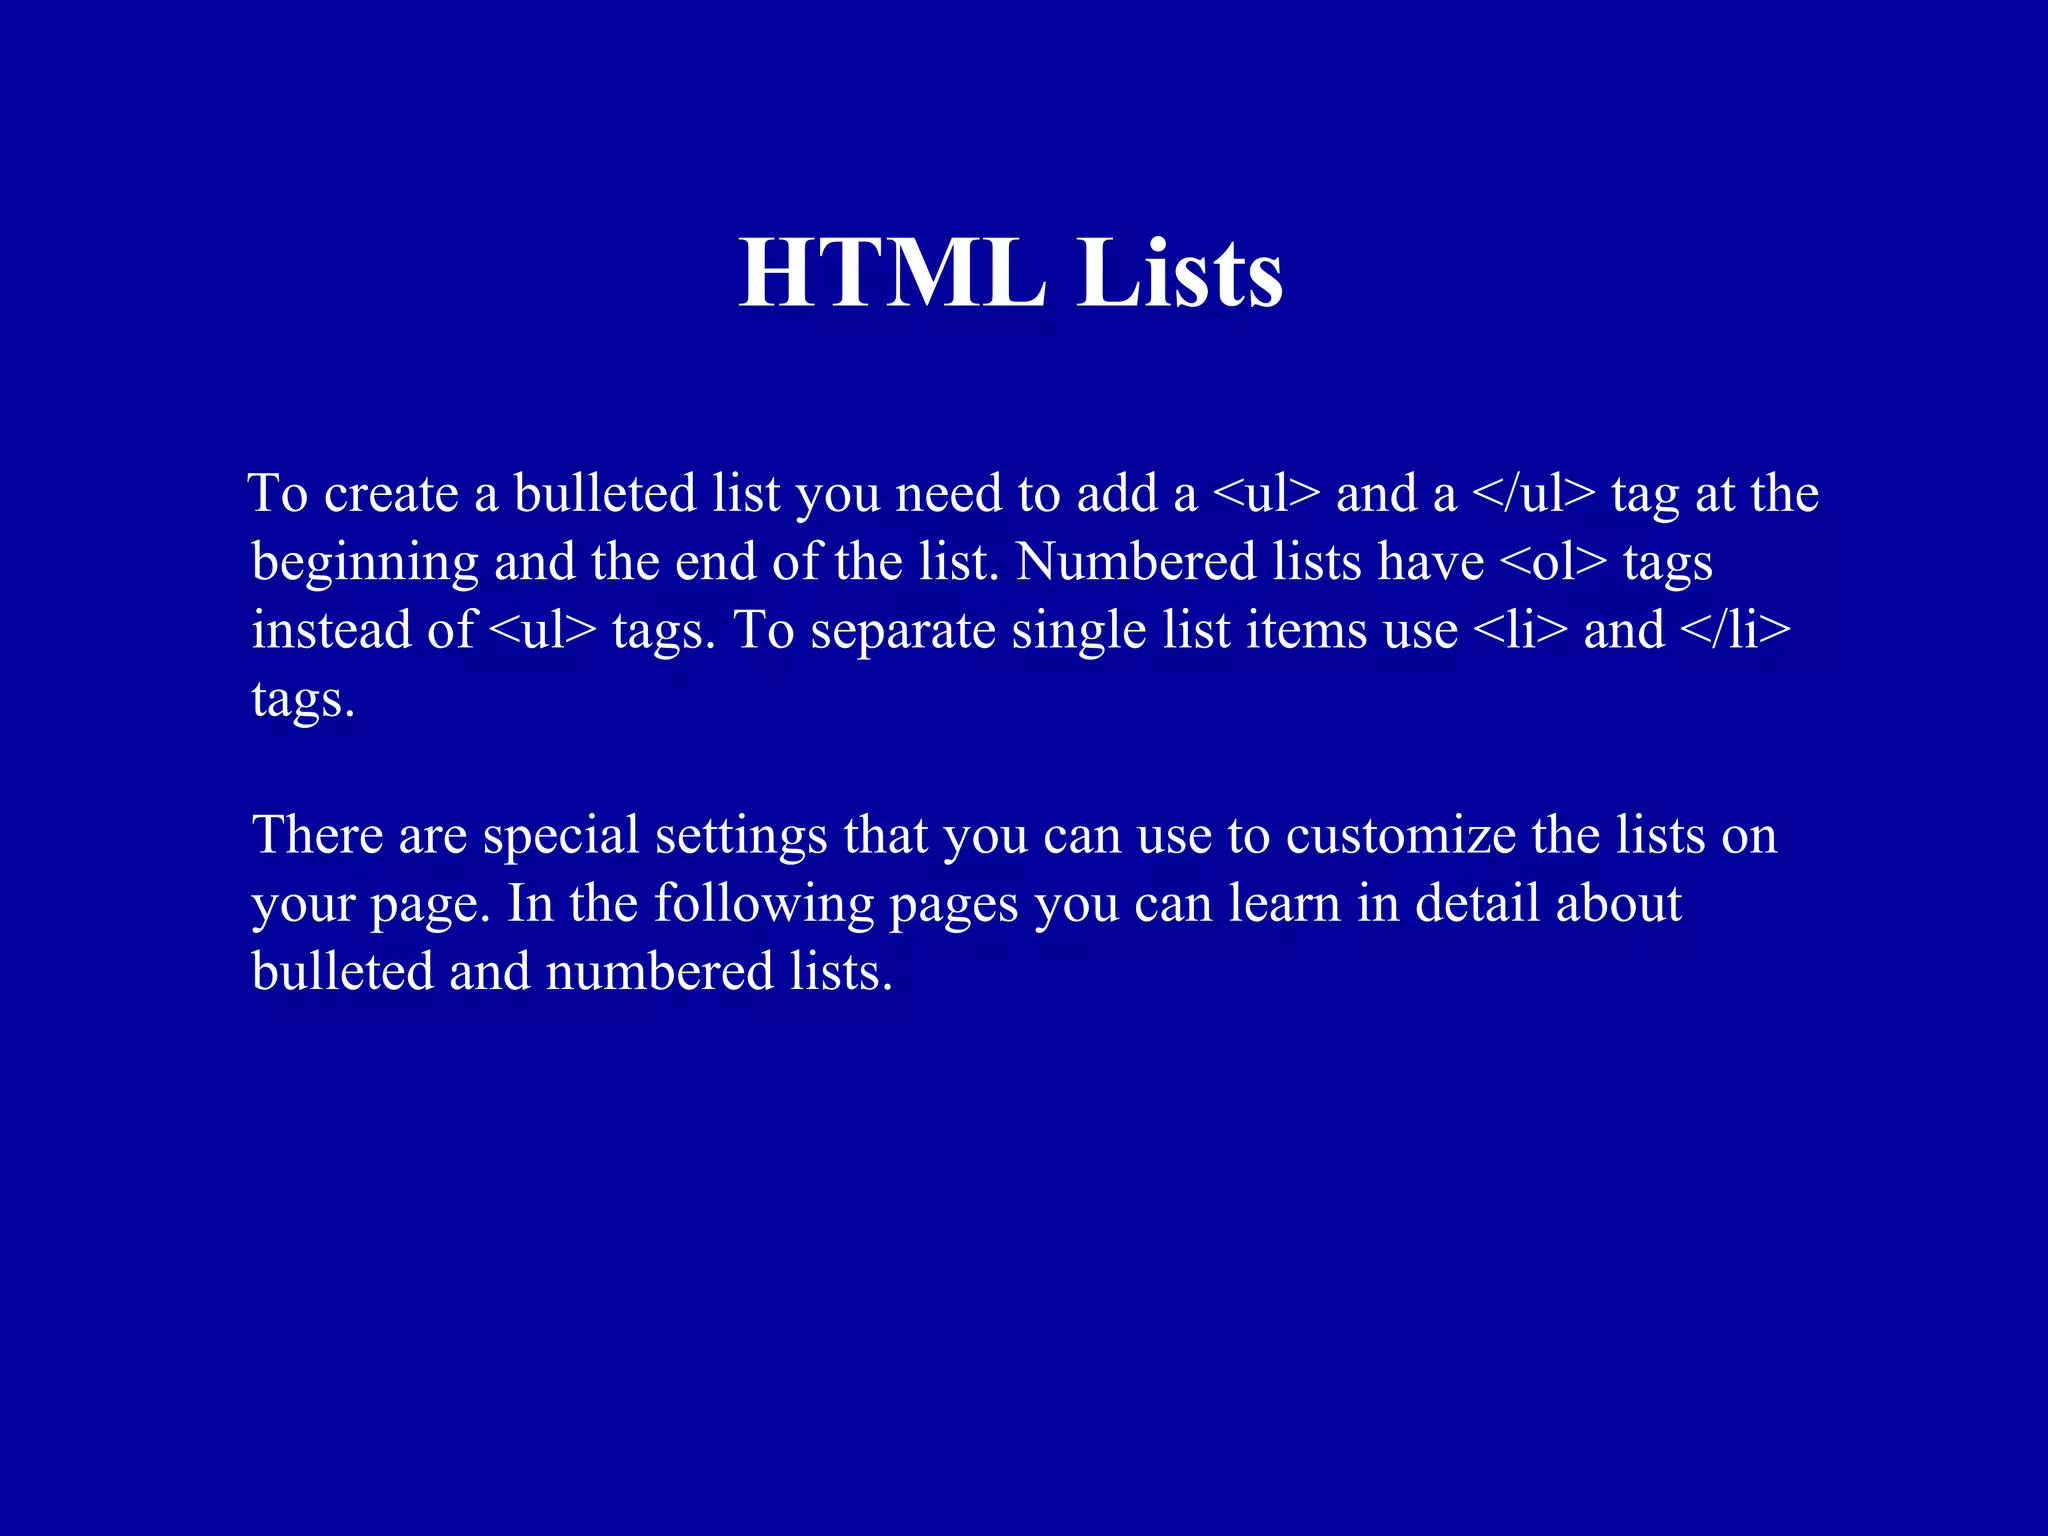
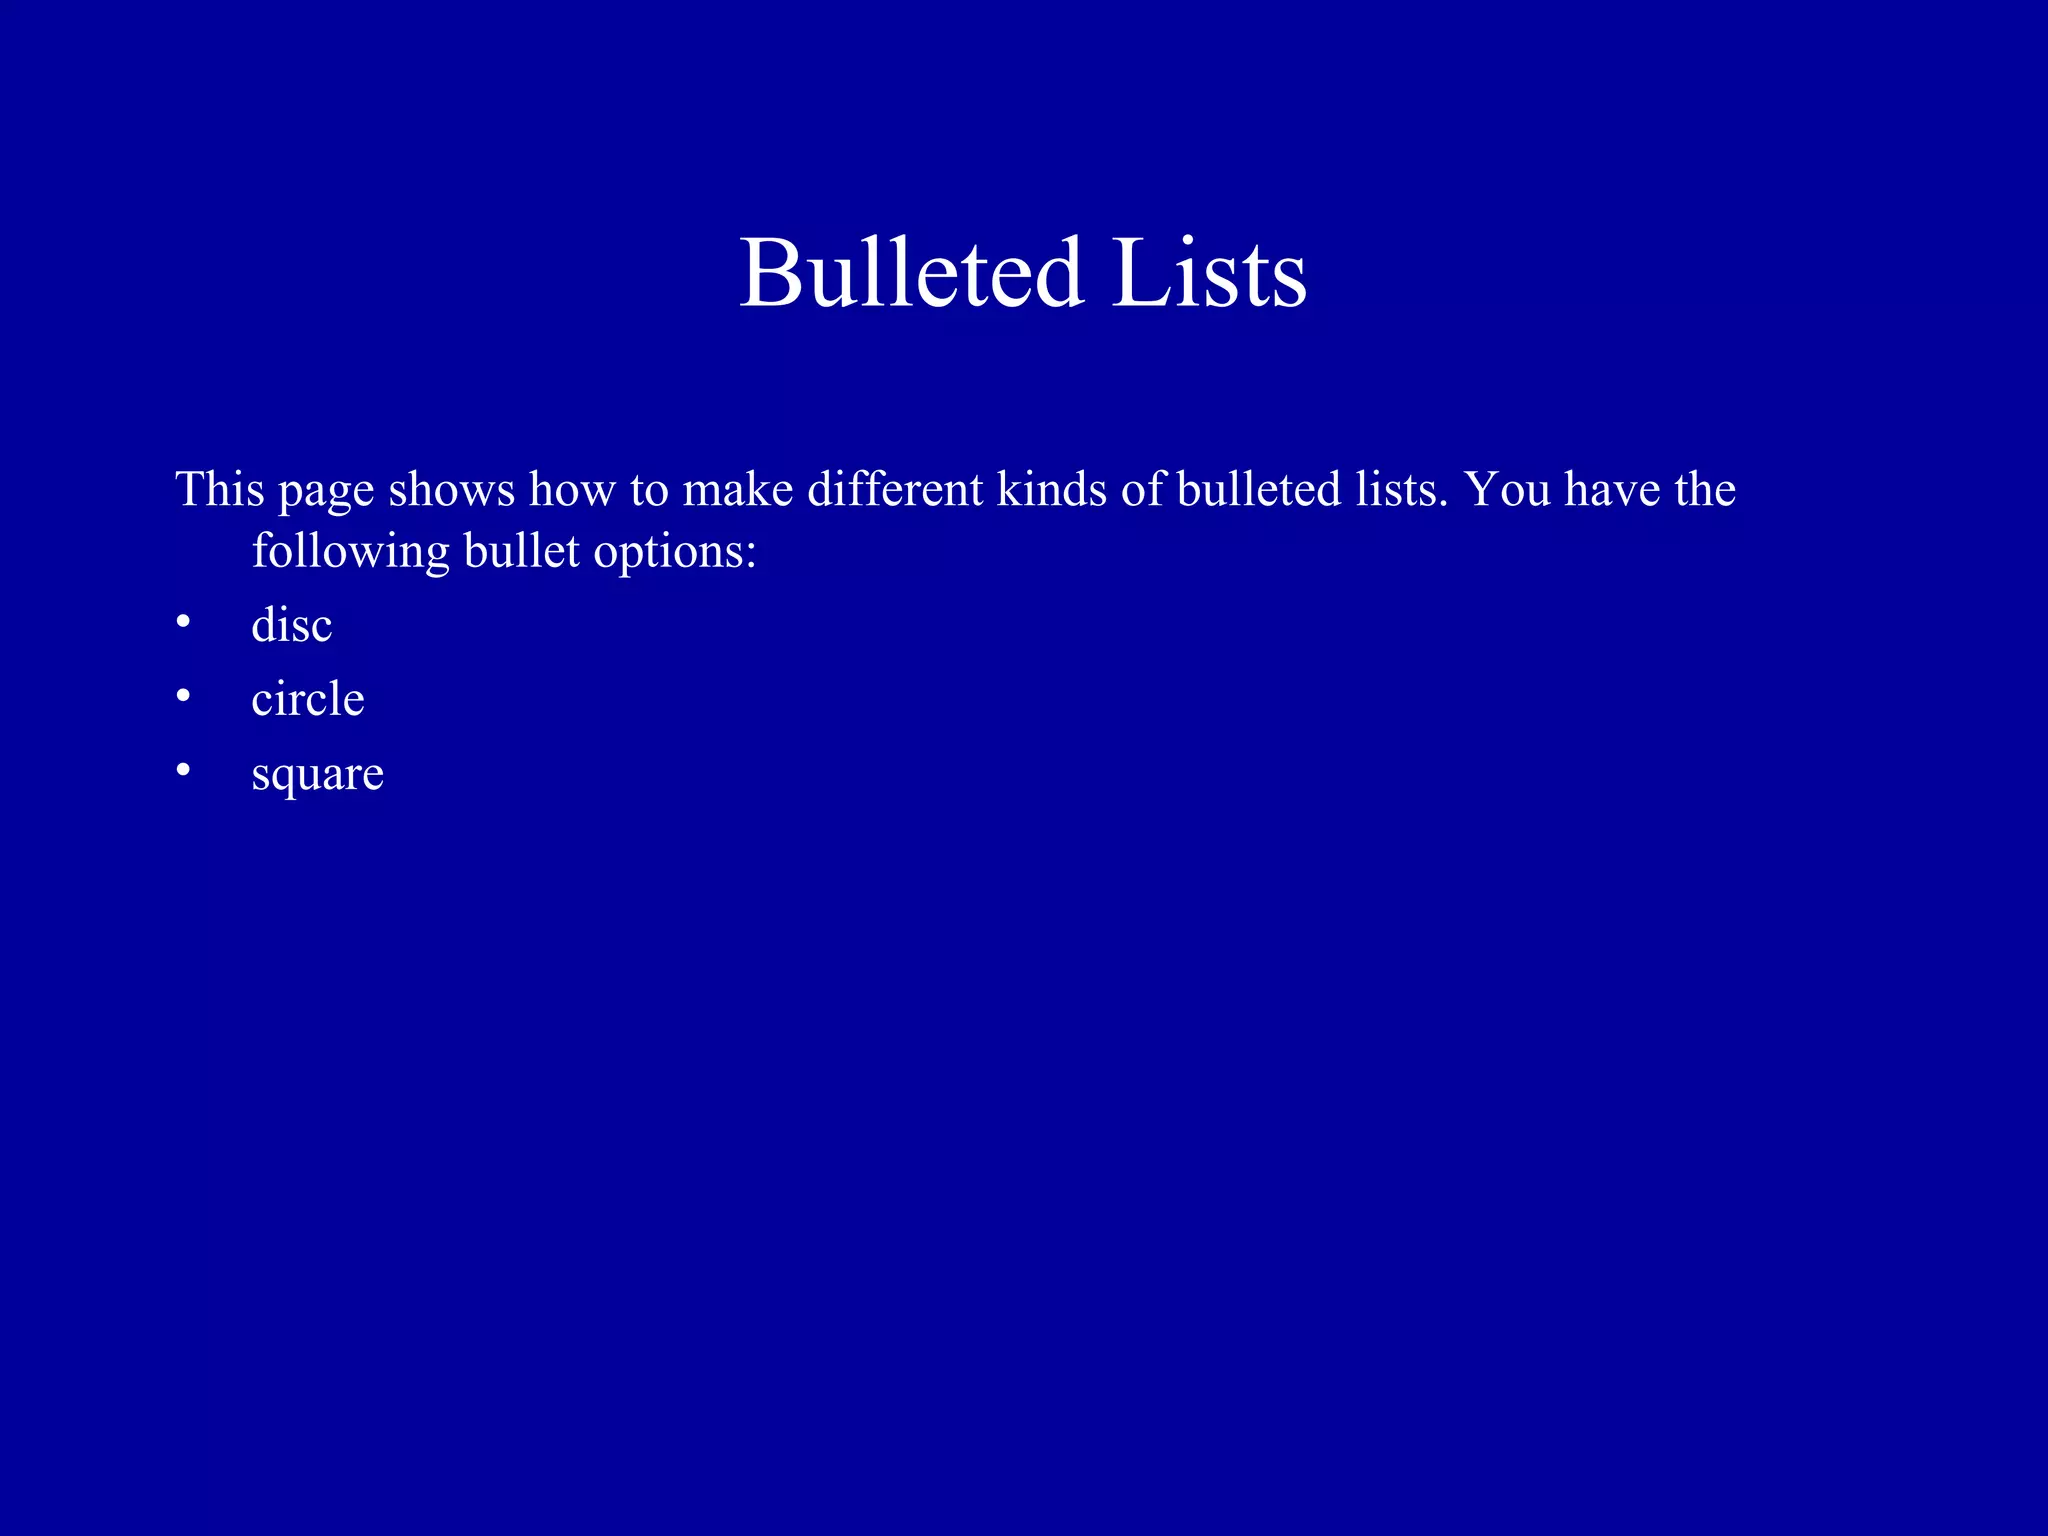
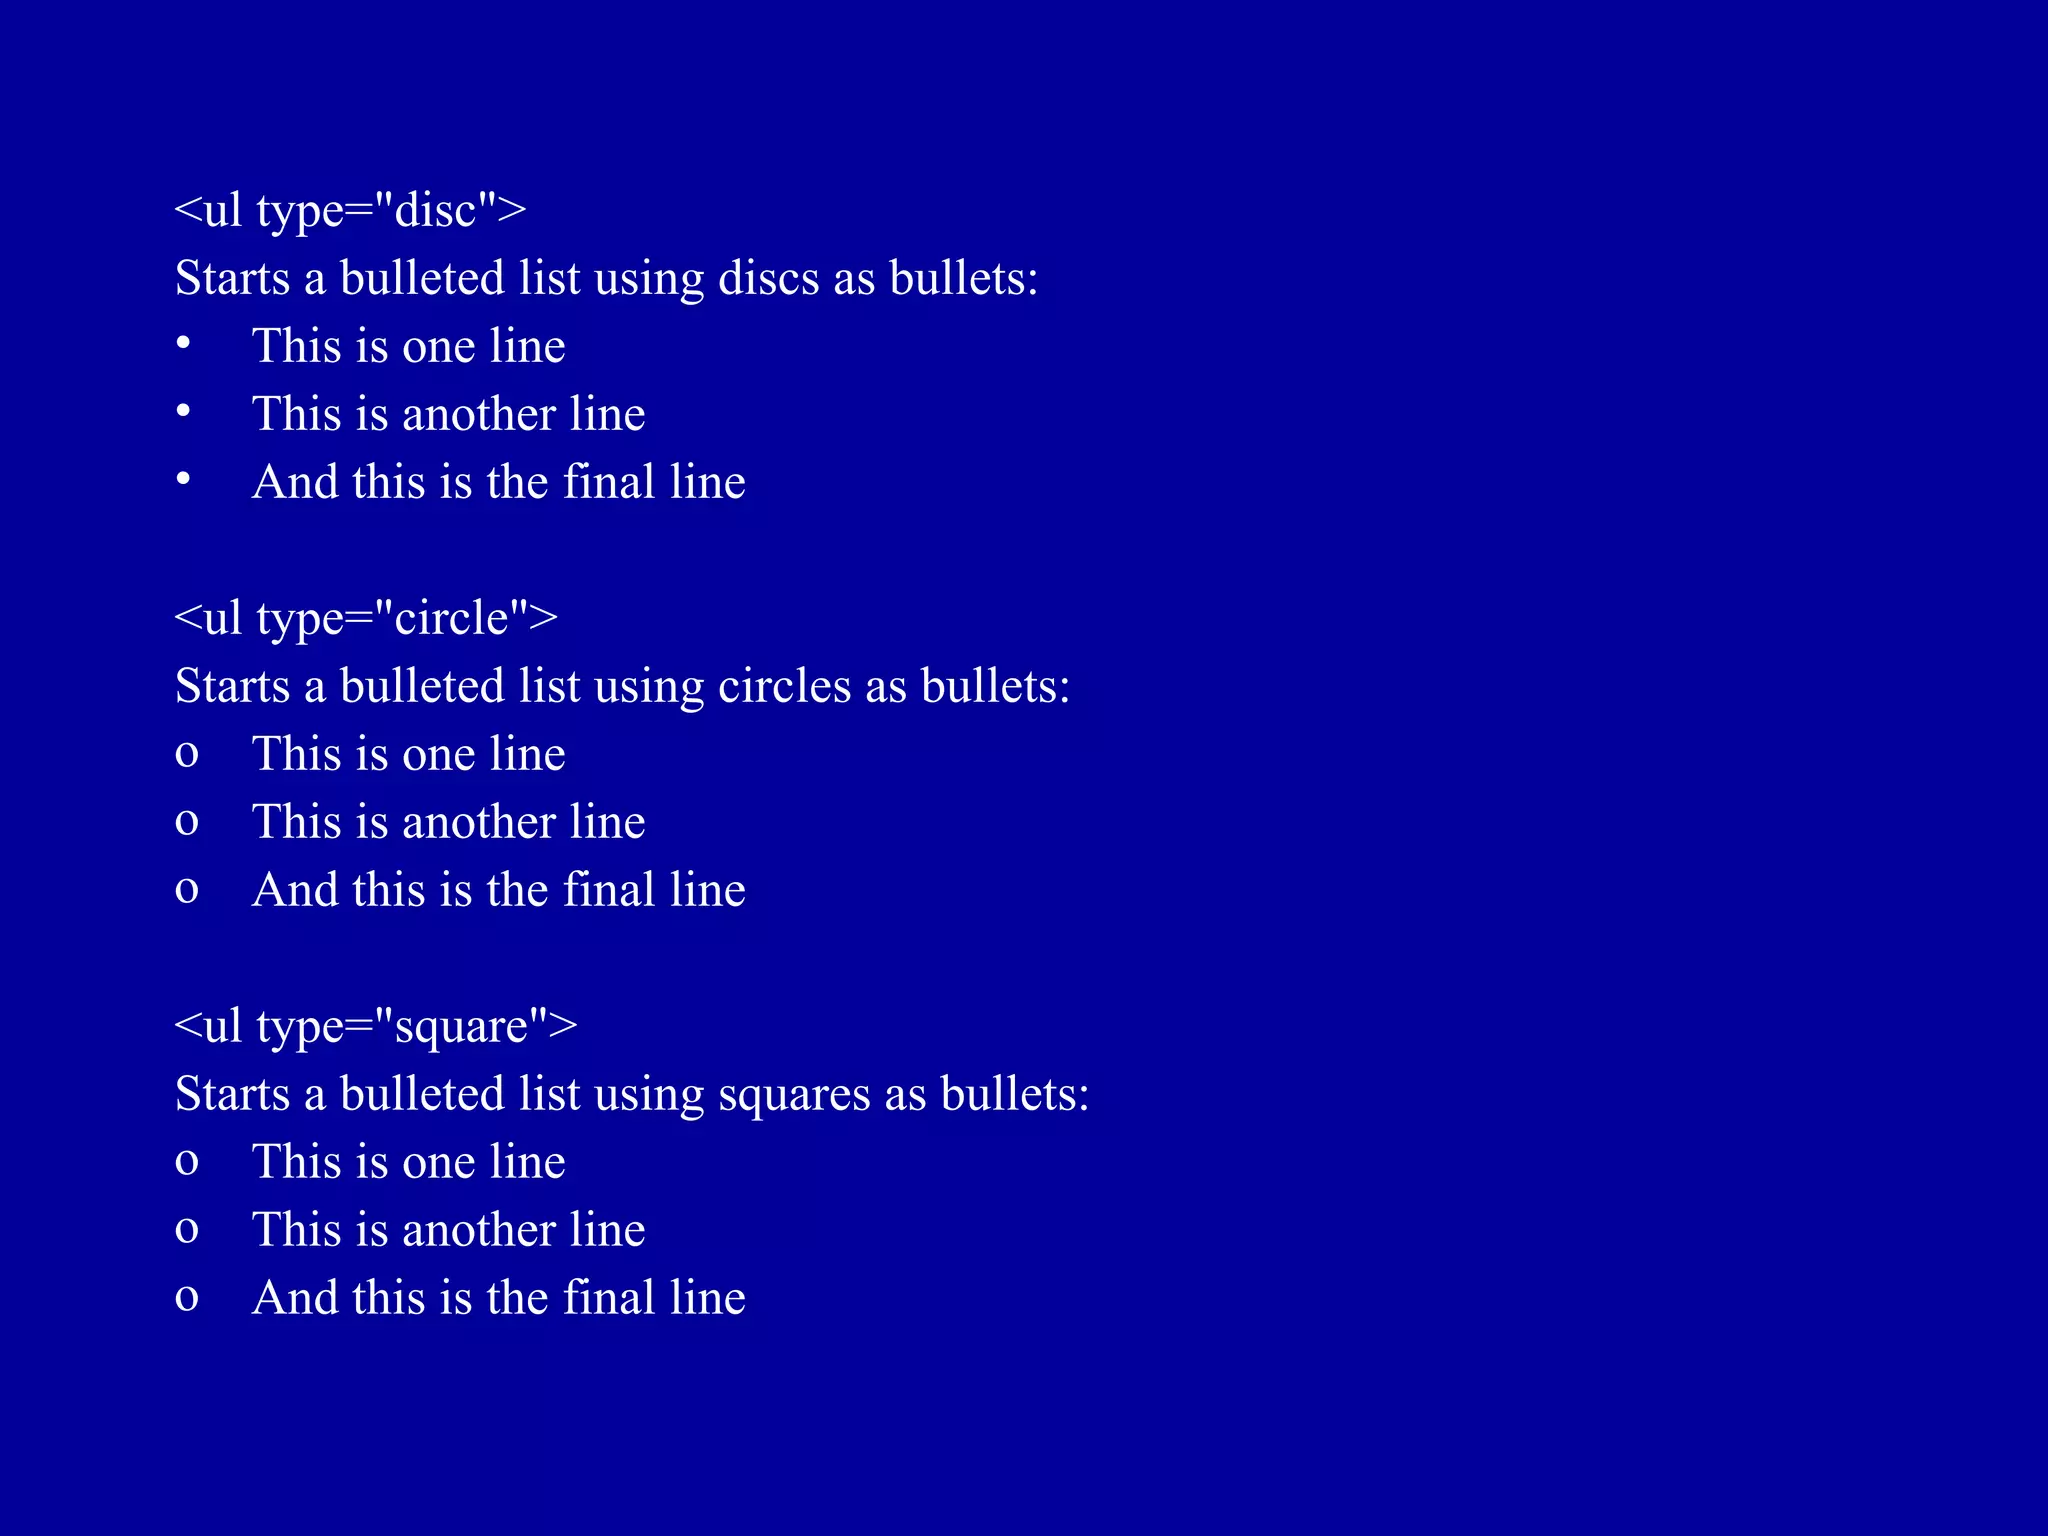
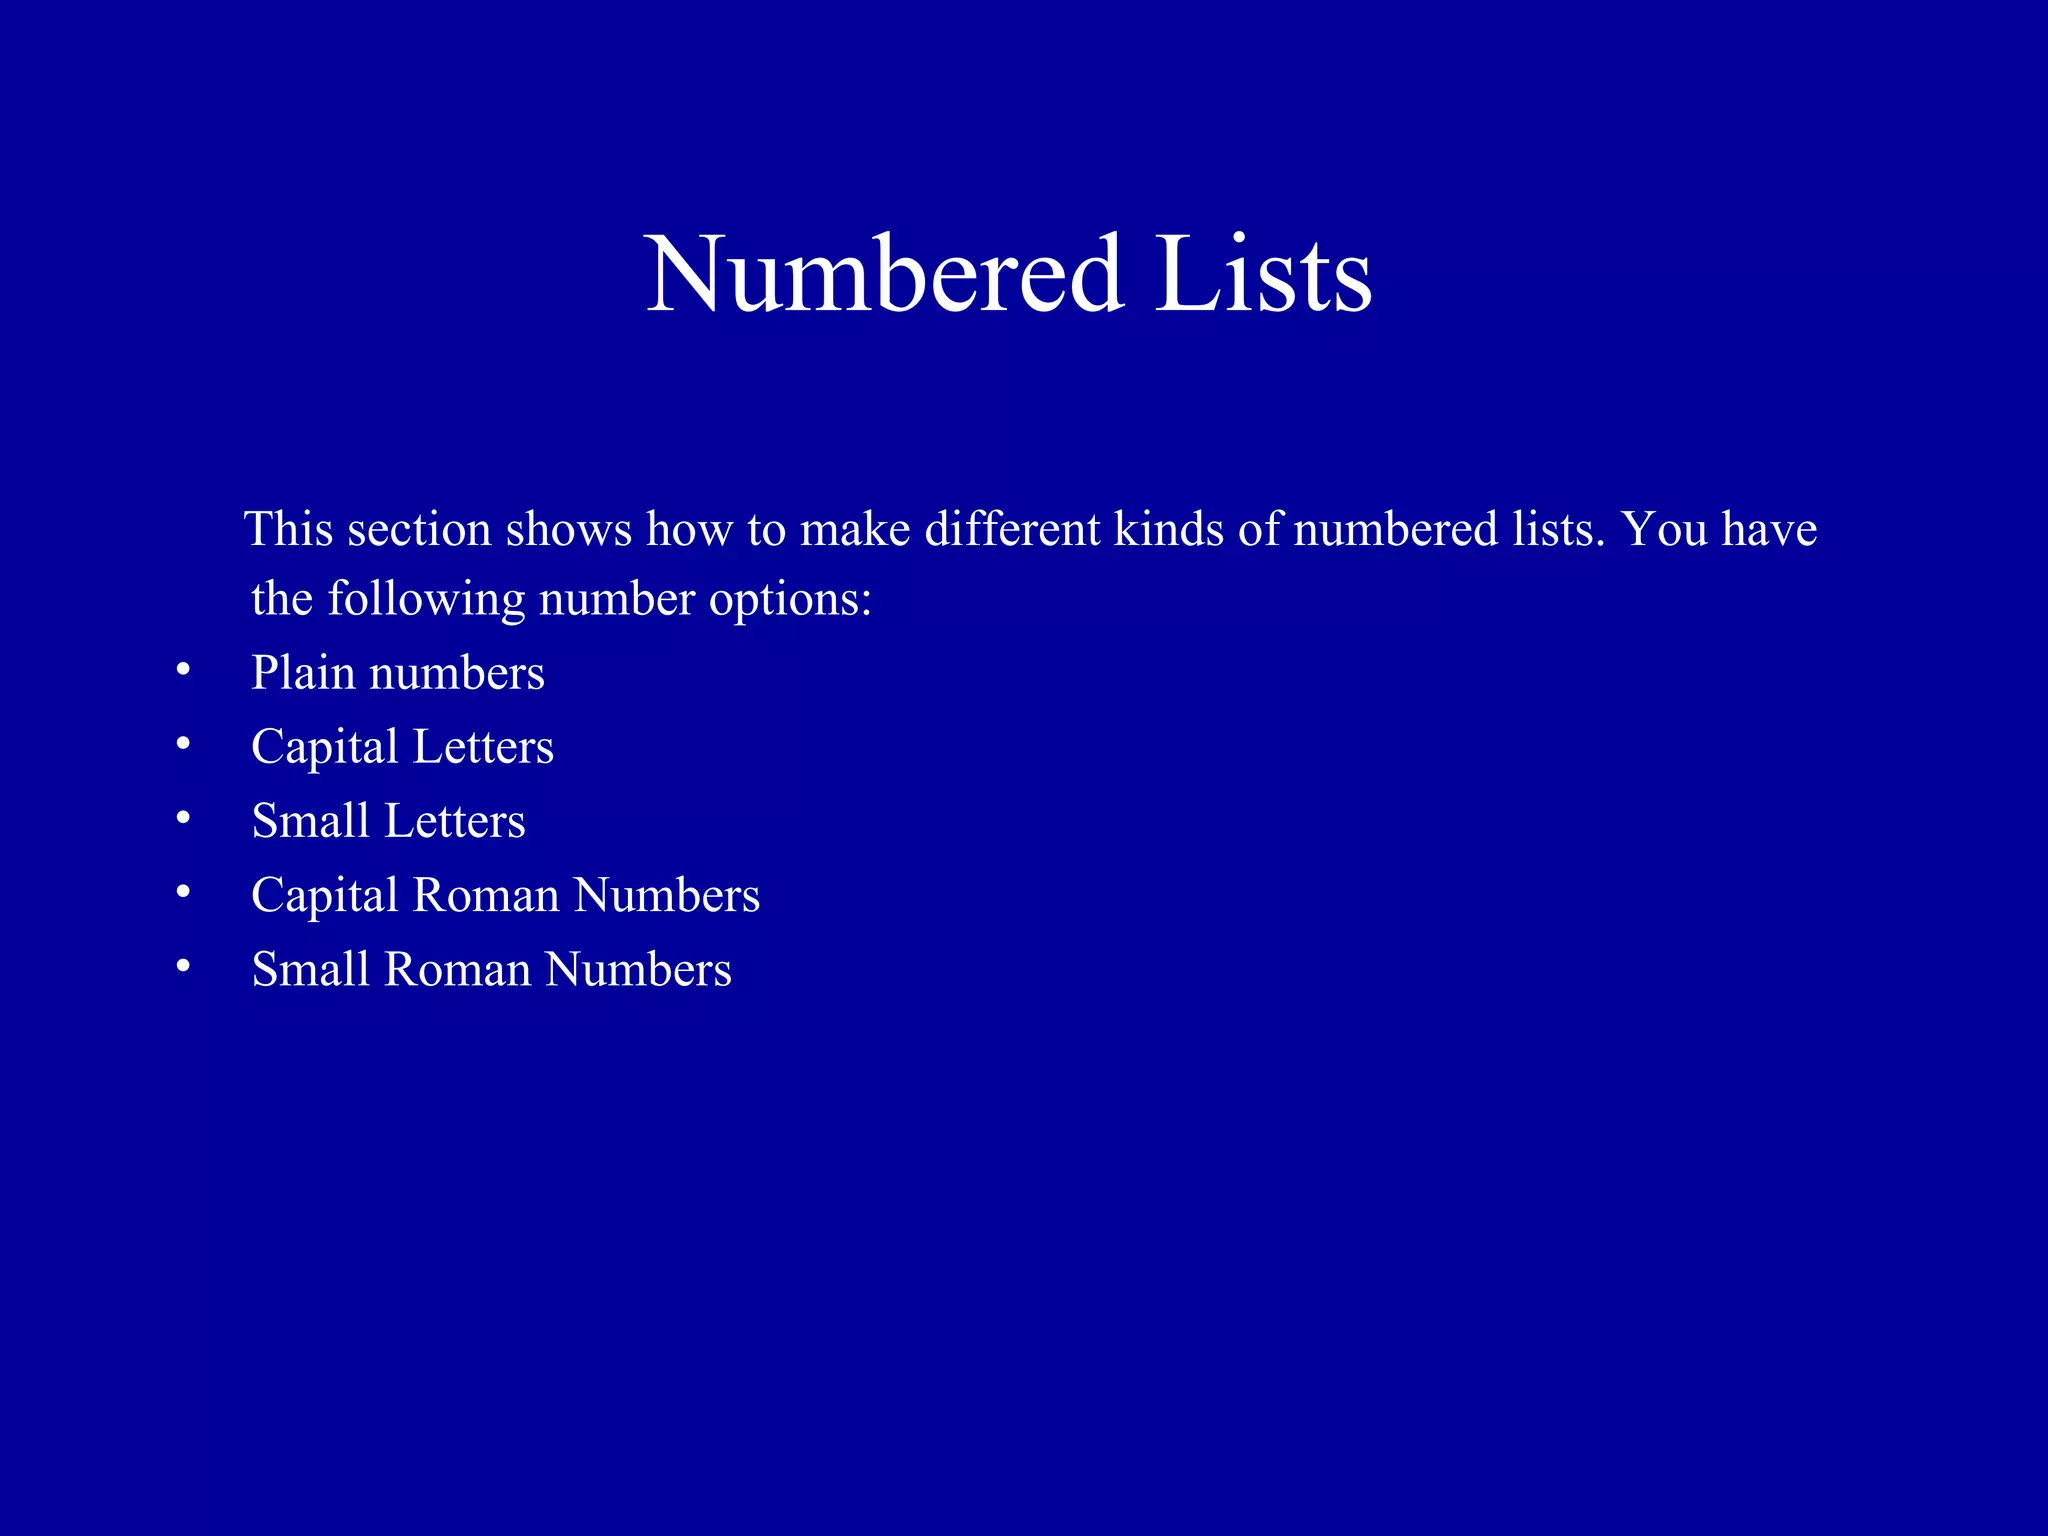
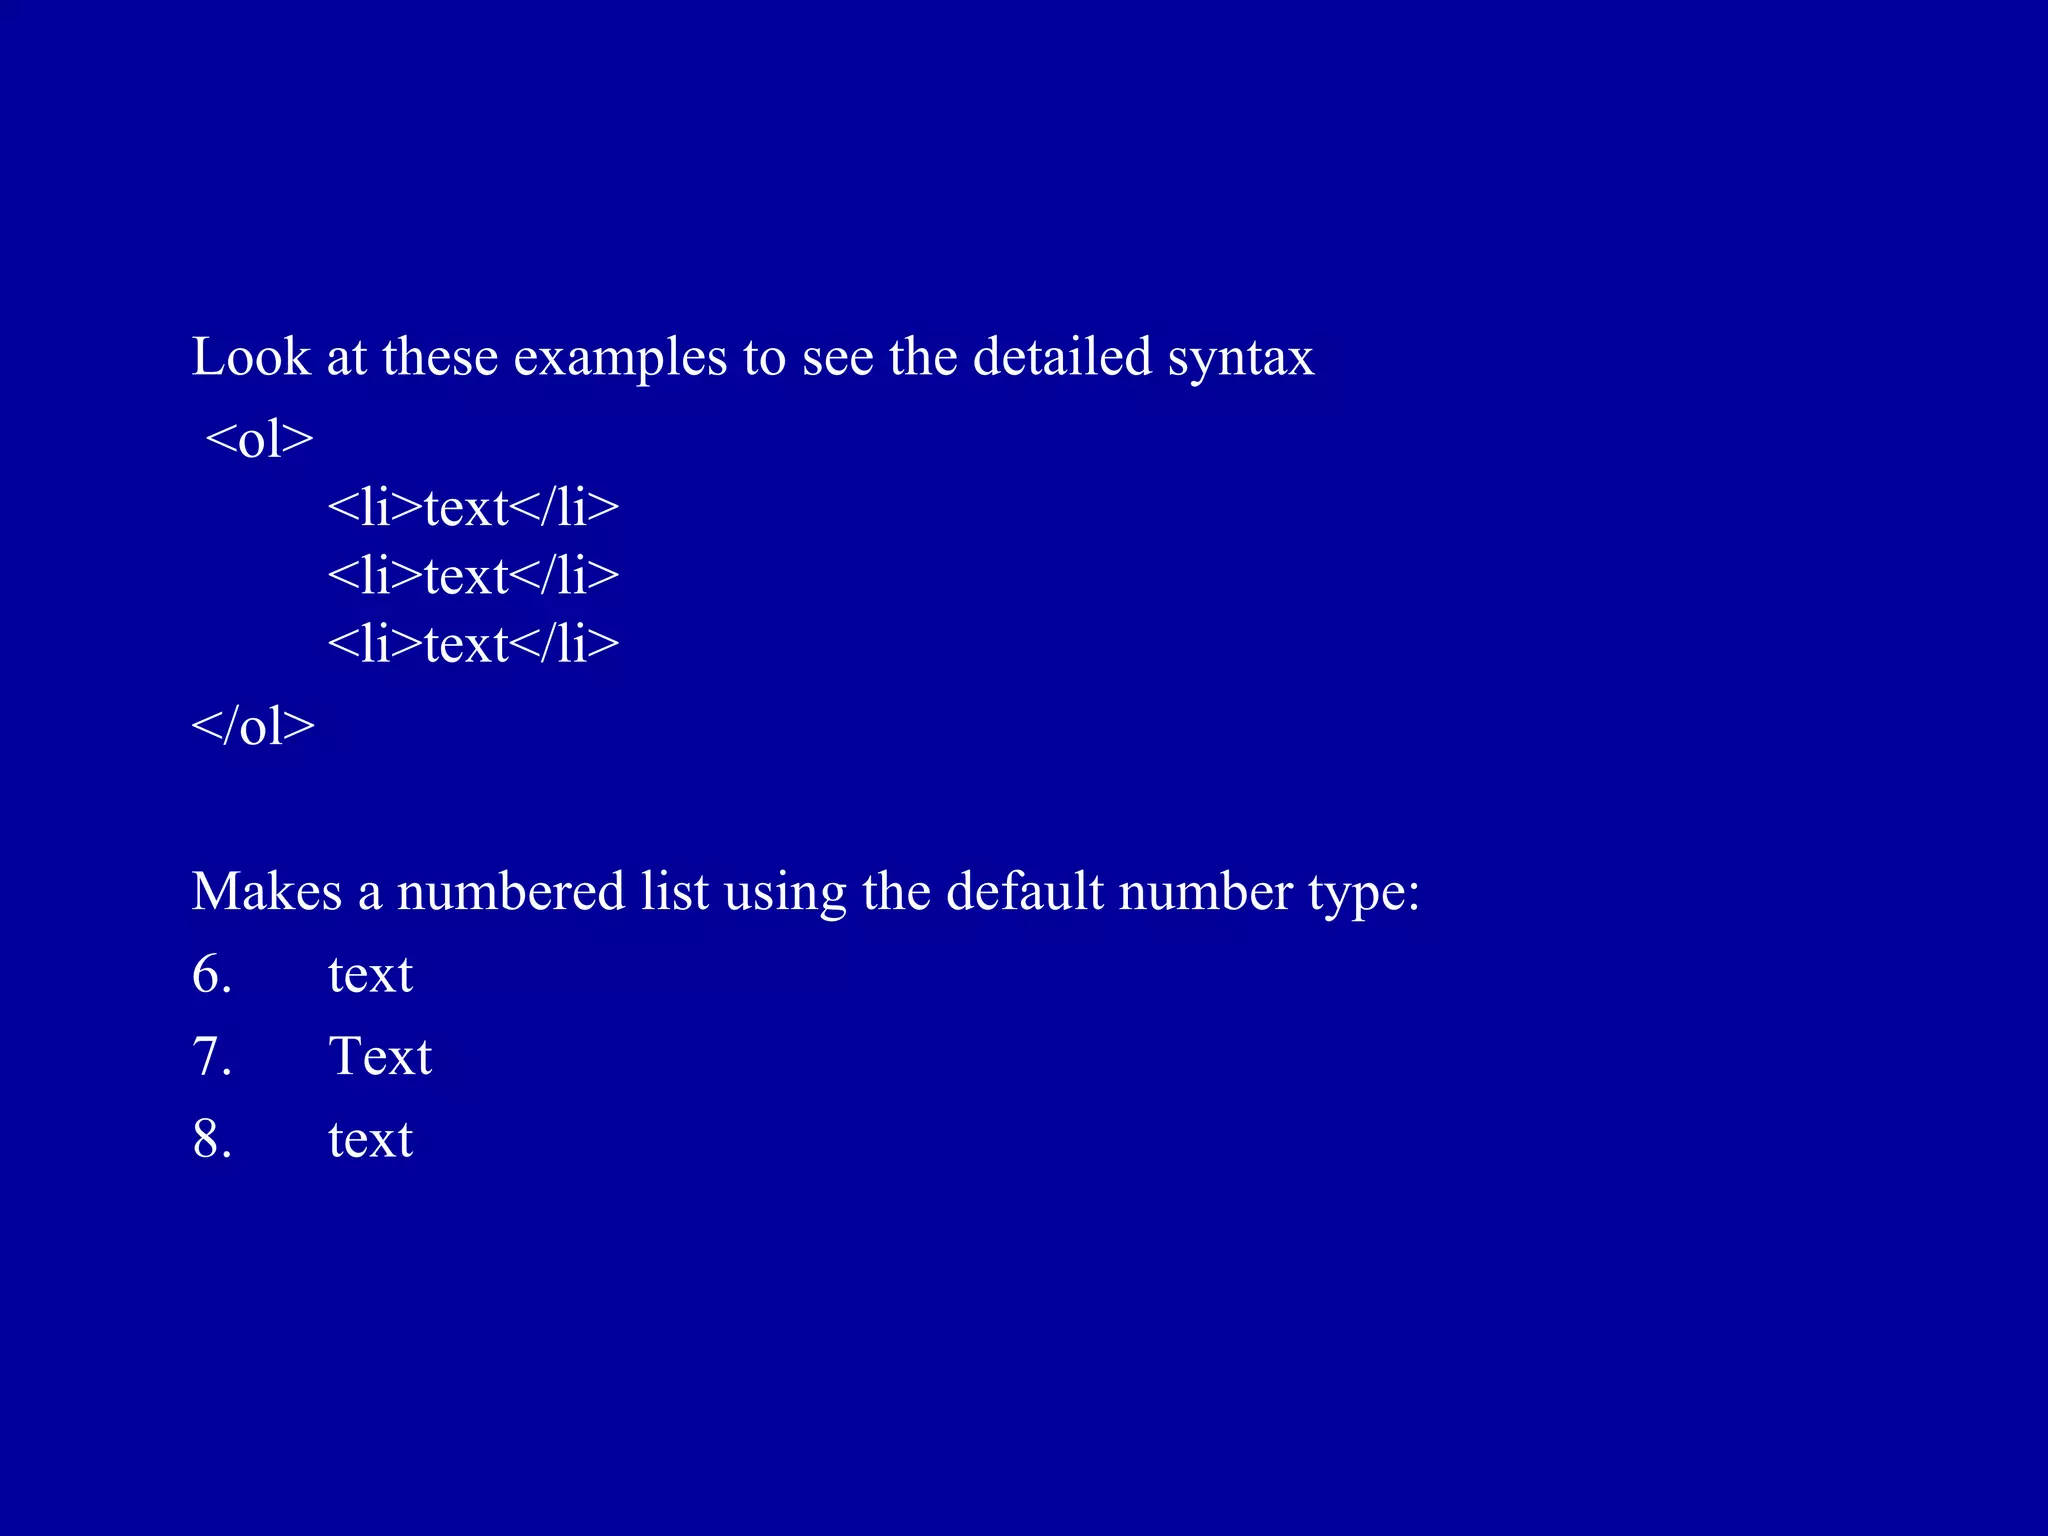
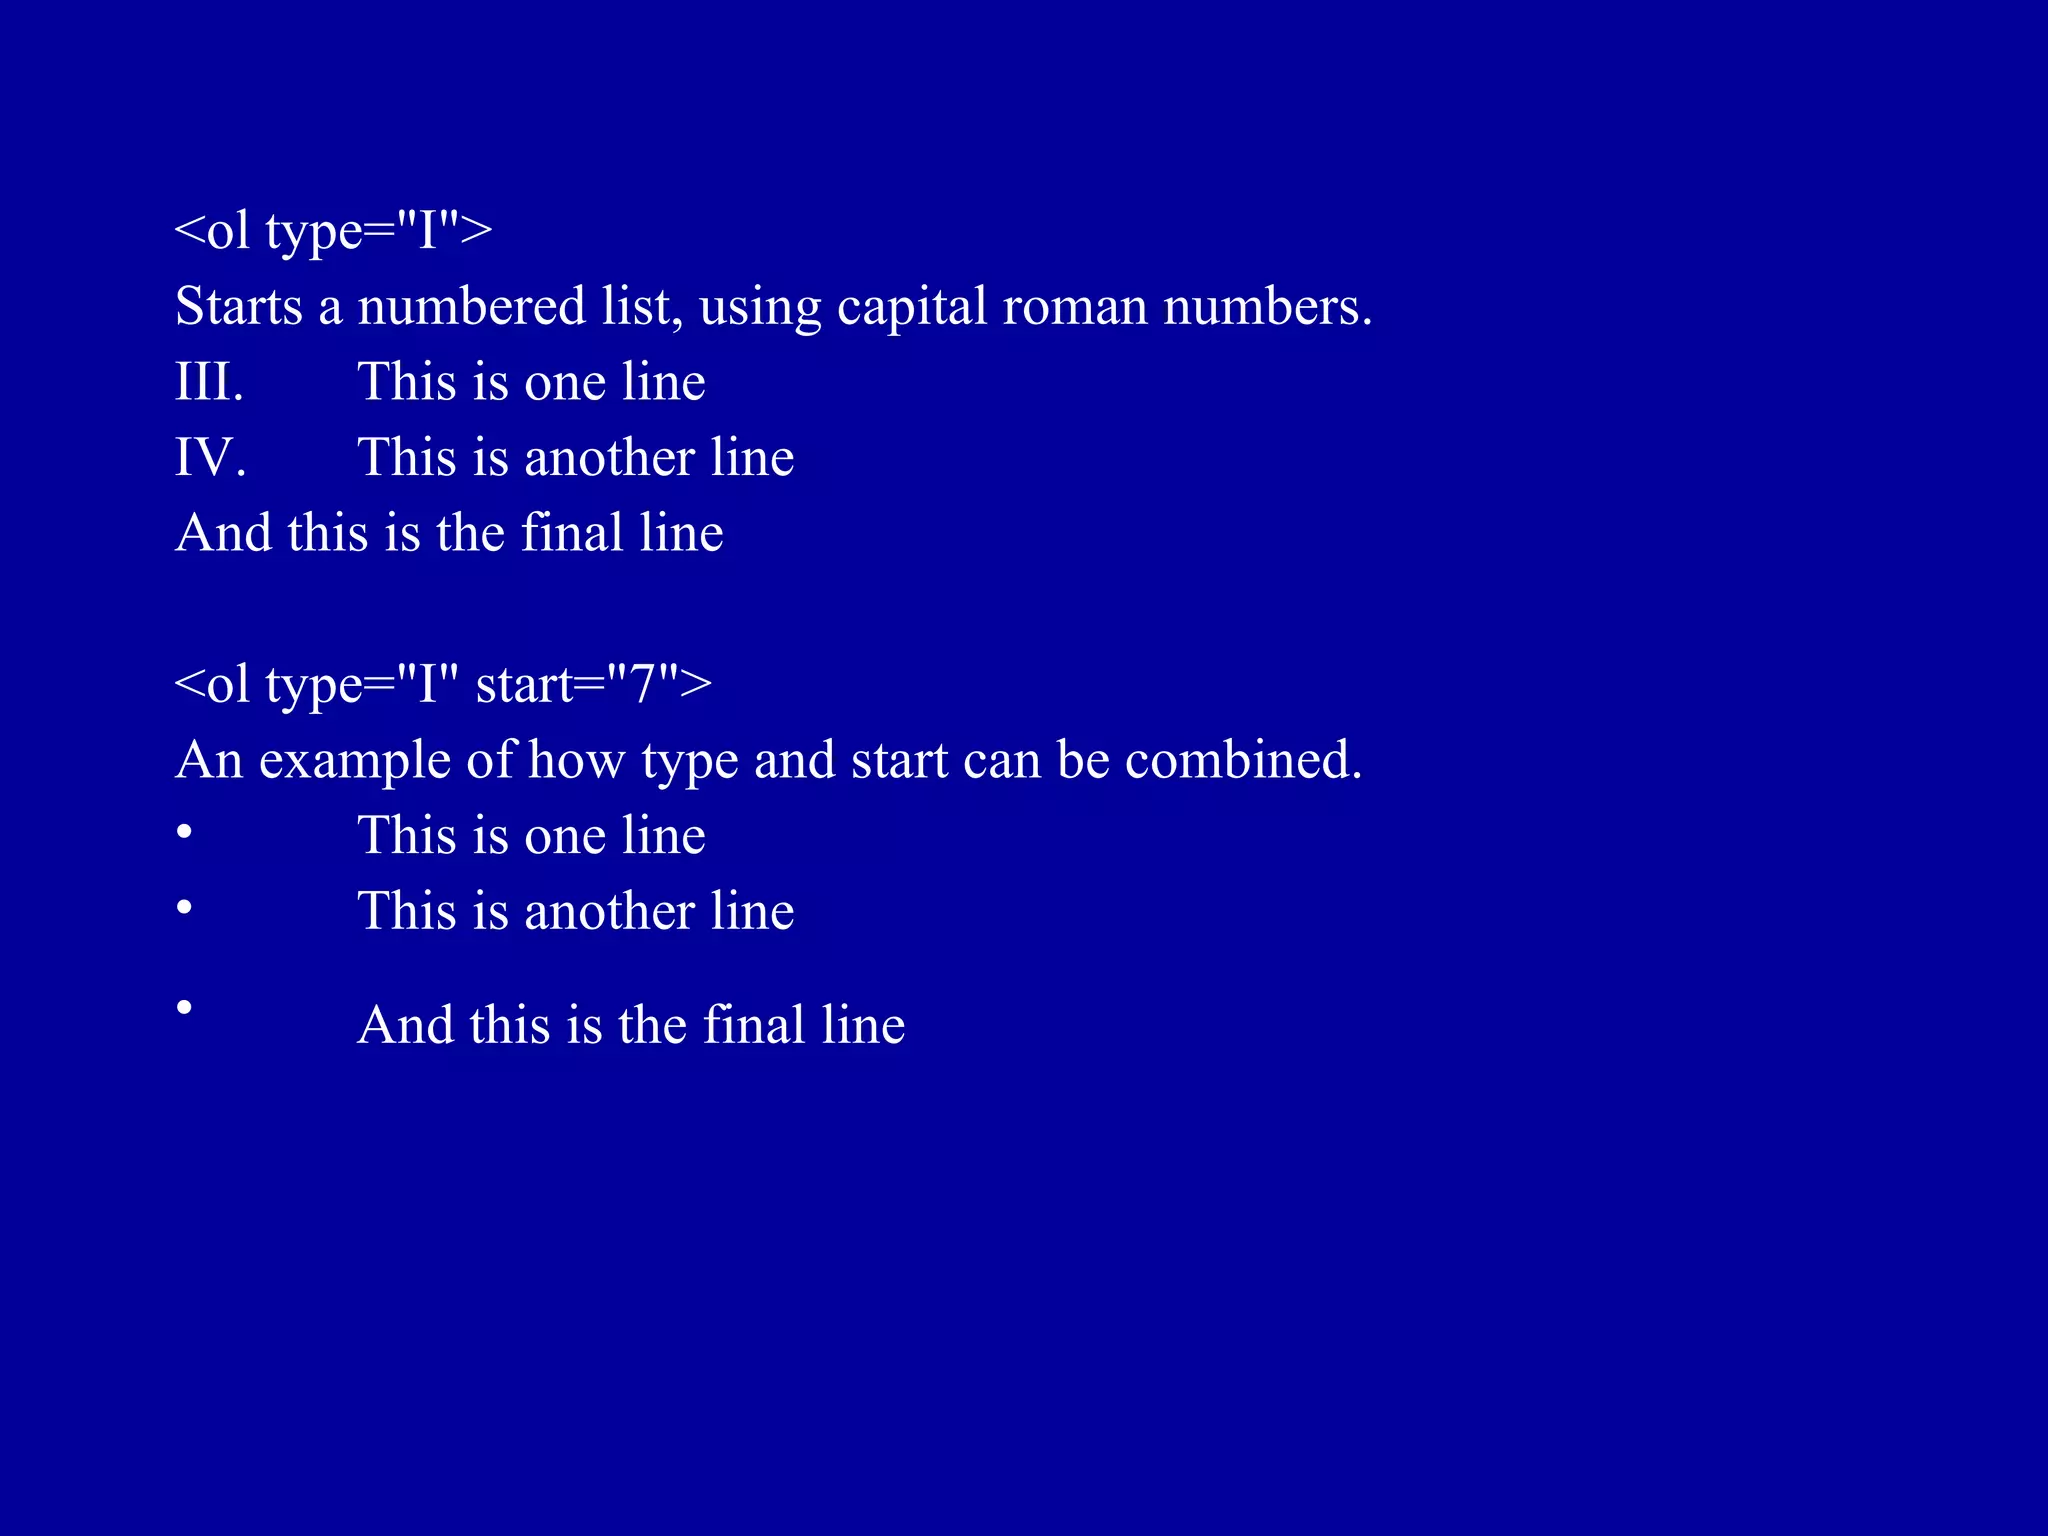
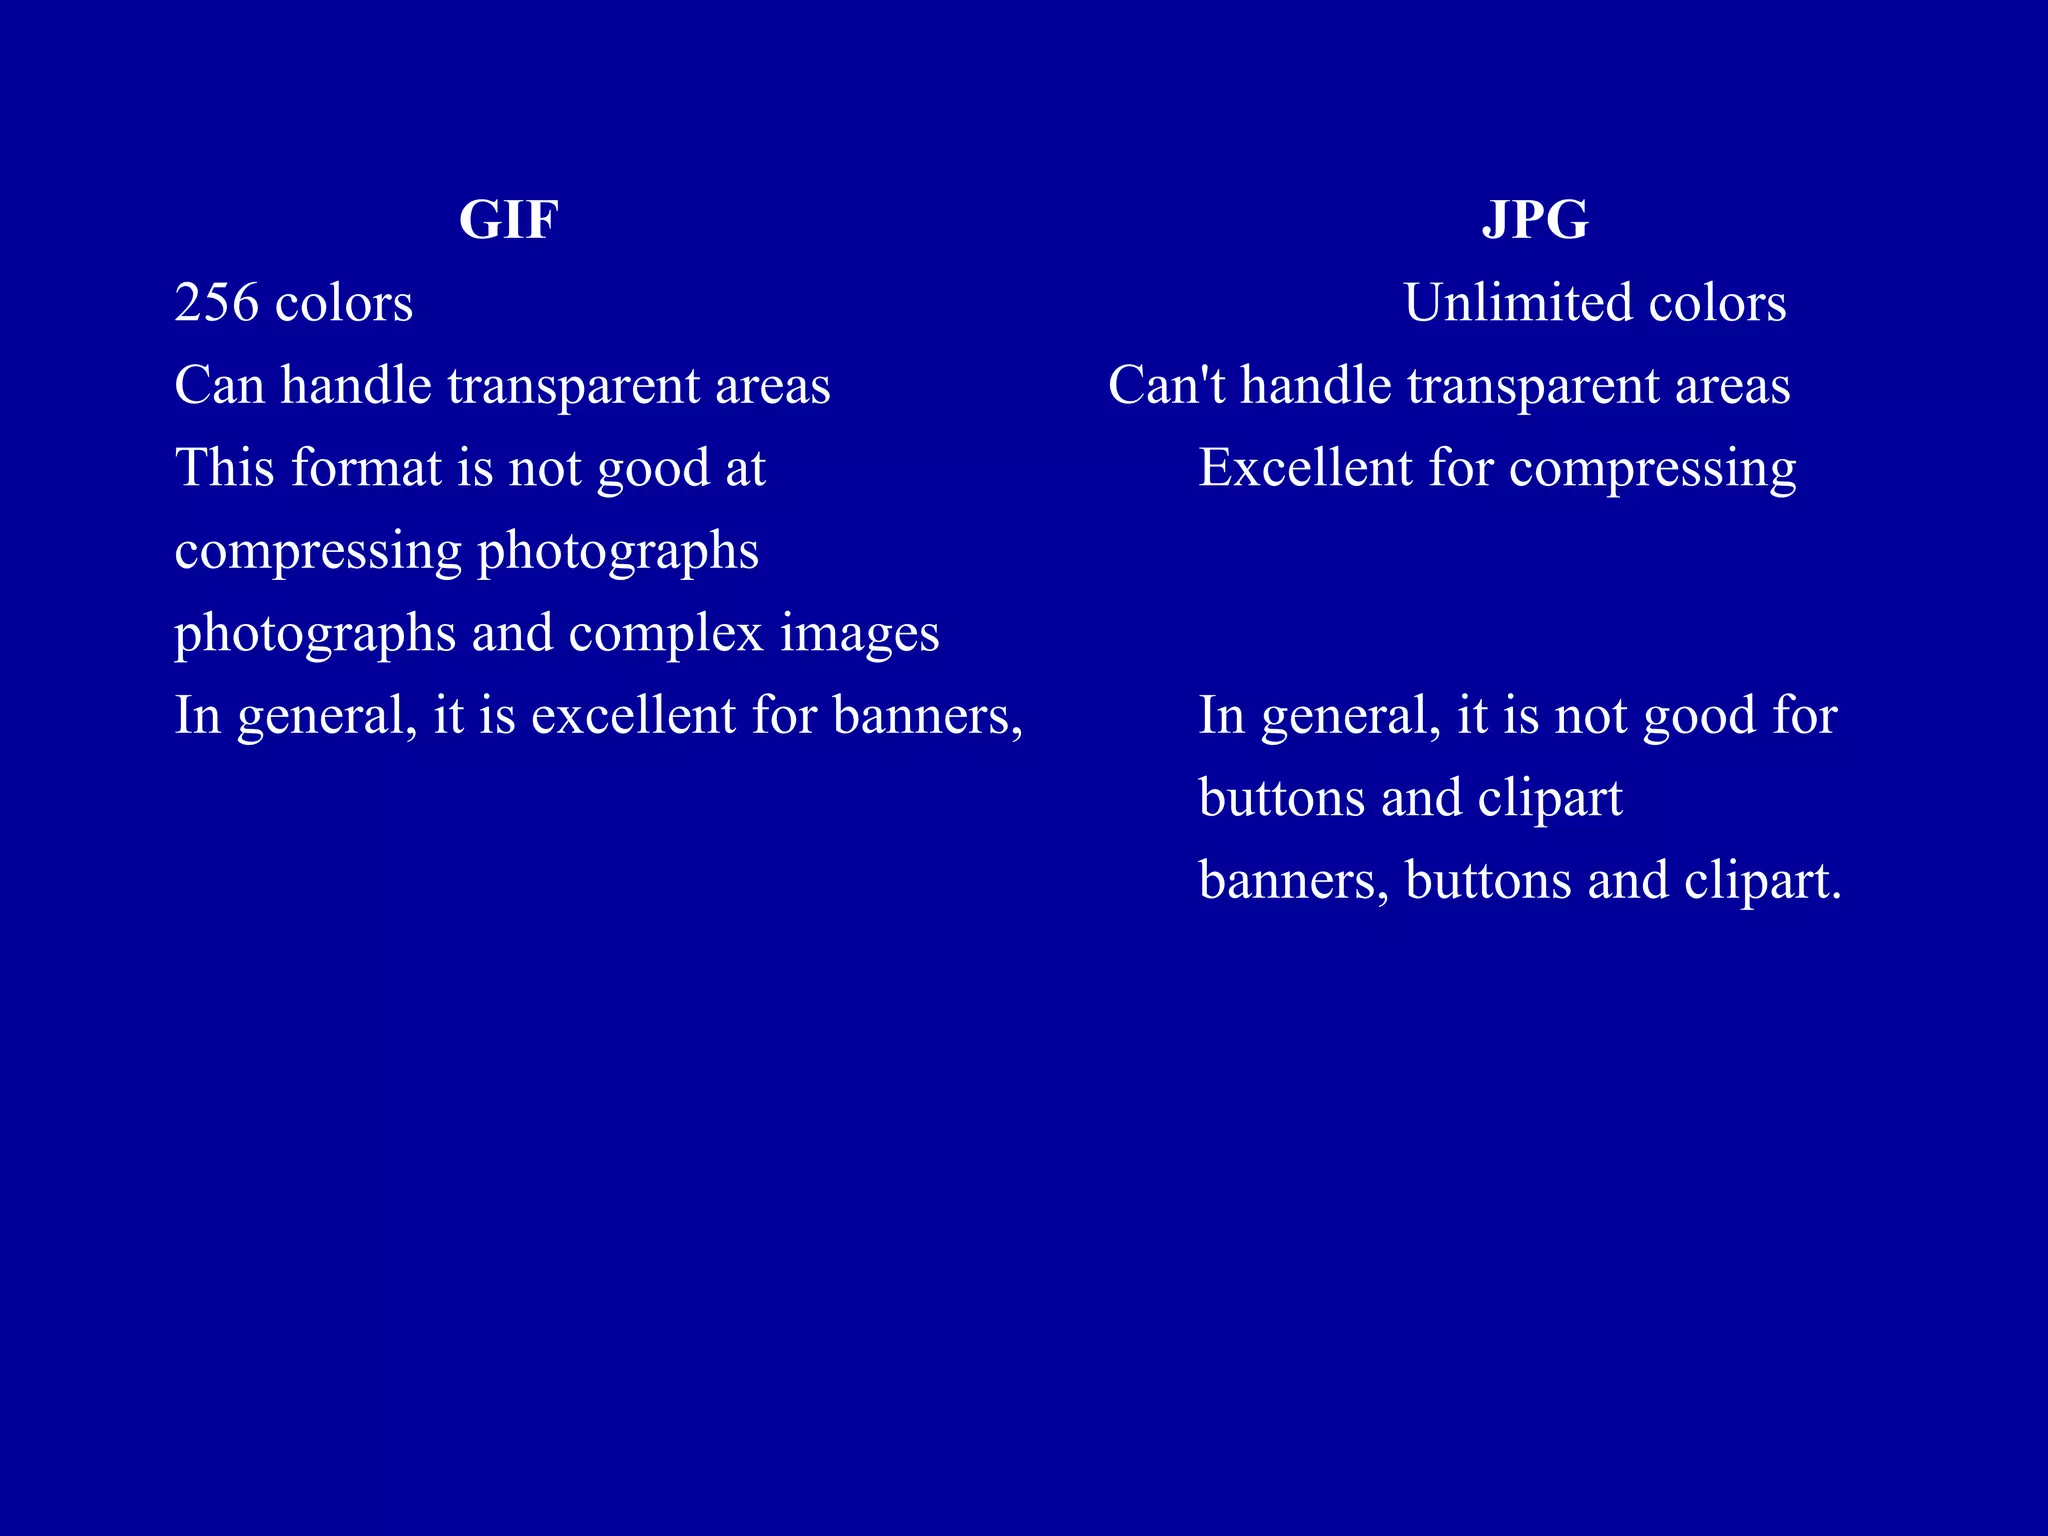
HTML is used to write web pages and consists of markup tags that indicate how the content should be displayed in a web browser. Key points covered in the document include:
- HTML pages use tags like <b> and </b> to make text bold, <img> to embed images, and <a> tags and href attributes to create hyperlinks.
- The basic structure of an HTML page includes <head> and <title> sections and a <body> section where visible content goes.
- Lists, text formatting, alignment, and other styling can be controlled through tags like <ul>, <p>, <font>.
- Images are inserted with <img> tags and their size
html example
html tutorial for beginners
html basics
html tutorial pdf
basic html page template
what is html
html tags
basic html tags list
1. 1 Introduction to HTML What is an HTML File? HTML stands for Hyper Text Markup Language An HTML file is a text file containing small markup tags The markup tags tell the Web browser how to display the page An HTML file must have an htm or html file extension An HTML file can be created using a simple text editor If you are running Windows, start Notepad. Type in the following text: <html> <head> <title>Title of page</title> </head> <body> This is my first homepage. <b>This text is bold</b> </body> </html> Save the file as "mypage.htm". Start your Internet browser. Select "Open" (or "Open Page") in the File menu of your browser. A dialog box will appear. Select "Browse" (or "Choose File") and locate the HTML file you just created - "mypage.htm" - select it and click "Open". Now you should see an address in the dialog box, for example "C:MyDocumentsmypage.htm". Click OK, and the browser will display the page. Example Explained The first tag in your HTML document is <html>. This tag tells your browser that this is the start of an HTML document. The last tag in your document is </html>. This tag tells your browser that this is the end of the HTML document. The text between the <head> tag and the </head> tag is header information. Header information is not displayed in the browser window. The text between the <title> tags is the title of your document. The title is displayed in your browser's caption. The text between the <body> tags is the text that will be displayed in your browser. The text between the <b> and </b> tags will be displayed in a bold font.
It describe the whole detail of html, CSS , html5 for descibing how to use html tags and where we use html tags. It describe the whole detail of html and CSS.
Learn HTML and CSS in few steps . Practice an hour daily for good results in 10 days.
Here I am mentioning basic elements , attributes and tags of HTML with styling them
This slide guides through the differences of the Span and Div tags in HTML.
I started a channel on YouTube for Networking lovers. "VERY SIMPLE NETWORKING" SERIES can be found at http://www.youtube.com/bgccnadom.
THANK YOU FOR YOUR SUPPORT AND LIKES.
Mendeley is a free reference manager and academic social network. It is a very useful tool for reference management through which you can make your own fully-searchable library in seconds, cite as you write, and read and annotate your PDFs on any device.It is a useful tool to create and manage lists of references in any format for research projects.
32 Ways a Digital Marketing Consultant Can Help Grow Your BusinessBarry Feldman
How can a digital marketing consultant help your business? In this resource we'll count the ways. 24 additional marketing resources are bundled for free.
HTML tags, Tags, Empty tag, Container tag, Attributes, Structure of HTML document, Head section, body section, comment tags, Font tag, attribute of font tag, More tags on formatting, heading tags, paragraph tag, the paragraph attribute 'align', line break, horizontal tag, line break, background tag, text attribute, Marquee tag,
Following are the some notes regarding HTML.It will provide you a basic insight in HTML and web designing.
For further, contact us -http://nextgenr.com/
State of ICS and IoT Cyber Threat Landscape Report 2024 previewPrayukth K V
The IoT and OT threat landscape report has been prepared by the Threat Research Team at Sectrio using data from Sectrio, cyber threat intelligence farming facilities spread across over 85 cities around the world. In addition, Sectrio also runs AI-based advanced threat and payload engagement facilities that serve as sinks to attract and engage sophisticated threat actors, and newer malware including new variants and latent threats that are at an earlier stage of development.
The latest edition of the OT/ICS and IoT security Threat Landscape Report 2024 also covers:
State of global ICS asset and network exposure
Sectoral targets and attacks as well as the cost of ransom
Global APT activity, AI usage, actor and tactic profiles, and implications
Rise in volumes of AI-powered cyberattacks
Major cyber events in 2024
Malware and malicious payload trends
Cyberattack types and targets
Vulnerability exploit attempts on CVEs
Attacks on counties – USA
Expansion of bot farms – how, where, and why
In-depth analysis of the cyber threat landscape across North America, South America, Europe, APAC, and the Middle East
Why are attacks on smart factories rising?
Cyber risk predictions
Axis of attacks – Europe
Systemic attacks in the Middle East
Download the full report from here:
https://sectrio.com/resources/ot-threat-landscape-reports/sectrio-releases-ot-ics-and-iot-security-threat-landscape-report-2024/
Key Trends Shaping the Future of Infrastructure.pdfCheryl Hung
Keynote at DIGIT West Expo, Glasgow on 29 May 2024.
Cheryl Hung, ochery.com
Sr Director, Infrastructure Ecosystem, Arm.
The key trends across hardware, cloud and open-source; exploring how these areas are likely to mature and develop over the short and long-term, and then considering how organisations can position themselves to adapt and thrive.
PHP Frameworks: I want to break free (IPC Berlin 2024)Ralf Eggert
In this presentation, we examine the challenges and limitations of relying too heavily on PHP frameworks in web development. We discuss the history of PHP and its frameworks to understand how this dependence has evolved. The focus will be on providing concrete tips and strategies to reduce reliance on these frameworks, based on real-world examples and practical considerations. The goal is to equip developers with the skills and knowledge to create more flexible and future-proof web applications. We'll explore the importance of maintaining autonomy in a rapidly changing tech landscape and how to make informed decisions in PHP development.
This talk is aimed at encouraging a more independent approach to using PHP frameworks, moving towards a more flexible and future-proof approach to PHP development.
UiPath Test Automation using UiPath Test Suite series, part 4DianaGray10
Welcome to UiPath Test Automation using UiPath Test Suite series part 4. In this session, we will cover Test Manager overview along with SAP heatmap.
The UiPath Test Manager overview with SAP heatmap webinar offers a concise yet comprehensive exploration of the role of a Test Manager within SAP environments, coupled with the utilization of heatmaps for effective testing strategies.
Participants will gain insights into the responsibilities, challenges, and best practices associated with test management in SAP projects. Additionally, the webinar delves into the significance of heatmaps as a visual aid for identifying testing priorities, areas of risk, and resource allocation within SAP landscapes. Through this session, attendees can expect to enhance their understanding of test management principles while learning practical approaches to optimize testing processes in SAP environments using heatmap visualization techniques
What will you get from this session?
1. Insights into SAP testing best practices
2. Heatmap utilization for testing
3. Optimization of testing processes
4. Demo
Topics covered:
Execution from the test manager
Orchestrator execution result
Defect reporting
SAP heatmap example with demo
Speaker:
Deepak Rai, Automation Practice Lead, Boundaryless Group and UiPath MVP
Securing your Kubernetes cluster_ a step-by-step guide to success !KatiaHIMEUR1
Today, after several years of existence, an extremely active community and an ultra-dynamic ecosystem, Kubernetes has established itself as the de facto standard in container orchestration. Thanks to a wide range of managed services, it has never been so easy to set up a ready-to-use Kubernetes cluster.
However, this ease of use means that the subject of security in Kubernetes is often left for later, or even neglected. This exposes companies to significant risks.
In this talk, I'll show you step-by-step how to secure your Kubernetes cluster for greater peace of mind and reliability.
Le nuove frontiere dell'AI nell'RPA con UiPath Autopilot™UiPathCommunity
In questo evento online gratuito, organizzato dalla Community Italiana di UiPath, potrai esplorare le nuove funzionalità di Autopilot, il tool che integra l'Intelligenza Artificiale nei processi di sviluppo e utilizzo delle Automazioni.
📕 Vedremo insieme alcuni esempi dell'utilizzo di Autopilot in diversi tool della Suite UiPath:
Autopilot per Studio Web
Autopilot per Studio
Autopilot per Apps
Clipboard AI
GenAI applicata alla Document Understanding
👨🏫👨💻 Speakers:
Stefano Negro, UiPath MVPx3, RPA Tech Lead @ BSP Consultant
Flavio Martinelli, UiPath MVP 2023, Technical Account Manager @UiPath
Andrei Tasca, RPA Solutions Team Lead @NTT Data
Epistemic Interaction - tuning interfaces to provide information for AI supportAlan Dix
Paper presented at SYNERGY workshop at AVI 2024, Genoa, Italy. 3rd June 2024
https://alandix.com/academic/papers/synergy2024-epistemic/
As machine learning integrates deeper into human-computer interactions, the concept of epistemic interaction emerges, aiming to refine these interactions to enhance system adaptability. This approach encourages minor, intentional adjustments in user behaviour to enrich the data available for system learning. This paper introduces epistemic interaction within the context of human-system communication, illustrating how deliberate interaction design can improve system understanding and adaptation. Through concrete examples, we demonstrate the potential of epistemic interaction to significantly advance human-computer interaction by leveraging intuitive human communication strategies to inform system design and functionality, offering a novel pathway for enriching user-system engagements.
Dev Dives: Train smarter, not harder – active learning and UiPath LLMs for do...UiPathCommunity
💥 Speed, accuracy, and scaling – discover the superpowers of GenAI in action with UiPath Document Understanding and Communications Mining™:
See how to accelerate model training and optimize model performance with active learning
Learn about the latest enhancements to out-of-the-box document processing – with little to no training required
Get an exclusive demo of the new family of UiPath LLMs – GenAI models specialized for processing different types of documents and messages
This is a hands-on session specifically designed for automation developers and AI enthusiasts seeking to enhance their knowledge in leveraging the latest intelligent document processing capabilities offered by UiPath.
Speakers:
👨🏫 Andras Palfi, Senior Product Manager, UiPath
👩🏫 Lenka Dulovicova, Product Program Manager, UiPath
Transcript: Selling digital books in 2024: Insights from industry leaders - T...BookNet Canada
The publishing industry has been selling digital audiobooks and ebooks for over a decade and has found its groove. What’s changed? What has stayed the same? Where do we go from here? Join a group of leading sales peers from across the industry for a conversation about the lessons learned since the popularization of digital books, best practices, digital book supply chain management, and more.
Link to video recording: https://bnctechforum.ca/sessions/selling-digital-books-in-2024-insights-from-industry-leaders/
Presented by BookNet Canada on May 28, 2024, with support from the Department of Canadian Heritage.
UiPath Test Automation using UiPath Test Suite series, part 3DianaGray10
Welcome to UiPath Test Automation using UiPath Test Suite series part 3. In this session, we will cover desktop automation along with UI automation.
Topics covered:
UI automation Introduction,
UI automation Sample
Desktop automation flow
Pradeep Chinnala, Senior Consultant Automation Developer @WonderBotz and UiPath MVP
Deepak Rai, Automation Practice Lead, Boundaryless Group and UiPath MVP
Assuring Contact Center Experiences for Your Customers With ThousandEyes
Html tutorials
1. HTML Tutorials
• Webpages are written in HTML - a simple
scripting language.
• HTML is short for HyperText Markup
Language.
• Hypertext is simply a piece of text that
works as a link.
• Markup Language is a way of writing
layout information within documents.
• Basically an HTML document is a plain
text file that contains text and nothing else.
2. • When a browser opens an HTML file, the browser
will look for HTML codes in the text and use them
to change the layout, insert images, or create links to
other pages.
• Since HTML documents are just text files they can
be written in even the simplest text editor. A more
popular choice is to use a special HTML editor -
maybe even one that puts focus on the visual result
rather than the codes - a so-called WYSIWYG
editor ("What You See Is What You Get").
• Some of the most popular HTML editors, such as
FrontPage or Dreamweaver lets one create pages
more or less as documents in Word or whatever text
editor being used.
3. Why learn HTML?
It is possible to create WebPages without
knowing anything about the HTML source
behind the page. There are excellent editors
on the market that will take care of the
HTML parts. All one needs to do is layout
the page. HTML can be written with almost
any available text editor, including notepad
that comes as a standard program with
Windows.
4. All you need to do is type in
the code, then save the
document, making sure to
put an .html extension or
an .htm extension to the file
(for instance
"mypage.html").
5. Tags
Basically, a computer sees an "A" as simply
an "A" - whether it is bold, italic, big or
small. To tell the browser that an "A"
should be bold we need to put a markup in
front of the A. Such a markup is called a
This is an example of bold text
Tag. All HTML tags are enclosed in < and
>.
This is an example of <b>bold</b> text
6. Example: a piece of text as it appears on the screen.
This is an example of bold text
HTML: the HTML for the above example:
This is an example of <b>bold</b> text
As you can see, the start tag <b> indicates that
whatever follows should be written in bold. The
corresponding end tag </b> indicates that the browser
should stop writing text in bold.
7. Page Structure
All normal webpages consist of a head and a
body.
The head is used for text and tags that do not
show directly on the page.
The body is used for text and tags that are
shown directly on the page.
8. <html>
<head>
<!-- This section is for the title and technical info
of the page. -->
</head>
<body>
<!-- This section is for all that you want to show
on the page. -->
</body>
</html>
Finally, all webpages have an <html> tag at the
beginning and the end, telling the browser where
the document starts and where it stops.
9. Head Section
The head section of the web page includes
all the stuff that does not show directly on
the resulting page.
The <title> and </title> tags encapsulate the
title of your page. The title is what shows in
the top of your browser window when the
page is loaded. Right now it should say
something like "Vidyanidhi-NASSDOC -
Html Tutorial" on top of the window
containing this text.
10. often see in the head section is metatags. Metatags are
used for, among other things, to improve the
rankings in search engines. Quite often the head
section contains javascript which is a programming
language for more complex HTML pages. Finally,
more and more pages contain codes for cascading
style sheets (CSS). CSS is a rather new technique
for optimizing the layout of major websites.
11. Body Section
The body of the document contains all that
can be seen when the user loads the page. In
the rest of this tutorial you can learn in
detail about all the different aspects of
HTML, including:
• Text
• Links
• Images
• Backgrounds
• Tables
12. HTML Text
To enter text on your pages - all you have to do is
simply enter the text. If you do not specify any
attributes for text it will use the default size, font
etc. of the visitor's browser. Browsers can only
show fonts that are available on the PC. Therefore
you are limited to using the fonts that are available
on almost any computer.
If you need to use a fancy font, you should use
your graphics program to make an image with the
text. This will assure that the visitor will see it -
even if he doesn't have the fancy font you're using.
Since images take up much more space than plain text,
thus increasing download time, you should use this option
with care.
13. Base Font
To specify the overall font for your page add the
<basefont> tag at the beginning of the <body> section.
Example: The page as it looks in the browser.
Hello! This is my page.
All text looks the same
since I only specified a basefont.
<body>
<basefont face="arial, verdana, courier" size="4"
color="green">
Hello! This is my page.<br>
All text looks the same<br>
since I only specified a basefont.<br>
</body>
14. Font
The <font> tag will change the font.
Example: How the output looks in the browser.
Hello! This is my page.
This local text looks different.
This text looks like the first line.
<body>
<basefont color="green" face="arial" size="4">
Hello! This is my page.<br><br>
<font color="red" face="arial" size="2">
This local text looks different.
</font>
<br><br>
This text looks like the first line.
</body>
15. Text Links
The tags used to produce links are the <a> and </a>. The <a> tells
where the link should start and the </a> indicates where
the link ends. Everything between these two will work as a
link.The target of the link is added to the <a> tag using the
href=”http://www.learnhtml.com” setting.
The example below shows how to make the word here
work as a link to yahoo.
Click <a href="http://www.yahoo.com">here</a> to go to
yahoo.
You simply:
• Specify the target in the <a href=" ">.
• Then add the text that should work as a link.
• Finally add an </a> tag to indicate where the link ends.
16. Text Format
These are the tags for text formats :
<b>text</b> writes text as bold
<i>text</i> writes text in italics
<u>text</u> writes underlined text
<sub>text</sub> lowers text and makes it smaller
<sup>text</sup> lifts text and makes it smaller
<blink>text</blink> guess yourself! (Note: Netscape only.)
<strike>text</strike> strikes a line through the text
<tt>text</tt> writes text as on a classic typewriter
<pre>text</pre> writes text exactly as it is, including
spaces.
<em>text</em> usually makes text italic
<strong>text<strong> usually makes text bold
17. Text Size
These are the tags for changing the font size
<big>text</big> increase the size by one
<small>text</small> increase the size by one
<h1>text</h1> writes text in biggest
heading
<h6>text</h6> writes text in smallest
heading
<font size="1">text</font> writes text in smallest
fontsize. (8 pt)
<font size="7">
text</font> writes text in biggest
fontsize (36 pt)
18. Text Layout
These tags will let you control the layout.
<p>text</p> Adds a paragraph break after the text.
(2 linebreaks).
<p align="left">text</p> Left justify text in paragraph.
<p align="center">text</p> Center text in paragraph.
<p align="right">text</p> Right justify text in paragraph.
text<br> Adds a single linebreak where the tag
is.
<nobr>text</nobr> Turns off automatic linebreaks
- even if text is wider than the window.
text<wbr> Allows the browser to insert a
linebreak
at exactly this point
- even if the text is within <nobr> tags.
<center>text</center> Center text.
<div align="center">text</div> Center text.
<div align="left">text</div> Left justify text.
<div align="right">text</div> Right justify text.
19. HTML Lists
To create a bulleted list you need to add a <ul> and a </ul> tag at the
beginning and the end of the list. Numbered lists have <ol> tags
instead of <ul> tags. To separate single list items use <li> and </li>
tags.
There are special settings that you can use to customize the lists on
your page. In the following pages you can learn in detail about
bulleted and numbered lists.
20. Bulleted Lists
This page shows how to make different kinds of bulleted lists. You have the
following bullet options:
• disc
• circle
• square
21. Examples
Look at these examples to see the detailed syntax.
<ul>
<li>text</li>
<li>text</li>
<li>text</li>
</ul>
Makes a bulleted list using the default bullet type:
• text
• text
• text
22. <ul type="disc">
Starts a bulleted list using discs as bullets:
• This is one line
• This is another line
• And this is the final line
<ul type="circle">
Starts a bulleted list using circles as bullets:
o This is one line
o This is another line
o And this is the final line
<ul type="square">
Starts a bulleted list using squares as bullets:
o This is one line
o This is another line
o And this is the final line
23. Numbered Lists
This section shows how to make different kinds of numbered lists. You have
the following number options:
• Plain numbers
• Capital Letters
• Small Letters
• Capital Roman Numbers
• Small Roman Numbers
24. Look at these examples to see the detailed syntax
<ol>
<li>text</li>
<li>text</li>
<li>text</li>
</ol>
Makes a numbered list using the default number type:
6. text
7. Text
8. text
25. <ol start="5">
Starts a numbered list, first # being 5.
3. This is one line
4. This is another line
5. And this is the final line
<ol type="A">
Starts a numbered list, using capital letters.
I. This is one line
J. This is another line
And this is the final line
26. <ol type="I">
Starts a numbered list, using capital roman numbers.
III. This is one line
IV. This is another line
And this is the final line
<ol type="I" start="7">
An example of how type and start can be combined.
• This is one line
• This is another line
• And this is the final line
27. HTML Images
Introduction
This section will show how to add images to your pages. We will start out with
a presentation of the two main image types on WebPages: jpg and gif. After
that, we will proceed with various ways to insert and customize images, with a
special focus on the different alignments you can choose
GIF and JPG
Computers store images in several different ways. Some storage methods focus
on compressing the size of the image as much as possible.
A major problem with using images on websites is that images take much
longer to load than text. To reduce download times as much as possible two of
the best image compressing formats used on the web are:
28. GIF JPG
256 colors Unlimited colors
Can handle transparent areas Can't handle transparent areas
This format is not good at Excellent for compressing
compressing photographs
photographs and complex images
In general, it is excellent for banners, In general, it is not good for
buttons and clipart
banners, buttons and clipart.
29. Inserting in HTML
The tag used to insert an image is called img. Below you see an image called
"rainbow.gif".
Here is the HTML code used to insert the image on this webpage:
<img src=”http://www.learnhtml.com/rainbow.gif”>
30. If the image is stored in the same folder as the HTML page, you can leave out the
domain reference (http://www.test.com/) and simply insert the image with this
code:
<img src=”rainbow.gif”>
Resizing
You can change the size of an image using the width and height attributes. In
general, it is not advisable to reduce image size using these settings, since the
image will be transferred over the internet in its original size no matter what
reduction is set for it. This will slow the loading of your webpage
<img src="http://www.learnhtml.com/rainbow.gif" width="60" height="60">
If you leave out the settings for width and height, the browser will automatically
use the real size of the image.
31. Border Around
You can add a border to the image using the border setting shown in the example
below:
<img src="http://www.learnhtml.com/rainbow.gif" border="5">
Alternative Text
<img src="http://www.learnhtml.com/rainbow.gif" alt="This is a text that goes
with the image">
Spacing Around
<img src="rainbow.gif" Hspace="30" Vspace="10">
32. Alignment of
You can align images according to the text around it, using the following
alignments:
• default aligns the image using the default settings of the Web browser. Same
as baseline.
• left aligns the image in the left margin and wraps the text that follows the
image.
• right aligns the image in the right margin and wraps the text that precedes the
image.
• top aligns the top of the image with the surrounding text.
• texttop aligns the top of the image with the top of the tallest text in the line.
• middle aligns the middle of the image with the surrounding text.
• absmiddle aligns the image with the middle of the current line.
• baseline aligns the image with the baseline of the current line.
• bottom aligns the bottom of the image with the surrounding text.
• absbottom aligns the image with the bottom of the current line.
• center aligns the center of the image with the surrounding text.
33. Text Wrap Around
<img src="rainbow.gif"
align="left">
bla bla bla bla bla
bla bla bla bla bla
bla bla bla bla bla
bla bla bla bla bla
blabla bla bla bla
bla bla bla bla bla bla bla
34. HTML Links
Links are the most fundamental part of the world wide web. It is the links that tie
it all together.
There are three different kinds of links you can have on your website:
• Links to anchors on the current page (Internal).
• Links to other pages within the current site (Local)
• Links to pages outside the current site (Global).
It is possible to make texts and images work as links. With a little creativity other
objects, such as push buttons or even drop-down menus can work as links as
well.
35. How to make a link
Click <a href="http://www.yahoo.com">here</a> to go to yahoo.
The tags used to produce links are the <a> and </a>. The <a> tells where the link
should start and the </a> indicates where the link ends.
Everything between these two will work as a link. The target of the link is
added to the <a> tag using the href="http://www.whateverpage.com" setting.
The example below shows how to make the word here work as a link to
yahoo.
Click <a href="http://www.yahoo.com">here</a> to go to yahoo.
You simply:
• Specify the target in the <a href=" ">.
• Then add the text that should work as a link.
• Finally add an </a> tag to indicate where the link ends.
36. Colors on Text Links
There are a few settings that can be useful for controlling the colors of text links.
This section will teach you how to:
• Define colors for all links on the page.
• Define colors for individual links on the page.
<body link="#C0C0C0" vlink="#808080" alink="#FF0000">
Define colors for all links on the page:
The general color of text links is specified in the <body> tag, like in the
example below:
<body link="#C0C0C0" vlink="#808080" alink="#FF0000">
• link - standard link - to a page the visitor hasn't been to yet. (standard color is
blue - #0000FF).
• vlink - visited link - to a page the visitor has been to before. (standard color is
purple - #800080).
• alink - active link - the color of the link when the mouse is on it. (standard
color is red - #FF0000).
37. Link Targets
By default, links will open in the current window or frame. You need to
add a target if you want the link to open in another window or frame
than the link itself is placed in.
To do this you simply add a target="" to the <a href>. This example
will open yahoo in a new window:
<a href="http://www.yahoo.com" target="_blank">
38. Image Links
If you want to make an image work as a link, the method is exactly the same
as with texts. You simply place the <a href> and the </a> tags on each side of
the image.
Below is the HTML code used to make the image work as a link to a page
called myfile.htm:
<a href="myfile.htm"><img src="rainbow.gif"></a>
39. Link within a page
Linking to anchors is very similar to normal links. Normal links always point to
the top of a page. Anchors point to a place within a page.
A # in front of a link location specifies that the link is pointing to an anchor on
a page. (Anchor meaning a specific place in the middle of your page).
To link to an anchor you need to:
• Create a link pointing to the anchor
• Create the anchor itself.
<a name="chapter4"></a>
An anchor is created using the <a> tag. If you want to create an anchor called
chapter4, you simply add this line where you want the anchor to be:
<a name="chapter4"></a>
Click <a href="#chapter4">here</a> to read chapter 4.
After doing this, you can make a link pointing to the anchor using the normal <a
href> tag, like this:
Click <a href="#chapter4">here</a> to read chapter 4.
40. Link to email
<a href="mailto:youremailaddress">Email Me</a>
Having a link that allows visitors to send email from your website can be a great
addition to your site, making it easy for your visitors to send questions or
comments.
There is a special link for this action. Email links are done much the same as
links to other pages, using the
<a href> tag.
An email link would require the following code:
<a href="mailto:youremailaddress">Email Me</a>
41. HTML Backgrounds
Background Color
Adding a plain background color to your page is easy. All
you need to do is add a bgcolor property to the body tag:
<body bgcolor="#FF0000">
42. Background Image
To add the background image you will need to specify in the <body> tag which
image should be used for the background.
<body background="drkrainbow.gif">
43. Fixed Image
The background image will scroll when the user scrolls down the page, unless you
have set it to be fixed:
<body background="drkrainbow.gif" bgproperties="fixed">
44. HTML Tables
Tables are used on websites for two major purposes:
• The obvious purpose of arranging information in a table
• The less obvious - but more widely used - purpose of creating a page
layout with the use of hidden tables.
Using tables to divide the page into different sections is an extremely
powerful tool.
Almost all major sites on the web are using invisible tables to layout
the pages.
45. The most important layout aspects that can be done with tables are
• Dividing the page into separate sections.
An invisible table is excellent for this purpose.
• Creating menus.
Typically with one color for the header and another for the links
following in the next lines.
• Adding interactive form fields.
Typically a gray area containing a search option.
• Creating fast loading headers for the page.
A colored table with a text on it loads like a bullet compared to even a
small banner.
• Easy alignment of images that have been cut into smaller pieces.
• A simple way to allow text to be written in two or more columns next
to each other.
46. Basic Tags
To insert a table on your page you simply add these tags where you want the table
to occur:
<table>
</table>
The above table would be of no use since it has no rows and no columns.
ROWS:
To add rows to your table use the <tr> and </tr> tags.
Example:
<table>
<tr></tr>
</table>
47. Basic Tags
It doesn't make sense to write the above lines in itself, cause you can't write content outside
of table cells. If you do write things outside of cells it will appear right above the table.
COLUMNS:
You can divide rows into columns with <td> and </td> tags:
Example:
<table>
<tr> <td>This is row one, left side.</td> <td>This is row one, right side.</td> </tr>
<tr> <td>This is row two, left side.</td> <td>This is row two, right side.</td> </tr>
</table>
48. Table Tags
The following properties can be added to the <table> tag:
align=
left left align table
center center table
right right align table
background=filename image inserted behind the
table
bgcolor=#rrggbb background color
border=n border thickness
49. bordercolor=#rrggbb border color
bordercolordark=#rrggbb border shadow
cellpadding=n distance between cell and content
cellspacing=n space between cells
Nowrap protects agains linebreaks, even though
the content might be wider than the
browser window.
valign=
top aligns content to top of cells
bottom aligns content to bottom of cells
width=
n,n minimum width of table in pixels
n,n% minimum width in percentage of window size
50. Row/Cell Tags
These settings can be added to both <tr> and <td> tags.
align=
left aligns content to the left of cells
right aligns content to the right of cells
center aligns content to the center of the cells
background=filename sets a background image for the cells
bgcolor=#rrggbb sets a background color for the cells
bordercolor=#rrggbb sets color for the border of cells
bordercolordark=#rrggbb sets color for the border shadow of cells
51. These settings are only valid for <td> tags
colspan=n number of columns a cell should span
Nowrap protects agains linebreaks, even though the content
of a cell might be wider than the browser window
rowspan=n number of rows a cell should span