SlideShare a Scribd company logo
1 of 25
When creating the album poster, I again had
to open Photoshop to enable me to create a
new document which I would be able to
work on. Once I had opened Photoshop, I
then selected ‘File’ and then ‘New’.
This pop up box then appeared
and I was able to change the
dimensions to ensure that the
document was the correct size
for my album poster. I decided
to go with a width of ‘210
Pixels’ and a height of ‘297
Pixels’. Once I had changed the
dimensions to what I wanted
them to be, I then changed the
name of document to ‘Album
Poster’ and clicked ‘OK’.
The main image I wanted to
include on the poster was the
digi-pack cover, so this meant
that I had to save the digi-pack
cover as an image so I would be
able to put it onto the poster. To
do this I just had to open the
digi-pack cover document and
once I had done that, I then
clicked ‘File’ then ‘Save As’.
This pop up box then appeared and I was able to choose a location
to save the digi-pack cover in. Once I had found somewhere to
save it, I then clicked on the drop down box next to where it says
‘Format’ and selected ‘JPEG’ and this was to ensure that the digi-
pack cover would be saved as an image rather than a Photoshop
document, so I would be able to put it onto my poster. Once I had
made all of these changes, I then clicked ‘OK’.
I then went back onto my poster
document as I needed to open
up the digi-pack cover image in
it. To do this I just had to click on
the ‘File’ tab and then ‘Open’.
This pop up box then appeared and I was
then able to find the location in which I had
saved the image. Once I had found the
location I had saved the image in, I then
selected the image and clicked ‘Open’.
Once the image was on my poster
document, I then needed to make
the image bigger as it was too
small in relation to the poster. To
do this I just had to click ‘Edit’,
‘Transform’ and then ‘Scale’.
In the image I have presented
on the left, you are able to see
how my album poster was
beginning to turn out.
Once the image of the album cover had been
placed in the correct position, I then wanted to
add a background to the poster and I decided
to get an image from Google Images as I
wanted a rough black background which would
conform to the Pop Punk genre, but would also
make the album poster look more appealing.
Once I had found an image I wanted to use
from Google Images, I then right clicked on it
and selected ‘Save Image As’.
This pop up box appeared and I was
then able to choose a location in which
to save this image in. Once I had found
a location to save this image in, I then
changed the name to ‘black
background’ and clicked ‘Save’.
Once I had saved this image, I
then needed to open it in
Photoshop and I was able to do
this by going onto my album
poster document and clicking
‘File’ and then ‘Open’.
This pop up box then appeared and I
was able to find the location in which
the image I had saved was in. Once I
had found the location the image I
wanted was in, I then selected it and
clicked ‘Open’.
Once the image had been put onto
my document, I then needed to
resize it to ensure that it would fit
on my document and I was able to
do this by clicking ‘Edit’, ‘Transform’
and then ‘Scale’.
The image I have presented on
the left is what my document
looked like once I had resized the
background image.
After I had put the image into
the position I wanted it to be in,
I then wanted to change the
colour of it a bit to make it blend
in more with the image and to
do this I just clicked ‘Image’,
‘Adjustments’ and then
‘Brightness/Contrast’.
This pop up box then appeared
and I was then able to change the
brightness and contrast settings of
the background image. Once I had
changed the settings to what I
wanted them to be, I then clicked
‘OK’ and you are then able to see
how the background colour had
changed in the image I have
presented on the left.
Once I had the background image in the
position I wanted it, I then wanted to
add some effects to the digi-pack cover
to make it stand out more and I was
able to do this by clicking ‘Layer’, ‘Layer
Style’ and then ‘Blending Options’.
This pop up box then
appeared and I was able to
add whatever effects I
wanted to the image to
make it stand out more.
The effects I decided to
add to the digi-pack cover
were called ‘Stroke’, ‘Outer
Glow’ and ‘Drop Shadow’.
Once I had added all the
effects I wanted to this
image, I then clicked ‘OK’.
The next thing I wanted to actually do was add text which
would read ‘The New Album’ and ‘Includes The Single’
which I wanted to both be in the same font. So to do this I
selected the ‘Text Tool’ and then selected the font called
‘Aparajita’. Once this had been selected, I then wrote out
the text and placed it into the position I wanted it to be in.
I then wanted to add more text to the poster,
but this time I wanted it to be in a different
font where the text would read ‘Available
12.8.17’ and ‘Not Enough’. So again all I had
to do was select the ‘Text Tool’ and then I
selected the font called ‘Fairydust8’, wrote
the text and then placed them into the
positions I wanted them to be in.
In the image I have presented on
the left, you are able to see what
the poster looked like once I had
added the text I had just written.
The next thing I wanted to do was
actually add some effects to the text I
had written and I firstly decided to
add effect to the first two pieces of
text I had written. I was able to do this
by clicking ‘Layer’, ‘Layer Style’ and
then ‘Blending Options’.
This pop up box then appeared and I was able
to choose the effects I wanted to add to the
text. The effects I decided to use were called
‘Stroke’, ‘Inner Shadow’ and ‘Drop Shadow’.
Once I had selected all of the effects I
wanted, I then clicked ‘OK’.
After that, I then wanted to
add some effects to the second
pieces of text I had written and
again to do this I had to click
‘Layer’, ‘Layer Style’ and then
‘Blending Options’.
This pop up box then appeared and again I was
able to choose the effects I wanted to add to the
text. The effects I decided to use were called
‘Bevel and Emboss’, ‘Contour’, ‘Stroke’, ‘Drop
Shadow’. When I had chosen all of the effects I
wanted, I then clicked ‘OK’.
Once I had added all the
effects I wanted to the text I
had written, the image I have
presented on the left is what
my poster looked liked once
the effects had been added.
The next thing I wanted to do was add an
iTunes logo onto the poster to enable
the audience to know that they would
be able to purchase the album on iTunes.
So I decided to go onto Google images to
get a logo – when I found one I wanted
to use, I then right clicked on it and
selected ‘Save Image As’.
This pop up box then appeared
and I was able to choose a
location to save this image in.
Once I had found somewhere
to save this image, I then
named it ‘itunes logo’ and
clicked ‘Save’.
I then went back onto my poster
document to enable me to put the image
I had just saved onto the poster. To do
this I had to click ‘File’ and then ‘Open’.
This pop up box then appeared and I
was able to find the location in which
the image I had saved was in. When I
found the image I wanted, I then
selected it and clicked ‘Open’.
When the image had been put onto my
poster document, I then needed to
resize it as it was too big for the
document and to do this I had to click
‘Edit’, ‘Transform’ and then ‘Scale’.
Once this image was in the position I
wanted it to be in, I then wanted to
add some effects to the image to
make it stand out more and to do
this I had to click ‘Layer’, ‘Layer Style’
and then ‘Blending Options’.
This pop up box then appeared and I was able
to choose the effects I wanted to add to this
image. The effects I decided to use were
called ‘Inner Glow’ and ‘Outer Glow’. Once I
had added all of the effects I wanted, I then
clicked ‘OK’.
After I had added the image of the
iTunes logo, I then decided to add
two other logo’s which included the
HMV and Spotify logo to inform the
audience that they would be able to
purchase the album in these places.
When putting these images onto my
poster, I again retrieved them from
Google Images and once I had put
them onto y poster document, I
then added some effects to the to
make them stand out more, which
you are able to see in the image I
have presented on the left.
I then wanted to add a scan code which the audience
would be able to scan when they see the poster which
will engage them with my artist and will hopefully
make them want to purchase the album. To get this
image, I again went onto Google images and once I
found a scan code that I wanted to use, I then right
clicked on it and selected ‘Save Image As’.
This pop up box then
appeared and I was able to
choose a location to save
this image in. Once I had
found somewhere to save
it, I then changed the
name to ‘scan barcode’
and clicked ‘Save’.
I then went back onto my poster
document so I would be able to put
this image onto my poster and to do
this I had to click ‘File’ and then ‘Open’.
This pop up box appeared and I
was then able to find the
location in which I had saved the
image I wanted. Once I found
the image I wanted, I then
selected it and clicked ‘Open’.
Once the image was on my document, I
then needed to resize it as it was too small
and I needed to make it visible to the
audience to ensure they see it. So to make
the image bigger I had to click ‘Edit’,
‘Transform’ and then ‘Scale’.
Once the image was the size I
wanted it, I then decided to
add some effects to it to make
it stand out more and again I
was able to do this by clicking
‘Layer’, ‘Layer Style’ and then
‘Blending Options’.
This pop up box then appeared and I was
able to choose the effects I wanted to
add to this image. The only effect I
decided to use was called ‘Drop Shadow’.
Once I had chosen this effect, I then
clicked ‘OK’.
When adding this scan code, I also
decided to add the logo for the record
label that my artist is signed to and as
I already had the image for this saved
in my documents, I just had to open
the image up on my poster document
and again I added some effects to it to
make it stand out more. You are able
to see how the poster began to look
as I have presented an image of it on
the left.
I then wanted to add my artists website address to the poster
and this meant that I needed to click on the ‘Text Tool’ and
once I had done this, I was then able to select the font I
wanted to use – the font I decided to use was called ‘Aparajita’.
Once I had selected this, I then wrote out my artists website
address and placed it into the position I wanted it to be in.
After that, I then wanted to
add some effects to the text I
had just written and I was able
to do this by selecting ‘Layer’,
‘Layer Style’ and then
‘Blending Options’.
This pop up box appeared and I was then
able to choose the effects I wanted to add to
the text. The effects I decided to use were
called ‘Bevel and Emboss’, ‘Contour’, ‘Stroke’
and ‘Drop Shadow’. Once I had chosen all of
the effects I wanted, I then clicked ‘OK’.
In the image I have presented
on the left, you are able to see
how my poster had turned out
once I had added the website
address I had written.
After I had completed creating my
poster, I then needed to save it and I
was able to do this by clicking ‘File’
and then ‘Save As’.
This pop up box then appeared and I was
able to choose a location to save this
document in. Once I had found somewhere
to save it, I then clicked on the drop down
box next to where it says ‘Format’ and
selected ‘JPEG’ and this was to ensure that
this document would be saved as an image
rather than a Photoshop document. Once I
had changed everything I needed, I then
clicked ‘Save’.

More Related Content

What's hot

How to use picmonkey
How to use picmonkeyHow to use picmonkey
How to use picmonkeymeriam bulabos
 
Development diary front cover
Development diary front coverDevelopment diary front cover
Development diary front coverKate-Anna Smith
 
3D game engine work flow
3D game engine work flow3D game engine work flow
3D game engine work flowsoulsama
 
Question 4
Question 4Question 4
Question 4maxbeard4
 
Digi-Pack Development Diary
Digi-Pack Development DiaryDigi-Pack Development Diary
Digi-Pack Development Diaryellierawl
 
Evaluation 6 + 7
Evaluation 6 + 7Evaluation 6 + 7
Evaluation 6 + 7armani765
 
Unit 73- Criteria 4: Programming Sounds Into a Video Game.
Unit 73- Criteria 4: Programming Sounds Into a Video Game.Unit 73- Criteria 4: Programming Sounds Into a Video Game.
Unit 73- Criteria 4: Programming Sounds Into a Video Game.ConnahTilley
 
Making the contents page (screenshots)
Making the contents page (screenshots)Making the contents page (screenshots)
Making the contents page (screenshots)georgia lonie
 
Evaluation 6 + 7
Evaluation 6 + 7Evaluation 6 + 7
Evaluation 6 + 7armani765
 

What's hot (11)

How to use picmonkey
How to use picmonkeyHow to use picmonkey
How to use picmonkey
 
Development diary front cover
Development diary front coverDevelopment diary front cover
Development diary front cover
 
3D game engine work flow
3D game engine work flow3D game engine work flow
3D game engine work flow
 
Question 4
Question 4Question 4
Question 4
 
Digi-Pack Development Diary
Digi-Pack Development DiaryDigi-Pack Development Diary
Digi-Pack Development Diary
 
How to Use Evernote
How to Use EvernoteHow to Use Evernote
How to Use Evernote
 
Flickr tutorial
Flickr tutorialFlickr tutorial
Flickr tutorial
 
Evaluation 6 + 7
Evaluation 6 + 7Evaluation 6 + 7
Evaluation 6 + 7
 
Unit 73- Criteria 4: Programming Sounds Into a Video Game.
Unit 73- Criteria 4: Programming Sounds Into a Video Game.Unit 73- Criteria 4: Programming Sounds Into a Video Game.
Unit 73- Criteria 4: Programming Sounds Into a Video Game.
 
Making the contents page (screenshots)
Making the contents page (screenshots)Making the contents page (screenshots)
Making the contents page (screenshots)
 
Evaluation 6 + 7
Evaluation 6 + 7Evaluation 6 + 7
Evaluation 6 + 7
 

Viewers also liked

Written Answers
Written AnswersWritten Answers
Written AnswersRebecca Witty
 
Liiar analysis of ancillary texts
Liiar analysis of ancillary textsLiiar analysis of ancillary texts
Liiar analysis of ancillary textsRebecca Witty
 
Liiar analysis of music video
Liiar analysis of music videoLiiar analysis of music video
Liiar analysis of music videoRebecca Witty
 
Last survey answers
Last survey answersLast survey answers
Last survey answersRebecca Witty
 
Punk Responses
Punk ResponsesPunk Responses
Punk ResponsesRebecca Witty
 
Hardware used evaluation
Hardware used evaluationHardware used evaluation
Hardware used evaluationRebecca Witty
 
Survey monkey results
Survey monkey resultsSurvey monkey results
Survey monkey resultsRebecca Witty
 
Digipack Images
Digipack ImagesDigipack Images
Digipack ImagesRebecca Witty
 
Audience Theory
Audience TheoryAudience Theory
Audience TheoryRebecca Witty
 
Paramore conventions
Paramore conventionsParamore conventions
Paramore conventionsRebecca Witty
 
Yellowcard conventions
Yellowcard conventionsYellowcard conventions
Yellowcard conventionsRebecca Witty
 
Personal Albums
Personal Albums Personal Albums
Personal Albums Rebecca Witty
 
From Under The Cork Tree Conventions
From Under The Cork Tree ConventionsFrom Under The Cork Tree Conventions
From Under The Cork Tree ConventionsRebecca Witty
 
Record label info
Record label infoRecord label info
Record label infoRebecca Witty
 
Fav photoshoot pics
Fav photoshoot picsFav photoshoot pics
Fav photoshoot picsRebecca Witty
 
Day 4 Equipment
Day 4 Equipment Day 4 Equipment
Day 4 Equipment Rebecca Witty
 
Song Upload Onto Phone
Song Upload Onto PhoneSong Upload Onto Phone
Song Upload Onto PhoneRebecca Witty
 

Viewers also liked (20)

Written Answers
Written AnswersWritten Answers
Written Answers
 
Real world
Real worldReal world
Real world
 
Liiar analysis of ancillary texts
Liiar analysis of ancillary textsLiiar analysis of ancillary texts
Liiar analysis of ancillary texts
 
Liiar analysis of music video
Liiar analysis of music videoLiiar analysis of music video
Liiar analysis of music video
 
Feedback
FeedbackFeedback
Feedback
 
Last survey answers
Last survey answersLast survey answers
Last survey answers
 
Punk Responses
Punk ResponsesPunk Responses
Punk Responses
 
Hardware used evaluation
Hardware used evaluationHardware used evaluation
Hardware used evaluation
 
Survey monkey results
Survey monkey resultsSurvey monkey results
Survey monkey results
 
Digipack Images
Digipack ImagesDigipack Images
Digipack Images
 
Narrative
Narrative Narrative
Narrative
 
Audience Theory
Audience TheoryAudience Theory
Audience Theory
 
Paramore conventions
Paramore conventionsParamore conventions
Paramore conventions
 
Yellowcard conventions
Yellowcard conventionsYellowcard conventions
Yellowcard conventions
 
Personal Albums
Personal Albums Personal Albums
Personal Albums
 
From Under The Cork Tree Conventions
From Under The Cork Tree ConventionsFrom Under The Cork Tree Conventions
From Under The Cork Tree Conventions
 
Record label info
Record label infoRecord label info
Record label info
 
Fav photoshoot pics
Fav photoshoot picsFav photoshoot pics
Fav photoshoot pics
 
Day 4 Equipment
Day 4 Equipment Day 4 Equipment
Day 4 Equipment
 
Song Upload Onto Phone
Song Upload Onto PhoneSong Upload Onto Phone
Song Upload Onto Phone
 

Similar to Poster process

Evidence of Front Cover
Evidence of Front CoverEvidence of Front Cover
Evidence of Front CoverTiaMaletta
 
Poster
Poster Poster
Poster shaybulms
 
Editing final poster - step by step
Editing final poster - step by step Editing final poster - step by step
Editing final poster - step by step rachh456
 
6. What have you learnt about technologies from the process of constructing t...
6. What have you learnt about technologies from the process of constructing t...6. What have you learnt about technologies from the process of constructing t...
6. What have you learnt about technologies from the process of constructing t...caitlinhulse
 
Editing Images
Editing ImagesEditing Images
Editing Imagesagatatrigox
 
ancillary text - photoshop process
ancillary text - photoshop processancillary text - photoshop process
ancillary text - photoshop processtaraburton07
 
Screenshots of music magazine ( first draft )
Screenshots of music magazine ( first draft )Screenshots of music magazine ( first draft )
Screenshots of music magazine ( first draft )ninachapman99
 
Construction of double page spread
Construction of double page spreadConstruction of double page spread
Construction of double page spreadkirsty97
 
3. production experiments (fmp)
3. production experiments (fmp)3. production experiments (fmp)
3. production experiments (fmp)Shaun Gardner
 
Photoshop Image Editing
Photoshop Image EditingPhotoshop Image Editing
Photoshop Image Editingpoynertyler2249
 
Tools I Used to Create my Magazine Advert
Tools I Used to Create my Magazine AdvertTools I Used to Create my Magazine Advert
Tools I Used to Create my Magazine AdvertChloe Jayde
 
Question 6
Question 6Question 6
Question 6hmoores123
 
Skills Development Advanced Portfolio 2014
Skills Development Advanced Portfolio 2014Skills Development Advanced Portfolio 2014
Skills Development Advanced Portfolio 2014Surya Gregory Robinson
 
Screenshots of final poster
Screenshots of final posterScreenshots of final poster
Screenshots of final postermollysmith123
 
Poster step by step
Poster step by stepPoster step by step
Poster step by stepgraciemarshall
 

Similar to Poster process (20)

Evidence of Front Cover
Evidence of Front CoverEvidence of Front Cover
Evidence of Front Cover
 
Image portfolio
Image portfolioImage portfolio
Image portfolio
 
Poster
Poster Poster
Poster
 
Editing final poster - step by step
Editing final poster - step by step Editing final poster - step by step
Editing final poster - step by step
 
6. What have you learnt about technologies from the process of constructing t...
6. What have you learnt about technologies from the process of constructing t...6. What have you learnt about technologies from the process of constructing t...
6. What have you learnt about technologies from the process of constructing t...
 
Editing Images
Editing ImagesEditing Images
Editing Images
 
ancillary text - photoshop process
ancillary text - photoshop processancillary text - photoshop process
ancillary text - photoshop process
 
Screenshots of music magazine ( first draft )
Screenshots of music magazine ( first draft )Screenshots of music magazine ( first draft )
Screenshots of music magazine ( first draft )
 
Construction of double page spread
Construction of double page spreadConstruction of double page spread
Construction of double page spread
 
Experiments
ExperimentsExperiments
Experiments
 
3. production experiments (fmp)
3. production experiments (fmp)3. production experiments (fmp)
3. production experiments (fmp)
 
Photoshop Image Editing
Photoshop Image EditingPhotoshop Image Editing
Photoshop Image Editing
 
Tools I Used to Create my Magazine Advert
Tools I Used to Create my Magazine AdvertTools I Used to Create my Magazine Advert
Tools I Used to Create my Magazine Advert
 
Question 6
Question 6Question 6
Question 6
 
Step by step
Step by stepStep by step
Step by step
 
Skills Development Advanced Portfolio 2014
Skills Development Advanced Portfolio 2014Skills Development Advanced Portfolio 2014
Skills Development Advanced Portfolio 2014
 
Screenshots
ScreenshotsScreenshots
Screenshots
 
Screenshots of final poster
Screenshots of final posterScreenshots of final poster
Screenshots of final poster
 
Poster step by step
Poster step by stepPoster step by step
Poster step by step
 
Panel 4
Panel 4Panel 4
Panel 4
 

More from Rebecca Witty

Game Environment Survey
Game Environment Survey Game Environment Survey
Game Environment Survey Rebecca Witty
 
Final Character Design Feedback Survey
Final Character Design Feedback SurveyFinal Character Design Feedback Survey
Final Character Design Feedback SurveyRebecca Witty
 
Character Sketches Feedback Survey
Character Sketches Feedback SurveyCharacter Sketches Feedback Survey
Character Sketches Feedback SurveyRebecca Witty
 
Character Design - Survey Responses
Character Design - Survey ResponsesCharacter Design - Survey Responses
Character Design - Survey ResponsesRebecca Witty
 
Day 1 equipment
Day 1 equipmentDay 1 equipment
Day 1 equipmentRebecca Witty
 

More from Rebecca Witty (9)

Game Environment Survey
Game Environment Survey Game Environment Survey
Game Environment Survey
 
Final Character Design Feedback Survey
Final Character Design Feedback SurveyFinal Character Design Feedback Survey
Final Character Design Feedback Survey
 
Character Sketches Feedback Survey
Character Sketches Feedback SurveyCharacter Sketches Feedback Survey
Character Sketches Feedback Survey
 
Character Design - Survey Responses
Character Design - Survey ResponsesCharacter Design - Survey Responses
Character Design - Survey Responses
 
Final
FinalFinal
Final
 
Day3 images
Day3 imagesDay3 images
Day3 images
 
Day2 images
Day2 imagesDay2 images
Day2 images
 
Day1 images
Day1 imagesDay1 images
Day1 images
 
Day 1 equipment
Day 1 equipmentDay 1 equipment
Day 1 equipment
 

Recently uploaded

How to Configure Email Server in Odoo 17
How to Configure Email Server in Odoo 17How to Configure Email Server in Odoo 17
How to Configure Email Server in Odoo 17Celine George
 
Introduction to ArtificiaI Intelligence in Higher Education
Introduction to ArtificiaI Intelligence in Higher EducationIntroduction to ArtificiaI Intelligence in Higher Education
Introduction to ArtificiaI Intelligence in Higher Educationpboyjonauth
 
Solving Puzzles Benefits Everyone (English).pptx
Solving Puzzles Benefits Everyone (English).pptxSolving Puzzles Benefits Everyone (English).pptx
Solving Puzzles Benefits Everyone (English).pptxOH TEIK BIN
 
Pharmacognosy Flower 3. Compositae 2023.pdf
Pharmacognosy Flower 3. Compositae 2023.pdfPharmacognosy Flower 3. Compositae 2023.pdf
Pharmacognosy Flower 3. Compositae 2023.pdfMahmoud M. Sallam
 
internship ppt on smartinternz platform as salesforce developer
internship ppt on smartinternz platform as salesforce developerinternship ppt on smartinternz platform as salesforce developer
internship ppt on smartinternz platform as salesforce developerunnathinaik
 
Paris 2024 Olympic Geographies - an activity
Paris 2024 Olympic Geographies - an activityParis 2024 Olympic Geographies - an activity
Paris 2024 Olympic Geographies - an activityGeoBlogs
 
BASLIQ CURRENT LOOKBOOK LOOKBOOK(1) (1).pdf
BASLIQ CURRENT LOOKBOOK  LOOKBOOK(1) (1).pdfBASLIQ CURRENT LOOKBOOK  LOOKBOOK(1) (1).pdf
BASLIQ CURRENT LOOKBOOK LOOKBOOK(1) (1).pdfSoniaTolstoy
 
_Math 4-Q4 Week 5.pptx Steps in Collecting Data
_Math 4-Q4 Week 5.pptx Steps in Collecting Data_Math 4-Q4 Week 5.pptx Steps in Collecting Data
_Math 4-Q4 Week 5.pptx Steps in Collecting DataJhengPantaleon
 
Computed Fields and api Depends in the Odoo 17
Computed Fields and api Depends in the Odoo 17Computed Fields and api Depends in the Odoo 17
Computed Fields and api Depends in the Odoo 17Celine George
 
call girls in Kamla Market (DELHI) 🔝 >༒9953330565🔝 genuine Escort Service 🔝✔️✔️
call girls in Kamla Market (DELHI) 🔝 >༒9953330565🔝 genuine Escort Service 🔝✔️✔️call girls in Kamla Market (DELHI) 🔝 >༒9953330565🔝 genuine Escort Service 🔝✔️✔️
call girls in Kamla Market (DELHI) 🔝 >༒9953330565🔝 genuine Escort Service 🔝✔️✔️9953056974 Low Rate Call Girls In Saket, Delhi NCR
 
Organic Name Reactions for the students and aspirants of Chemistry12th.pptx
Organic Name Reactions  for the students and aspirants of Chemistry12th.pptxOrganic Name Reactions  for the students and aspirants of Chemistry12th.pptx
Organic Name Reactions for the students and aspirants of Chemistry12th.pptxVS Mahajan Coaching Centre
 
Final demo Grade 9 for demo Plan dessert.pptx
Final demo Grade 9 for demo Plan dessert.pptxFinal demo Grade 9 for demo Plan dessert.pptx
Final demo Grade 9 for demo Plan dessert.pptxAvyJaneVismanos
 
Presiding Officer Training module 2024 lok sabha elections
Presiding Officer Training module 2024 lok sabha electionsPresiding Officer Training module 2024 lok sabha elections
Presiding Officer Training module 2024 lok sabha electionsanshu789521
 
Class 11 Legal Studies Ch-1 Concept of State .pdf
Class 11 Legal Studies Ch-1 Concept of State .pdfClass 11 Legal Studies Ch-1 Concept of State .pdf
Class 11 Legal Studies Ch-1 Concept of State .pdfakmcokerachita
 
ENGLISH5 QUARTER4 MODULE1 WEEK1-3 How Visual and Multimedia Elements.pptx
ENGLISH5 QUARTER4 MODULE1 WEEK1-3 How Visual and Multimedia Elements.pptxENGLISH5 QUARTER4 MODULE1 WEEK1-3 How Visual and Multimedia Elements.pptx
ENGLISH5 QUARTER4 MODULE1 WEEK1-3 How Visual and Multimedia Elements.pptxAnaBeatriceAblay2
 
Kisan Call Centre - To harness potential of ICT in Agriculture by answer farm...
Kisan Call Centre - To harness potential of ICT in Agriculture by answer farm...Kisan Call Centre - To harness potential of ICT in Agriculture by answer farm...
Kisan Call Centre - To harness potential of ICT in Agriculture by answer farm...Krashi Coaching
 
Call Girls in Dwarka Mor Delhi Contact Us 9654467111
Call Girls in Dwarka Mor Delhi Contact Us 9654467111Call Girls in Dwarka Mor Delhi Contact Us 9654467111
Call Girls in Dwarka Mor Delhi Contact Us 9654467111Sapana Sha
 

Recently uploaded (20)

How to Configure Email Server in Odoo 17
How to Configure Email Server in Odoo 17How to Configure Email Server in Odoo 17
How to Configure Email Server in Odoo 17
 
Introduction to ArtificiaI Intelligence in Higher Education
Introduction to ArtificiaI Intelligence in Higher EducationIntroduction to ArtificiaI Intelligence in Higher Education
Introduction to ArtificiaI Intelligence in Higher Education
 
Solving Puzzles Benefits Everyone (English).pptx
Solving Puzzles Benefits Everyone (English).pptxSolving Puzzles Benefits Everyone (English).pptx
Solving Puzzles Benefits Everyone (English).pptx
 
Pharmacognosy Flower 3. Compositae 2023.pdf
Pharmacognosy Flower 3. Compositae 2023.pdfPharmacognosy Flower 3. Compositae 2023.pdf
Pharmacognosy Flower 3. Compositae 2023.pdf
 
internship ppt on smartinternz platform as salesforce developer
internship ppt on smartinternz platform as salesforce developerinternship ppt on smartinternz platform as salesforce developer
internship ppt on smartinternz platform as salesforce developer
 
Paris 2024 Olympic Geographies - an activity
Paris 2024 Olympic Geographies - an activityParis 2024 Olympic Geographies - an activity
Paris 2024 Olympic Geographies - an activity
 
BASLIQ CURRENT LOOKBOOK LOOKBOOK(1) (1).pdf
BASLIQ CURRENT LOOKBOOK  LOOKBOOK(1) (1).pdfBASLIQ CURRENT LOOKBOOK  LOOKBOOK(1) (1).pdf
BASLIQ CURRENT LOOKBOOK LOOKBOOK(1) (1).pdf
 
Model Call Girl in Bikash Puri Delhi reach out to us at 🔝9953056974🔝
Model Call Girl in Bikash Puri  Delhi reach out to us at 🔝9953056974🔝Model Call Girl in Bikash Puri  Delhi reach out to us at 🔝9953056974🔝
Model Call Girl in Bikash Puri Delhi reach out to us at 🔝9953056974🔝
 
_Math 4-Q4 Week 5.pptx Steps in Collecting Data
_Math 4-Q4 Week 5.pptx Steps in Collecting Data_Math 4-Q4 Week 5.pptx Steps in Collecting Data
_Math 4-Q4 Week 5.pptx Steps in Collecting Data
 
Computed Fields and api Depends in the Odoo 17
Computed Fields and api Depends in the Odoo 17Computed Fields and api Depends in the Odoo 17
Computed Fields and api Depends in the Odoo 17
 
call girls in Kamla Market (DELHI) 🔝 >༒9953330565🔝 genuine Escort Service 🔝✔️✔️
call girls in Kamla Market (DELHI) 🔝 >༒9953330565🔝 genuine Escort Service 🔝✔️✔️call girls in Kamla Market (DELHI) 🔝 >༒9953330565🔝 genuine Escort Service 🔝✔️✔️
call girls in Kamla Market (DELHI) 🔝 >༒9953330565🔝 genuine Escort Service 🔝✔️✔️
 
Organic Name Reactions for the students and aspirants of Chemistry12th.pptx
Organic Name Reactions  for the students and aspirants of Chemistry12th.pptxOrganic Name Reactions  for the students and aspirants of Chemistry12th.pptx
Organic Name Reactions for the students and aspirants of Chemistry12th.pptx
 
Final demo Grade 9 for demo Plan dessert.pptx
Final demo Grade 9 for demo Plan dessert.pptxFinal demo Grade 9 for demo Plan dessert.pptx
Final demo Grade 9 for demo Plan dessert.pptx
 
Presiding Officer Training module 2024 lok sabha elections
Presiding Officer Training module 2024 lok sabha electionsPresiding Officer Training module 2024 lok sabha elections
Presiding Officer Training module 2024 lok sabha elections
 
TataKelola dan KamSiber Kecerdasan Buatan v022.pdf
TataKelola dan KamSiber Kecerdasan Buatan v022.pdfTataKelola dan KamSiber Kecerdasan Buatan v022.pdf
TataKelola dan KamSiber Kecerdasan Buatan v022.pdf
 
Class 11 Legal Studies Ch-1 Concept of State .pdf
Class 11 Legal Studies Ch-1 Concept of State .pdfClass 11 Legal Studies Ch-1 Concept of State .pdf
Class 11 Legal Studies Ch-1 Concept of State .pdf
 
9953330565 Low Rate Call Girls In Rohini Delhi NCR
9953330565 Low Rate Call Girls In Rohini  Delhi NCR9953330565 Low Rate Call Girls In Rohini  Delhi NCR
9953330565 Low Rate Call Girls In Rohini Delhi NCR
 
ENGLISH5 QUARTER4 MODULE1 WEEK1-3 How Visual and Multimedia Elements.pptx
ENGLISH5 QUARTER4 MODULE1 WEEK1-3 How Visual and Multimedia Elements.pptxENGLISH5 QUARTER4 MODULE1 WEEK1-3 How Visual and Multimedia Elements.pptx
ENGLISH5 QUARTER4 MODULE1 WEEK1-3 How Visual and Multimedia Elements.pptx
 
Kisan Call Centre - To harness potential of ICT in Agriculture by answer farm...
Kisan Call Centre - To harness potential of ICT in Agriculture by answer farm...Kisan Call Centre - To harness potential of ICT in Agriculture by answer farm...
Kisan Call Centre - To harness potential of ICT in Agriculture by answer farm...
 
Call Girls in Dwarka Mor Delhi Contact Us 9654467111
Call Girls in Dwarka Mor Delhi Contact Us 9654467111Call Girls in Dwarka Mor Delhi Contact Us 9654467111
Call Girls in Dwarka Mor Delhi Contact Us 9654467111
 

Poster process

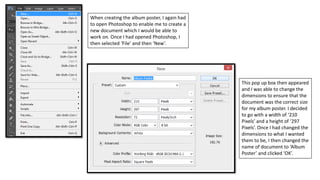
  • 1. When creating the album poster, I again had to open Photoshop to enable me to create a new document which I would be able to work on. Once I had opened Photoshop, I then selected ‘File’ and then ‘New’. This pop up box then appeared and I was able to change the dimensions to ensure that the document was the correct size for my album poster. I decided to go with a width of ‘210 Pixels’ and a height of ‘297 Pixels’. Once I had changed the dimensions to what I wanted them to be, I then changed the name of document to ‘Album Poster’ and clicked ‘OK’.
  • 2. The main image I wanted to include on the poster was the digi-pack cover, so this meant that I had to save the digi-pack cover as an image so I would be able to put it onto the poster. To do this I just had to open the digi-pack cover document and once I had done that, I then clicked ‘File’ then ‘Save As’.
  • 3. This pop up box then appeared and I was able to choose a location to save the digi-pack cover in. Once I had found somewhere to save it, I then clicked on the drop down box next to where it says ‘Format’ and selected ‘JPEG’ and this was to ensure that the digi- pack cover would be saved as an image rather than a Photoshop document, so I would be able to put it onto my poster. Once I had made all of these changes, I then clicked ‘OK’. I then went back onto my poster document as I needed to open up the digi-pack cover image in it. To do this I just had to click on the ‘File’ tab and then ‘Open’.
  • 4. This pop up box then appeared and I was then able to find the location in which I had saved the image. Once I had found the location I had saved the image in, I then selected the image and clicked ‘Open’. Once the image was on my poster document, I then needed to make the image bigger as it was too small in relation to the poster. To do this I just had to click ‘Edit’, ‘Transform’ and then ‘Scale’.
  • 5. In the image I have presented on the left, you are able to see how my album poster was beginning to turn out. Once the image of the album cover had been placed in the correct position, I then wanted to add a background to the poster and I decided to get an image from Google Images as I wanted a rough black background which would conform to the Pop Punk genre, but would also make the album poster look more appealing. Once I had found an image I wanted to use from Google Images, I then right clicked on it and selected ‘Save Image As’.
  • 6. This pop up box appeared and I was then able to choose a location in which to save this image in. Once I had found a location to save this image in, I then changed the name to ‘black background’ and clicked ‘Save’. Once I had saved this image, I then needed to open it in Photoshop and I was able to do this by going onto my album poster document and clicking ‘File’ and then ‘Open’.
  • 7. This pop up box then appeared and I was able to find the location in which the image I had saved was in. Once I had found the location the image I wanted was in, I then selected it and clicked ‘Open’. Once the image had been put onto my document, I then needed to resize it to ensure that it would fit on my document and I was able to do this by clicking ‘Edit’, ‘Transform’ and then ‘Scale’.
  • 8. The image I have presented on the left is what my document looked like once I had resized the background image. After I had put the image into the position I wanted it to be in, I then wanted to change the colour of it a bit to make it blend in more with the image and to do this I just clicked ‘Image’, ‘Adjustments’ and then ‘Brightness/Contrast’.
  • 9. This pop up box then appeared and I was then able to change the brightness and contrast settings of the background image. Once I had changed the settings to what I wanted them to be, I then clicked ‘OK’ and you are then able to see how the background colour had changed in the image I have presented on the left.
  • 10. Once I had the background image in the position I wanted it, I then wanted to add some effects to the digi-pack cover to make it stand out more and I was able to do this by clicking ‘Layer’, ‘Layer Style’ and then ‘Blending Options’. This pop up box then appeared and I was able to add whatever effects I wanted to the image to make it stand out more. The effects I decided to add to the digi-pack cover were called ‘Stroke’, ‘Outer Glow’ and ‘Drop Shadow’. Once I had added all the effects I wanted to this image, I then clicked ‘OK’.
  • 11. The next thing I wanted to actually do was add text which would read ‘The New Album’ and ‘Includes The Single’ which I wanted to both be in the same font. So to do this I selected the ‘Text Tool’ and then selected the font called ‘Aparajita’. Once this had been selected, I then wrote out the text and placed it into the position I wanted it to be in. I then wanted to add more text to the poster, but this time I wanted it to be in a different font where the text would read ‘Available 12.8.17’ and ‘Not Enough’. So again all I had to do was select the ‘Text Tool’ and then I selected the font called ‘Fairydust8’, wrote the text and then placed them into the positions I wanted them to be in.
  • 12. In the image I have presented on the left, you are able to see what the poster looked like once I had added the text I had just written. The next thing I wanted to do was actually add some effects to the text I had written and I firstly decided to add effect to the first two pieces of text I had written. I was able to do this by clicking ‘Layer’, ‘Layer Style’ and then ‘Blending Options’.
  • 13. This pop up box then appeared and I was able to choose the effects I wanted to add to the text. The effects I decided to use were called ‘Stroke’, ‘Inner Shadow’ and ‘Drop Shadow’. Once I had selected all of the effects I wanted, I then clicked ‘OK’. After that, I then wanted to add some effects to the second pieces of text I had written and again to do this I had to click ‘Layer’, ‘Layer Style’ and then ‘Blending Options’.
  • 14. This pop up box then appeared and again I was able to choose the effects I wanted to add to the text. The effects I decided to use were called ‘Bevel and Emboss’, ‘Contour’, ‘Stroke’, ‘Drop Shadow’. When I had chosen all of the effects I wanted, I then clicked ‘OK’. Once I had added all the effects I wanted to the text I had written, the image I have presented on the left is what my poster looked liked once the effects had been added.
  • 15. The next thing I wanted to do was add an iTunes logo onto the poster to enable the audience to know that they would be able to purchase the album on iTunes. So I decided to go onto Google images to get a logo – when I found one I wanted to use, I then right clicked on it and selected ‘Save Image As’. This pop up box then appeared and I was able to choose a location to save this image in. Once I had found somewhere to save this image, I then named it ‘itunes logo’ and clicked ‘Save’.
  • 16. I then went back onto my poster document to enable me to put the image I had just saved onto the poster. To do this I had to click ‘File’ and then ‘Open’. This pop up box then appeared and I was able to find the location in which the image I had saved was in. When I found the image I wanted, I then selected it and clicked ‘Open’.
  • 17. When the image had been put onto my poster document, I then needed to resize it as it was too big for the document and to do this I had to click ‘Edit’, ‘Transform’ and then ‘Scale’. Once this image was in the position I wanted it to be in, I then wanted to add some effects to the image to make it stand out more and to do this I had to click ‘Layer’, ‘Layer Style’ and then ‘Blending Options’.
  • 18. This pop up box then appeared and I was able to choose the effects I wanted to add to this image. The effects I decided to use were called ‘Inner Glow’ and ‘Outer Glow’. Once I had added all of the effects I wanted, I then clicked ‘OK’. After I had added the image of the iTunes logo, I then decided to add two other logo’s which included the HMV and Spotify logo to inform the audience that they would be able to purchase the album in these places. When putting these images onto my poster, I again retrieved them from Google Images and once I had put them onto y poster document, I then added some effects to the to make them stand out more, which you are able to see in the image I have presented on the left.
  • 19. I then wanted to add a scan code which the audience would be able to scan when they see the poster which will engage them with my artist and will hopefully make them want to purchase the album. To get this image, I again went onto Google images and once I found a scan code that I wanted to use, I then right clicked on it and selected ‘Save Image As’. This pop up box then appeared and I was able to choose a location to save this image in. Once I had found somewhere to save it, I then changed the name to ‘scan barcode’ and clicked ‘Save’.
  • 20. I then went back onto my poster document so I would be able to put this image onto my poster and to do this I had to click ‘File’ and then ‘Open’. This pop up box appeared and I was then able to find the location in which I had saved the image I wanted. Once I found the image I wanted, I then selected it and clicked ‘Open’.
  • 21. Once the image was on my document, I then needed to resize it as it was too small and I needed to make it visible to the audience to ensure they see it. So to make the image bigger I had to click ‘Edit’, ‘Transform’ and then ‘Scale’. Once the image was the size I wanted it, I then decided to add some effects to it to make it stand out more and again I was able to do this by clicking ‘Layer’, ‘Layer Style’ and then ‘Blending Options’.
  • 22. This pop up box then appeared and I was able to choose the effects I wanted to add to this image. The only effect I decided to use was called ‘Drop Shadow’. Once I had chosen this effect, I then clicked ‘OK’. When adding this scan code, I also decided to add the logo for the record label that my artist is signed to and as I already had the image for this saved in my documents, I just had to open the image up on my poster document and again I added some effects to it to make it stand out more. You are able to see how the poster began to look as I have presented an image of it on the left.
  • 23. I then wanted to add my artists website address to the poster and this meant that I needed to click on the ‘Text Tool’ and once I had done this, I was then able to select the font I wanted to use – the font I decided to use was called ‘Aparajita’. Once I had selected this, I then wrote out my artists website address and placed it into the position I wanted it to be in. After that, I then wanted to add some effects to the text I had just written and I was able to do this by selecting ‘Layer’, ‘Layer Style’ and then ‘Blending Options’.
  • 24. This pop up box appeared and I was then able to choose the effects I wanted to add to the text. The effects I decided to use were called ‘Bevel and Emboss’, ‘Contour’, ‘Stroke’ and ‘Drop Shadow’. Once I had chosen all of the effects I wanted, I then clicked ‘OK’. In the image I have presented on the left, you are able to see how my poster had turned out once I had added the website address I had written.
  • 25. After I had completed creating my poster, I then needed to save it and I was able to do this by clicking ‘File’ and then ‘Save As’. This pop up box then appeared and I was able to choose a location to save this document in. Once I had found somewhere to save it, I then clicked on the drop down box next to where it says ‘Format’ and selected ‘JPEG’ and this was to ensure that this document would be saved as an image rather than a Photoshop document. Once I had changed everything I needed, I then clicked ‘Save’.