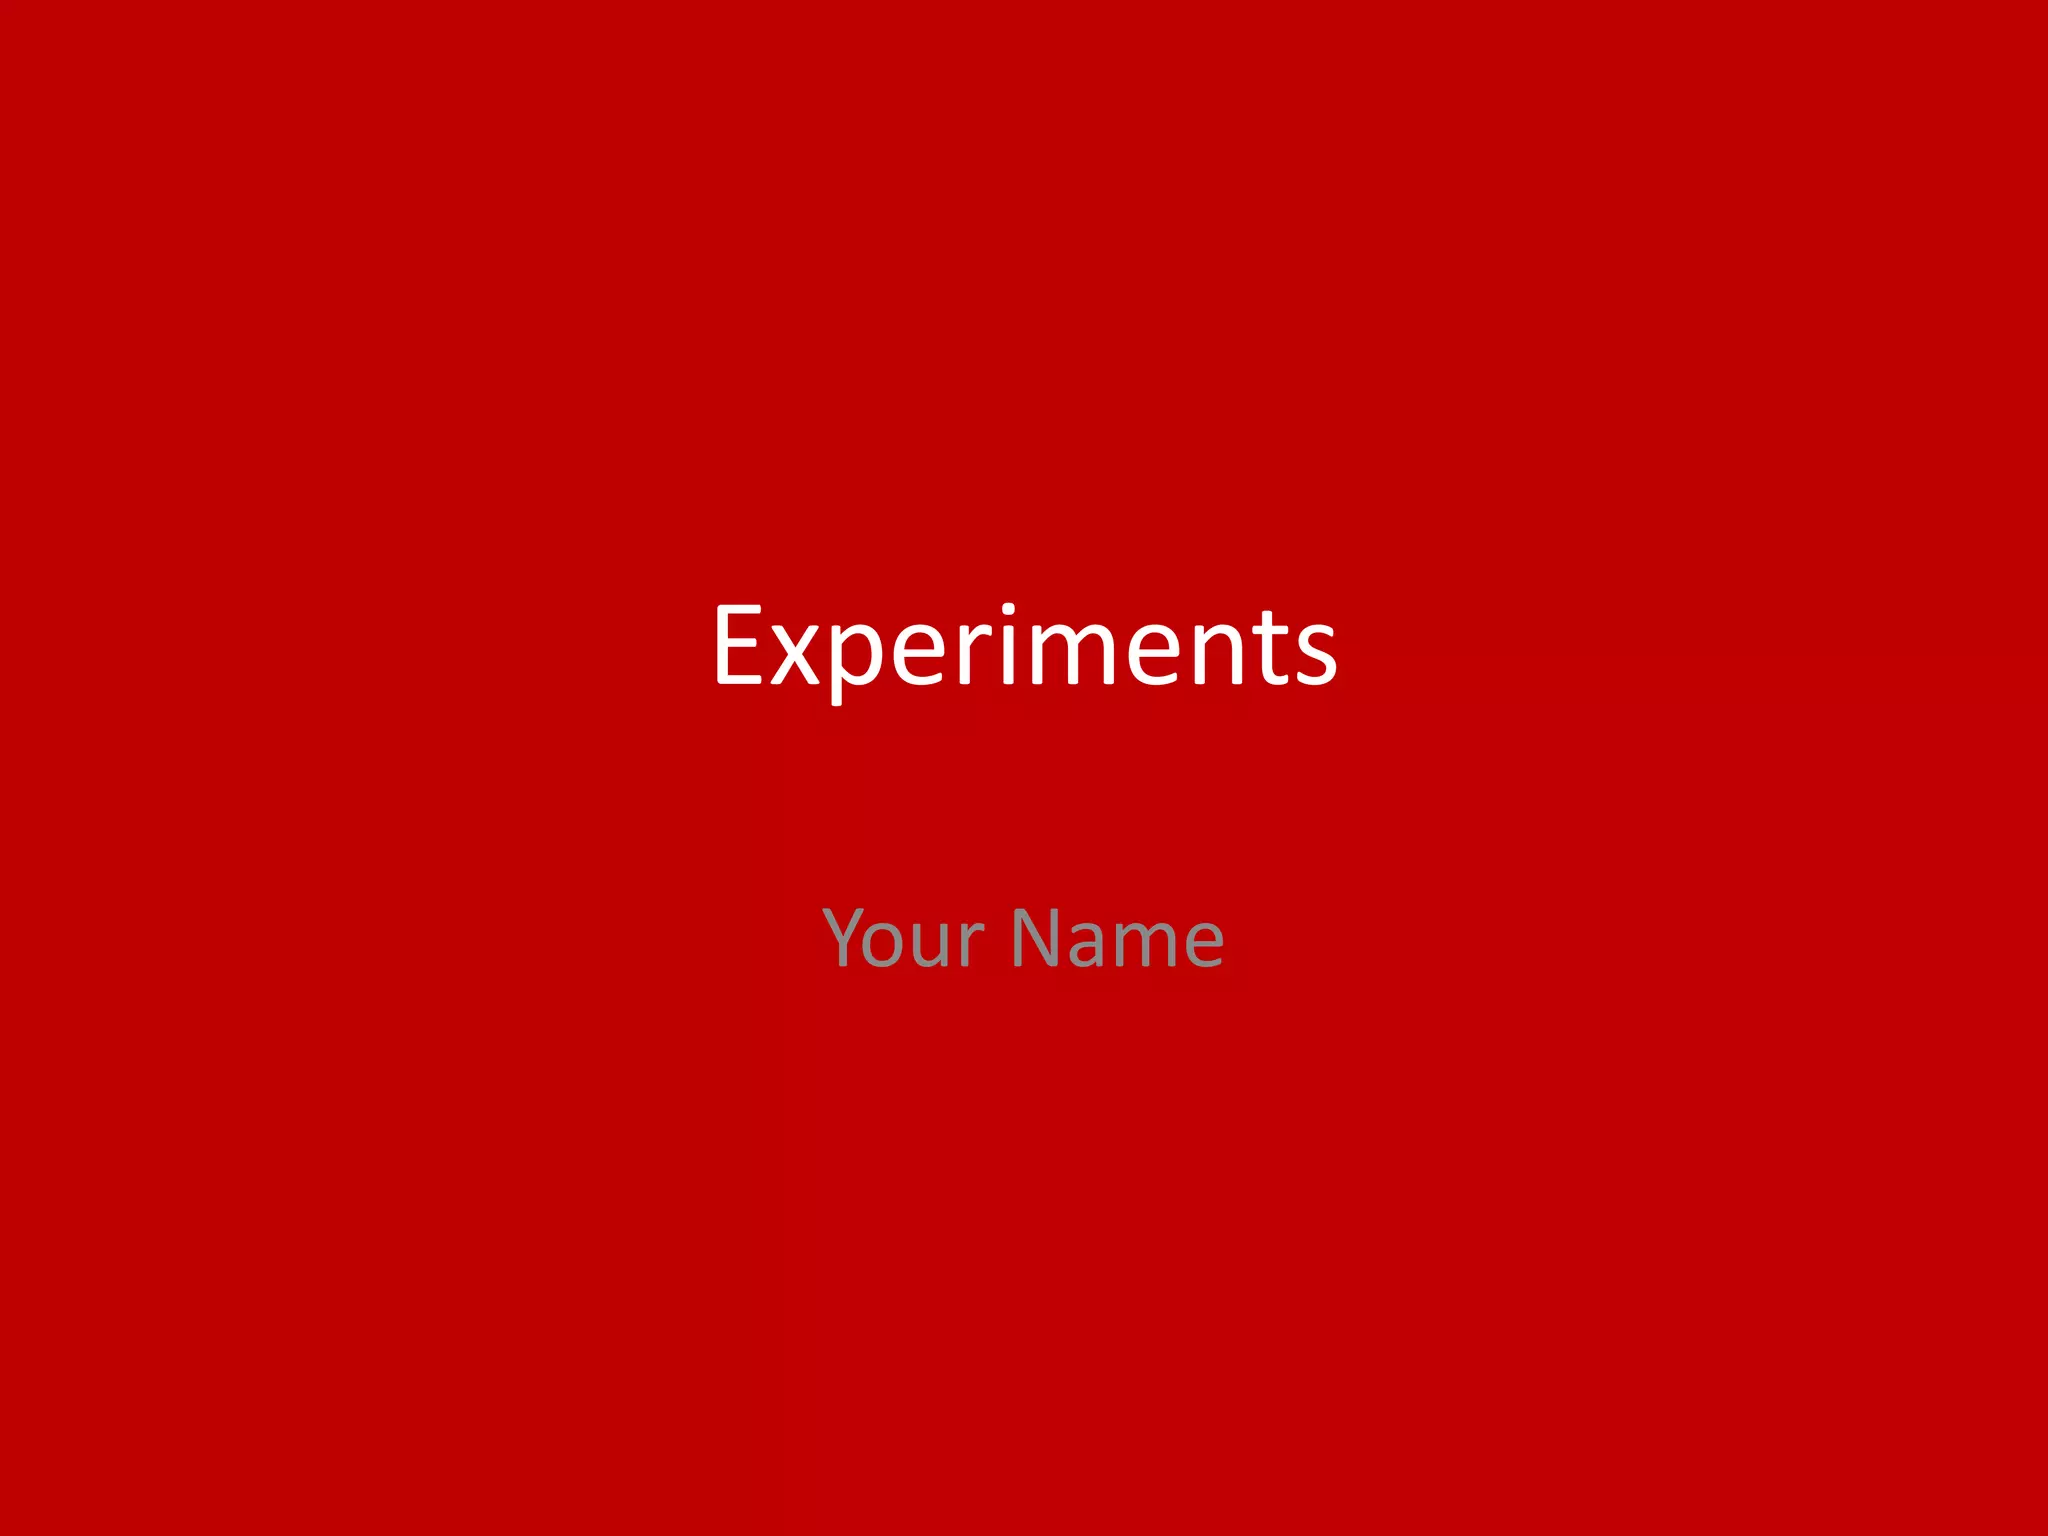
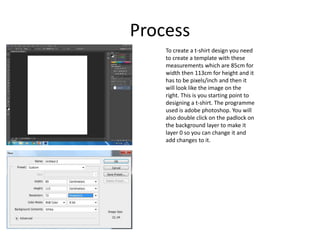
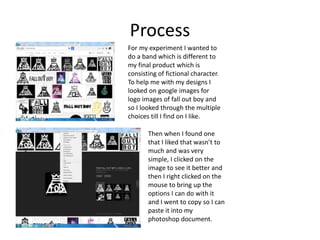
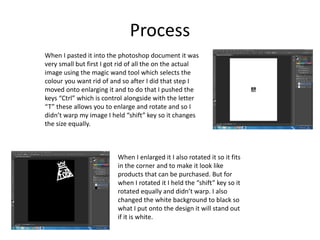
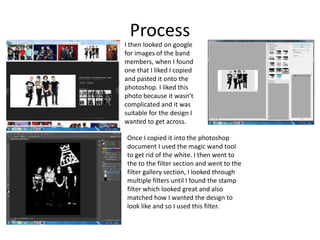
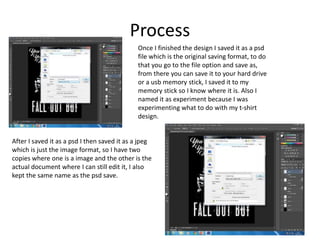
Experiments
Your Name
Process
To create a t-shirt design you need
to create a template with these
measurements which are 85cm for
width then 113cm for height and it
has to be pixels/inch and then it
will look like the image on the
right. This is you starting point to
designing a t-shirt. The programme
used is adobe photoshop. You will
also double click on the padlock on
the background layer to make it
layer 0 so you can change it and
add changes to it.
Process
For my experiment I wanted to
do a band which is different to
my final product which is
consisting of fictional character.
To help me with my designs I
looked on google images for
logo images of fall out boy and
so I looked through the multiple
choices till I find on I like.
Then when I found one
that I liked that wasn’t to
much and was very
simple, I clicked on the
image to see it better and
then I right clicked on the
mouse to bring up the
options I can do with it
and I went to copy so I can
paste it into my
photoshop document.
Process
When I pasted it into the photoshop document it was
very small but first I got rid of all the on the actual
image using the magic wand tool which selects the
colour you want rid of and so after I did that step I
moved onto enlarging it and to do that I pushed the
keys “Ctrl” which is control alongside with the letter
“T” these allows you to enlarge and rotate and so I
didn’t warp my image I held “shift” key so it changes
the size equally.
When I enlarged it I also rotated it so it fits
in the corner and to make it look like
products that can be purchased. But for
when I rotated it I held the “shift” key so it
rotated equally and didn’t warp. I also
changed the white background to black so
what I put onto the design it will stand out
if it is white.
Process
I then looked on google
for images of the band
members, when I found
one that I liked I copied
and pasted it onto the
photoshop. I liked this
photo because it wasn’t
complicated and it was
suitable for the design I
wanted to get across.
Once I copied it into the photoshop
document I used the magic wand tool
to get rid of the white. I then went to
the to the filter section and went to the
filter gallery section, I looked through
multiple filters until I found the stamp
filter which looked great and also
matched how I wanted the design to
look like and so I used this filter.
Process
I went onto dafont to look for a suitable font
to use for a quote that I wanted to include on
the design, once I found the font that I
wanted to use I clicked on it and changed the
size to medium and typed in what I want it to
say then copied and pasted it into photoshop
and I then used the polygon lasso tool to get
rid of the webpage and then used the magic
wand tool to get rid of the parts I couldn’t get
to. I repeated this step three times.
To get the writing white I double clicked on
the layer the text was on then tab appeared
with multiple options, once that’s up you go
to the colour overlay option and when you’ve
gone on there the colours will already be red
then you click on the red box and then I
changed it to white to match the rest of the
colours I have used.
Process
Once I finished the design I saved it as a psd
file which is the original saving format, to do
that you go to the file option and save as,
from there you can save it to your hard drive
or a usb memory stick, I saved it to my
memory stick so I know where it is. Also I
named it as experiment because I was
experimenting what to do with my t-shirt
design.
After I saved it as a psd I then saved it as a jpeg
which is just the image format, so I have two
copies where one is a image and the other is the
actual document where I can still edit it, I also
kept the same name as the psd save.
Reflection
• What elements of your experiments will you include in your final product?
For my final product I will keep the elements of the t-shirt design the reason because of this
is because is that my target audience want me to create t-shirts with different designs and
so on. The only that I will be changing for my final product is that I won’t be creating a
design for a band such fall out boy or disturbed etc. instead my designs will consist of
fictional characters such as comic book heroes like batman, superman, iron man. I will also
include comic villains like joker, bane, mysterio and others like game characters. I will also
use the rotoscope technique which use the polygon lasso tool and the colour overlay
option. I will also use the filter that I have used in my experiment which was the stamp. But
I will be use different filters as well to create variety in my designs.

3. production experiments (fmp)

  • 1.
  • 2.
    Process To create at-shirt design you need to create a template with these measurements which are 85cm for width then 113cm for height and it has to be pixels/inch and then it will look like the image on the right. This is you starting point to designing a t-shirt. The programme used is adobe photoshop. You will also double click on the padlock on the background layer to make it layer 0 so you can change it and add changes to it.
  • 3.
    Process For my experimentI wanted to do a band which is different to my final product which is consisting of fictional character. To help me with my designs I looked on google images for logo images of fall out boy and so I looked through the multiple choices till I find on I like. Then when I found one that I liked that wasn’t to much and was very simple, I clicked on the image to see it better and then I right clicked on the mouse to bring up the options I can do with it and I went to copy so I can paste it into my photoshop document.
  • 4.
    Process When I pastedit into the photoshop document it was very small but first I got rid of all the on the actual image using the magic wand tool which selects the colour you want rid of and so after I did that step I moved onto enlarging it and to do that I pushed the keys “Ctrl” which is control alongside with the letter “T” these allows you to enlarge and rotate and so I didn’t warp my image I held “shift” key so it changes the size equally. When I enlarged it I also rotated it so it fits in the corner and to make it look like products that can be purchased. But for when I rotated it I held the “shift” key so it rotated equally and didn’t warp. I also changed the white background to black so what I put onto the design it will stand out if it is white.
  • 5.
    Process I then lookedon google for images of the band members, when I found one that I liked I copied and pasted it onto the photoshop. I liked this photo because it wasn’t complicated and it was suitable for the design I wanted to get across. Once I copied it into the photoshop document I used the magic wand tool to get rid of the white. I then went to the to the filter section and went to the filter gallery section, I looked through multiple filters until I found the stamp filter which looked great and also matched how I wanted the design to look like and so I used this filter.
  • 6.
    Process I went ontodafont to look for a suitable font to use for a quote that I wanted to include on the design, once I found the font that I wanted to use I clicked on it and changed the size to medium and typed in what I want it to say then copied and pasted it into photoshop and I then used the polygon lasso tool to get rid of the webpage and then used the magic wand tool to get rid of the parts I couldn’t get to. I repeated this step three times. To get the writing white I double clicked on the layer the text was on then tab appeared with multiple options, once that’s up you go to the colour overlay option and when you’ve gone on there the colours will already be red then you click on the red box and then I changed it to white to match the rest of the colours I have used.
  • 7.
    Process Once I finishedthe design I saved it as a psd file which is the original saving format, to do that you go to the file option and save as, from there you can save it to your hard drive or a usb memory stick, I saved it to my memory stick so I know where it is. Also I named it as experiment because I was experimenting what to do with my t-shirt design. After I saved it as a psd I then saved it as a jpeg which is just the image format, so I have two copies where one is a image and the other is the actual document where I can still edit it, I also kept the same name as the psd save.
  • 8.
    Reflection • What elementsof your experiments will you include in your final product? For my final product I will keep the elements of the t-shirt design the reason because of this is because is that my target audience want me to create t-shirts with different designs and so on. The only that I will be changing for my final product is that I won’t be creating a design for a band such fall out boy or disturbed etc. instead my designs will consist of fictional characters such as comic book heroes like batman, superman, iron man. I will also include comic villains like joker, bane, mysterio and others like game characters. I will also use the rotoscope technique which use the polygon lasso tool and the colour overlay option. I will also use the filter that I have used in my experiment which was the stamp. But I will be use different filters as well to create variety in my designs.

Editor's Notes

  • #3 Discuss the tools and processes used in your experiments
  • #4 Discuss the tools and processes used in your experiments
  • #5 Discuss the tools and processes used in your experiments
  • #6 Discuss the tools and processes used in your experiments
  • #7 Discuss the tools and processes used in your experiments
  • #8 Discuss the tools and processes used in your experiments