Microscopy and Identification of Mircobes
•Download as PPTX, PDF•
3 likes•84 views

Microscopy and Identification of Mircobes

Recommended
More Related Content
What's hot
What's hot (19)
Similar to Microscopy and Identification of Mircobes
Similar to Microscopy and Identification of Mircobes (20)
Recently uploaded
Recently uploaded (20)
Microscopy and Identification of Mircobes
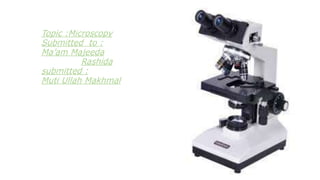
- 1. Topic :Microscopy Submitted to : Ma’am Majeeda Rashida submitted : Muti Ullah Makhmal
- 2. Introduction History microscopy Types of microscopy Term related to microscopy Identification of microbes Staining Types of staining
- 3. Microscopy Microscope is the combination of two words; "micro" meaning small and "scope" meaning view. Microscopy is the technical field of using microscopes to view objects and areas of objects that cannot be seen with the naked eye (objects that are not within the resolution range of the normal eye). There are three main branches of microscopy: 1-Optical microscopy or light microscopy 2-Electron microscopy 3- scanning probe microscopy.
- 4. Light Microscopy • 1-Compound Light Microscopes • 2-Dark Field Microscopes • 3-Phase-Contrast Microscopy • 4-Differential Interference Contrast Microscopy • 5-Fluorecence Microscopy • 6-Two Photon Microscopy • 8-Scaning Acoustic Microscopy TYPES OF MICROSCO PY
- 5. Electron Microscopy • 1-Transmission Electron microscopy • 2-Scaning Electron mircroscopy SCANED PORBE MICROSCOPY • 1-Scanning Tunnelling microscopy • 2-Atomic force microscopy
- 6. History of Microscopy Around the 1st century, someone discovered that looking through a crystal made things look larger That piece of crystal was called a “magnifying glass” and then later was called a lens because it was shaped like a lentil seed. In the 13th century (1200s) an Italian inventor made the first eye glasses, allowing the wearer to have magnification. His name was Salvino D’Armate. Eye glasses were also called spectacles.
- 7. Microscopy The earliest forms of magnification were magnifying glasses, usually between 6x to 10x, and were used for looking at tiny insects. These excited general wonder when used to view fleas or tiny creeping things and so were dubbed "flea glasses.“ The microscope was first built in 1595 by Zacharias Janssen and his father Hans in Holland.
- 8. • The first compound microscopes produced by the Janssens were simply a tube with lenses at each end. • The magnification of these early scopes ranged from 3X to 9X, depending on the size of the diaphragm openings. 14th century were used in spectacles Late 16th century the Dutch refined the art of lens grinding significant magnification. 1600s – lenses first mounted on permanent frameworks (so distance could be changed) • Why would this be important? 1. To focus the image 2. Next, lenses were paired together.
- 9. •Robert Hooke (1635-1703) Developed a primitive Compound microscope. In Micrographic (1665), he coined the word cell to describe the features of plant tissue (cork from the bark of an oak tree). he was able to discover under the microscope.
- 10. •Anton van Leeuwenhoek (1632-1723) He gained much of his inspiration form reading Hooke's Micrographia. Used his new instrument, reaching 300x with a single lens (more powerful than Hooke’s) and discovered startling microscopic things, such as protozoa and spermatozoa, or to discover the microscopic structure of known things, such as fleas and plant leaves Anton Van Leeuwenhoek was the first to see bacteria, yeast, and life found in a drop of pond water. • He refined lens grinding so that living • things could be seen through the microscope. • Then there was little change until
- 11. Term related to microscope RESOLUTION In microscopy, the term 'resolution' is used to describe the ability of a microscope to distinguish detail. In other words, this is the minimum distance at which two distinct points of a specimen can still be seen - either by the observer or the microscope camera - as separate entities. Magnification is the ability to make small objects seem larger, such as making a microscopic organism visible. Resolution is the ability to distinguish two objects from each other. Light microscopy has limits to both its resolution and its magnification.
- 12. PARTS OF MICROSCOPE Eyepiece The eyepiece contains the ocular lens which magnifies objects a given amount that is listed on the eyepiece. It remagnifies the image formed by objectives lens Body Tube It transmited the image from the objective lens to ocular lens. The body tube supports the eyepiece and objectives. How much does our microscopes magnify
- 13. • Nosepiece, Objectives, and • Stage Clips • The nosepiece holds the 3 objectives. • The objective lenses range in magnification from 4X, 10X, and 40X. • The stage clips holds the slide in place. Nosepiece
- 14. •Stage, Light, and Diaphragm • The stage supports the slide being viewed. • The light source projects upward through • the diaphragm, the specimen, and the lenses. • The diaphragm regulates • the amount of light on the specimen. • Turn the wheel to change settings.
- 15. • Arm and Base • The arm is used to support the microscope when it is carried. • The base supports the microscope. Coarse Adjustment Knob Moves the stage up and down for focusing. NOT TO BE USED WITH ANY OTHER OBJECTIVE BUT THE 4X
- 16. • Fine Adjustment Knob • Moves the • stage slightly to sharpen the image. • Used with the 10X and 40X objective to focus.
- 17. • IDENTIFICATION OF MICROORGANISMS • Most microorganisms appear colourless when viewed through microscope so we must prepared them for observation .the best way is stain the specimen. STAINING • Staining means coloring the microorganisms with a dye that show certain structure . • For staining first we fixed microorganisms on the slide. • Fixing simultaneously kills the microorganisms and fixes them to the slide .It preserves various parts of microbes in their natural state with only minimal distortion. • When a specimen is to be fixed a thin film of material containing the microorganisms is spread over the surface of the slide .This film is called SMEAR .
- 18. • It may be allowed to dry .In most staining technique then slide is then fixed by passing the flame for several time ,smear side by the covering the slide with methanol for one minute .Stain is applied and then wash off with water ,then slide is blotted with absorbent papers .Without fixing ,the stain is might wash the microorganisms off the slide .the stained microbes are now ready for microscopes examination .
- 19. CHEMISTY OF STAINS Stain is slats which composed of positive and negative ions.One of which is coloured and is known Chromophor .the colour of so called basic dyes is in the present of cation, and colour is called acidic dye in the present of anion .Bacteria are slightly negative charge at pH 7 ,thus the colour is in a basic dye and is attracted to the negative charged bacterial cell.it include crystal violet ,methylene blue ,safranine are commonly used in acidic dyes.
- 20. TYPES OF STAINNING 1. SIMPLE STAINING 2. DIFFERNTIAL STAININGS 3. SPECIAL STAININGS SIMPLE STAINS Is an aqeous or alcohol solution of a single basic dye.the primary purpose of it is to show the entire microorganisms so that cellular shapes and basic structure are visible .The stain is applied on fixed smear for few time and then whished off .Then slide is dried and examined by microscopes.Some time solution is added in stain to intensify the stain such chemical is called Mordant. The function of that chemical is to increase the affinity of stain and microbes of slide. Example of simple stain used in laboratory are I. Methylene blue
- 21. I. Carbolfuchsin II. Crystal violet III. Safranin Differential stains It reacts differently with different kinds of becteria and it used to distinguish them.There are two most well known types of differential stain that is frequently used in laboratory are Gram stain and Acid-fast stain Gram stain Was developed in 1884 by Danish Hans Christian Gram It is most usefull staining procedure because it classifies bacteria into two groups 1. Gram positive 2. Grame negative
- 22. Acid-fast stain It also type of differential stain it differentiated bacteria into distinctive group .It bind only those bacteria that have a waxy material in their cell walls.bectrologist commonly use it to identify pathogenic bacteria such as mycobacterium SPECIAL STAINS It is used to colour parts of microorganisms such as endospores flagella and capsules
- 23. THANKS FOR YOUR