Downloaded 924 times


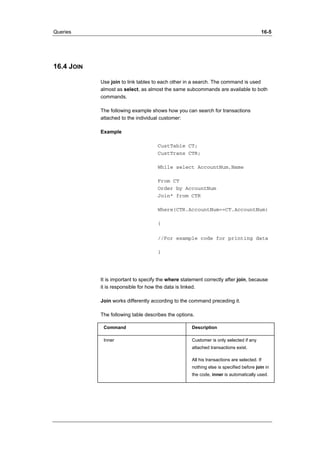


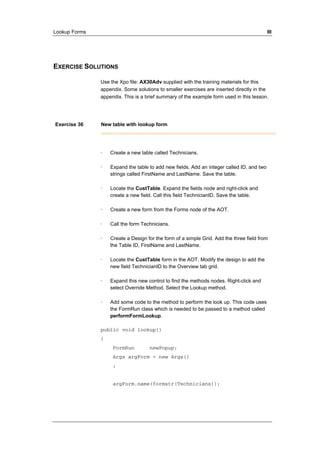
![Windows in Forms V
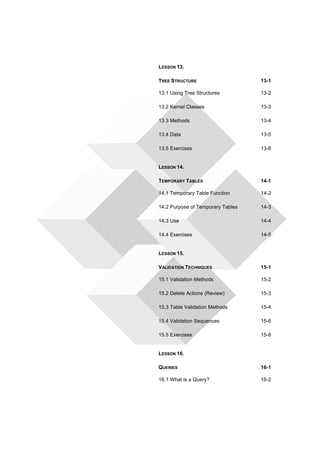
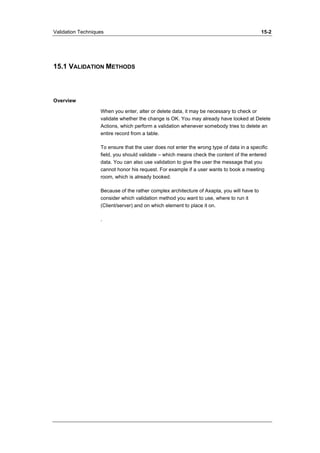
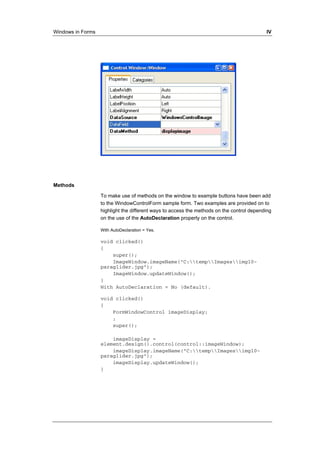
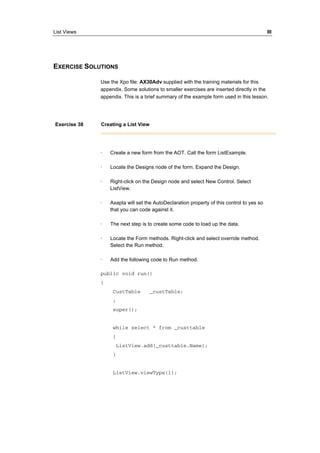
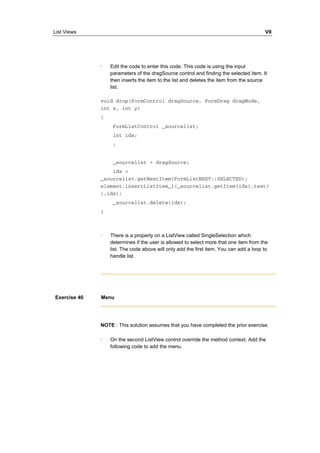
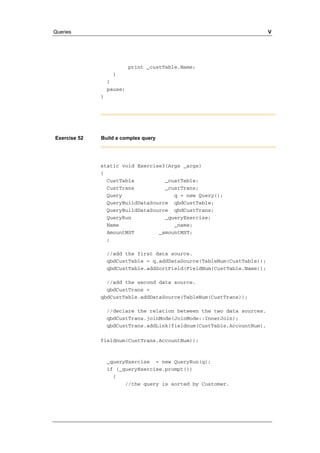
Database stored images
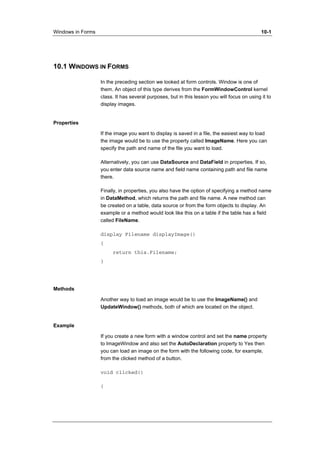
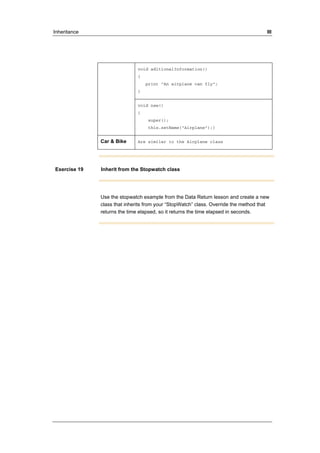
On the sample form WindowControlFrom three buttons have been added
along with a method on the form. This relies on a container field existing in
the underlying table. A good example of using this is the standard
CompanyLogo form.
The first button titled “Store Image” uses this code on the overridden
clicked method.
void clicked()
{
str filename;
FileNameFilter filter = ['All files','*.*'];
Bindata binData = new BinData();
super();
filename =
Winapi::getOpenFileName(element.hWnd(),filter,'',
"Select Image to Display", '','');
if (filename)
{
if (binData.loadFile(filename))
{
WindowsControlImage.displayImage =
binData.getData();
}
element.displayImage();
}
}
The second button “Load Image from Table” calls a new method on the
form to display the image from the table field.
void clicked()
{
super();
//Make a call to the method to display the image.
This is on the form.
element.displayImage();
}
The third button “Remove Image” clears the data from the field.
void clicked()
{
super();](https://image.slidesharecdn.com/xadvancedcourse-141026082019-conversion-gate01/85/X-advanced-course-207-320.jpg)

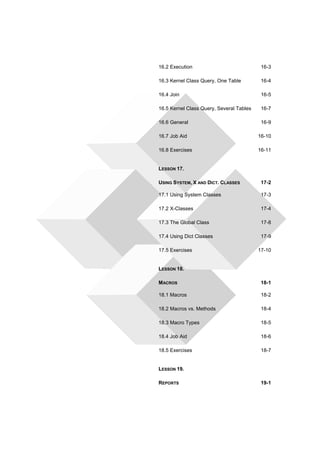
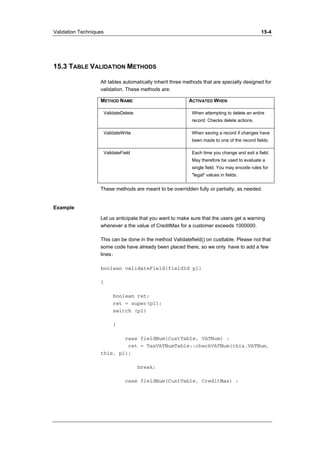
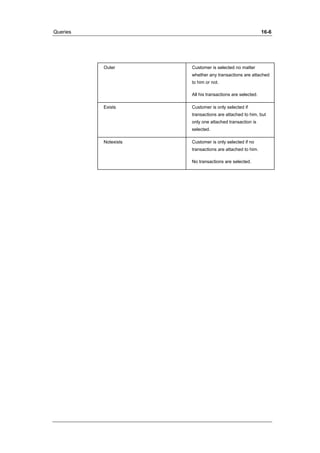
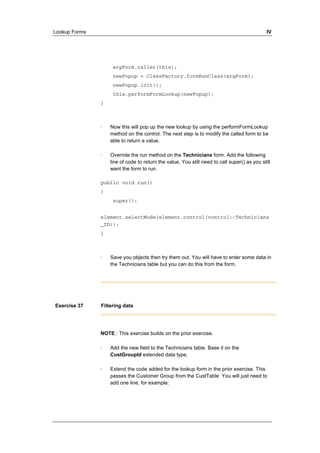
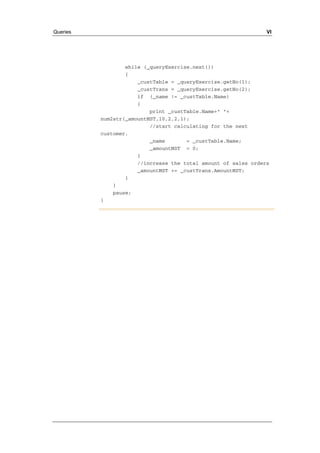
![Windows in Forms IX
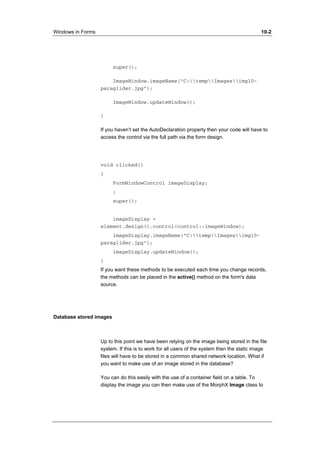
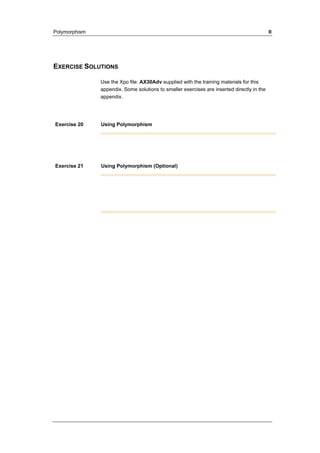
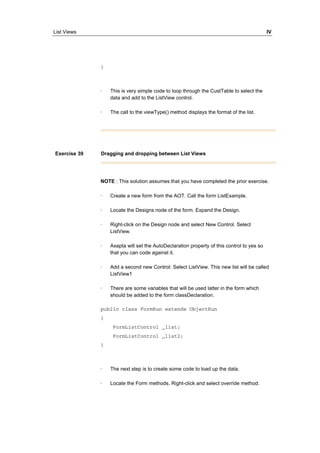
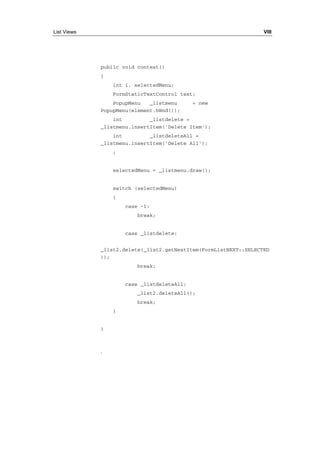
Exercise 34 Selecting a file
NOTE : This solution relies on exercise Using Properties being completed.
· Locate the Design node on the form WindowsImages.
· Add a new button to the form.
· Expand the nodes of the button.
· Right-click on the Method node and select Override Method. Select the
Clicked method. Here we can write some code on the method to use
the Windows API calls in Axapta WinAPI.
· Add the following code to the method when the editor is displayed or
double-click on the method to edit it.
void clicked()
{
str filename;
FileNameFilter filter = ['All files','*.*'];
;
super();
filename =
Winapi::getOpenFileName(element.hWnd(),filter,'',
"Select Image to Display", '','');
if (filename)
{
WindowsImages.ImageName = filename;
}
}
· Save and compile the form then run it. Click the new button and select
a file.
Exercise 35 Using a stored image](https://image.slidesharecdn.com/xadvancedcourse-141026082019-conversion-gate01/85/X-advanced-course-211-320.jpg)
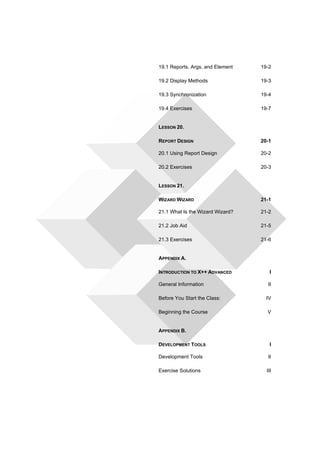
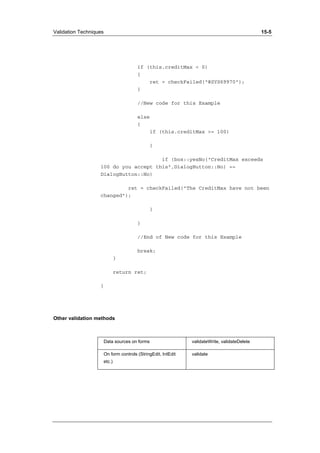
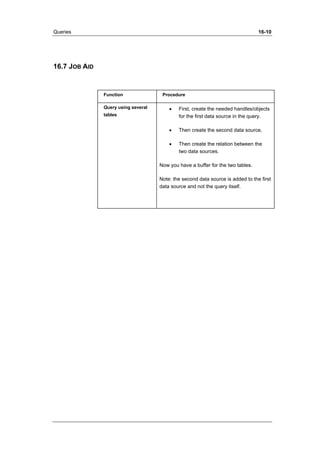
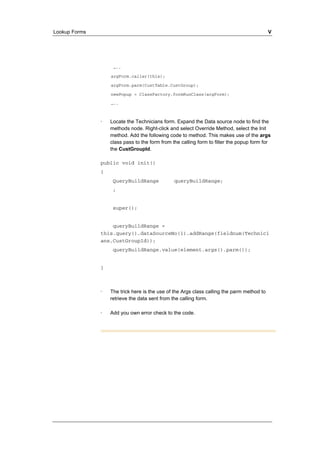
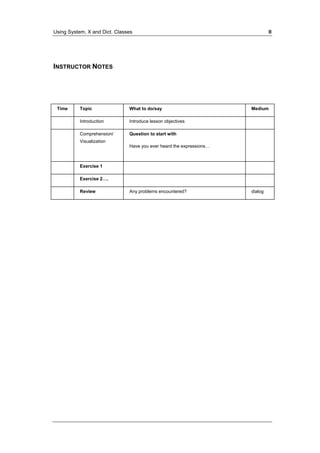
![Windows in Forms X
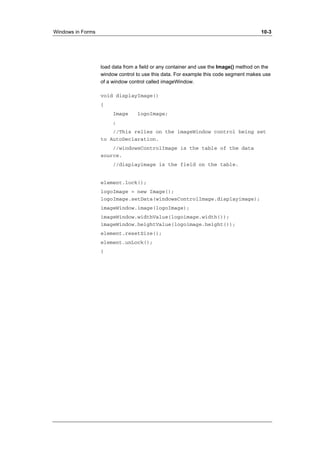
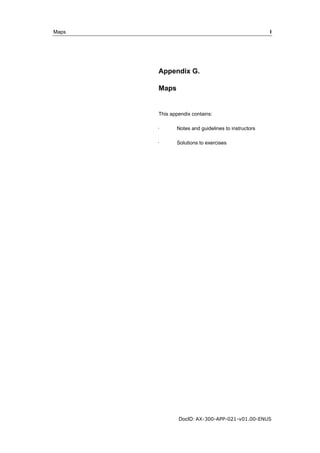
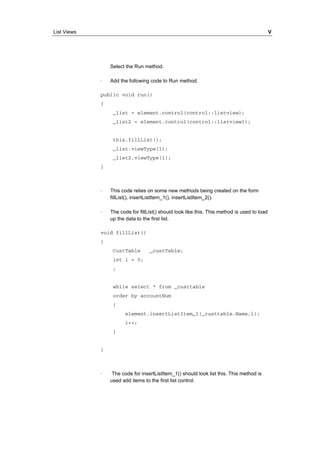
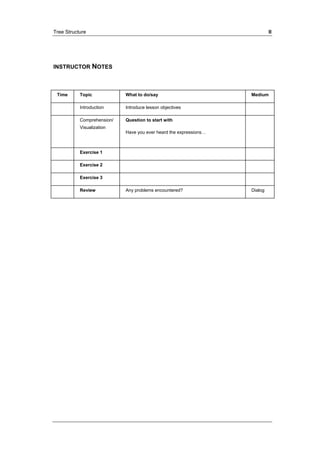
NOTE : This solution relies on the prior exercise being completed.
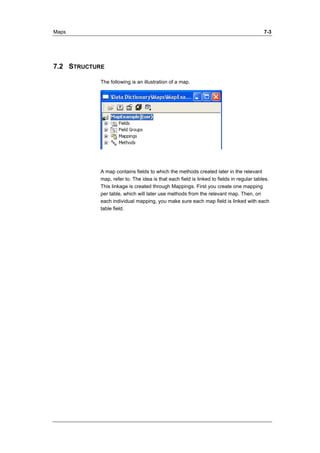
· Add a new field to the table of type container.
· Call the field ImageData.
· There is a small issue with changing the underlying table that a form is
based on as the new field won’t be picked up in the data sources
assigned to the form. To get around this issue, save the form. Then
right-click and select the restore option. The new file will be available in
the data source.
· You will have to change some properties of the Window control to
make it easier to code again. Right-click on the Window control and
change the properties. Name to WindowImage and Auto Declaration to
es.
· So that you have two examples of the code right-click on the button
created in exercise 3. Select the duplicate option. You will now have
two buttons on the form and the code on the clicked method will have
been copied as well.
· Change the code on the new button to retrieve the binary data from the
selected image and use the Image class to load it into the control.
void clicked()
{
str filename;
FileNameFilter filter = ['All files','*.*'];
Bindata binData = new BinData();
Image logoImage;
;
super();
filename =
Winapi::getOpenFileName(element.hWnd(),filter,'',
"Select Image to Display", '','');
if (filename)
{
if (binData.loadFile(filename))
{
WindowsImages.ImageData =
binData.getData();
}](https://image.slidesharecdn.com/xadvancedcourse-141026082019-conversion-gate01/85/X-advanced-course-212-320.jpg)


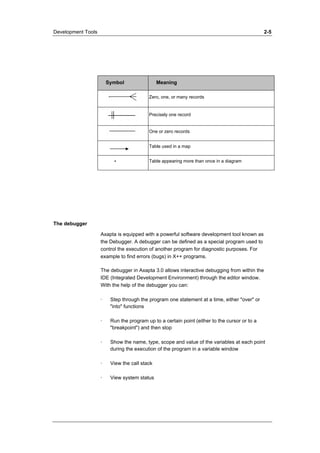
This document provides an overview of the development tools available in Microsoft Axapta. It begins with a recap of the MorphX development environment, including IntelliMorph for the user interface and MorphX Development Suite for business logic and data. It then describes several key tools in Axapta, such as the MorphXplorer, debugger, trace, cross-reference, table browser, find functionality, compare tool, and table definition tool. The lesson aims to help users understand where the different tools are located and how they can be used.
![Progecad 2025 Professional Cracked [Latest]](https://cdn.slidesharecdn.com/ss_thumbnails/1-250523110414-1ac543c0-250523121349-2f0f5a8d-thumbnail.jpg?width=640&height=640&fit=bounds)


![[Ebooks PDF] download C How to Program 1ST Edition Harvey M. Deitel full chap...](https://cdn.slidesharecdn.com/ss_thumbnails/50876-241223092440-32e628ff-thumbnail.jpg?width=640&height=640&fit=bounds)