Downloaded 753 times
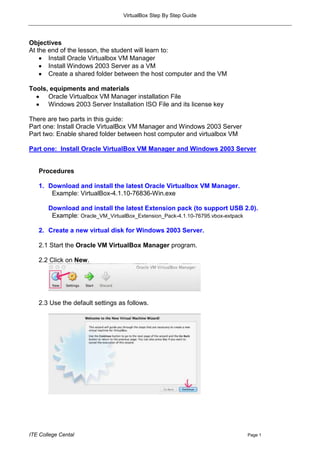

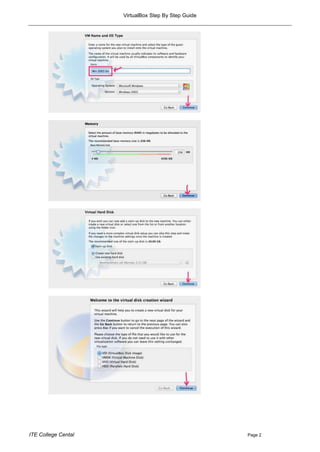
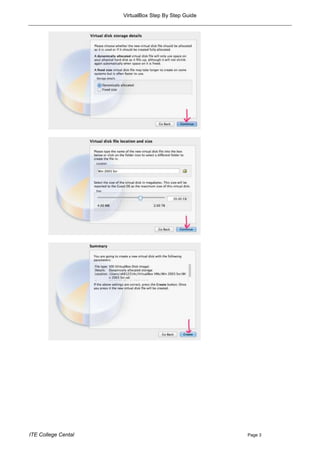

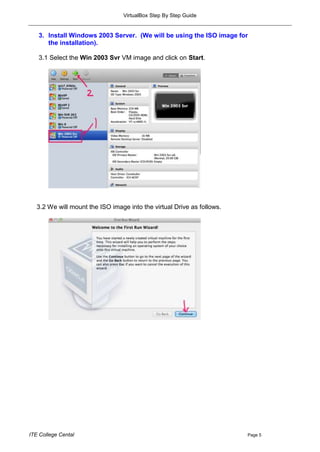
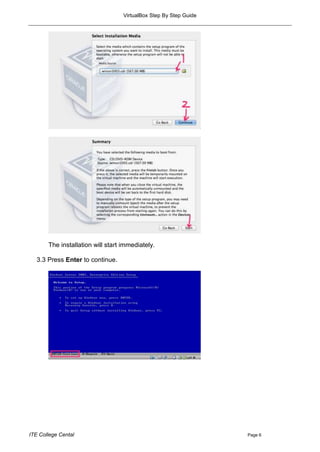
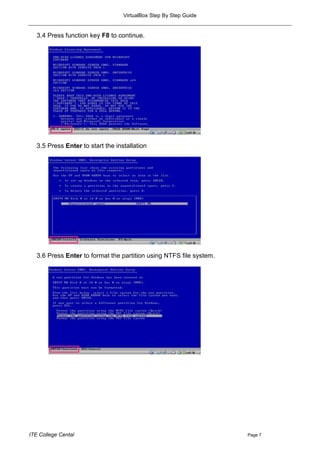

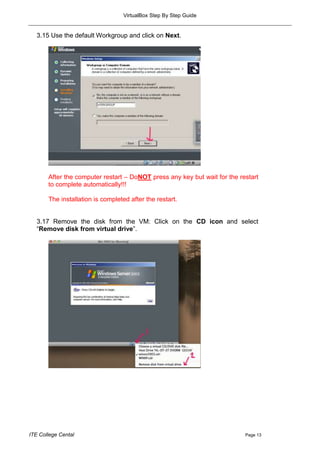
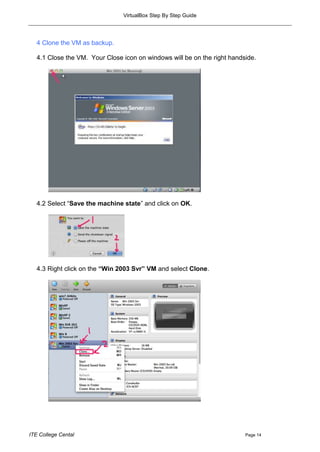
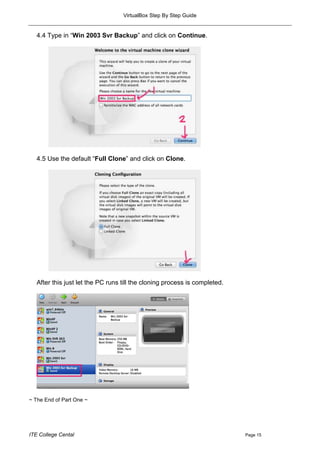

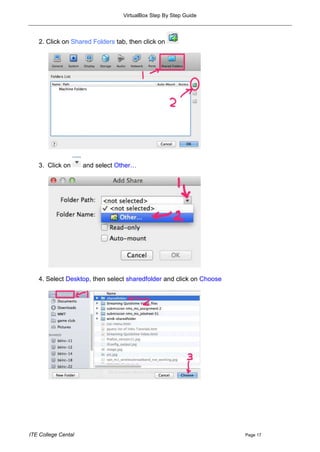
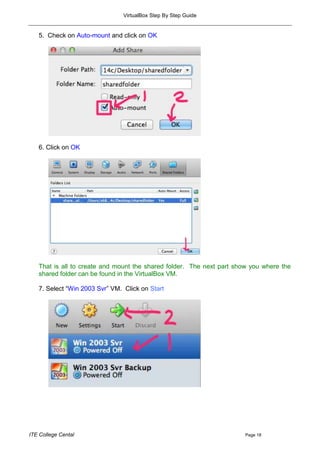

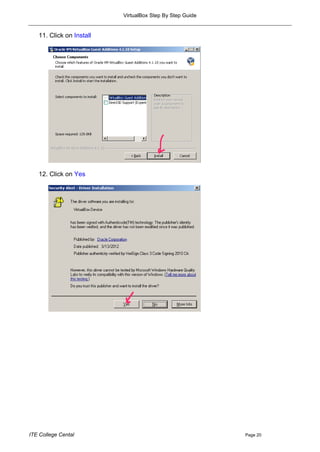
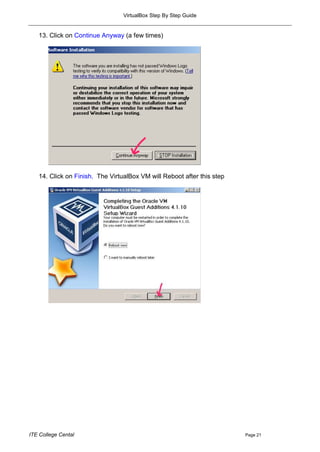


The document is a step-by-step guide for installing Oracle VirtualBox and setting up a Windows 2003 Server virtual machine, including procedures for creating a shared folder between the host and VM. It covers the installation of the VM manager, the Windows Server setup using an ISO image, and cloning the VM for backup. Additionally, it details the process for enabling shared folders to facilitate file transfer between the host computer and the virtual machine.