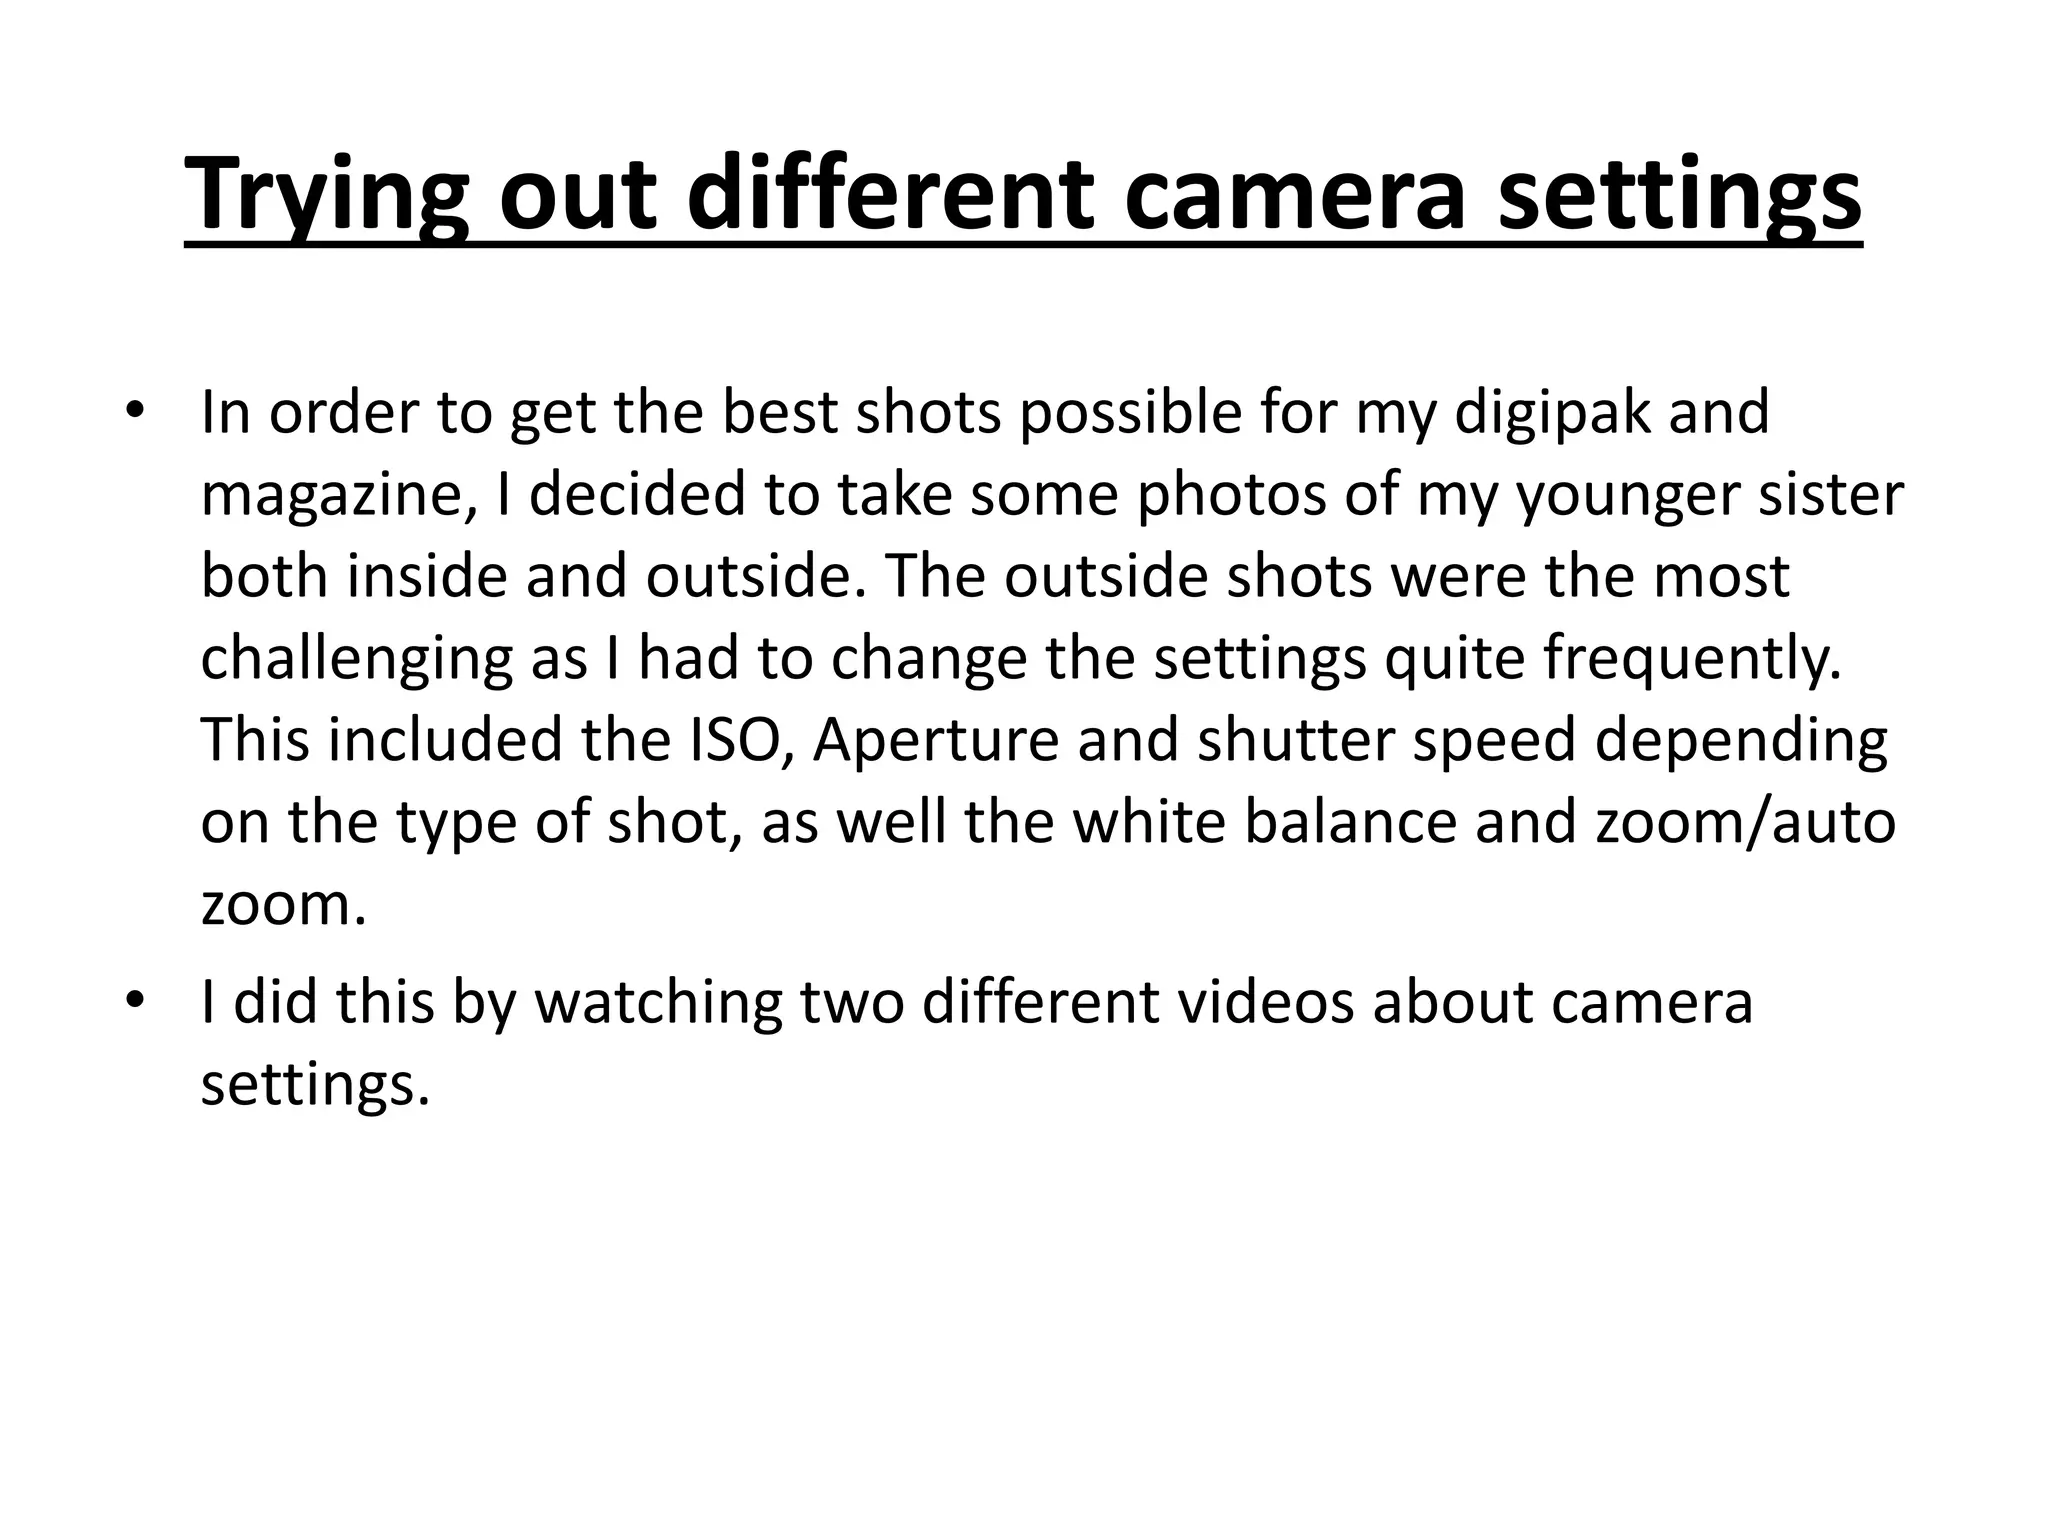
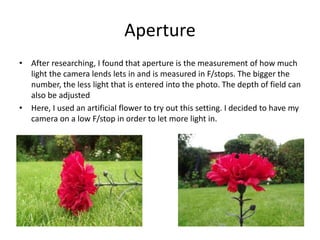
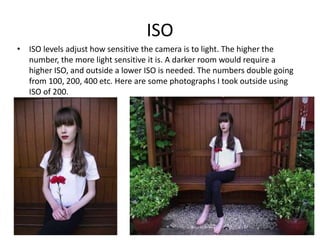
Trying out different camera settings
• In order to get the best shots possible for my digipak and
magazine, I decided to take some photos of my younger sister
both inside and outside. The outside shots were the most
challenging as I had to change the settings quite frequently.
This included the ISO, Aperture and shutter speed depending
on the type of shot, as well the white balance and zoom/auto
zoom.
• I did this by watching two different videos about camera
settings.
Aperture
• After researching, I found that aperture is the measurement of how much
light the camera lends lets in and is measured in F/stops. The bigger the
number, the less light that is entered into the photo. The depth of field can
also be adjusted
• Here, I used an artificial flower to try out this setting. I decided to have my
camera on a low F/stop in order to let more light in.
ISO
• ISO levels adjust how sensitive the camera is to light. The higher the
number, the more light sensitive it is. A darker room would require a
higher ISO, and outside a lower ISO is needed. The numbers double going
from 100, 200, 400 etc. Here are some photographs I took outside using
ISO of 200.
• In the first image, I used an ISO of 400 and
then in the second I used an ISO of 200. The
difference in shots is significant; the second is
much sharper and brighter.
• Inside, where the lighting was artificial and the room was
dark, I used a ISO of 400 which was more appropriate than for
outside use age. On the final image, I used a flash which did
produce a nice shadow.

Trying out different camera settings

  • 1.
    Trying out differentcamera settings • In order to get the best shots possible for my digipak and magazine, I decided to take some photos of my younger sister both inside and outside. The outside shots were the most challenging as I had to change the settings quite frequently. This included the ISO, Aperture and shutter speed depending on the type of shot, as well the white balance and zoom/auto zoom. • I did this by watching two different videos about camera settings.
  • 2.
    Aperture • After researching,I found that aperture is the measurement of how much light the camera lends lets in and is measured in F/stops. The bigger the number, the less light that is entered into the photo. The depth of field can also be adjusted • Here, I used an artificial flower to try out this setting. I decided to have my camera on a low F/stop in order to let more light in.
  • 3.
    ISO • ISO levelsadjust how sensitive the camera is to light. The higher the number, the more light sensitive it is. A darker room would require a higher ISO, and outside a lower ISO is needed. The numbers double going from 100, 200, 400 etc. Here are some photographs I took outside using ISO of 200.
  • 4.
    • In thefirst image, I used an ISO of 400 and then in the second I used an ISO of 200. The difference in shots is significant; the second is much sharper and brighter.
  • 5.
    • Inside, wherethe lighting was artificial and the room was dark, I used a ISO of 400 which was more appropriate than for outside use age. On the final image, I used a flash which did produce a nice shadow.