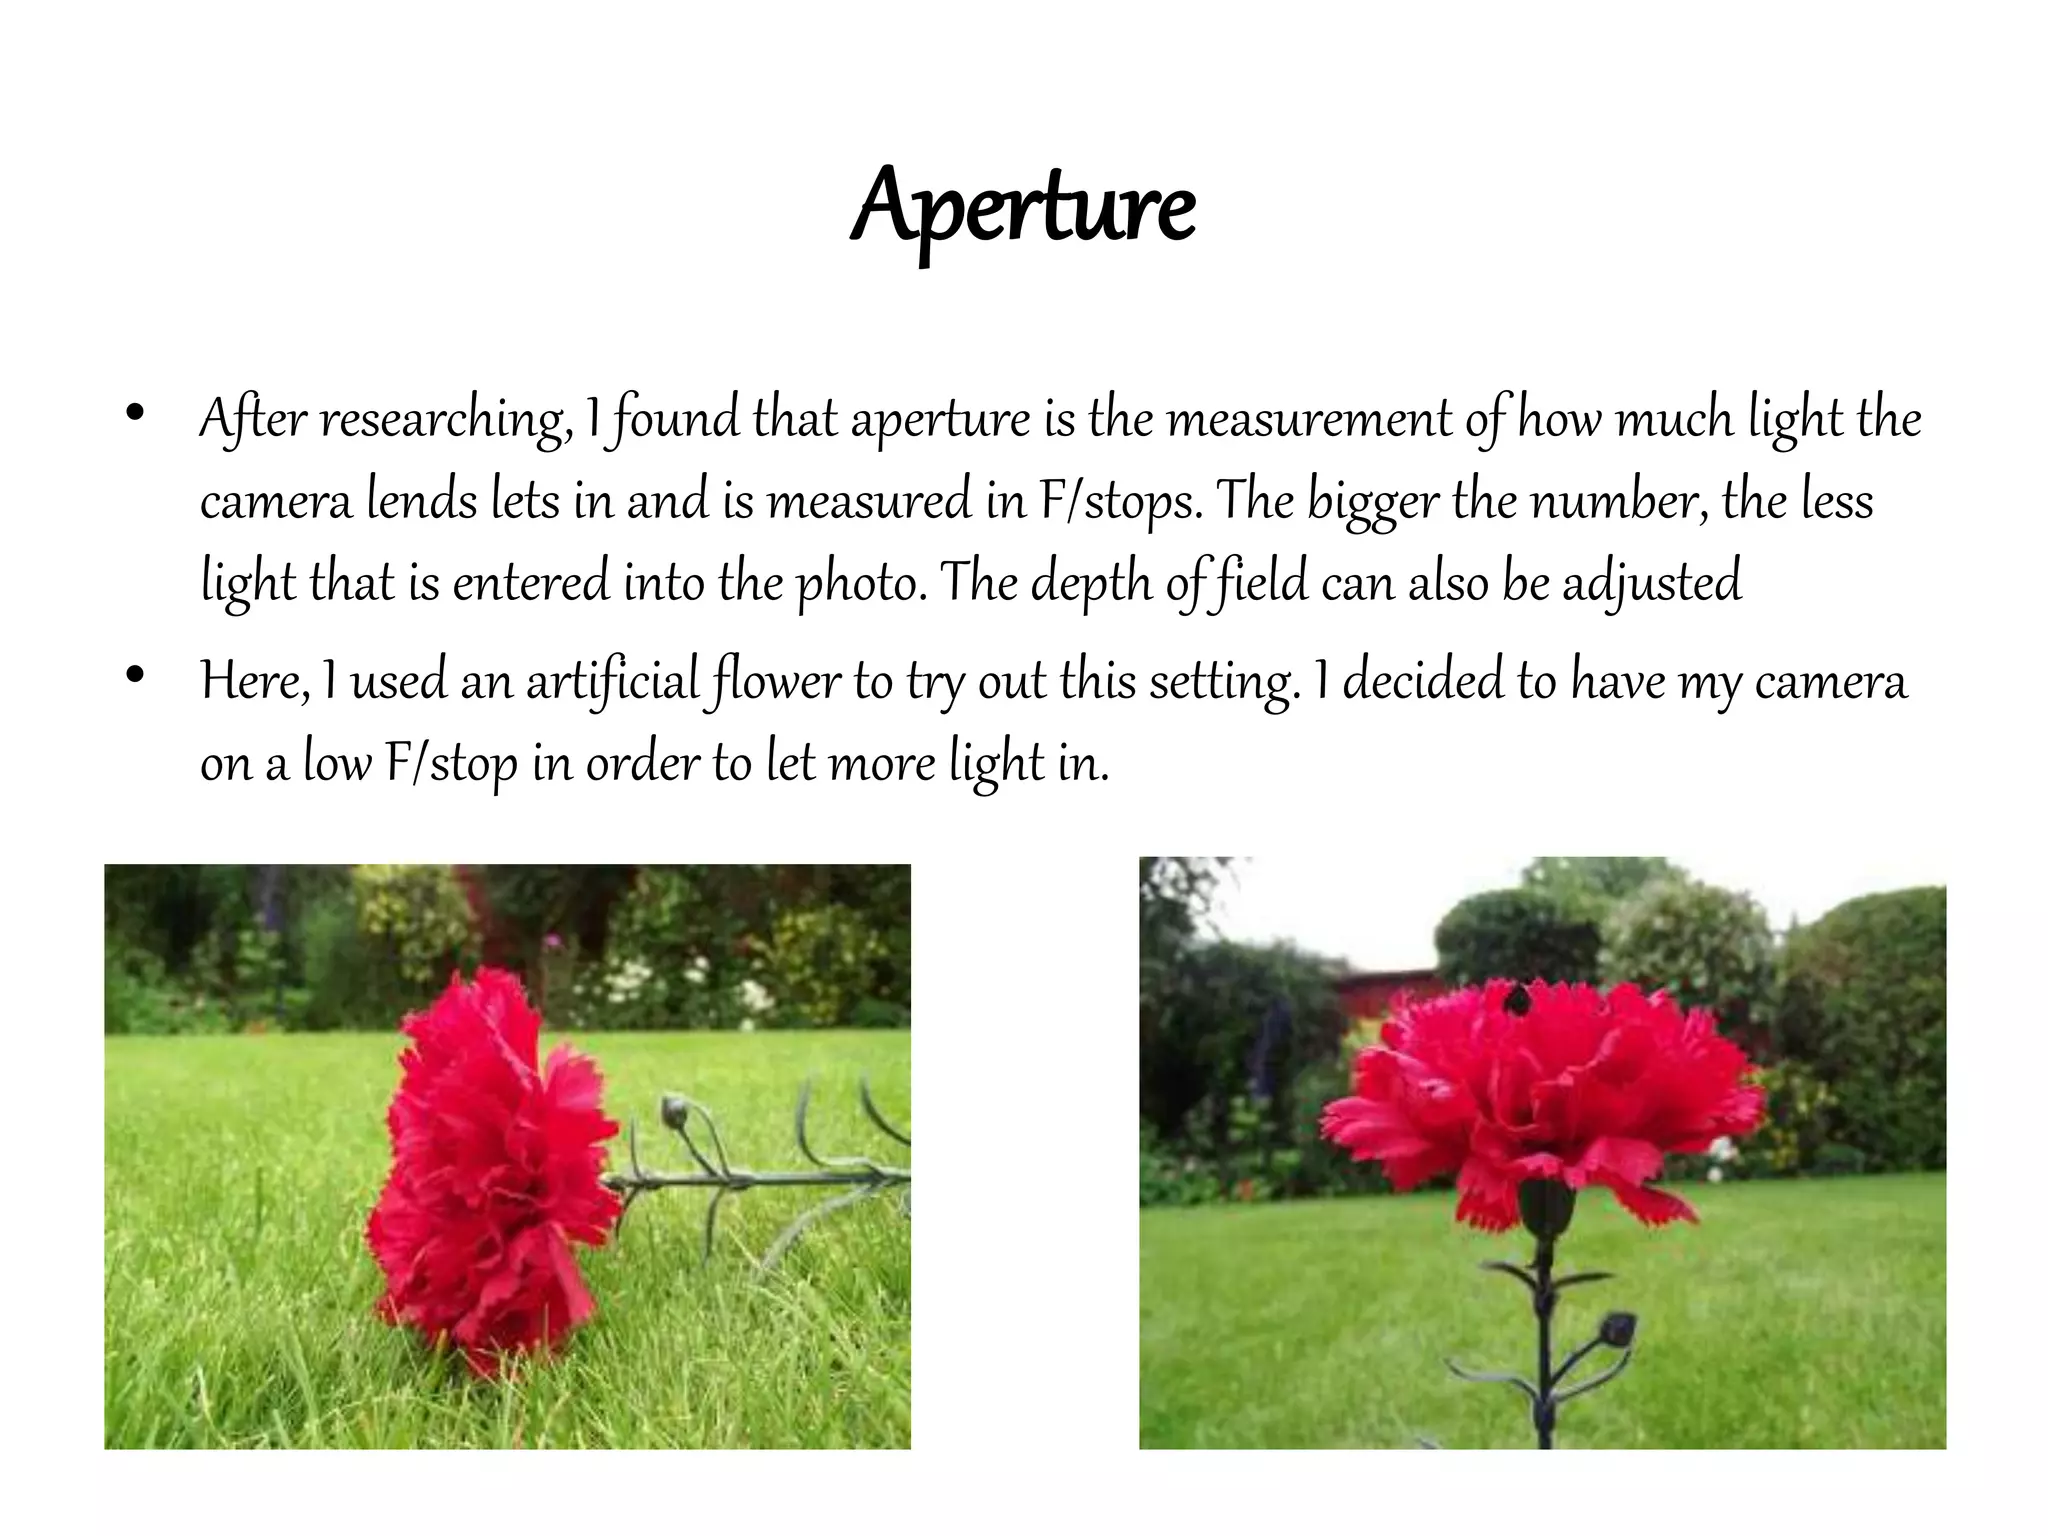
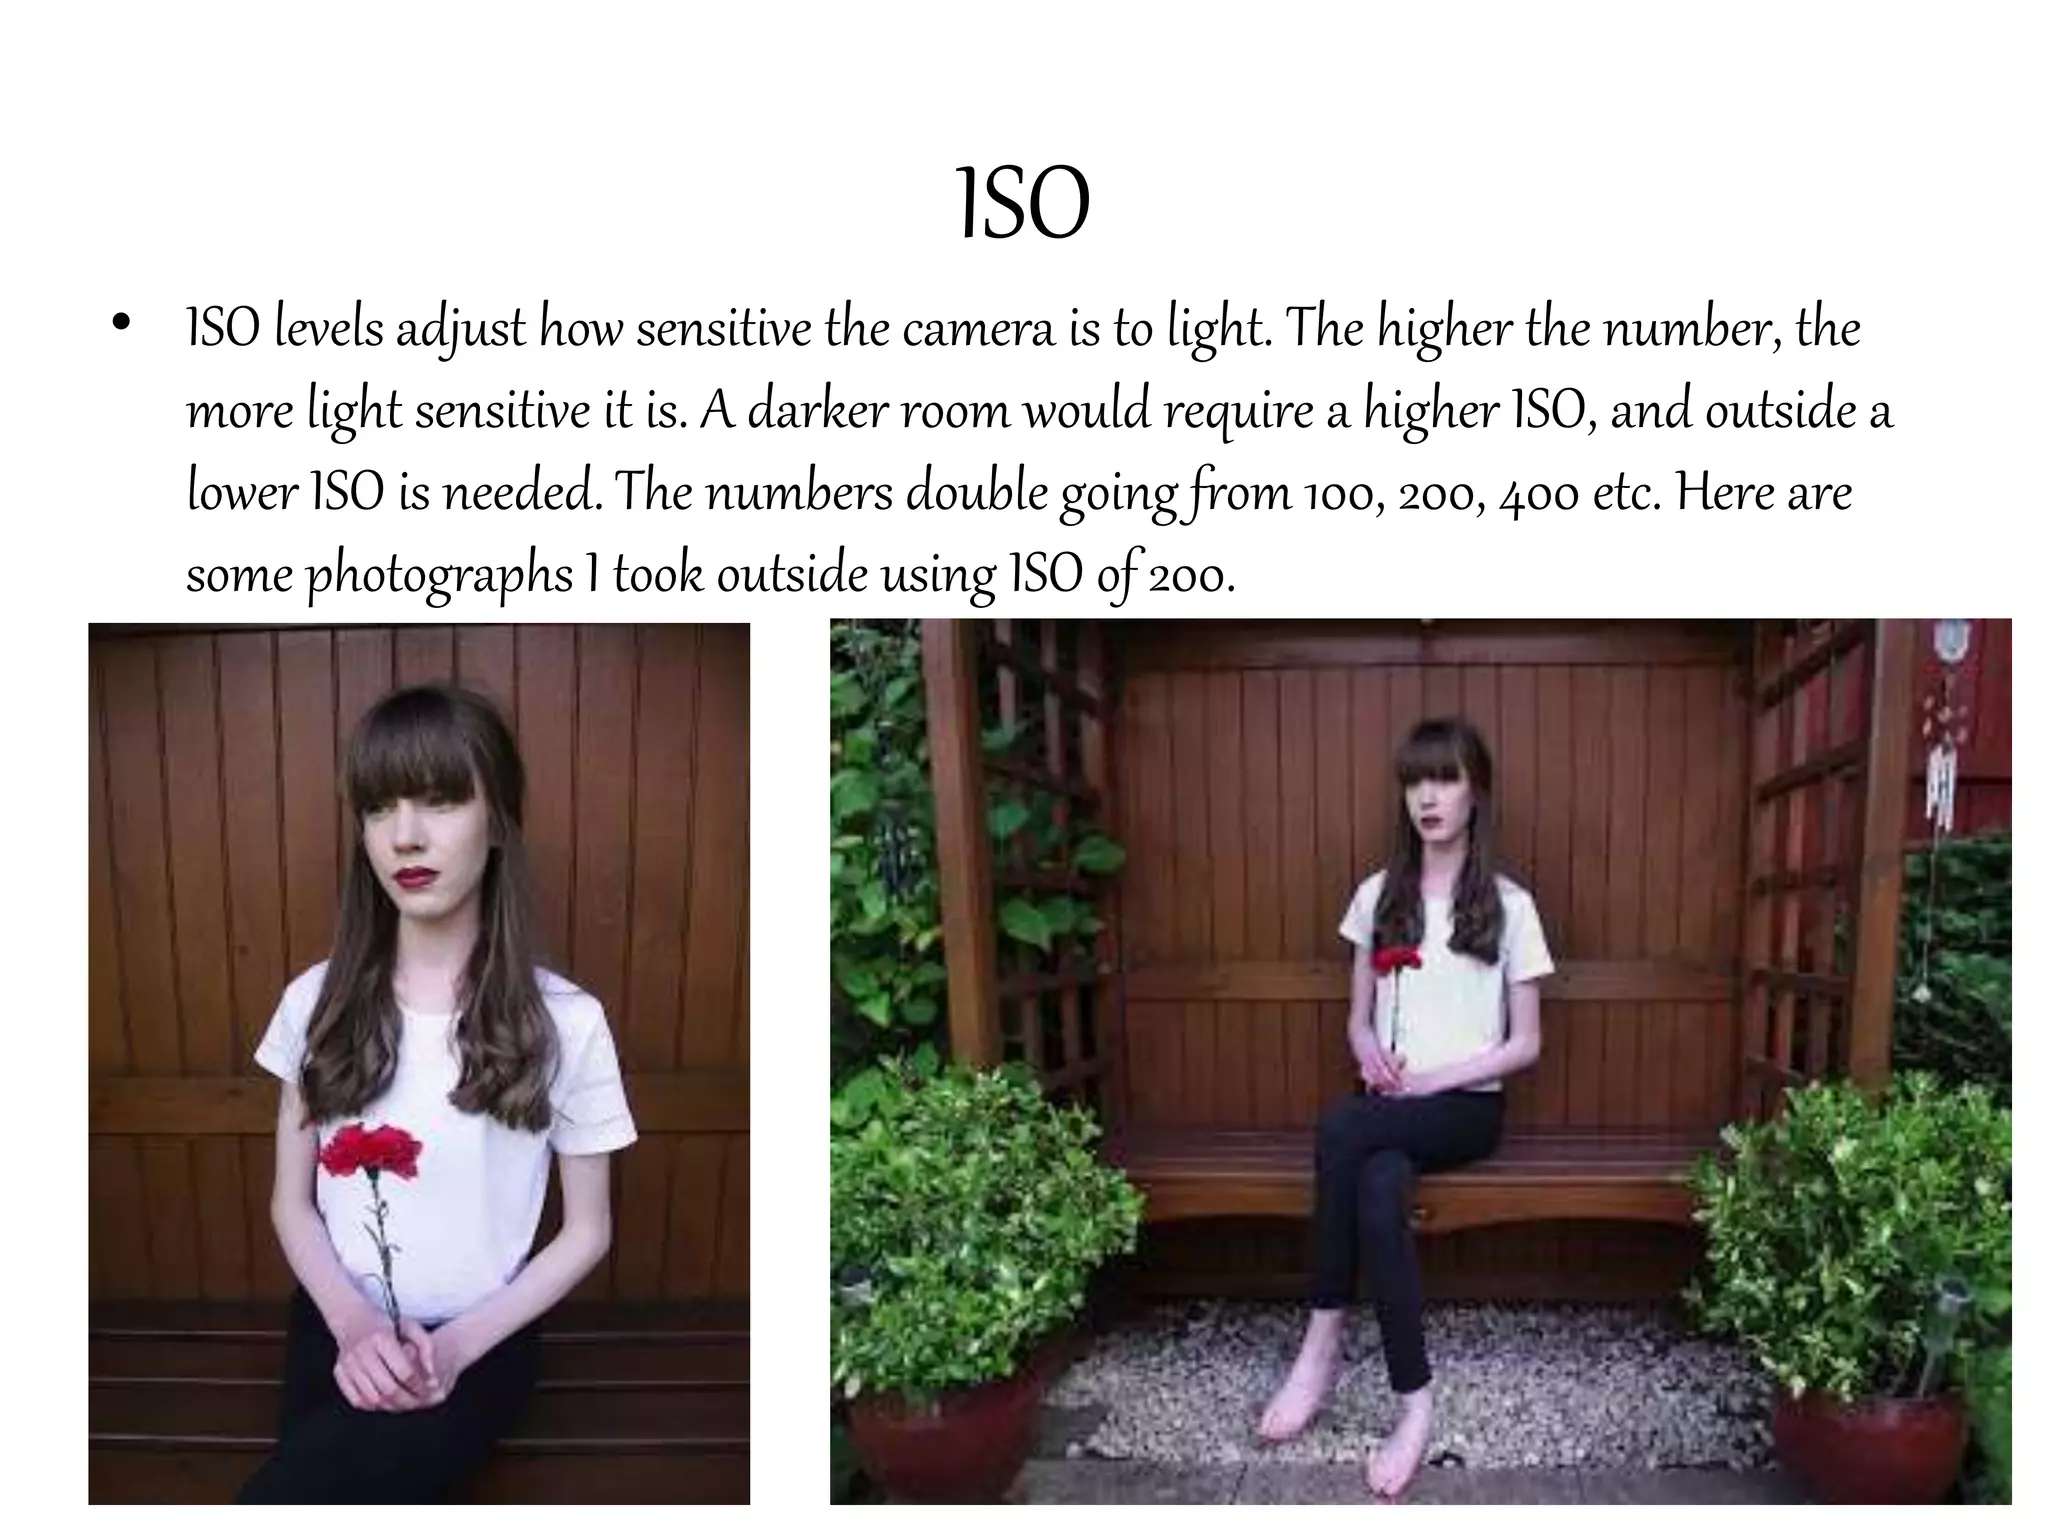
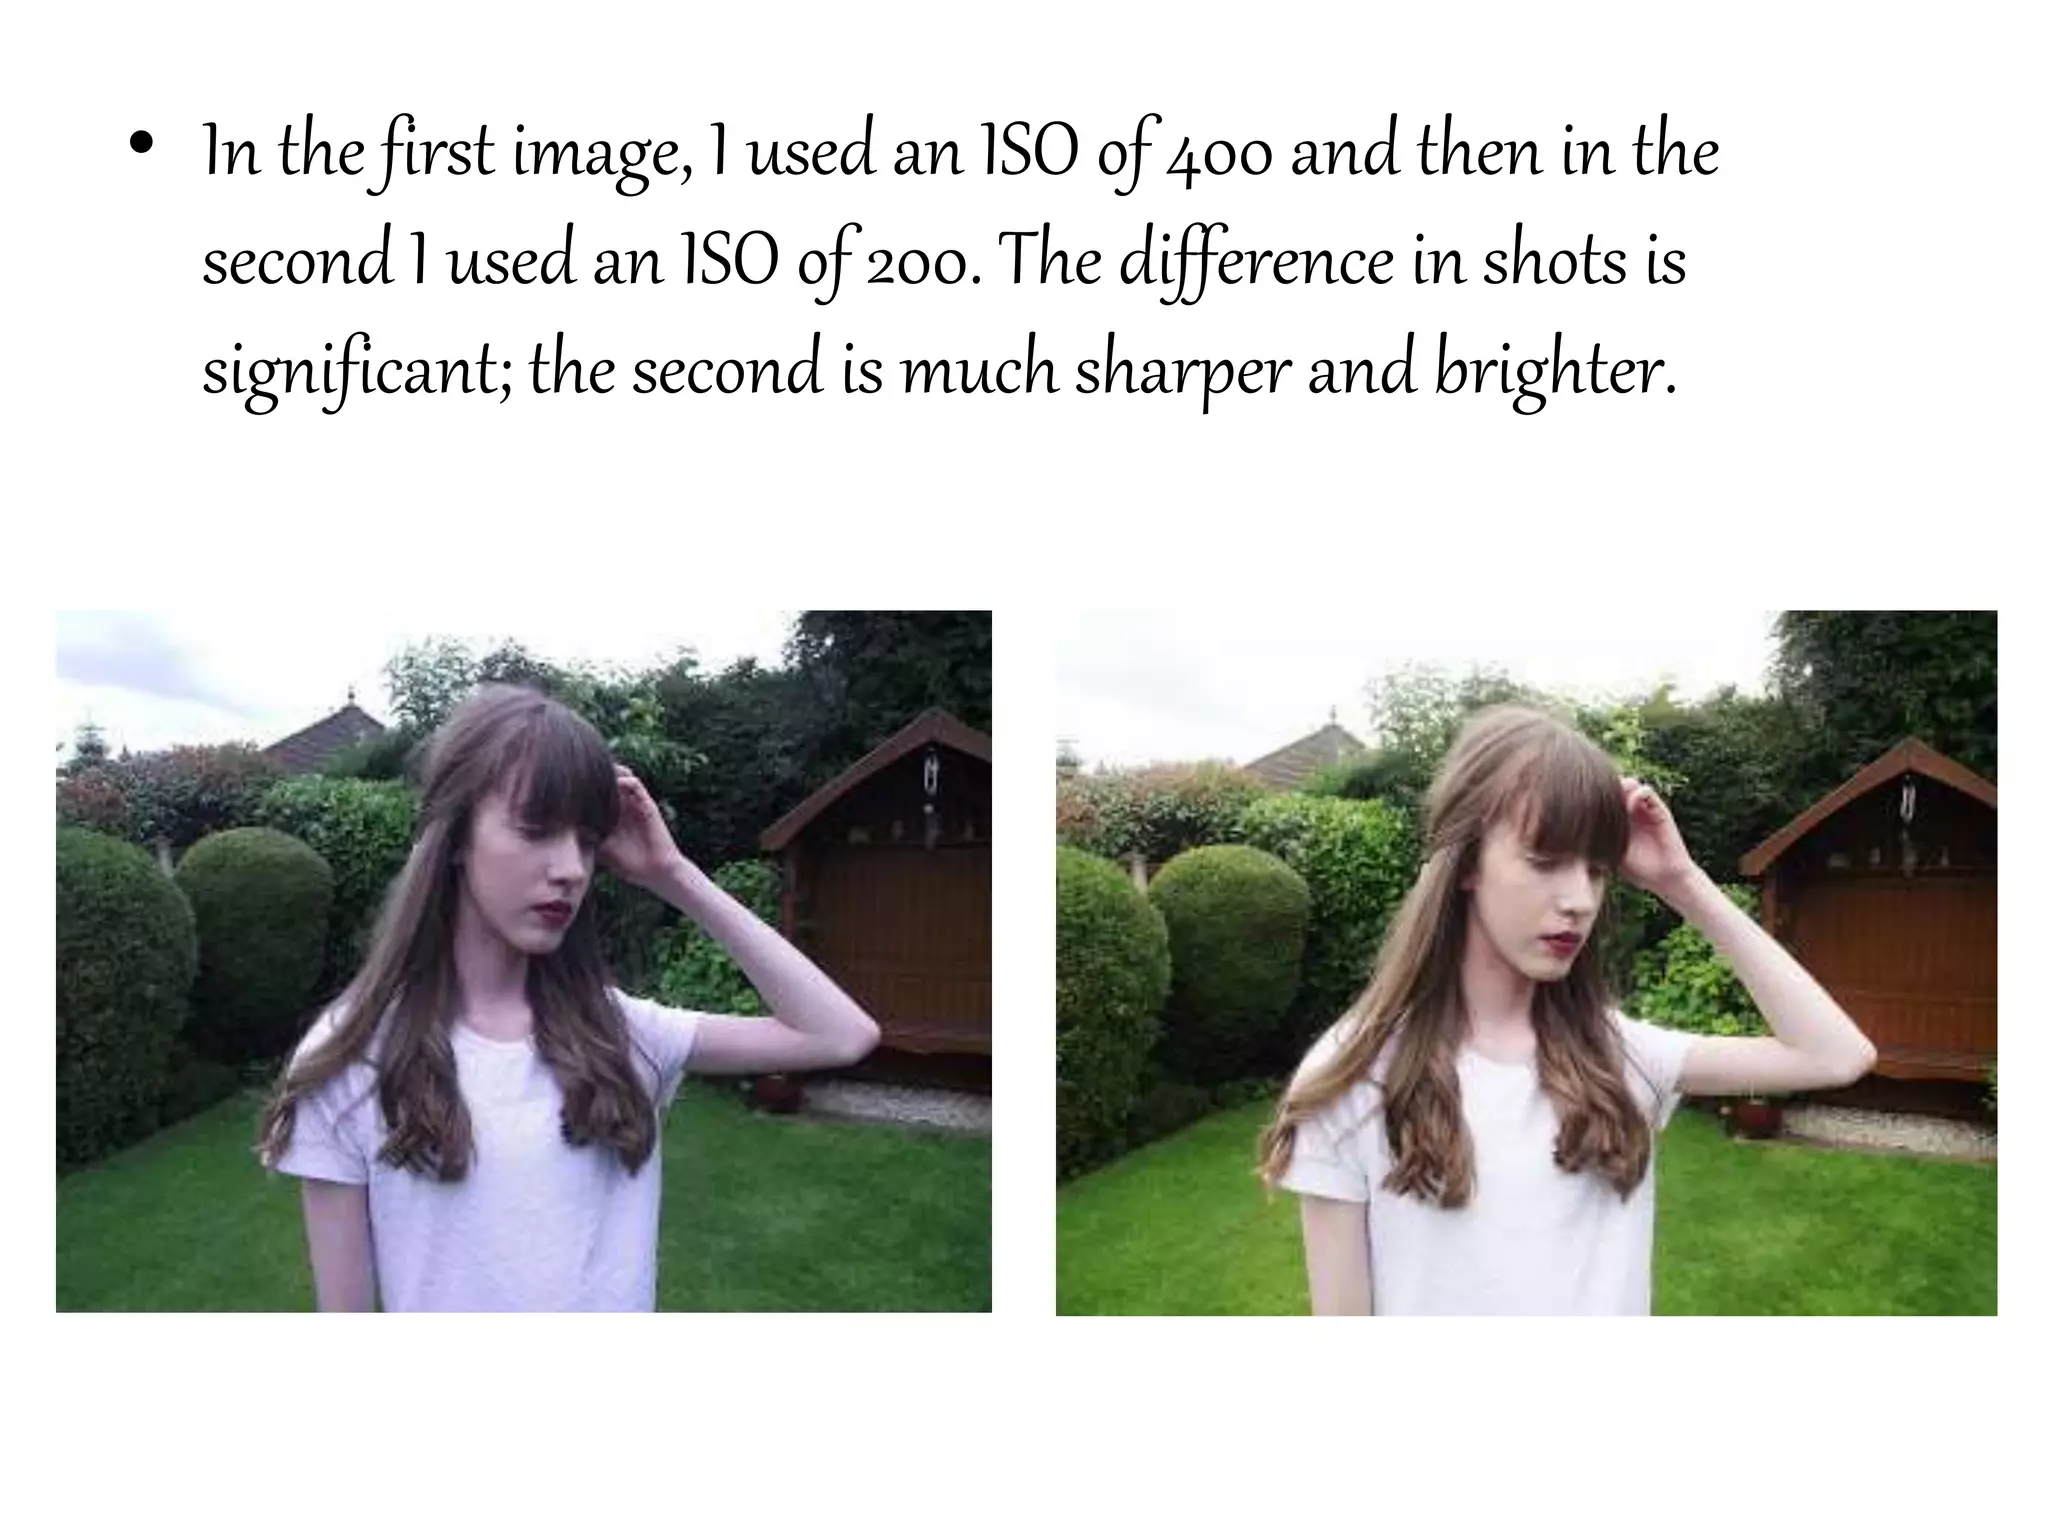
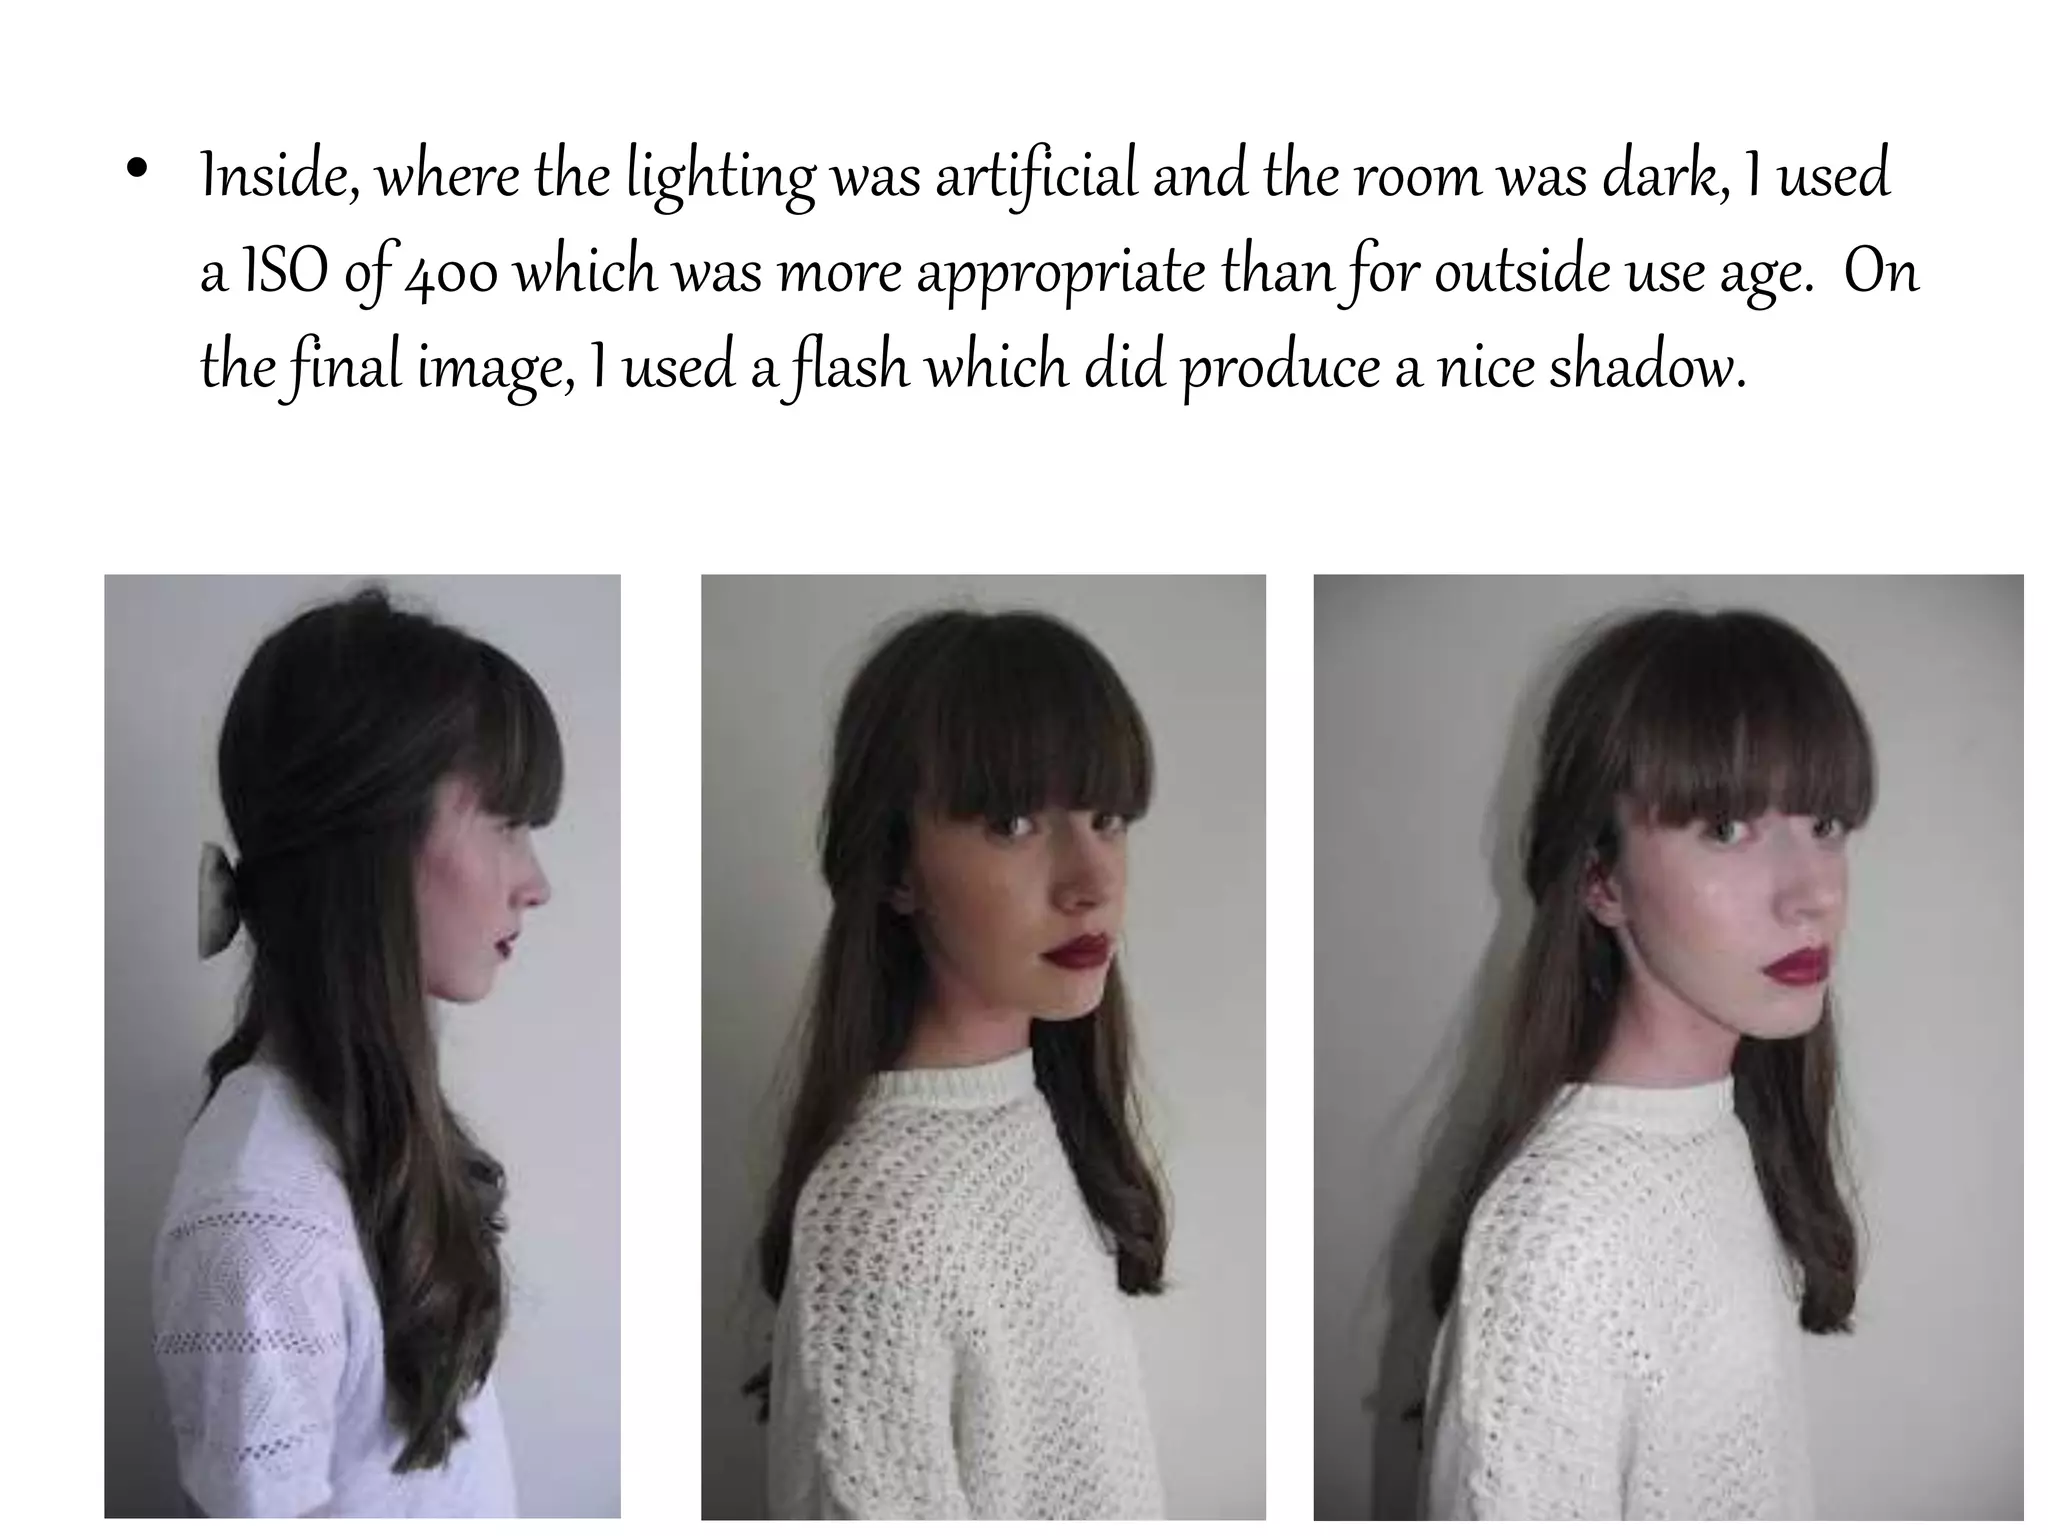
Trying out different camera settings
• In order to get the best shots possible for my digipak and
magazine, I decided to take some photos of my younger sister
both inside and outside. The outside shots were the most
challenging as I had to change the settings quite frequently.
This included the ISO, Aperture and shutter speed depending
on the type of shot, as well the white balance and zoom/auto
zoom.
• I did this by watching two different videos about camera
settings.
Aperture
• After researching, I found that aperture is the measurement of how much light the
camera lends lets in and is measured in F/stops. The bigger the number, the less
light that is entered into the photo. The depth of field can also be adjusted
• Here, I used an artificial flower to try out this setting. I decided to have my camera
on a low F/stop in order to let more light in.
ISO
• ISO levels adjust how sensitive the camera is to light. The higher the number, the
more light sensitive it is. A darker room would require a higher ISO, and outside a
lower ISO is needed. The numbers double going from 100, 200, 400 etc. Here are
some photographs I took outside using ISO of 200.
• In the first image, I used an ISO of 400 and then in the
second I used an ISO of 200. The difference in shots is
significant; the second is much sharper and brighter.
• Inside, where the lighting was artificial and the room was dark, I used
a ISO of 400 which was more appropriate than for outside use age. On
the final image, I used a flash which did produce a nice shadow.
Shutter Speed
• Shutter speed is measured in fractions of a second.
• This controls how long the shutter is open for each time you
take a photograph.
• The higher the number, the faster the shutter speed e.g.
1/2000 which may be used to capture someone moving.
• A slow shutter speed would be 1/30 seconds and would be
used in low light situations. The lower the shutter speed, the
richer the colours and more detailed the picuture.
Creative Modes
P (program)
• This setting has a built in light measuring device called a ‘light metre’ which
selects aperture and shutter speed bases on the ISO setting.
TV (time value)
• This setting automatically selects the aperture and gives the shutter speed priority.
This setting should be used when capturing movement and to avoid blurring on
fast moving objects.
AV (aperture value)
• This allows the aperture setting to be selected as well as adjusting the depth of
field or focus onto an object. The shutter speed is adjusted automatically. A low
aperture setting means there will be a low depth of field. A tripod is recommended
with this setting.
Creative modes continued…
A-dep
• This setting allows the user to select the most important areas in focus, for
example objects close to the camera and to keep a sharp image. This setting again
will automatically choose the aperture . The user must pay attention to the shutter
speed on this mode.
M (manual)
• The user has total control over aperture, shutter speed and ISO using the display.
This can be used for purposefully under or over exposing images.

Trying out different camera settings

  • 1.
    Trying out differentcamera settings • In order to get the best shots possible for my digipak and magazine, I decided to take some photos of my younger sister both inside and outside. The outside shots were the most challenging as I had to change the settings quite frequently. This included the ISO, Aperture and shutter speed depending on the type of shot, as well the white balance and zoom/auto zoom. • I did this by watching two different videos about camera settings.
  • 2.
    Aperture • After researching,I found that aperture is the measurement of how much light the camera lends lets in and is measured in F/stops. The bigger the number, the less light that is entered into the photo. The depth of field can also be adjusted • Here, I used an artificial flower to try out this setting. I decided to have my camera on a low F/stop in order to let more light in.
  • 3.
    ISO • ISO levelsadjust how sensitive the camera is to light. The higher the number, the more light sensitive it is. A darker room would require a higher ISO, and outside a lower ISO is needed. The numbers double going from 100, 200, 400 etc. Here are some photographs I took outside using ISO of 200.
  • 4.
    • In thefirst image, I used an ISO of 400 and then in the second I used an ISO of 200. The difference in shots is significant; the second is much sharper and brighter.
  • 5.
    • Inside, wherethe lighting was artificial and the room was dark, I used a ISO of 400 which was more appropriate than for outside use age. On the final image, I used a flash which did produce a nice shadow.
  • 6.
    Shutter Speed • Shutterspeed is measured in fractions of a second. • This controls how long the shutter is open for each time you take a photograph. • The higher the number, the faster the shutter speed e.g. 1/2000 which may be used to capture someone moving. • A slow shutter speed would be 1/30 seconds and would be used in low light situations. The lower the shutter speed, the richer the colours and more detailed the picuture.
  • 7.
    Creative Modes P (program) •This setting has a built in light measuring device called a ‘light metre’ which selects aperture and shutter speed bases on the ISO setting. TV (time value) • This setting automatically selects the aperture and gives the shutter speed priority. This setting should be used when capturing movement and to avoid blurring on fast moving objects. AV (aperture value) • This allows the aperture setting to be selected as well as adjusting the depth of field or focus onto an object. The shutter speed is adjusted automatically. A low aperture setting means there will be a low depth of field. A tripod is recommended with this setting.
  • 8.
    Creative modes continued… A-dep •This setting allows the user to select the most important areas in focus, for example objects close to the camera and to keep a sharp image. This setting again will automatically choose the aperture . The user must pay attention to the shutter speed on this mode. M (manual) • The user has total control over aperture, shutter speed and ISO using the display. This can be used for purposefully under or over exposing images.