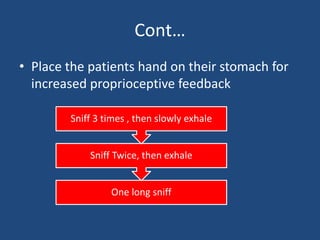
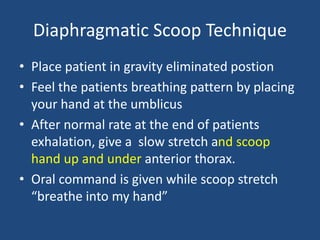
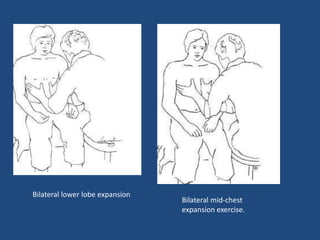
Diaphragm Facilitation Techniques
Dr. Hina Vaish (PT)
BPT, MPT (Cardiopulmonary), MIAP
Assistant Professor, MMIPR,
Maharishi Markhandeshwar ( Deemed to be
University), Mullana, Ambala
Breathing at rest is generally
perceived as effortless under
normal conditions.
But!
In patients often after surgery, respiratory
disease, or dysfunction secondary to
neurological insult or injury, the vital capacity
may be significantly decreased and the oxygen
consumption may be greatly increased resulting
from the use of accessory muscles or the extra
effort needed to breath or cough.
Ventilatory strategies
depends on the patient's individual
problem
The goal with patients with primary lung disease
is to teach them to relax the neck and chest
accessory muscles and use more diaphragmatic
breathing to reduce the work of breathing.
However, patients with secondary pulmonary
dysfunction patients, may have accessory
muscles intact, but they are not able to use
them to faciliate deep breathing or coughing. In
these cases the goal is to teach them to use the
accessory muscles to balance the upper and
lower chest.
Diaphragm
• Main muscle of inspiration
Dome shaped
Two hemi-diaphragms
Accounts for 75% of volume change (quiet
breathing)
DIAPHRAGMATIC BREATHING
• For relaxation & coordinated breathing
pattern
• Greater tidal volume is achieved with
diaphragmatic breathing and improve overall
ventilation
Diaphragmatic Facilitation Techniques
• Relaxing techniques
• Re-patterning
• Sniffing
• Diaphragmatic scoop
• Lateral Costal facilitation Technique
• Upper Chest Inhibition Technique
• Normal Timing techniques
The first step in facilitating any
breathing pattern is to position the
patient for respiratory success.
Relaxation of upper chest and
shoulders
• Maximal contractions leads to maximal
relaxation
• This technique can be applied to upper chest
and shoulders
• Verbal commands can be very important with
this procedure.
Cont…
Cont…
• The therapist places his or her hands on the
patient's shoulder girdle. The patient is asked
to shrug his or her shoulders up into the
therapist's hands and hold it.
• The emphasis is on the relaxation phase.
Re-patterning Techniques
• When the patient needs more support to gain
control of breath and is experiencing shortness of
breath.
• Ask the patient to exhale “ try to blow out easily
with lips pursed. Donot force it, just let it come
out.
• Once patient feels some control of breath then
ask to hold breath at top of inspiration just for 1-2
seconds.
• Avoid valsalva maneuver
Sniffing
• Sniffing is primarily diaphragmatic breathing
• Place the patient in gravity eliminated position
• Relatively posterior pelvis
• Use pillow under head
• Arms down below 90 degree of flexion
Cont…
• Place the patients hand on their stomach for
increased proprioceptive feedback
One long sniff
Sniff Twice, then exhale
Sniff 3 times , then slowly exhale
Diaphragmatic Scoop Technique
• Place patient in gravity eliminated postion
• Feel the patients breathing pattern by placing
your hand at the umblicus
• After normal rate at the end of patients
exhalation, give a slow stretch and scoop
hand up and under anterior thorax.
• Oral command is given while scoop stretch
“breathe into my hand”
Cont…
• Try not to have patients take too many deep
breaths; they may begin to feel light-headed
because they may hyperventilate and blow off
too much Carbon dioxide.
Lateral Costal Breathing
• Lower chest lateral costal expansion facilitate
diaphragmatic and intercostal breathing
• Mid chest lateral costal expansion will recruit
primarily intercostal activity
Bilateral lower lobe expansion
Bilateral mid-chest
expansion exercise.
Upper Chest Inhibition
• Position the patient appropriately.
• For a couple of respiratory cycles without
applying any pressure to feel the upper chest's
movement
Cont…
• On the patient's next inspiratory effort apply
pressure or resistance to the expansion of the
upper chest. This gentle pressure will cause
postural inhibition to the anterior and
superior movement of the upper chest.
• After each expiratory cycle, add more pressure
until the patient subconsciously increases the
lower chest breathing out of necessity.
• This technique should never cause an increase
in anxiety or it will only encourage more upper
chest breathing rather than less.
Cont…..
Normal Timing
• A normal timing technique adapted from the
physical therapy approach of PNF can help the
patient work on this sequence.
• Position the patient in supine or supported
sitting with neutral pelvis position.
• At the end of an expiratory cycle using the
hand placement of the diaphragm scoop, asks
the patient to breathe in "here." With the
other hand, the therapist moves up
Cont…
• The chest wall to the lower sternum and
touches the patient with the instructions
again to "now breathe here.“
• Finally, the therapist uses the first hand to
move up to the upper sternum (usually
around the level of the sternal angle) and asks
the patient to "now breathe here.“
• The manual cues provide tactile cuing
Facilitating effective ventilation goes far
beyond just the diaphragmatic exercise,
physiotherapists can be incorporate
techniques and strategies to get their
patients to assist them in reaching their
greatest rehabilitation potential.
THANK YOU

The diaphragm facilitation techniques

  • 1.
    Diaphragm Facilitation Techniques Dr.Hina Vaish (PT) BPT, MPT (Cardiopulmonary), MIAP Assistant Professor, MMIPR, Maharishi Markhandeshwar ( Deemed to be University), Mullana, Ambala
  • 2.
    Breathing at restis generally perceived as effortless under normal conditions.
  • 3.
    But! In patients oftenafter surgery, respiratory disease, or dysfunction secondary to neurological insult or injury, the vital capacity may be significantly decreased and the oxygen consumption may be greatly increased resulting from the use of accessory muscles or the extra effort needed to breath or cough.
  • 4.
    Ventilatory strategies depends onthe patient's individual problem
  • 5.
    The goal withpatients with primary lung disease is to teach them to relax the neck and chest accessory muscles and use more diaphragmatic breathing to reduce the work of breathing. However, patients with secondary pulmonary dysfunction patients, may have accessory muscles intact, but they are not able to use them to faciliate deep breathing or coughing. In these cases the goal is to teach them to use the accessory muscles to balance the upper and lower chest.
  • 7.
    Diaphragm • Main muscleof inspiration Dome shaped Two hemi-diaphragms Accounts for 75% of volume change (quiet breathing)
  • 8.
    DIAPHRAGMATIC BREATHING • Forrelaxation & coordinated breathing pattern • Greater tidal volume is achieved with diaphragmatic breathing and improve overall ventilation
  • 9.
    Diaphragmatic Facilitation Techniques •Relaxing techniques • Re-patterning • Sniffing • Diaphragmatic scoop • Lateral Costal facilitation Technique • Upper Chest Inhibition Technique • Normal Timing techniques
  • 10.
    The first stepin facilitating any breathing pattern is to position the patient for respiratory success.
  • 11.
    Relaxation of upperchest and shoulders • Maximal contractions leads to maximal relaxation • This technique can be applied to upper chest and shoulders • Verbal commands can be very important with this procedure.
  • 12.
  • 13.
    Cont… • The therapistplaces his or her hands on the patient's shoulder girdle. The patient is asked to shrug his or her shoulders up into the therapist's hands and hold it. • The emphasis is on the relaxation phase.
  • 14.
    Re-patterning Techniques • Whenthe patient needs more support to gain control of breath and is experiencing shortness of breath. • Ask the patient to exhale “ try to blow out easily with lips pursed. Donot force it, just let it come out. • Once patient feels some control of breath then ask to hold breath at top of inspiration just for 1-2 seconds. • Avoid valsalva maneuver
  • 15.
    Sniffing • Sniffing isprimarily diaphragmatic breathing • Place the patient in gravity eliminated position • Relatively posterior pelvis • Use pillow under head • Arms down below 90 degree of flexion
  • 16.
    Cont… • Place thepatients hand on their stomach for increased proprioceptive feedback One long sniff Sniff Twice, then exhale Sniff 3 times , then slowly exhale
  • 17.
    Diaphragmatic Scoop Technique •Place patient in gravity eliminated postion • Feel the patients breathing pattern by placing your hand at the umblicus • After normal rate at the end of patients exhalation, give a slow stretch and scoop hand up and under anterior thorax. • Oral command is given while scoop stretch “breathe into my hand”
  • 18.
    Cont… • Try notto have patients take too many deep breaths; they may begin to feel light-headed because they may hyperventilate and blow off too much Carbon dioxide.
  • 19.
    Lateral Costal Breathing •Lower chest lateral costal expansion facilitate diaphragmatic and intercostal breathing • Mid chest lateral costal expansion will recruit primarily intercostal activity
  • 20.
    Bilateral lower lobeexpansion Bilateral mid-chest expansion exercise.
  • 21.
    Upper Chest Inhibition •Position the patient appropriately. • For a couple of respiratory cycles without applying any pressure to feel the upper chest's movement
  • 22.
    Cont… • On thepatient's next inspiratory effort apply pressure or resistance to the expansion of the upper chest. This gentle pressure will cause postural inhibition to the anterior and superior movement of the upper chest. • After each expiratory cycle, add more pressure until the patient subconsciously increases the lower chest breathing out of necessity.
  • 23.
    • This techniqueshould never cause an increase in anxiety or it will only encourage more upper chest breathing rather than less. Cont…..
  • 24.
    Normal Timing • Anormal timing technique adapted from the physical therapy approach of PNF can help the patient work on this sequence. • Position the patient in supine or supported sitting with neutral pelvis position. • At the end of an expiratory cycle using the hand placement of the diaphragm scoop, asks the patient to breathe in "here." With the other hand, the therapist moves up
  • 25.
    Cont… • The chestwall to the lower sternum and touches the patient with the instructions again to "now breathe here.“ • Finally, the therapist uses the first hand to move up to the upper sternum (usually around the level of the sternal angle) and asks the patient to "now breathe here.“ • The manual cues provide tactile cuing
  • 26.
    Facilitating effective ventilationgoes far beyond just the diaphragmatic exercise, physiotherapists can be incorporate techniques and strategies to get their patients to assist them in reaching their greatest rehabilitation potential.
  • 27.