
Recommended
More Related Content
What's hot
What's hot (20)
Similar to SHOULDER JOINT
Similar to SHOULDER JOINT (20)
Recently uploaded
Recently uploaded (20)
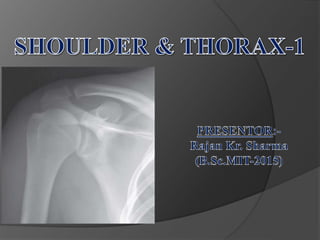
SHOULDER JOINT
- 2. GENERAL INTRODUCTION BASIC VIEW of SHOULDER RADIOGRAPH OUTLET PROJECTION RECURRENT DISCOLATION CALCIFIED TENDONS BASIC VIEWS OF CLAVICLE BASIC VIEWS OF SCAPULA GLENO-HUMERAL JOINT (GH JOINT) ACROMIO-CLAVICULAR JOINTS (AC JOINT)
- 3. Shoulder joint is simply the articulation of the head of humerus and glenoid cavity of scapula. The shoulder is a complex joint capable of a great range of movements. Also known as the pectoral girdle. It is a type Ball and Socket Joint. Consists of:- Clavicles Scapulae Humeral Head
- 4. CONTD…. Radiographic examinations of the shoulder joint and shoulder girdle can be carried out with the patient supine on the X-ray table or trolley. In most cases it will be more comfortable for the patient to sit or stand with the back of the shoulder in contact with the cassette. It is common practice to obtain two views of the shoulder joint, particularly in cases of suspected dislocation: an antero-posterior (supine/erect) view and a supero-inferior (axial) view.
- 5. BASIC VIEWS ANTERO POSTERIOR (AP) - Erect Position of patient and image receptor The patient stands with the affected shoulder against the image receptor. The patient is externally rotated 15° to bring the shoulder under examination closer to the image receptor and the plane of AC joint perpendicular to the image receptor. The arm is supinated and slightly abducted away from the body. Direction and location of the X-ray beam oThe collimated horizontal beam is directed to the palpable coracoid process of the scapula and collimated to include the structures. Fig:-Shoulder AP Radiograph
- 6. BASIC VIEWS (CONTD)… SUPERO-INFERIOR - AXIAL Position of patient and image receptor:- Patient is seated by the side of the table and the image receptor is placed on the table top. The arm under examination is abducted over the table. The patient leans towards the table to reduce the object-to receptor distance and to ensure that the glenoid cavity is included in the image. Direction and centering of the X-ray beam The vertical central ray is directed through the proximal aspect of the humeral head. Some tube angulations, towards the palm of the hand, may be necessary to coincide with the plane of the glenoid cavity. Fig:- Supero-inferior radiograph of the shoulder
- 7. OUTLET PROJECTION ANTERO-POSTERIOR (AP) Fig:- AP outlet radiograph of the shoulder Position of patient and cassette The patient stands with the affected shoulder against a cassette and is rotated 15° to bring the plane of the scapula parallel with the cassette. Direction and centering of the X- ray beam The horizontal central ray is directed 30° caudally and centred to the palpable coracoid process of the scapula.
- 8. OUTLET PROJECTION (CONTD)… LATERAL OBLIQUE Fig:- Lateral oblique shoulder outlet Radiograph POSITION OF PATIENT AND CASSETTE o The patient stands or sits facing the cassette, with the lateral aspect of the affected arm in contact with the cassette. o The affected arm is extended backwards, with the dorsum of the hand resting on the patient’s waist. o The patient is adjusted so that the head of the humerus (coracoid process) is in the centre of the cassette. o The patient is now rotated forward until a line joining the medial and lateral borders of the affected scapula is at right-angles to the cassette (i.e. the body of the scapula is at right-angles to the cassette). DIRECTION AND CENTERING OF THE X- RAY BEAM The horizontal central ray is angled 10 degrees caudally and centred to the head of the humerus.
- 9. RECURRENT DISCOLATION AP-LATERAL HUMERUS Fig:-Antero-posterior shoulder (lateral humerus projection) for recurrent dislocation Position of patient and cassette The patient is positioned erect, with the affected shoulder raised approximately 30 degrees to bring the glenoid cavity at right-angles to the centre of the cassette. The arm is partially abducted, the elbow flexed and the arm medially rotated. Direction and centering of the X-ray beam The horizontal central ray is directed to the head of the humerus and the centre of the cassette.
- 10. RECURRENT DISCOLATION AP -OBLIQUE HUMERUS Fig:-Antero-posterior shoulder (oblique humerus projection) for recurrent dislocation Position of patient and cassette The patient is positioned erect, with the unaffected shoulder raised approximately 30 degrees to bring the glenoid cavity at right- angles to the centre of the cassette. The elbow is extended, allowing the arm to rest in partial abduction by the patient’s side. The humerus is now in an oblique position midway between that for the antero-posterior projection and that for a lateral projection. Direction and centering of the X-ray beam The horizontal central ray is directed to the head of thehumerus and the centre of the cassette.
- 11. RECURRENT DISCOLATION INFERO-SUPERIOR Fig:-Normal infero-superior radiograph of shoulder Position of patient and cassette The patient lies supine on the x-ray table, with the arm of the affected side abducted without causing discomfort to the patient. The palm of the hand is turned to face upwards, with the medical and lateral epicondyles of the humerus equidistant from the tabletop. A cassette is supported vertically against the shoulder and is pressed against the neck to include as much as possible of the scapula on the film. The shoulder and arm are raised slightly on non-opaque pads. Direction and centering of the X-ray beam The horizontal central ray is directed towards the axilla with minimum angulations towards the trunk.
- 12. CALCIFIED TENDONS ANTERO-POSTERIOR Direction and centering of the X-ray beam In each case, the horizontal central ray is directed to the head of the humerus and to the centre of the film. Position of patient and cassette The patient stands with the affected shoulder against the vertical cassette holder and rotated 15 degrees to bring the plane of the scapula parallel with the cassette. Position of the arm NO ROTATION OF HUMERUS The arm is supinated at the patient’s side, palm facing forwards, with the line joining the medial and lateral epicondyles of the humerus parallel to the vertical cassette holder. Demonstrates:-SUPRASPINATUS TENDONS MEDIAL ROTATION OF HUMERUS With the elbow flexed, the arm is partially abducted and medially rotated, with the dorsum of the hand resting on the rear waistline. The line joining the medial and lateral epicondyles of the humerus is now perpendicular to the vertical cassette holder. Demonstrates:-TERES MINOR TENDON LATERAL ROTATION OF HUMERUS With the elbow flexed, the arm is partially abducted and medially rotated, with the dorsum of the hand resting on the rear waistline. The line joining the medial and lateral epicondyles of the humerus is now perpendicular to the vertical cassette holder. Demonstrates:-SUBSCAPULARIS TENDON
- 13. CALCIFIED TENDONS ANTERO-POSTERIOR – 25 DEGREES CAUDAD Fig:-Antero-posterior radiograph of shoulder with 25 degrees caudad angulations to show calcifications Position of patient and cassette The patient stands with the affected shoulder against a vertical cassette holder and rotated 15 degrees to bring the plane of the scapula parallel with the cassette. The arm is supinated at the patient’s side, palm facing forwards, with the line joining the medial and lateral epicondyles of the humerus parallel to the vertical cassette holder. Direction and centering of the X-ray beam The collimated central ray is angled 25 degrees caudally and centred to the head of the humerus and to the centre of the film. DEMONSTRATES:- Insertion of INFRASPINATUS TENDON and the Subacromial part of the SUPRASPINATUS Tendon.
- 14. CALCIFIED TENDONS INFERO-SUPERIOR Fig:- Infero-superior radiograph of shoulder showing calcification Position of patient and cassette The patient lies supine on the table, with the arm of the side being examined abducted to a right-angle. The palm of the hand faces upwards and the line joining the medial and lateral epicondyles is in a plane parallel to the tabletop. The cassette is supported vertically against the upper border of the shoulder and pressed into the neck. Direction and centering of the X-ray beam The horizontal central ray is directed to the centre of the axilla, with the minimum angulation towards the trunk. DEMONSTRATES:- The insertion of the SUBSCAPULARIS TENDON and TERES MINOR TENDON and the course of tendons anterior and posterior to the capsule of the shoulder joint.
- 15. CLAVICLE POSTERO-ANTERIOR Fig:-Normal postero-anterior radiograph of clavicle Position of patient and cassette The patient sits or stands facing vertical cassette holder. The patient’s position is adjusted so that the middle of the clavicle is in the centre of the cassette. The patient’s head is turned away from the side being examined and the affected shoulder rotated slightly forward to allow the affected clavicle to be in close contact with the cassette. Direction and centering of the X-ray beam The horizontal central ray is directed to the centre of the clavicle and the centre of the cassette, with the beam collimated to the clavicle.
- 16. CLAVICLE INFERO-SUPERIOR Fig:- Infero-superior radiograph of clavicle showing fracture Position of patient and cassette The patient sits facing the x-ray tube. The affected shoulder is raised slightly to bring the scapula in contact with the cassette. The patient’s head is turned away from the affected side. The cassette is displaced above the shoulder to allow the clavicle to be projected into the middle of the image. Direction and centering of the X-ray beam The central ray is angled 30 degrees cranially and centered to the centre of the clavicle. Fig:- normal Infero-superior radiograph of clavicle
- 17. SCAPULA ANTERO-POSTERIOR (BASIC) – ERECT Fig:-AP radiograph of scapula showing a fracture through the neck of the glenoid. Position of patient and cassette The patient stands with the affected shoulder against a cassette and rotated slightly to bring the plane of the scapula parallel with the cassette. The arm is slightly abducted away from the body and medially rotated. Direction and centering of the X-ray beam The horizontal ray is directed to the head of the humerus.
- 18. SCAPULA LATERAL (BASIC) Fig:-Normal lateral radiograph of scapula Position of patient and cassette Patient stand/sits facing vertical bucky. Keeping the affected shoulder in contact with the vertical Bucky, the patient’s trunk is rotated forward until the body of the scapula is at right-angles to the cassette. The arm is abducted with the elbow flexed to allow the back of the hand to rest on the hip. Direction and centering of the X-ray beam The horizontal central ray is directed to the midpoint of the medial border of the scapula and to the middle of the cassette.
- 19. GLENOHUMERAL JOINT (GH JOINT) Antero-posterior – erect Fig:-Normal AP radiograph of the shoulder showing GH-Joint Position of patient and cassette The patient stands with the affected shoulder against the cassette and is rotated approximately 30 degrees to bring the plane of the glenoid fossa perpendicular to the cassette. The arm is supinated and slightly abducted away from the body. Direction and centering of the X-ray beam The horizontal central ray is centered to the palpable coracoid process of the scapula.
- 20. ACROMIOCLAVICULAR JOINT (AC JOINT) ANTERO-POSTERIOR Fig:-Normal AP Radiograph of AC Joint Position of patient and cassette The patient stands facing the X-ray tube, with the arms relaxed to the side. The posterior aspect of the shoulder being examined is placed in contact with the cassette, and the patient is then rotated approximately 15 degrees towards the side being examined to bring the acromioclavicular joint space at right angles to the film. Direction and centering of the X-ray beam The horizontal central ray is centered to the palpable lateral end of the clavicle at the acromioclavicular joint.
Editor's Notes
- General survey of shoulder joint
- If there is a large OFD, it may be necessary to increase the overall focus-to-film distance (FFD) to reduce magnification.
- In cases of suspected shoulder impingement syndrome, it is important to visualize the anterior portion of the acromion process