This document provides instructions for continuing the setup of a Raspberry Pi 3 Model B by updating the operating system, enabling remote desktop access, configuring location and hardware settings, and finishing the initial setup. The objectives are to get the Raspberry Pi fully operational so users can start working on projects. The instructions include commands to run and screenshots to illustrate the configuration process, which should take approximately 1-2 hours to complete.
31 creating a robust and professional messaging systemMubariz Mahmood
To create a robust messaging system for a Facebook page, go to the page settings, select the messaging option, and configure general and response assistant settings. General settings include options for using return/enter to send messages and prompting visitors to message. Response assistant settings allow configuring automatic replies and greetings to keep conversations ongoing even when away from computer or phone.
This readme file provides instructions and notices for the game Virtua Cop 2 PC. It outlines 7 key points: 1) How to start the game and access the menu bar. 2) Reloading now only requires a single click. 3) The middle mouse button functions as start and pause for 3-button mice. 4) Using cheats will prevent entering your name. 5) Changes to the menu bar layout and options. 6) Corrections to hot keys in the menus. 7) Restart and device renaming details for multiplayer mode.
The warkey++ program allows users to easily add hotkeys for various functions in games like checking allies' and enemies' health bars, pausing the game, and sending quick messages to allies or everyone without disabling the chat system. It is compatible with many gaming platforms and suitable for both casual and professional matches. The program also automatically shields the left and right windows key when gaming and allows customizing hero skill hotkeys.
To import video footage into Final Cut Express, connect the camera to the computer and go to File > Log and Transfer. Drag clips from the browser into the timeline. You can preview clips by double clicking in the viewer. To set in and out points for a clip, use the I and O keyboard shortcuts to add arrows on the viewer. The blade tool, accessed with Command + B, is used to cut clips on the timeline. To zoom in on a clip, change the scale percentage above the canvas.
This document provides step-by-step instructions for installing Windows Server 2012 from a DVD. The process involves booting from the DVD, selecting language and installation options, accepting license terms, selecting a disk to install on, creating partitions if desired, copying files to complete the installation, setting the administrator password, logging in, and optionally changing the computer name before restarting.
This document provides instructions for using a vehicle programming tool. It outlines the tool's menu options, which allow selecting a vehicle make, adjusting tool settings like contrast, and updating the tool's software and hardware information. The main functions include selecting special functions and immobilizer programming for specific vehicle makes. The immobilizer instructions provide steps for selecting the vehicle, entering a PIN code, deleting or matching keys, and completing a remote function with prompts to connect to the OBDII port and respond to messages.
This document provides step-by-step instructions for loading USN software from a USB thumb drive onto a Point of Sale terminal. It details rebooting the terminal, entering the BIOS, changing secure boot settings to allow booting from the USB drive, initiating the Windows PE environment from the drive, selecting installation options, and imaging the new software. Upon completion, the document specifies one additional post-installation task to edit a configuration file to resolve device listing issues.
This document provides steps for reinstalling Windows using a disk, including backing up data, booting to the BIOS, selecting the installation option, completing language and keyboard setup, accepting the EULA, selecting the partition for installation, going through the installation stages without interruption, setting up a name, password and product key, and configuring time and date settings. It concludes by explaining how to reload drivers after reinstallation and provides tags and URLs for more information.
Ubuntu 14.04 installation with windows8 with legacy modeRakesh Gunderi
The document provides step-by-step instructions for installing Ubuntu 14.04 in dual boot mode with Windows 8 or 8.1, including disabling fast startup in Windows, changing BIOS settings to enable legacy mode and select the Ubuntu install media as the first boot device, using the Ubuntu installer to create Linux partitions and install Ubuntu, and instructions for selecting Ubuntu at startup.
This document provides step-by-step instructions for installing Windows XP Professional on a PC. It begins with inserting the Windows XP CD and booting from it. The user then proceeds through configuring language and regional settings, entering a product key, setting up an administrator account with password, and configuring date, time and network settings. Finally, the PC reboots to complete the Windows XP installation and the user logs into the new desktop for the first time. The document outlines each screen in the installation process to guide users through the full Windows XP setup.
This document provides instructions for using Windows Movie Maker to create videos. It discusses importing media like photos and video clips, editing them on the timeline, adding effects, transitions, titles and credits. It also covers adding audio, previewing the movie, saving the final video in different formats, and includes additional resources for learning more about Movie Maker.
To create a program through object navigator: go to transaction code SE80, select package, enter the package name ZLWM_RFC, click yes to create the object, enter a short description, and click the green tick multiple times to continue and complete the package creation.
Step by Step guide for creating first ABAP report in SAPnityaabap
This document provides a step-by-step guide to create a first ABAP report. It involves using transaction code SE80 to access the ABAP workbench, creating a program object called ZHELLOWORLD, adding sample ABAP code using WRITE statements, activating the object, and executing it to display output. The guide demonstrates basics like accessing the ABAP editor, modifying code, activating and running a simple report.
This document provides instructions for changing the logon screen background in Windows 7 in 3 steps:
1. Create and save a compressed JPG photo under 245KB as "backgroundDefault.jpg" and copy it to the C:\Windows\system32\oobe\info\backgrounds folder.
2. Open the Registry Editor and navigate to HKLM\Software\Microsoft\Windows\CurrentVersion\Authentication\LogonUI\Background, creating the "Background" key if needed. Then create or access the "OEMBackground" DWORD and set its value to 1.
3. Log off to see the new background or set the value back to 0 to revert to the default.
This document provides step-by-step instructions for adding a hard drive to a virtual machine and formatting it. It begins by having the user start the VMware program, click the Add icon, and select to add a SCSI hard disk of 5GB in size. After the disk is added, the document guides the user through powering on the virtual machine, opening Disk Management, initializing and formatting the new disk as an MBR partition with a simple volume assigned the L: drive letter. In the end, the user has successfully added and formatted a 5GB hard drive to their virtual machine.
The document provides steps for setting up a music video project in Adobe Premiere Pro and importing footage. It explains how to open a new project, import clips, drag clips into the timeline sequence, and ensure the sequence settings match the footage. It also describes how to preview clips before adding them to the sequence and how to drag audio files underneath video clips in the timeline.
Windows Movie Maker is freeware video editing software from Microsoft that allows users to create and edit home movies on their computer. It has various panes for importing and organizing media clips, creating a timeline of clips, transitions, and effects, and previewing and exporting the final video. The timeline and storyboard allow arranging clips in order and previewing transitions and effects between clips. Various menus, toolbars, and panels provide options for importing, editing, and sharing finished videos.
Nokia 3 g hsdpa handset pc suite installation & apn manualdimazss
To install PC Suite, download the latest version from Nokia's website or insert the CD-ROM. Accept the license agreement during installation and wait for the process to complete. Once finished, a connection wizard will prompt you to connect your phone via USB cable. PC Suite will then detect your phone and show its model number.
To create a Telkomsel broadband connection, open PC Suite after connecting your phone. Select "Connect to the Internet" and "Settings" to manually configure the connection using the flash access point without entering login credentials. Click "Connect" to start the authentication process and establish the broadband connection.
This document provides step-by-step instructions for downloading, burning to a disc, and installing Ubuntu Linux. It explains how to create space on your computer's hard drive for installation by deleting an existing volume and creating a new one. The installation process involves booting from the Ubuntu disc, selecting installation options such as language and disk partitioning, and filling in personal details before restarting and logging in to the new Ubuntu system.
The document provides a step-by-step guide for installing Windows 8 or 8.1 on a computer system. It outlines preparing the system by checking specifications and inserting an installation disk or USB. The user then restarts the system to boot from the media, selects the boot option, chooses the language and installs Windows. The process includes formatting partitions, completing the installation, personalizing settings, and optionally signing into a Microsoft account.
The command prompt for Windows is probably one of the most powerful applications in this operating system, but is far from the eyes of most users yet! Go beyond the more modern features of Windows
The document describes how new media technologies were used in different stages of a video project in Premier Pro. Transitions between scenes were added using fades of varying speeds and cross fades. A split screen effect was created by overlaying two clips on top of each other and adjusting the size of each on the top or bottom to 50%. A golden filter was applied to some scenes using the fast color corrector to select a golden hue and create a happy, pop genre feel.
The document provides instructions for installing and configuring Lotus Notes 7.0.3. It describes sharing the installation CD across multiple PCs, installing the Lotus Notes client software, configuring it with a user ID file and Domino server settings, setting up replication to sync the user's mail file, and creating a location document profile. It also covers opening mail files for other users and replicating the global address book.
The document provides instructions for configuring various components in BOSS GNU/Linux, including networking, printers, mail clients, partition editing, Bluetooth, input methods, multimedia applications, data burning and protection, chat applications, and more. Specific steps are outlined for tasks like network and printer configuration, installing external printer drivers, using the mail client and SCIM input method, transferring files via Bluetooth, burning and ripping CDs/DVDs using various applications, encrypting and decrypting files with GnuPG, and joining chat channels in Xchat.
The document provides step-by-step instructions for installing Windows XP and Windows 7 from a USB flash drive. It describes preparing the USB drive by formatting it, adding the boot code, and copying the installation files from the Windows disc. The instructions then explain how to boot from the USB drive by changing the BIOS settings and initiating the installation process from the flash drive.
This document provides step-by-step instructions for setting up a virtual client/server network, including installing and configuring Windows XP on two client machines, and Windows Server 2003 on a server machine. It outlines 27 steps to install Windows XP on each client, assigning them IP addresses, and 13 steps to install Windows Server 2003 on the server. The network will then be configured by setting up Active Directory on the server and DHCP for network addressing.
This manual summarizes the operation of an Evolution Series network element. It describes the Evolution Manager interface for configuring and monitoring the system. Key functions covered include the unit housekeeping wizard for hardware configuration, setting frequencies and IP addresses, changing passwords and adding new users, and configuring radio protection switching for hot standby systems. The manual provides step-by-step instructions and screenshots to illustrate these processes.
This document provides instructions for using RCCreator software to copy remote controls. It includes:
1) An introduction to the software and its ability to copy 98% of remote controls.
2) System requirements to run the software on Windows XP/Vista/7/8/10.
3) Steps to install the software, add a new remote control profile, read codes from an original remote, and export the codes to program a USB remote.
1. Boot the CentOS 7 installation media and select language.
2. Configure networking and enable NTP before setting up software and partitioning disks for installation.
3. Complete installation, set root and user passwords, then reboot to log in and finish configuration.
Os and network activity javier guerreroJGuerreroM96
This document provides information about various Windows XP tools and computer networking topics. It includes sections on mouse properties, adding/removing programs, user accounts, security center, regional options, how to set up a basic computer network with 7 PCs and a printer, MS-DOS commands like ipconfig and ping to test the network, and solutions for common security problems like ransomware infections. The document serves as a guide to understanding and working with basic Windows and networking functions.
The document provides step-by-step instructions for installing and configuring the Lotus Notes 7.0.3 client software. It describes sharing the installation CD across multiple computers, running the installation wizard, selecting installation options, and completing the installation process. It then explains how to configure the client by adding server details to the hosts file, entering login credentials, selecting the user ID file, and finishing the configuration. The final step discussed is setting up replication of the user's mail file from the Domino server.
This document provides step-by-step instructions for formatting a computer in Windows 7. It begins with backing up files to an external hard drive. Next, it involves inserting a Windows 7 installation disk or bootable flash drive and restarting the computer to boot from the installation media. The instructions then outline changing the BIOS settings to boot from the removable device, and following the Windows 7 installation wizard to format the hard drive and reinstall Windows. Finally, it concludes with restoring backed up files and completing the Windows installation process.
Leadleds Brand Remote led sign board manualleadleds AW
Learn how to easy to program your message by PC or by remote, by remote is fast way to program your messages, which support text, number and etc., multi-language supported, learn more click https://untsmart.com/products/remote-led-sign
The document provides sample questions and answers related to PC maintenance and repair. It includes guidelines for preventive maintenance, definitions of technical terms like jumper pins and CMOS batteries, instructions for configuring hard disks and optical drives, and steps for installing Windows XP Service Pack 2 and activating unlicensed Windows 7. The key points covered are procedures for disassembling, cleaning, and checking hardware and software, definitions of components and interfaces, how to set jumper pins for multiple storage devices, and a detailed process for installing each operating system from start to finish.
This presentation is part of our reports in our Operating System Concepts subject. Included in the presentation are topics about Installing Windows XP, Peer to peer networking, File Sharing, Printer Sharing and Net meeting configuration.
This document provides step-by-step instructions for installing Windows XP operating system software. It details how to enable booting from a CD, format drives, create partitions, and complete the Windows XP installation. Key steps include enabling the BIOS to boot from the CD/DVD drive, formatting drives using the NTFS file system, creating primary partitions for drives C and others, and completing the Windows XP setup by entering registration information and configuring network and security settings. Users are advised to follow all steps carefully to successfully install Windows XP.
The document provides instructions for configuring a Cisco 2901 router through the Cisco Setup Command Facility. It involves 11 steps:
1) Powering on the router and accessing the Setup Command Facility
2) Choosing to use the Setup Command Facility for initial configuration
3) Configuring basic settings like hostname, passwords, and SNMP settings
4) Selecting an interface (GigabitEthernet0/1) and configuring IP address and subnet mask
5) Viewing and confirming the generated configuration script
6) Saving the configuration to complete initial setup
7) Additional options like modifying the existing configuration through CLI
The document provides instructions for customizing the dashboard displayed on the driver station screen in the 2010 FIRST Robotics Competition. It discusses modifying the dashboard to display additional sensor readings, status updates, and video feeds from the robot. The key steps include using data types to bundle and transfer information from the robot program to the driver station via UDP, designing the dashboard user interface, and building an executable file to display the customized dashboard.
The document provides instructions for setting up and using a VIVOTEK network camera test lab. It includes chapters on preparation, installation, using the Installation Wizard 2 software, camera configuration, and using the ST7501 client/server software. Some key points:
- Chapter 1 discusses necessary lab components and how to connect the camera.
- Chapter 2 covers installing the Installation Wizard 2 and ST7501 software, including selecting installation directories and options.
- Chapter 3 describes the Installation Wizard 2 user interface and how it analyzes the network environment.
- Chapter 4 provides steps for configuring camera cropping through the viewing window page to define the region of interest and output frame size.
This document provides step-by-step instructions for installing Windows 2000. It describes the setup screens that appear during installation including selecting partition options, formatting the hard drive, setting the computer name and password, configuring network settings, and completing the installation process. After working through each screen, the Windows 2000 desktop will load, indicating a successful installation.
This document provides instructions for using RCCreator software to program remote controls. It discusses downloading and installing the software, connecting a programmable remote control to the computer, adding a new remote to the software database, reading codes from an original remote control, assigning those codes to buttons on the programmable remote, and then programming the remote control. The summary highlights the key steps in programming a remote control using the RCCreator software.
Similar to Raspberry pi getting the pi up and running part II (20)
Temple of Asclepius in Thrace. Excavation resultsKrassimira Luka
The temple and the sanctuary around were dedicated to Asklepios Zmidrenus. This name has been known since 1875 when an inscription dedicated to him was discovered in Rome. The inscription is dated in 227 AD and was left by soldiers originating from the city of Philippopolis (modern Plovdiv).
How to Make a Field Mandatory in Odoo 17Celine George
In Odoo, making a field required can be done through both Python code and XML views. When you set the required attribute to True in Python code, it makes the field required across all views where it's used. Conversely, when you set the required attribute in XML views, it makes the field required only in the context of that particular view.
Level 3 NCEA - NZ: A Nation In the Making 1872 - 1900 SML.pptHenry Hollis
The History of NZ 1870-1900.
Making of a Nation.
From the NZ Wars to Liberals,
Richard Seddon, George Grey,
Social Laboratory, New Zealand,
Confiscations, Kotahitanga, Kingitanga, Parliament, Suffrage, Repudiation, Economic Change, Agriculture, Gold Mining, Timber, Flax, Sheep, Dairying,
This presentation was provided by Rebecca Benner, Ph.D., of the American Society of Anesthesiologists, for the second session of NISO's 2024 Training Series "DEIA in the Scholarly Landscape." Session Two: 'Expanding Pathways to Publishing Careers,' was held June 13, 2024.
Beyond Degrees - Empowering the Workforce in the Context of Skills-First.pptxEduSkills OECD
Iván Bornacelly, Policy Analyst at the OECD Centre for Skills, OECD, presents at the webinar 'Tackling job market gaps with a skills-first approach' on 12 June 2024
ISO/IEC 27001, ISO/IEC 42001, and GDPR: Best Practices for Implementation and...PECB
Denis is a dynamic and results-driven Chief Information Officer (CIO) with a distinguished career spanning information systems analysis and technical project management. With a proven track record of spearheading the design and delivery of cutting-edge Information Management solutions, he has consistently elevated business operations, streamlined reporting functions, and maximized process efficiency.
Certified as an ISO/IEC 27001: Information Security Management Systems (ISMS) Lead Implementer, Data Protection Officer, and Cyber Risks Analyst, Denis brings a heightened focus on data security, privacy, and cyber resilience to every endeavor.
His expertise extends across a diverse spectrum of reporting, database, and web development applications, underpinned by an exceptional grasp of data storage and virtualization technologies. His proficiency in application testing, database administration, and data cleansing ensures seamless execution of complex projects.
What sets Denis apart is his comprehensive understanding of Business and Systems Analysis technologies, honed through involvement in all phases of the Software Development Lifecycle (SDLC). From meticulous requirements gathering to precise analysis, innovative design, rigorous development, thorough testing, and successful implementation, he has consistently delivered exceptional results.
Throughout his career, he has taken on multifaceted roles, from leading technical project management teams to owning solutions that drive operational excellence. His conscientious and proactive approach is unwavering, whether he is working independently or collaboratively within a team. His ability to connect with colleagues on a personal level underscores his commitment to fostering a harmonious and productive workplace environment.
Date: May 29, 2024
Tags: Information Security, ISO/IEC 27001, ISO/IEC 42001, Artificial Intelligence, GDPR
-------------------------------------------------------------------------------
Find out more about ISO training and certification services
Training: ISO/IEC 27001 Information Security Management System - EN | PECB
ISO/IEC 42001 Artificial Intelligence Management System - EN | PECB
General Data Protection Regulation (GDPR) - Training Courses - EN | PECB
Webinars: https://pecb.com/webinars
Article: https://pecb.com/article
-------------------------------------------------------------------------------
For more information about PECB:
Website: https://pecb.com/
LinkedIn: https://www.linkedin.com/company/pecb/
Facebook: https://www.facebook.com/PECBInternational/
Slideshare: http://www.slideshare.net/PECBCERTIFICATION
A Visual Guide to 1 Samuel | A Tale of Two HeartsSteve Thomason
These slides walk through the story of 1 Samuel. Samuel is the last judge of Israel. The people reject God and want a king. Saul is anointed as the first king, but he is not a good king. David, the shepherd boy is anointed and Saul is envious of him. David shows honor while Saul continues to self destruct.
Raspberry pi getting the pi up and running part II
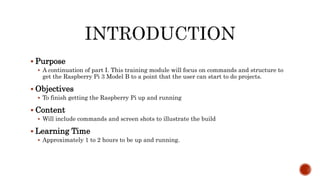
1. Purpose
A continuation of part I. This training module will focus on commands and structure to
get the Raspberry Pi 3 Model B to a point that the user can start to do projects.
Objectives
To finish getting the Raspberry Pi up and running
Content
Will include commands and screen shots to illustrate the build
Learning Time
Approximately 1 to 2 hours to be up and running.
2. Take the SDMicro and insert into the Raspberry Pi. Connect the keyboard and
mouse to the USB ports, insert the HDMI cable to the monitor and plug in the
network cable for internet BEFORE connecting the power.
When the Raspberry Pi starts to boot
it will scroll through all the Linux
startup lines and will bring up
the desktop as shown.
3. The next step is to update the operating system
Open a terminal window which is on the top of the screen on the tool bar and looks
like a monitor.
4. In the terminal window type the command below to update the operating system.
“sudo apt-get update”
Sudo = Super User
DO
5. When the update is complete it will bring the user back to the raspberry pi
command prompt
6. Remote Desktop is easy to install.
From the terminal
“sudo apt-get install xrdp -y”
And click Enter
7. The next step is configuring the Pi to a location and hardware and other options.
Type “sudo raspi-config”
That will bring up the configurator as shown
8. Choose the Expand Filesystem (which should already be highlighted) by pressing
enter. (All interaction in this configurator is keyboard driven use arrow keys to
navigate the configurator)
The user will get a string of command lines and then the below screen. Press enter
and it will bring the user back to the configurator.
11. The screen will ask if the user wants the SSH enabled and enabled should be
highlighted, so just click enter then it will say server enabled click ok
12. The user will be brought back to the original configuration screen. Scroll down to
Internationalisation Options and click enter
18. Scroll down to Central (since that is where I am at) and click enter
19. The user will be brought back to the Internationalisation screen so choose
Internationalisation again and scroll down to Change Keyboard Layout and press
Enter
20. Scroll down to find the particular keyboard needed. If the user’s keyboard was not
found the user can choose the standard Dell keyboard as that will work as a
generic keyboard. Then click Enter.
21. The user will be brought to the Keyboard Layout screen, scroll down to other and
click Enter
22. The user will be brought to the Country of origin for the keyboard screen, scroll
down to English (US) and click Enter
23. The user will be brought to the Keyboard Layout screen, scroll up to English (US)
and click Enter
24. The user will be brought to the Key to Function as ALTGR screen, scroll to the
default for the keyboard layout and click Enter
25. The user will be brought to the Compose Key screen, scroll to the No compose key
and click Enter
26. The user will be brought to the use Control+ALT+Backspace to terminate the x
server screen, No will be highlighted and click Enter
27. The user will be brought back to the main configuration page, scroll down to
Internationalisation options and click Enter
28. Scroll down to change Wi-Fi Country and click Enter.
30. It will bring the user to Wi-fi set to US with ok highlighted, click Enter
31. The user will be brought back to the main configuration page, use the right arrow
and highlight Finish and click Enter
Editor's Notes
Welcome to the Digi-Key Electronics Getting the Pi up and Running – Part 2 of 2 product training module. This presentation will provide users with a continuation of part I and will focus on commands and structures to get the Raspberry Pi 3 Model B to the point that users can start doing projects. This presentation will use commands and screenshots to explain and implement the completion of the Raspberry Pi setup. This could take from 1 to 2 hours
The next step is to insert the SD Micro Card, connect the keyboard, mouse, HDMI from the monitor and Ethernet cable. After everything is connected connect the power to the Raspberry Pi. The screen will scroll Linux type code as the Raspberry Pi boots up. The screen will come to a desktop like the one in the picture.
The next step is to update the operating system. Open the terminal window in the upper left of the menu bar at the top of the screen. It looks like a monitor, double click to open.
In the terminal window, type the command “sudo (space) apt-get (space) update”. Sudo means Super User Do it gives you administrator privileges to do most commands.
This command may take some time to complete, depending on how fast the internet connection is. But it will bring the user back to the pi@raspberrypi: command prompt when finished.
The next thing to do is to install the remote desktop software. The user should be back at a terminal now, type “sudo (space) apt-get (space) install (space) xrdp (space) –y and click enter. The Raspberry Pi will download and return the user to the pi@raspberrypi: command prompt
The next step is configuring the Pi to the users location. In the terminal window from the update type “sudo (space) raspi-config” and hit the Enter key. This will bring up the configuration window like shown.
Choose the “expand Filesystem” which should be highlighted by pressing the Enter key. All interaction in this configurator is keyboard driven, use the arrow keys to navigate the configurator. The user will get a string of command lines and then the window will show that the file system has been resized. Hit the Enter key to return to the configurator.
The user will be brought back to the main configuration page. Scroll down to “Advanced Options” and click Enter.
Scroll down to SSH and click Enter. This will allow the operating system to use Secure Shell for later use. It is more convenient to enable it here since the user is already here.
The screen will ask if you would like to enable SSH Server and enable should be highlighted, so just click Enter and it will say server Enabled.
The user will be brought back to the original configuration screen. Now scroll down to the “internationalization Options” as shown and hit the Enter key.
Scroll down to the “Change Locale” and click Enter
Scroll up to “None” and click Enter
The user will be brought back to the original configuration screen. Now scroll down to the “internationalization Options” as shown and hit the Enter key.
Scroll down to the “Change Timezone” and click Enter
Scroll down to “US” and click Enter
Scroll down to “Central” (The user should choose the correct time zone for their location) and click Enter.
This will bring the user back to the Internationalisation screen, scroll down to “Change Keyboard Layout” and click Enter.
Scroll down to find the correct keyboard the user is using. If the user’s keyboard was not found the user can choose the standard Dell keyboard as that will work as a generic keyboard. Then click Enter.
The user will be brought to the Keyboard Layout screen, scroll down to Other and then click Enter.
The user will be brought to the Country of Origin for the Keyboard screen, scroll down to English (US) and then click Enter.
The user will be brought to the Keyboard Layout screen. Scroll up to English (US) and then click Enter.
The user will be brought to the Key To Function as ALTGR screen, scroll to the default for the keyboard layout and then click Enter.
The user will be brought to the Compose Key screen, scroll to the no compose key and then click Enter.
The user will be brought to the use Control+ALT+Backspace to terminate the x server screen, No will be highlighted and click Enter
The user will be brought back to the main configuration page, scroll down to Internationalisation options and click Enter
Scroll down to change Wi-Fi Country and click Enter
Scroll down to US United States and click Enter
It will bring the user to Wi-fi set to US with ok highlighted, click Enter
Scroll down to find the correct keyboard the user is using. If the user’s keyboard was not found the user can choose the standard Dell keyboard as that will work as a generic keyboard. Then click Enter.
This has the basic setup complete. The user can go on to some of the other options such as; Bluetooth/ WiFi Setup, Samba Server setup, Mounting external drives andCreating a Network Attached Storage server