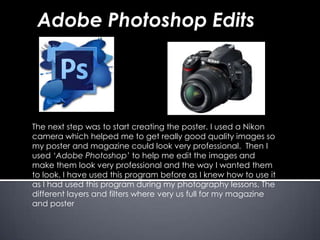
How Did you use media
technologies in the construction
and research, planning and
evaluation stages?
 At the start of the project we had to use ‘Questionpro’ the reason for
this was because it helped us to do research on bigger media
platforms for example social media websites such as facebook and
twitter. We had posted our questions on ‘questionpro’ and we had
put it on our social media pages such as ‘Facebook’ and ‘Twitter’ as
these two websites are the biggest social websites on the internet
we got a great response. This helped us by saving us time on going
around and asking people for their opinion. It was not hard to use as
the website was straight forward and simple. The next step was to
put the data on ‘excel’, I used this to help me to create the graphs
and gather the data which we had collected on ‘Questionpro’. The
program was not hard to get to grips with and it was very easy to
use. This allows me to create different types of graphs for my data.
The graphs helped to get the answers and to see which options
where the best and had the best response.
The next step of the research was to analyse existing horror trailers, so
I used ‘YouTube’ as you could find any video which you want from
this website. This really made my analysis of trailers really easy as it
was there. It would have been very hard to do this task without
YouTube. I could watch the trailers any time and over and over
again to get the analyses right.
To analyse existing horror posters and magazines I again used
‘Google’ this was really helpful as I could reach any horror poster and
magazine really easy. It also helped me with any type of research
which I needed to do to in the project.
I used power pint next to create the ‘Powerpoint’ to present my
qualitative and quantitative data and the research into conventions
of the horror genre which I had gotten the information and research
from ‘Google’. It was easy to use as I was very familiar with it. I also
did my contact-sheets and casting documents on ‘Power point’.
The next step was to start creating the poster. I used a Nikon
camera which helped me to get really good quality images so
my poster and magazine could look very professional. Then I
used ‘Adobe Photoshop’ to help me edit the images and
make them look very professional and the way I wanted them
to look. I have used this program before as I knew how to use it
as I had used this program during my photography lessons. The
different layers and filters where very us full for my magazine
and poster
Adobe Photoshop Edits
At the start of the images I
had cleared the background
and made it white to get a
higher quality looking photo. I
did this by using paint brush
and painting around the
image white.
In this stage what Ii had did was
that I used the levelling tool to
get it a more level between the
colours for the images so they
all where the same balanced.
In this stage I was
doing the last
stage to the photo
by using the colour
balances tool and
getting the high
quality colours in
the image.
This was the first stage of
editing the photo for the film
poster . I had used colour
balances tool to get the
balance of the colours strong
and bright to get a higher
quality image.
The next stage was getting
the image black and
white and getting the
image of the killer very
black so he could not be
identified. I balances the
black and white and git
the final edit which is on
the film poster.
I used ‘Publisher’ to create the templates for my magazine and poster.
The reason I used this program was because I was very used to this
program as I have been using it for a long time so I knew what do and
how to use it. I used ‘Microsoft Publisher’ to create my poster and
‘Microsoft Word’ to Write all my final essays as it’s a very use program
to use and I knew how to use it. I also did the cast and call sheets. So
people who were involved in the trailer knew where to go. We also
took their contacts so if they didn’t turn up we knew and if any
accidents had happened we knew where to call so we had the
contacts of the hospitals and the local police station on there.
The next step was to start creating the poster. I used a Nikon camera
which helped me to get really good quality images so my poster and
magazine could look very professional. Then I used ‘Adobe
Photoshop’ to help me edit the images and make them look very
professional and the way I wanted them to look. I have used this
program before as I knew how to use it as I had used this program
during my photography lessons. The different layers and filters where
very us full for my magazine and poster
Publisher: poster and magazine
This shows how I had
started my magazine
with the image
This shows that I had
added the film reel .
This show the next
step which was
adding the
magazines name.
This shows that I had
added the main title.
Of the issue. Which
was our film.
This shows I added
the subtitles
This shows I had added the
buzz words and bar codes
and a banner
 To edit the trailer we used ‘Serif Movie Plus x3’. this is a non liner
software that's the reason why we are using this to edit our film as we
are a independent film there for we don't have the advantages of
using the other software's which are of a higher quality We put
together and edited the trailer using this software to put the finishing
touches on it. We filmed the trailer on a ‘Panasonic Digital Video
Camera’. This allowed us to put filters and different transitions in the
trailer. At the start of the editing session we had problems on how to
edit as none of us in the group had used the program. But when we
got the hang of the program we found it very easy.
This are different parts of the trailer which
we had created in serif movie plus 3. the
trailer is non liner there for the lighting of
the different shoots are different to show
the different times of the day. Some of
the tings we did wear For the montage
shots the pace of the footage we had to
be sped up by rising the speed and
straight along the time line exactly. For
the clips with the logos and realise date
we had to create it on publisher and save
it as a jpeg and insert it on the serif movie
plus.
 The next step of the project was creating the sound for the trailer.
We had worked with the sound engineer as we directed what we
wanted and the sound was going to sound we used Cubase. We I
had used the school studio to record the sounds we wanted and the
voices over’s. We had gotten the chances to play around with the
studio to get the perfect sound for our trailer to make it and take it to
the next step.

Question 4

  • 1.
    How Did youuse media technologies in the construction and research, planning and evaluation stages?
  • 2.
     At thestart of the project we had to use ‘Questionpro’ the reason for this was because it helped us to do research on bigger media platforms for example social media websites such as facebook and twitter. We had posted our questions on ‘questionpro’ and we had put it on our social media pages such as ‘Facebook’ and ‘Twitter’ as these two websites are the biggest social websites on the internet we got a great response. This helped us by saving us time on going around and asking people for their opinion. It was not hard to use as the website was straight forward and simple. The next step was to put the data on ‘excel’, I used this to help me to create the graphs and gather the data which we had collected on ‘Questionpro’. The program was not hard to get to grips with and it was very easy to use. This allows me to create different types of graphs for my data. The graphs helped to get the answers and to see which options where the best and had the best response.
  • 3.
    The next stepof the research was to analyse existing horror trailers, so I used ‘YouTube’ as you could find any video which you want from this website. This really made my analysis of trailers really easy as it was there. It would have been very hard to do this task without YouTube. I could watch the trailers any time and over and over again to get the analyses right. To analyse existing horror posters and magazines I again used ‘Google’ this was really helpful as I could reach any horror poster and magazine really easy. It also helped me with any type of research which I needed to do to in the project. I used power pint next to create the ‘Powerpoint’ to present my qualitative and quantitative data and the research into conventions of the horror genre which I had gotten the information and research from ‘Google’. It was easy to use as I was very familiar with it. I also did my contact-sheets and casting documents on ‘Power point’.
  • 4.
    The next stepwas to start creating the poster. I used a Nikon camera which helped me to get really good quality images so my poster and magazine could look very professional. Then I used ‘Adobe Photoshop’ to help me edit the images and make them look very professional and the way I wanted them to look. I have used this program before as I knew how to use it as I had used this program during my photography lessons. The different layers and filters where very us full for my magazine and poster Adobe Photoshop Edits
  • 5.
    At the startof the images I had cleared the background and made it white to get a higher quality looking photo. I did this by using paint brush and painting around the image white. In this stage what Ii had did was that I used the levelling tool to get it a more level between the colours for the images so they all where the same balanced. In this stage I was doing the last stage to the photo by using the colour balances tool and getting the high quality colours in the image.
  • 6.
    This was thefirst stage of editing the photo for the film poster . I had used colour balances tool to get the balance of the colours strong and bright to get a higher quality image. The next stage was getting the image black and white and getting the image of the killer very black so he could not be identified. I balances the black and white and git the final edit which is on the film poster.
  • 7.
    I used ‘Publisher’to create the templates for my magazine and poster. The reason I used this program was because I was very used to this program as I have been using it for a long time so I knew what do and how to use it. I used ‘Microsoft Publisher’ to create my poster and ‘Microsoft Word’ to Write all my final essays as it’s a very use program to use and I knew how to use it. I also did the cast and call sheets. So people who were involved in the trailer knew where to go. We also took their contacts so if they didn’t turn up we knew and if any accidents had happened we knew where to call so we had the contacts of the hospitals and the local police station on there. The next step was to start creating the poster. I used a Nikon camera which helped me to get really good quality images so my poster and magazine could look very professional. Then I used ‘Adobe Photoshop’ to help me edit the images and make them look very professional and the way I wanted them to look. I have used this program before as I knew how to use it as I had used this program during my photography lessons. The different layers and filters where very us full for my magazine and poster Publisher: poster and magazine
  • 8.
    This shows howI had started my magazine with the image This shows that I had added the film reel . This show the next step which was adding the magazines name. This shows that I had added the main title. Of the issue. Which was our film. This shows I added the subtitles This shows I had added the buzz words and bar codes and a banner
  • 9.
     To editthe trailer we used ‘Serif Movie Plus x3’. this is a non liner software that's the reason why we are using this to edit our film as we are a independent film there for we don't have the advantages of using the other software's which are of a higher quality We put together and edited the trailer using this software to put the finishing touches on it. We filmed the trailer on a ‘Panasonic Digital Video Camera’. This allowed us to put filters and different transitions in the trailer. At the start of the editing session we had problems on how to edit as none of us in the group had used the program. But when we got the hang of the program we found it very easy.
  • 10.
    This are differentparts of the trailer which we had created in serif movie plus 3. the trailer is non liner there for the lighting of the different shoots are different to show the different times of the day. Some of the tings we did wear For the montage shots the pace of the footage we had to be sped up by rising the speed and straight along the time line exactly. For the clips with the logos and realise date we had to create it on publisher and save it as a jpeg and insert it on the serif movie plus.
  • 11.
     The nextstep of the project was creating the sound for the trailer. We had worked with the sound engineer as we directed what we wanted and the sound was going to sound we used Cubase. We I had used the school studio to record the sounds we wanted and the voices over’s. We had gotten the chances to play around with the studio to get the perfect sound for our trailer to make it and take it to the next step.