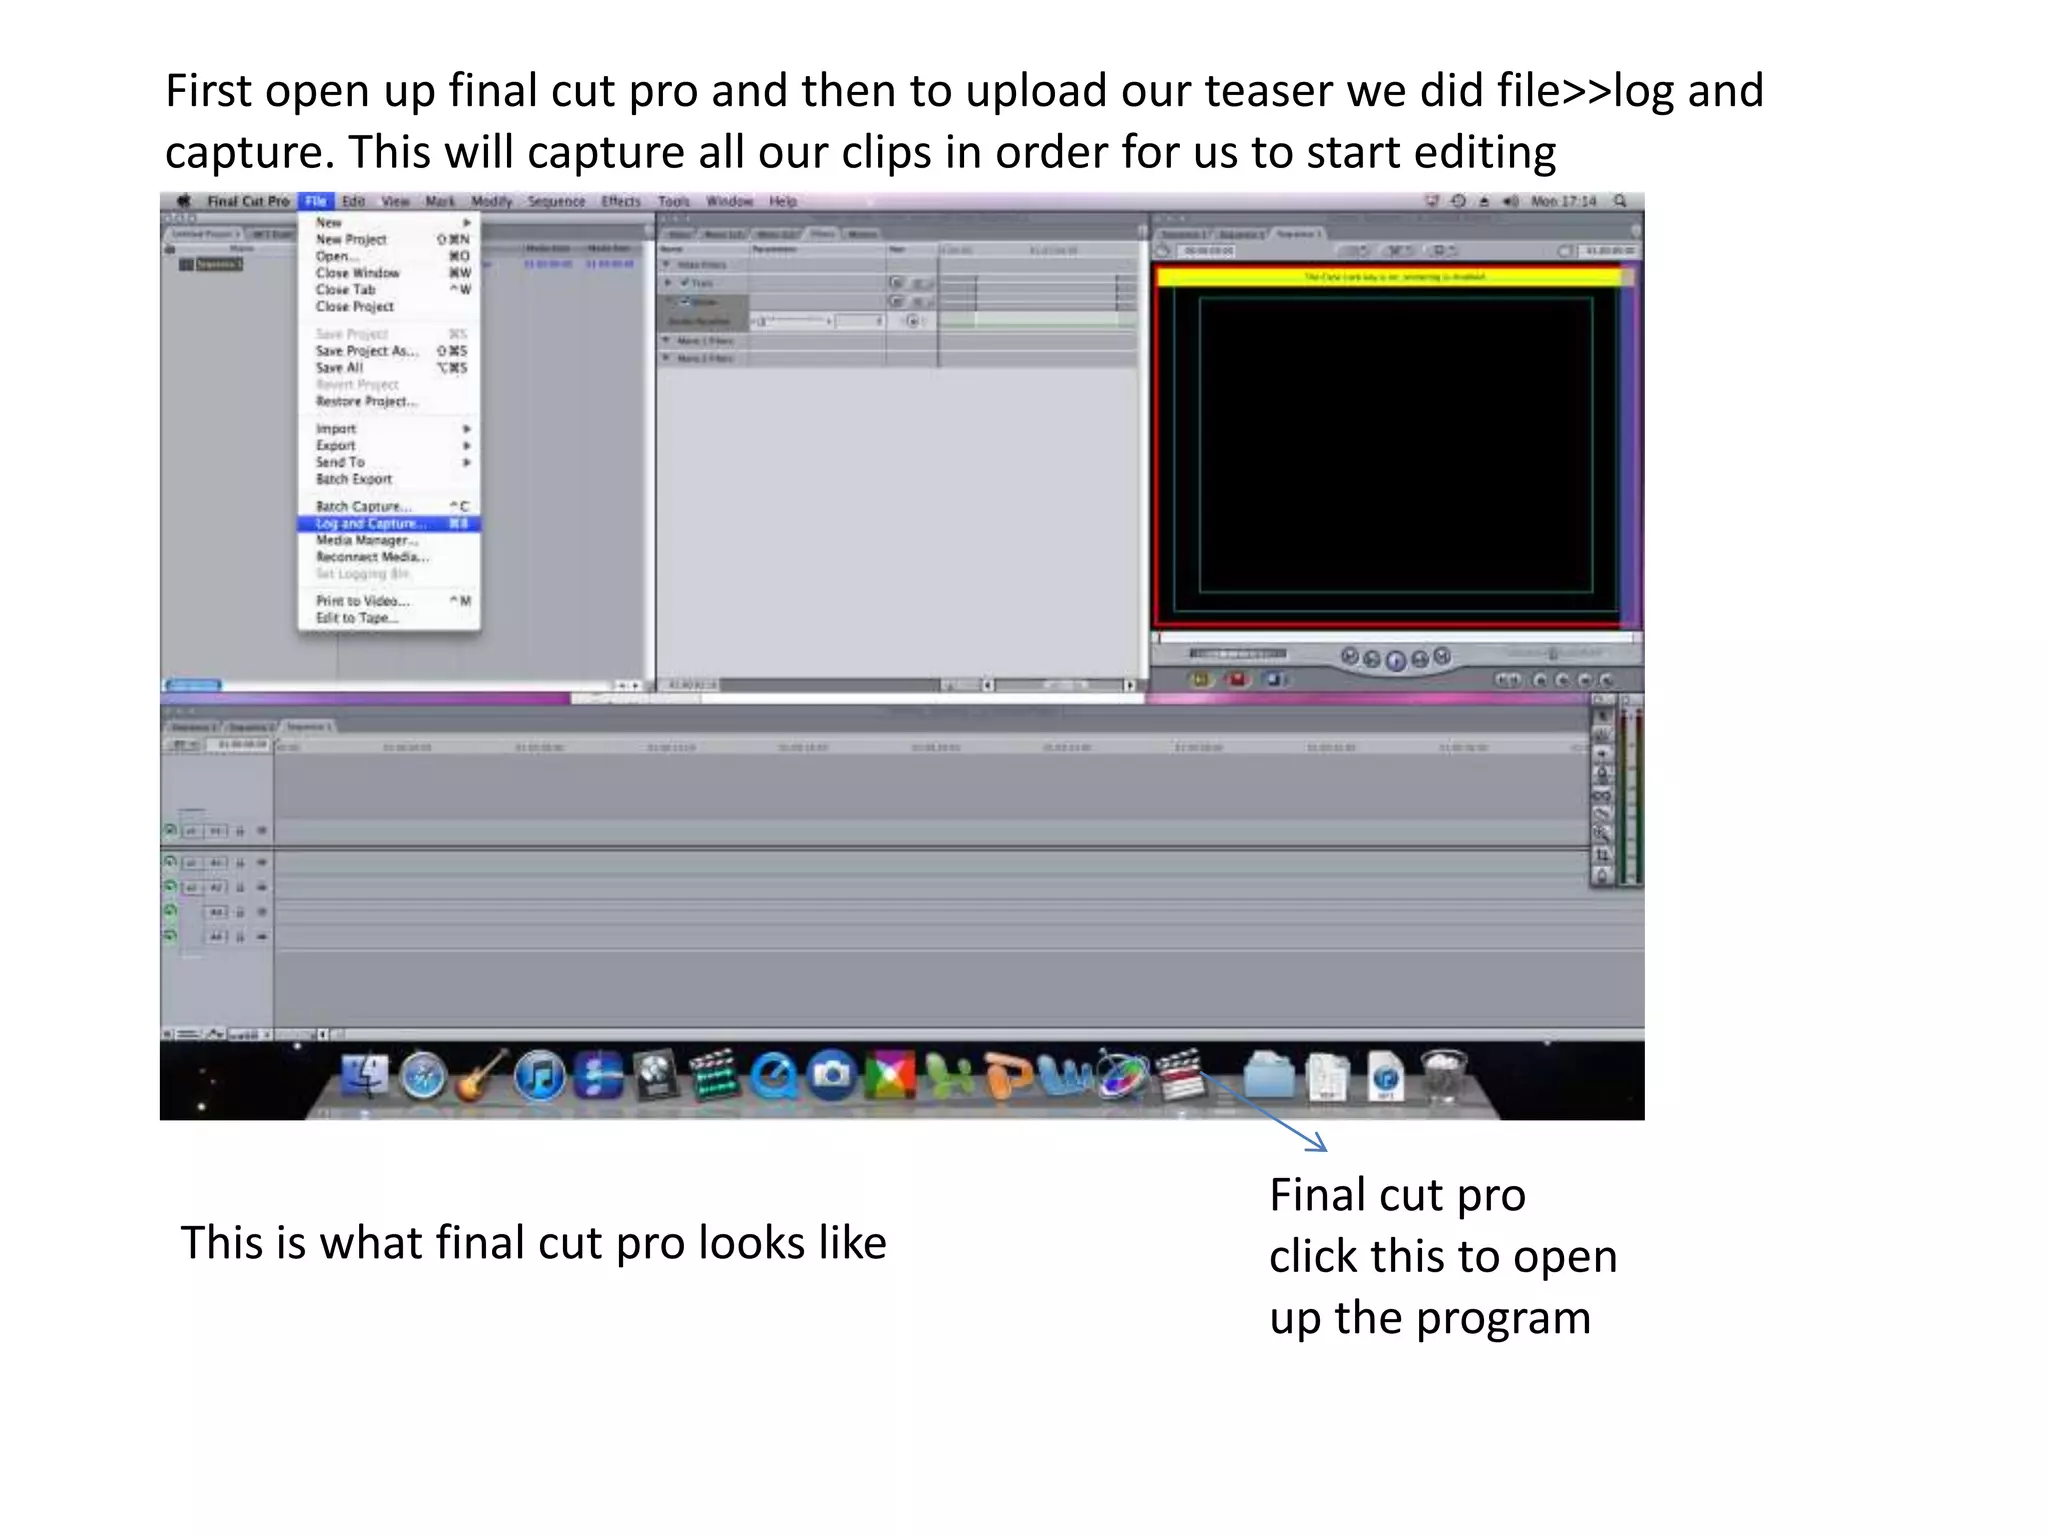
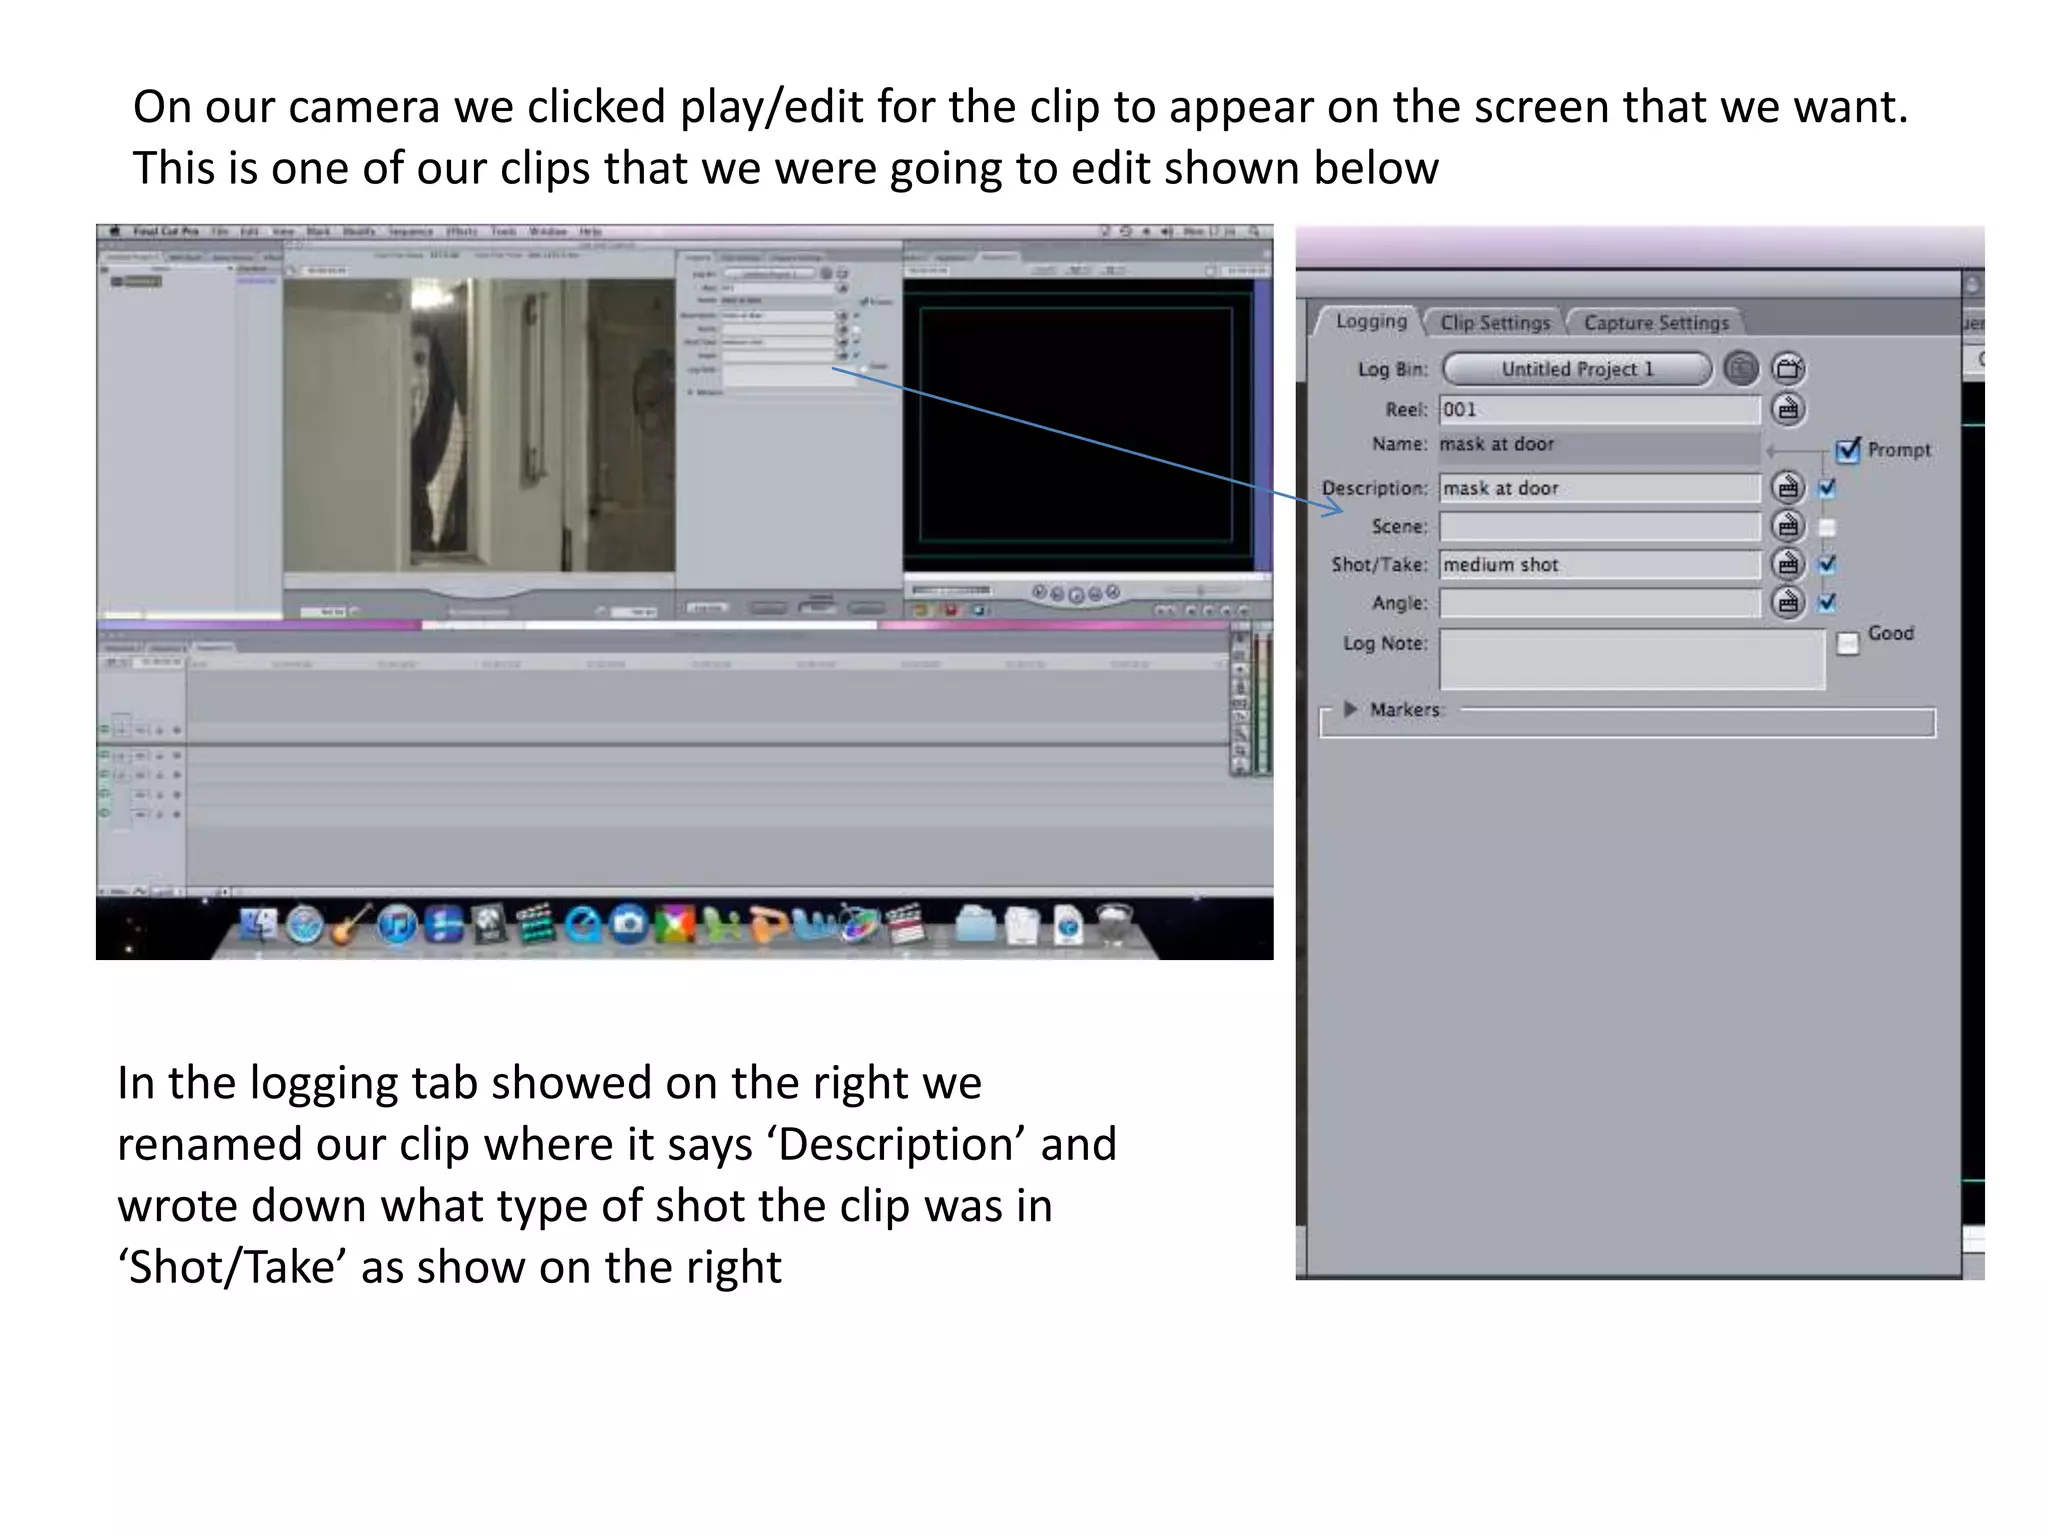
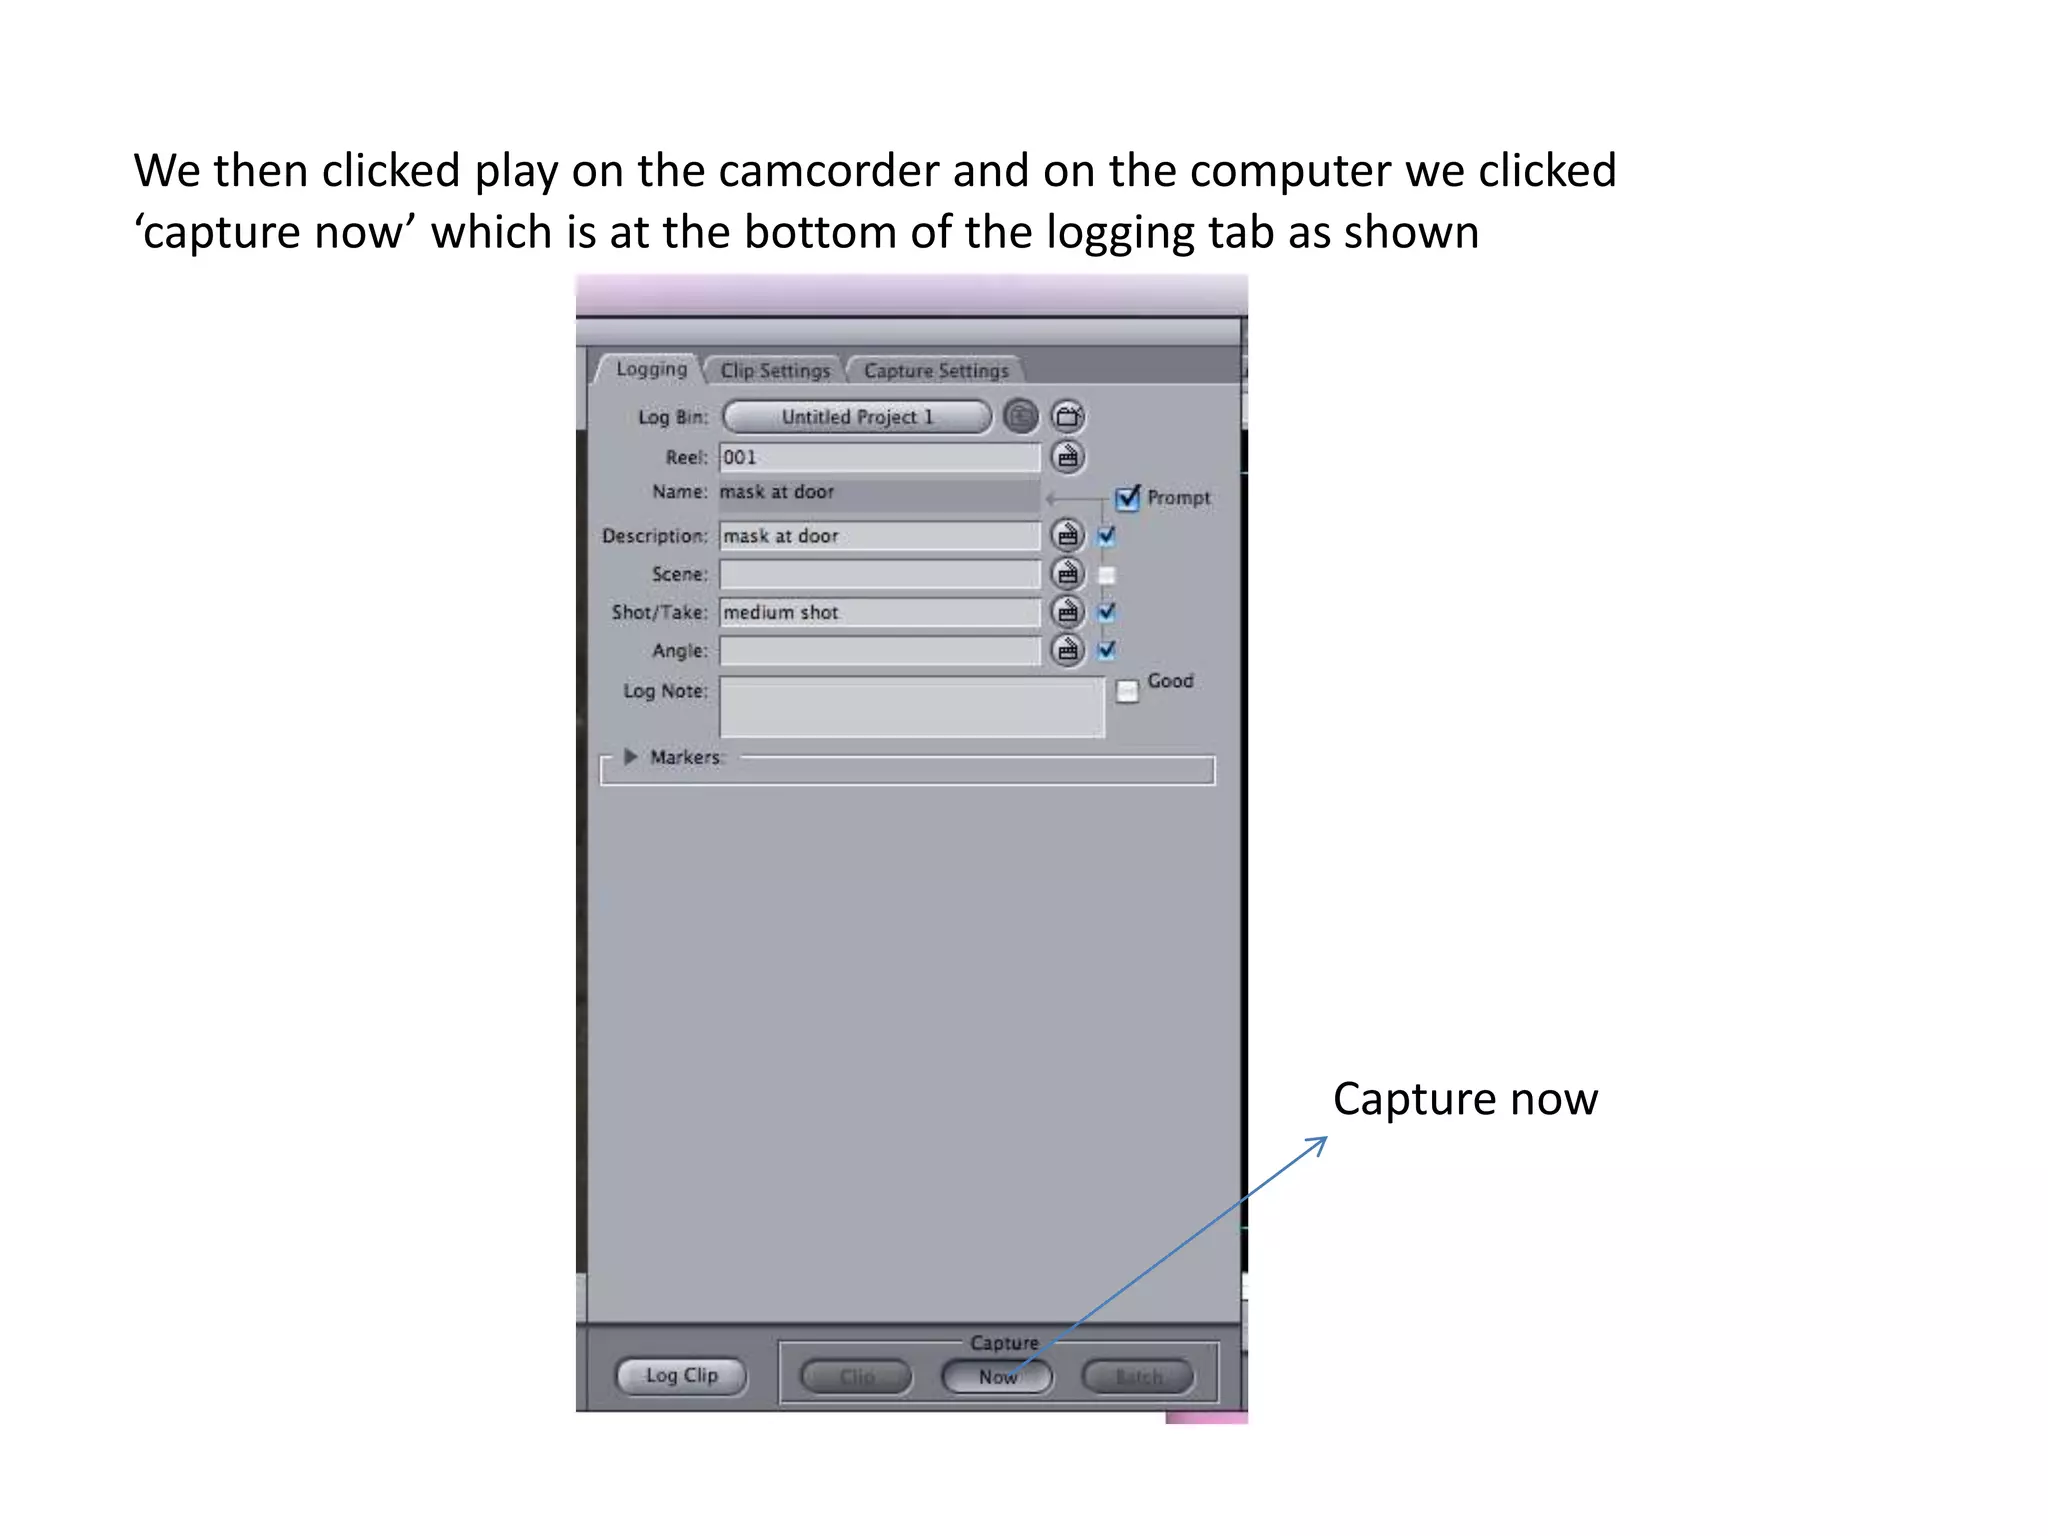
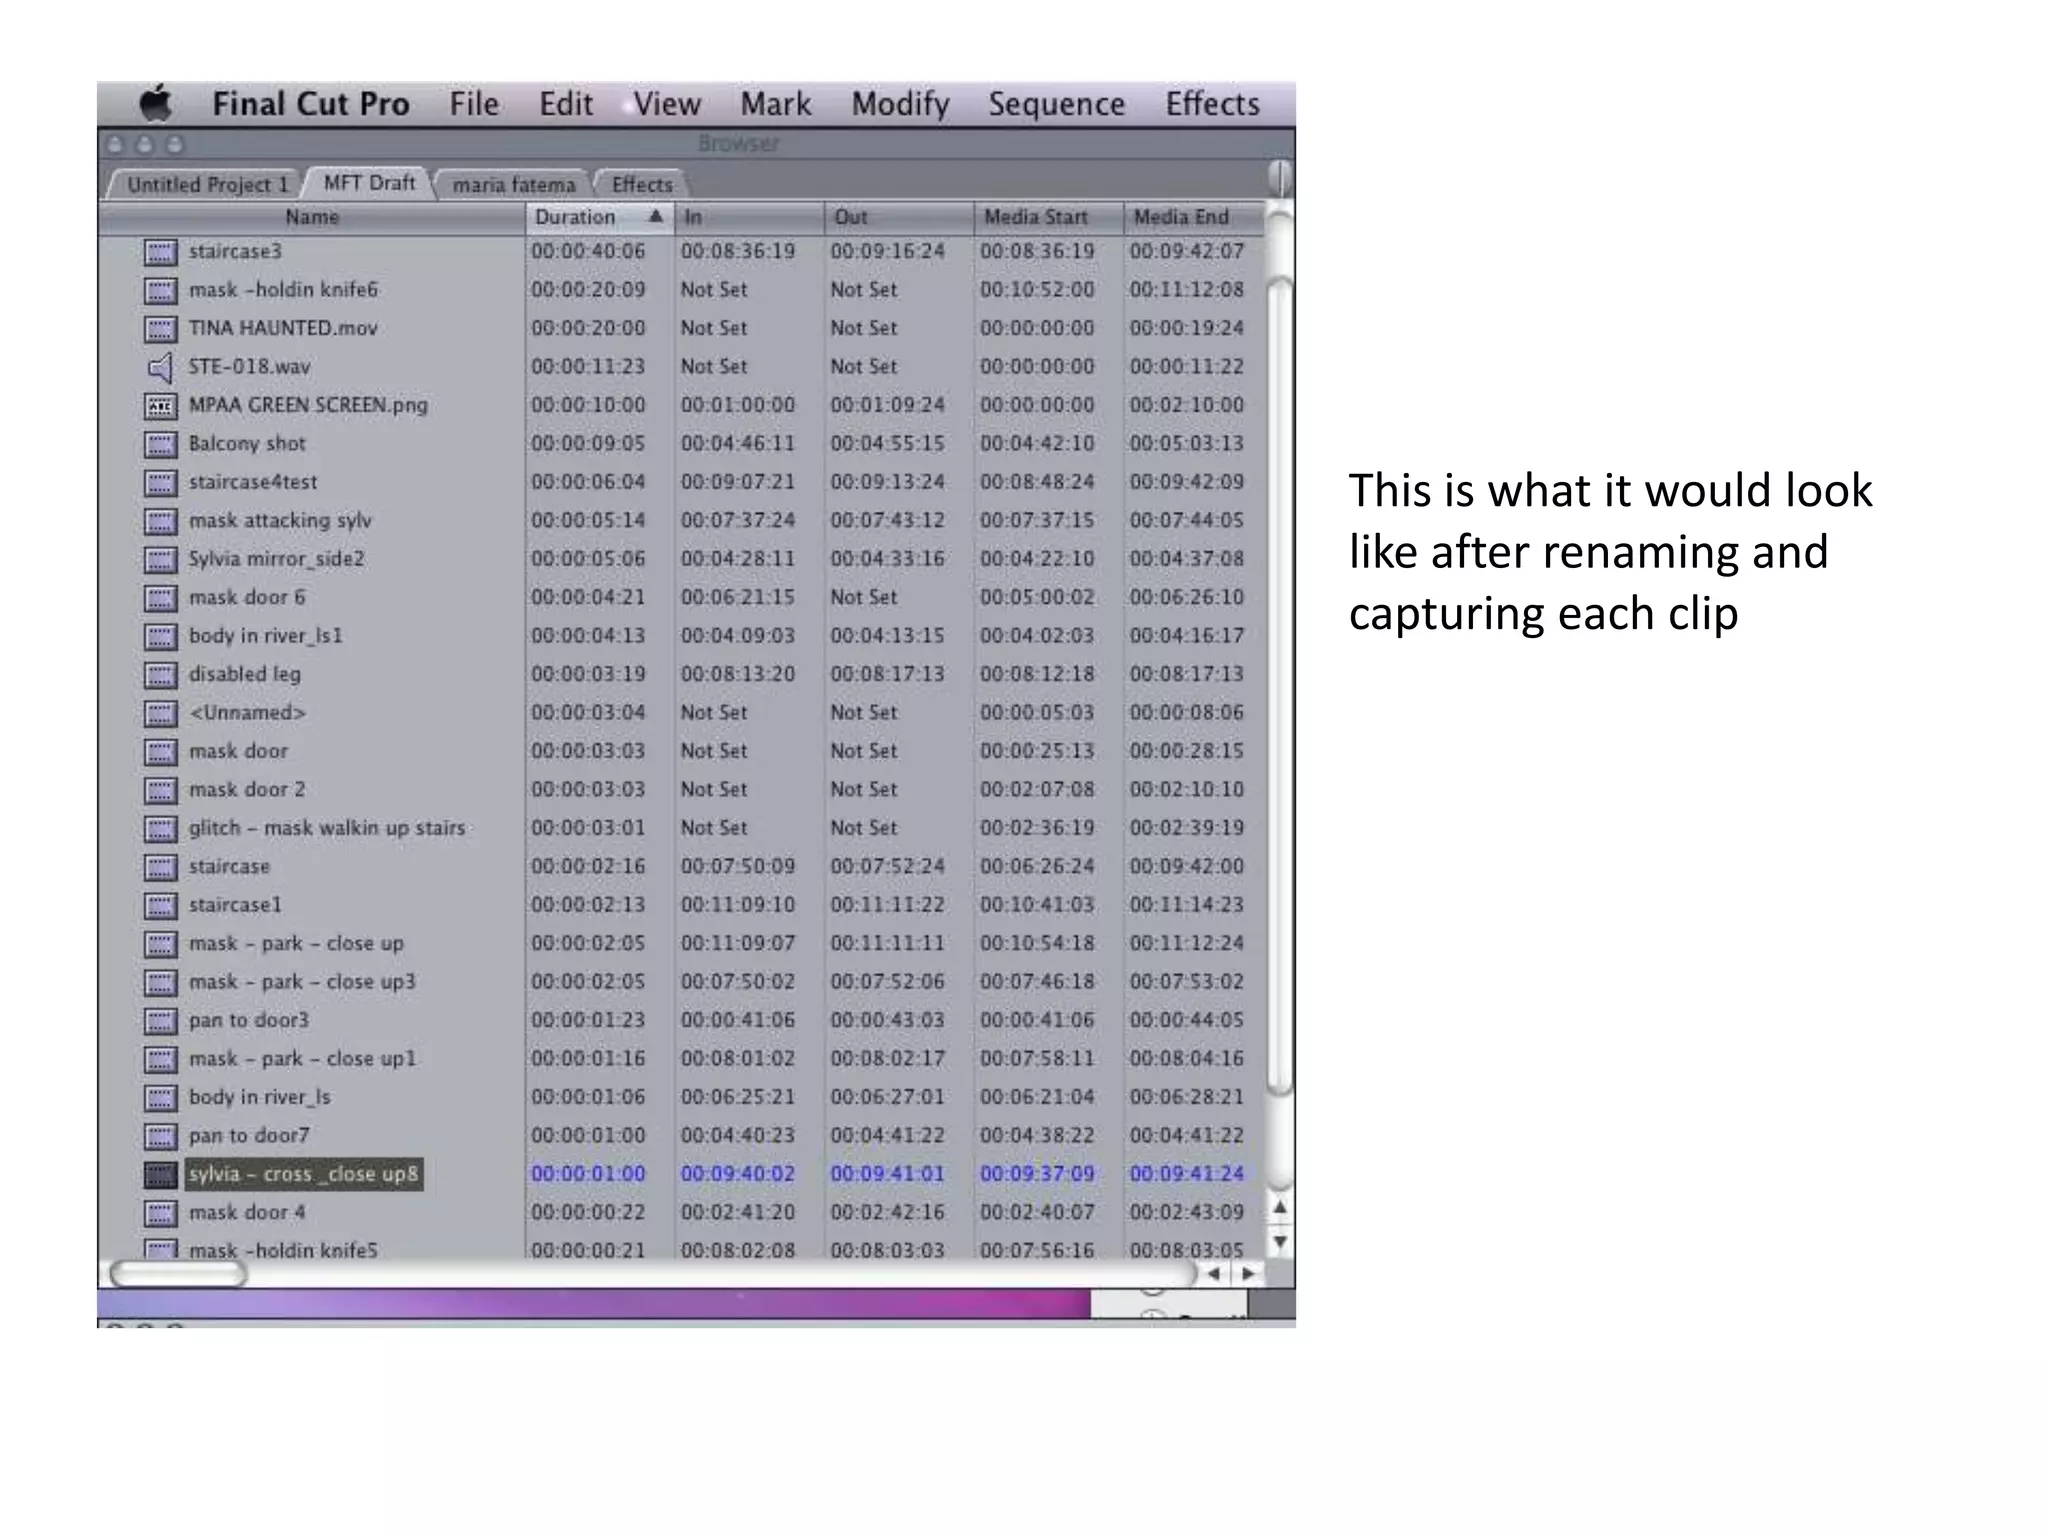
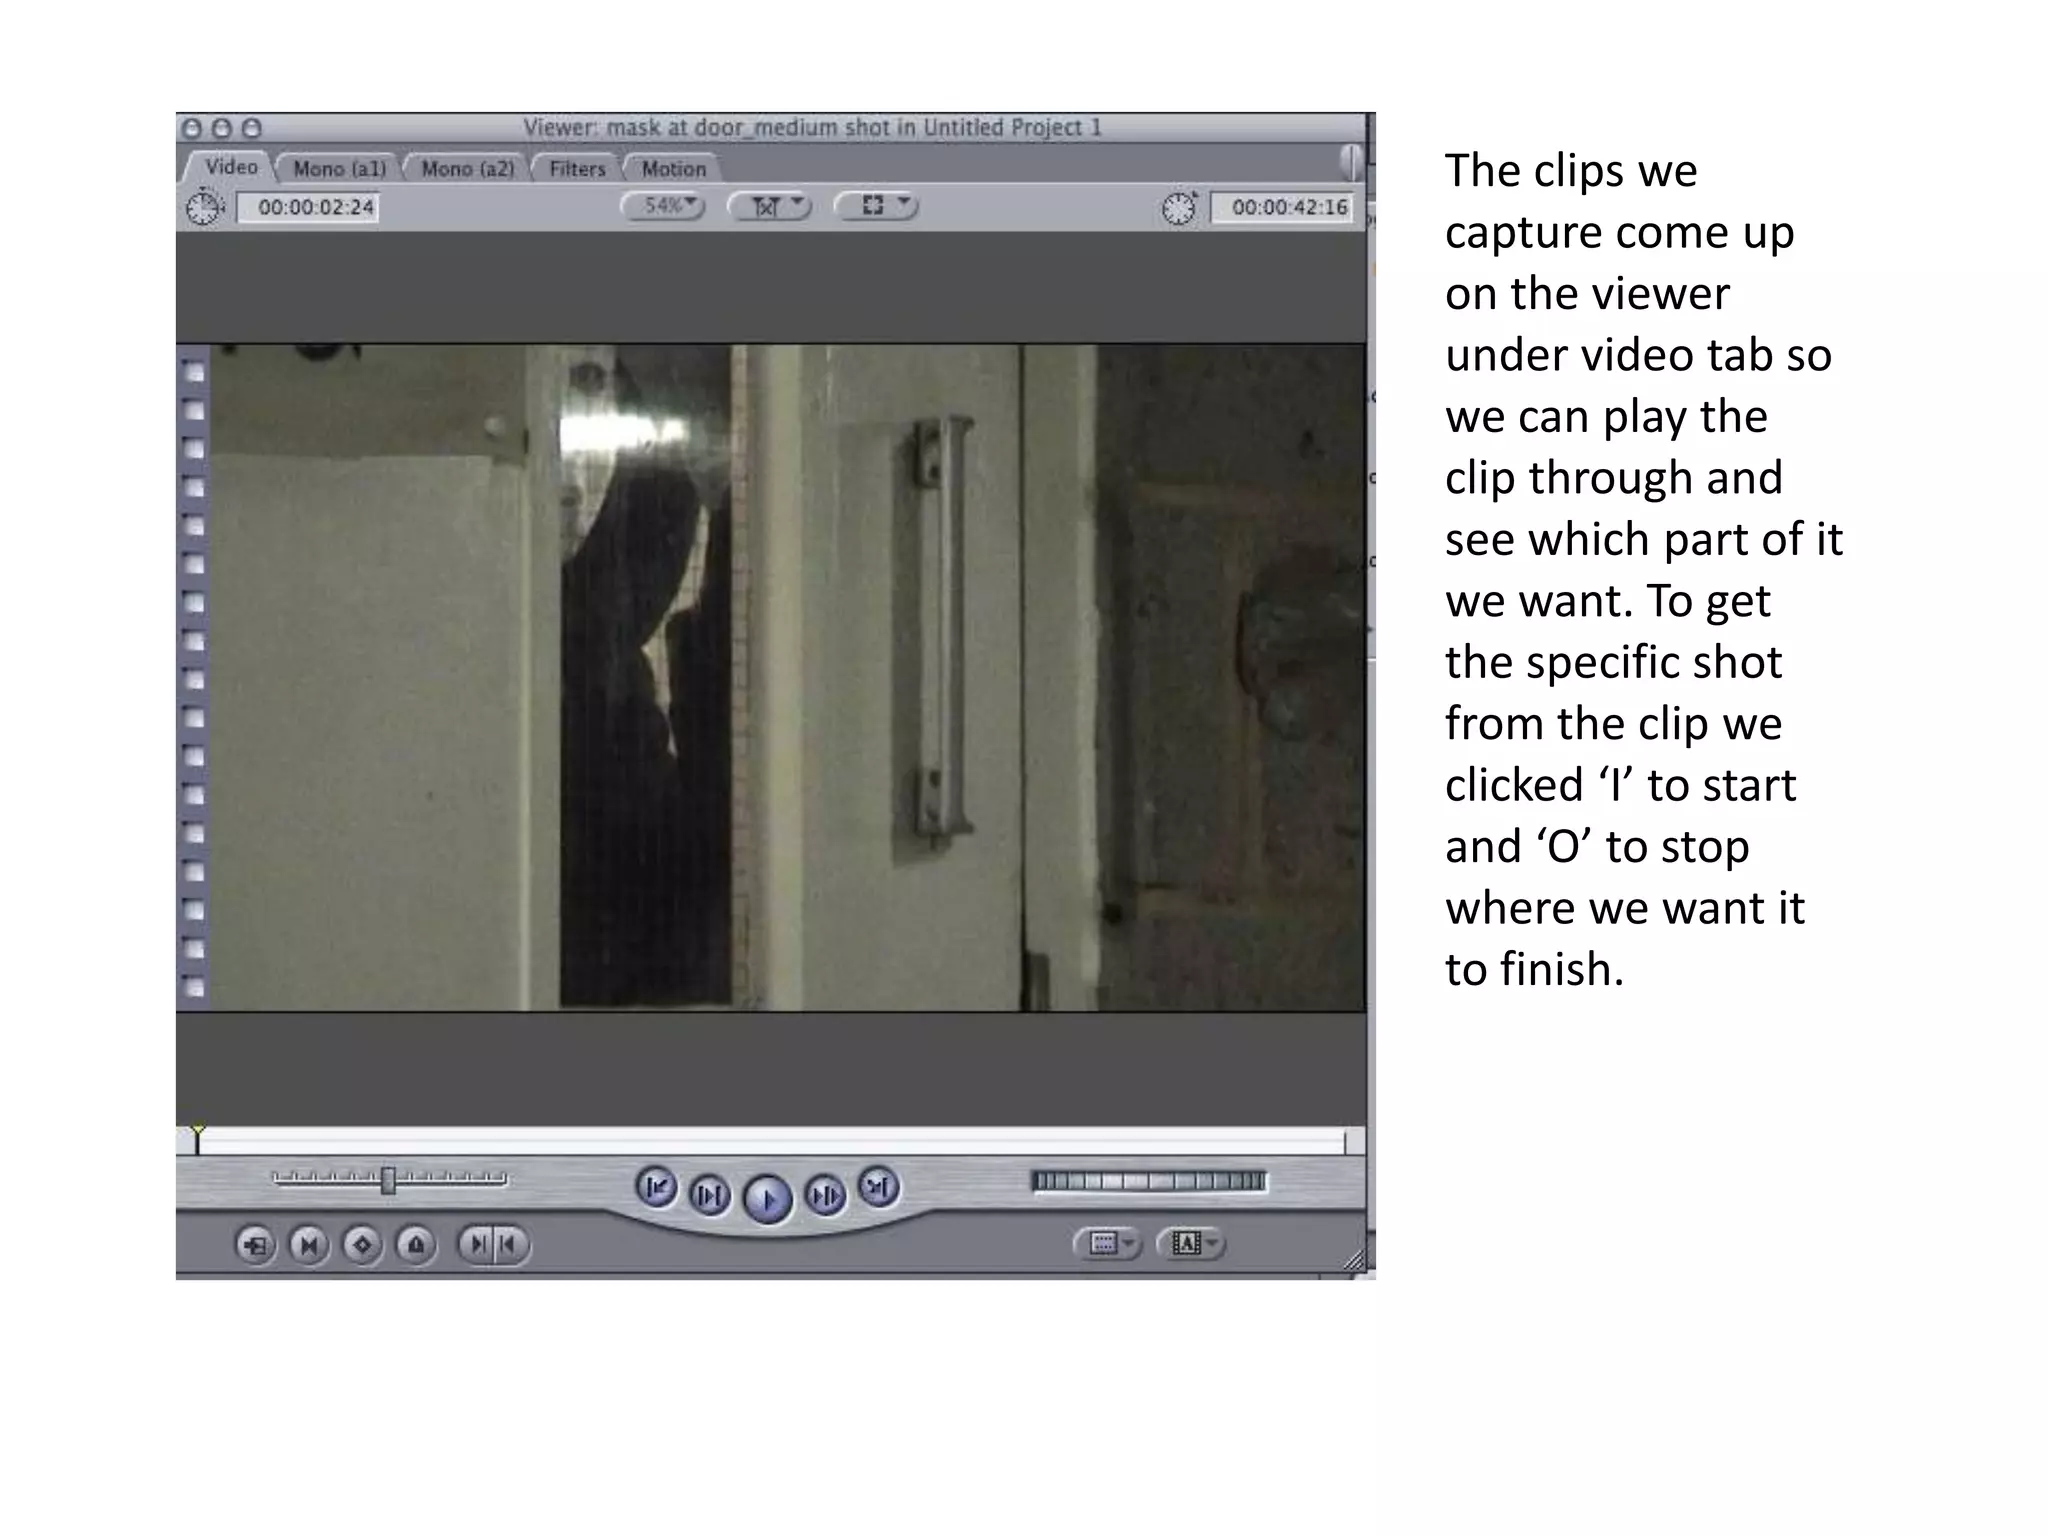
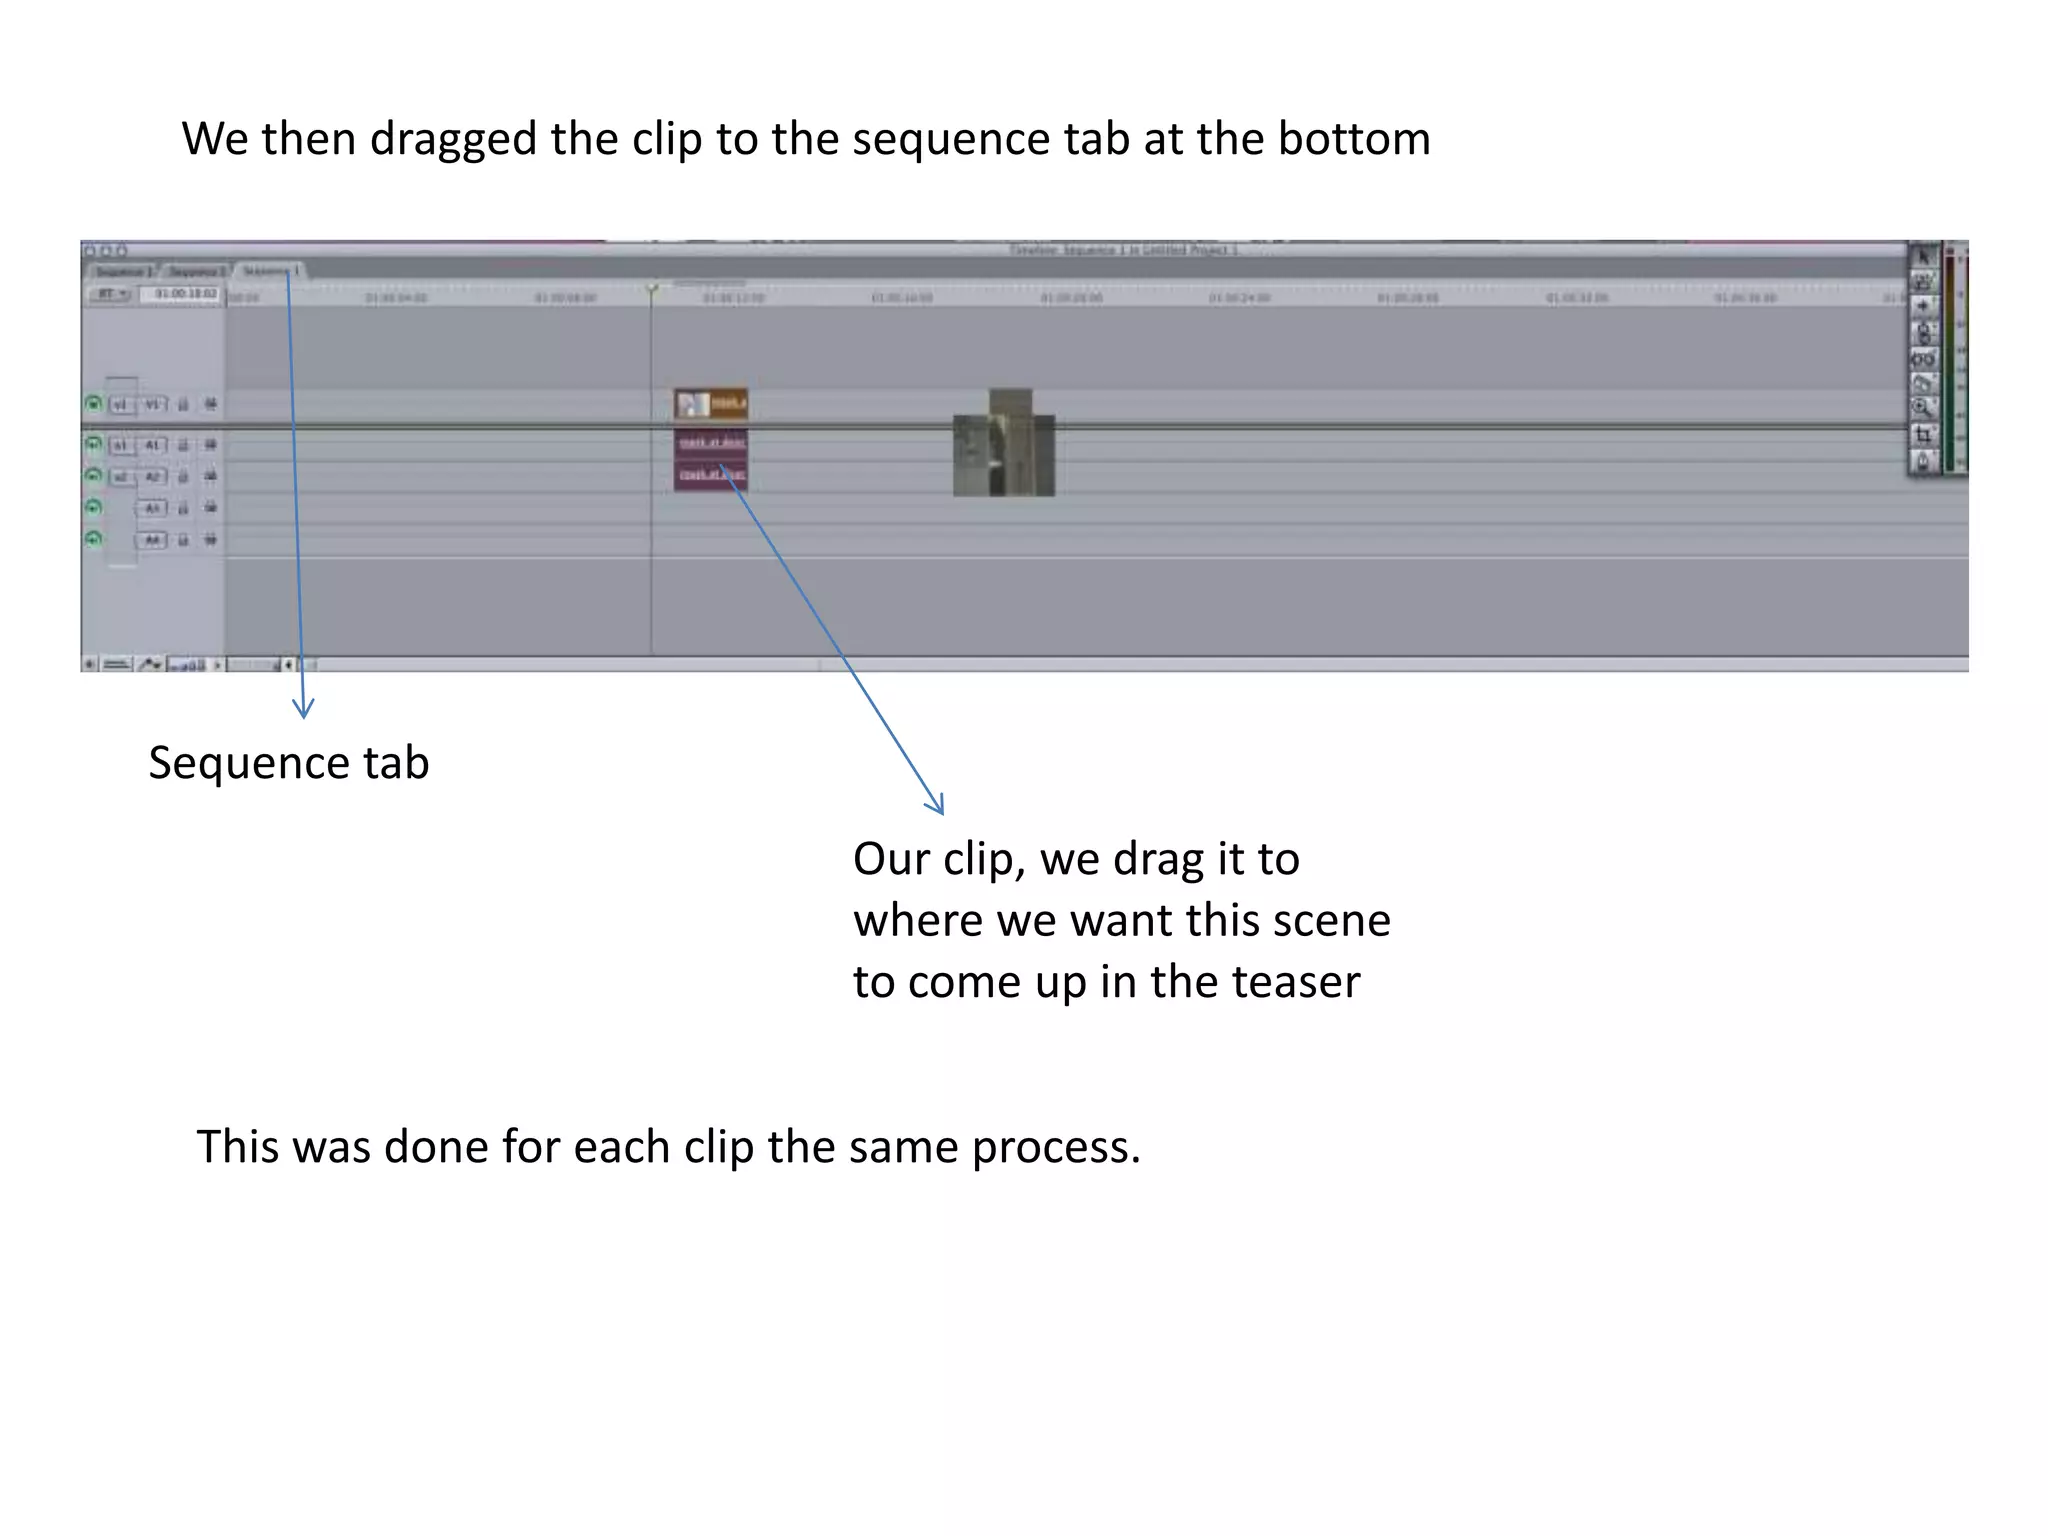
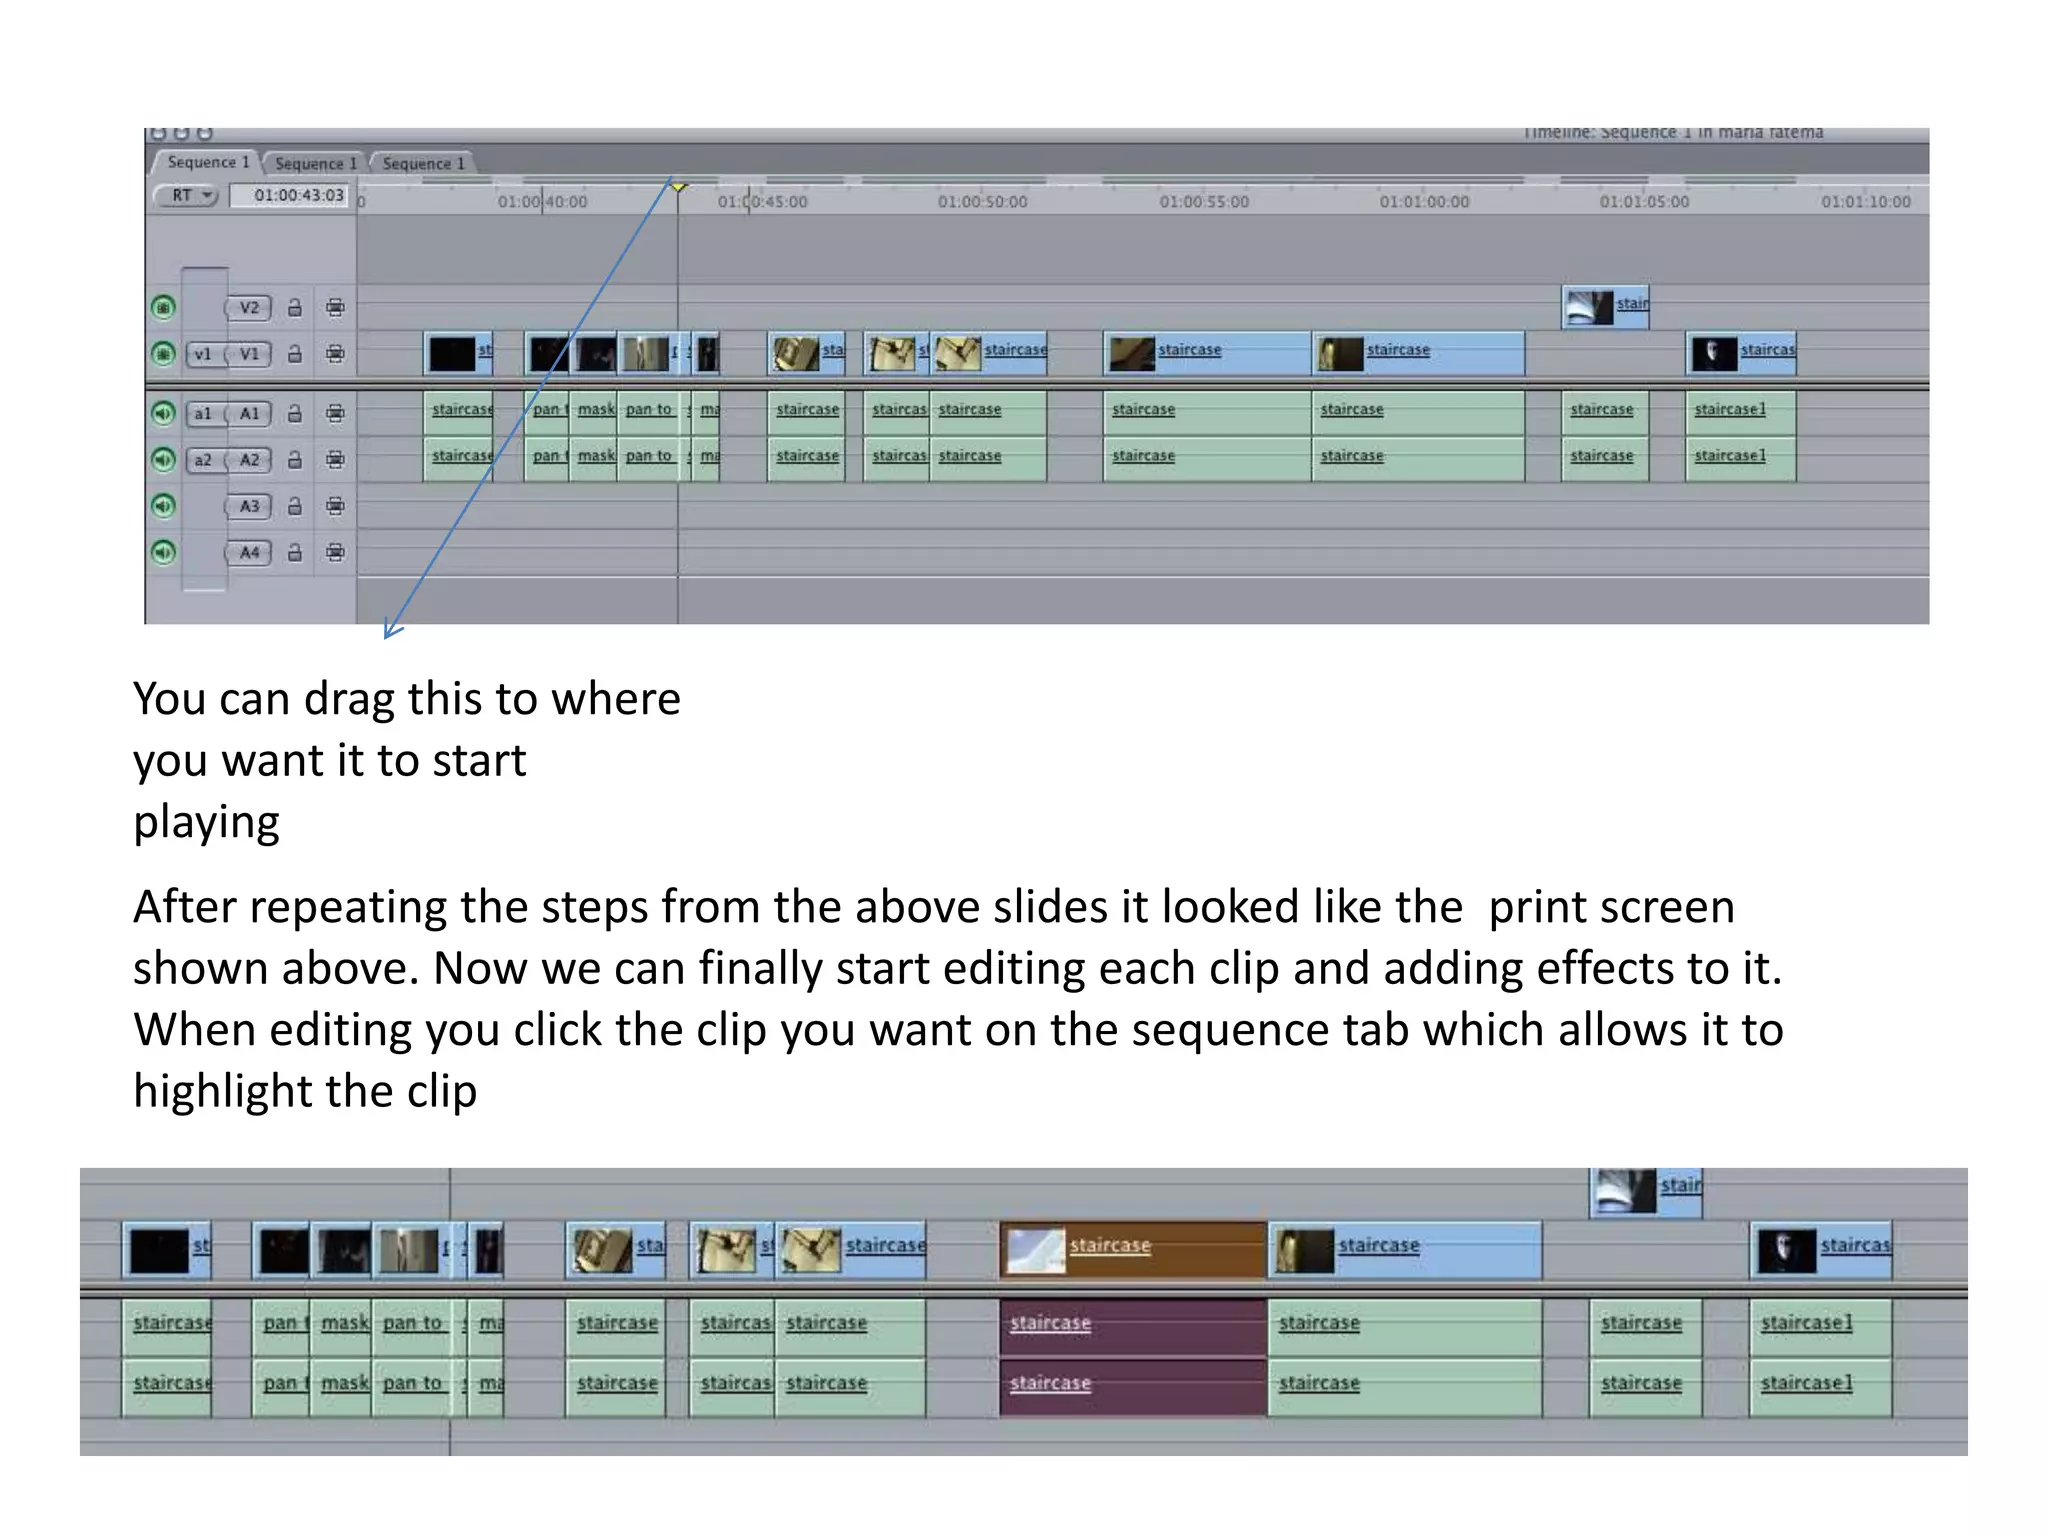
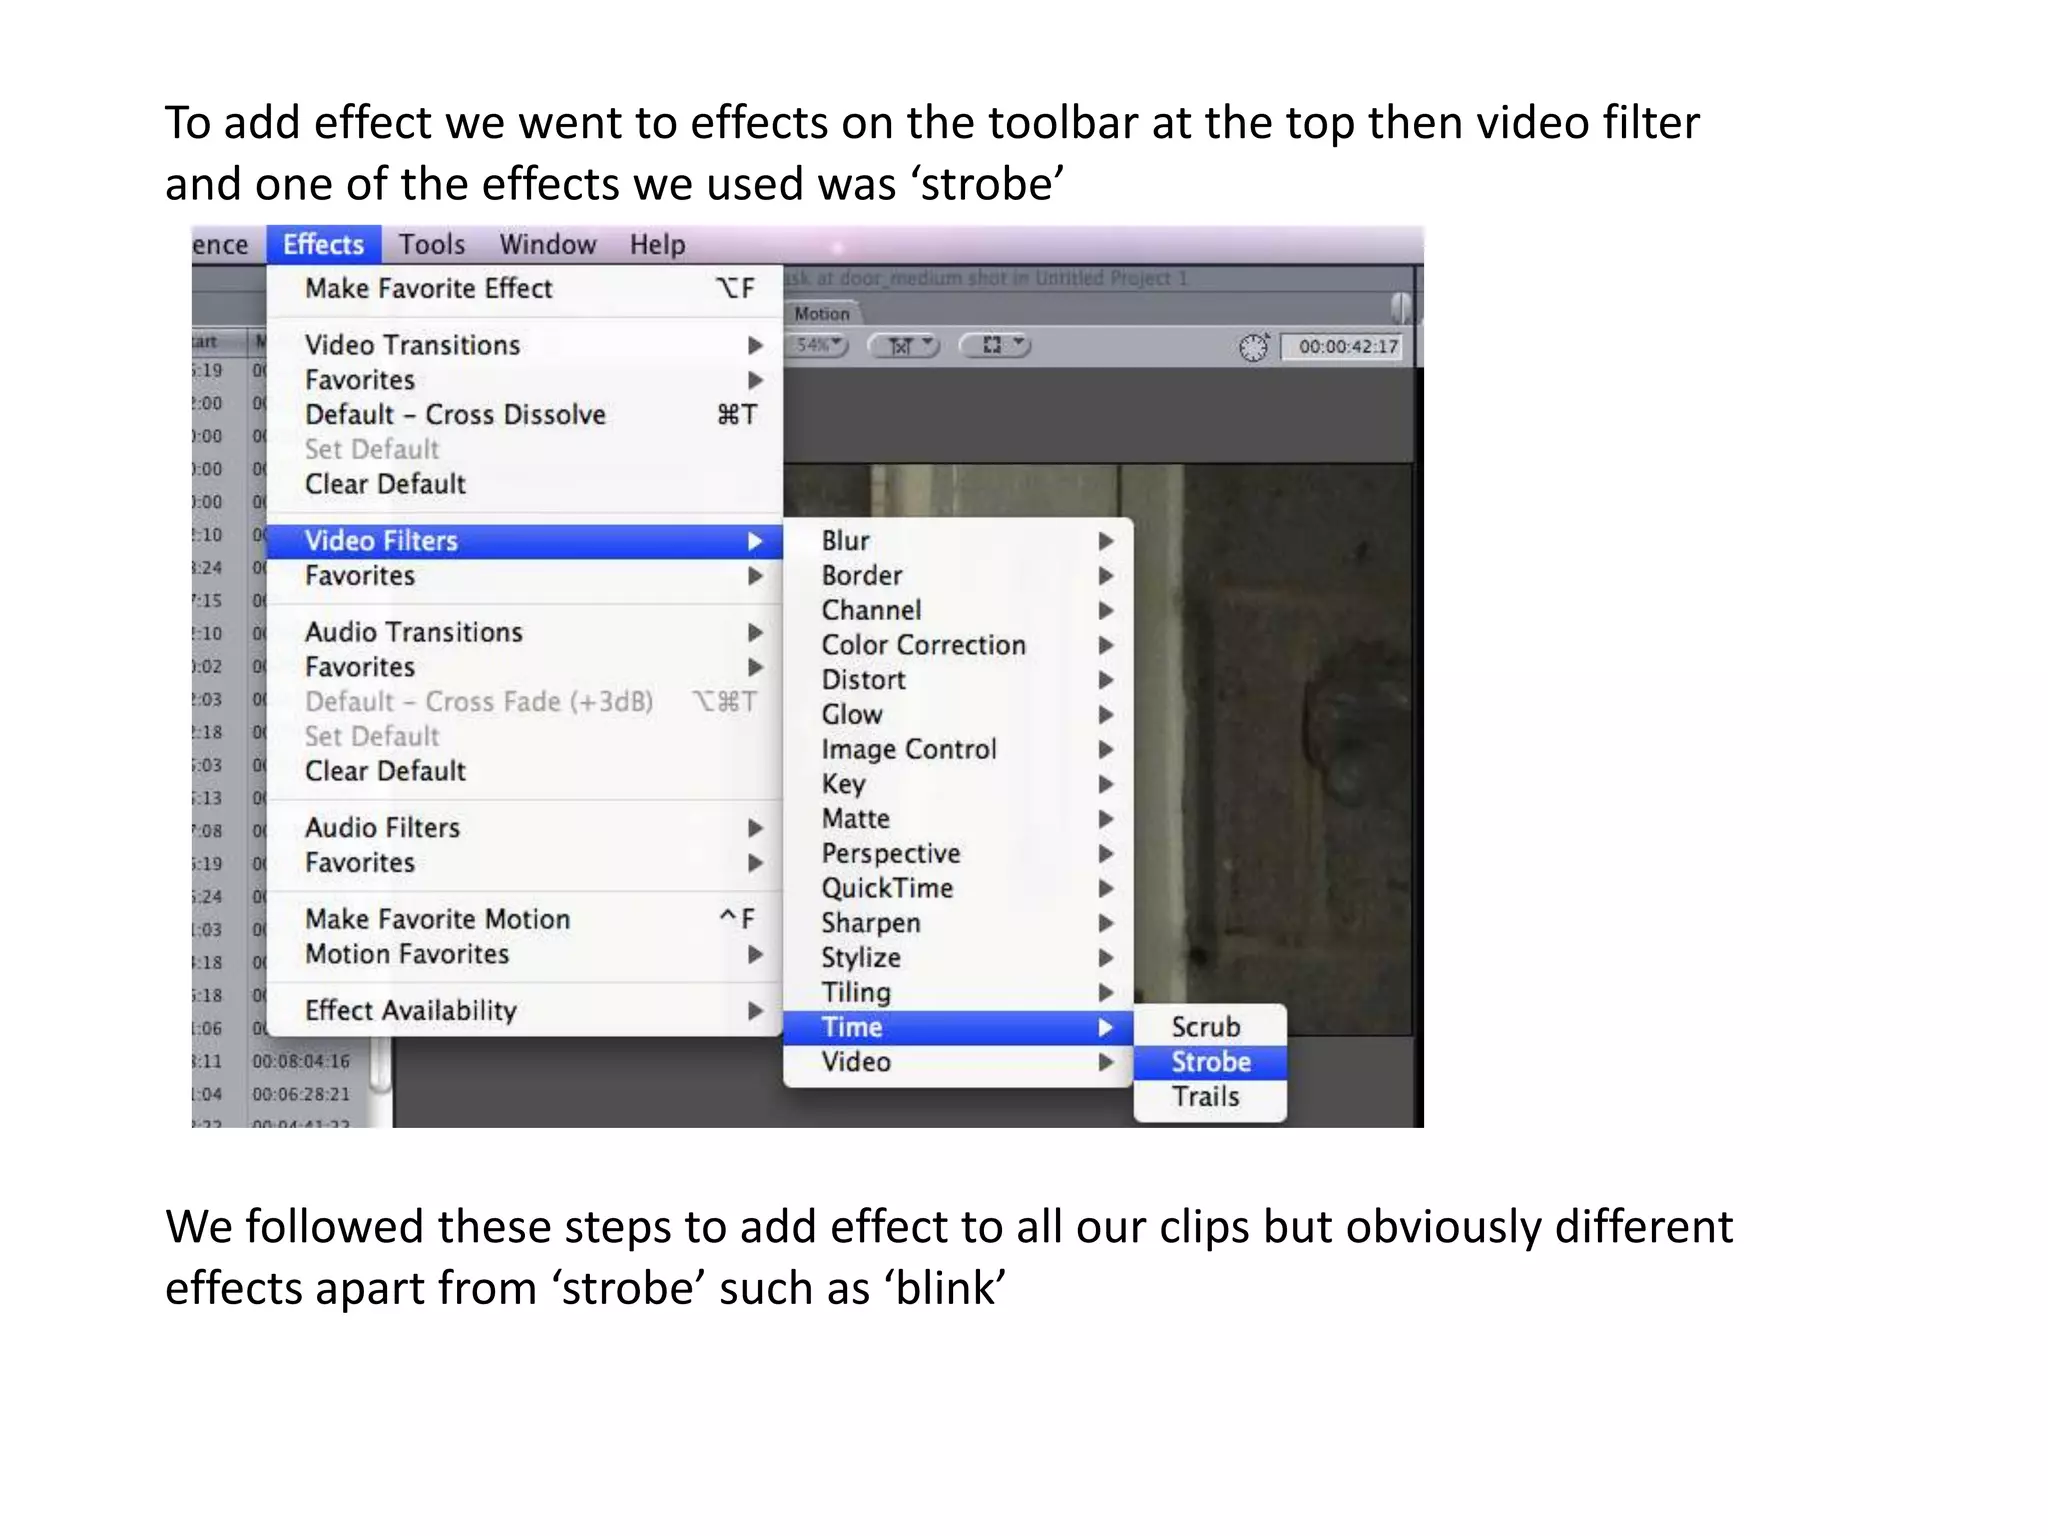
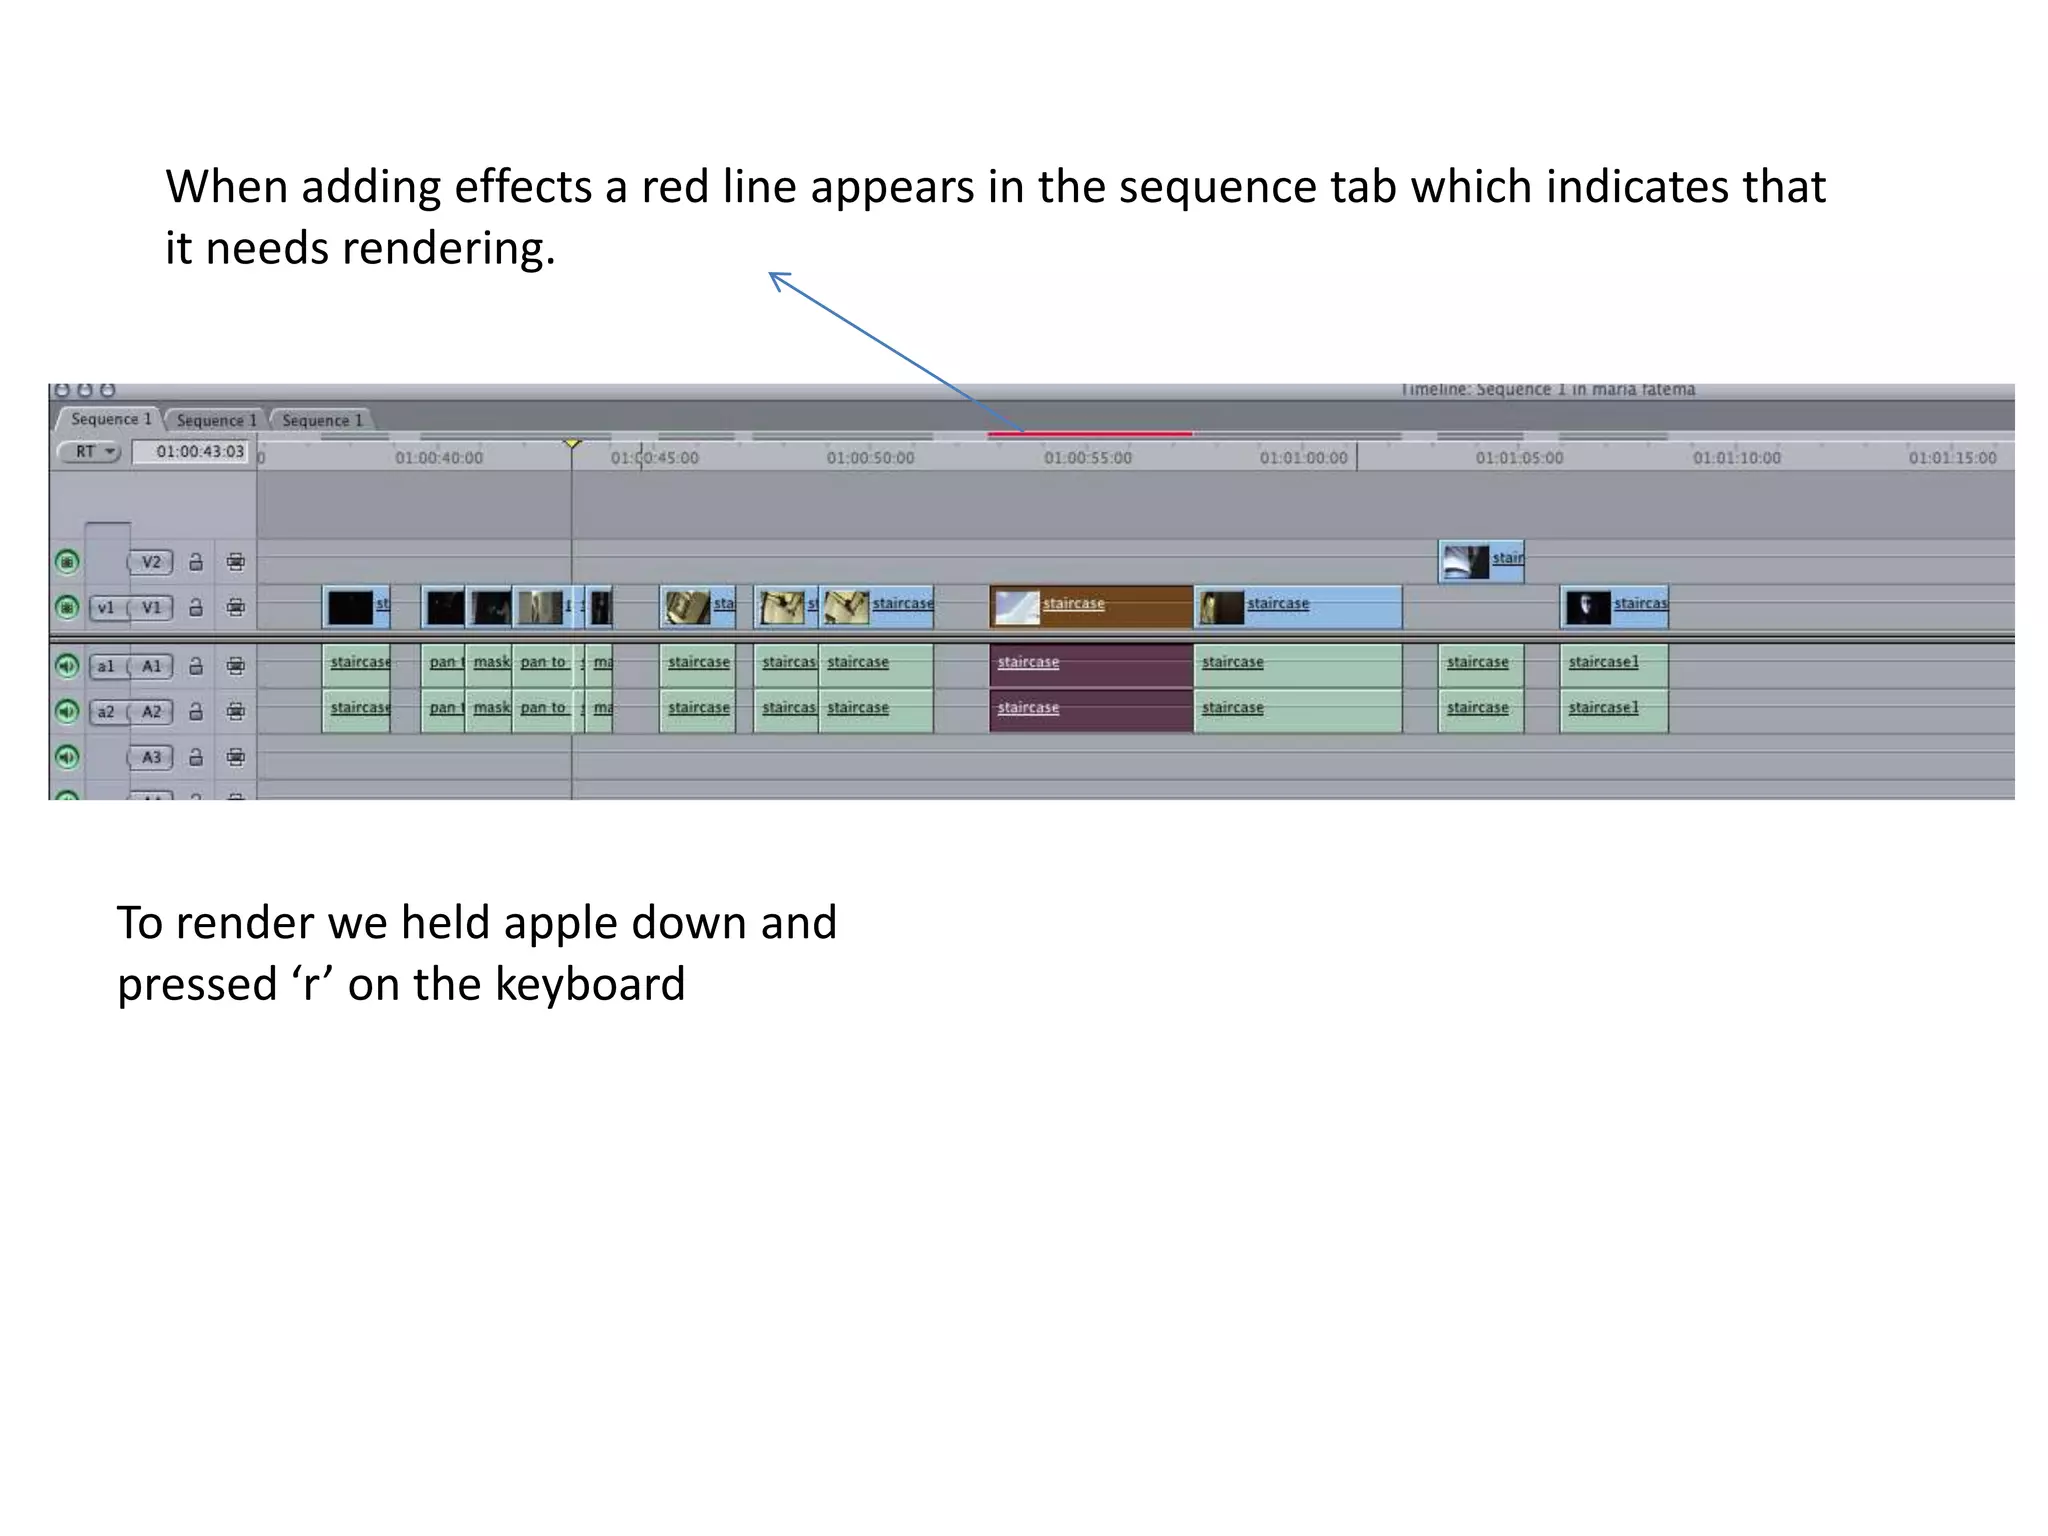
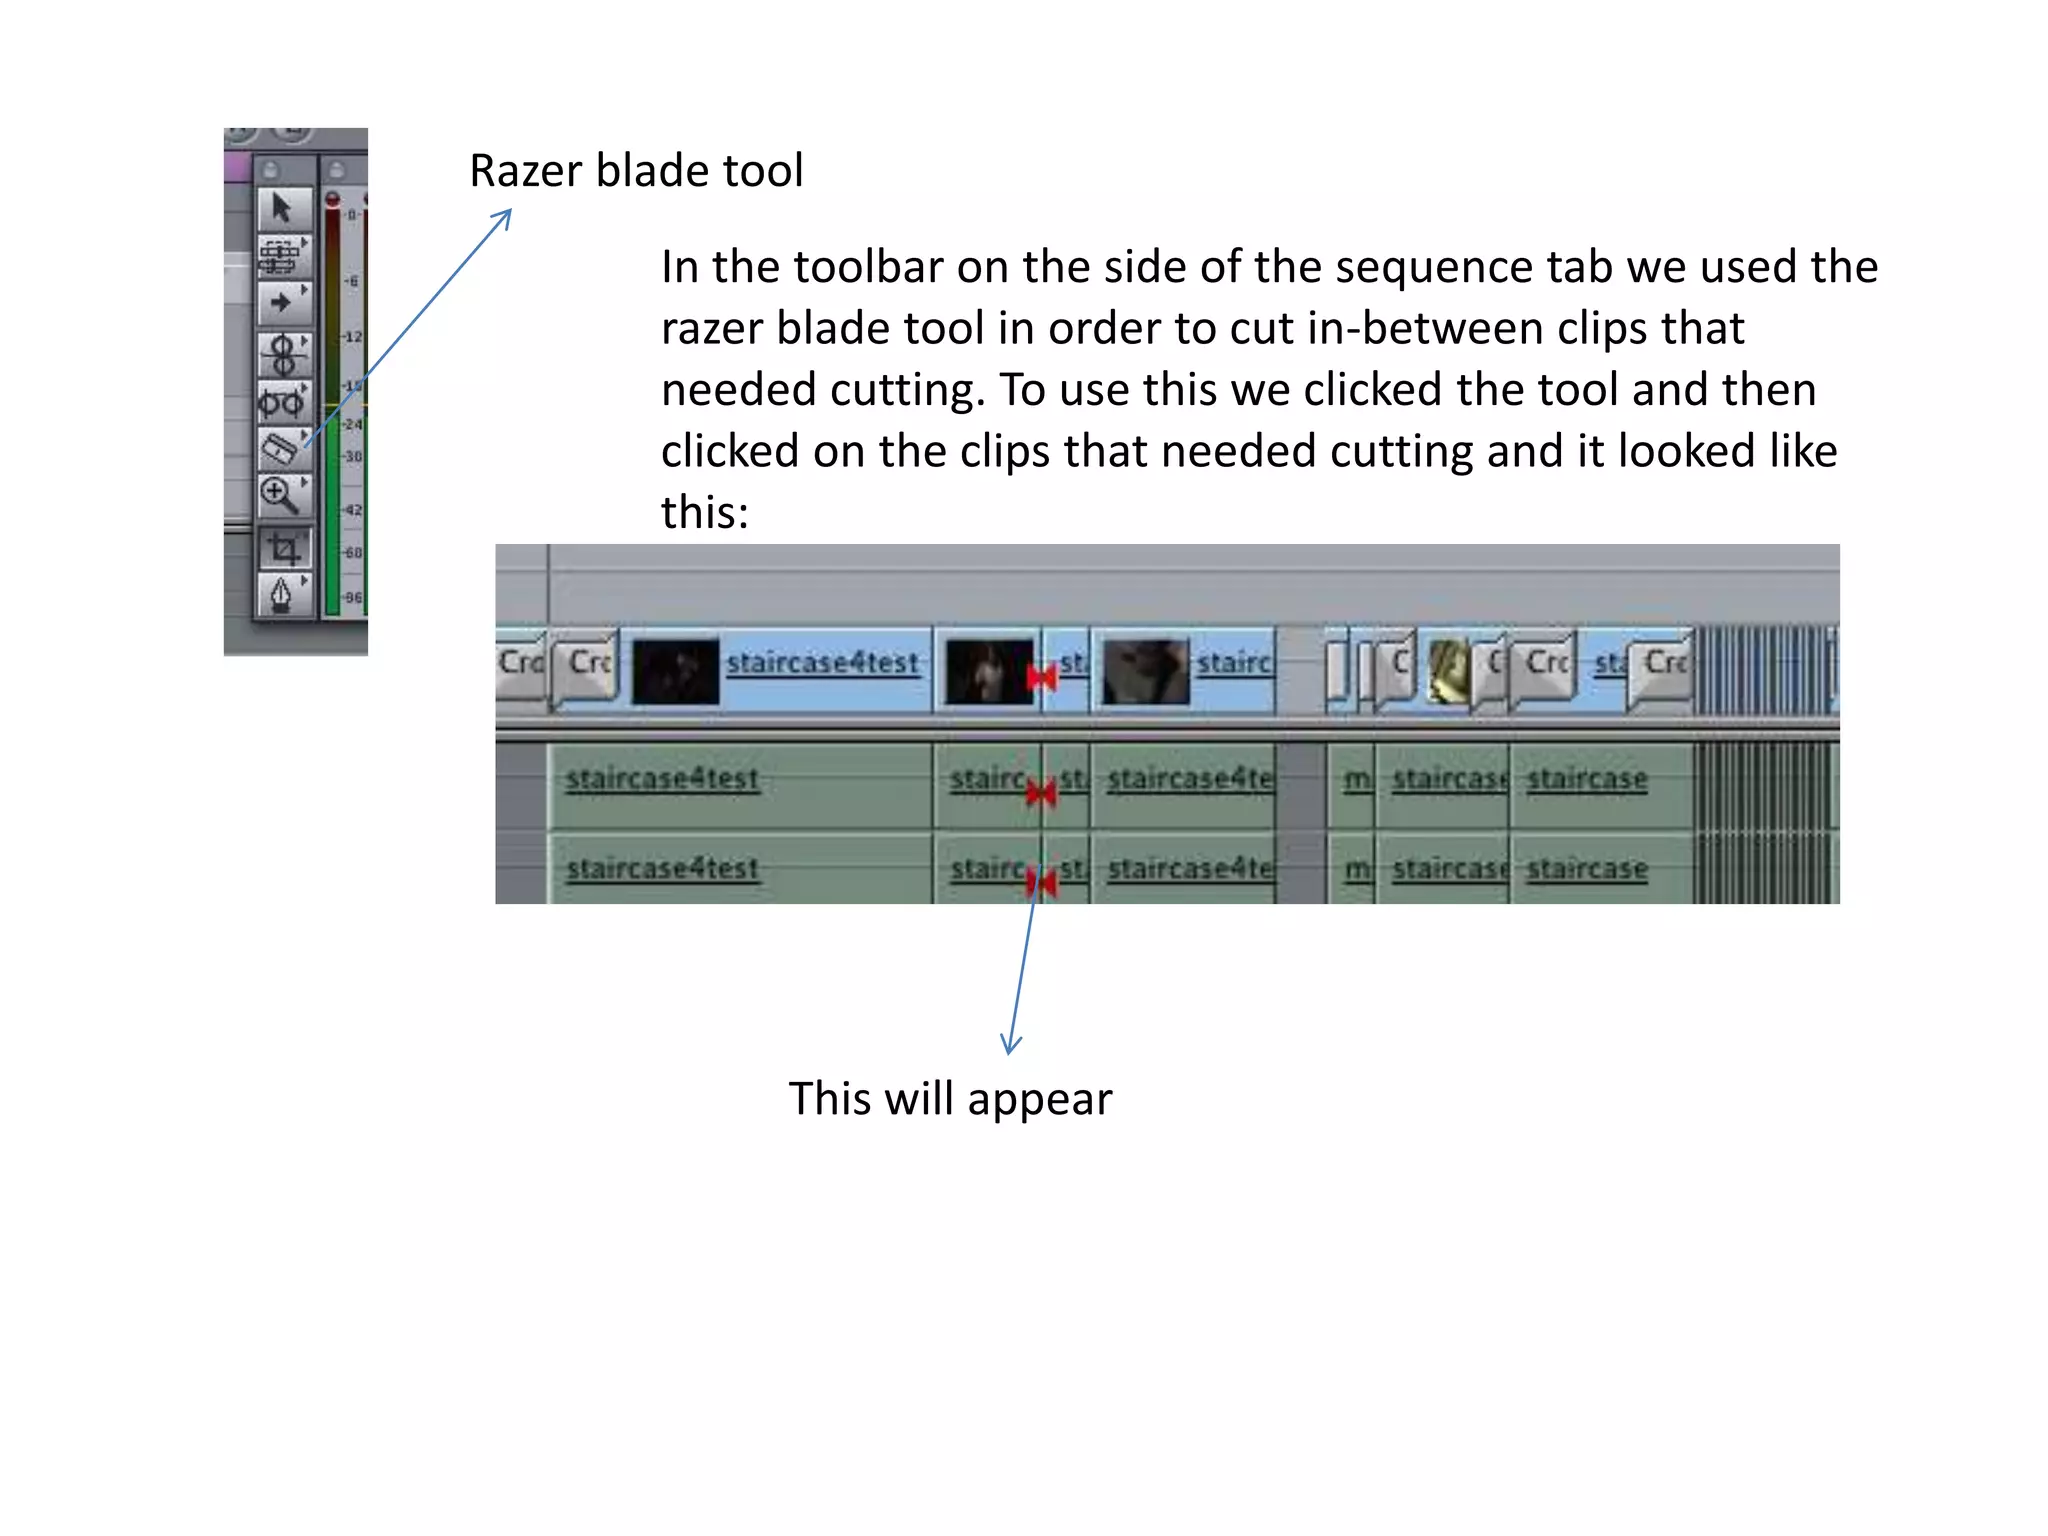
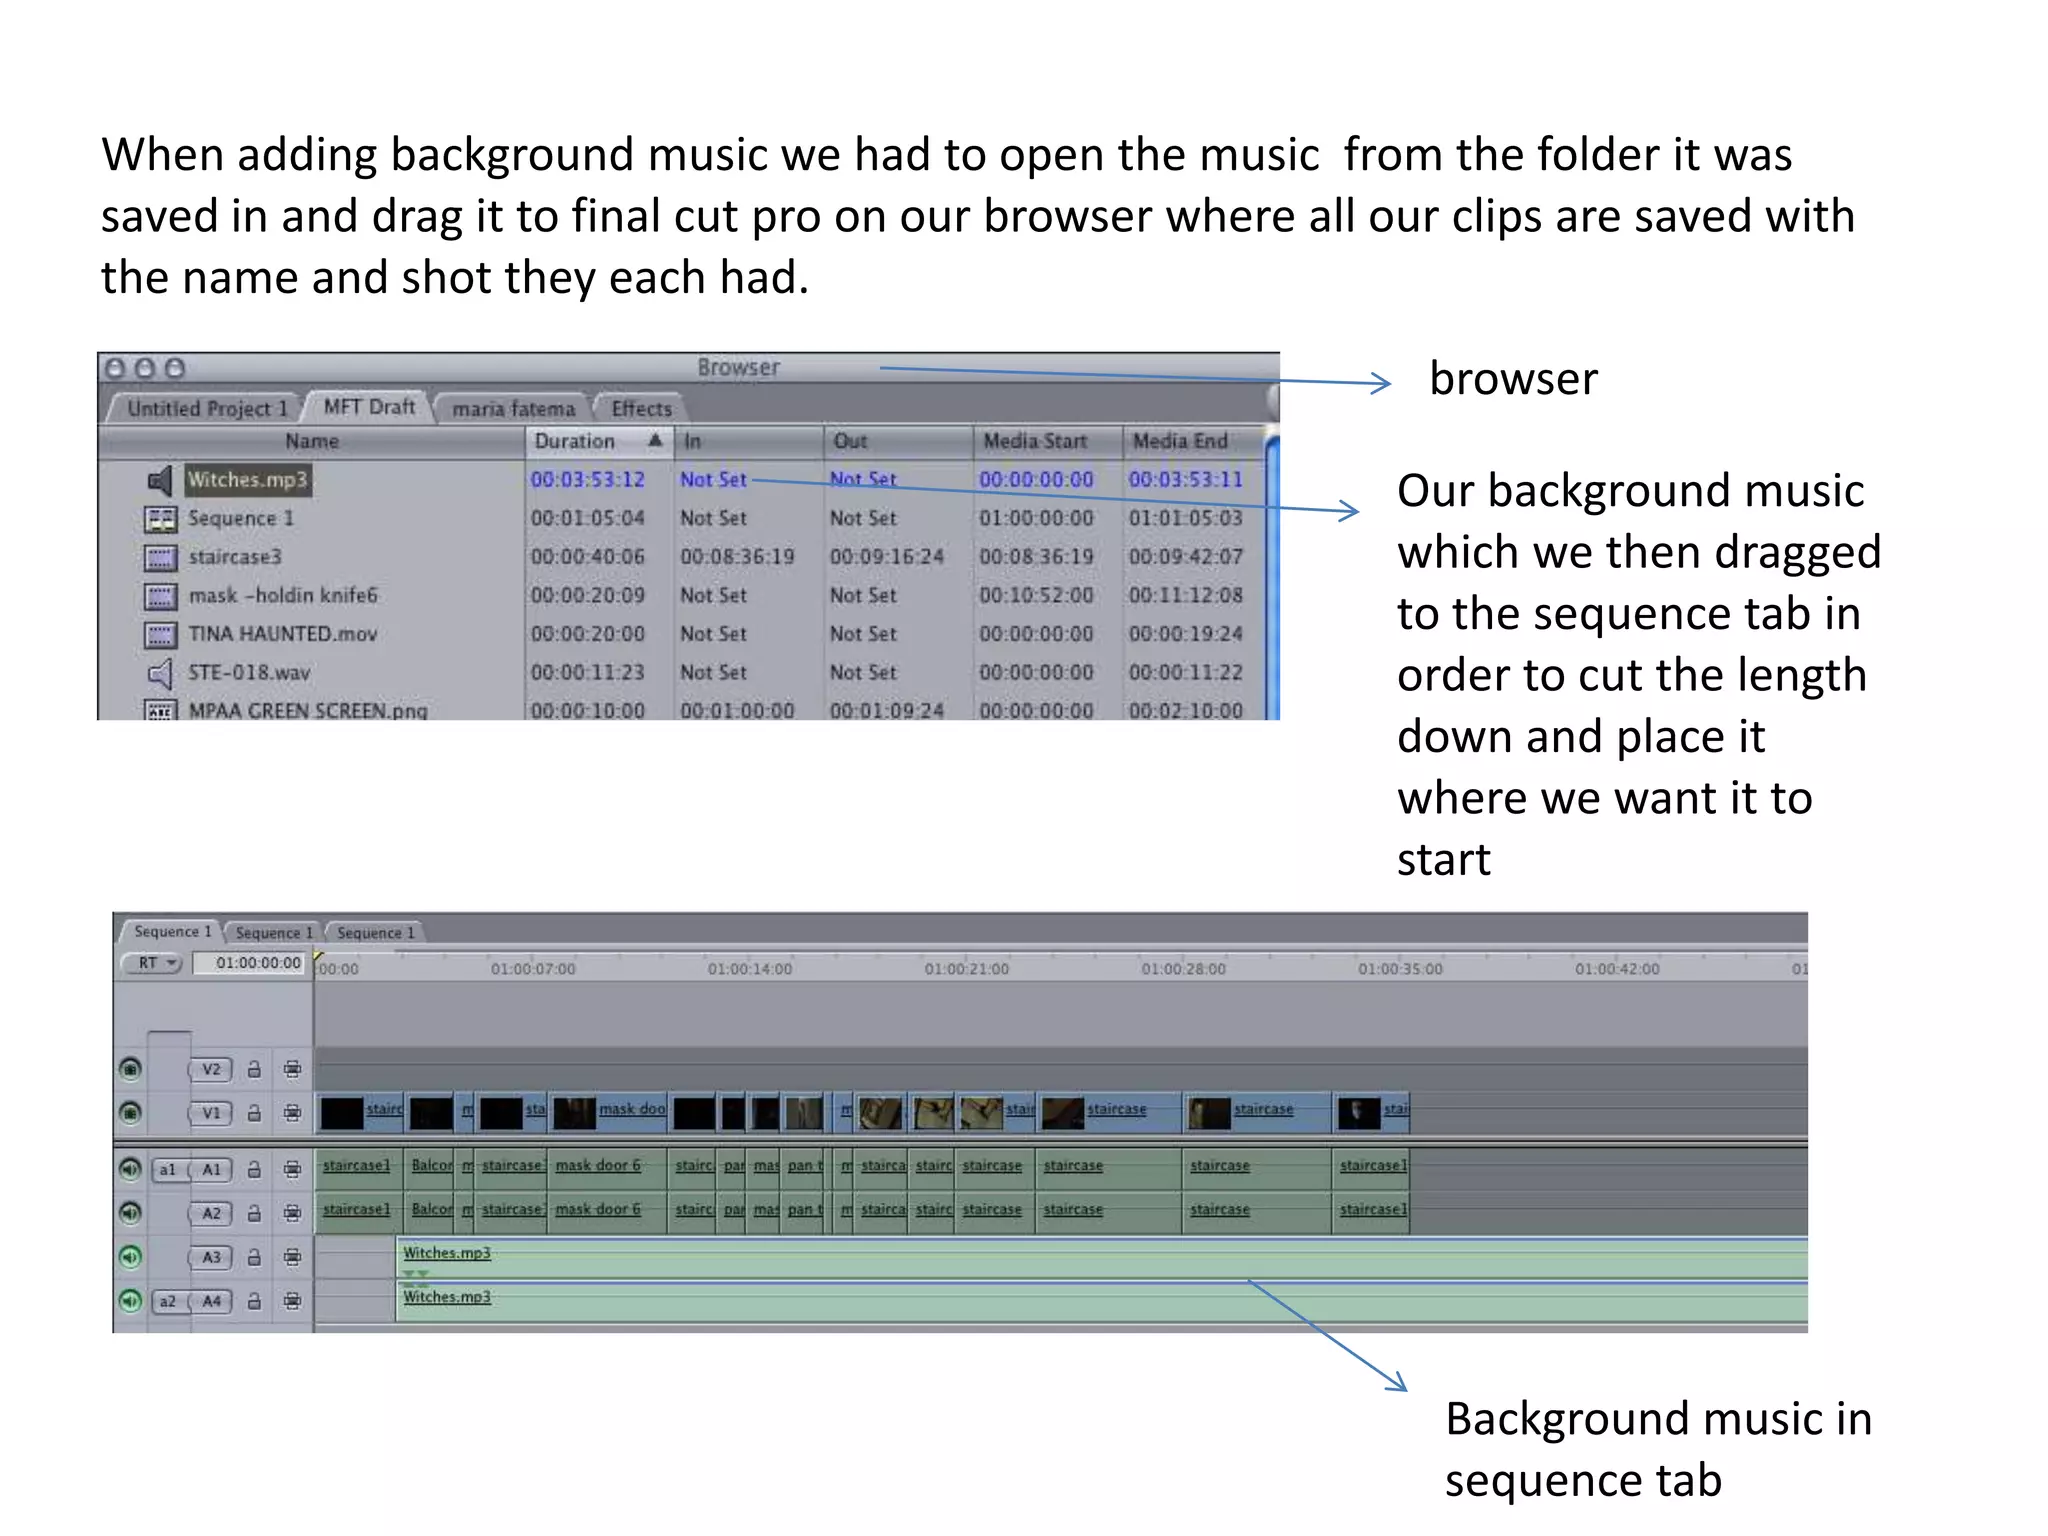
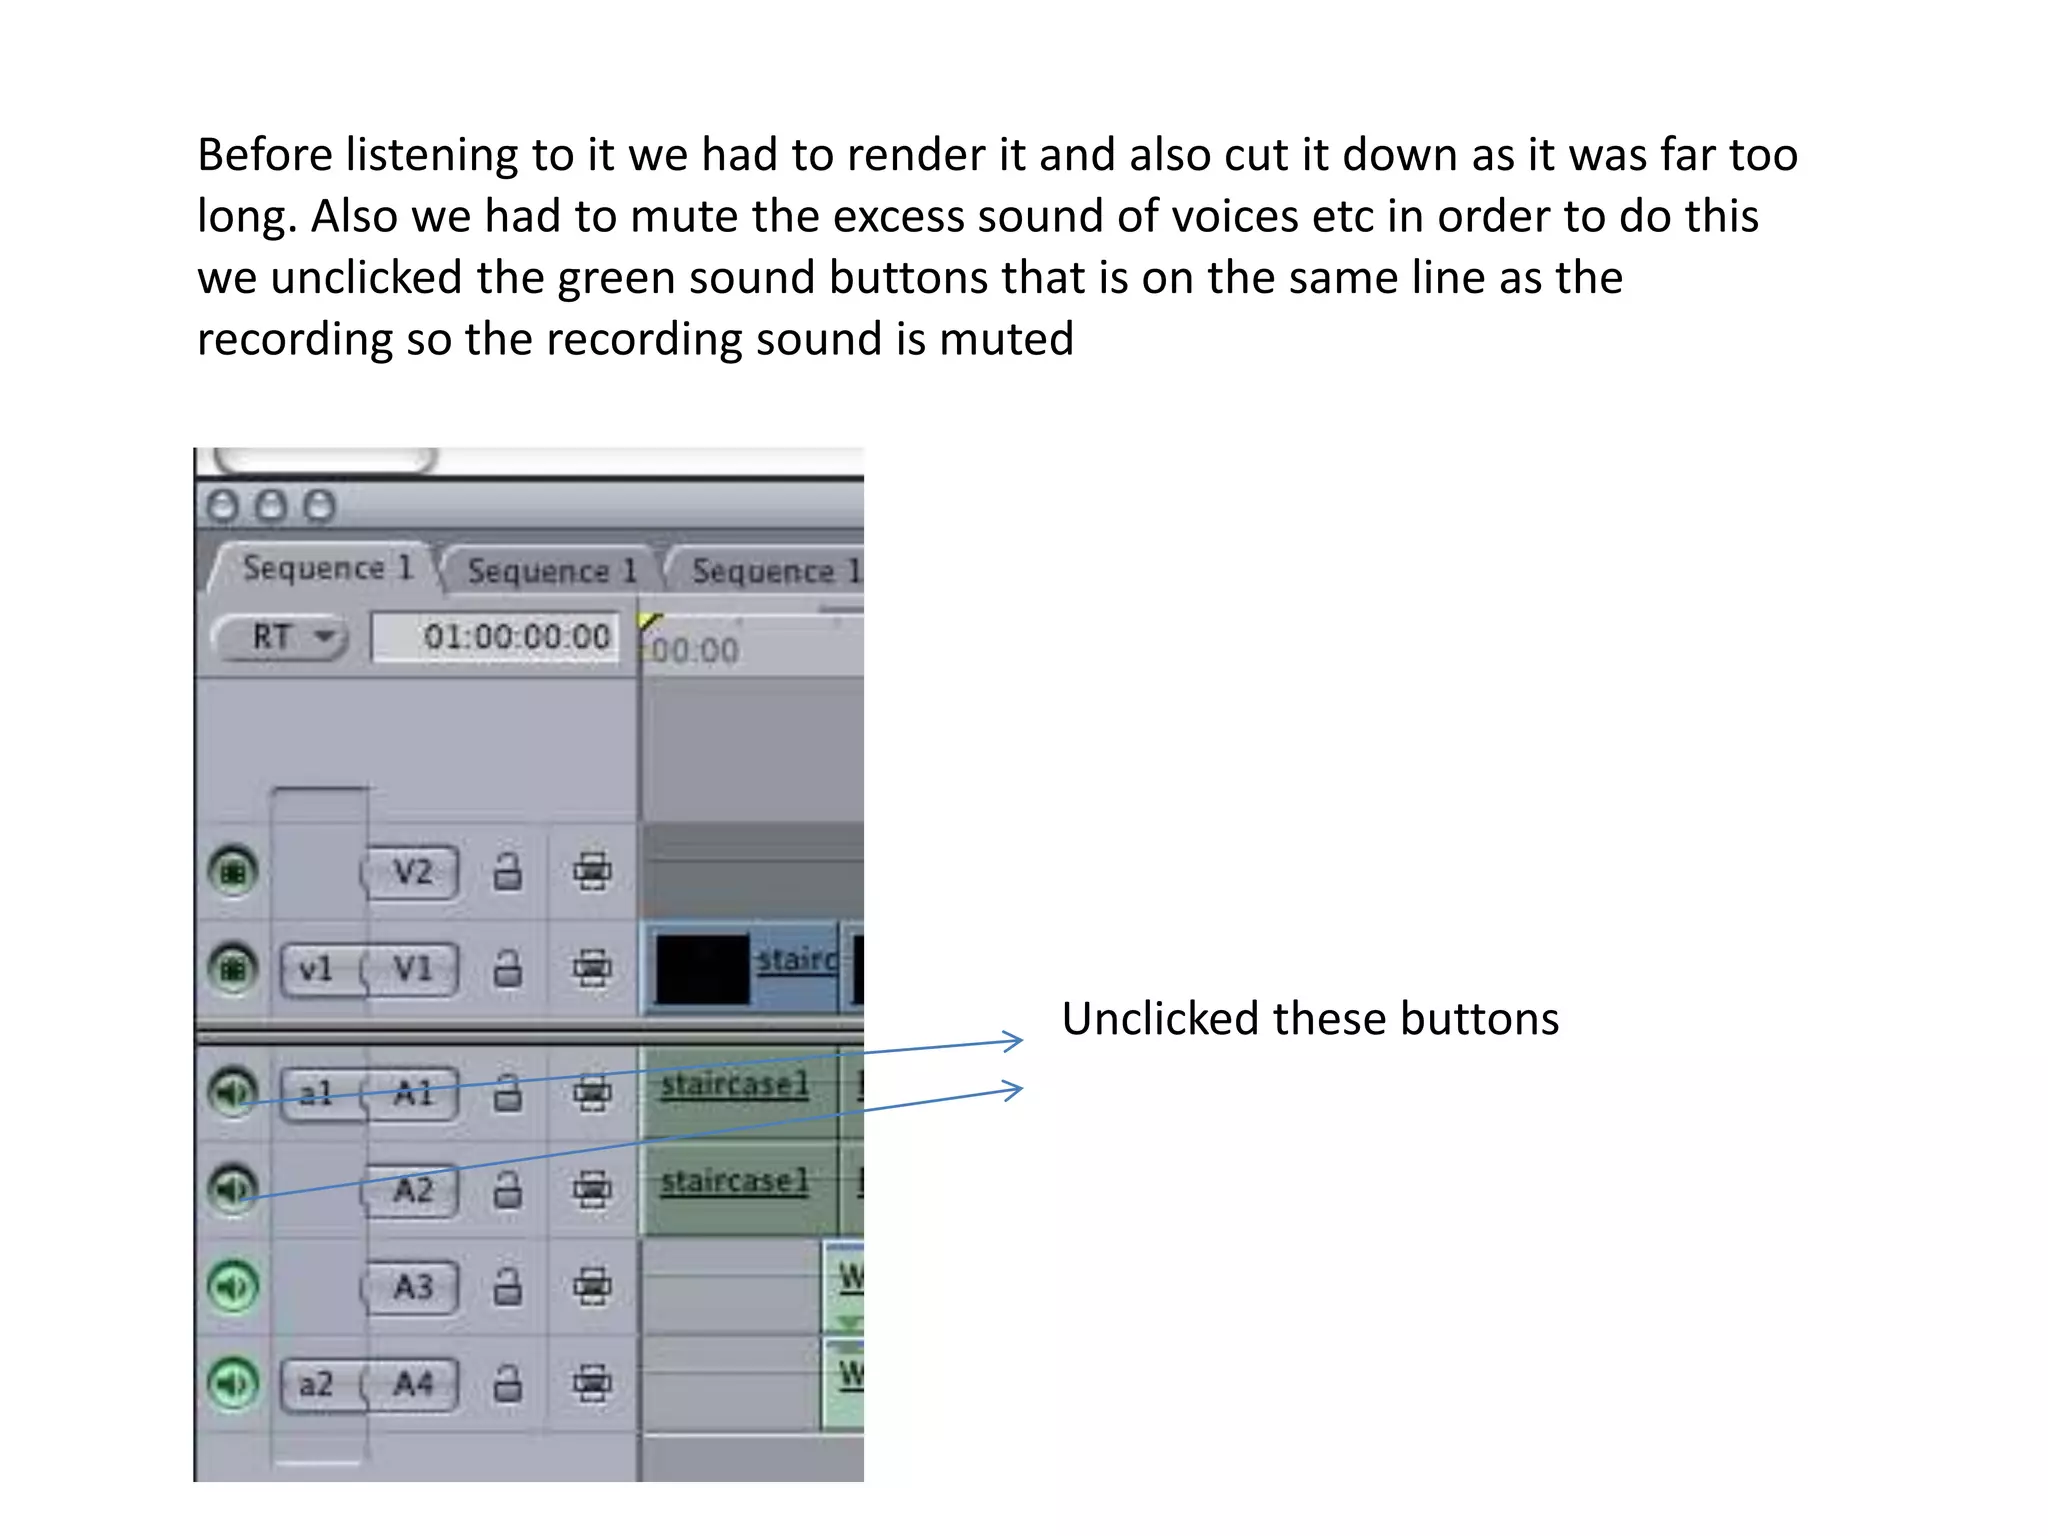
Print screens for Final Cut Pro
First open up final cut pro and then to upload our teaser we did file>>log and capture. This will capture all our clips in order for us to start editingFinal cut pro click this to open up the program This is what final cut pro looks like
On our camera we clicked play/edit for the clip to appear on the screen that we want. This is one of our clips that we were going to edit shown below In the logging tab showed on the right we renamed our clip where it says ‘Description’ and wrote down what type of shot the clip was in  ‘Shot/Take’ as show on the right
We then clicked play on the camcorder and on the computer we clicked ‘capture now’ which is at the bottom of the logging tab as shownCapture now
After capturing we press esc and it gets saved  under the new tab on the left This will make it more easier for us to go back to the shots we want as we will know what each shot is through the naming of them. We redid this for all our shots that we wanted in order to start our editing.
This is what it would look like after renaming and capturing each clip
The clips we capture come up on the viewer under video tab so we can play the clip through and see which part of it we want. To get the specific shot from the clip we clicked ‘I’ to start and ‘O’ to stop where we want it to finish.
We then dragged the clip to the sequence tab at the bottom Sequence tab Our clip, we drag it to where we want this scene to come up in the teaser This was done for each clip the same process.
You can drag this to where you want it to start playing After repeating the steps from the above slides it looked like the  print screen shown above. Now we can finally start editing each clip and adding effects to it.When editing you click the clip you want on the sequence tab which allows it to highlight the clip
To add effect we went to effects on the toolbar at the top then video filter and one of the effects we used was ‘strobe’ We followed these steps to add effect to all our clips but obviously different effects apart from ‘strobe’ such as ‘blink’
When adding effects a red line appears in the sequence tab which indicates that it needs rendering.To render we held apple down and pressed ‘r’ on the keyboard
Razer blade tool In the toolbar on the side of the sequence tab we used the razer blade tool in order to cut in-between clips that needed cutting. To use this we clicked the tool and then clicked on the clips that needed cutting and it looked like this:This will appear
When adding background music we had to open the music  from the folder it was saved in and drag it to final cut pro on our browser where all our clips are saved with the name and shot they each had.browserOur background music which we then dragged to the sequence tab in order to cut the length down and place it where we want it to startBackground music in sequence tab
Before listening to it we had to render it and also cut it down as it was far too long. Also we had to mute the excess sound of voices etc in order to do this we unclicked the green sound buttons that is on the same line as the recording so the recording sound is mutedUnclicked these buttons
Next step we cut down the background music with the razer blade tool like shown below:We then moved it around to where we wanted the music to start and end by just dragging it along the column. We then recorded a voice over to go in our teaser trailer using a microphone which said ‘finders keepers doesn’t always apply’ which is also our tagline. Then carried out the same process of uploading it and dragging it to our sequence tab shown below:
levelWe then increased the voice over by making sure it was highlighted if it wasn’t double click on it and on the viewer  a stereo tab will appear and under this it will say level with a arrow which you can drag to the right to make the sound louder we increased it to 12 to make it louder than the music to give in a more sinister atmosphere We decided to add a cross dissolved effect on the background sound after the voice over finished by going effect>>cross dissolved.
In order to add cross dissolved we used the select button and clicked on the edge of the clips. We added cross dissolve to build up more tension when the music starts to play after the voice overWe logged and captured some of the clips that wasn’t to the correct size

Print screens for final cut pro

  • 1.
    Print screens forFinal Cut Pro
  • 2.
    First open upfinal cut pro and then to upload our teaser we did file>>log and capture. This will capture all our clips in order for us to start editingFinal cut pro click this to open up the program This is what final cut pro looks like
  • 3.
    On our camerawe clicked play/edit for the clip to appear on the screen that we want. This is one of our clips that we were going to edit shown below In the logging tab showed on the right we renamed our clip where it says ‘Description’ and wrote down what type of shot the clip was in ‘Shot/Take’ as show on the right
  • 4.
    We then clickedplay on the camcorder and on the computer we clicked ‘capture now’ which is at the bottom of the logging tab as shownCapture now
  • 5.
    After capturing wepress esc and it gets saved under the new tab on the left This will make it more easier for us to go back to the shots we want as we will know what each shot is through the naming of them. We redid this for all our shots that we wanted in order to start our editing.
  • 6.
    This is whatit would look like after renaming and capturing each clip
  • 7.
    The clips wecapture come up on the viewer under video tab so we can play the clip through and see which part of it we want. To get the specific shot from the clip we clicked ‘I’ to start and ‘O’ to stop where we want it to finish.
  • 8.
    We then draggedthe clip to the sequence tab at the bottom Sequence tab Our clip, we drag it to where we want this scene to come up in the teaser This was done for each clip the same process.
  • 9.
    You can dragthis to where you want it to start playing After repeating the steps from the above slides it looked like the print screen shown above. Now we can finally start editing each clip and adding effects to it.When editing you click the clip you want on the sequence tab which allows it to highlight the clip
  • 10.
    To add effectwe went to effects on the toolbar at the top then video filter and one of the effects we used was ‘strobe’ We followed these steps to add effect to all our clips but obviously different effects apart from ‘strobe’ such as ‘blink’
  • 11.
    When adding effectsa red line appears in the sequence tab which indicates that it needs rendering.To render we held apple down and pressed ‘r’ on the keyboard
  • 12.
    Razer blade toolIn the toolbar on the side of the sequence tab we used the razer blade tool in order to cut in-between clips that needed cutting. To use this we clicked the tool and then clicked on the clips that needed cutting and it looked like this:This will appear
  • 13.
    When adding backgroundmusic we had to open the music from the folder it was saved in and drag it to final cut pro on our browser where all our clips are saved with the name and shot they each had.browserOur background music which we then dragged to the sequence tab in order to cut the length down and place it where we want it to startBackground music in sequence tab
  • 14.
    Before listening toit we had to render it and also cut it down as it was far too long. Also we had to mute the excess sound of voices etc in order to do this we unclicked the green sound buttons that is on the same line as the recording so the recording sound is mutedUnclicked these buttons
  • 15.
    Next step wecut down the background music with the razer blade tool like shown below:We then moved it around to where we wanted the music to start and end by just dragging it along the column. We then recorded a voice over to go in our teaser trailer using a microphone which said ‘finders keepers doesn’t always apply’ which is also our tagline. Then carried out the same process of uploading it and dragging it to our sequence tab shown below:
  • 16.
    levelWe then increasedthe voice over by making sure it was highlighted if it wasn’t double click on it and on the viewer a stereo tab will appear and under this it will say level with a arrow which you can drag to the right to make the sound louder we increased it to 12 to make it louder than the music to give in a more sinister atmosphere We decided to add a cross dissolved effect on the background sound after the voice over finished by going effect>>cross dissolved.
  • 17.
    In order toadd cross dissolved we used the select button and clicked on the edge of the clips. We added cross dissolve to build up more tension when the music starts to play after the voice overWe logged and captured some of the clips that wasn’t to the correct size