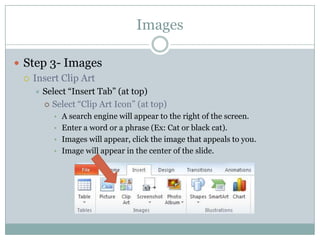
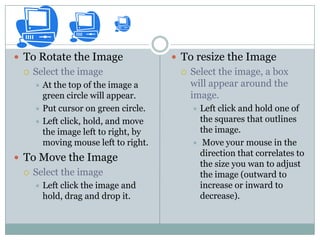
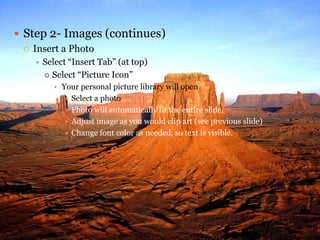
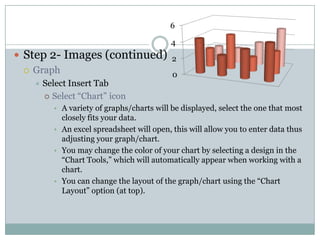
Power Point for the Novice
How to make a powerful and professional impact.


                DAVID HUBBARD
                  MRS. CLINE
                   ENG. 102
                  MAY 5, 2012
Benefits

 Why use Power Point
   “Visual aids help you reach your objectives by providing
    emphasis to whatever is being said. Clear pictures multiply the
    audience's level of understanding of the material presented,
    and they should be used to reinforce your message, clarify
    points, and create excitement” (OSHA.gov).
   “PowerPoint presentation creates a more persuasive &
    intimate scenography” (Negroni, par 1).
   “Presentations with extraordinary visuals help audiences to
    understand and comprehend your message. Comprehension
    leads to connection…which leads to success” (Learner, par 1).
Applications

Professional                      Personal

 College Classes                    Electronic Scrapbooking
   Demonstrate knowledge in an      Diary/ Journal
    area                             Personal Narrative
   College Portfolio                Cook Book
   College Applications             Baby Book
                                     Karaoke
 Career                             Family History/Family Tree
   Professional Development         Emergency Contacts Info./
   Introduce a new                   Direction for care
    product/service                  Greeting Cards
   Instructional manual             Planning Vacations
   Sell services/products           Resume/vita
   Reference page                   Comic book/story
Getting Started

 Step 1- Setting Up
   Open Microsoft Power Point 2010

   Save

   Select “Design Tab” (at top)
     Slide 1 will appear on the screen. This is your introduction slide.
      Enter your title and any additional information (name, date, etc.).
     Chose a design that appeals to your audience. Click to select.


                                                     Your design options
Slides

 Step 2- Adding a slide
   Select Home Tab (at top)
     Click the image of a slide on the “New Slide” button to get an
      identical slide.
     Click the words “New Slide” with an arrow to get a drop down
      menu of alternative slide designs.
     Input text
        To change font, color or size of text use the “Font” box (similar
         to Microsoft Word).
        Text will shrink to fit in most slide designs.
     Outline
        Most designs will have a built in bullet outline that helps to
         create a more organized and fluid look. This may be turned off,
         by selecting the bullet icon in the Home Tab.
Images

 Step 3- Images
   Insert Clip Art
       Select “Insert Tab” (at top)
         Select “Clip Art Icon” (at top)
          •   A search engine will appear to the right of the screen.
          •   Enter a word or a phrase (Ex: Cat or black cat).
          •   Images will appear, click the image that appeals to you.
          •   Image will appear in the center of the slide.
 To Rotate the Image                 To resize the Image
    Select the image                    Select the image, a box
      At the top of the image a          will appear around the
       green circle will appear.          image.
      Put cursor on green circle.        Left click and hold one of
      Left click, hold, and move          the squares that outlines
       the image left to right, by         the image.
       moving mouse left to right.         Move your mouse in the
                                           direction that correlates to
 To Move the Image
                                           the size you wan to adjust
    Select the image                      the image (outward to
        Left click the image and          increase or inward to
         hold, drag and drop it.           decrease).
 Step 2- Images (continues)
   Insert a Photo
      Select “Insert Tab” (at top)
        Select “Picture Icon”
         • Your personal picture library will open
             Select a photo
             Photo will automatically fit the entire slide.
             Adjust image as you would clip art (see previous slide)
             Change font color as needed, so text is visible.
6

                                          4
 Step 2- Images (continued)               2
   Graph
                                           0
      Select Insert Tab
        Select “Chart” icon
         • A variety of graphs/charts will be displayed, select the one that most
           closely fits your data.
         • An excel spreadsheet will open, this will allow you to enter data thus
           adjusting your graph/chart.
         • You may change the color of your chart by selecting a design in the
           “Chart Tools,” which will automatically appear when working with a
           chart.
         • You can change the layout of the graph/chart using the “Chart
           Layout” option (at top).
 Step 2- Images (continued)
   To add flair to an image or photo
     Click on image or photo already inserted into a slide.
     “Picture Tools” will appear under the format tab.
       Use the “Color” icon to change the color of the entire image (see
         above clip art).
       The “Artistic Effects” icon allows for a wide variety of dramatic
         alterations.
       The send the image behind the text, select the “Send
         Backwards” icon.
       To create a border use the “Picture Style” icon.
Transitions

 Step 3- Transitions
   Select Transition Tab (at top)
       To create movement from one slide to the next. Select introduction
        slide (1st slide), it will become highlighted on left column.
         Select desired transition.
          • Change time of transition by using “Duration Timer” in upper right
            hand corner.
          • Repeat for all following slides or hit “Apply to All” icon in upper
            right corner.
Animation

 Step 3- Animations
   Create movement in words or images.
       Select the Animation Tab (top).
         Select the image or highlight the text you wish to have
          animation.
         Chose an animation that appeals to you and select it.
            • Additional “Effect Options” (if available) will be shown next to
              animation icons.
           Select the “Preview” icon to view animations on current slide.
Viewing

 Step 4- To View
   Select Slide Show Tab (at top)
     To view your slides at any time, select the “From Beginning” icon.
     At this stage you will have to use the arrow keys to go from one
      slide to the next.
     To have automatic transitions, select the “Record Slide Show” and
      hit Start recording.
       Your first slide will appear with a time at the top left. Leave the
         slide on the screen for as long as you want it to be shown in the
         power point. Then go to next slide and repeat. For slides with
         more information you may want to have a longer time.
       Once done, all slides will appear with time on screen at bottom
         of each.
Hints:
Save frequently.
Don’t be afraid to make
mistakes, you have an
undo button in the top
left corner (next to
save).
Power Points has many
features, play around
…have fun.
There is a learning
curve, but don’t fret it
gets easier.
There is more than one
way to skin a cat,
meaning many tasks
can be accomplished in
multiple ways.
Works Cited

L E R N E R , K E V I N . “ T H E VA L U E O F E X T R A O R D I N A R Y V I S U A L S I N
             P R E S E N T AT I O N S / ” T H E P R E S E N T AT I O N T E A M . W E B . 5 M A Y 2 0 1 2 .
             < H T T P : / / W W W. P R E S E N T AT I O N T E A M . C O M / P R E S E N T AT I O N -
             T I P S / P O W E R P O I N T - T I P S / T H E - VA L U E - O F - E X T R A O R D I N A R Y- V I S U A L S - I N -
             P R E S E N T AT I O N S >
N E G R O N I , G A R C I A , E T A L . " H A N D O U T, P O W E R P O I N T A N D A C A D E M I C
             E T H O S : O N E P I T E X T S I N S C I E N T I F I C C O M M U N I C A T I O N . " R E V I S TA
             INTERNACIONAL DE LINGUISTICA IBEROAMERICANA 6.2 (2008): 33-49.
             L I N G U I S T I C S A N D L A N G U A G E B E H AV I O R A B S T R A C T S (L L B A ). WE B . 5
             M AY 2 0 1 2 .
P O W E R P O I N T. M I C R O S O F T. 2 0 1 0 E D .
U N I T E D S T AT E S . D E P T . O F L A B O R . “ P R E S E N T I N G E F F E C T I V E P R E S E N T AT I O N S
             W I T H V I S U A L A I D S . ” O H S A . G O V. U S . D E P T . O F O C C U PAT I O N A L
             H E A L T H A N D S A F E T Y A D M I N I S T R AT I O N . W E B . 5 M A Y 2 0 1 2 .
             < H T T P : / / W W W. O S H A . G O V / D O C / O U T R E A C H T R A I N I N G / H T M L F I L E S / T R A I N T
             EC.HTML>

Power Point for the Novice

  • 1.
    Power Point forthe Novice How to make a powerful and professional impact. DAVID HUBBARD MRS. CLINE ENG. 102 MAY 5, 2012
  • 2.
    Benefits  Why usePower Point  “Visual aids help you reach your objectives by providing emphasis to whatever is being said. Clear pictures multiply the audience's level of understanding of the material presented, and they should be used to reinforce your message, clarify points, and create excitement” (OSHA.gov).  “PowerPoint presentation creates a more persuasive & intimate scenography” (Negroni, par 1).  “Presentations with extraordinary visuals help audiences to understand and comprehend your message. Comprehension leads to connection…which leads to success” (Learner, par 1).
  • 3.
    Applications Professional Personal  College Classes  Electronic Scrapbooking  Demonstrate knowledge in an  Diary/ Journal area  Personal Narrative  College Portfolio  Cook Book  College Applications  Baby Book  Karaoke  Career  Family History/Family Tree  Professional Development  Emergency Contacts Info./  Introduce a new Direction for care product/service  Greeting Cards  Instructional manual  Planning Vacations  Sell services/products  Resume/vita  Reference page  Comic book/story
  • 4.
    Getting Started  Step1- Setting Up  Open Microsoft Power Point 2010  Save  Select “Design Tab” (at top)  Slide 1 will appear on the screen. This is your introduction slide. Enter your title and any additional information (name, date, etc.).  Chose a design that appeals to your audience. Click to select. Your design options
  • 5.
    Slides  Step 2-Adding a slide  Select Home Tab (at top)  Click the image of a slide on the “New Slide” button to get an identical slide.  Click the words “New Slide” with an arrow to get a drop down menu of alternative slide designs.  Input text  To change font, color or size of text use the “Font” box (similar to Microsoft Word).  Text will shrink to fit in most slide designs.  Outline  Most designs will have a built in bullet outline that helps to create a more organized and fluid look. This may be turned off, by selecting the bullet icon in the Home Tab.
  • 6.
    Images  Step 3-Images  Insert Clip Art  Select “Insert Tab” (at top)  Select “Clip Art Icon” (at top) • A search engine will appear to the right of the screen. • Enter a word or a phrase (Ex: Cat or black cat). • Images will appear, click the image that appeals to you. • Image will appear in the center of the slide.
  • 7.
     To Rotatethe Image  To resize the Image  Select the image  Select the image, a box  At the top of the image a will appear around the green circle will appear. image.  Put cursor on green circle. Left click and hold one of  Left click, hold, and move the squares that outlines the image left to right, by the image. moving mouse left to right.  Move your mouse in the direction that correlates to  To Move the Image the size you wan to adjust  Select the image the image (outward to  Left click the image and increase or inward to hold, drag and drop it. decrease).
  • 8.
     Step 2-Images (continues)  Insert a Photo  Select “Insert Tab” (at top)  Select “Picture Icon” • Your personal picture library will open  Select a photo  Photo will automatically fit the entire slide.  Adjust image as you would clip art (see previous slide)  Change font color as needed, so text is visible.
  • 9.
    6 4  Step 2- Images (continued) 2  Graph 0  Select Insert Tab  Select “Chart” icon • A variety of graphs/charts will be displayed, select the one that most closely fits your data. • An excel spreadsheet will open, this will allow you to enter data thus adjusting your graph/chart. • You may change the color of your chart by selecting a design in the “Chart Tools,” which will automatically appear when working with a chart. • You can change the layout of the graph/chart using the “Chart Layout” option (at top).
  • 10.
     Step 2-Images (continued)  To add flair to an image or photo  Click on image or photo already inserted into a slide.  “Picture Tools” will appear under the format tab.  Use the “Color” icon to change the color of the entire image (see above clip art).  The “Artistic Effects” icon allows for a wide variety of dramatic alterations.  The send the image behind the text, select the “Send Backwards” icon.  To create a border use the “Picture Style” icon.
  • 11.
    Transitions  Step 3-Transitions  Select Transition Tab (at top)  To create movement from one slide to the next. Select introduction slide (1st slide), it will become highlighted on left column.  Select desired transition. • Change time of transition by using “Duration Timer” in upper right hand corner. • Repeat for all following slides or hit “Apply to All” icon in upper right corner.
  • 12.
    Animation  Step 3-Animations  Create movement in words or images.  Select the Animation Tab (top).  Select the image or highlight the text you wish to have animation.  Chose an animation that appeals to you and select it. • Additional “Effect Options” (if available) will be shown next to animation icons.  Select the “Preview” icon to view animations on current slide.
  • 13.
    Viewing  Step 4-To View  Select Slide Show Tab (at top)  To view your slides at any time, select the “From Beginning” icon.  At this stage you will have to use the arrow keys to go from one slide to the next.  To have automatic transitions, select the “Record Slide Show” and hit Start recording.  Your first slide will appear with a time at the top left. Leave the slide on the screen for as long as you want it to be shown in the power point. Then go to next slide and repeat. For slides with more information you may want to have a longer time.  Once done, all slides will appear with time on screen at bottom of each.
  • 14.
    Hints: Save frequently. Don’t beafraid to make mistakes, you have an undo button in the top left corner (next to save). Power Points has many features, play around …have fun. There is a learning curve, but don’t fret it gets easier. There is more than one way to skin a cat, meaning many tasks can be accomplished in multiple ways.
  • 15.
    Works Cited L ER N E R , K E V I N . “ T H E VA L U E O F E X T R A O R D I N A R Y V I S U A L S I N P R E S E N T AT I O N S / ” T H E P R E S E N T AT I O N T E A M . W E B . 5 M A Y 2 0 1 2 . < H T T P : / / W W W. P R E S E N T AT I O N T E A M . C O M / P R E S E N T AT I O N - T I P S / P O W E R P O I N T - T I P S / T H E - VA L U E - O F - E X T R A O R D I N A R Y- V I S U A L S - I N - P R E S E N T AT I O N S > N E G R O N I , G A R C I A , E T A L . " H A N D O U T, P O W E R P O I N T A N D A C A D E M I C E T H O S : O N E P I T E X T S I N S C I E N T I F I C C O M M U N I C A T I O N . " R E V I S TA INTERNACIONAL DE LINGUISTICA IBEROAMERICANA 6.2 (2008): 33-49. L I N G U I S T I C S A N D L A N G U A G E B E H AV I O R A B S T R A C T S (L L B A ). WE B . 5 M AY 2 0 1 2 . P O W E R P O I N T. M I C R O S O F T. 2 0 1 0 E D . U N I T E D S T AT E S . D E P T . O F L A B O R . “ P R E S E N T I N G E F F E C T I V E P R E S E N T AT I O N S W I T H V I S U A L A I D S . ” O H S A . G O V. U S . D E P T . O F O C C U PAT I O N A L H E A L T H A N D S A F E T Y A D M I N I S T R AT I O N . W E B . 5 M A Y 2 0 1 2 . < H T T P : / / W W W. O S H A . G O V / D O C / O U T R E A C H T R A I N I N G / H T M L F I L E S / T R A I N T EC.HTML>