Downloaded 109 times
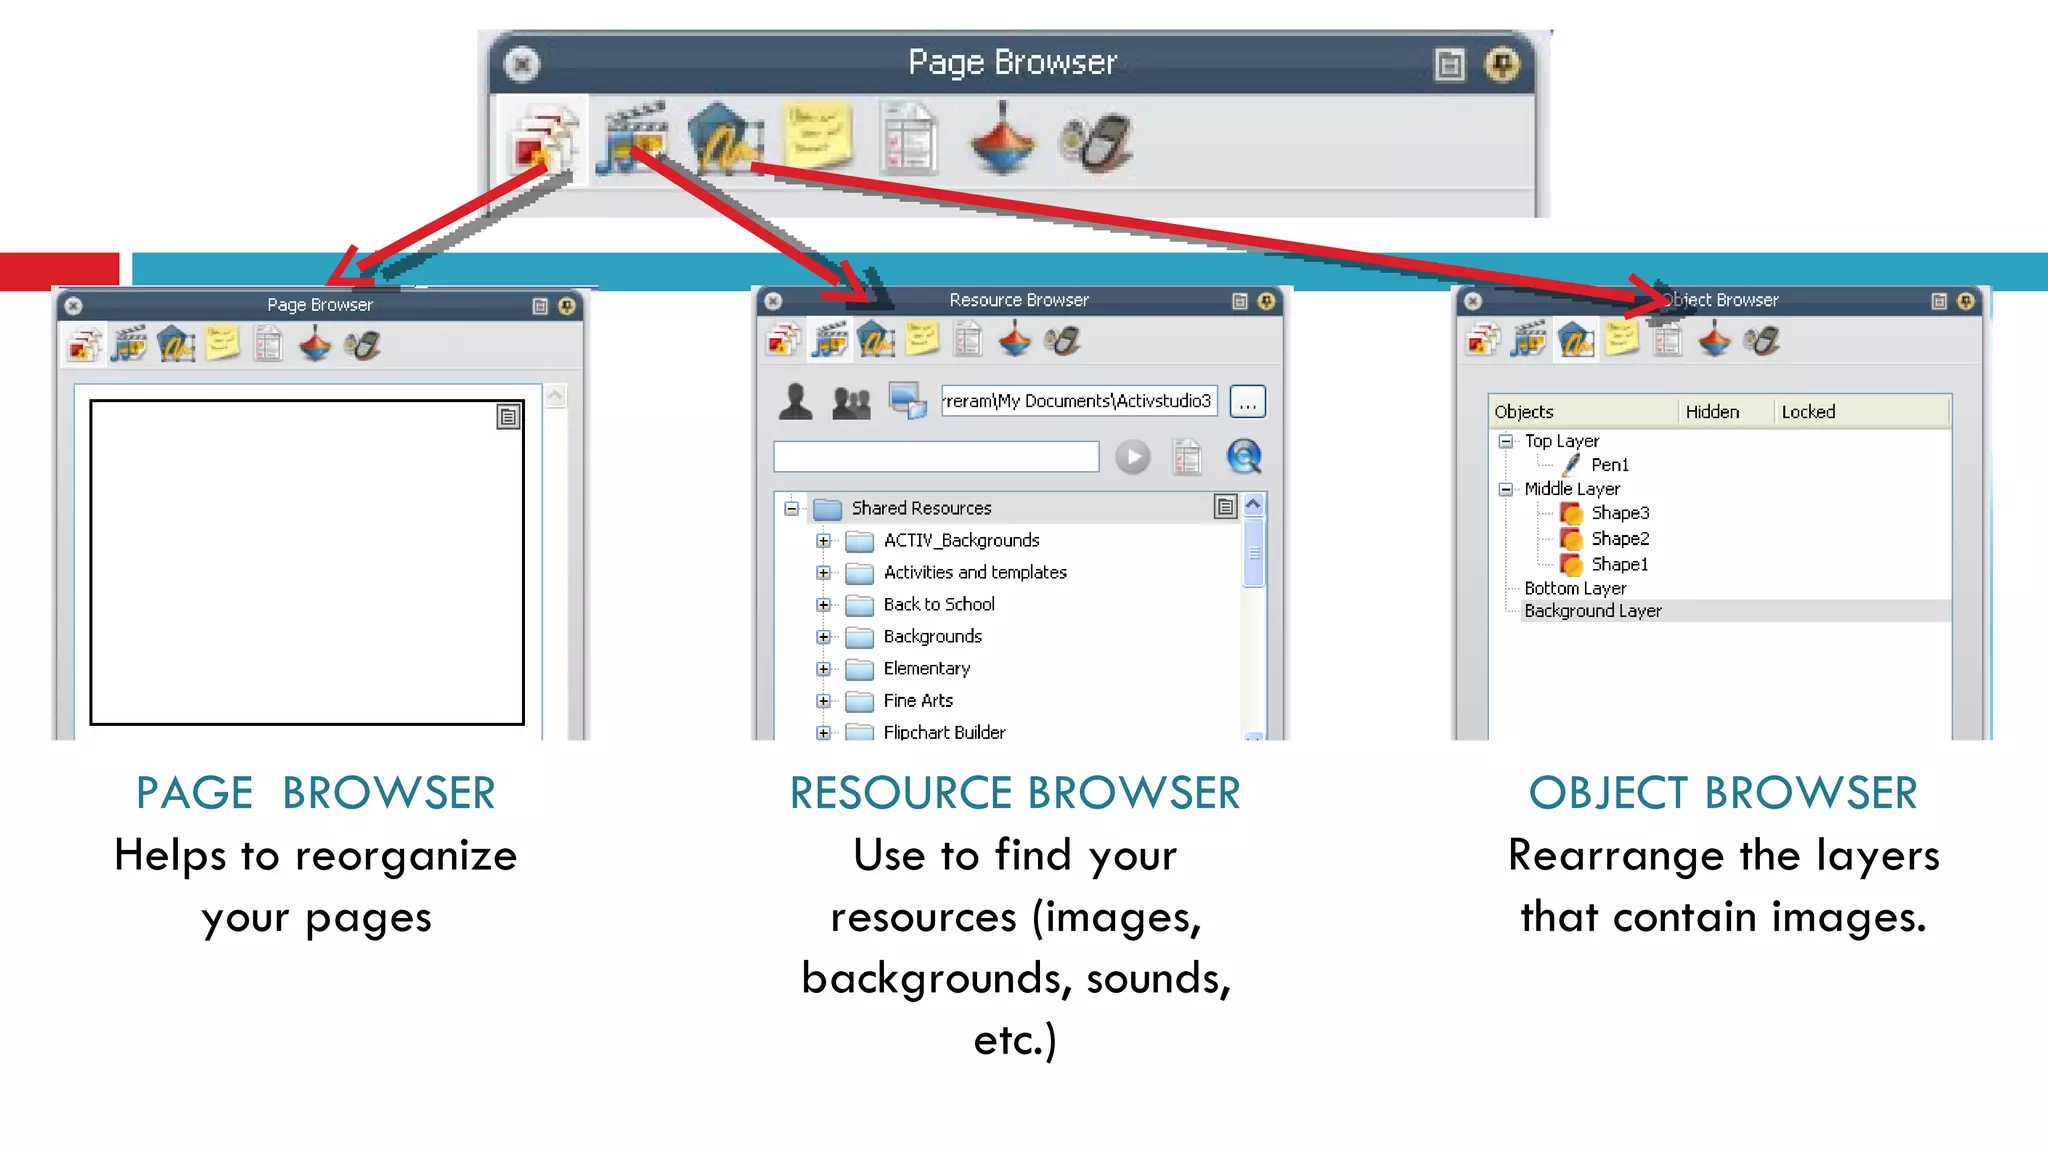
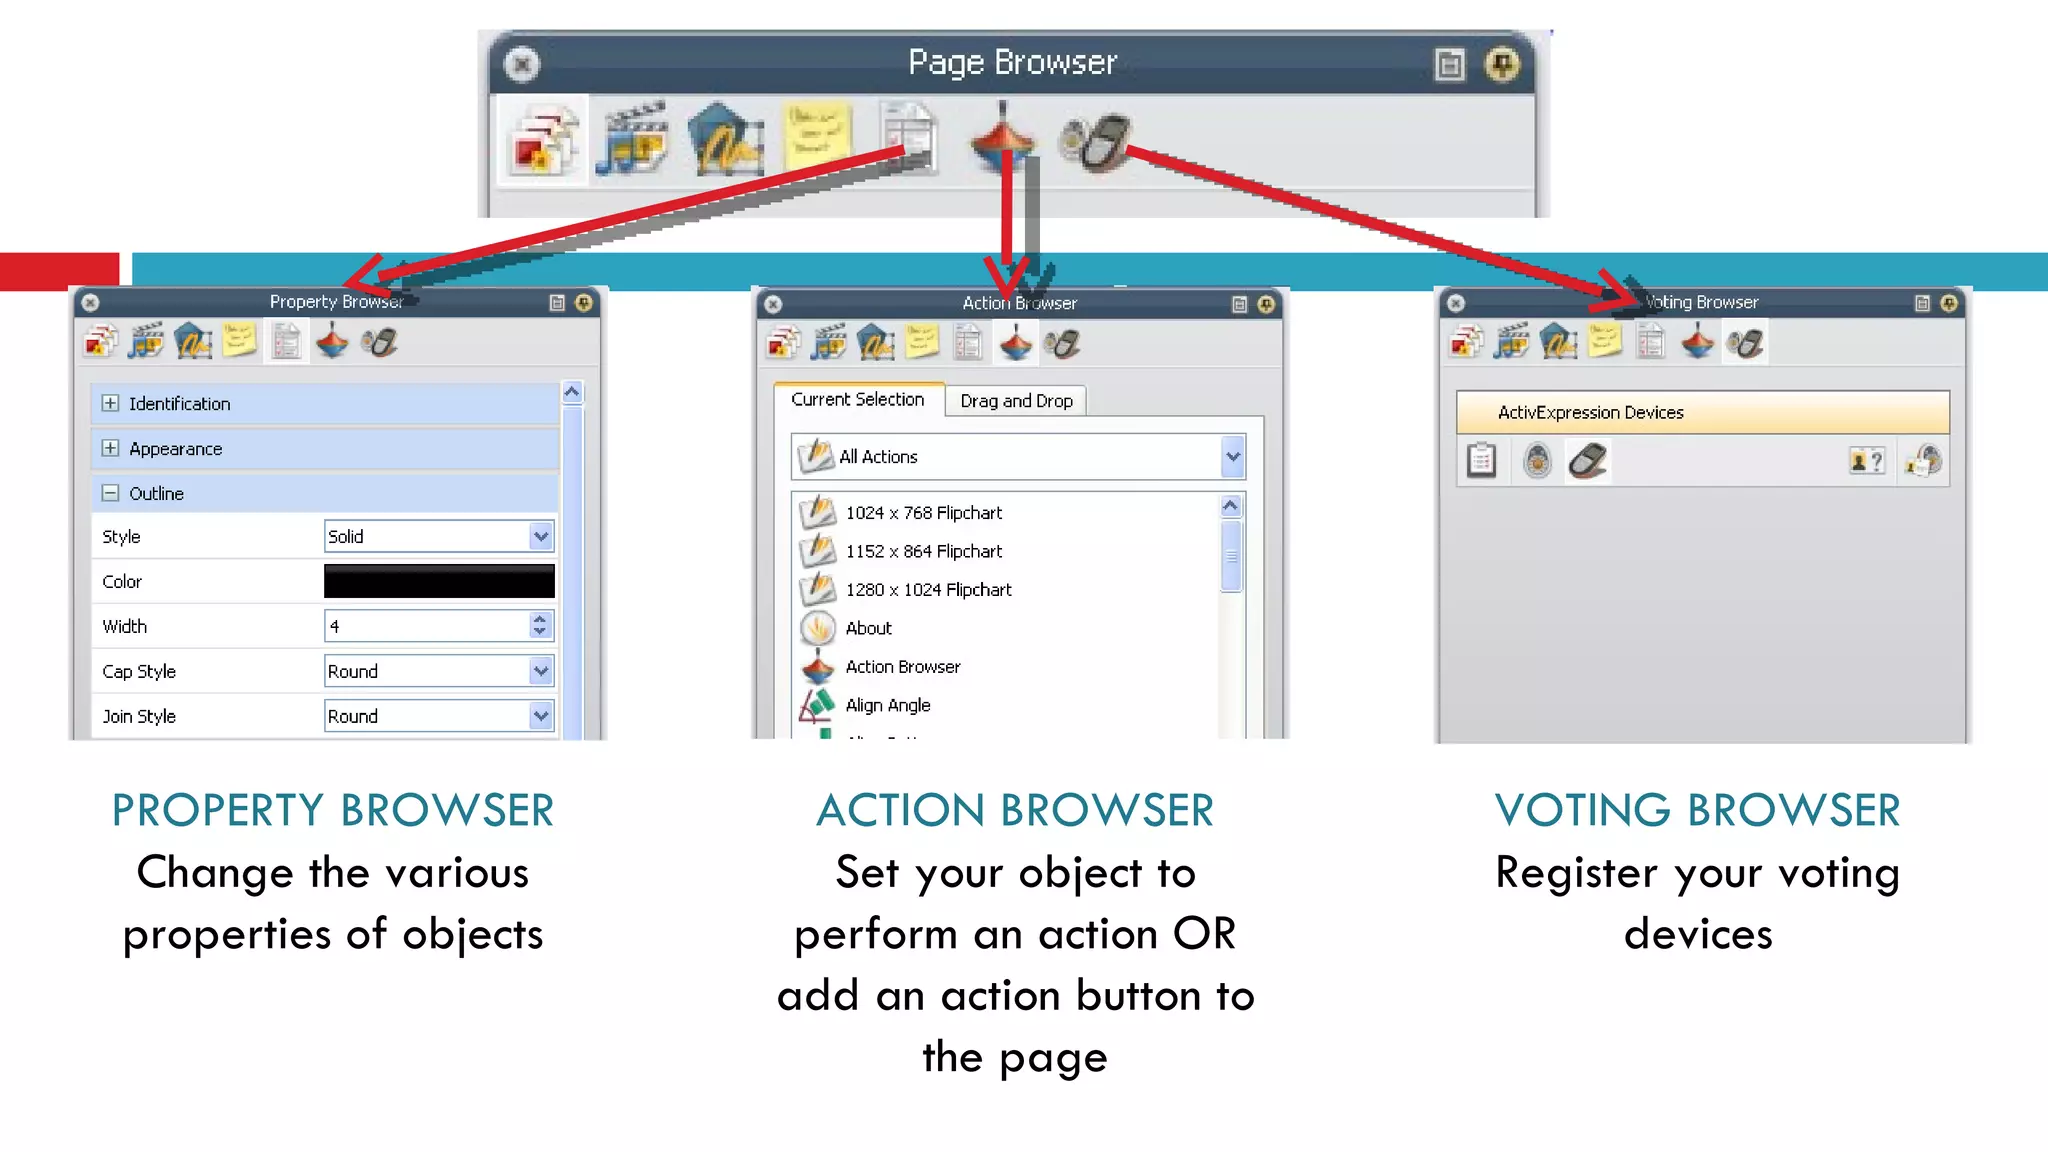
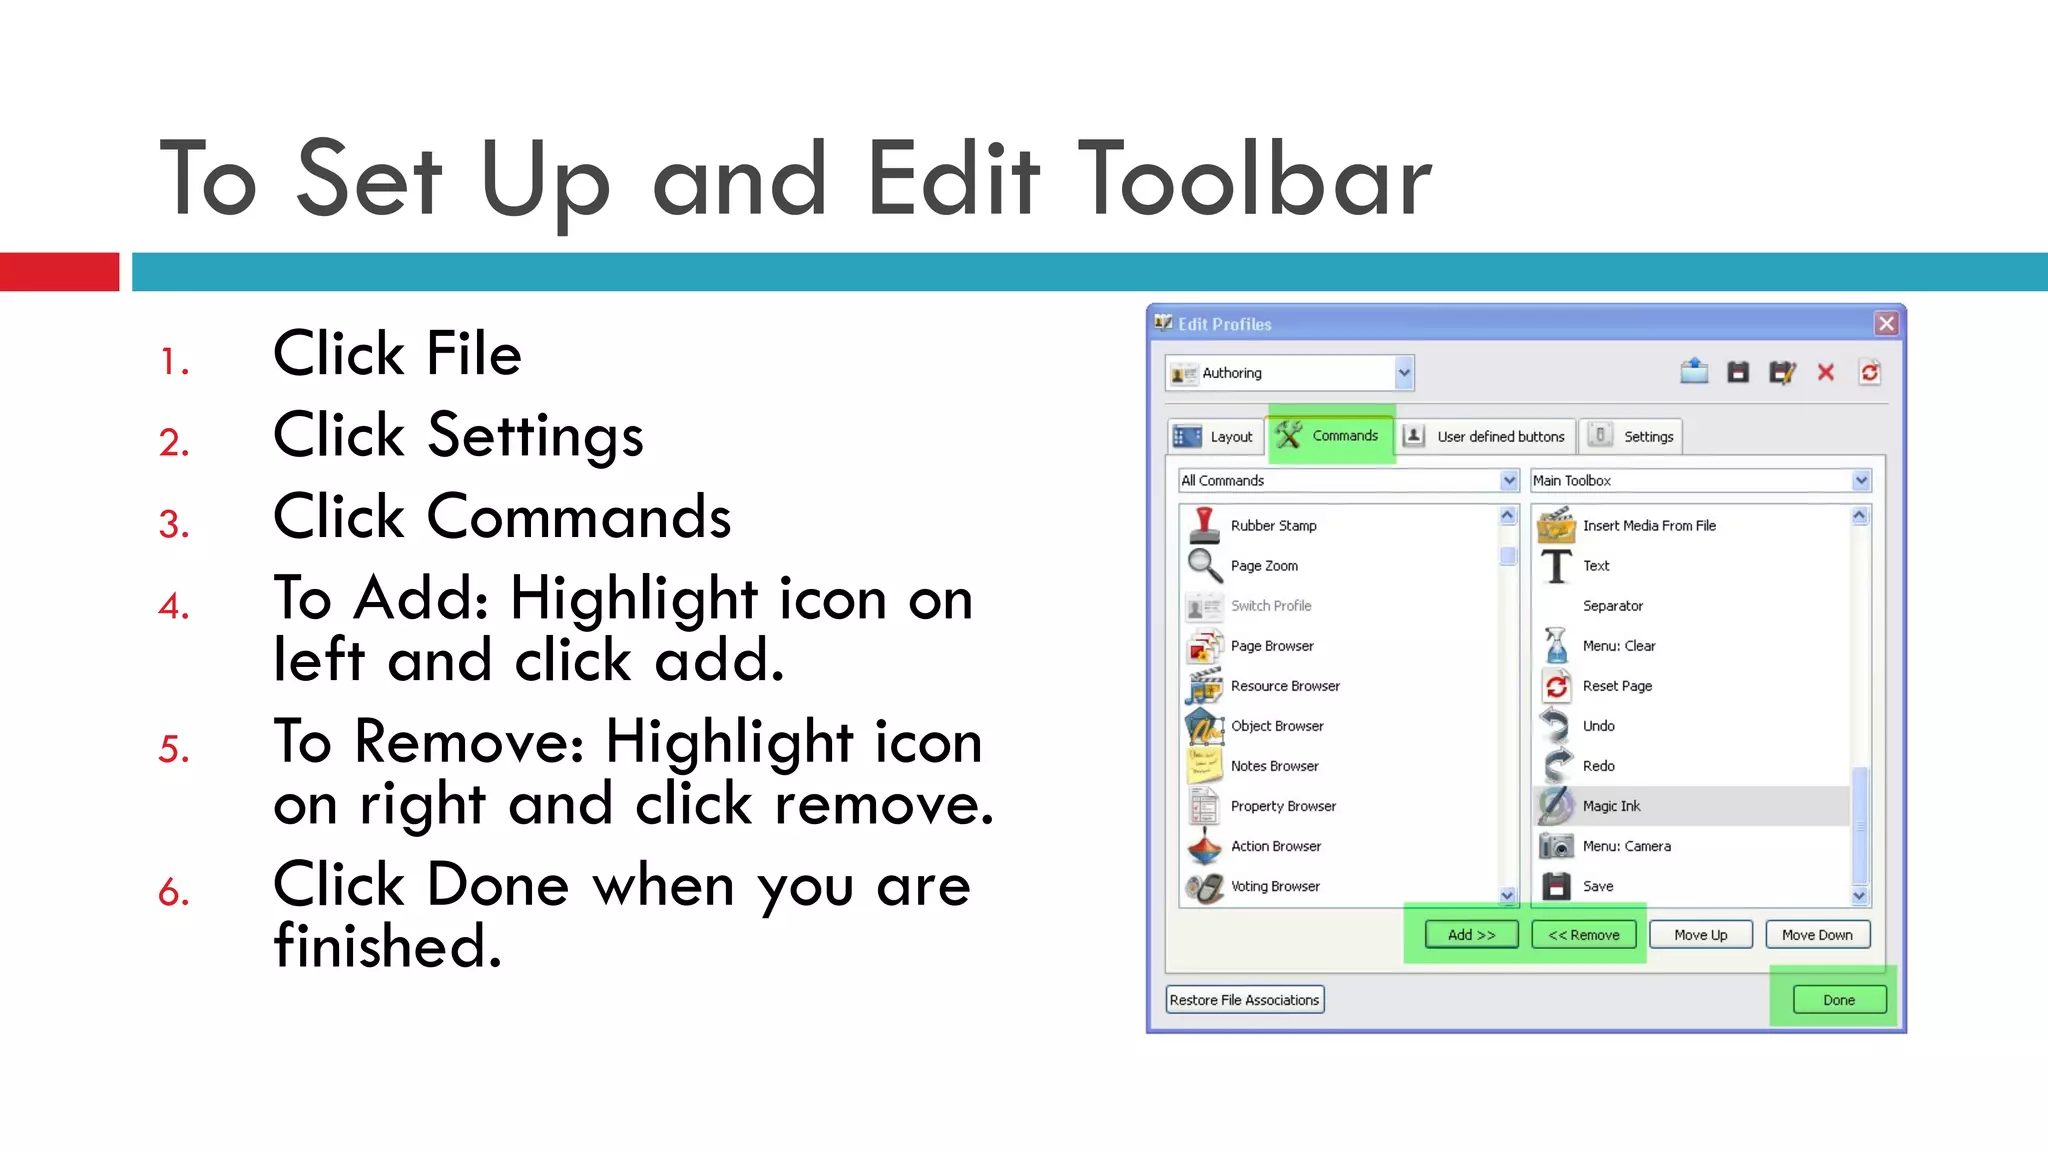
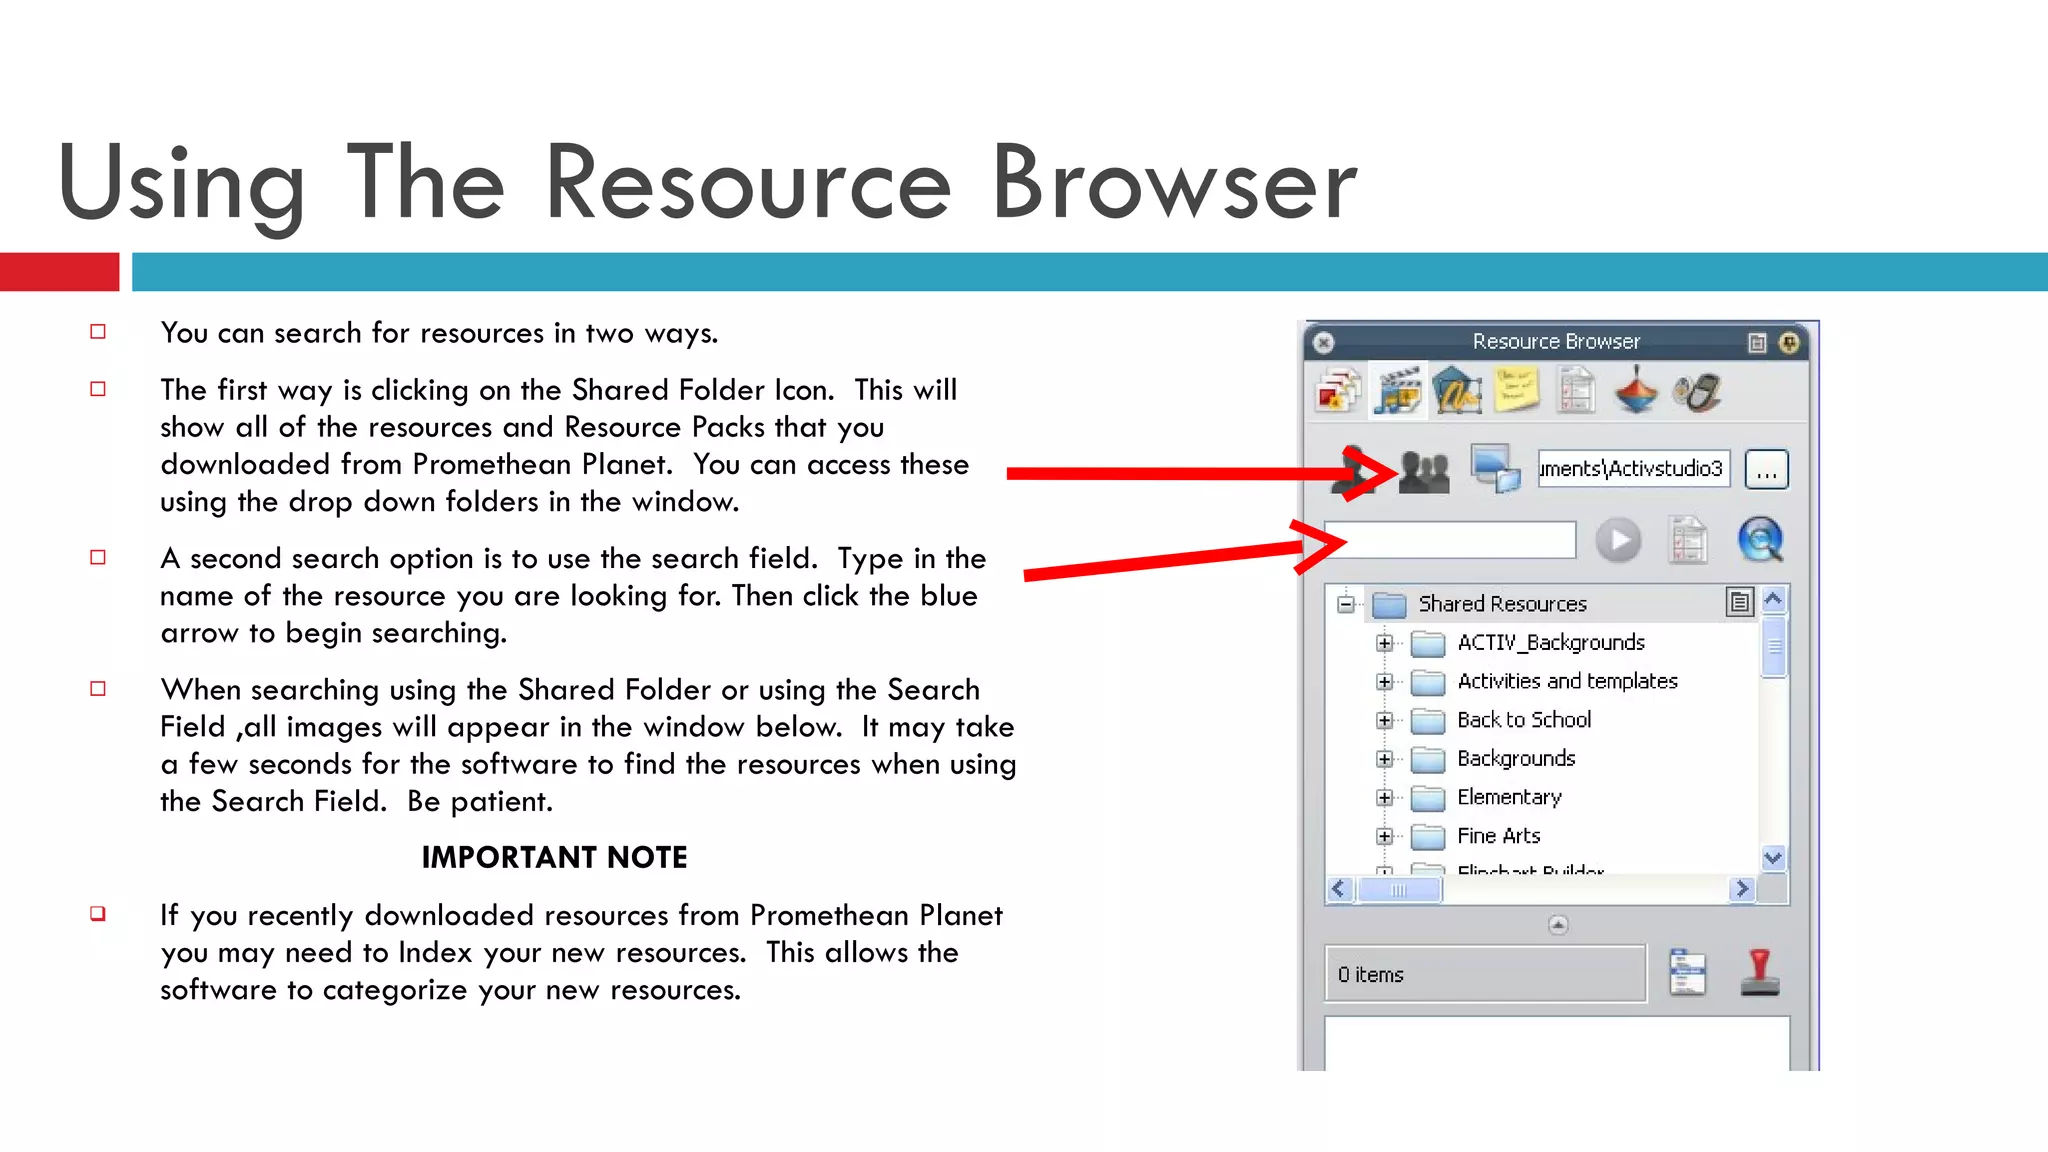


This document provides tips and tools for creating flipcharts and using various features on the ActivInspire software. It explains how to use tools like the page browser, resource browser, object browser, and property browser. It also provides instructions for setting up questions and polls, registering voting devices, and exporting results.


