This document provides an overview of PowerPoint basics, including:
- Different slide layouts and designs that can be used
- The session aim is to understand PowerPoint's basic features and the difference between good and bad presentations
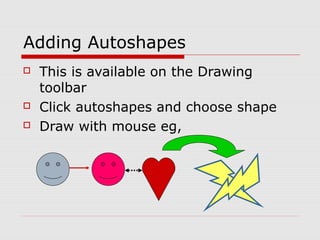
- How to insert clip art, change formatting, backgrounds, and add diagrams and autoshapes
- Other topics covered are views, notes, printing handouts, and creating a presentation to practice the skills learned