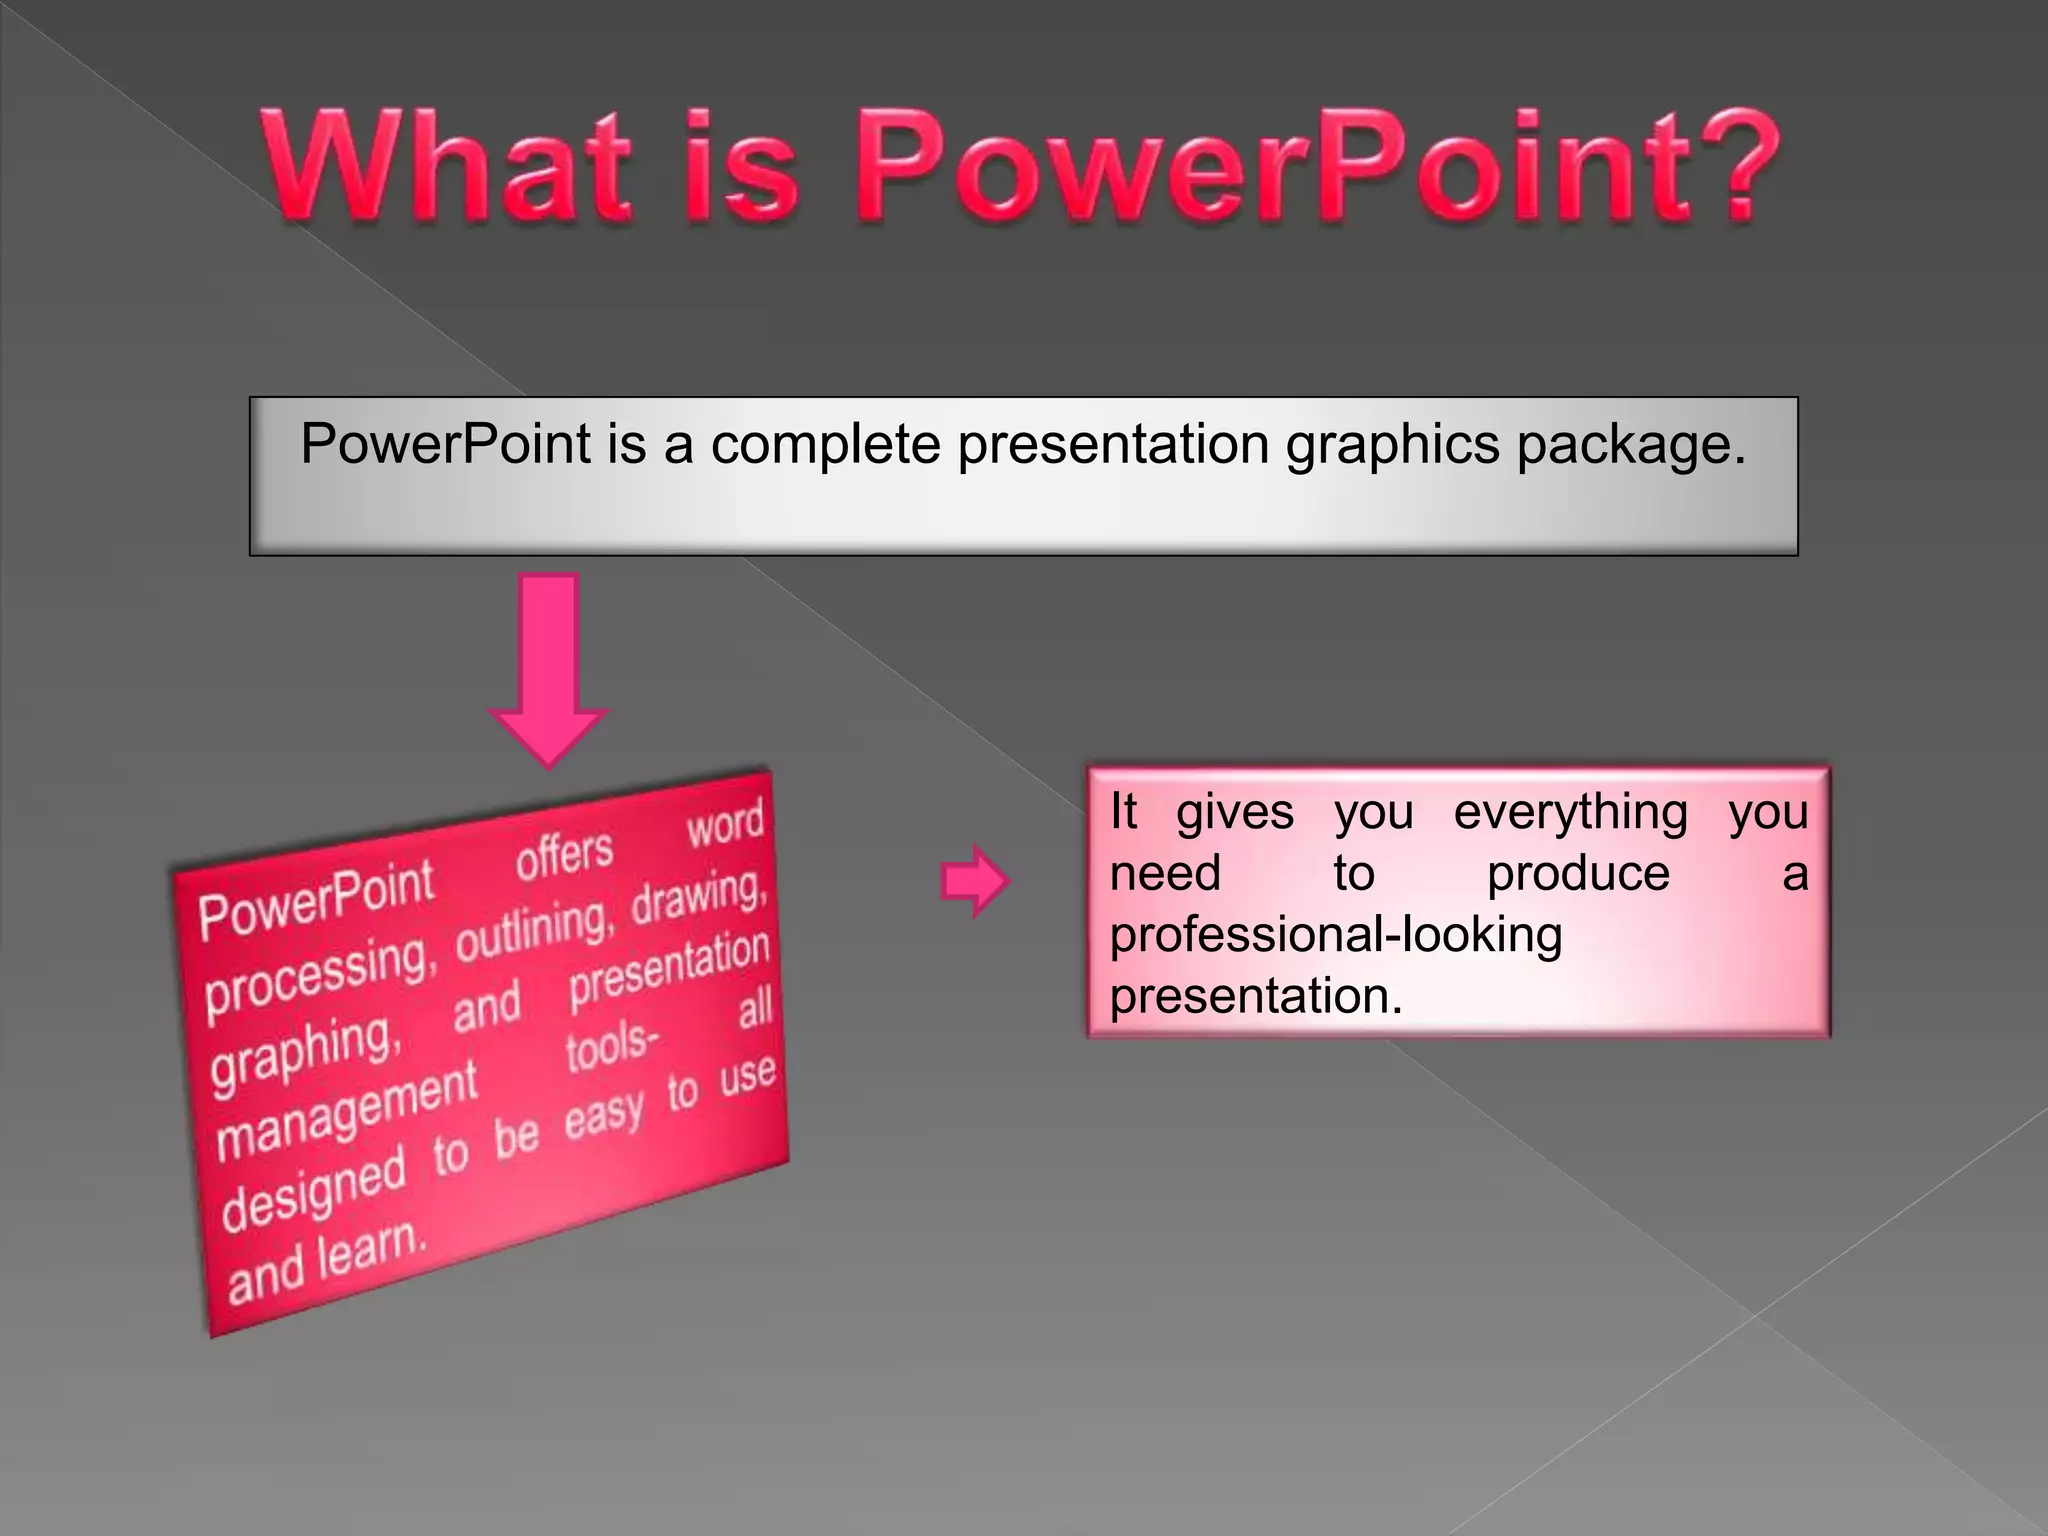
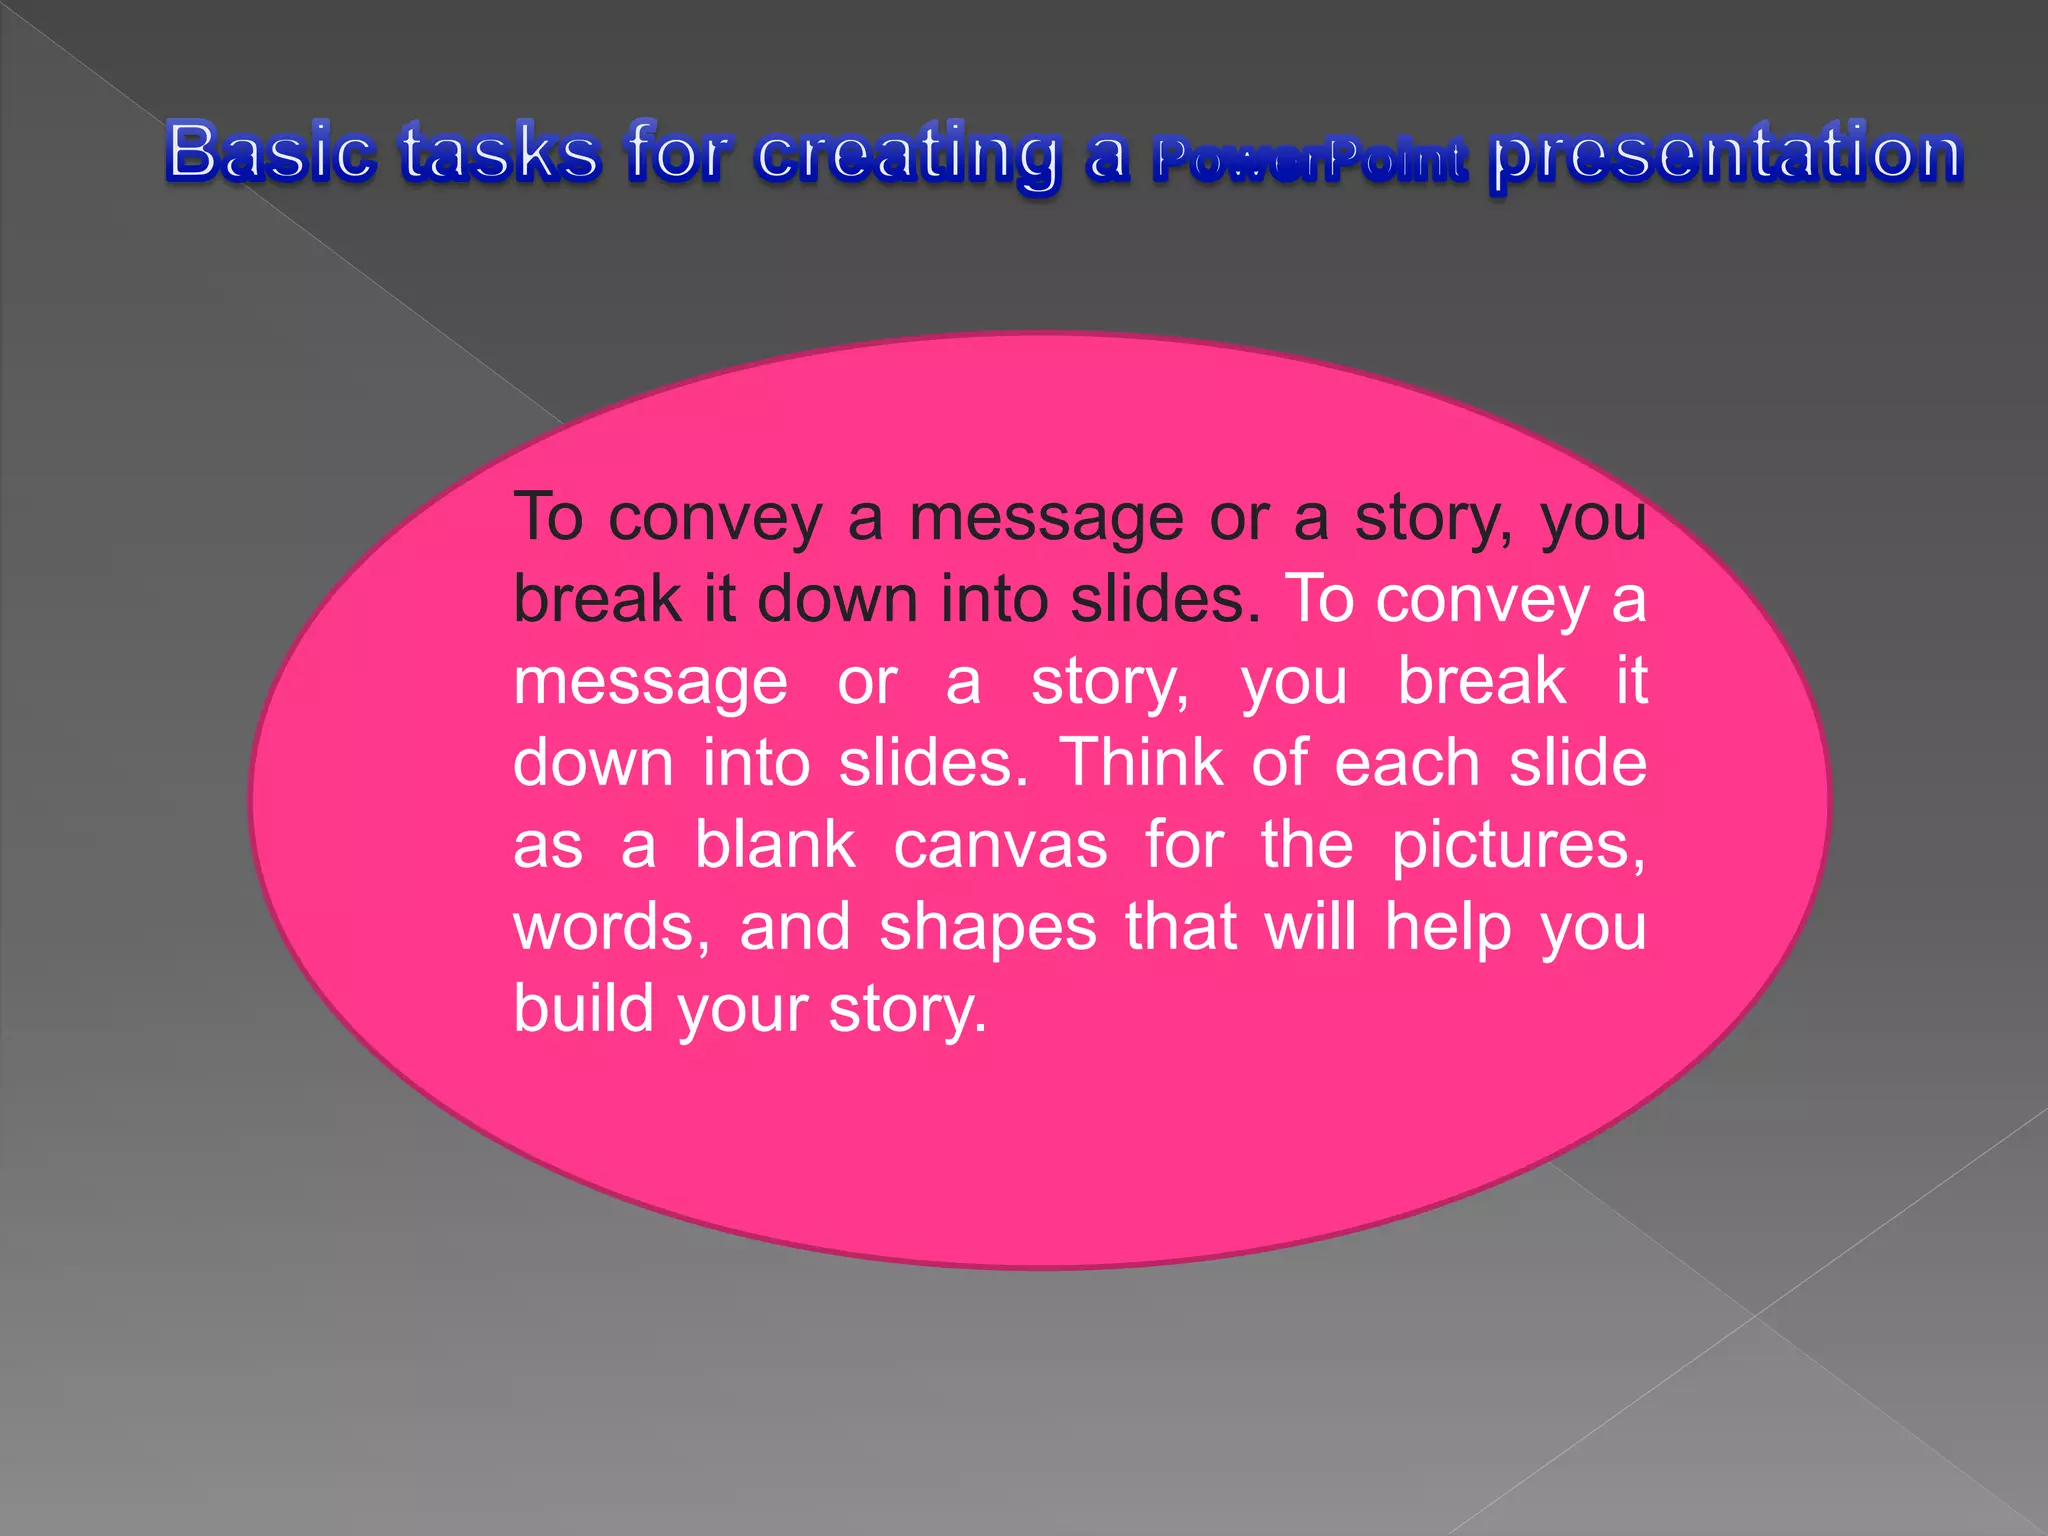
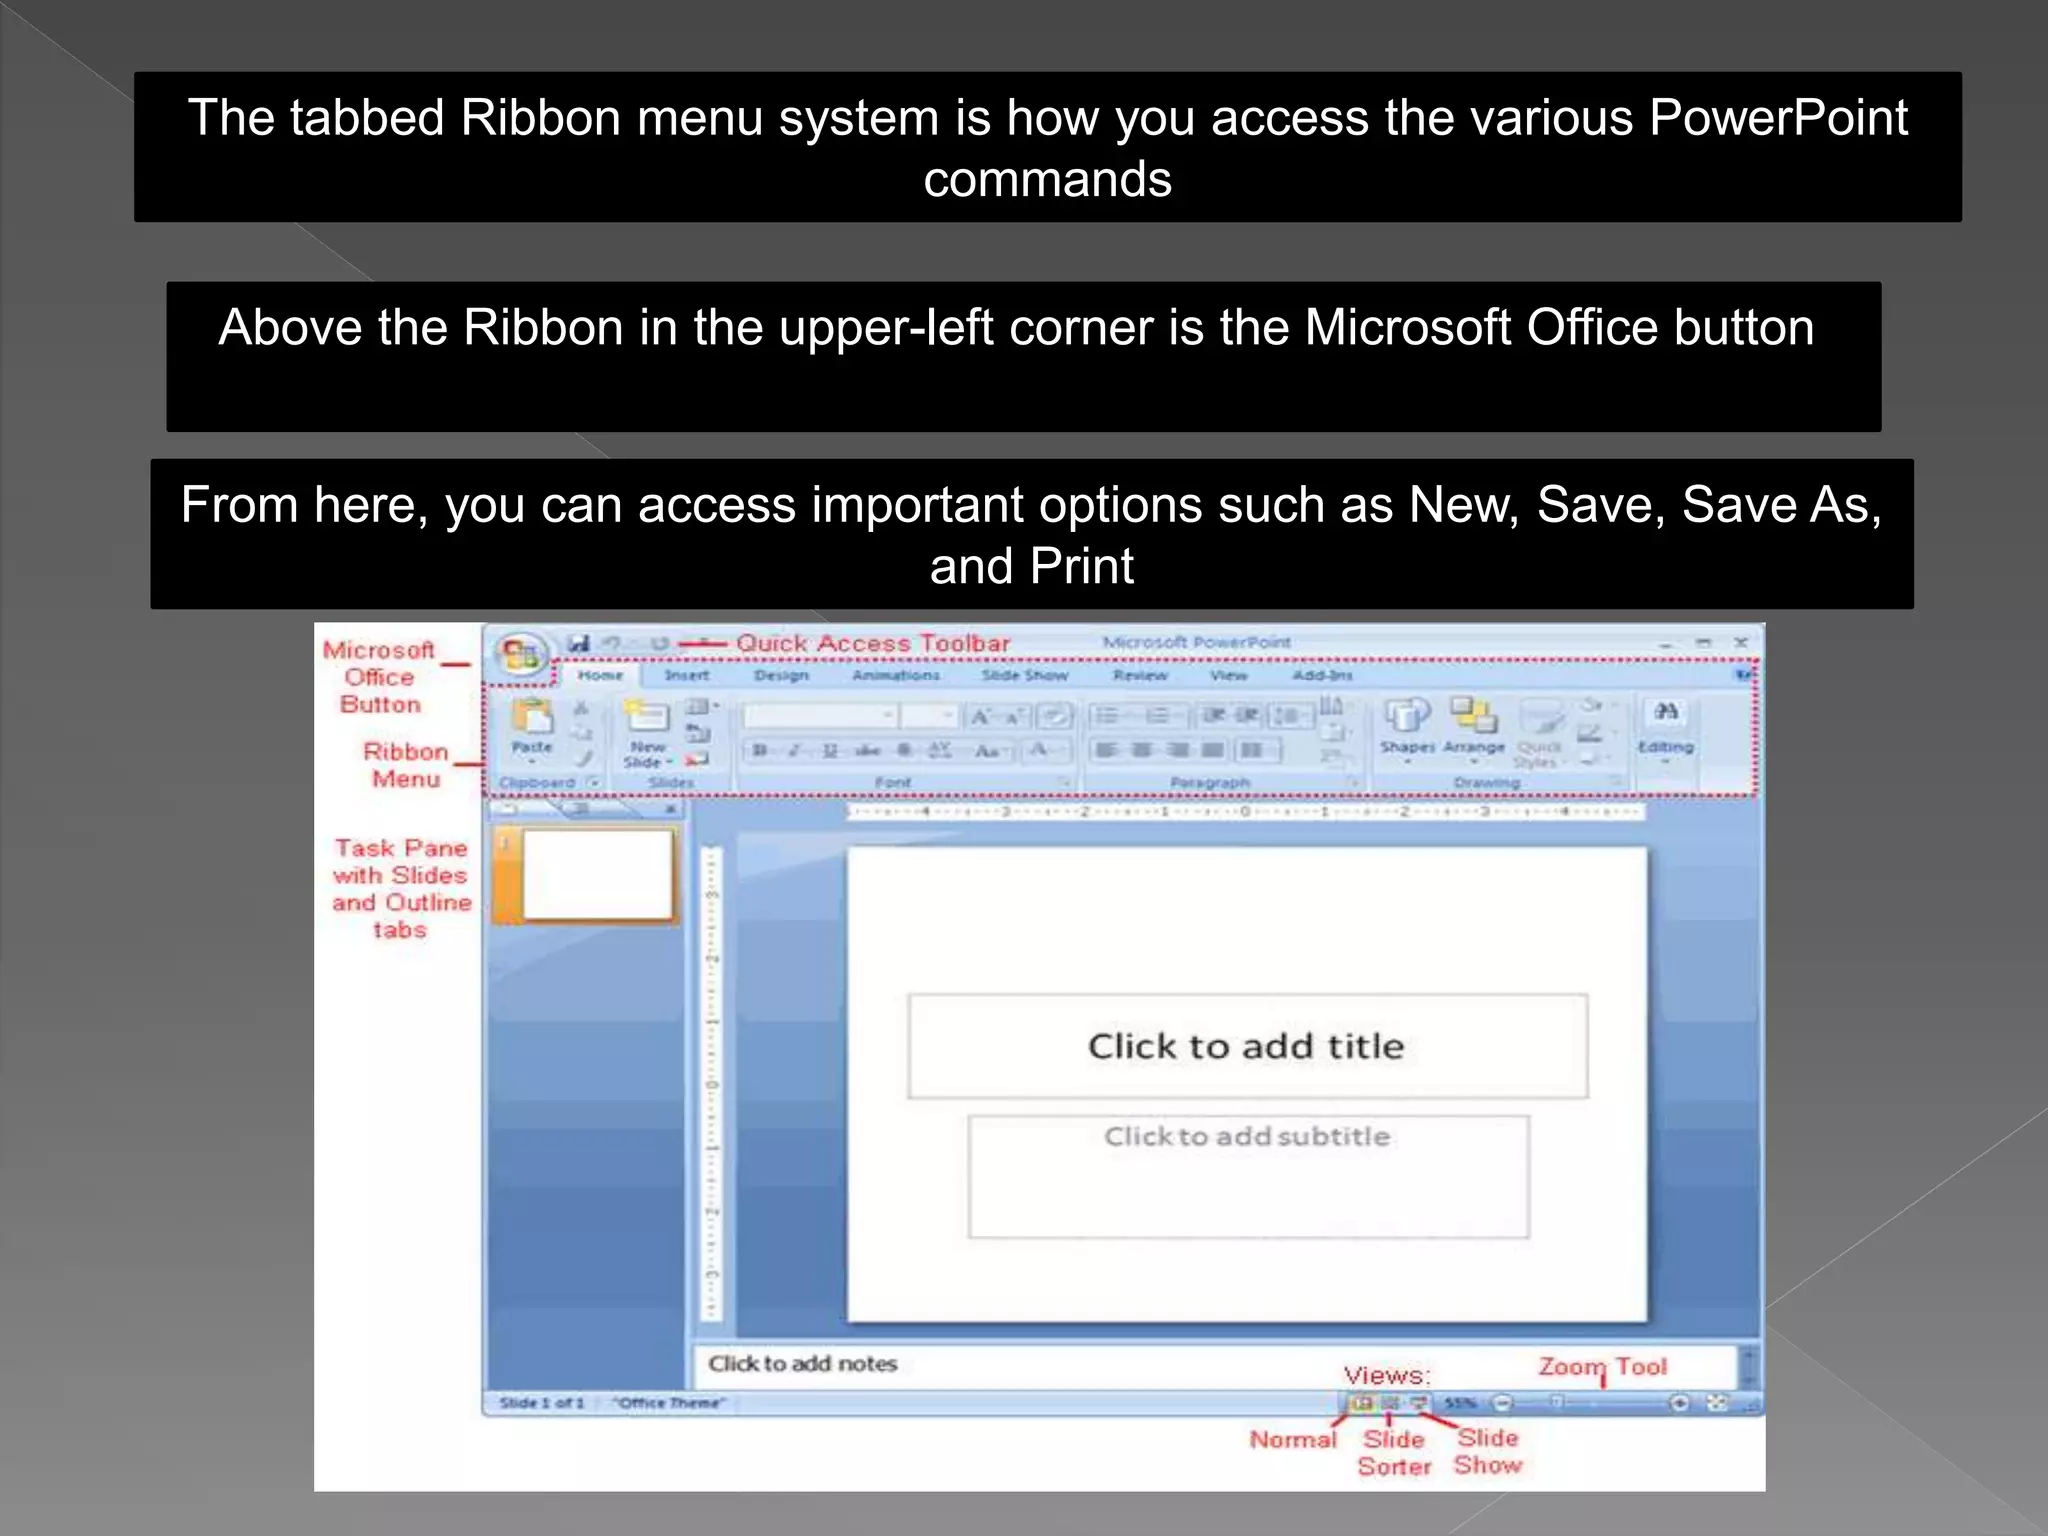
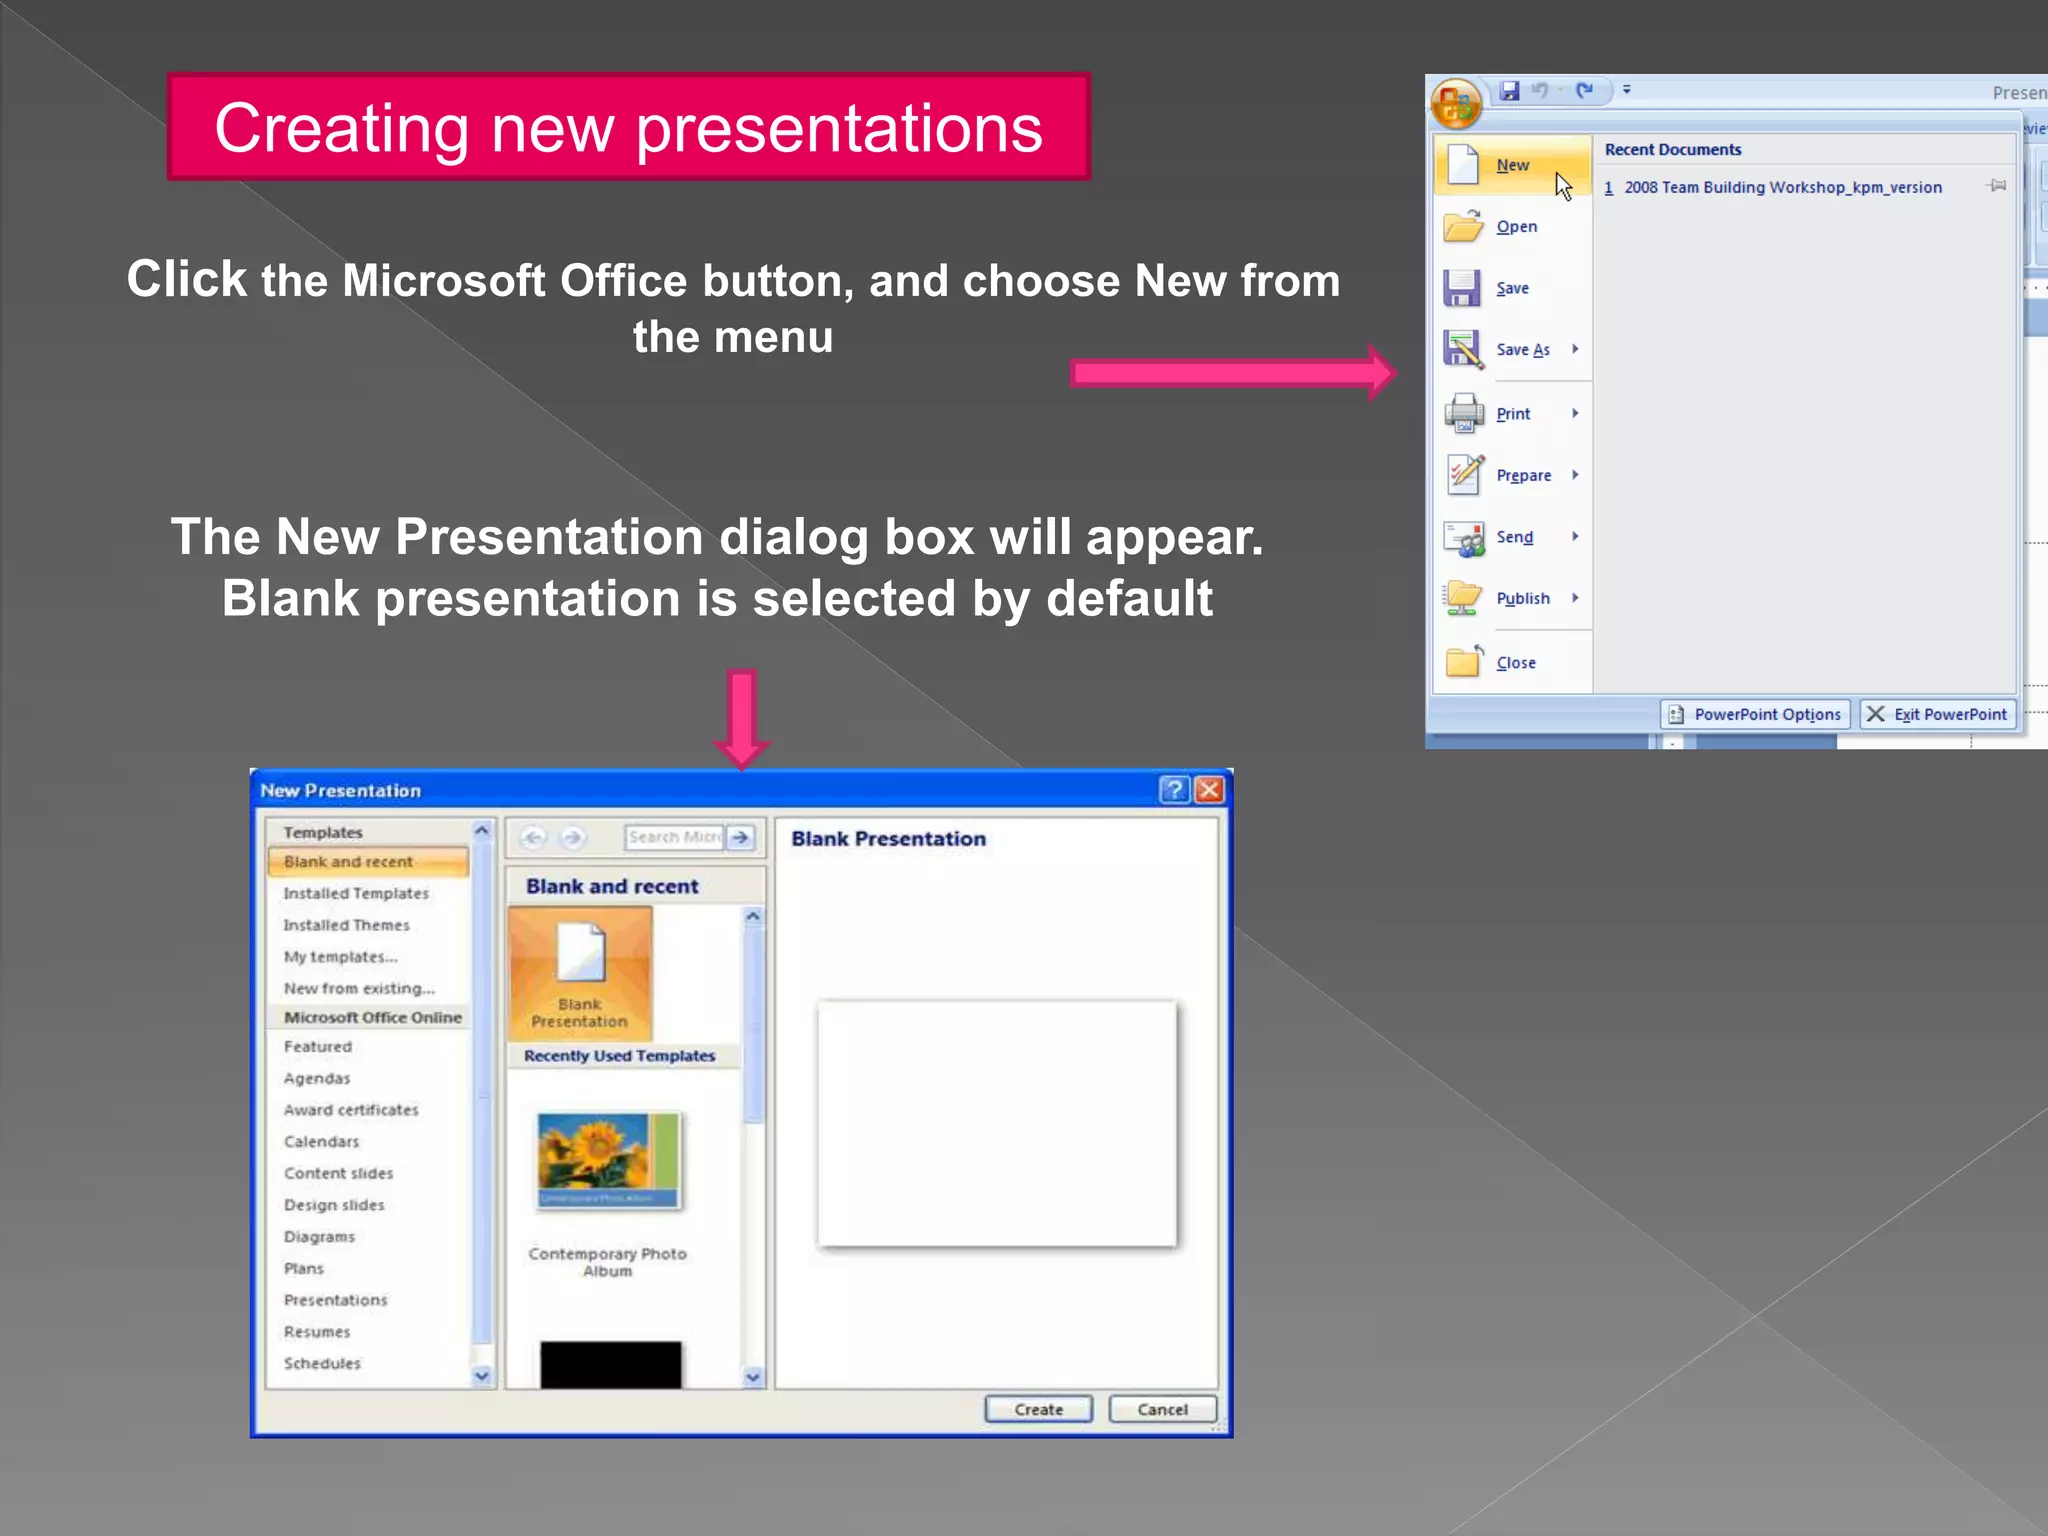
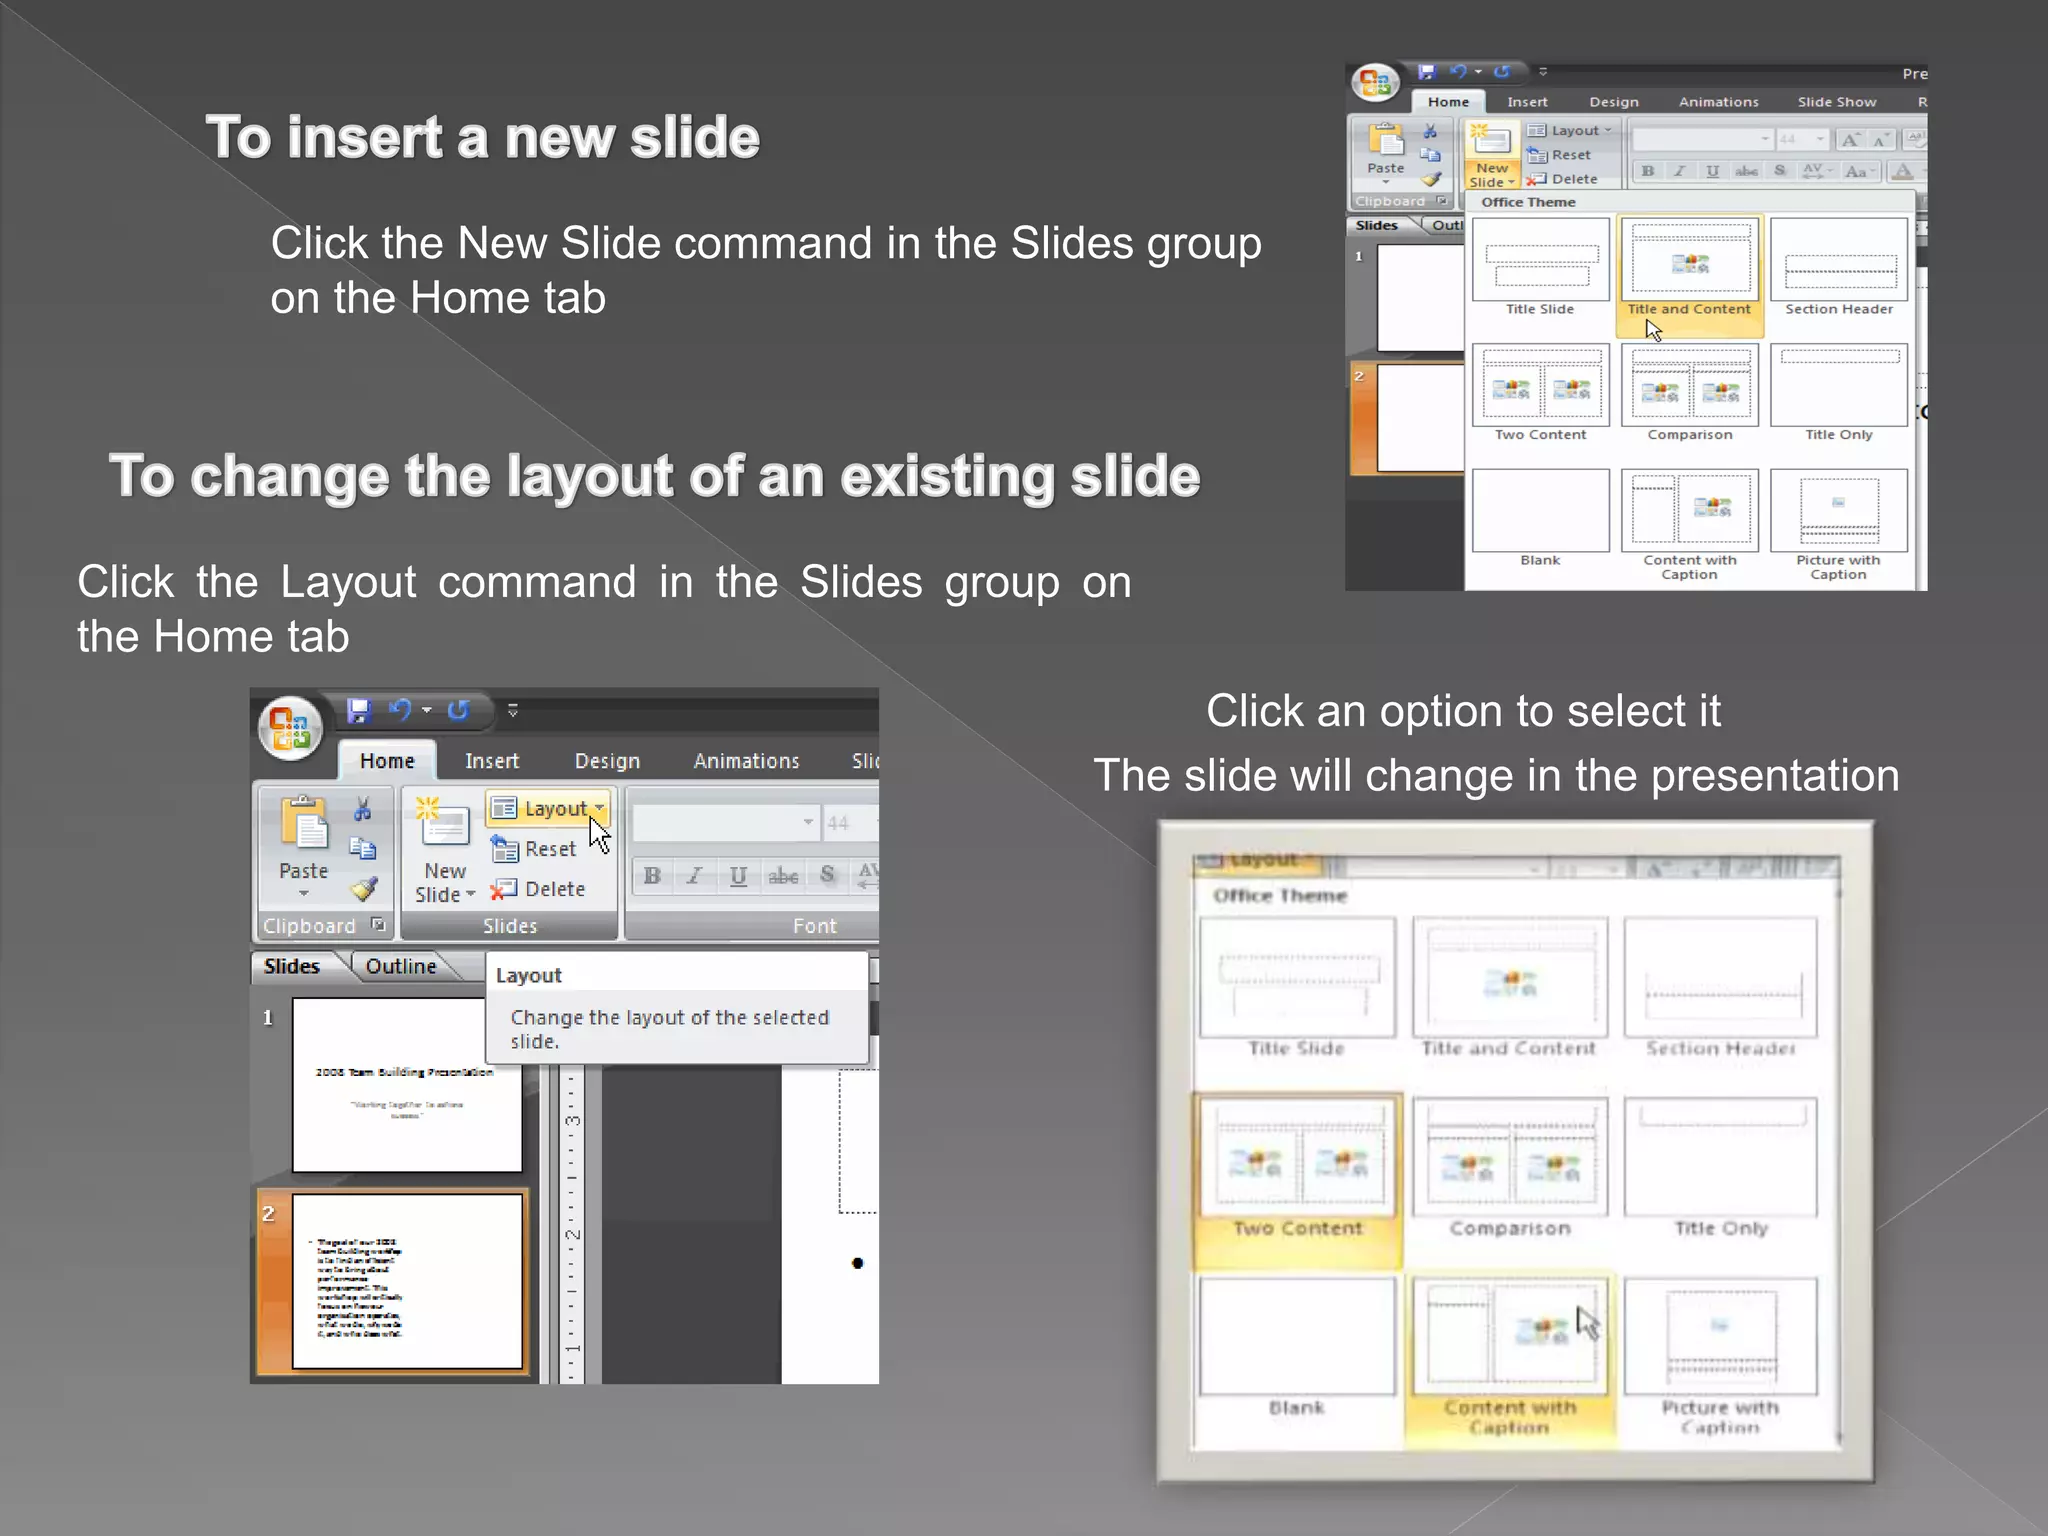
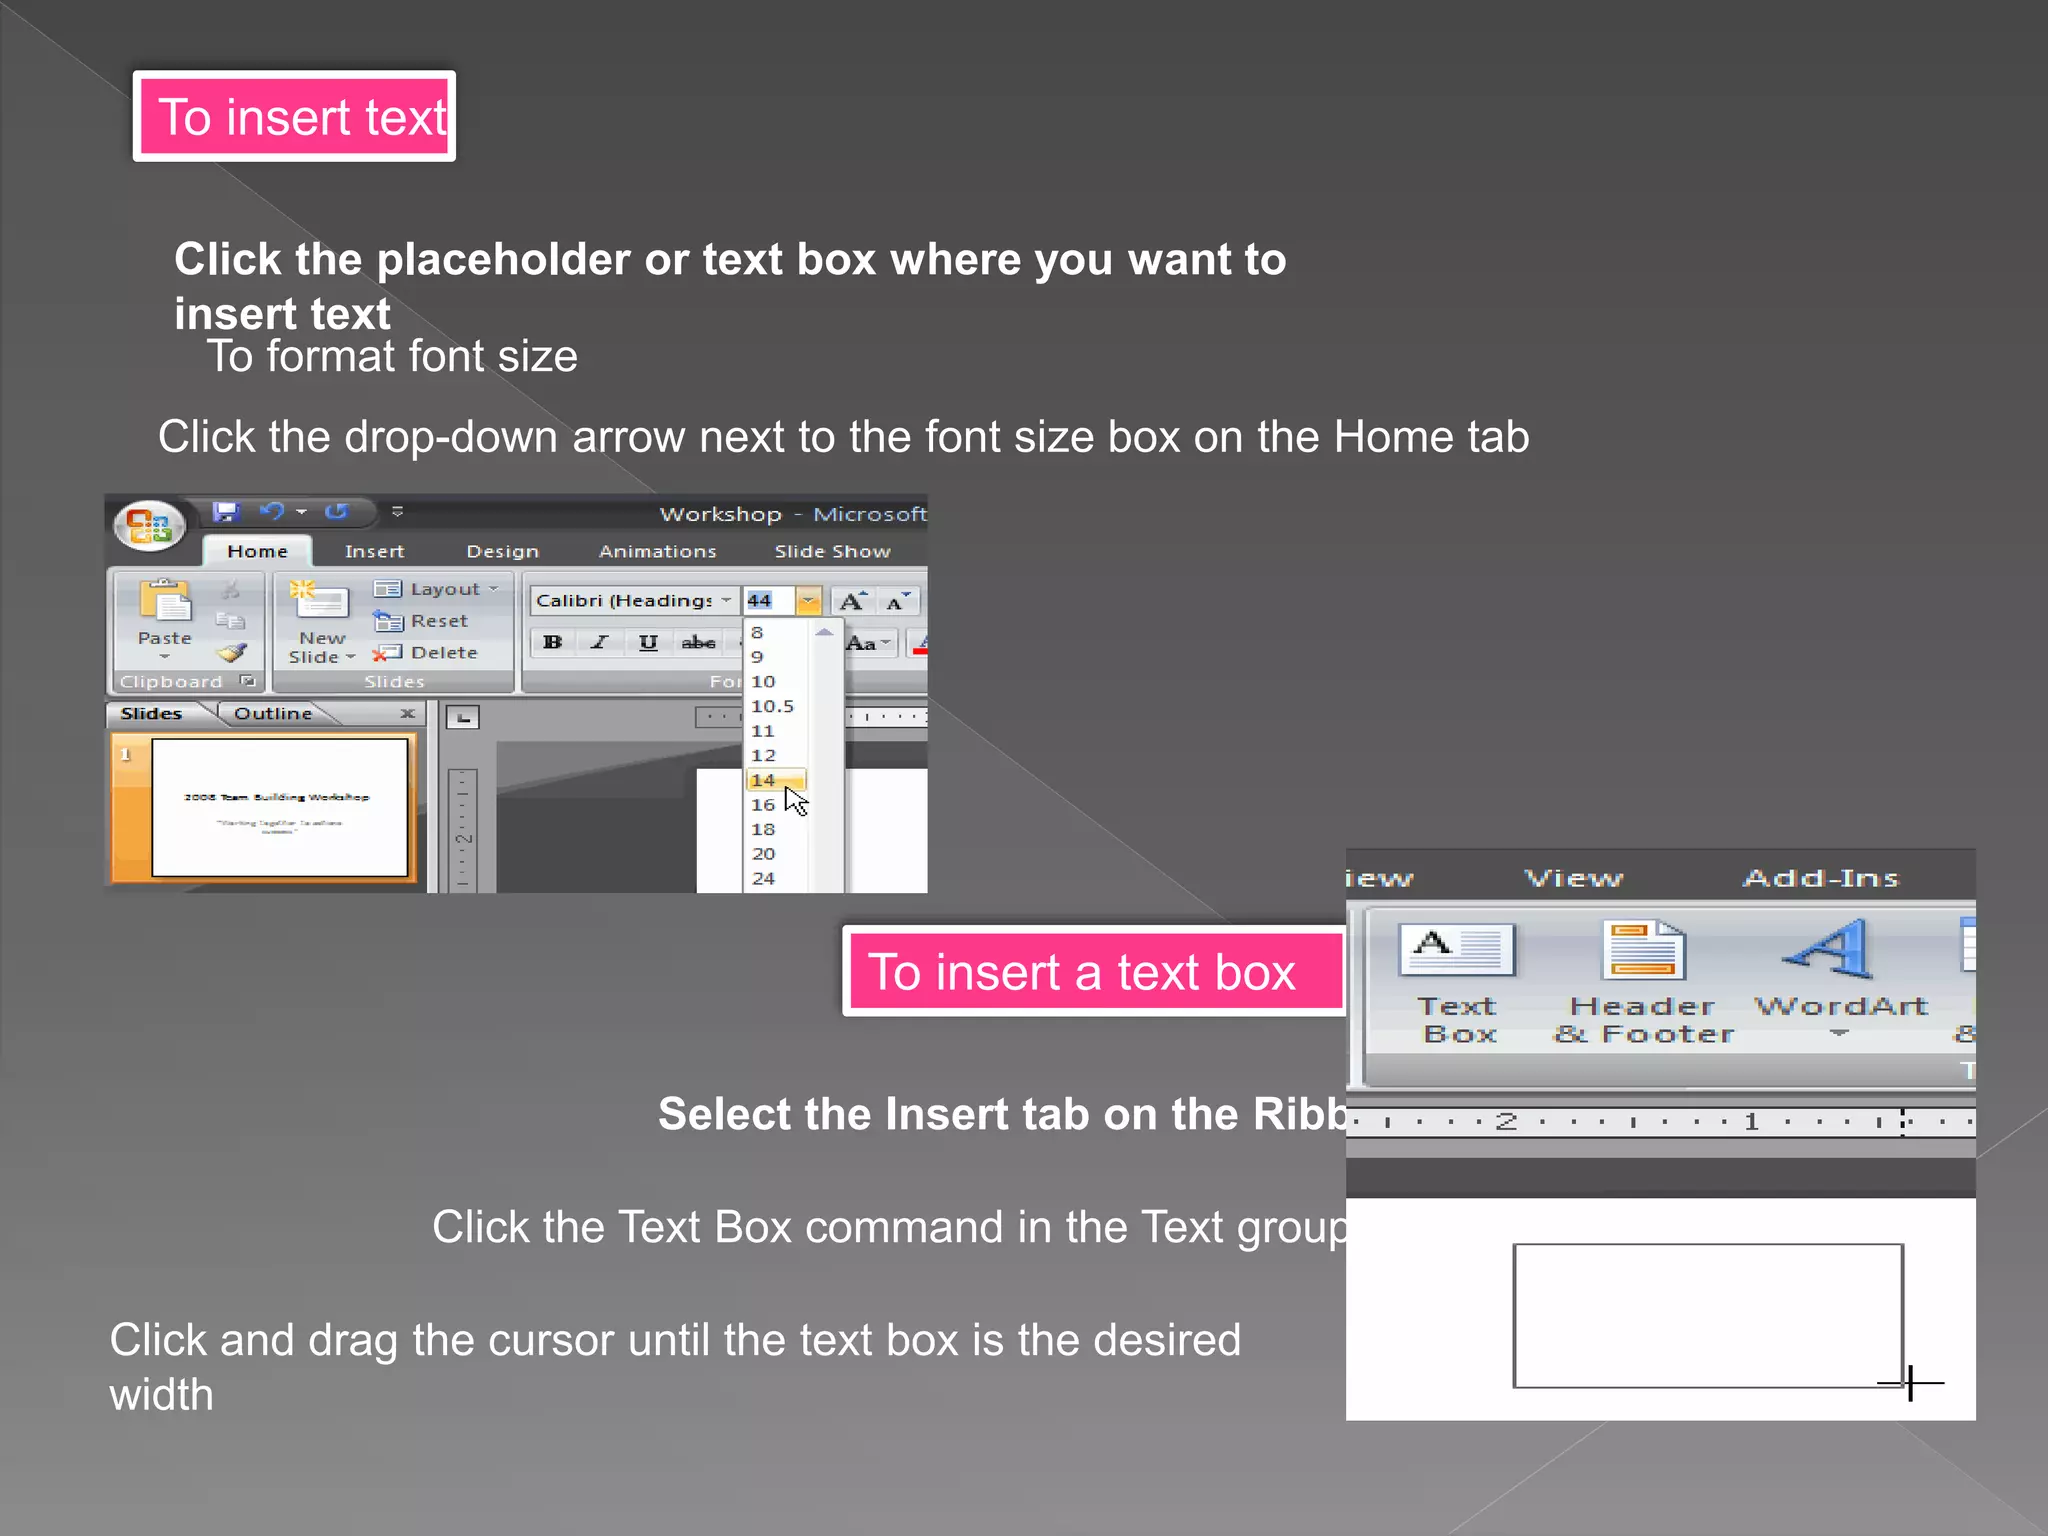
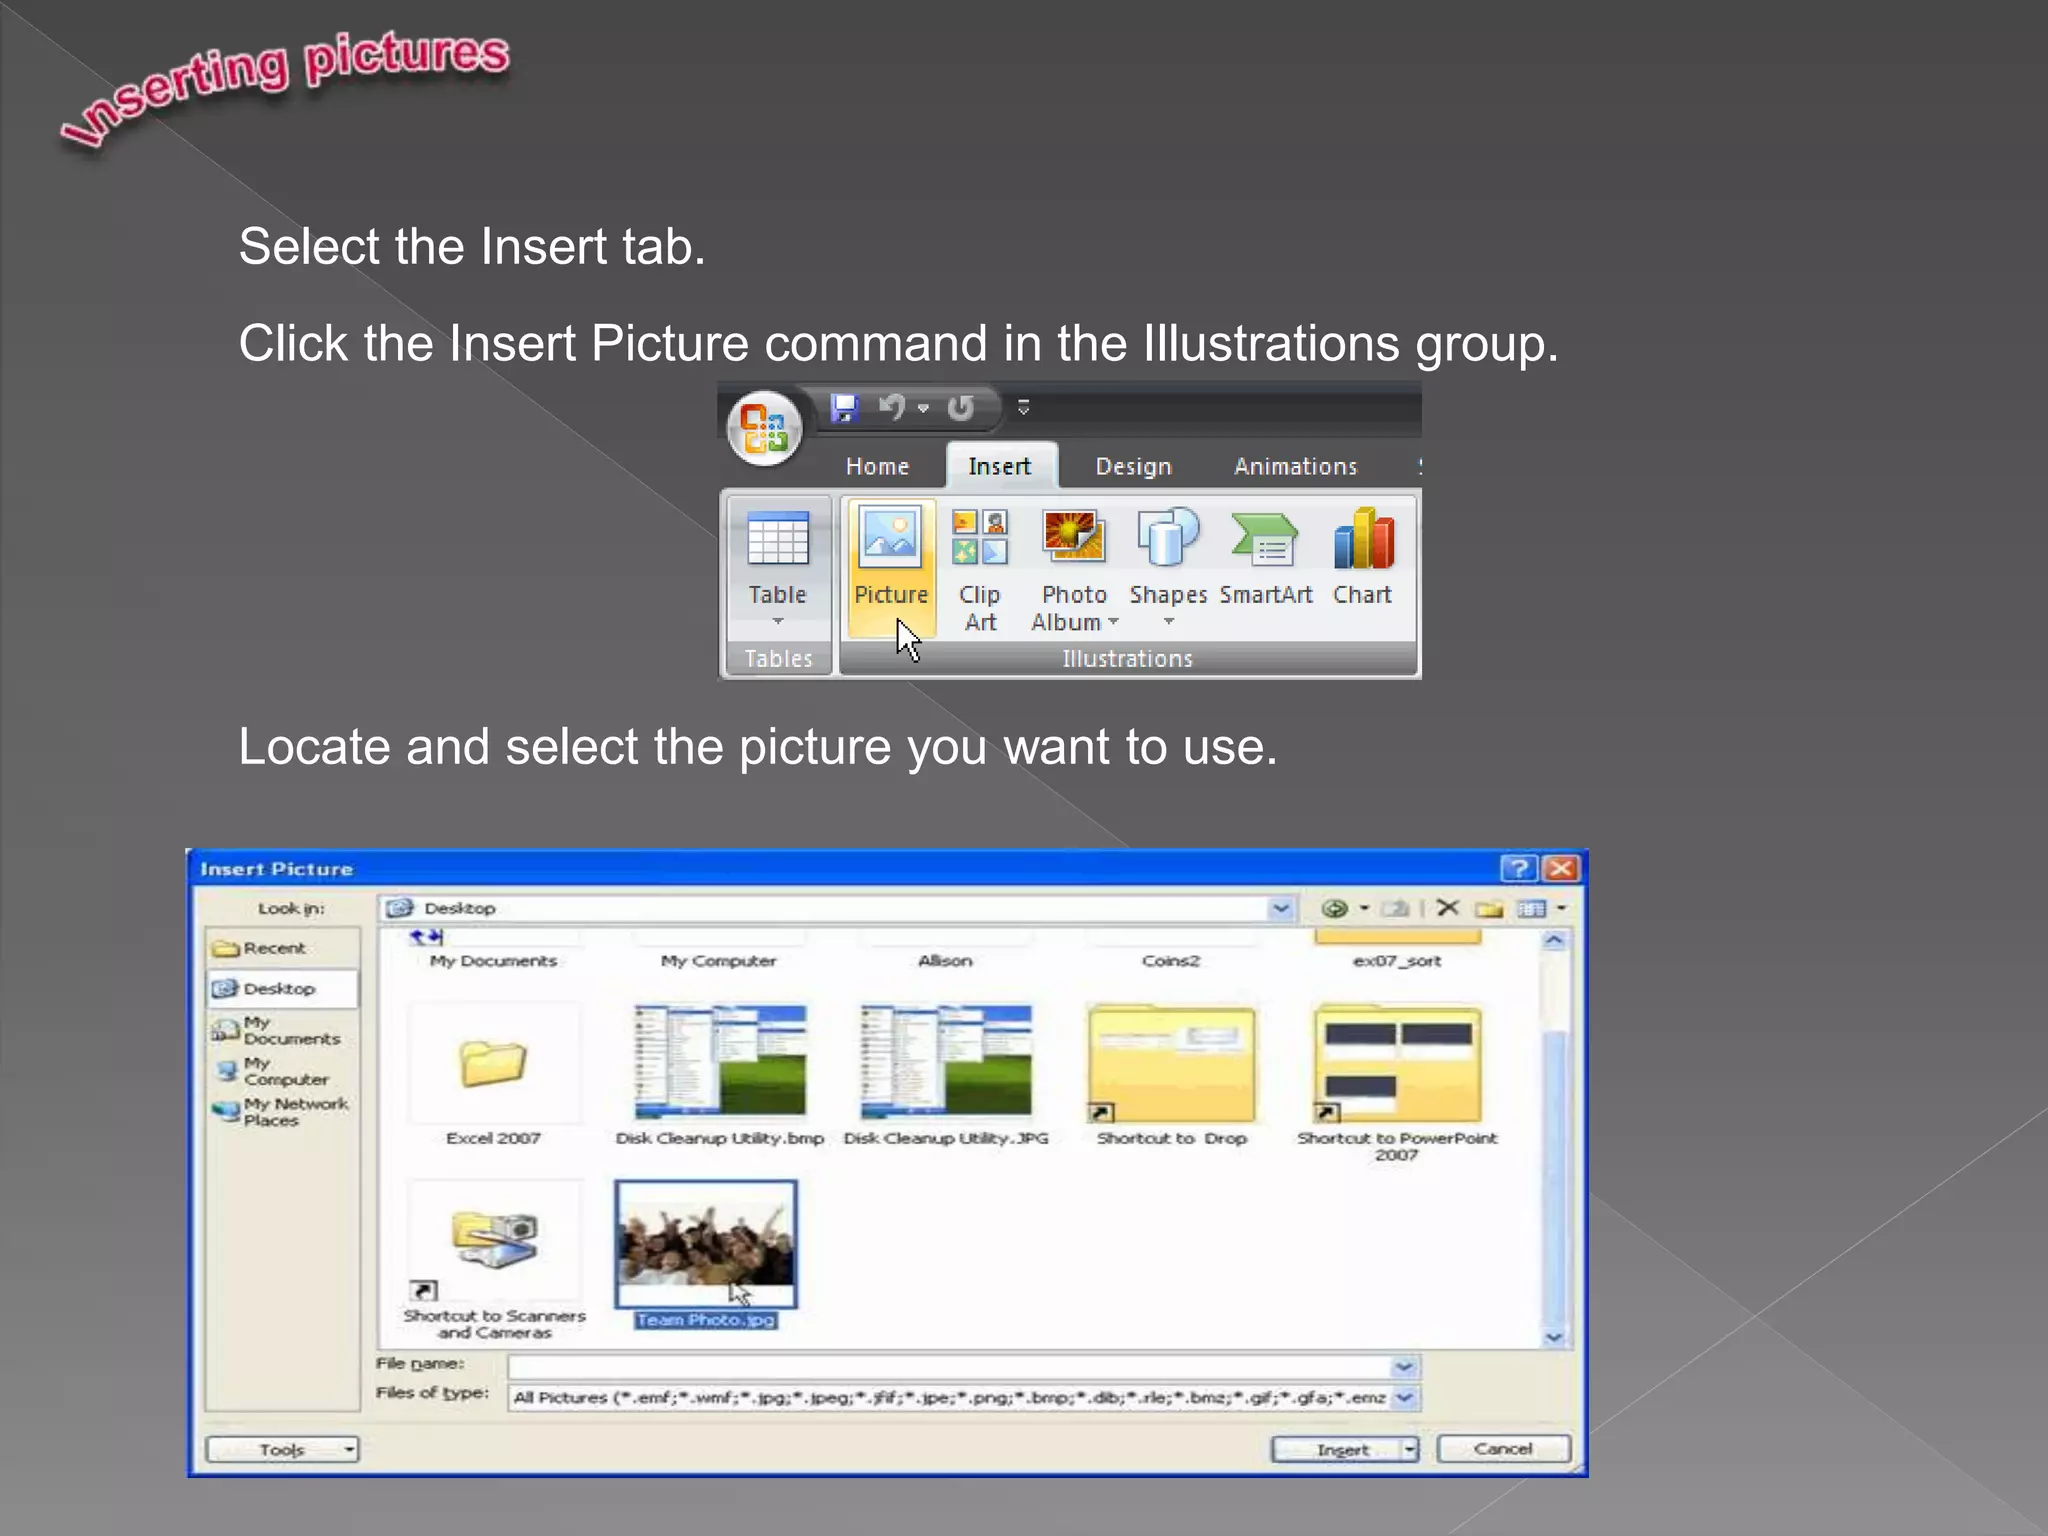
PowerPoint is a complete presentation graphics package.
It gives you everything you
need to produce a
professional-looking
presentation.
To convey a message or a story, you
break it down into slides. To convey a
message or a story, you break it
down into slides. Think of each slide
as a blank canvas for the pictures,
words, and shapes that will help you
build your story.
The tabbed Ribbon menu system is how you access the various PowerPoint
commands
Above the Ribbon in the upper-left corner is the Microsoft Office button
From here, you can access important options such as New, Save, Save As,
and Print
Creating new presentations
Click the Microsoft Office button, and choose New from
the menu
The New Presentation dialog box will appear.
Blank presentation is selected by default
Slide basics
Placeholders can contain many different items, including text, pictures, and
charts
Click the New Slide command in the Slides group
on the Home tab
Click the Layout command in the Slides group on
the Home tab
Click an option to select it
The slide will change in the presentation
To insert text
Click the placeholder or text box where you want to
insert text
To format font size
Click the drop-down arrow next to the font size box on the Home tab
To insert a text box
Select the Insert tab on the Ribbon
Click the Text Box command in the Text group
Click and drag the cursor until the text box is the desired
width
Select the Insert tab.
Click the Insert Picture command in the Illustrations group.
Locate and select the picture you want to use.
To resize a picture:
Select the picture.
Click one of the corner sizing handles
The cursor will turn into a cross
While holding down the mouse button, drag the sizing handle until the
image is the desired size
Release the mouse button
Modifying pictures
When you select a picture, a Picture Tools Format tab appears on the
Ribbon
To apply a picture style
Click the More drop-down arrow to display all the picture styles.
To change the shape of a picture
Click the Picture Shape icon
To insert a clip art from the Ribbon
Inserting Movies
Click the drop-down arrow on the Movie command in the Media Clips group
To preview the movie
Working with tables
Enter the number of table columns and rows in the
dialog box
Options on the Design tab
To insert a row
Click the Insert Chart command
Click and drag the scroll
bar to view the chart types,
or click a label on the left of
the dialog box to see a
specific chart style
Enter chart data
The data that appears
in the Excel
spreadsheet is
placeholder source
data you'll replace with
your own information.
To enter chart data
Select a cell in the Excel spreadsheet
Select any cells with placeholder data
remaining
To apply a custom animation effect
Click Add Effect in the task
pane to add an animation effect
to the selected text or object
Using Transitions
To apply a transition to one slide
Locate the Transition to This Slide group
To set slide transition speed
Power point 1

Power point 1

  • 2.
    PowerPoint is acomplete presentation graphics package. It gives you everything you need to produce a professional-looking presentation.
  • 3.
    To convey amessage or a story, you break it down into slides. To convey a message or a story, you break it down into slides. Think of each slide as a blank canvas for the pictures, words, and shapes that will help you build your story.
  • 4.
    The tabbed Ribbonmenu system is how you access the various PowerPoint commands Above the Ribbon in the upper-left corner is the Microsoft Office button From here, you can access important options such as New, Save, Save As, and Print
  • 5.
    Creating new presentations Clickthe Microsoft Office button, and choose New from the menu The New Presentation dialog box will appear. Blank presentation is selected by default
  • 6.
    Slide basics Placeholders cancontain many different items, including text, pictures, and charts
  • 7.
    Click the NewSlide command in the Slides group on the Home tab Click the Layout command in the Slides group on the Home tab Click an option to select it The slide will change in the presentation
  • 8.
    To insert text Clickthe placeholder or text box where you want to insert text To format font size Click the drop-down arrow next to the font size box on the Home tab To insert a text box Select the Insert tab on the Ribbon Click the Text Box command in the Text group Click and drag the cursor until the text box is the desired width
  • 9.
    Select the Inserttab. Click the Insert Picture command in the Illustrations group. Locate and select the picture you want to use.
  • 10.
    To resize apicture: Select the picture. Click one of the corner sizing handles The cursor will turn into a cross While holding down the mouse button, drag the sizing handle until the image is the desired size Release the mouse button
  • 11.
    Modifying pictures When youselect a picture, a Picture Tools Format tab appears on the Ribbon To apply a picture style Click the More drop-down arrow to display all the picture styles.
  • 12.
    To change theshape of a picture Click the Picture Shape icon To insert a clip art from the Ribbon
  • 13.
    Inserting Movies Click thedrop-down arrow on the Movie command in the Media Clips group To preview the movie
  • 14.
    Working with tables Enterthe number of table columns and rows in the dialog box Options on the Design tab To insert a row
  • 15.
    Click the InsertChart command Click and drag the scroll bar to view the chart types, or click a label on the left of the dialog box to see a specific chart style
  • 16.
    Enter chart data Thedata that appears in the Excel spreadsheet is placeholder source data you'll replace with your own information. To enter chart data Select a cell in the Excel spreadsheet Select any cells with placeholder data remaining
  • 17.
    To apply acustom animation effect Click Add Effect in the task pane to add an animation effect to the selected text or object
  • 18.
    Using Transitions To applya transition to one slide Locate the Transition to This Slide group To set slide transition speed