Photographic terminology is defined, including:
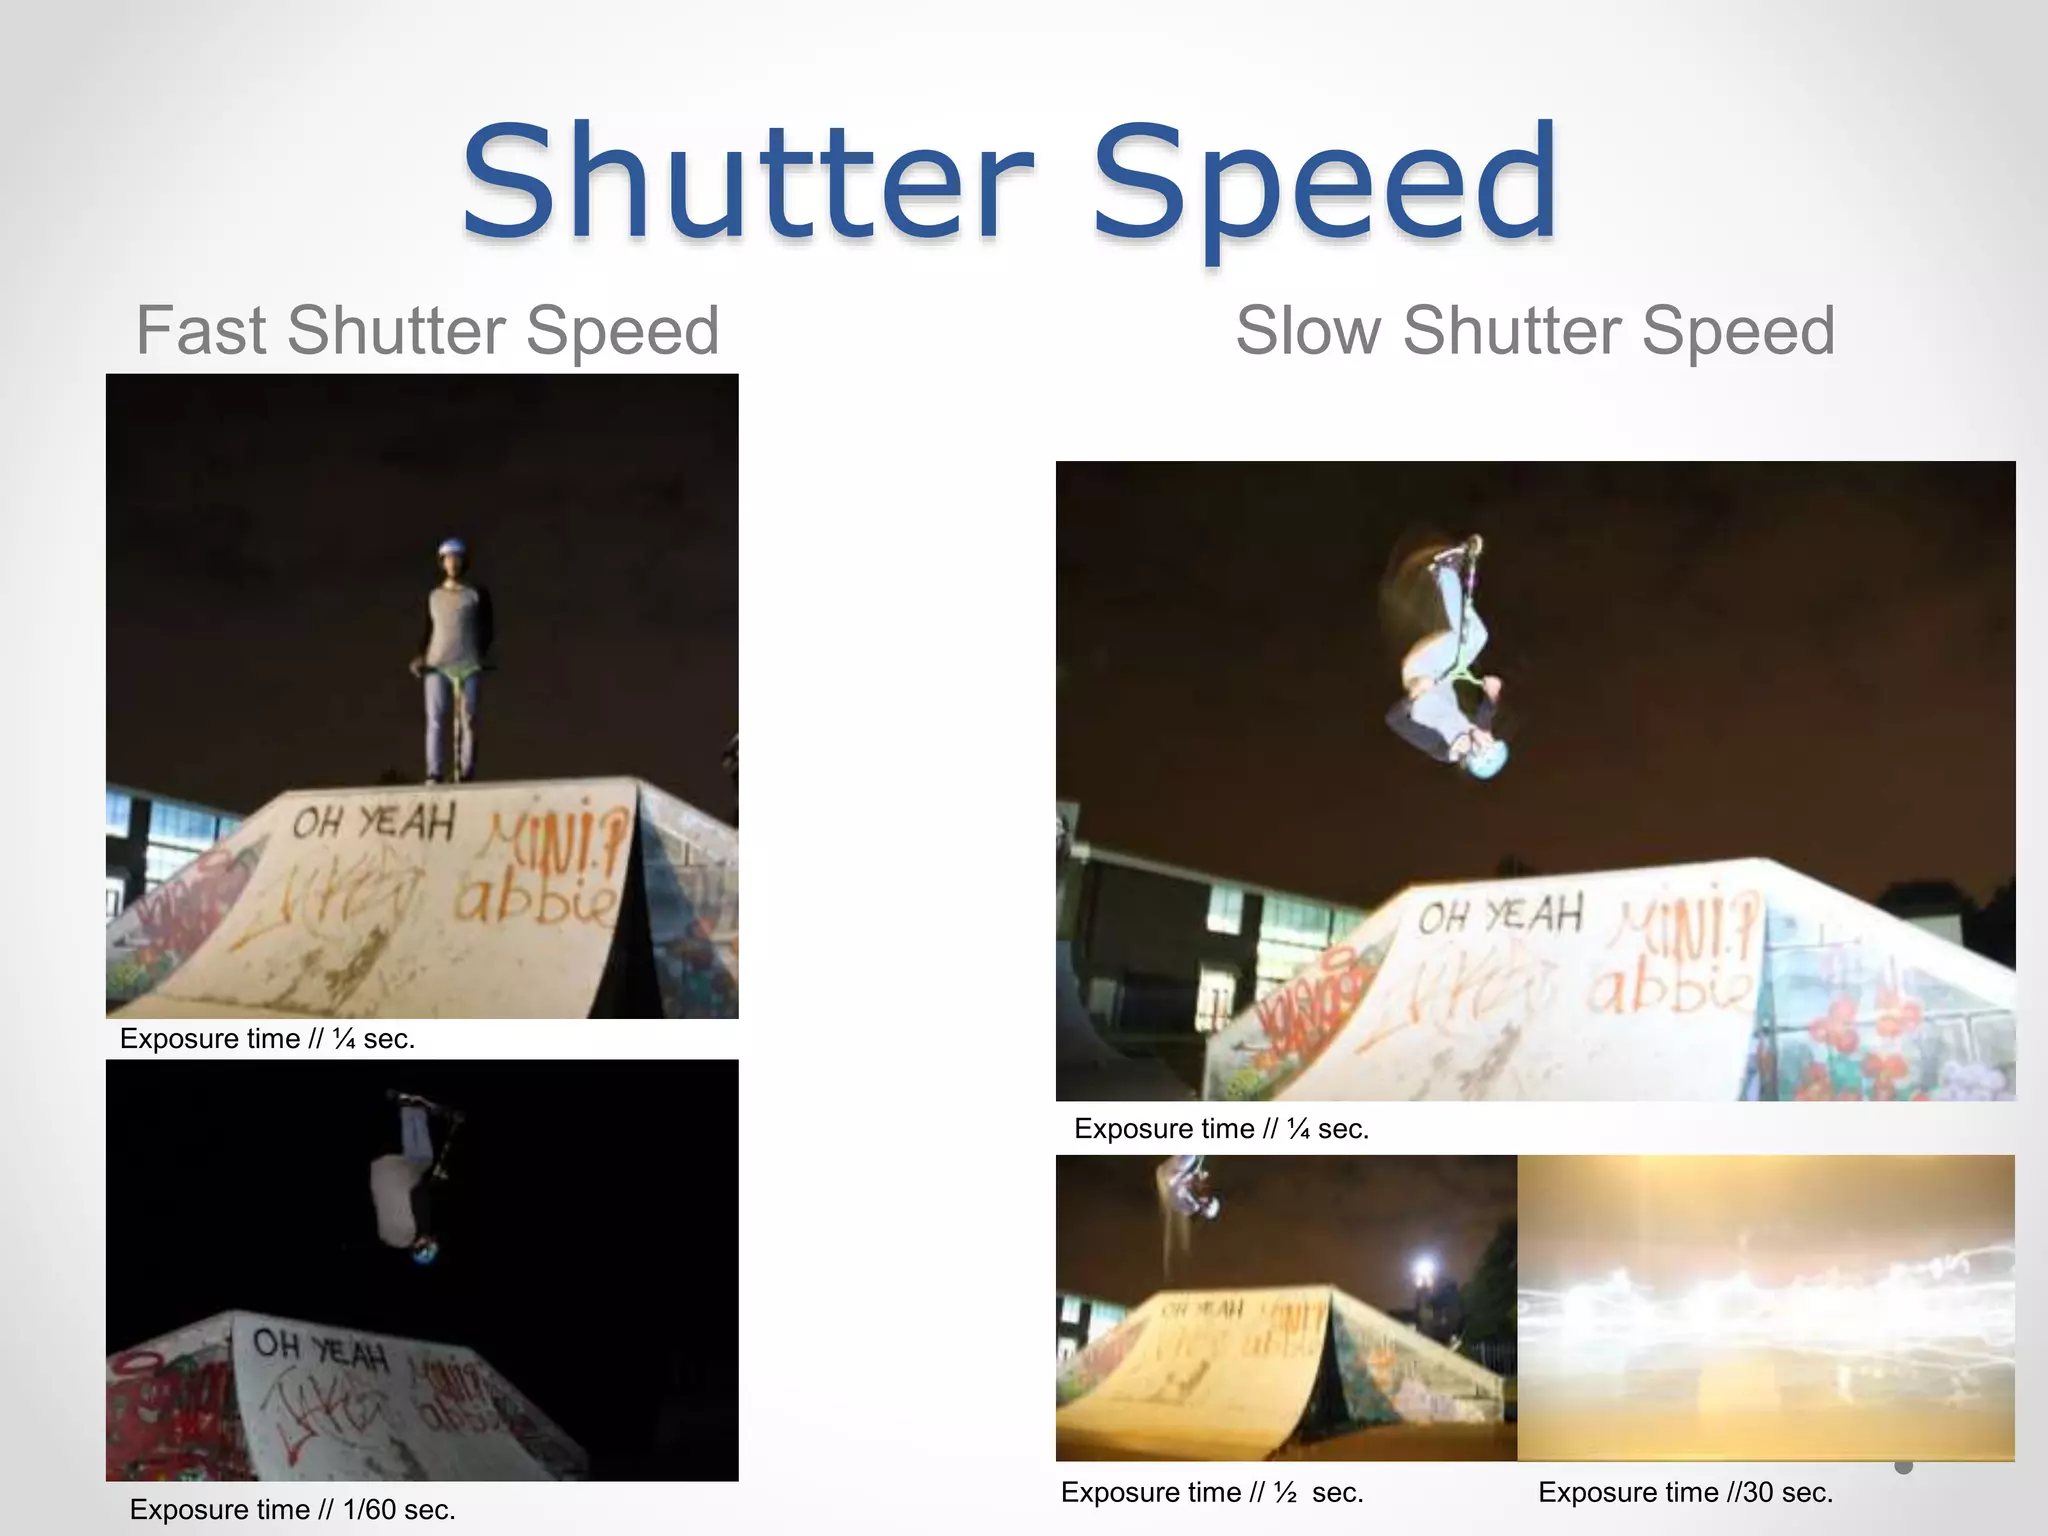
Shutter speed, which controls the length of time the camera lens is exposed to light. Longer exposures are needed for dark subjects while shorter exposures work better for bright subjects.
ISO, which controls the amount of light let into the lens and can affect white balance. Higher ISO settings let in more light for darker subjects.
Aperture and depth of field, where aperture controls the amount of light through adjustment of the lens opening. This affects depth of field, or what is in or out of focus in an image.
Manual exposure allows the user to set shutter speed, ISO, aperture, and other settings, while automatic exposure uses default camera settings that