The document describes the Mini-Romag generator designed by Jean-Louis Naudin. The generator uses magnetic fields and currents to produce electricity without external input. It must be started by an external motor for 42 seconds to establish the magnetic energy flow. Then it can generate 3.5 volts and 7 amps of free DC power to sustain itself. Detailed instructions and a parts list are provided to build the generator, which works by harnessing and recycling magnetic energy through its coils and permanent magnets.
MEMS relays provide reliable and inexpensive solutions to operate a circuit that requires a large current. We provide the design and fabrication of a magnetic relay that uses a space-saving coil capable of producing an actuation force of 1 µN and a stroke of 1 mm. The method of action is a cantilever beam that deflects in-plane with the wafer. The device should require less than 1.5 mA to bring the beam into contact with the opposing part, effectively turning the switch on. The coil is made of copper and the cantilever beam is made of a Ni/Fe permalloy. The relay is fabricated with a sacrificial layer underneath the beam, so that when it is removed, the beam can actuate. A layer of SU-8 between the magnetic core and conductive coil is used to provide electrical isolation. Our fabrication process is CMOS compatible.
A través de estas rutas podremos acercarnos, conocer y descubrir los Monumentos, Castillos y Fortificaciones, más importantes del antiguo Reyno.
En nuestra visita a estas joyas arquitectónicas, que tanta belleza, historia y enigmas esconden, tendremos el placer de poder, ver, conocer y palpar, como eran los muros de las fortalezas.
A su vez también, tendremos la oportunidad de sentir el placer de estar en las antiguas Almenas y Torreones, que componen los castillos y fortalezas.
Dependiendo de nuestra imaginación, podremos hacer una regresión, de cómo era la vida en la época medieval, tanto de los reyes, princesas, caballeros, etc.
Contemplaremos estas espectaculares fortificaciones, que en aquella época, era lo más lujoso y espectacular, donde abundaba, el dinero, la comida, las joyas, el placer y las conspiraciones.
El viejo Reyno de Navarra, puede presumir de haber tenido un centenar de fortificaciones defensivas, durante el periodo de la Edad Media. A su vez Navarra es de las pocas CCAA, que más fortificaciones tiene, a pesar de haber transcurrido más de 500 años.
La Ruta de los Castillos y Fortificaciones, propone a los viajeros, poder visitar unos 20 Fortificaciones, Baluartes y Castillos. A su vez Navarra es de las pocas CCAA, que más fortificaciones tiene, a pesar de haber transcurrido más de 5 siglos.
We have designed a Wind Generator as our final year Engineering project. For information please go through the presentation or else you can contact me. Feel free to give your valued suggestions
Searl-Effect Generator Design and Manufacturing Procedure
In this article, the design and manufacturing procedure for a Searl-Effect Generator (SEG) will be described. The SEG is a device that generates electricity using principles of magnetism and rotation. The generator consists of three main parts: the rotor, the stator, and the housing. The rotor is a metal disc that rotates around a stationary stator. The stator is made up of two electromagnets that create a rotating magnetic field. The housing holds everything together and provides a place for the wiring to connect to the generator.
The first step in building the SEG is to create the rotor. The rotor is made from a metal disc that is about 12 inches in diameter. A hole must be drilled in the center of the disc so that it can fit over the axle of the motor.
“Electricity Generation by Universal Neodymium Permanent Magnetic Rotor by Re...IJERA Editor
In this paper construction of universal neodymium permanent magnetic rotor without any electromagnetic core, due to this we will reduce 38% of core losses and increase the stability of the system efficiency. Now a day’s electricity generation from various sources like hydro, steam, solar, nuclear etc. but these sources have some merits & demerits. By these sources have more demerits as well as its have more losses, so we not fulfill the costumer/industrial requirements. For alternate arrangement we have been innovated this system
1. Cancelling Earth’s Magnetic Field ABSTRACT PURPOSE Wayne State Department of Chemistry Nadim Bari
Canceling Earth’s magnetic field will help with the advancements of scientific innovation. It will make sensitive experiments more realistic and possible. For example, if a scientist were to be conducting an experiment using lasers to produce change particles, the force of the Earth’s magnetic field may be strong enough to cause the particles to change directions and miss the detector. Therefore, the purpose of this experiment was to cancel Earth’s magnetic field. To cancel Earth’s magnetic field, a coil consisting of 38 loops and is 1 meter in diameter was built. The coil itself was made from copper wire that is 2 mm thick. This coil was charged with a current of 1.214 amps and had a voltage of .768 volts. The resistant of the coil is .64 ohms. The results of detecting the Earth’s Magnetic field opposed the initial thought the Earth’s magnetic field was perpendicular to the Earth’s surface. Once the coil was charged with the correct current and voltage an angle of correction had to be determined via a 3-D magnetic probe placed in the center of the coil. A 3-D magnetic probe works just like a compass. It points the cardinal directions according to Earth’s magnetic field. The cancelation of the field was indicated by the probe not indicating a magnetic field presence inside the coil while registering a field outside the coil. Thus, it is concluded that no magnetic field exists within the coil. Therefore, Earth’s magnetic field has been successfully cancelled. The scope of this project is to outline the construction of the device and discuss design enhancement while effectively cancelling Earth’s magnetic field. This will possibly bring forth new and improved scientific laboratories. These new laboratories may be customized for future experiments that can gradually influence and expand scientific ideas.
Zero point energy conversion for selfsustained generationMocLan2
In this paper zero point energy conversion is proposed for self-sustained generator applications. Our entire
universe balance is based on a magnetic energy lying in a minimum energy point called zero-point. By using an energy
conversion machine magneto-gravitic link can be made zero-point energy by taking kinetic energy form i.e. rotational
motion .Kinetic energy link is constructed using a special permanent magnet arrangement and it is independent of
electricity . It uses perpetual motion and the kinetic energy is later converted by using a special type low speed axial flux
alternator, comprising two rotating discs in-between which the coil is placed from which the power is drawn .
LF Energy Webinar: Electrical Grid Modelling and Simulation Through PowSyBl -...DanBrown980551
Do you want to learn how to model and simulate an electrical network from scratch in under an hour?
Then welcome to this PowSyBl workshop, hosted by Rte, the French Transmission System Operator (TSO)!
During the webinar, you will discover the PowSyBl ecosystem as well as handle and study an electrical network through an interactive Python notebook.
PowSyBl is an open source project hosted by LF Energy, which offers a comprehensive set of features for electrical grid modelling and simulation. Among other advanced features, PowSyBl provides:
- A fully editable and extendable library for grid component modelling;
- Visualization tools to display your network;
- Grid simulation tools, such as power flows, security analyses (with or without remedial actions) and sensitivity analyses;
The framework is mostly written in Java, with a Python binding so that Python developers can access PowSyBl functionalities as well.
What you will learn during the webinar:
- For beginners: discover PowSyBl's functionalities through a quick general presentation and the notebook, without needing any expert coding skills;
- For advanced developers: master the skills to efficiently apply PowSyBl functionalities to your real-world scenarios.
Essentials of Automations: The Art of Triggers and Actions in FMESafe Software
In this second installment of our Essentials of Automations webinar series, we’ll explore the landscape of triggers and actions, guiding you through the nuances of authoring and adapting workspaces for seamless automations. Gain an understanding of the full spectrum of triggers and actions available in FME, empowering you to enhance your workspaces for efficient automation.
We’ll kick things off by showcasing the most commonly used event-based triggers, introducing you to various automation workflows like manual triggers, schedules, directory watchers, and more. Plus, see how these elements play out in real scenarios.
Whether you’re tweaking your current setup or building from the ground up, this session will arm you with the tools and insights needed to transform your FME usage into a powerhouse of productivity. Join us to discover effective strategies that simplify complex processes, enhancing your productivity and transforming your data management practices with FME. Let’s turn complexity into clarity and make your workspaces work wonders!
GridMate - End to end testing is a critical piece to ensure quality and avoid...ThomasParaiso2
End to end testing is a critical piece to ensure quality and avoid regressions. In this session, we share our journey building an E2E testing pipeline for GridMate components (LWC and Aura) using Cypress, JSForce, FakerJS…
20 Comprehensive Checklist of Designing and Developing a WebsitePixlogix Infotech
Dive into the world of Website Designing and Developing with Pixlogix! Looking to create a stunning online presence? Look no further! Our comprehensive checklist covers everything you need to know to craft a website that stands out. From user-friendly design to seamless functionality, we've got you covered. Don't miss out on this invaluable resource! Check out our checklist now at Pixlogix and start your journey towards a captivating online presence today.
Enchancing adoption of Open Source Libraries. A case study on Albumentations.AIVladimir Iglovikov, Ph.D.
Presented by Vladimir Iglovikov:
- https://www.linkedin.com/in/iglovikov/
- https://x.com/viglovikov
- https://www.instagram.com/ternaus/
This presentation delves into the journey of Albumentations.ai, a highly successful open-source library for data augmentation.
Created out of a necessity for superior performance in Kaggle competitions, Albumentations has grown to become a widely used tool among data scientists and machine learning practitioners.
This case study covers various aspects, including:
People: The contributors and community that have supported Albumentations.
Metrics: The success indicators such as downloads, daily active users, GitHub stars, and financial contributions.
Challenges: The hurdles in monetizing open-source projects and measuring user engagement.
Development Practices: Best practices for creating, maintaining, and scaling open-source libraries, including code hygiene, CI/CD, and fast iteration.
Community Building: Strategies for making adoption easy, iterating quickly, and fostering a vibrant, engaged community.
Marketing: Both online and offline marketing tactics, focusing on real, impactful interactions and collaborations.
Mental Health: Maintaining balance and not feeling pressured by user demands.
Key insights include the importance of automation, making the adoption process seamless, and leveraging offline interactions for marketing. The presentation also emphasizes the need for continuous small improvements and building a friendly, inclusive community that contributes to the project's growth.
Vladimir Iglovikov brings his extensive experience as a Kaggle Grandmaster, ex-Staff ML Engineer at Lyft, sharing valuable lessons and practical advice for anyone looking to enhance the adoption of their open-source projects.
Explore more about Albumentations and join the community at:
GitHub: https://github.com/albumentations-team/albumentations
Website: https://albumentations.ai/
LinkedIn: https://www.linkedin.com/company/100504475
Twitter: https://x.com/albumentations
Unlock the Future of Search with MongoDB Atlas_ Vector Search Unleashed.pdfMalak Abu Hammad
Discover how MongoDB Atlas and vector search technology can revolutionize your application's search capabilities. This comprehensive presentation covers:
* What is Vector Search?
* Importance and benefits of vector search
* Practical use cases across various industries
* Step-by-step implementation guide
* Live demos with code snippets
* Enhancing LLM capabilities with vector search
* Best practices and optimization strategies
Perfect for developers, AI enthusiasts, and tech leaders. Learn how to leverage MongoDB Atlas to deliver highly relevant, context-aware search results, transforming your data retrieval process. Stay ahead in tech innovation and maximize the potential of your applications.
#MongoDB #VectorSearch #AI #SemanticSearch #TechInnovation #DataScience #LLM #MachineLearning #SearchTechnology
Epistemic Interaction - tuning interfaces to provide information for AI supportAlan Dix
Paper presented at SYNERGY workshop at AVI 2024, Genoa, Italy. 3rd June 2024
https://alandix.com/academic/papers/synergy2024-epistemic/
As machine learning integrates deeper into human-computer interactions, the concept of epistemic interaction emerges, aiming to refine these interactions to enhance system adaptability. This approach encourages minor, intentional adjustments in user behaviour to enrich the data available for system learning. This paper introduces epistemic interaction within the context of human-system communication, illustrating how deliberate interaction design can improve system understanding and adaptation. Through concrete examples, we demonstrate the potential of epistemic interaction to significantly advance human-computer interaction by leveraging intuitive human communication strategies to inform system design and functionality, offering a novel pathway for enriching user-system engagements.
DevOps and Testing slides at DASA ConnectKari Kakkonen
My and Rik Marselis slides at 30.5.2024 DASA Connect conference. We discuss about what is testing, then what is agile testing and finally what is Testing in DevOps. Finally we had lovely workshop with the participants trying to find out different ways to think about quality and testing in different parts of the DevOps infinity loop.
How to Get CNIC Information System with Paksim Ga.pptxdanishmna97
Pakdata Cf is a groundbreaking system designed to streamline and facilitate access to CNIC information. This innovative platform leverages advanced technology to provide users with efficient and secure access to their CNIC details.
Encryption in Microsoft 365 - ExpertsLive Netherlands 2024Albert Hoitingh
In this session I delve into the encryption technology used in Microsoft 365 and Microsoft Purview. Including the concepts of Customer Key and Double Key Encryption.
Removing Uninteresting Bytes in Software FuzzingAftab Hussain
Imagine a world where software fuzzing, the process of mutating bytes in test seeds to uncover hidden and erroneous program behaviors, becomes faster and more effective. A lot depends on the initial seeds, which can significantly dictate the trajectory of a fuzzing campaign, particularly in terms of how long it takes to uncover interesting behaviour in your code. We introduce DIAR, a technique designed to speedup fuzzing campaigns by pinpointing and eliminating those uninteresting bytes in the seeds. Picture this: instead of wasting valuable resources on meaningless mutations in large, bloated seeds, DIAR removes the unnecessary bytes, streamlining the entire process.
In this work, we equipped AFL, a popular fuzzer, with DIAR and examined two critical Linux libraries -- Libxml's xmllint, a tool for parsing xml documents, and Binutil's readelf, an essential debugging and security analysis command-line tool used to display detailed information about ELF (Executable and Linkable Format). Our preliminary results show that AFL+DIAR does not only discover new paths more quickly but also achieves higher coverage overall. This work thus showcases how starting with lean and optimized seeds can lead to faster, more comprehensive fuzzing campaigns -- and DIAR helps you find such seeds.
- These are slides of the talk given at IEEE International Conference on Software Testing Verification and Validation Workshop, ICSTW 2022.
In the rapidly evolving landscape of technologies, XML continues to play a vital role in structuring, storing, and transporting data across diverse systems. The recent advancements in artificial intelligence (AI) present new methodologies for enhancing XML development workflows, introducing efficiency, automation, and intelligent capabilities. This presentation will outline the scope and perspective of utilizing AI in XML development. The potential benefits and the possible pitfalls will be highlighted, providing a balanced view of the subject.
We will explore the capabilities of AI in understanding XML markup languages and autonomously creating structured XML content. Additionally, we will examine the capacity of AI to enrich plain text with appropriate XML markup. Practical examples and methodological guidelines will be provided to elucidate how AI can be effectively prompted to interpret and generate accurate XML markup.
Further emphasis will be placed on the role of AI in developing XSLT, or schemas such as XSD and Schematron. We will address the techniques and strategies adopted to create prompts for generating code, explaining code, or refactoring the code, and the results achieved.
The discussion will extend to how AI can be used to transform XML content. In particular, the focus will be on the use of AI XPath extension functions in XSLT, Schematron, Schematron Quick Fixes, or for XML content refactoring.
The presentation aims to deliver a comprehensive overview of AI usage in XML development, providing attendees with the necessary knowledge to make informed decisions. Whether you’re at the early stages of adopting AI or considering integrating it in advanced XML development, this presentation will cover all levels of expertise.
By highlighting the potential advantages and challenges of integrating AI with XML development tools and languages, the presentation seeks to inspire thoughtful conversation around the future of XML development. We’ll not only delve into the technical aspects of AI-powered XML development but also discuss practical implications and possible future directions.
UiPath Test Automation using UiPath Test Suite series, part 5DianaGray10
Welcome to UiPath Test Automation using UiPath Test Suite series part 5. In this session, we will cover CI/CD with devops.
Topics covered:
CI/CD with in UiPath
End-to-end overview of CI/CD pipeline with Azure devops
Speaker:
Lyndsey Byblow, Test Suite Sales Engineer @ UiPath, Inc.
Elizabeth Buie - Older adults: Are we really designing for our future selves?
Perpetual energy generatori
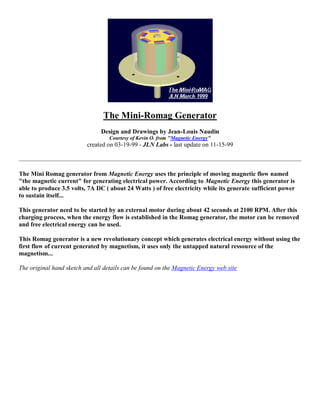
1. The Mini-Romag Generator
Design and Drawings by Jean-Louis Naudin
Courtesy of Kevin O. from "Magnetic Energy"
created on 03-19-99 - JLN Labs - last update on 11-15-99
The Mini Romag generator from Magnetic Energy uses the principle of moving magnetic flow named
"the magnetic current" for generating electrical power. According to Magnetic Energy this generator is
able to produce 3.5 volts, 7A DC ( about 24 Watts ) of free electricity while its generate sufficient power
to sustain itself...
This generator need to be started by an external motor during about 42 seconds at 2100 RPM. After this
charging process, when the energy flow is established in the Romag generator, the motor can be removed
and free electrical energy can be used.
This Romag generator is a new revolutionary concept which generates electrical energy without using the
first flow of current generated by magnetism, it uses only the untapped natural ressource of the
magnetism...
The original hand sketch and all details can be found on the Magnetic Energy web site
2. HOW THE UNIT WORKS :
The here disclosed 3½ volt, 7 amperage magnet motor/generator must be charged up by driving the main
shaft at 2100 RPM for 42 seconds. This charging process manifests as magnetic energy within the six coils
of copper wire, the copper tube supporting these coils and the copper coated steel wires wrapped around
the magnets. This charging is accomplished while the six coil connection wires, Part #22, are making
contact and setting up their alternating magnetic poles. After the 42 second charging time one of these
coil connection wires must be opened and this circuit again completed through an energy draw at what
could be called 7 amps. See load Part #23. As current is drawn from the six coils, this draw sets up
magnetic poles which are a response between the rotor magnets and the coils. This response then causes
the main shaft to be rotated by the 12 permanent magnets as they attract and build a release field. Then
the driver unit (hand crank) is disconnected allowing the unit to rotate with the load being the activating
driving force.
The fields of the magnets must be maintained during their spin movement. These magnetic fields which
are encapsulated are achieved by the wiring system. The attract/release of the magnets is a function of
several factors. First, the magnets attract field between north and south is completed by taking a crossing
path of attract (top of one row to bottom of next, etc.). This action has the effect of fields blending into
fields, and a hold—back attract does not happen. Each time a magnet set passes a coil an interchange of
like energy between the coils around the magnets and the generating coils sets—up neutral polarities
which are ‘release fields’ and prevents a hold—back attract.
One important magnetic assembly is the circuitry which allows this interchange of energy. This is a
recycling of a stabilized magnetic/electro energy not electro/magnetic because the field of force is not a
case of electrical input, an input that created the magnetic energy, but rather a build—up of magnetic
energy which caused an energy thrust.
In further defining the workings of this unit it is important to understand that although electrical and
magnetic (energy) work with similar attitudes, the manner in which they work sets—up a differing energy
3. effect. One of these effects is that magnetic structures want to share their f1ow, compatible to the
Universal Force, while electrical flow argues, (short circuits, sparks, etc.). Because of this fact the working
responses (within the unit) take place, how they are needed, and when they are needed which results in a
functioning unit. There is a continuous transmutation process taking place whereby magnetic energy
continually generates an energy that manifests a measurable current.
4.
5. PARTS LIST AND CONSTRUCTION DETAILS
When building your first unit we suggest using the stated materials.
1) Aluminum Base Plate
2) Sleave Bearing, 1" long, ½" inside diameter, oil impregnated brass.
3) 4" long by ½" diameter Brass Shaft
4) Brass 2" diameter Rotor, 1—3/4" long
5) Six rotor slots, each 1—3/4" long by .260 deep by 23/32" wide. These slots are spaced exactly 60
degrees apart.
6. 6) One slot cut in center of Brass Rotor, 360 degrees around, ¼" wide by 5/16" deep.
7) 12 slots (formed from the six slots as the 360 degree cut is made). Each slot is lined with .010 thick mica
insulation.
8) A total of 228 pieces of U—shaped .040 thick copper coated steel wires. Each slot (Part #7) has 19
pieces of these wires fitted into the Mica, thus these wires do not contact the Brass rotor. The lead edge of
these wires is flush with the Rotor’s outer surface and the trail edge protrudes 1/8" above the Rotor’s outer
diameter.
9) Eleven complete turns of .032 thick copper coated steel wire. These 11 turns or ‘wraps’ accumulate to
3/8" wide and the same pattern is placed around all 12 magnets. When placed into the bent wires #8, they
are a snug fit making firm contact.
10) Are 12 pieces of .005" thick mylar insulation inserted into the cores of the wires #9.
11) 12 permanent magnets, insulated with the mylar, to not contact wires # 9. These magnets measure
3/4" long, 5/8" wide, 3/8" thick and are made of a special composition and strength. Alnico 4, M—60; 12
AL, 28 Ni, 5 Co, bal Fe, Isotropic permanent magnet material cooled in magnetic field, Cast 9100 TS. 450
Brin, 2.2 Peak energy product. When inserted in the rotor the outer faces of these 12 magnets are not to be
machined to a radius. The center of these magnets pass the center of the coils with 3/32" clearance. The
edges, where the wires are wrapped, pass 1/32" away from the coils. This ‘changing magnet spacing’ aids
in not only the release cycle but also contributes to rotational movement. (Sharp magnet edges which are
facing the coils are to be sanded to a small smooth radius.)
12) Magnet polarity placement into Rotor.
13) Connection pattern for wires wrapped around magnets. The 12 wire wraps are divided into two
sections, upper and lower of six each. There are no connections between these sections. The magnetic
flow direction between the upper 6 wraps and the lower 6 wraps is attained by the ‘flow direction’ as
shown in Figure 5. Viewing Figure 6 shows the wires wrapped around the magnet starting at the top
‘north’ half and then after 11 complete turns the wire exits at the lower ‘south’ half. As this wire then goes
to the next magnet it arrives at an attract wire which is its ‘north’ side. Thus all wires get interconnected
from south to north magnet half or north to south magnet half. The actual connections should be crimped
copper clips not solder with insulation tubing to prevent contact to the Rotor body.
14) A .030 thick copper tube (stiff material) 2" long by 2½" inside diameter.
15) Are six slots cut at the top of tube #14. These slots are 5/8" wide by 1/32" deep spaced at 60 degrees
apart.
16) Are six slots cut at the bottom of tube #14. These slots are 5/8" wide by 5/16" deep and in line with
the upper slots #15.
17) Six copper tube mounting points.
18) Acrylic ring to hold Part #14, measuring 3—3/4" O.D., 2¼" I.D., 3/8" thick bolted directly to Part #1.
This ring has a .030 wide groove cut ¼"deep to allow the six copper tube mounting points, Part #17, to be
inserted.
19) A .002" thick plastic insulation paper to be placed around the inside and outside of Part #14.
7. 20) Are six coils of insulated copper wire, each coil having 72 turns of .014 thick wire. Each coil is wound
with two layers, the bottom layer to completely fill the 5/8" wide slot with 45 turns and the top layer to
span 5/16" wide with 27 turns. To be sure each coil has the exact wire length or 72 turns, a sample length
wire is wrapped then unwound to serve as a template for six lengths. A suggested coil winding method is
to fill a small spool with one length then by holding the copper tube at the lower extension, then start at
the plus wire in Figure 2 and temporarily secure this wire to the outer surface of the tube. Next, place the
pre—measured spool of wire inside the tube, wrapping down and around the outside advancing clockwise
until the 5/8" slot is filled with 45 turns. Then, return this wire back across the top of the coil for 15/32"
and winding in the same direction again advance clock—wise placing the second layer spanned for 5/16"
with 27 turns. This method should have the second layer perfectly centered above the first layer. After
winding this coil, repeat the process by again filling the small spool with another length of pre—measured
wire. A very important magnetic response happens as all six coils have their second layers spaced as
disclosed.
21) This number identifies the top view of the second layer.
22) Connection pattern for six coils. When the unit is driven at start—up (hand crank) for 42 seconds at
2100 RPM, all six jumper wires must be together which means the plus wire goes to the minus wire
connected by the start switch. After 42 seconds the load is added to the circuit and the start switch is
opened. To double check your connections between the coils, note that the finish wire of coil #1 goes to
the finish wire of coil #2, which is top layer to top layer. This pattern then has start of coil 2 (bottom layer)
going to start of coil 3 (also bottom layer). When the copper tube with the coils is placed around the rotor,
the distance from any magnet to any coil must be identical. If it measures different, acrylic holding shapes
can be bolted to the aluminum base, protruding upward, and thus push the copper tube in the direction
needed to maintain the spacing as stated.
23) Wires to load.
24) Wires to start switch.
25) Rotational direction which is clock—wise when viewing from top down.
26) Acrylic dome for protection against elements.
27) Coating of clear acrylic to solidify rotor. Do not use standard motor varnish. Pre-heat the rotor and
then dip it into heated liquid acrylic. After removal from dip tank, hand rotate until the acrylic hardens,
then balance rotor. For balancing procedure, either add brass weights or remove brass as needed by
drilling small holes into rotor on its heavy side.
28) Insulation tubing on all connections.
29) Shaft for start purposes and speed testing (if desired).
This concludes the parts list for the Mini-Romag.
This simple unit demonstrates profound concepts and has a surprising number of applications.
Remember, it must have a load to work, something that attracts magnetic energy. Build this unit and
explore new possibilities with us.
All these informations has been shared freely with courtesy of Magnetic Energy, special thanks to them for
sharing their wonderful and advanced technology...
8. See also :
The Mini-Romag generator : Towards a possible explanation ? by JL Naudin (updated 04-13-99)
The Theory of Mini-Romag Generator by Dave Squires (updated 04-13-99)
Email : JNaudin509@aol.com
Return to the JLN Labs home page