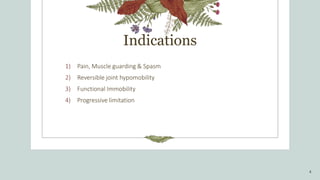
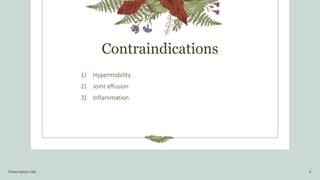
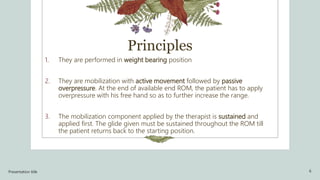
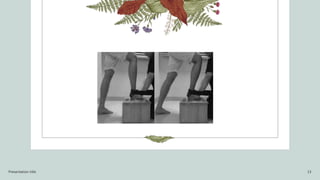
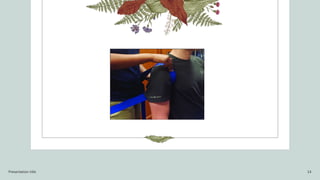
Mobilization with
Movement
-By Shreya Kothale(MPT 2)
Introduction
2
• A concept by Brian Mulligan.
• It is the application of pain free sustained accessory mobilization applied by
therapist and an active movement performed by the patient; followed by
passive overpressure.
Mulligan Concept
• The Mulligan techniques are based on the hypothesis of positional fault/
maltracking of the joint surfaces.
• It is hypothesized that it corrects the positional fault/ maltracking of the
joint leading to pain relief and improvement in ROM.
• The explanation given is that minor positional faults occur following injury
or strain resulting in movement restriction and pain.
• These are not palpable or visible on X- ray. But when a correctional
mobilization is sustained, pain free function is restored. Results obtained
are fast.
Presentation title 3
Indications
1) Pain, Muscle guarding & Spasm
2) Reversible joint hypomobility
3) Functional Immobility
4) Progressive limitation
4
Contraindications
1) Hypermobility
2) Joint effusion
3) Inflammation
Presentation title 5
Principles
1. They are performed in weight bearing position
2. They are mobilization with active movement followed by passive
overpressure. At the end of available end ROM, the patient has to apply
overpressure with his free hand so as to further increase the range.
3. The mobilization component applied by the therapist is sustained and
applied first. The glide given must be sustained throughout the ROM till
the patient returns back to the starting position.
Presentation title 6
4. This technique follows the treatment plane rule. Glide is applied
parallel or perpendicular to the treatment plane.
5. They are given in the available end range and not in the resting
position of the joint.
6. When indicated, they are painless.
Presentation title 7
Mulligan technique can be performed in spine as well as in the
extremities.
Spine
• NAGS (natural apophyseal glides)
• Reverse NAGS
• SNAGS ( sustained natural apophyseal glides)
• SNAGS with arm / leg movements
Extremity
• MWMS ( Movement with mobilizations)
Presentation title 8
Spine
NAGS
• It is given in oscillatory form.
• The superior facet is mobilized over the inferior facet.
• Can be performed from C2 -C7 level
• Works best in patients with a gross loss in ROM.
Reverse NAGS
• Oscillatory
• The inferior facet is mobilized on the superior facet.
• Can be performed in Cervical and upper thoracic levels
• Works best in patients with forward head posture due to desk job, cervical
headache, vertigo etc.
• Useful in patients with loss of the end range.
Presentation title 9
SNAGS
• SNAGS are a combination of a sustained facet glide with active
spinal movement.
• They are useful in cervical, thoracic and lumbar spines
• can be used in patients with pain and restricted ROM in the
spine.
SNAGS with extremity movements.
• These are the combination of a sustained facet glide with
extremity movements.
• Useful in patients with pain in the extremity which is spinal in
origin. (referred / radiating pain)
Presentation title 10
Extremity
• MWMS ( Movement with mobilization) is used in extremity.
• It is concurrent application of glide with active movement of the joint,
isometric contraction of muscles (Tennis elbow).
• It is useful in all the extremity joints presenting with pain and decrease
ROM.
Presentation title 11
Application
1) Comparable sign
2) Passive technique
3) Accessory glide with active comparable sign
4) No pain
5) Repetitions
Presentation title 12
Presentation title 13
Presentation title 14
Patient Response &
Progression
15
Points to Remember
1. Always treat the patient in the weight bearing position.
2. Movement must be pain-free way. If not, change the pressure/ hold/ angle/ level/ side (spine).
3. Belt must be parallel to the floor. Angle and position of your forearm should be in the direction of
glide.
4. Synchronize the glide with the patients active movement with your pelvis and body movements so
that the treatment plane is followed.
5. Your position/ hand grip/ belt must not block the patient’s movement.
Presentation title 16
6. Grip must be firm but painless. There should be even distribution of your hand/
belt pressure.
7. Always be as close to the joint line as possible.
8. Give good stabilization so as to have good mobilization,
9. Always explain the patient what you are going to do and what he is expected to
do.
10. Reassess the patients Pain response and ROM.
11. Teach self treatment to patients.
Presentation title 17
Thank you

MWM.pptx

  • 1.
  • 2.
    Introduction 2 • A conceptby Brian Mulligan. • It is the application of pain free sustained accessory mobilization applied by therapist and an active movement performed by the patient; followed by passive overpressure.
  • 3.
    Mulligan Concept • TheMulligan techniques are based on the hypothesis of positional fault/ maltracking of the joint surfaces. • It is hypothesized that it corrects the positional fault/ maltracking of the joint leading to pain relief and improvement in ROM. • The explanation given is that minor positional faults occur following injury or strain resulting in movement restriction and pain. • These are not palpable or visible on X- ray. But when a correctional mobilization is sustained, pain free function is restored. Results obtained are fast. Presentation title 3
  • 4.
    Indications 1) Pain, Muscleguarding & Spasm 2) Reversible joint hypomobility 3) Functional Immobility 4) Progressive limitation 4
  • 5.
    Contraindications 1) Hypermobility 2) Jointeffusion 3) Inflammation Presentation title 5
  • 6.
    Principles 1. They areperformed in weight bearing position 2. They are mobilization with active movement followed by passive overpressure. At the end of available end ROM, the patient has to apply overpressure with his free hand so as to further increase the range. 3. The mobilization component applied by the therapist is sustained and applied first. The glide given must be sustained throughout the ROM till the patient returns back to the starting position. Presentation title 6
  • 7.
    4. This techniquefollows the treatment plane rule. Glide is applied parallel or perpendicular to the treatment plane. 5. They are given in the available end range and not in the resting position of the joint. 6. When indicated, they are painless. Presentation title 7
  • 8.
    Mulligan technique canbe performed in spine as well as in the extremities. Spine • NAGS (natural apophyseal glides) • Reverse NAGS • SNAGS ( sustained natural apophyseal glides) • SNAGS with arm / leg movements Extremity • MWMS ( Movement with mobilizations) Presentation title 8
  • 9.
    Spine NAGS • It isgiven in oscillatory form. • The superior facet is mobilized over the inferior facet. • Can be performed from C2 -C7 level • Works best in patients with a gross loss in ROM. Reverse NAGS • Oscillatory • The inferior facet is mobilized on the superior facet. • Can be performed in Cervical and upper thoracic levels • Works best in patients with forward head posture due to desk job, cervical headache, vertigo etc. • Useful in patients with loss of the end range. Presentation title 9
  • 10.
    SNAGS • SNAGS area combination of a sustained facet glide with active spinal movement. • They are useful in cervical, thoracic and lumbar spines • can be used in patients with pain and restricted ROM in the spine. SNAGS with extremity movements. • These are the combination of a sustained facet glide with extremity movements. • Useful in patients with pain in the extremity which is spinal in origin. (referred / radiating pain) Presentation title 10
  • 11.
    Extremity • MWMS (Movement with mobilization) is used in extremity. • It is concurrent application of glide with active movement of the joint, isometric contraction of muscles (Tennis elbow). • It is useful in all the extremity joints presenting with pain and decrease ROM. Presentation title 11
  • 12.
    Application 1) Comparable sign 2)Passive technique 3) Accessory glide with active comparable sign 4) No pain 5) Repetitions Presentation title 12
  • 13.
  • 14.
  • 15.
  • 16.
    Points to Remember 1.Always treat the patient in the weight bearing position. 2. Movement must be pain-free way. If not, change the pressure/ hold/ angle/ level/ side (spine). 3. Belt must be parallel to the floor. Angle and position of your forearm should be in the direction of glide. 4. Synchronize the glide with the patients active movement with your pelvis and body movements so that the treatment plane is followed. 5. Your position/ hand grip/ belt must not block the patient’s movement. Presentation title 16
  • 17.
    6. Grip mustbe firm but painless. There should be even distribution of your hand/ belt pressure. 7. Always be as close to the joint line as possible. 8. Give good stabilization so as to have good mobilization, 9. Always explain the patient what you are going to do and what he is expected to do. 10. Reassess the patients Pain response and ROM. 11. Teach self treatment to patients. Presentation title 17
  • 18.