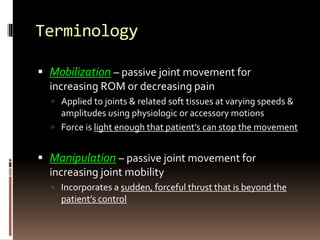
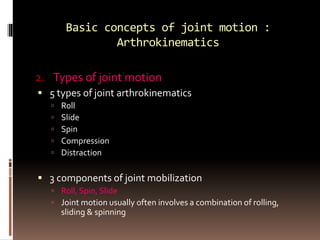
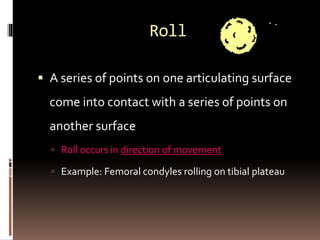
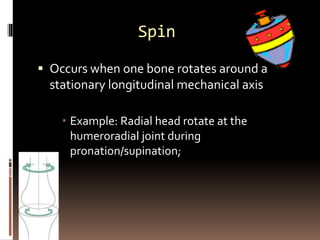
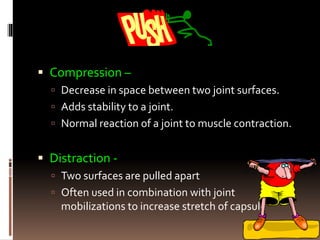
Joint mobilization refers to a technique of manual therapy by which a therapist applies a brief stretch of 30s or less through traction and gliding along a joint surface.
3. Terminology
Mobilization – passive joint movement for
increasing ROM or decreasing pain
Applied to joints & related soft tissues at varying speeds &
amplitudes using physiologic or accessory motions
Force is light enough that patient’s can stop the movement
Manipulation – passive joint movement for
increasing joint mobility
Incorporates a sudden, forceful thrust that is beyond the
patient’s control
4. Basic concepts of joint motion :
Arthrokinematics
2. Types of joint motion
5 types of joint arthrokinematics
Roll
Slide
Spin
Compression
Distraction
3 components of joint mobilization
Roll, Spin, Slide
Joint motion usually often involves a combination of rolling,
sliding & spinning
5. Roll
A series of points on one articulating surface
come into contact with a series of points on
another surface
Roll occurs in direction of movement
Example: Femoral condyles rolling on tibial plateau
6. Spin
Occurs when one bone rotates around a
stationary longitudinal mechanical axis
Example: Radial head rotate at the
humeroradial joint during
pronation/supination;
7. Slide
Specific point on one surface comes into
contact with a series of points on another
surface
When a passive mobilization technique is
applied to produce a slide in the joint –
referred to as a GLIDE.
8. Compression –
Decrease in space between two joint surfaces.
Adds stability to a joint.
Normal reaction of a joint to muscle contraction.
Distraction -
Two surfaces are pulled apart
Often used in combination with joint
mobilizations to increase stretch of capsule
9. Convex-Concave & Concave-Convex Rule
One joint surface is MOBILE & one is STABLE
Concave-convex rule: concave joint surfaces
slide in the SAME direction as the bone
movement (convex is STABLE)
If concave joint is moving on stationary convex surface
– glide occurs in same direction as roll
10. Convex-concave rule: convex joint surfaces
slide in the OPPOSITE direction of the
bone movement (concave is STABLE)
If convex surface in moving on stationary
concave surface – gliding occurs in
opposite direction to roll
12. Open Packed Position
Joint position where the capsule is most relaxed
and therefore has the greatest room and
accommodate the most fluid.
Least amount of joint contact
Greatest amount of joint play
13. Close Packed Position
Joint capsule and ligaments are tight
Maximal contact between surfaces
14. Effects of Joint
Mobilization
Neurophysiological
Stimulates large mechanoreceptors to decrease pain
Gate ControlTheory
Nutritional
Synovial fluid movement improve nutrient
exchange
Mechanical
Improve the mobility of hypomobile joints due to
immobilization or dysfunction (capsular adhesions or
scar adhesions)
15. Maitland Joint Mobilization
About Maitland:
G. D. Maitland, born in 1924 in Australia, is
the founder of the Maitland mobilization
techniques.
He completed his training as a
physiotherapist in 1949 and quickly
developed an interest in “careful clinical
examination and assessment of patients with
neuro-musculo-skeletal disorders."1
16. Maitland Joint Mobilization Grading Scale
Grading based on amplitude of movement & where
within available ROM the force is applied.
Grade I
Small amplitude rhythmic oscillating movement at the
beginning of range of movement
Manage pain and spasm
Grade II
Large amplitude rhythmic oscillating movement within
midrange of movement
Manage pain and spasm
Grades I & II – often used before & after treatment
with grades III & IV
17. Grade III
Large amplitude rhythmic oscillating movement up to
point of limitation (PL) in range of movement
Used to gain motion within the joint
Stretches capsule & CT structures
Grade IV
Small amplitude rhythmic oscillating movement at
very end range of movement
Used to gain motion within the joint
Used when resistance limits movement in absence of pain
GradeV – (thrust technique) - Manipulation
Small amplitude, quick thrust at end of range
Accompanied by popping sound (manipulation)
Velocity vs. force
Requires training
18. Indications for Mobilization
Grades I and II - primarily used for pain
Grades III and IV - primarily used to increase
motion
19. Joint Positions
Resting position
Maximum joint play - position in which joint capsule and ligaments
are most relaxed
Evaluation and treatment position utilized with hypomobile joints
Loose-packed position
Articulating surfaces are maximally separated
Joint will exhibit greatest amount of joint play
Position used for both traction and joint mobilization
Close-packed position
Joint surfaces are in maximal contact to each other
General rule: Extremes of joint motion are close-packed, &
midrange positions are loose-packed
20. Joint Mobilization Application
All joint mobilizations follow the convex-concave
rule
Patient should be relaxed
Explain purpose of treatment & sensations to
expect to patient
Evaluate BEFORE & AFTER treatment
Stop the treatment if it is too painful for the
patient
Use proper body mechanics
Use gravity to assist the mobilization technique if
possible
Begin & end treatments with Grade I or II
oscillations
21. Positioning & Stabilization
Patient & extremity should be positioned so that
the patient can RELAX
Initial mobilization is performed in a loose-
packed position
In some cases, the position to use is the one in which
the joint is least painful
Firmly & comfortably stabilize one joint
segment, usually the proximal bone
Hand, belt, assistant
Prevents unwanted stress & makes the stretch force
more specific & effective
22. Treatment Force & Direction of Movement
Treatment force is applied as close to the
opposing joint surface as possible
The larger the contact surface is, the more
comfortable the procedure will be (use flat surface
of hand vs. thumb)
Direction of movement during treatment is
either PARALLEL or PERENDICULAR to the
treatment plane
23. Gliding techniques are applied parallel to the treatment
plane
Glide in the direction in which the slide would
normally occur for the desired motion
Direction of sliding is easily determined by using the
convex-concave rule
The entire bone is moved so that there is gliding of
one joint surface on the other
When using grade III gliding techniques, a grade I
distraction should be used
If gliding in the restricted direction is too painful,
begin gliding mobilizations in the painless direction
then progress to gliding in restricted direction when
not as painful
24. Speed, Rhythm, & Duration of Movements
Joint mobilization sessions usually involve:
3-6 sets of oscillations
Perform 2-3 oscillations per second
Lasting 20-60 seconds for tightness
Lasting 1-2 minutes for pain 2-3 oscillations per second
Apply smooth, regular oscillations
25. Vary speed of oscillations for different effects
For painful joints, apply intermittent distraction for 7-10
seconds with a few seconds of rest in between for several
cycles
For restricted joints, apply a minimum of a 6-second
stretch force, followed by partial release then repeat
with slow, intermittent stretches at 3-4 second intervals
26. Joint Traction Techniques
Technique involving pulling one articulating
surface away from another – creating separation
Performed perpendicular to treatment plane
Used to decrease pain or reduce joint
hypomobility
Kaltenborn classification system
Combines traction and mobilization
Joint looseness = slack
27. Patient Response
May cause soreness
Perform joint mobilizations on alternate
days to allow soreness to decrease & tissue
healing to occur
Patient should perform ROM techniques
Patient’s joint & ROM should be
reassessed after treatment, & again before
the next treatment
Pain is always the guide
28. References
Houglum, P.A. (2005).Therapeutic exercise for
musculoskeletal injuries, 2nd ed. Human Kinetics:
Champaign, IL
Kisner, C. & Colby, L.A. (2002).Therapeutic
exercise: Foundations and techniques, 4th ed.
F.A. Davis: Philadelphia.