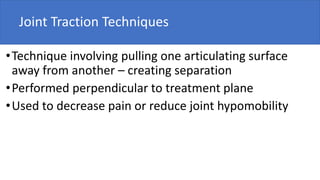
Mobilization
Dr. Abid Ullah PT
What is Joint Mobilization?
• Manual therapy technique
• Used to modulate pain
• Used to increase ROM
• Used to treat joint dysfunctions that limit ROM by specifically addressing altered joint
mechanics
• Factors that may alter joint mechanics:
• Pain & Muscle guarding
• Joint hypomobility
• Joint effusion
• Contractures or adhesions in the joint capsules or supporting ligaments
• Malalignment or subluxation of bony surfaces
Terminology
• Mobilization – passive joint movement for increasing joint mobility or
decreasing pain
• Applied to joints & related soft tissues at varying speeds &
amplitudes using physiologic or accessory motions
• Force is light enough that patient’s can stop the movement
• Manipulation – passive joint movement for increasing joint mobility
• Incorporates a sudden, forceful thrust that is beyond the patient’s
control
Cont….
•Self-Mobilization (Auto-mobilization) – self-stretching
techniques that specifically use joint traction or glides that
direct the stretch force to the joint capsule
•Mobilization with Movement (MWM) – concurrent
application of a sustained accessory mobilization applied by a
clinician, Physiotherapist to end range and physiological
movement applied by the patient
•Applied in a pain-free direction
Osteokinematics– movements done voluntarily
• Physiologic Movements– motions of the bones
 Accessory Movements – movements within the joint & surrounding tissues that are
necessary for normal ROM, but can not be voluntarily performed
(1)Component motions – motions that accompany active motion, but are not under
voluntary control
• Ex: Upward rotation of scapula & rotation of clavicle that occur with shoulder flexion
(2)Joint play –Arthrokinematics motions that occur within the joint
• Determined by joint capsule’s laxity
• distraction, sliding, compression, rolling, and spinning of the joint surfaces.
• Can be demonstrated passively, but not performed actively
• Thrust – high-velocity, short-amplitude motion that the
patient can not prevent
•Performed at end of pathologic limit of the joint (snap
adhesions, stimulate joint receptors)
• Concave – hollowed or rounded inward
• Convex – curved or rounded outward
Relationship Between Physiological & Accessory Motion
• Biomechanics of joint motion
• Physiological motion
• Result of concentric or eccentric muscle contractions
• flexion, extension, abduction, adduction or rotation
• Accessory Motion
• Motion of articular surfaces relative to one another
• Generally associated with physiological movement
• Necessary for full range of physiological motion to occur
• Ligament & joint capsule involvement in motion
Joint Shapes & Arthrokinematics
• Ovoid – one surface is convex, other surface is concave
•Sellar (saddle) – one surface is concave in one direction &
convex in the other, with the opposing surface convex &
concave respectively
5 types of joint arthrokinematics
• Roll
• Slide
• Spin
• Compression
• Distraction
Roll
• A series of points on one articulating surface come into
contact with a series of points on another surface
• ball rolling on ground
• Example: Femoral condyles rolling on tibial plateau
• Roll occurs in direction of movement
• Occurs on incongruent (unequal) surfaces
• Usually occurs in combination with sliding or spinning
Spin
• Occurs when one bone rotates around a stationary longitudinal mechanical axis
• Same point on the moving surface creates an arc of a circle as the bone
spins
• Example: Radial head at the humeroradial joint during
pronation/supination
Slide
• Specific point on one surface comes into contact with a series of points on
another surface
• Surfaces are congruent
• When a passive mobilization technique is applied to produce a slide in the joint
– referred to as a GLIDE.
• Combined rolling-sliding in a joint
• The more congruent the surfaces are, the more sliding there is
• The more incongruent the joint surfaces are, the more rolling there is
• Compression –
• Decrease in space between two joint surfaces
• Adds stability to a joint
• Normal reaction of a joint to muscle contraction
• Distraction -
• Two surfaces are pulled apart
• Often used in combination with joint mobilizations to increase stretch of capsule
Convex-Concave & Concave-Convex Rule
• Basic application of correct mobilization techniques
• One joint surface is MOBILE & one is STABLE
• Concave-convex rule:
• concave joint surfaces slide in the SAME direction as the bone
movement (convex is STABLE)
• If concave joint is moving on stationary convex surface – glide
occurs in same direction as roll
Convex-concave rule:
• convex joint surfaces slide in the OPPOSITE direction of the bone
movement (concave is STABLE)
• If convex surface is moving on stationary concave surface – gliding
occurs in opposite direction to roll
Effects of Joint Mobilization
• Neurophysiological effects –
• Stimulates mechanoreceptors to  pain
• Affect muscle spasm & muscle guarding – nociceptive sedation
• Increase in awareness of position & motion because of afferent nerve
impulses
• Nutritional effects –
• Distraction or small gliding movements – cause synovial fluid movement
• Movement can improve nutrient exchange
•Mechanical effects –
•Improve mobility of hypo-mobile joints (adhesions &
thickened Connective tissue from immobilization –
loosens)
•Maintains extensibility & tensile strength of articular
tissues.
Contraindications for Mobilization
• Avoid the following:
• Ligamentous rupture
• Herniated disks with nerve
compression
• Bone disease
1.Malignancy
2.Tuberculosis
3.Osteoporosis
4.Bone fracture
• Neurological involvement
• Congenital bone deformities
• Vascular disorders
1.Joint effusion
2.Inflammatory arthritis May
use I & II mobilizations to
relieve pain
Precautions
• Osteoarthritis
• Pregnancy
• Total joint replacement
• Severe scoliosis
• Poor general health
• Patient’s inability to relax
Maitland Joint Mobilization Grading Scale
• Grading based on amplitude of movement & where within available ROM the
force is applied.
• Grade I
• SARO at the beginning of range of movement
• Manage pain and spasm
• Grade II
• LARO within midrange of movement
• Manage pain and spasm
cont….
• Grade III
• LARO up to point of limitation (PL) in range of movement
• Used to gain motion within the joint
• Stretches capsule & CT structures
• Grade IV
• SARO at very end range of movement
• Used to gain motion within the joint
• Used when resistance limits movement in absence of pain
• Grade V – (thrust technique) - Manipulation
• Small amplitude, quick thrust at end of range
• Requires training
Indications for Mobilization
• Grades I and II - primarily used for pain
•Grades III and IV - used to increase motion
Sustained Translatory Joint-Play Techniques
• Grade I (loosen):
Small-amplitude distraction is applied. no stress is placed on the capsule.
• Grade II (tighten):
Enough distraction or glide is applied to tighten the tissues around the joint.
Kaltenborn called this “taking up the slack.”
• Grade III (stretch):
A distraction or glide is applied with an amplitude large enough to place stretch
on the joint capsule and surrounding periarticular structures.
uses
• Grade I distraction is used with all gliding motions and may be used
for relief of pain.
• Grade II distraction is used for the initial treatment to determine how
sensitive the joint is. Once the joint reaction is known, the treatment
dosage is increased or decreased accordingly.
• Gentle grade II distraction applied intermittently may be used to
inhibit pain. Grade II glides may be used to maintain joint play when
ROM is not allowed.
• Grade III distractions or glides are used to stretch the joint structures
and thus increase joint play.
ALWAYS Examine PRIOR to Treatment
• If limited or painful ROM, examine & decide which tissues are
limiting function
• Determine whether treatment will be directed primarily toward
relieving pain or stretching a joint or soft tissue limitation
• Quality of pain when testing ROM helps determine stage of
recovery & dosage of techniques
If pain is experienced BEFORE tissue limitation, gentle pain-inhibiting joint
techniques may be used
• Stretching under these circumstances is contraindicated
2)If pain is experienced CONCURRENTLY with tissue limitation (e.g. pain &
limitation that occur when damaged tissue begins to heal) the limitation is
treated cautiously – gentle stretching techniques used
3)If pain is experienced AFTER tissue limitation is met because of stretching of
tight capsular tissue, the joint can be stretched aggressively
Joint Positions
• Resting position
• Maximum joint play - position in which joint capsule and ligaments are most relaxed
• Evaluation and treatment position utilized with hypomobile joints
• Loose-packed position
• Articulating surfaces are maximally separated
• Joint will exhibit greatest amount of joint play
• Position used for both traction and joint mobilization
• Close-packed position
• Joint surfaces are in maximal contact to each other
• General rule: Extremes of joint motion are close-packed, & midrange positions are loose-
packed
Joint Mobilization Application
• All joint mobilizations follow the convex-concave rule
• Patient should be relaxed
• Explain purpose of treatment & sensations to expect to patient
• Evaluate BEFORE & AFTER treatment
• Stop the treatment if it is too painful for the patient
• Use proper body mechanics
• Use gravity to assist the mobilization technique if possible
• Begin & end treatments with Grade I or II oscillations
Positioning & Stabilization
• Patient & extremity should be positioned so that the patient can RELAX
• Initial mobilization is performed in a loose-packed position
• In some cases, the position to use is the one in which the joint is least
painful
• Firmly & comfortably stabilize one joint segment, usually the proximal bone
• Hand, belt, assistant
• Prevents unwanted stress & makes the stretch force more specific &
effective
Treatment Force & Direction of Movement
• Treatment force is applied as close to the opposing joint
surface as possible
• The larger the contact surface is, the more comfortable
the procedure will be (use flat surface of hand vs.
thumb)
• Direction of movement during treatment is either PARALLEL
or PERENDICULAR to the treatment plane
Treatment Direction
• Treatment plane lies on the
concave articulating surface,
perpendicular to a line from the
center of the convex articulating
surface
• Joint traction techniques are
applied perpendicular to the
treatment plane
• Entire bone is moved so that the
joint surfaces are separated
Gliding techniques are applied parallel to the treatment plane
• Glide in the direction in which the slide would normally occur for the
desired motion
• Direction of sliding is easily determined by using the convex-concave rule
• The entire bone is moved so that there is gliding of one joint surface on
the other
• When using grade III gliding techniques, a grade I distraction should be
used
• If gliding in the restricted direction is too painful, begin gliding
mobilizations in the painless direction then progress to gliding in
restricted direction when not as painful
Reevaluate the joint response the next day or have the
patient report at the next visit
• If increased pain, reduce amplitude of oscillations
• If joint is the same or better, perform either of the following:
• Repeat the same maneuver if goal is to maintain joint play
• Progress to sustained grade III traction or glides if the goal is
to increase joint play
Speed, Rhythm, & Duration of Movements
•joint mobilization sessions usually involve:
•3-6 sets of oscillations
•Perform 2-3 oscillations per second
•Lasting 20-60 seconds for tightness
•Lasting 1-2 minutes for pain 2-3 oscillations per second
•Apply smooth, regular oscillations
•Vary speed of oscillations for different effects
•For painful joints, apply intermittent distraction for 7-10
seconds with a few seconds of rest in between for several
cycles
•For restricted joints, apply a minimum of a 6-second stretch
force, followed by partial release then repeat with slow,
intermittent stretches at 3-4 second intervals
Patient Response
•May cause soreness
•Perform joint mobilizations on alternate days to allow
soreness to decrease & tissue healing to occur
•Patient should perform ROM techniques
•Patient’s joint & ROM should be reassessed after treatment,
& again before the next treatment
•Pain is always the guide
Joint Traction Techniques
•Technique involving pulling one articulating surface
away from another – creating separation
•Performed perpendicular to treatment plane
•Used to decrease pain or reduce joint hypomobility

Mobilization

  • 1.
  • 3.
    What is JointMobilization? • Manual therapy technique • Used to modulate pain • Used to increase ROM • Used to treat joint dysfunctions that limit ROM by specifically addressing altered joint mechanics • Factors that may alter joint mechanics: • Pain & Muscle guarding • Joint hypomobility • Joint effusion • Contractures or adhesions in the joint capsules or supporting ligaments • Malalignment or subluxation of bony surfaces
  • 4.
    Terminology • Mobilization –passive joint movement for increasing joint mobility or decreasing pain • Applied to joints & related soft tissues at varying speeds & amplitudes using physiologic or accessory motions • Force is light enough that patient’s can stop the movement • Manipulation – passive joint movement for increasing joint mobility • Incorporates a sudden, forceful thrust that is beyond the patient’s control
  • 5.
    Cont…. •Self-Mobilization (Auto-mobilization) –self-stretching techniques that specifically use joint traction or glides that direct the stretch force to the joint capsule •Mobilization with Movement (MWM) – concurrent application of a sustained accessory mobilization applied by a clinician, Physiotherapist to end range and physiological movement applied by the patient •Applied in a pain-free direction
  • 6.
    Osteokinematics– movements donevoluntarily • Physiologic Movements– motions of the bones  Accessory Movements – movements within the joint & surrounding tissues that are necessary for normal ROM, but can not be voluntarily performed (1)Component motions – motions that accompany active motion, but are not under voluntary control • Ex: Upward rotation of scapula & rotation of clavicle that occur with shoulder flexion (2)Joint play –Arthrokinematics motions that occur within the joint • Determined by joint capsule’s laxity • distraction, sliding, compression, rolling, and spinning of the joint surfaces. • Can be demonstrated passively, but not performed actively
  • 7.
    • Thrust –high-velocity, short-amplitude motion that the patient can not prevent •Performed at end of pathologic limit of the joint (snap adhesions, stimulate joint receptors) • Concave – hollowed or rounded inward • Convex – curved or rounded outward
  • 8.
    Relationship Between Physiological& Accessory Motion • Biomechanics of joint motion • Physiological motion • Result of concentric or eccentric muscle contractions • flexion, extension, abduction, adduction or rotation • Accessory Motion • Motion of articular surfaces relative to one another • Generally associated with physiological movement • Necessary for full range of physiological motion to occur • Ligament & joint capsule involvement in motion
  • 9.
    Joint Shapes &Arthrokinematics • Ovoid – one surface is convex, other surface is concave •Sellar (saddle) – one surface is concave in one direction & convex in the other, with the opposing surface convex & concave respectively
  • 10.
    5 types ofjoint arthrokinematics • Roll • Slide • Spin • Compression • Distraction
  • 11.
    Roll • A seriesof points on one articulating surface come into contact with a series of points on another surface • ball rolling on ground • Example: Femoral condyles rolling on tibial plateau • Roll occurs in direction of movement • Occurs on incongruent (unequal) surfaces • Usually occurs in combination with sliding or spinning
  • 12.
    Spin • Occurs whenone bone rotates around a stationary longitudinal mechanical axis • Same point on the moving surface creates an arc of a circle as the bone spins • Example: Radial head at the humeroradial joint during pronation/supination
  • 13.
    Slide • Specific pointon one surface comes into contact with a series of points on another surface • Surfaces are congruent • When a passive mobilization technique is applied to produce a slide in the joint – referred to as a GLIDE. • Combined rolling-sliding in a joint • The more congruent the surfaces are, the more sliding there is • The more incongruent the joint surfaces are, the more rolling there is
  • 14.
    • Compression – •Decrease in space between two joint surfaces • Adds stability to a joint • Normal reaction of a joint to muscle contraction • Distraction - • Two surfaces are pulled apart • Often used in combination with joint mobilizations to increase stretch of capsule
  • 15.
    Convex-Concave & Concave-ConvexRule • Basic application of correct mobilization techniques • One joint surface is MOBILE & one is STABLE • Concave-convex rule: • concave joint surfaces slide in the SAME direction as the bone movement (convex is STABLE) • If concave joint is moving on stationary convex surface – glide occurs in same direction as roll
  • 16.
    Convex-concave rule: • convexjoint surfaces slide in the OPPOSITE direction of the bone movement (concave is STABLE) • If convex surface is moving on stationary concave surface – gliding occurs in opposite direction to roll
  • 17.
    Effects of JointMobilization • Neurophysiological effects – • Stimulates mechanoreceptors to  pain • Affect muscle spasm & muscle guarding – nociceptive sedation • Increase in awareness of position & motion because of afferent nerve impulses • Nutritional effects – • Distraction or small gliding movements – cause synovial fluid movement • Movement can improve nutrient exchange
  • 18.
    •Mechanical effects – •Improvemobility of hypo-mobile joints (adhesions & thickened Connective tissue from immobilization – loosens) •Maintains extensibility & tensile strength of articular tissues.
  • 19.
    Contraindications for Mobilization •Avoid the following: • Ligamentous rupture • Herniated disks with nerve compression • Bone disease 1.Malignancy 2.Tuberculosis 3.Osteoporosis 4.Bone fracture • Neurological involvement • Congenital bone deformities • Vascular disorders 1.Joint effusion 2.Inflammatory arthritis May use I & II mobilizations to relieve pain
  • 20.
    Precautions • Osteoarthritis • Pregnancy •Total joint replacement • Severe scoliosis • Poor general health • Patient’s inability to relax
  • 21.
    Maitland Joint MobilizationGrading Scale • Grading based on amplitude of movement & where within available ROM the force is applied. • Grade I • SARO at the beginning of range of movement • Manage pain and spasm • Grade II • LARO within midrange of movement • Manage pain and spasm
  • 22.
    cont…. • Grade III •LARO up to point of limitation (PL) in range of movement • Used to gain motion within the joint • Stretches capsule & CT structures • Grade IV • SARO at very end range of movement • Used to gain motion within the joint • Used when resistance limits movement in absence of pain • Grade V – (thrust technique) - Manipulation • Small amplitude, quick thrust at end of range • Requires training
  • 24.
    Indications for Mobilization •Grades I and II - primarily used for pain •Grades III and IV - used to increase motion
  • 25.
    Sustained Translatory Joint-PlayTechniques • Grade I (loosen): Small-amplitude distraction is applied. no stress is placed on the capsule. • Grade II (tighten): Enough distraction or glide is applied to tighten the tissues around the joint. Kaltenborn called this “taking up the slack.” • Grade III (stretch): A distraction or glide is applied with an amplitude large enough to place stretch on the joint capsule and surrounding periarticular structures.
  • 27.
    uses • Grade Idistraction is used with all gliding motions and may be used for relief of pain. • Grade II distraction is used for the initial treatment to determine how sensitive the joint is. Once the joint reaction is known, the treatment dosage is increased or decreased accordingly. • Gentle grade II distraction applied intermittently may be used to inhibit pain. Grade II glides may be used to maintain joint play when ROM is not allowed. • Grade III distractions or glides are used to stretch the joint structures and thus increase joint play.
  • 28.
    ALWAYS Examine PRIORto Treatment • If limited or painful ROM, examine & decide which tissues are limiting function • Determine whether treatment will be directed primarily toward relieving pain or stretching a joint or soft tissue limitation • Quality of pain when testing ROM helps determine stage of recovery & dosage of techniques
  • 29.
    If pain isexperienced BEFORE tissue limitation, gentle pain-inhibiting joint techniques may be used • Stretching under these circumstances is contraindicated 2)If pain is experienced CONCURRENTLY with tissue limitation (e.g. pain & limitation that occur when damaged tissue begins to heal) the limitation is treated cautiously – gentle stretching techniques used 3)If pain is experienced AFTER tissue limitation is met because of stretching of tight capsular tissue, the joint can be stretched aggressively
  • 30.
    Joint Positions • Restingposition • Maximum joint play - position in which joint capsule and ligaments are most relaxed • Evaluation and treatment position utilized with hypomobile joints • Loose-packed position • Articulating surfaces are maximally separated • Joint will exhibit greatest amount of joint play • Position used for both traction and joint mobilization • Close-packed position • Joint surfaces are in maximal contact to each other • General rule: Extremes of joint motion are close-packed, & midrange positions are loose- packed
  • 31.
    Joint Mobilization Application •All joint mobilizations follow the convex-concave rule • Patient should be relaxed • Explain purpose of treatment & sensations to expect to patient • Evaluate BEFORE & AFTER treatment • Stop the treatment if it is too painful for the patient • Use proper body mechanics • Use gravity to assist the mobilization technique if possible • Begin & end treatments with Grade I or II oscillations
  • 32.
    Positioning & Stabilization •Patient & extremity should be positioned so that the patient can RELAX • Initial mobilization is performed in a loose-packed position • In some cases, the position to use is the one in which the joint is least painful • Firmly & comfortably stabilize one joint segment, usually the proximal bone • Hand, belt, assistant • Prevents unwanted stress & makes the stretch force more specific & effective
  • 33.
    Treatment Force &Direction of Movement • Treatment force is applied as close to the opposing joint surface as possible • The larger the contact surface is, the more comfortable the procedure will be (use flat surface of hand vs. thumb) • Direction of movement during treatment is either PARALLEL or PERENDICULAR to the treatment plane
  • 34.
    Treatment Direction • Treatmentplane lies on the concave articulating surface, perpendicular to a line from the center of the convex articulating surface • Joint traction techniques are applied perpendicular to the treatment plane • Entire bone is moved so that the joint surfaces are separated
  • 35.
    Gliding techniques areapplied parallel to the treatment plane • Glide in the direction in which the slide would normally occur for the desired motion • Direction of sliding is easily determined by using the convex-concave rule • The entire bone is moved so that there is gliding of one joint surface on the other • When using grade III gliding techniques, a grade I distraction should be used • If gliding in the restricted direction is too painful, begin gliding mobilizations in the painless direction then progress to gliding in restricted direction when not as painful
  • 36.
    Reevaluate the jointresponse the next day or have the patient report at the next visit • If increased pain, reduce amplitude of oscillations • If joint is the same or better, perform either of the following: • Repeat the same maneuver if goal is to maintain joint play • Progress to sustained grade III traction or glides if the goal is to increase joint play
  • 37.
    Speed, Rhythm, &Duration of Movements •joint mobilization sessions usually involve: •3-6 sets of oscillations •Perform 2-3 oscillations per second •Lasting 20-60 seconds for tightness •Lasting 1-2 minutes for pain 2-3 oscillations per second •Apply smooth, regular oscillations
  • 38.
    •Vary speed ofoscillations for different effects •For painful joints, apply intermittent distraction for 7-10 seconds with a few seconds of rest in between for several cycles •For restricted joints, apply a minimum of a 6-second stretch force, followed by partial release then repeat with slow, intermittent stretches at 3-4 second intervals
  • 39.
    Patient Response •May causesoreness •Perform joint mobilizations on alternate days to allow soreness to decrease & tissue healing to occur •Patient should perform ROM techniques •Patient’s joint & ROM should be reassessed after treatment, & again before the next treatment •Pain is always the guide
  • 40.
    Joint Traction Techniques •Techniqueinvolving pulling one articulating surface away from another – creating separation •Performed perpendicular to treatment plane •Used to decrease pain or reduce joint hypomobility