Download to read offline

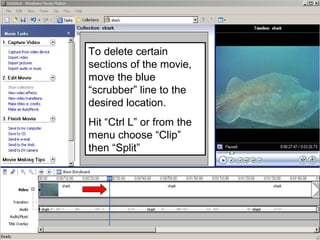

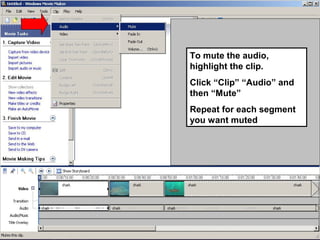
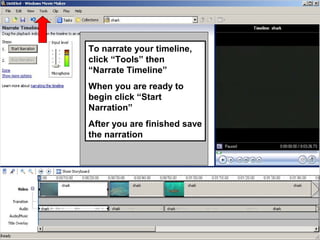
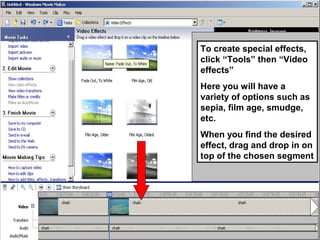
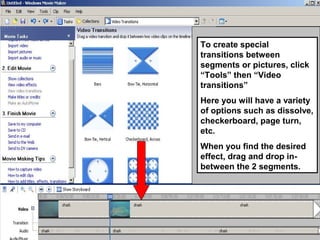
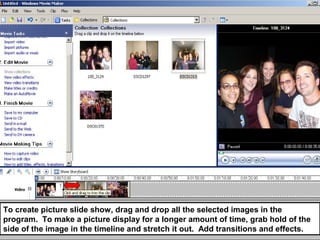
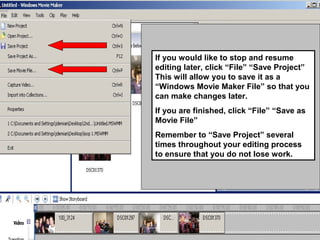

This document provides a detailed guide on using a movie maker software, covering key functionalities such as importing media, editing clips, muting audio, adding narration, and applying special effects and transitions. It also includes instructions on how to save your project to prevent data loss during editing. Overall, it serves as a tutorial for creating and managing video projects efficiently.


