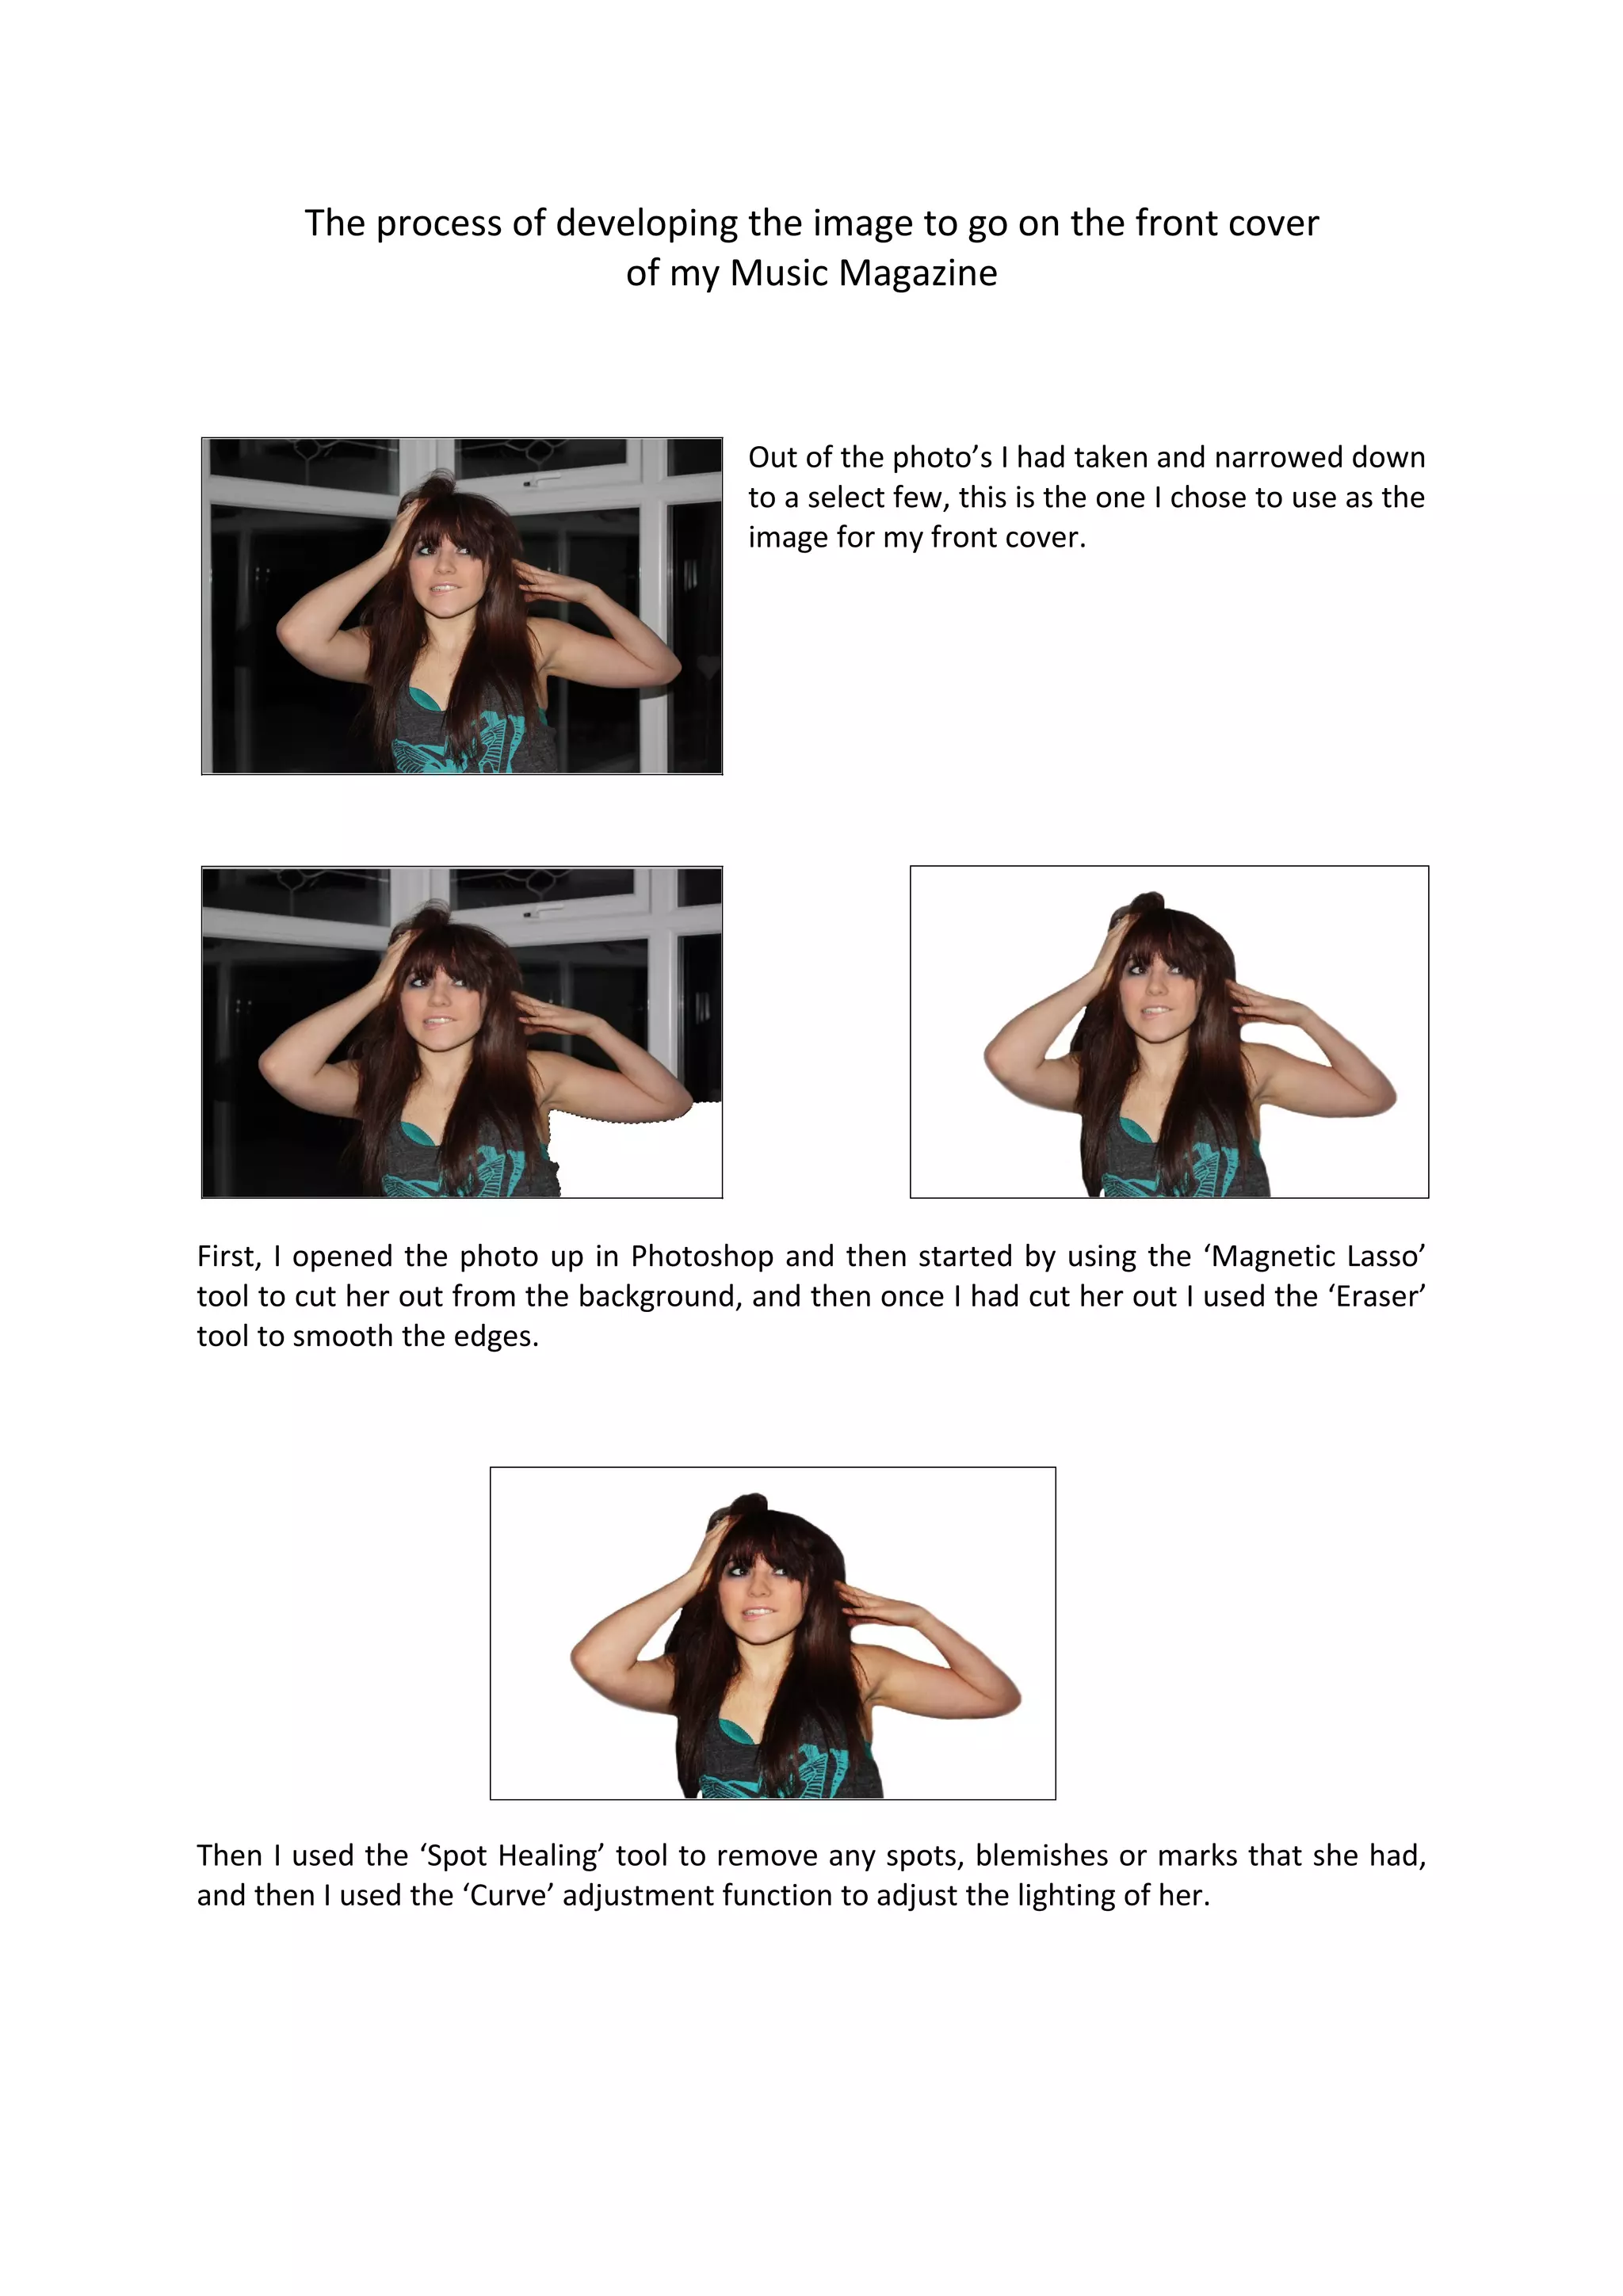
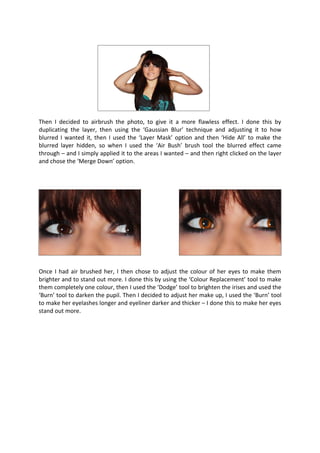
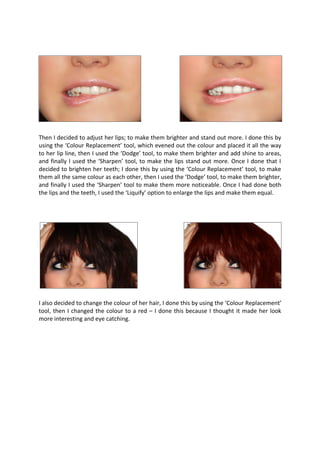
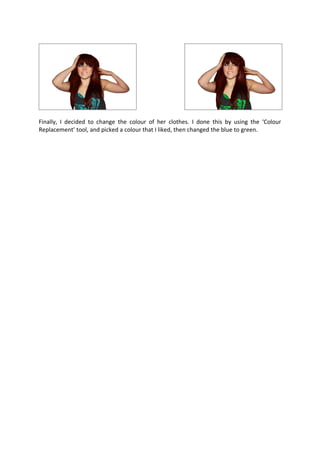
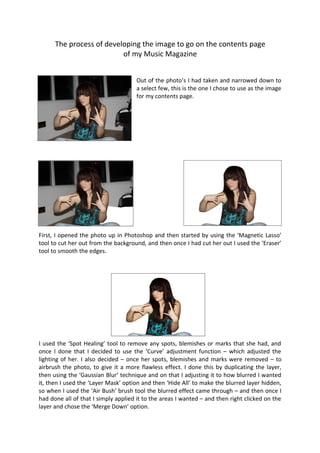
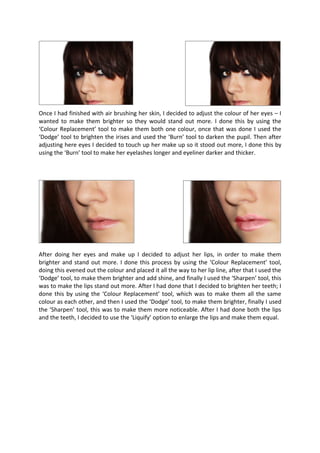
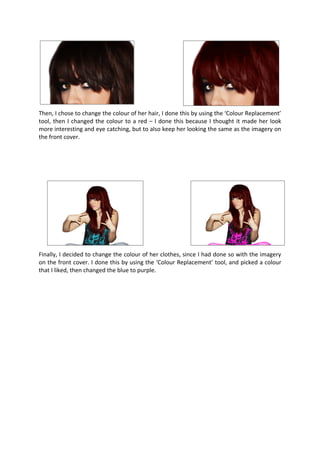
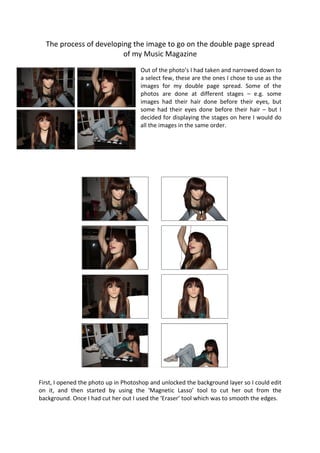
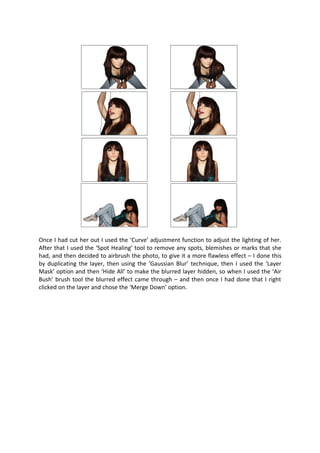
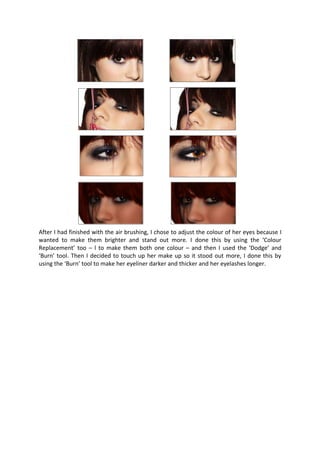
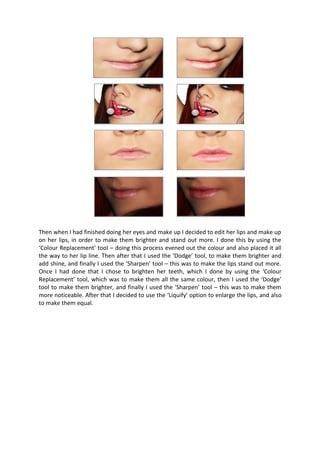
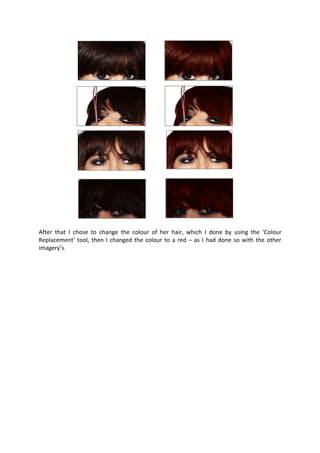
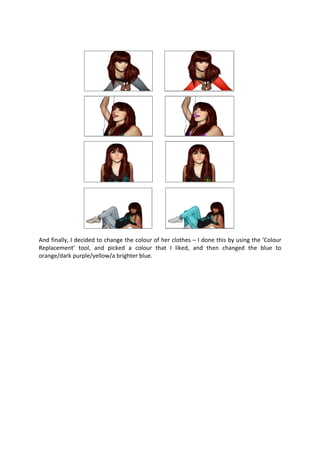
The process of developing the image to go on the front cover
                          of my Music Magazine


                                         Out of the photo’s I had taken and narrowed down
                                         to a select few, this is the one I chose to use as the
                                         image for my front cover.


First, I opened the photo up in Photoshop and then started by using the ‘Magnetic Lasso’
tool to cut her out from the background, and then once I had cut her out I used the ‘Eraser’
tool to smooth the edges.


Then I used the ‘Spot Healing’ tool to remove any spots, blemishes or marks that she had,
and then I used the ‘Curve’ adjustment function to adjust the lighting of her.
Then I decided to airbrush the photo, to give it a more flawless effect. I done this by
duplicating the layer, then using the ‘Gaussian Blur’ technique and adjusting it to how
blurred I wanted it, then I used the ‘Layer Mask’ option and then ‘Hide All’ to make the
blurred layer hidden, so when I used the ‘Air Bush’ brush tool the blurred effect came
through – and I simply applied it to the areas I wanted – and then right clicked on the layer
and chose the ‘Merge Down’ option.


Once I had air brushed her, I then chose to adjust the colour of her eyes to make them
brighter and to stand out more. I done this by using the ‘Colour Replacement’ tool to make
them completely one colour, then I used the ‘Dodge’ tool to brighten the irises and used the
‘Burn’ tool to darken the pupil. Then I decided to adjust her make up, I used the ‘Burn’ tool
to make her eyelashes longer and eyeliner darker and thicker – I done this to make her eyes
stand out more.
Then I decided to adjust her lips; to make them brighter and stand out more. I done this by
using the ‘Colour Replacement’ tool, which evened out the colour and placed it all the way
to her lip line, then I used the ‘Dodge’ tool, to make them brighter and add shine to areas,
and finally I used the ‘Sharpen’ tool, to make the lips stand out more. Once I done that I
decided to brighten her teeth; I done this by using the ‘Colour Replacement’ tool, to make
them all the same colour as each other, then I used the ‘Dodge’ tool, to make them brighter,
and finally I used the ‘Sharpen’ tool to make them more noticeable. Once I had done both
the lips and the teeth, I used the ‘Liquify’ option to enlarge the lips and make them equal.


I also decided to change the colour of her hair, I done this by using the ‘Colour Replacement’
tool, then I changed the colour to a red – I done this because I thought it made her look
more interesting and eye catching.
Finally, I decided to change the colour of her clothes. I done this by using the ‘Colour
Replacement’ tool, and picked a colour that I liked, then changed the blue to green.
The process of developing the image to go on the contents page
                          of my Music Magazine


                                     Out of the photo’s I had taken and narrowed down to
                                     a select few, this is the one I chose to use as the image
                                     for my contents page.


First, I opened the photo up in Photoshop and then started by using the ‘Magnetic Lasso’
tool to cut her out from the background, and then once I had cut her out I used the ‘Eraser’
tool to smooth the edges.


I used the ‘Spot Healing’ tool to remove any spots, blemishes or marks that she had, and
once I done that I decided to use the ‘Curve’ adjustment function – which adjusted the
lighting of her. I also decided – once her spots, blemishes and marks were removed – to
airbrush the photo, to give it a more flawless effect. I done this by duplicating the layer,
then using the ‘Gaussian Blur’ technique and on that I adjusting it to how blurred I wanted
it, then I used the ‘Layer Mask’ option and then ‘Hide All’ to make the blurred layer hidden,
so when I used the ‘Air Bush’ brush tool the blurred effect came through – and then once I
had done all of that I simply applied it to the areas I wanted – and then right clicked on the
layer and chose the ‘Merge Down’ option.
Once I had finished with air brushing her skin, I decided to adjust the colour of her eyes – I
wanted to make them brighter so they would stand out more. I done this by using the
‘Colour Replacement’ tool to make them both one colour, once that was done I used the
‘Dodge’ tool to brighten the irises and used the ‘Burn’ tool to darken the pupil. Then after
adjusting here eyes I decided to touch up her make up so it stood out more, I done this by
using the ‘Burn’ tool to make her eyelashes longer and eyeliner darker and thicker.


After doing her eyes and make up I decided to adjust her lips, in order to make them
brighter and stand out more. I done this process by using the ‘Colour Replacement’ tool,
doing this evened out the colour and placed it all the way to her lip line, after that I used the
‘Dodge’ tool, to make them brighter and add shine, and finally I used the ‘Sharpen’ tool, this
was to make the lips stand out more. After I had done that I decided to brighten her teeth; I
done this by using the ‘Colour Replacement’ tool, which was to make them all the same
colour as each other, and then I used the ‘Dodge’ tool, to make them brighter, finally I used
the ‘Sharpen’ tool, this was to make them more noticeable. After I had done both the lips
and the teeth, I decided to use the ‘Liquify’ option to enlarge the lips and make them equal.
Then, I chose to change the colour of her hair, I done this by using the ‘Colour Replacement’
tool, then I changed the colour to a red – I done this because I thought it made her look
more interesting and eye catching, but to also keep her looking the same as the imagery on
the front cover.


Finally, I decided to change the colour of her clothes, since I had done so with the imagery
on the front cover. I done this by using the ‘Colour Replacement’ tool, and picked a colour
that I liked, then changed the blue to purple.
The process of developing the image to go on the double page spread
                         of my Music Magazine
                                      Out of the photo’s I had taken and narrowed down to
                                      a select few, these are the ones I chose to use as the
                                      images for my double page spread. Some of the
                                      photos are done at different stages – e.g. some
                                      images had their hair done before their eyes, but
                                      some had their eyes done before their hair – but I
                                      decided for displaying the stages on here I would do
                                      all the images in the same order.


First, I opened the photo up in Photoshop and unlocked the background layer so I could edit
on it, and then started by using the ‘Magnetic Lasso’ tool to cut her out from the
background. Once I had cut her out I used the ‘Eraser’ tool which was to smooth the edges.
Once I had cut her out I used the ‘Curve’ adjustment function to adjust the lighting of her.
After that I used the ‘Spot Healing’ tool to remove any spots, blemishes or marks that she
had, and then decided to airbrush the photo, to give it a more flawless effect – I done this
by duplicating the layer, then using the ‘Gaussian Blur’ technique, then I used the ‘Layer
Mask’ option and then ‘Hide All’ to make the blurred layer hidden, so when I used the ‘Air
Bush’ brush tool the blurred effect came through – and then once I had done that I right
clicked on the layer and chose the ‘Merge Down’ option.
After I had finished with the air brushing, I chose to adjust the colour of her eyes because I
wanted to make them brighter and stand out more. I done this by using the ‘Colour
Replacement’ too – l to make them both one colour – and then I used the ‘Dodge’ and
‘Burn’ tool. Then I decided to touch up her make up so it stood out more, I done this by
using the ‘Burn’ tool to make her eyeliner darker and thicker and her eyelashes longer.
Then when I had finished doing her eyes and make up I decided to edit her lips and make up
on her lips, in order to make them brighter and stand out more. I done this by using the
‘Colour Replacement’ tool – doing this process evened out the colour and also placed it all
the way to her lip line. Then after that I used the ‘Dodge’ tool, to make them brighter and
add shine, and finally I used the ‘Sharpen’ tool – this was to make the lips stand out more.
Once I had done that I chose to brighten her teeth, which I done by using the ‘Colour
Replacement’ tool, which was to make them all the same colour, then I used the ‘Dodge’
tool to make them brighter, and finally I used the ‘Sharpen’ tool – this was to make them
more noticeable. After that I decided to use the ‘Liquify’ option to enlarge the lips, and also
to make them equal.
After that I chose to change the colour of her hair, which I done by using the ‘Colour
Replacement’ tool, then I changed the colour to a red – as I had done so with the other
imagery’s.
And finally, I decided to change the colour of her clothes – I done this by using the ‘Colour
Replacement’ tool, and picked a colour that I liked, and then changed the blue to
orange/dark purple/yellow/a brighter blue.

The process of developing the image to go on the front cover, contents page and double page spread of my Music Magazine

  • 1.
    The process ofdeveloping the image to go on the front cover of my Music Magazine Out of the photo’s I had taken and narrowed down to a select few, this is the one I chose to use as the image for my front cover. First, I opened the photo up in Photoshop and then started by using the ‘Magnetic Lasso’ tool to cut her out from the background, and then once I had cut her out I used the ‘Eraser’ tool to smooth the edges. Then I used the ‘Spot Healing’ tool to remove any spots, blemishes or marks that she had, and then I used the ‘Curve’ adjustment function to adjust the lighting of her.
  • 2.
    Then I decidedto airbrush the photo, to give it a more flawless effect. I done this by duplicating the layer, then using the ‘Gaussian Blur’ technique and adjusting it to how blurred I wanted it, then I used the ‘Layer Mask’ option and then ‘Hide All’ to make the blurred layer hidden, so when I used the ‘Air Bush’ brush tool the blurred effect came through – and I simply applied it to the areas I wanted – and then right clicked on the layer and chose the ‘Merge Down’ option. Once I had air brushed her, I then chose to adjust the colour of her eyes to make them brighter and to stand out more. I done this by using the ‘Colour Replacement’ tool to make them completely one colour, then I used the ‘Dodge’ tool to brighten the irises and used the ‘Burn’ tool to darken the pupil. Then I decided to adjust her make up, I used the ‘Burn’ tool to make her eyelashes longer and eyeliner darker and thicker – I done this to make her eyes stand out more.
  • 3.
    Then I decidedto adjust her lips; to make them brighter and stand out more. I done this by using the ‘Colour Replacement’ tool, which evened out the colour and placed it all the way to her lip line, then I used the ‘Dodge’ tool, to make them brighter and add shine to areas, and finally I used the ‘Sharpen’ tool, to make the lips stand out more. Once I done that I decided to brighten her teeth; I done this by using the ‘Colour Replacement’ tool, to make them all the same colour as each other, then I used the ‘Dodge’ tool, to make them brighter, and finally I used the ‘Sharpen’ tool to make them more noticeable. Once I had done both the lips and the teeth, I used the ‘Liquify’ option to enlarge the lips and make them equal. I also decided to change the colour of her hair, I done this by using the ‘Colour Replacement’ tool, then I changed the colour to a red – I done this because I thought it made her look more interesting and eye catching.
  • 4.
    Finally, I decidedto change the colour of her clothes. I done this by using the ‘Colour Replacement’ tool, and picked a colour that I liked, then changed the blue to green.
  • 5.
    The process ofdeveloping the image to go on the contents page of my Music Magazine Out of the photo’s I had taken and narrowed down to a select few, this is the one I chose to use as the image for my contents page. First, I opened the photo up in Photoshop and then started by using the ‘Magnetic Lasso’ tool to cut her out from the background, and then once I had cut her out I used the ‘Eraser’ tool to smooth the edges. I used the ‘Spot Healing’ tool to remove any spots, blemishes or marks that she had, and once I done that I decided to use the ‘Curve’ adjustment function – which adjusted the lighting of her. I also decided – once her spots, blemishes and marks were removed – to airbrush the photo, to give it a more flawless effect. I done this by duplicating the layer, then using the ‘Gaussian Blur’ technique and on that I adjusting it to how blurred I wanted it, then I used the ‘Layer Mask’ option and then ‘Hide All’ to make the blurred layer hidden, so when I used the ‘Air Bush’ brush tool the blurred effect came through – and then once I had done all of that I simply applied it to the areas I wanted – and then right clicked on the layer and chose the ‘Merge Down’ option.
  • 6.
    Once I hadfinished with air brushing her skin, I decided to adjust the colour of her eyes – I wanted to make them brighter so they would stand out more. I done this by using the ‘Colour Replacement’ tool to make them both one colour, once that was done I used the ‘Dodge’ tool to brighten the irises and used the ‘Burn’ tool to darken the pupil. Then after adjusting here eyes I decided to touch up her make up so it stood out more, I done this by using the ‘Burn’ tool to make her eyelashes longer and eyeliner darker and thicker. After doing her eyes and make up I decided to adjust her lips, in order to make them brighter and stand out more. I done this process by using the ‘Colour Replacement’ tool, doing this evened out the colour and placed it all the way to her lip line, after that I used the ‘Dodge’ tool, to make them brighter and add shine, and finally I used the ‘Sharpen’ tool, this was to make the lips stand out more. After I had done that I decided to brighten her teeth; I done this by using the ‘Colour Replacement’ tool, which was to make them all the same colour as each other, and then I used the ‘Dodge’ tool, to make them brighter, finally I used the ‘Sharpen’ tool, this was to make them more noticeable. After I had done both the lips and the teeth, I decided to use the ‘Liquify’ option to enlarge the lips and make them equal.
  • 7.
    Then, I choseto change the colour of her hair, I done this by using the ‘Colour Replacement’ tool, then I changed the colour to a red – I done this because I thought it made her look more interesting and eye catching, but to also keep her looking the same as the imagery on the front cover. Finally, I decided to change the colour of her clothes, since I had done so with the imagery on the front cover. I done this by using the ‘Colour Replacement’ tool, and picked a colour that I liked, then changed the blue to purple.
  • 8.
    The process ofdeveloping the image to go on the double page spread of my Music Magazine Out of the photo’s I had taken and narrowed down to a select few, these are the ones I chose to use as the images for my double page spread. Some of the photos are done at different stages – e.g. some images had their hair done before their eyes, but some had their eyes done before their hair – but I decided for displaying the stages on here I would do all the images in the same order. First, I opened the photo up in Photoshop and unlocked the background layer so I could edit on it, and then started by using the ‘Magnetic Lasso’ tool to cut her out from the background. Once I had cut her out I used the ‘Eraser’ tool which was to smooth the edges.
  • 9.
    Once I hadcut her out I used the ‘Curve’ adjustment function to adjust the lighting of her. After that I used the ‘Spot Healing’ tool to remove any spots, blemishes or marks that she had, and then decided to airbrush the photo, to give it a more flawless effect – I done this by duplicating the layer, then using the ‘Gaussian Blur’ technique, then I used the ‘Layer Mask’ option and then ‘Hide All’ to make the blurred layer hidden, so when I used the ‘Air Bush’ brush tool the blurred effect came through – and then once I had done that I right clicked on the layer and chose the ‘Merge Down’ option.
  • 10.
    After I hadfinished with the air brushing, I chose to adjust the colour of her eyes because I wanted to make them brighter and stand out more. I done this by using the ‘Colour Replacement’ too – l to make them both one colour – and then I used the ‘Dodge’ and ‘Burn’ tool. Then I decided to touch up her make up so it stood out more, I done this by using the ‘Burn’ tool to make her eyeliner darker and thicker and her eyelashes longer.
  • 11.
    Then when Ihad finished doing her eyes and make up I decided to edit her lips and make up on her lips, in order to make them brighter and stand out more. I done this by using the ‘Colour Replacement’ tool – doing this process evened out the colour and also placed it all the way to her lip line. Then after that I used the ‘Dodge’ tool, to make them brighter and add shine, and finally I used the ‘Sharpen’ tool – this was to make the lips stand out more. Once I had done that I chose to brighten her teeth, which I done by using the ‘Colour Replacement’ tool, which was to make them all the same colour, then I used the ‘Dodge’ tool to make them brighter, and finally I used the ‘Sharpen’ tool – this was to make them more noticeable. After that I decided to use the ‘Liquify’ option to enlarge the lips, and also to make them equal.
  • 12.
    After that Ichose to change the colour of her hair, which I done by using the ‘Colour Replacement’ tool, then I changed the colour to a red – as I had done so with the other imagery’s.
  • 13.
    And finally, Idecided to change the colour of her clothes – I done this by using the ‘Colour Replacement’ tool, and picked a colour that I liked, and then changed the blue to orange/dark purple/yellow/a brighter blue.