
Recommended
More Related Content
What's hot
What's hot (20)
Similar to Advanced Excel: Top Skills for Data Analysis
Similar to Advanced Excel: Top Skills for Data Analysis (20)
Recently uploaded
Recently uploaded (20)
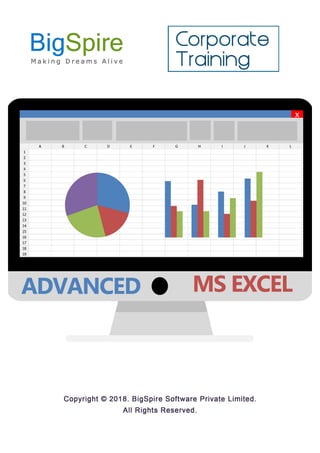
Advanced Excel: Top Skills for Data Analysis
- 2. CORPORATE TRAINING BOOK - ADVANCED EXCEL ADVANCED EXCEL: S.NO. TOPICS TITLE PAGE NO. 1 2 OBJECTIVE EXCEL BASICS 1 1 3 ADVANCED CHARTS 25 4 FORMULAS AND FUNCTIONS 43 5 VBA & MACROS 56 6 DATA ANALYSIS 77
- 3. CORPORATE TRAINING BOOK - ADVANCED EXCEL Copyrights © 2017 BigSpire Software Private Limited. All Rights Reserved 1 1. OBJECTIVE The objective of the training manual to understand the Microsoft Offce Excel features and functions. The book covers core concepts of Advanced Excel such as Formulas, Optimizing Data, Data Analysis, Data Reportings, Visualizations, VBA & Macros, Selet a right Charts, Pivot Table tools, Data Tables, Simulators, Integrating excel with other tools and more. 2. EXCEL BASICS Microsoft Excel is one of the most used software applications of all time. Hundreds of millions of people around the world use Microsoft Excel. You can use Excel to enter all sorts of data and perform financial, mathematical or statistical calculations. 2.1 RANGE A range in Excel is a collection of two or more cells. This below chapter gives an overview of some very important range operations.. Cell, Row, Column Let's start by selecting a cell, row and column. 1. To select cell C3, click on the box at the intersection of column C and row 3. 2. To select column C, click on the column C header. 3. To select row 3, click on the row 3 header. 4. To select the range B2:C4, click on cell B2 and drag it to cell C4.
- 4. CORPORATE TRAINING BOOK - ADVANCED EXCEL Copyrights © 2017 BigSpire Software Private Limited. All Rights Reserved 2 2. To select a range of individual cells, hold down CTRL and click on each cell that you want to include in the range. Fill a Range To fill a range, execute the following steps. 1b. Select cell B2, click on the lower right corner of cell B2 and drag it down to cell B8.
- 5. CORPORATE TRAINING BOOK - ADVANCED EXCEL Copyrights © 2017 BigSpire Software Private Limited. All Rights Reserved 3 This dragging technique is very important and you will use it very often in Excel. Here's another example. 2a. Enter the value 2 into cell B2 and the value 4 into cell B3. 2b. Select cell B2 and cell B3, click on the lower right corner of this range and drag it down. Date Pattern:
- 6. CORPORATE TRAINING BOOK - ADVANCED EXCEL Copyrights © 2017 BigSpire Software Private Limited. All Rights Reserved 4 Move the Range: To move a range, execute the following steps. 1. Select a range and click on the border of the range.
- 7. CORPORATE TRAINING BOOK - ADVANCED EXCEL Copyrights © 2017 BigSpire Software Private Limited. All Rights Reserved 5 Copy/Paste a Range To copy and paste a range, execute the following steps. 1. Select the range, right click, and then click Copy (or press CTRL + c). 2. Select the cell where you want the first cell of the range to appear, right click, and then click Paste under 'Paste Options:' (or press CTRL + v).
- 8. CORPORATE TRAINING BOOK - ADVANCED EXCEL Copyrights © 2017 BigSpire Software Private Limited. All Rights Reserved 6 Insert Row, Column To insert a row between the values 20 and 40 below, execute the following steps. 1. Select row 3. 2.2 FORMULAS AND FUNCTIONS A formula is an expression which calculates the value of a cell. Functions are predefined formulas and are already available in Excel. For example, cell A3 below contains a formula which adds the value of cell A2 to the value of cell A1. For example, cell A3 below contains the SUM function which calculates the sum of the range A1:A2.
- 9. CORPORATE TRAINING BOOK - ADVANCED EXCEL Copyrights © 2017 BigSpire Software Private Limited. All Rights Reserved 7 Enter a Formula To enter a formula, execute the following steps. 1. Select a cell. 2. To let Excel know that you want to enter a formula, type an equal sign (=). 3. For example, type the formula A1+A2. Tip: instead of typing A1 and A2, simply select cell A1 and cell A2. 4. Change the value of cell A1 to 3. Excel automatically recalculates the value of cell A3. This is one of Excel's most powerful features! Edit a Formula When you select a cell, Excel shows the value or formula of the cell in the formula bar. 1. To edit a formula, click in the formula bar and change the formula.
- 10. CORPORATE TRAINING BOOK - ADVANCED EXCEL Copyrights © 2017 BigSpire Software Private Limited. All Rights Reserved 8 2. Press Enter. Operator Precedence Excel uses a default order in which calculations occur. If a part of the formula is in parentheses, that part will be calculated first. It then performs multiplication or division calculations. Once this is complete, Excel will add and subtract the remainder of your formula. See the example below. First, Excel performs multiplication (A1 * A2). Next, Excel adds the value of cell A3 to this result.
- 11. CORPORATE TRAINING BOOK - ADVANCED EXCEL Copyrights © 2017 BigSpire Software Private Limited. All Rights Reserved 9 First, Excel calculates the part in parentheses (A2+A3). Next, it multiplies this result by the value of cell A1. Copy/Paste a Formula When you copy a formula, Excel automatically adjusts the cell references for each new cell the formula is copied to. To understand this, execute the following steps. 1. Enter the formula shown below into cell A4. 2a. Select cell A4, right click, and then click Copy (or press CTRL + c)... 2b. You can also drag the formula to cell B4. Select cell A4, click on the lower right corner of cell A4 and drag it across to cell B4. This is much easier and gives the exact same result!
- 12. CORPORATE TRAINING BOOK - ADVANCED EXCEL Copyrights © 2017 BigSpire Software Private Limited. All Rights Reserved 10 2.3 RIBBON The tabs on the ribbon are: File, Home, Insert, Page layout, Formulas, Data, Review and View. Excel selects the ribbon's Home tab when you open a workbook. Excel's Ribbon consists of a series of tabs containing command buttons arranged into different groups. The Ribbon is made up of the following components: Tabs for each of Excel's main tasks that bring together and display all the commands commonly needed to perform that core task. Groups that organize related command buttons into subtasks normally performed as part of the tab's larger core task. Command buttons within each group that you select to perform a particular action or to open a gallery from which you can click a particular thumbnail - note that many command buttons on certain tabs of the Excel Ribbon are organized into mini-toolbars with related settings. Dialog Box launcher in the lower-right corner of certain groups that opens a dialog box containing a bunch of additional options you can select. To get more of the Worksheet area displayed in the program window, you can minimize the Ribbon so that only its tabs are displayed - simply click Minimize the Ribbon on the menu opened by clicking the Custom Quick Access Toolbar button, double-click any one of the Ribbon's tabs or press Ctrl+F1. To redisplay the entire Ribbon, and keep all the command buttons on its tab displayed in the program window, click Minimize the Ribbon item on the Custom Quick Access Toolbar's drop-down menu, double-click one of the tabs or press Ctrl+F1 a second time. When you work in Excel with the Ribbon minimized, the Ribbon expands each time you click one of its tabs to show its command buttons but that tab stays open only until you select one of the command buttons. The moment you select a command button, Excel immediately minimizes the Ribbon again to just the display of its tabs. Keeping tabs on the Excel Ribbon The very first time you launch Excel, its Ribbon contains the following seven tabs, going from left to right: Home tab with the command buttons normally used when creating, formatting, and editing a spreadsheet arranged into the Clipboard, Font, Alignment, Number, Styles, Cells, and Editing groups. Insert tab with the command buttons normally used when adding particular elements (including graphics, PivotTables, charts, hyperlinks, and headers and footers) to a spreadsheet arranged into the Shapes, Tables, Illustrations, Charts, Links, and Text groups Page Layout tab with the command buttons normally used when preparing a spreadsheet for
- 13. CORPORATE TRAINING BOOK - ADVANCED EXCEL Copyrights © 2017 BigSpire Software Private Limited. All Rights Reserved 11 printing or re-ordering graphics on the sheet arranged into the Themes, Page Setup, Scale to Fit, Sheet Options, and Arrange groups Formulas tab with the command buttons normally used when adding formulas and functions to a spreadsheet or checking a worksheet for formula errors arranged into the Function Library, Defined Names, Formula Auditing, and Calculation groups. Note that this tab also contains a Solutions group when you activate certain add-in programs such as Conditional Sum and Euro Currency Tools. Data tab with the command buttons normally used when importing, querying, outlining, and subtotaling the data placed into a worksheet's data list arranged into the Get External Data, Manage Connections, Sort & Filter, Data Tools, and Outline groups. Note that this tab also contains an Analysis group if you activate add-ins such as the Analysis Toolpak and Solver Add-In. Review tab with the command buttons normally used when proofing, protecting, and marking up a spreadsheet for review by others arranged into the Proofing, Comments, and Changes. View tab with the command buttons normally used when changing the display of the Worksheet area and the data it contains arranged into the Workbook Views, Show/Hide, Zoom, Window, and Macros groups 2.4 WORKBOOK A workbook is another word for your Excel file. When you start Excel, click Blank workbook to create an Excel workbook from scratch. 2.5 WORKSHEETS A worksheet is a collection of cells where you keep and manipulate the data. Each Excel workbook can contain multiple worksheets. Select a Worksheet
- 14. CORPORATE TRAINING BOOK - ADVANCED EXCEL Copyrights © 2017 BigSpire Software Private Limited. All Rights Reserved 12 When you open an Excel workbook, Excel automatically selects Sheet1 for you. The name of the worksheet appears on its sheet tab at the bottom of the document window. Rename a Worksheet To give a worksheet a more specific name, execute the following steps. 1. Right click on the sheet tab of Sheet1. 2. Choose Rename. Move a Worksheet
- 15. CORPORATE TRAINING BOOK - ADVANCED EXCEL Copyrights © 2017 BigSpire Software Private Limited. All Rights Reserved 13 To move a worksheet, click on the sheet tab of the worksheet you want to move and drag it into the new position. 1. For example, click on the sheet tab of Sheet2 and drag it before Sales 2016. Delete a Worksheet To delete a worksheet, right click on a sheet tab and choose Delete. 1. For example, delete Sheet2. Copy a Worksheet Imagine, you have got the sales for 2016 ready and want to create the exact same sheet for 2017, but with different data. You can recreate the worksheet, but this is time-consuming. It's a lot easier to copy the entire worksheet and only change the numbers. 1. Right click on the sheet tab of Sales 2016. 2. Choose Move or Copy.
- 16. CORPORATE TRAINING BOOK - ADVANCED EXCEL Copyrights © 2017 BigSpire Software Private Limited. All Rights Reserved 14 The 'Move or Copy' dialog box appears. 3. Select (move to end) and check Create a copy. 2.6 FORMAT CELLS When we format cells in Excel, we change the appearance of a number without changing the number itself. We can apply a number format (0.8, $0.80, 80%, etc) or other formatting (alignment, font, border, etc).
- 17. CORPORATE TRAINING BOOK - ADVANCED EXCEL Copyrights © 2017 BigSpire Software Private Limited. All Rights Reserved 15 1. Enter the value 0.8 into cell B2. By default, Excel uses the General format (no specific number format) for numbers. To apply a number format, use the 'Format Cells' dialog box. 2. Select cell B2. 3. Right click, and then click Format Cells (or press CTRL + 1). The 'Format Cells' dialog box appears. 4. For example, select Currency.
- 18. CORPORATE TRAINING BOOK - ADVANCED EXCEL Copyrights © 2017 BigSpire Software Private Limited. All Rights Reserved 16 Note: Excel gives you a life preview of how the number will be formatted (under Sample). 5. Click OK. 2.7 FIND AND SELECT You can use Excel's Find and Replace feature to quickly find specific text and replace it with other text. You can use Excel's Go To Special feature to quickly select all cells with formulas, comments, conditional formatting, constants, data validation, etc. Find To quickly find specific text, execute the following steps. 1. On the Home tab, in the Editing group, click Find & Select.
- 19. CORPORATE TRAINING BOOK - ADVANCED EXCEL Copyrights © 2017 BigSpire Software Private Limited. All Rights Reserved 17 Go To Special You can use Excel's Go To Special feature to quickly select all cells with formulas, comments, conditional formatting, constants, data validation, etc. For example, to select all cells with formulas, execute the following steps. 1. Select a single cell. 2. On the Home tab, in the Editing group, click Find & Select.
- 20. CORPORATE TRAINING BOOK - ADVANCED EXCEL Copyrights © 2017 BigSpire Software Private Limited. All Rights Reserved 18 2.8 TEMPLATES Instead of creating an Excel workbook from scratch, you can create a workbook based on a template. There are many free templates available, waiting to be used. Existing Templates To create a workbook based on an existing template, execute the following steps. 1. On the File tab, click New. 2. Use the search box to search for online templates or click a template from one of the featured templates.
- 21. CORPORATE TRAINING BOOK - ADVANCED EXCEL Copyrights © 2017 BigSpire Software Private Limited. All Rights Reserved 19 2.9 DATA VALIDATION Use data validation in Excel to make sure that users enter certain values into a cell. Data Validation Example In this example, we restrict users to enter a whole number between 0 and 10. Create Data Validation Rule To create the data validation rule, execute the following steps. 1. Select cell C2. 2. On the Data tab, in the Data Tools group, click Data Validation. On the Settings tab: 3. In the Allow list, click Whole number. 4. In the Data list, click between. 5. Enter the Minimum and Maximum values. Input Message
- 22. CORPORATE TRAINING BOOK - ADVANCED EXCEL Copyrights © 2017 BigSpire Software Private Limited. All Rights Reserved 20 Input messages appear when the user selects the cell and tell the user what to enter. On the Input Message tab: 1. Check 'Show input message when cell is selected'. 2. Enter a title. 3. Enter an input message. Error Alert If users ignore the input message and enter a number that is not valid, you can show them an error alert. On the Error Alert tab: 1. Check 'Show error alert after invalid data is entered'. 2. Enter a title. 3. Enter an error message.
- 23. CORPORATE TRAINING BOOK - ADVANCED EXCEL Copyrights © 2017 BigSpire Software Private Limited. All Rights Reserved 21 4. Click OK. Data Validation Result 1. Select cell C2. 2. Try to enter a number higher than 10. Result: Note: to remove data validation from a cell, select the cell, on the Data tab, in the Data Tools group, click Data Validation, and then click Clear All. You can use Excel's Go To Special feature to quickly select all cells with data validation.
- 24. CORPORATE TRAINING BOOK - ADVANCED EXCEL Copyrights © 2017 BigSpire Software Private Limited. All Rights Reserved 22 2.10 KEYBOARD SHORTCUTS Keyboard Shortcuts: Keyboard shortcuts allow you to do things with your keyboard instead of your mouse to increase your speed. Basic Select cell B2. 1. To select the entire range, press CTRL + a (if you press CTRL + a one more time Excel selects the entire sheet). 2. To copy the range, press CTRL + c (to cut a range, press CTRL + x). 3. Select cell A6 and press CTRL + v to paste this range. 4. To undo this operation, press CTRL + z 5. To select cells while moving down, hold down SHIFT and press ↓ a few times. 6. To select cells while moving to the right, hold down SHIFT and press → a few times. 7. To quickly insert the SUM function, press ATL + =, and press Enter.
- 25. CORPORATE TRAINING BOOK - ADVANCED EXCEL Copyrights © 2017 BigSpire Software Private Limited. All Rights Reserved 23 8. Launch the 'Format cells' dialog box, press CTRL + 1 2.11 PRINT This chapter teaches you how to print a worksheet and how to change some important print settings in Excel. Printing the Entire Workbook Printing the Active Worksheet(s) Defining the Print Area Printing Ranges of Cells 2.12 SHARE Learn how to share Excel data with Word documents and other files. Paste Most of the time, you'll simply need to paste static Excel data in a Word document. 1. Select the Excel data. 2. Right click, and then click Copy (or press CTRL + c). 3. Open a Word document. 4. Press CTRL + v. 5. Click the icon in the upper left corner of the table and add borders. Result.
- 26. CORPORATE TRAINING BOOK - ADVANCED EXCEL Copyrights © 2017 BigSpire Software Private Limited. All Rights Reserved 24 2.13 PROTECT Encrypt an Excel file with a password so that it requires a password to open it.
- 27. CORPORATE TRAINING BOOK - ADVANCED EXCEL Copyrights © 2017 BigSpire Software Private Limited. All Rights Reserved 25 3. ADVANCED CHARTS A simple chart in Excel can say more than a sheet full of numbers. As you'll see, creating charts is very easy. 3.1 CREATE CHART To create a line chart, execute the following steps. 1. Select the range A1:D7. 2. On the Insert tab, in the Charts group, click the Line symbol.
- 28. CORPORATE TRAINING BOOK - ADVANCED EXCEL Copyrights © 2017 BigSpire Software Private Limited. All Rights Reserved 26 3. Click Line with Markers. Result:
- 29. CORPORATE TRAINING BOOK - ADVANCED EXCEL Copyrights © 2017 BigSpire Software Private Limited. All Rights Reserved 27 Note: enter a title by clicking on Chart Title. For example, Wildlife Population. 3.2 CHANGE CHART TYPE You can easily change to a different type of chart at any time. 1. Select the chart. 2. On the Design tab, in the Type group, click Change Chart Type. 3. On the left side, click Column.
- 30. CORPORATE TRAINING BOOK - ADVANCED EXCEL Copyrights © 2017 BigSpire Software Private Limited. All Rights Reserved 28 4. Click OK. Result: 3.3 SWITCH ROW/COLUMN If you want to display the animals (instead of the months) on the horizontal axis, execute the following steps. 1. Select the chart. 2. On the Design tab, in the Data group, click Switch Row/Column. Result:
- 31. CORPORATE TRAINING BOOK - ADVANCED EXCEL Copyrights © 2017 BigSpire Software Private Limited. All Rights Reserved 29 3.4 LEGEND POSITION To move the legend to the right side of the chart, execute the following steps. 1. Select the chart. 2. Click the + button on the right side of the chart, click the arrow next to Legend and click Right.
- 32. CORPORATE TRAINING BOOK - ADVANCED EXCEL Copyrights © 2017 BigSpire Software Private Limited. All Rights Reserved 30 Result: 3.5 DATA LABELS You can use data labels to focus your readers' attention on a single data series or data point. 1. Select the chart. 2. Click a green bar to select the Jun data series. 3. Use your arrow keys to select the population of Dolphins in June (tiny green bar). 4. Click the + button on the right side of the chart and click the check box next to Data Labels.
- 33. CORPORATE TRAINING BOOK - ADVANCED EXCEL Copyrights © 2017 BigSpire Software Private Limited. All Rights Reserved 31 Result: 3.6 COLUMN CHART Column charts are used to compare values across categories by using vertical bars. To create a column chart, execute the following steps. 1. Select the range A1:A7, hold down CTRL, and select the range C1:D7.
- 34. CORPORATE TRAINING BOOK - ADVANCED EXCEL Copyrights © 2017 BigSpire Software Private Limited. All Rights Reserved 32 3.7 LINE CHART Line charts are used to display trends over time. Use a line chart if you have text labels, dates or a few numeric labels on the horizontal axis. Use a scatter chart (XY chart) to show scientific XY data. To create a line chart, execute the following steps. 1. Select the range A1:D7.
- 35. CORPORATE TRAINING BOOK - ADVANCED EXCEL Copyrights © 2017 BigSpire Software Private Limited. All Rights Reserved 33 Note: only if you have numeric labels, empty cell A1 before you create the line chart. By doing this, Excel does not recognize the numbers in column A as a data series and automatically places these numbers on the horizontal (category) axis. After creating the chart, you can enter the text Year into cell A1 if you like. 3.8 PIE CHART Pie charts are used to display the contribution of each value (slice) to a total (pie). Pie charts always use one data series. To create a pie chart of the 2017 data series, execute the following steps. 1. Select the range A1:D2.
- 36. CORPORATE TRAINING BOOK - ADVANCED EXCEL Copyrights © 2017 BigSpire Software Private Limited. All Rights Reserved 34 3.9 BAR CHART A bar chart is the horizontal version of a column chart. Use a bar chart if you have large text labels. To create a bar chart, execute the following steps. 1. Select the range A1:B6.
- 37. CORPORATE TRAINING BOOK - ADVANCED EXCEL Copyrights © 2017 BigSpire Software Private Limited. All Rights Reserved 35 3.10 AREA CHART An area chart is a line chart with the areas below the lines filled with colors. Use a stacked area chart to display the contribution of each value to a total over time. To create an area chart, execute the following steps. 1. Select the range A1:D7.
- 38. CORPORATE TRAINING BOOK - ADVANCED EXCEL Copyrights © 2017 BigSpire Software Private Limited. All Rights Reserved 36 4. Change the chart's subtype to Stacked Area (the one next to Area). 3.11 SCATTER CHART Use a scatter chart (XY chart) to show scientific XY data. Scatter charts are often used to find out if there's a relationship between variable X and Y. Straight Lines To create a scatter chart, execute the following steps. 1. Select the range A1:D22.
- 39. CORPORATE TRAINING BOOK - ADVANCED EXCEL Copyrights © 2017 BigSpire Software Private Limited. All Rights Reserved 37
- 40. CORPORATE TRAINING BOOK - ADVANCED EXCEL Copyrights © 2017 BigSpire Software Private Limited. All Rights Reserved 38 3.12 DATA SERIES A row or column of numbers that are plotted in a chart is called a data series. You can plot one or more data series in a chart. To create a column chart, execute the following steps. 1. Select the range A1:D7. Select Data Source To launch the Select Data Source dialog box, execute the following steps. 1. Select the chart. Right click, and then click Select Data.
- 41. CORPORATE TRAINING BOOK - ADVANCED EXCEL Copyrights © 2017 BigSpire Software Private Limited. All Rights Reserved 39 Switch Row/Column If you click Switch Row/Column, you'll have 6 data series (Jan, Feb, Mar, Apr, May and Jun) and three horizontal axis labels (Bears, Dolphins and Whales).
- 42. CORPORATE TRAINING BOOK - ADVANCED EXCEL Copyrights © 2017 BigSpire Software Private Limited. All Rights Reserved 40 Add, Edit, Remove and Move You can use the Select Data Source dialog box to add, edit, remove and move data series, but there's a quicker way. 1. Select the chart. 2. Simply change the range on the sheet. Result:
- 43. CORPORATE TRAINING BOOK - ADVANCED EXCEL Copyrights © 2017 BigSpire Software Private Limited. All Rights Reserved 41 3.13 GANTT CHART Excel does not offer Gantt as chart type, but it's easy to create a Gantt chart by customizing the stacked bar chart type. Below you can find our Gantt chart data.
- 44. CORPORATE TRAINING BOOK - ADVANCED EXCEL Copyrights © 2017 BigSpire Software Private Limited. All Rights Reserved 42
- 45. CORPORATE TRAINING BOOK - ADVANCED EXCEL Copyrights © 2017 BigSpire Software Private Limited. All Rights Reserved 43 4. FORMULAS AND FUNCTIONS A formula is an expression which calculates the value of a cell. Functions are predefined formulas and are already available in Excel. 4.1 COUNT AND SUM FUNCTIONS The most used functions in Excel are the functions that count and sum. You can count and sum based on one criteria or multiple criteria. Count To count the number of cells that contain numbers, use the COUNT function. Countif To count cells based on one criteria (for example, higher than 9), use the following COUNTIF function. Countifs To count cells based on multiple criteria (for example, green and higher than 9), use the following COUNTIFS function.
- 46. CORPORATE TRAINING BOOK - ADVANCED EXCEL Copyrights © 2017 BigSpire Software Private Limited. All Rights Reserved 44 Sum To sum a range of cells, use the SUM function. Sumif To sum cells based on one criteria (for example, higher than 9), use the following SUMIF function (two arguments).
- 47. CORPORATE TRAINING BOOK - ADVANCED EXCEL Copyrights © 2017 BigSpire Software Private Limited. All Rights Reserved 45 To sum cells based on one criteria (for example, green), use the following SUMIF function (three arguments, last argument is the range to sum). Sumifs To sum cells based on multiple criteria (for example, blue and green), use the following SUMIFS function (first argument is the range to sum). General note: in a similar way, you can use the AVERAGEIF and AVERAGEIFS function to average cells based on one or multiple criteria. 4.2 LOGICAL FUNCTIONS Learn how to use Excel's logical functions such as the IF, AND and OR function. If Function The IF function checks whether a condition is met, and returns one value if TRUE and another value if FALSE.
- 48. CORPORATE TRAINING BOOK - ADVANCED EXCEL Copyrights © 2017 BigSpire Software Private Limited. All Rights Reserved 46 1. Select cell C1 and enter the following function. The IF function returns Correct because the value in cell A1 is higher than 10. And Function The AND Function returns TRUE if all conditions are true and returns FALSE if any of the conditions are false. 1. Select cell D1 and enter the following formula. The AND function returns FALSE because the value in cell B1 is not higher than 5. As a result the IF function returns Incorrect. Or Function The OR function returns TRUE if any of the conditions are TRUE and returns FALSE if all conditions are false. 1. Select cell E1 and enter the following formula. The OR function returns TRUE because the value in cell A1 is higher than 10. As a result the IF function returns Correct. General note: the AND and OR function can check up to 255 conditions. 4.3 CELL REFERENCES Cell references in Excel are very important. Understand the difference between relative, absolute and mixed reference, and you are on your way to success. Relative Reference By default, Excel uses relative reference. See the formula in cell D2 below. Cell D2 references (points to) cell B2 and cell C2. Both references are relative.
- 49. CORPORATE TRAINING BOOK - ADVANCED EXCEL Copyrights © 2017 BigSpire Software Private Limited. All Rights Reserved 47 Absolute Reference See the formula in cell E3 below. 1. To create an absolute reference to cell H3, place a $ symbol in front of the column letter and row number of cell H3 ($H$3) in the formula of cell E3. 2. Now we can quickly drag this formula to the other cells. The reference to cell H3 is fixed (when we drag the formula down and across). As a result, the correct lengths and widths in inches are calculated. Average To calculate the average of a range of cells, use the AVERAGE function.
- 50. CORPORATE TRAINING BOOK - ADVANCED EXCEL Copyrights © 2017 BigSpire Software Private Limited. All Rights Reserved 48 Averageif To average cells based on one criteria, use the AVERAGEIF function. For example, to calculate the average excluding zeros . Note: <> means not equal to. The AVERAGEIF function is similar to the SUMIF function. Min To find the minimum value, use the MIN function. Max To find the maximum value, use the MAX function.
- 51. CORPORATE TRAINING BOOK - ADVANCED EXCEL Copyrights © 2017 BigSpire Software Private Limited. All Rights Reserved 49 Similarly, Small: To find the second smallest number, use the following SMALL function. Large: To find the third largest number, use the following LARGE function. 4.4 DATE AND TIME FUNTIONS To enter a date in Excel, use the "/" or "-" characters. To enter a time, use the ":" (colon). You can also enter a date and a time in one cell. Note: Dates are in US Format. Months first, Days second. This type of format depends on your windows regional settings. Year, Month, Day To get the year of a date, use the YEAR function. Note: use the MONTH and DAY function to get the month and day of a date. Date Function 1. To add a number of days to a date, use the following simple formula. 2. To add a number of years, months and/or days, use the DATE function.
- 52. CORPORATE TRAINING BOOK - ADVANCED EXCEL Copyrights © 2017 BigSpire Software Private Limited. All Rights Reserved 50 Note: the DATE function accepts three arguments: year, month and day. Excel knows that 6 + 2 = 8 = August has 31 days and rolls over to the next month (23 August + 9 days = 1 September). Current Date & Time To get the current date and time, use the NOW function. Hour, Minute, Second To return the hour, use the HOUR function Note: use the MINUTE and SECOND function to return the minute and second. Time Function To add a number of hours, minutes and/or seconds, use the TIME function. Note: Excel adds 2 hours, 10 + 1 = 11 minutes and 70 - 60 = 10 seconds. 4.5 TEXT FUNCTIONS Excel has many functions to offer when it comes to manipulating text strings. Join Strings To join strings, use the & operator.
- 53. CORPORATE TRAINING BOOK - ADVANCED EXCEL Copyrights © 2017 BigSpire Software Private Limited. All Rights Reserved 51 Note: to insert a space, use " " Left To extract the leftmost characters from a string, use the LEFT function. Right To extract the rightmost characters from a string, use the RIGHT function. MID To extract a substring, starting in the middle of a string, use the MID function. Len To get the length of a string, use the LEN function.
- 54. CORPORATE TRAINING BOOK - ADVANCED EXCEL Copyrights © 2017 BigSpire Software Private Limited. All Rights Reserved 52 Find To find the position of a substring in a string, use the FIND function. Substitute To replace existing text with new text in a string, use the SUBSTITUTE function. 4.6 LOOKUP & REFERENCE FUNCTIONS Learn all about Excel's lookup & reference functions such as the VLOOKUP, HLOOKUP, MATCH, INDEX and CHOOSE function. VLookup The VLOOKUP (Vertical lookup) function looks for a value in the leftmost column of a table, and then returns a value in the same row from another column you specify. 1. Insert the VLOOKUP function shown below.
- 55. CORPORATE TRAINING BOOK - ADVANCED EXCEL Copyrights © 2017 BigSpire Software Private Limited. All Rights Reserved 53 Explanation: the VLOOKUP function looks for the ID (104) in the leftmost column of the range $E$4:$G$7 and returns the value in the same row from the third column (third argument is set to 3). The fourth argument is set to FALSE to return an exact match or a #N/A error if not found. 2. Drag the VLOOKUP function in cell B2 down to cell B11. Note: when we drag the VLOOKUP function down, the absolute reference ($E$4:$G$7) stays the same, while the relative reference (A2) changes to A3, A4, A5, etc. HLookup In a similar way, you can use the HLOOKUP (Horizontal lookup) function.
- 56. CORPORATE TRAINING BOOK - ADVANCED EXCEL Copyrights © 2017 BigSpire Software Private Limited. All Rights Reserved 54 Match The MATCH function returns the position of a value in a given range. Explanation: Yellow found at position 3 in the range E4:E7. The third argument is optional. Set this argument to 0 to return the position of the value that is exactly equal to lookup_value (A2) or a #N/A error if not found. Index The INDEX function below returns a specific value in a two-dimensional range. Explanation: 92 found at the intersection of row 3 and column 2 in the range E4:F7. The INDEX function below returns a specific value in a one-dimensional range.
- 57. CORPORATE TRAINING BOOK - ADVANCED EXCEL Copyrights © 2017 BigSpire Software Private Limited. All Rights Reserved 55 Choose The CHOOSE function returns a value from a list of values, based on a position number.
- 58. CORPORATE TRAINING BOOK - ADVANCED EXCEL Copyrights © 2017 BigSpire Software Private Limited. All Rights Reserved 56 5. VBA VBA (Visual Basic for Applications) is the programming language of Excel and other Office programs. 5.1 CREATE A MACRO With Excel VBA you can automate tasks in Excel by writing so called macros. In this chapter, learn how to create a simple macro which will be executed after clicking on a command button. First, turn on the Developer tab. Developer Tab To turn on the Developter tab, execute the following steps. 1. Right click anywhere on the ribbon, and then click Customize the Ribbon. 2. Under Customize the Ribbon, on the right side of the dialog box, select Main tabs (if necessary). 3. Check the Developer check box.
- 59. CORPORATE TRAINING BOOK - ADVANCED EXCEL Copyrights © 2017 BigSpire Software Private Limited. All Rights Reserved 57 4. Click OK. 5. You can find the Developer tab next to the View tab. Command Button To place a command button on your worksheet, execute the following steps. 1. On the Developer tab, click Insert. 2. In the ActiveX Controls group, click Command Button.
- 60. CORPORATE TRAINING BOOK - ADVANCED EXCEL Copyrights © 2017 BigSpire Software Private Limited. All Rights Reserved 58 3. Drag a command button on your worksheet. Assign a Macro To assign a macro (one or more code lines) to the command button, execute the following steps. 1. Right click CommandButton1 (make sure Design Mode is selected).
- 61. CORPORATE TRAINING BOOK - ADVANCED EXCEL Copyrights © 2017 BigSpire Software Private Limited. All Rights Reserved 59 2. Click View Code. The Visual Basic Editor appears. 3. Place your cursor between Private Sub CommandButton1_Click() and End Sub. 4. Add the code line shown below.
- 62. CORPORATE TRAINING BOOK - ADVANCED EXCEL Copyrights © 2017 BigSpire Software Private Limited. All Rights Reserved 60 Note: the window on the left with the names Sheet1, Sheet2 and Sheet3 is called the Project Explorer. If the Project Explorer is not visible, click View, Project Explorer. To add the Code window for the first sheet, click Sheet1 (Sheet1). 5. Close the Visual Basic Editor. 6. Click the command button on the sheet (make sure Design Mode is deselected). Result: Congratulations. You've just created a macro in Excel! Visual Basic Editor To open the Visual Basic Editor, on the Developer tab, click Visual Basic. The Visual Basic Editor appears.
- 63. CORPORATE TRAINING BOOK - ADVANCED EXCEL Copyrights © 2017 BigSpire Software Private Limited. All Rights Reserved 61 5.2 MSGBOX The MsgBox is a dialog box in Excel VBA you can use to inform the users of your program. Place a command button on your worksheet and add the following code lines: 1. A simple message. MsgBox "This is fun" Result when you click the command button on the sheet: 2. A little more advanced message. First, enter a number into cell A1. MsgBox "Entered value is " & Range("A1").Value Result when you click the command button on the sheet: Note: we used the & operator to concatenate (join) two strings. Although Range("A1").value is not a string, it works here. 3. To start a new line in a message, use vbNewLine. MsgBox "Line 1" & vbNewLine & "Line 2" Result when you click the command button on the sheet:
- 64. CORPORATE TRAINING BOOK - ADVANCED EXCEL Copyrights © 2017 BigSpire Software Private Limited. All Rights Reserved 62 5.3 WORKBOOK AND WORKSHEET OBJECT The MsgBox is a dialog box in Excel VBA you can use to inform the users of your program. Place a command button on your worksheet and add the following code lines: Learn more about the Workbook and Worksheet object in Excel VBA. Object Hierarchy In Excel VBA, an object can contain another object, and that object can contain another object, etc. In other words, Excel VBA programming involves working with an object hierarchy. This probably sounds quite confusing, but we will make it clear. The mother of all objects is Excel itself. We call it the Application object. The application object contains other objects. For example, the Workbook object (Excel file). This can be any workbook you have created. The Workbook object contains other objects, such as the Worksheet object. The Worksheet object contains other objects, such as the Range object. The Create a Macro chapter illustrates how to run code by clicking on a command button. We used the following code line: Range("A1").Value = "Hello" but what we really meant was: Application.Workbooks("create-a-macro").Worksheets(1).Range("A1").Value = "Hello" Note: the objects are connected with a dot. Fortunately, we do not have to add a code line this way. That is because we placed our command button in create-a-macro.xls, on the first worksheet. Be aware that if you want to change things on different worksheets, you have to include the Worksheet object. Read on. Collections You may have noticed that Workbooks and Worksheets are both plural. That is because they are collections. The Workbooks collection contains all the Workbook objects that are currently open. The Worksheets collection contains all the Worksheet objects in a workbook. You can refer to a member of the collection, for example, a single Worksheet object, in three ways. 1. Using the worksheet name. Worksheets("Sales").Range("A1").Value = "Hello" 2. Using the index number (1 is the first worksheet starting from the left). Worksheets(1).Range("A1").Value = "Hello" 3. Using the CodeName. Sheet1.Range("A1").Value = "Hello"
- 65. CORPORATE TRAINING BOOK - ADVANCED EXCEL Copyrights © 2017 BigSpire Software Private Limited. All Rights Reserved 63 To see the CodeName of a worksheet, open the Visual Basic Editor. In the Project Explorer, the first name is the CodeName. The second name is the worksheet name (Sales). Note: the CodeName remains the same if you change the worksheet name or the order of your worksheets so this is the safest way to reference a worksheet. Click View, Properties Window to change the CodeName of a worksheet. There is one disadvantage, you cannot use the CodeName if you reference a worksheet in a different workbook. Properties and Methods Now let's take a look at some properties and methods of the Workbooks and Worksheets collection. Properties are something which an collection has (they describe the collection), while methods do something (they perform an action with an collection). Place a command button on your worksheet and add the code lines: 1. The Add method of the Workbooks collection creates a new workbook. Workbooks.Add Note: the Add method of the Worksheets collection creates a new worksheet. 2. The Count property of the Worksheets collection counts the number of worksheets in a workbook. MsgBox Worksheets.Count Result when you click the command button on the sheet:
- 66. CORPORATE TRAINING BOOK - ADVANCED EXCEL Copyrights © 2017 BigSpire Software Private Limited. All Rights Reserved 64 5.4 RANGE OBJECT The Range object, which is the representation of a cell (or cells) on your worksheet, is the most important object of Excel VBA. This chapter gives an overview of the properties and methods of the Range object. Properties are something which an object has (they describe the object), while methods do something (they perform an action with an object). Range Examples Place a command button on your worksheet and add the following code line: 1. Range("B3").Value = 2 Result when you click the command button on the sheet: Code: 2. Range("A1:A4").Value = 5 Result: Code: 3. Range("A1:A2,B3:C4").Value = 10 Result: Note: to refer to a named range in your Excel VBA code, use a code line like this: Range("Prices").Value = 15 Cells Instead of Range, you can also use Cells. Using Cells is particularly useful when you want to loop through ranges. Code:
- 67. CORPORATE TRAINING BOOK - ADVANCED EXCEL Copyrights © 2017 BigSpire Software Private Limited. All Rights Reserved 65 Cells(3, 2).Value = 2 Result: Explanation: Excel VBA enters the value 2 into the cell at the intersection of row 3 and column 2. Code: Range(Cells(1, 1), Cells(4, 1)).Value = 5 Result: Declare a Range Object You can declare a Range object by using the keywords Dim and Set. Code: Dim example As Range Set example = Range("A1:C4") example.Value = 8 Result: Select An important method of the Range object is the Select method. The Select method simply selects a range. Code: Dim example As Range Set example = Range("A1:C4") example.Select
- 68. CORPORATE TRAINING BOOK - ADVANCED EXCEL Copyrights © 2017 BigSpire Software Private Limited. All Rights Reserved 66 Result: Note: to select cells on a different worksheet, you have to activate this sheet first. For example, the following code lines select cell B7 on the third worksheet from the left. Worksheets(3).Activate Worksheets(3).Range("B7").Select Rows The Rows property gives access to a specific row of a range. Code: Dim example As Range Set example = Range("A1:C4") example.Rows(3).Select Result: Columns The Columns property gives access to a specific column of a range. Code: Dim example As Range Set example = Range("A1:C4") example.Columns(2).Select
- 69. CORPORATE TRAINING BOOK - ADVANCED EXCEL Copyrights © 2017 BigSpire Software Private Limited. All Rights Reserved 67 Copy/Paste The Copy and Paste method are used to copy a range and to paste it somewhere else on the worksheet. Code: Range("A1:A2").Select Selection.Copy Range("C3").Select ActiveSheet.Paste Although this is allowed in Excel VBA, it is much better to use the code line below which does exactly the same. Range("C3:C4").Value = Range("A1:A2").Value Clear To clear the content of an Excel range, you can use the ClearContents method. Range("A1").ClearContents or simply use: Range("A1").Value = "" Note: use the Clear method to clear the content and format of a range. Use the ClearFormats method to clear the format only. Count With the Count property, you can count the number of cells, rows and columns of a range. Note: border for illustration only. Code: Dim example As Range Set example = Range("A1:C4")
- 70. CORPORATE TRAINING BOOK - ADVANCED EXCEL Copyrights © 2017 BigSpire Software Private Limited. All Rights Reserved 68 MsgBox example.Count Result: Code: Dim example As Range Set example = Range("A1:C4") MsgBox example.Rows.Count Note: in a similar way, you can count the number of columns of a range. 5.5 VARIABLES This chapter teaches you how to declare, initialize and display a variable in Excel VBA. Letting Excel VBA know you are using a variable is called declaring a variable. Initializing simply means assigning a beginning (initial) value to a variable. Place a command button on your worksheet and add the code lines below. To execute the code lines, click the command button on the sheet. Integer Integer variables are used to store whole numbers. Dim x As Integer x = 6 Range("A1").Value = x
- 71. CORPORATE TRAINING BOOK - ADVANCED EXCEL Copyrights © 2017 BigSpire Software Private Limited. All Rights Reserved 69 Explanation: the first code line declares a variable with name x of type Integer. Next, we initialize x with value 6. Finally, we write the value of x to cell A1. String String variables are used to store text. Code: Dim book As String book = "bible" Range("A1").Value = book Result: Explanation: the first code line declares a variable with name book of type String. Next, we initialize book with the text bible. Always use apostrophes to initialize String variables. Finally, we write the text of the variable book to cell A1. Double A variable of type Double is more accurate than a variable of type Integer and can also store numbers after the comma. Code: Dim x As Integer| x = 5.5 MsgBox "value is " & x Result:
- 72. CORPORATE TRAINING BOOK - ADVANCED EXCEL Copyrights © 2017 BigSpire Software Private Limited. All Rights Reserved 70 But that is not the right value! We initialized the variable with value 5.5 and we get the value 6. What we need is a variable of type Double. Code: Dim x As Double x = 5.5 MsgBox "value is " & x Result: Note: Long variables have even larger capacity. Always use variables of the right type. As a result, errors are easier to find and your code will run faster. Boolean Use a Boolean variable to hold the value True or False. Code: Dim continue As Boolean continue = True If continue = True Then MsgBox "Boolean variables are cool" Result: Explanation: the first code line declares a variable with name continue of type Boolean. Next, we initialize continue with the value True. Finally, we use the Boolean variable to only display a MsgBox if the variable holds the value True. 5.6 IF THEN STATEMENT Use the If Then statement in Excel VBA to execute code lines if a specific condition is met. If Then Statement
- 73. CORPORATE TRAINING BOOK - ADVANCED EXCEL Copyrights © 2017 BigSpire Software Private Limited. All Rights Reserved 71 Place a command button on your worksheet and add the following code lines: Dim score As Integer, result As String score = Range("A1").Value If score >= 60 Then result = "pass" Range("B1").Value = result Explanation: if score is greater than or equal to 60, Excel VBA returns pass. Result when you click the command button on the sheet: Note: if score is less than 60, Excel VBA places the value of the empty variable result into cell B1. Else Statement Place a command button on your worksheet and add the following code lines: Dim score As Integer, result As String score = Range("A1").Value If score >= 60 Then result = "pass" Else result = "fail" End If Range("B1").Value = result Explanation: if score is greater than or equal to 60, Excel VBA returns pass, else Excel VBA returns fail. Result when you click the command button on the sheet: Note: only if you have one code line after Then and no Else statement, it is allowed to place a code line directly after Then and to omit (leave out) End If (first example). Otherwise start a new line after the words Then and Else and end with End If (second example).
- 74. CORPORATE TRAINING BOOK - ADVANCED EXCEL Copyrights © 2017 BigSpire Software Private Limited. All Rights Reserved 72 5.7 LOOP Looping is one of the most powerful programming techniques. A loop in Excel VBA enables you to loop through a range of cells with just a few codes lines. You can use a single loop to loop through a one-dimensional range of cells. Place a command button on your worksheet and add the following code lines: Dim i As Integer For i = 1 To 6 Cells(i, 1).Value = 100 Next i Result when you click the command button on the sheet: Explanation: The code lines between For and Next will be executed six times. For i = 1, Excel VBA enters the value 100 into the cell at the intersection of row 1 and column 1. When Excel VBA reaches Next i, it increases i with 1 and jumps back to the For statement. For i = 2, Excel VBA enters the value 100 into the cell at the intersection of row 2 and column 1, etc. Note: it is good practice to always indent (tab) the code between the words For and Next. This makes your code easier to read. 5.8 STRING MANIPULATION In this chapter, you'll find the most important functions to manipulate strings in Excel VBA. Place a command button on your worksheet and add the code lines below. To execute the code lines, click the command button on the sheet. Join Strings We use the & operator to concatenate (join) strings. Code: Dim text1 As String, text2 As String text1 = "Hi" text2 = "Tim" MsgBox text1 & " " & text2 Result:
- 75. CORPORATE TRAINING BOOK - ADVANCED EXCEL Copyrights © 2017 BigSpire Software Private Limited. All Rights Reserved 73 Left To extract the leftmost characters from a string, use Left. Code: Dim text As String text = "example text" MsgBox Left(text, 4) Result: Right To extract the rightmost characters from a string, use Right. We can also directly insert text in a function. Code: MsgBox Right("example text", 2) Result: Mid
- 76. CORPORATE TRAINING BOOK - ADVANCED EXCEL Copyrights © 2017 BigSpire Software Private Limited. All Rights Reserved 74 To extract a substring, starting in the middle of a string, use Mid. Code: MsgBox Mid("example text", 9, 2) Result: Note: started at position 9 (t) with length 2. You can omit the third argument if you want to extract a substring starting in the middle of a string, until the end of the string. Len To get the length of a string, use Len. Code: MsgBox Len("example text") Result: Note: space (position 8) included! Instr To find the position of a substring in a string, use Instr. Code: MsgBox Instr("example text", "am") Result: Note: string "am" found at position 3.
- 77. CORPORATE TRAINING BOOK - ADVANCED EXCEL Copyrights © 2017 BigSpire Software Private Limited. All Rights Reserved 75 5.9 FUNCTION AND SUB The difference between a function and a sub in Excel VBA is that a function can return a value while a sub cannot. Functions and subs become very useful as program size increases. Function If you want Excel VBA to perform a task that returns a result, you can use a function. Place a function into a module (In the Visual Basic Editor, click Insert, Module). For example, the function with name Area. Function Area(x As Double, y As Double) As Double Area = x * y End Function Explanation: This function has two arguments (of type Double) and a return type (the part after As also of type Double). You can use the name of the function (Area) in your code to indicate which result you want to return (here x * y). You can now refer to this function (in other words call the function) from somewhere else in your code by simply using the name of the function and giving a value for each argument. Place a command button on your worksheet and add the following code lines: Dim z As Double z = Area(3, 5) + 2 MsgBox z Explanation: The function returns a value so you have to 'catch' this value in your code. You can use another variable (z) for this. Next, you can add another value to this variable (if you want). Finally, display the value using a MsgBox. Result when you click the command button on the sheet: Sub
- 78. CORPORATE TRAINING BOOK - ADVANCED EXCEL Copyrights © 2017 BigSpire Software Private Limited. All Rights Reserved 76 If you want Excel VBA to perform some actions, you can use a sub. Place a sub into a module (In the Visual Basic Editor, click Insert, Module). For example, the sub with name Area. Sub Area(x As Double, y As Double) MsgBox x * y End Sub Explanation: This sub has two arguments (of type Double). It does not have a return type! You can refer to this sub (call the sub) from somewhere else in your code by simply using the name of the sub and giving a value for each argument. Place a command button on your worksheet and add the following code line: Area 3, 5 Result when you click the command button on the sheet:
- 79. CORPORATE TRAINING BOOK - ADVANCED EXCEL Copyrights © 2017 BigSpire Software Private Limited. All Rights Reserved 77 6. DATA ANALYSIS This section illustrates the powerful features Excel has to offer to analyze data. 6.1 SORT You can sort your Excel data on one column or multiple columns. You can sort in ascending or descending order. One Column To sort on one column, execute the following steps. 1. Click any cell in the column you want to sort. 2. To sort in ascending order, on the Data tab, in the Sort & Filter group, click AZ. Result:
- 80. CORPORATE TRAINING BOOK - ADVANCED EXCEL Copyrights © 2017 BigSpire Software Private Limited. All Rights Reserved 78 Note: to sort in descending order, click ZA. Multiple Columns To sort on multiple columns, execute the following steps. 1. On the Data tab, in the Sort & Filter group, click Sort. The Sort dialog box appears. 2. Select Last Name from the 'Sort by' drop-down list.
- 81. CORPORATE TRAINING BOOK - ADVANCED EXCEL Copyrights © 2017 BigSpire Software Private Limited. All Rights Reserved 79 3. Click on Add Level. 4. Select Sales from the 'Then by' drop-down list. 5. Click OK. Result. Records are sorted by Last Name first and Sales second.
- 82. CORPORATE TRAINING BOOK - ADVANCED EXCEL Copyrights © 2017 BigSpire Software Private Limited. All Rights Reserved 80 6.2 FILTER Filter your Excel data if you only want to display records that meet certain criteria. 1. Click any single cell inside a data set. 2. On the Data tab, in the Sort & Filter group, click Filter. Arrows in the column headers appear. 3. Click the arrow next to Country.
- 83. CORPORATE TRAINING BOOK - ADVANCED EXCEL Copyrights © 2017 BigSpire Software Private Limited. All Rights Reserved 81 4. Click on Select All to clear all the check boxes, and click the check box next to USA. 5. Click OK. Result. Excel only displays the sales in the USA. 6.3 CONDITIONAL FORMATTING Conditional formatting in Excel enables you to highlight cells with a certain color, depending on the cell's value. Highlight Cells Rules
- 84. CORPORATE TRAINING BOOK - ADVANCED EXCEL Copyrights © 2017 BigSpire Software Private Limited. All Rights Reserved 82 To highlight cells that are greater than a value, execute the following steps. 1. Select the range A1:A10. 2. On the Home tab, in the Styles group, click Conditional Formatting. 3. Click Highlight Cells Rules, Greater Than. 4. Enter the value 80 and select a formatting style.
- 85. CORPORATE TRAINING BOOK - ADVANCED EXCEL Copyrights © 2017 BigSpire Software Private Limited. All Rights Reserved 83 5. Click OK. Result. Excel highlights the cells that are greater than 80. 6. Change the value of cell A1 to 81. Result. Excel changes the format of cell A1 automatically. 6.4 PIVOT TABLES Pivot tables are one of Excel's most powerful features. A pivot table allows you to extract the significance from a large, detailed data set.
- 86. CORPORATE TRAINING BOOK - ADVANCED EXCEL Copyrights © 2017 BigSpire Software Private Limited. All Rights Reserved 84 Our data set consists of 213 records and 6 fields. Order ID, Product, Category, Amount, Date and Country. Insert a Pivot Table To insert a pivot table, execute the following steps. 1. Click any single cell inside the data set. 2. On the Insert tab, in the Tables group, click PivotTable. The following dialog box appears. Excel automatically selects the data for you. The default location for a new pivot table is New Worksheet. 3. Click OK.
- 87. CORPORATE TRAINING BOOK - ADVANCED EXCEL Copyrights © 2017 BigSpire Software Private Limited. All Rights Reserved 85 Drag fields The PivotTable Fields pane appears. To get the total amount exported of each product, drag the following fields to the different areas. 1. Product field to the Rows area. 2. Amount field to the Values area. 3. Country field to the Filters area.
- 88. CORPORATE TRAINING BOOK - ADVANCED EXCEL Copyrights © 2017 BigSpire Software Private Limited. All Rights Reserved 86 Below you can find the pivot table. Bananas are our main export product. That's how easy pivot tables can be! Sort
- 89. CORPORATE TRAINING BOOK - ADVANCED EXCEL Copyrights © 2017 BigSpire Software Private Limited. All Rights Reserved 87 To get Banana at the top of the list, sort the pivot table. 1. Click any cell inside the Sum of Amount column. 2. Right click and click on Sort, Sort Largest to Smallest. Result. Filter Because we added the Country field to the Filters area, we can filter this pivot table by Country. For example, which products do we export the most to France? 1. Click the filter drop-down and select France. Result. Apples are our main export product to France.
- 90. CORPORATE TRAINING BOOK - ADVANCED EXCEL Copyrights © 2017 BigSpire Software Private Limited. All Rights Reserved 88 Change Summary Calculation By default, Excel summarizes your data by either summing or counting the items. To change the type of calculation that you want to use, execute the following steps. 1. Click any cell inside the Sum of Amount column. 2. Right click and click on Value Field Settings. 3. Choose the type of calculation you want to use. For example, click Count.
- 91. CORPORATE TRAINING BOOK - ADVANCED EXCEL Copyrights © 2017 BigSpire Software Private Limited. All Rights Reserved 89 4. Click OK. Result. 16 out of the 28 orders to France were 'Apple' orders. Two-dimensional Pivot Table If you drag a field to the Rows area and Columns area, you can create a two-dimensional pivot table. First, insert a pivot table. Next, to get the total amount exported to each country, of each product, drag the following fields to the different areas. 1. Country field to the Rows area. 2. Product field to the Columns area. 3. Amount field to the Values area. 4. Category field to the Filters area.
- 92. CORPORATE TRAINING BOOK - ADVANCED EXCEL Copyrights © 2017 BigSpire Software Private Limited. All Rights Reserved 90 Below you can find the two-dimensional pivot table. To easily compare these numbers, create a pivot chart and apply a filter. Maybe this is one step too far for you at this stage, but it shows you one of the many other powerful pivot table features Excel has to offer.
- 93. CORPORATE TRAINING BOOK - ADVANCED EXCEL Copyrights © 2017 BigSpire Software Private Limited. All Rights Reserved 91 6.5 TABLES Tables allow you to analyze your data in Excel quickly and easily. Learn how to insert, sort and filter a table, and how to display a total row at the end of a table. Insert a Table To insert a table, execute the following steps. 1. Click any single cell inside the data set. 2. On the Insert tab, in the Tables group, click Table.
- 94. CORPORATE TRAINING BOOK - ADVANCED EXCEL Copyrights © 2017 BigSpire Software Private Limited. All Rights Reserved 92 3. Excel automatically selects the data for you. Check 'My table has headers' and click on OK. Result. Excel creates a nicely formatted table for you. This may still seem like a normal data range to you but many powerful features are now just a click of a button away. Sort a Table To sort by Last Name first and Sales second, execute the following steps. 1. Click the arrow next to Sales and click Sort Smallest to Largest. 2. Click the arrow next to Last Name and click Sort A to Z. Result.
- 95. CORPORATE TRAINING BOOK - ADVANCED EXCEL Copyrights © 2017 BigSpire Software Private Limited. All Rights Reserved 93 Filter a Table To filter a table, execute the following steps. 1. Click the arrow next to Country and only check USA. Result. Total Row To display a total row at the end of the table, execute the following steps. 1. First, select a cell inside the table. Next, on the Design tab, in the Table Style Options group, check Total Row.
- 96. CORPORATE TRAINING BOOK - ADVANCED EXCEL Copyrights © 2017 BigSpire Software Private Limited. All Rights Reserved 94 Result. 2. Click any cell in the last row to calculate the Total (Average, Count, Max, Min, Sum etc.) of a column. For example, calculate the sum of the Sales column.
- 97. CORPORATE TRAINING BOOK - ADVANCED EXCEL Copyrights © 2017 BigSpire Software Private Limited. All Rights Reserved 95 Note: in the formula bar see how Excel uses the SUBTOTAL function to calculate the sum. 109 is the argument for Sum if you use the SUBTOTAL function. Excel uses this function (and not the standard SUM function) to correctly calculate table totals of filtered tables.