Recommended
PDF
OpenCM IDE、OpenCM 485 EXPを用いてのDynamixel Xシリーズの制御
PPTX
PDF
PDF
PDF
PDF
KEY
DE0でラジコンカー作ってみた 関西de0 fpga勉強会20120519
PPT
PDF
PDF
PPTX
Androidとfpgaを高速fifo通信させちゃう
PDF
PDF
PPT
PDF
PDF
汎用性と高速性を目指したペアリング暗号ライブラリ mcl
PDF
PDF
effective modern c++ chapeter36
PDF
PDF
PDF
Wavelet matrix implementation
PPTX
PDF
KEY
関東GPGPU勉強会 LLVM meets GPU
PDF
PDF
StackExchangeで見たシステムプログラミング案件
PDF
PDF
LTspiceを活用したスタートアップ機能の等価回路モデル
PDF
coma Study Room vol.2 Arduino Workshop
PDF
More Related Content
PDF
OpenCM IDE、OpenCM 485 EXPを用いてのDynamixel Xシリーズの制御
PPTX
PDF
PDF
PDF
PDF
KEY
DE0でラジコンカー作ってみた 関西de0 fpga勉強会20120519
PPT
What's hot
PDF
PDF
PPTX
Androidとfpgaを高速fifo通信させちゃう
PDF
PDF
PPT
PDF
PDF
汎用性と高速性を目指したペアリング暗号ライブラリ mcl
PDF
PDF
effective modern c++ chapeter36
PDF
PDF
PDF
Wavelet matrix implementation
PPTX
PDF
KEY
関東GPGPU勉強会 LLVM meets GPU
PDF
PDF
StackExchangeで見たシステムプログラミング案件
PDF
PDF
LTspiceを活用したスタートアップ機能の等価回路モデル
Similar to Kiso sekkei 01rev03
PDF
coma Study Room vol.2 Arduino Workshop
PDF
PPTX
ZIP
ZIP
Abc2012spring robot sammit - Kurimoto
PDF
SFC デザイン言語WS(電子工作)第5回「LED/駆動部品を使う」
PDF
Androidでロボットアームを動かしてみた(2012OSC愛媛)
ODP
AndroidとArduinoで ロボットを作って思ったこと
PDF
SFC デザイン言語WS(電子工作)第3回「電子工作の作法」
PDF
PDF
ものづくりプロジェクトII 一日でわかるArduino入門
PDF
Arduinoでプログラミングに触れてみよう 続編
PPTX
インターネット上のWikiページ上でエッジ側端末のI2Cデバイスの設定と入出力を可能とするIoTシステムの試作
PDF
Make: Ogaki Meeting 2012 Androidロボットサミットin大垣
ODP
PDF
女子美術大学メディアアート演習ⅡB 2012 Fall 第2回 2/2
PDF
ABC 2012 Spring Robot Summit
PPTX
PDF
PDF
3台以上のarduinoでのspi通信 2017 07-20
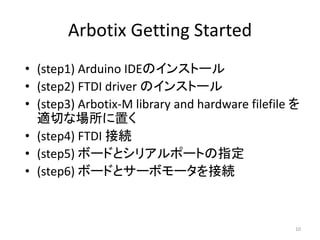
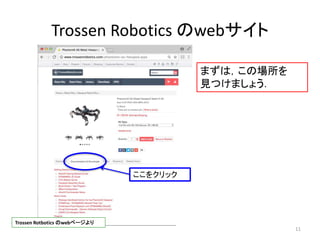
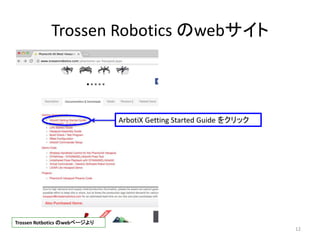
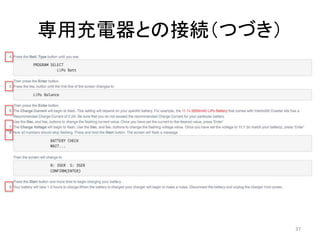
Kiso sekkei 01rev03 1. 2. 3. 4. 5. 6. 7. 8. 9. 10. Arbotix Getting Started
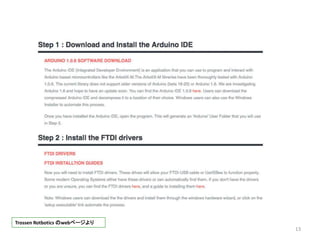
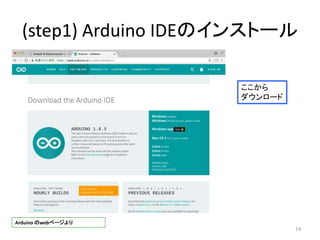
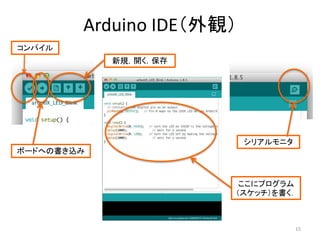
• (step1) Arduino IDEのインストール
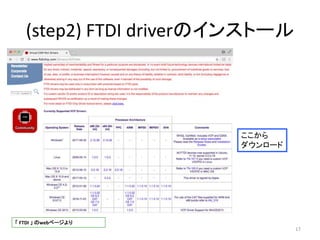
• (step2) FTDI driver のインストール
• (step3) Arbotix-M library and hardware filefile を
適切な場所に置く
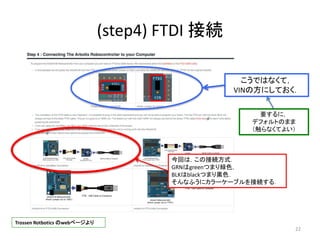
• (step4) FTDI 接続
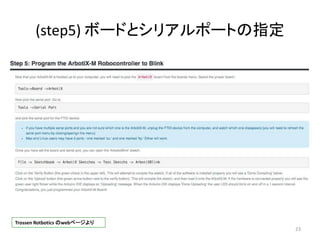
• (step5) ボードとシリアルポートの指定
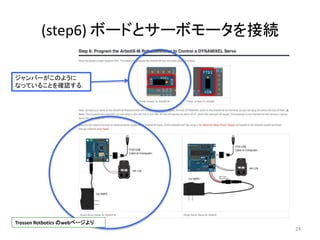
• (step6) ボードとサーボモータを接続
10
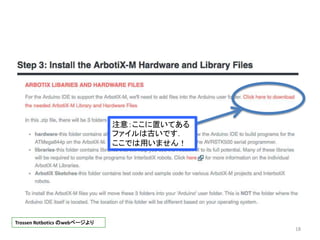
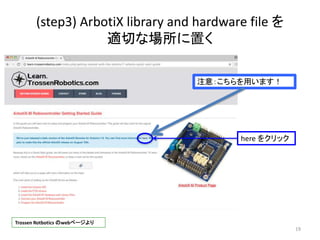
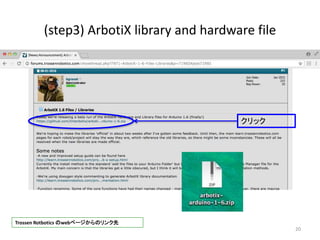
11. 12. 13. 14. 15. 16. 17. 18. 19. 20. 21. (step3) ArbotiX library and hardware file
21
Arbotixライブラリファイルとハードウェアファイル
の置き場所
この 1.6 にはこのフォルダーは含まれていない.
(必要に応じて古いリンクから持ってきましょう.)
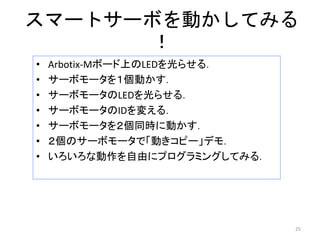
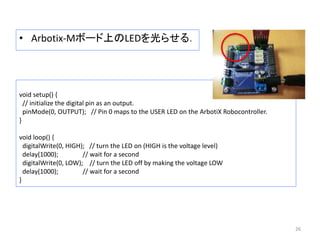
22. 23. 24. 25. 26. • Arbotix-Mボード上のLEDを光らせる.
26
void setup() {
// initialize the digital pin as an output.
pinMode(0, OUTPUT); // Pin 0 maps to the USER LED on the ArbotiX Robocontroller.
}
void loop() {
digitalWrite(0, HIGH); // turn the LED on (HIGH is the voltage level)
delay(1000); // wait for a second
digitalWrite(0, LOW); // turn the LED off by making the voltage LOW
delay(1000); // wait for a second
}
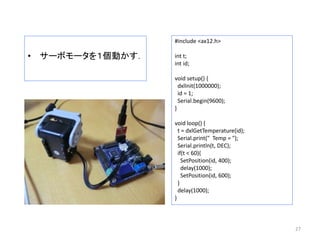
27. • サーボモータを1個動かす.
27
#include <ax12.h>
int t;
int id;
void setup() {
dxlInit(1000000);
id = 1;
Serial.begin(9600);
}
void loop() {
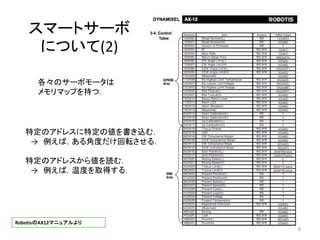
t = dxlGetTemperature(id);
Serial.print(" Temp = ");
Serial.println(t, DEC);
if(t < 60){
SetPosition(id, 400);
delay(1000);
SetPosition(id, 600);
}
delay(1000);
}
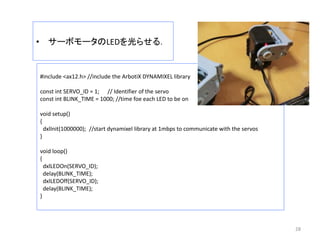
28. • サーボモータのLEDを光らせる.
28
#include <ax12.h> //include the ArbotiX DYNAMIXEL library
const int SERVO_ID = 1; // Identifier of the servo
const int BLINK_TIME = 1000; //time foe each LED to be on
void setup()
{
dxlInit(1000000); //start dynamixel library at 1mbps to communicate with the servos
}
void loop()
{
dxlLEDOn(SERVO_ID);
delay(BLINK_TIME);
dxlLEDOff(SERVO_ID);
delay(BLINK_TIME);
}
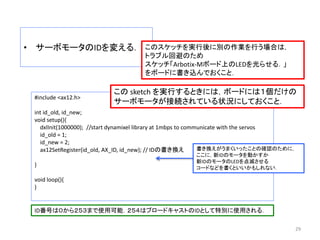
29. • サーボモータのIDを変える.
29
#include <ax12.h>
int id_old, id_new;
void setup(){
dxlInit(1000000); //start dynamixel library at 1mbps to communicate with the servos
id_old = 1;
id_new = 2;
ax12SetRegister(id_old, AX_ID, id_new); // IDの書き換え
}
void loop(){
}
この sketch を実行するときには,ボードには1個だけの
サーボモータが接続されている状況にしておくこと.
ID番号は0から253まで使用可能.254はブロードキャストのIDとして特別に使用される.
書き換えがうまくいったことの確認のために,
ここに,新IDのモータを動かすか
新IDのモータのLEDを点滅させる
コードなどを書くといいかもしれない.
このスケッチを実行後に別の作業を行う場合は,
トラブル回避のため
スケッチ「Arbotix-Mボード上のLEDを光らせる.」
をボードに書き込んでおくこと.
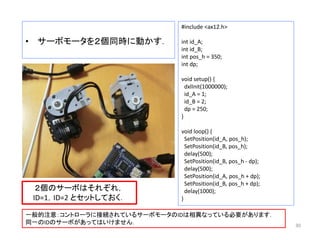
30. • サーボモータを2個同時に動かす.
30
#include <ax12.h>
int id_A;
int id_B;
int pos_h = 350;
int dp;
void setup() {
dxlInit(1000000);
id_A = 1;
id_B = 2;
dp = 250;
}
void loop() {
SetPosition(id_A, pos_h);
SetPosition(id_B, pos_h);
delay(500);
SetPosition(id_B, pos_h - dp);
delay(500);
SetPosition(id_A, pos_h + dp);
SetPosition(id_B, pos_h + dp);
delay(1000);
}
2個のサーボはそれぞれ,
ID=1,ID=2 とセットしておく.
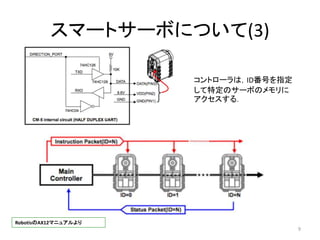
一般的注意:コントローラに接続されているサーボモータのIDは相異なっている必要があります.
同一のIDのサーボがあってはいけません.
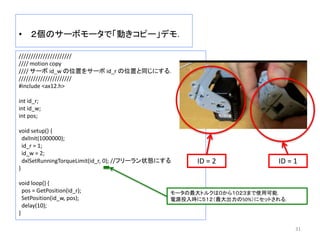
31. • 2個のサーボモータで「動きコピー」デモ.
31
//////////////////////
//// motion copy
//// サーボ id_w の位置をサーボ id_r の位置と同じにする.
//////////////////////
#include <ax12.h>
int id_r;
int id_w;
int pos;
void setup() {
dxlInit(1000000);
id_r = 1;
id_w = 2;
dxlSetRunningTorqueLimit(id_r, 0); //フリーラン状態にする
}
void loop() {
pos = GetPosition(id_r);
SetPosition(id_w, pos);
delay(10);
}
ID = 1ID = 2
モータの最大トルクは0から1023まで使用可能.
電源投入時に512(最大出力の50%)にセットされる.
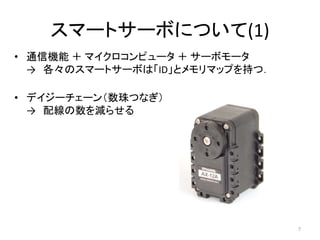
32. サーボモータに関する命令
• Document -> Arduino -> libraries -> ArbotiX -> ax12.h
• 上記テキストファイル ax12.h を見れば,
どのような命令が用意されているかがわかります.
32
スマートサーボモータAX12のマニュアル(日本語)は下記サイトにあります.
http://support.robotis.com/jp/product/dynamixel/ax_series/dxl_ax_actuator.htm
33. 34. 35. 36. 37. 38. まとめ
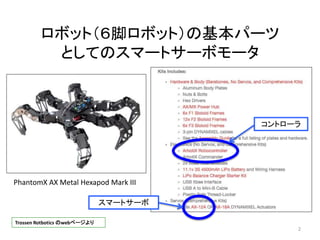
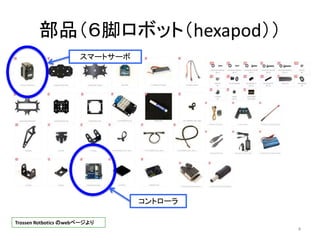
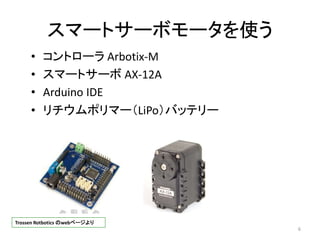
• コントローラ(Arbotix-M)を Arduino IDE で用いるためのセット
アップ方法を学んだ.
• スマートサーボ(AX-12)を動かすためにArduino IDE でコント
ローラをプログラミングする方法を学んだ.
• スマートサーボの基本的取り扱い方を学んだ.
• 実際にスマートサーボを動かしてみた.
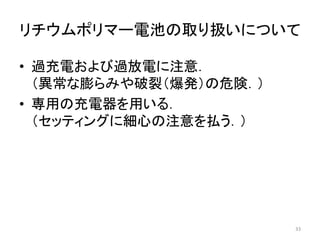
• LiPo(リチウムポリマー)バッテリーの取り扱い方を学んだ.
38