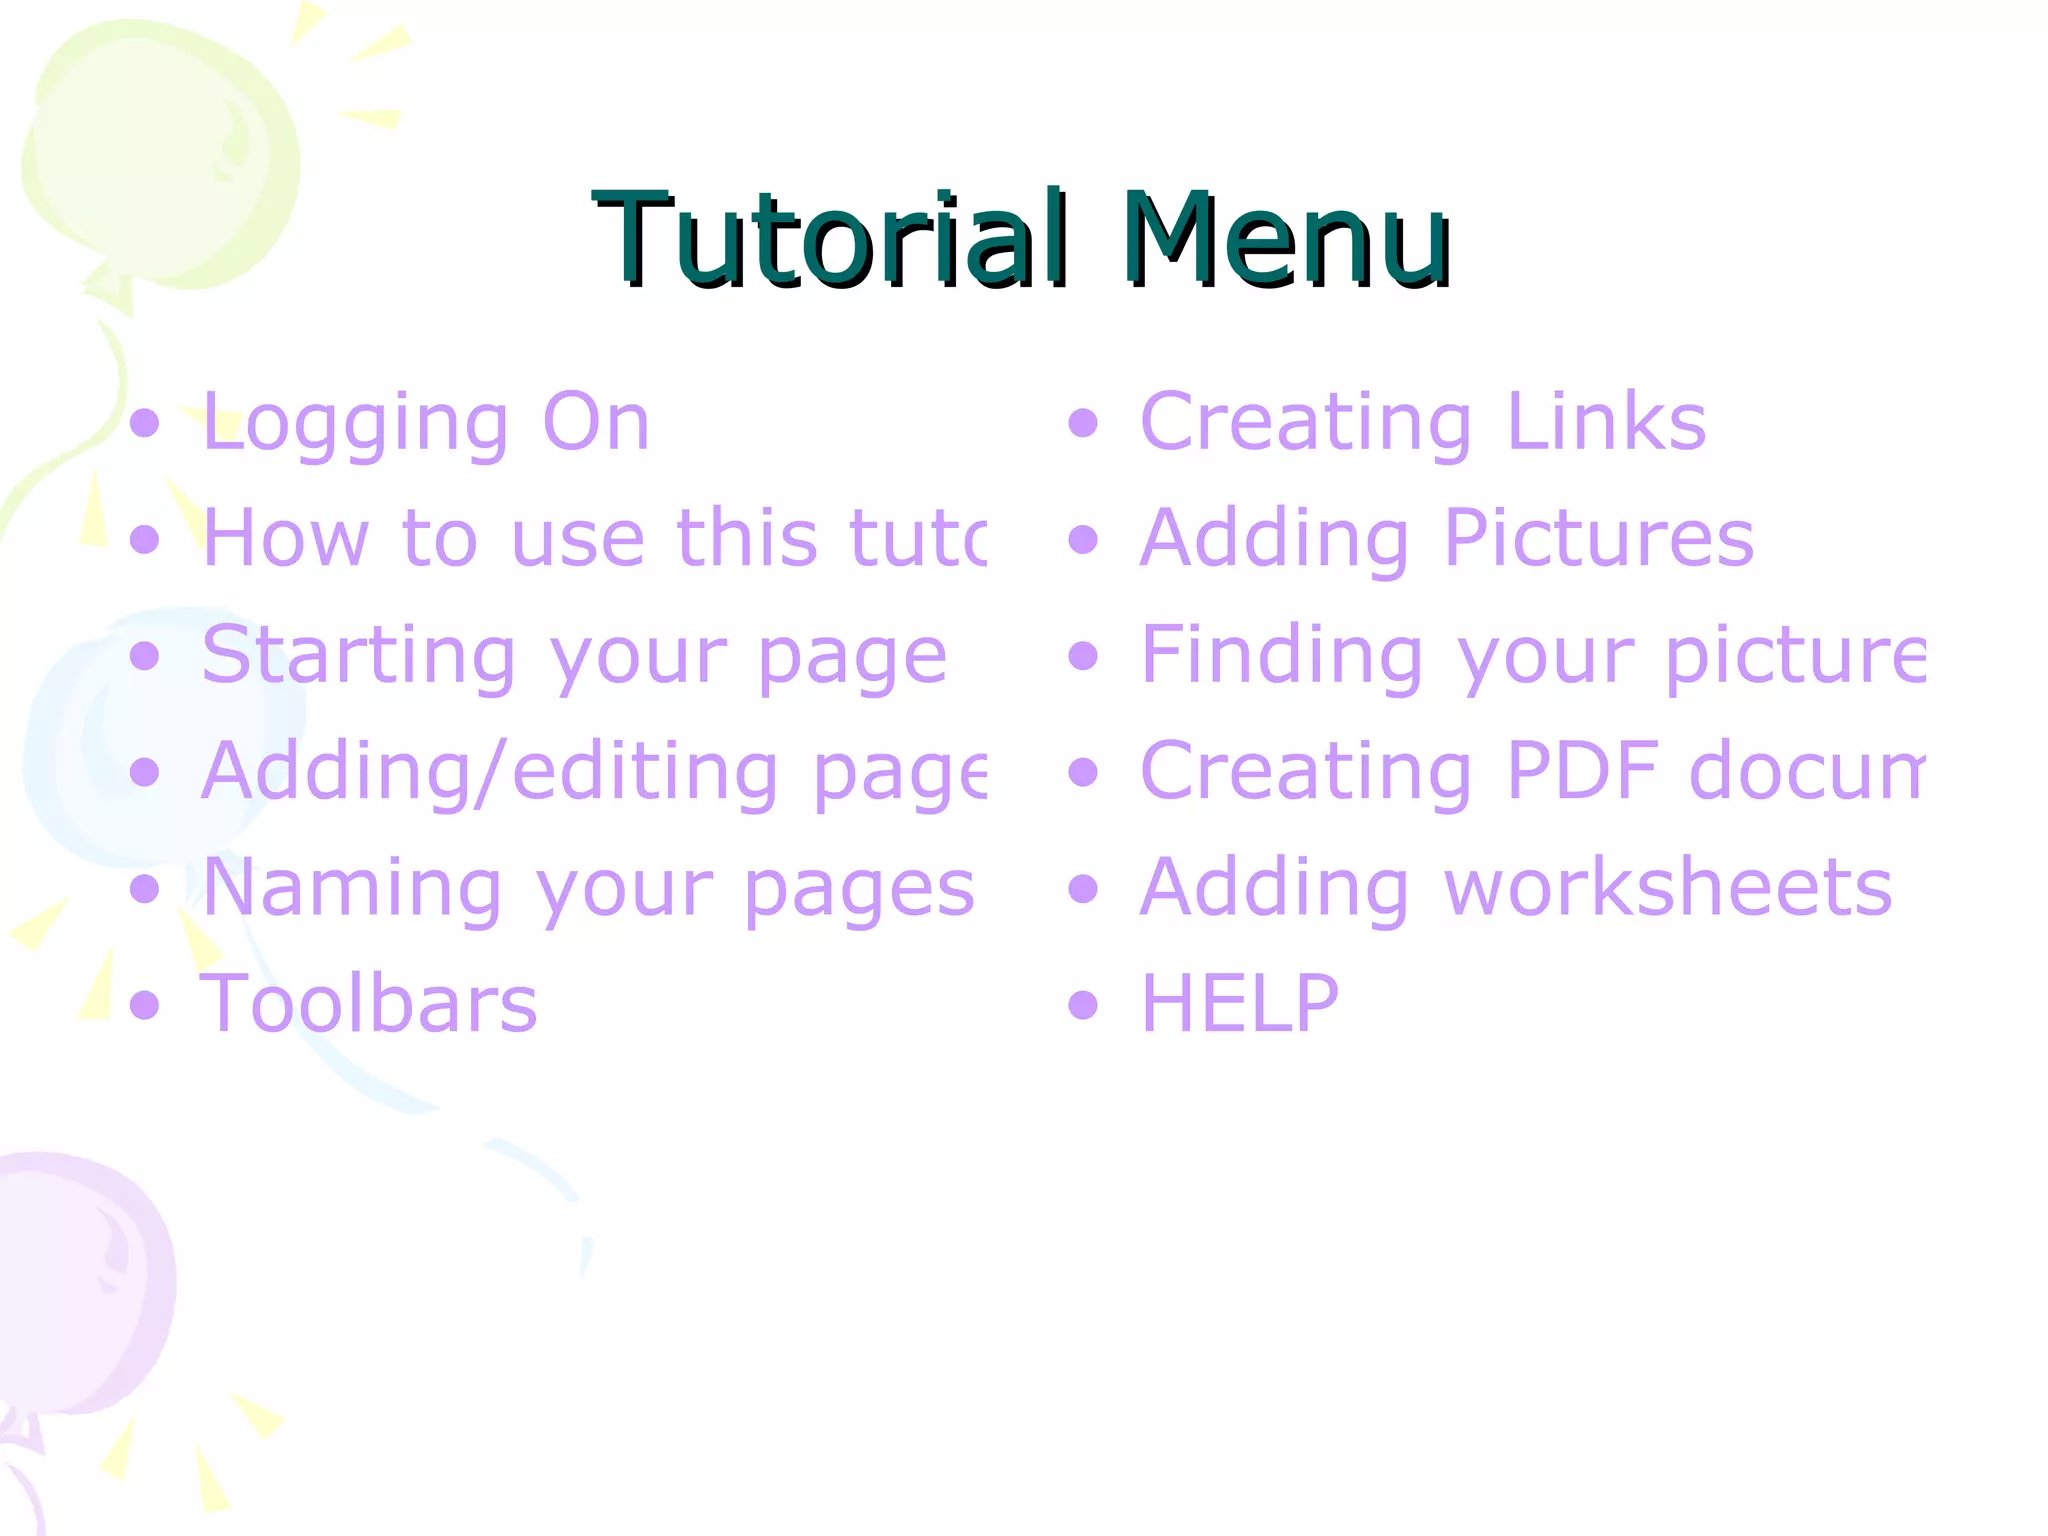
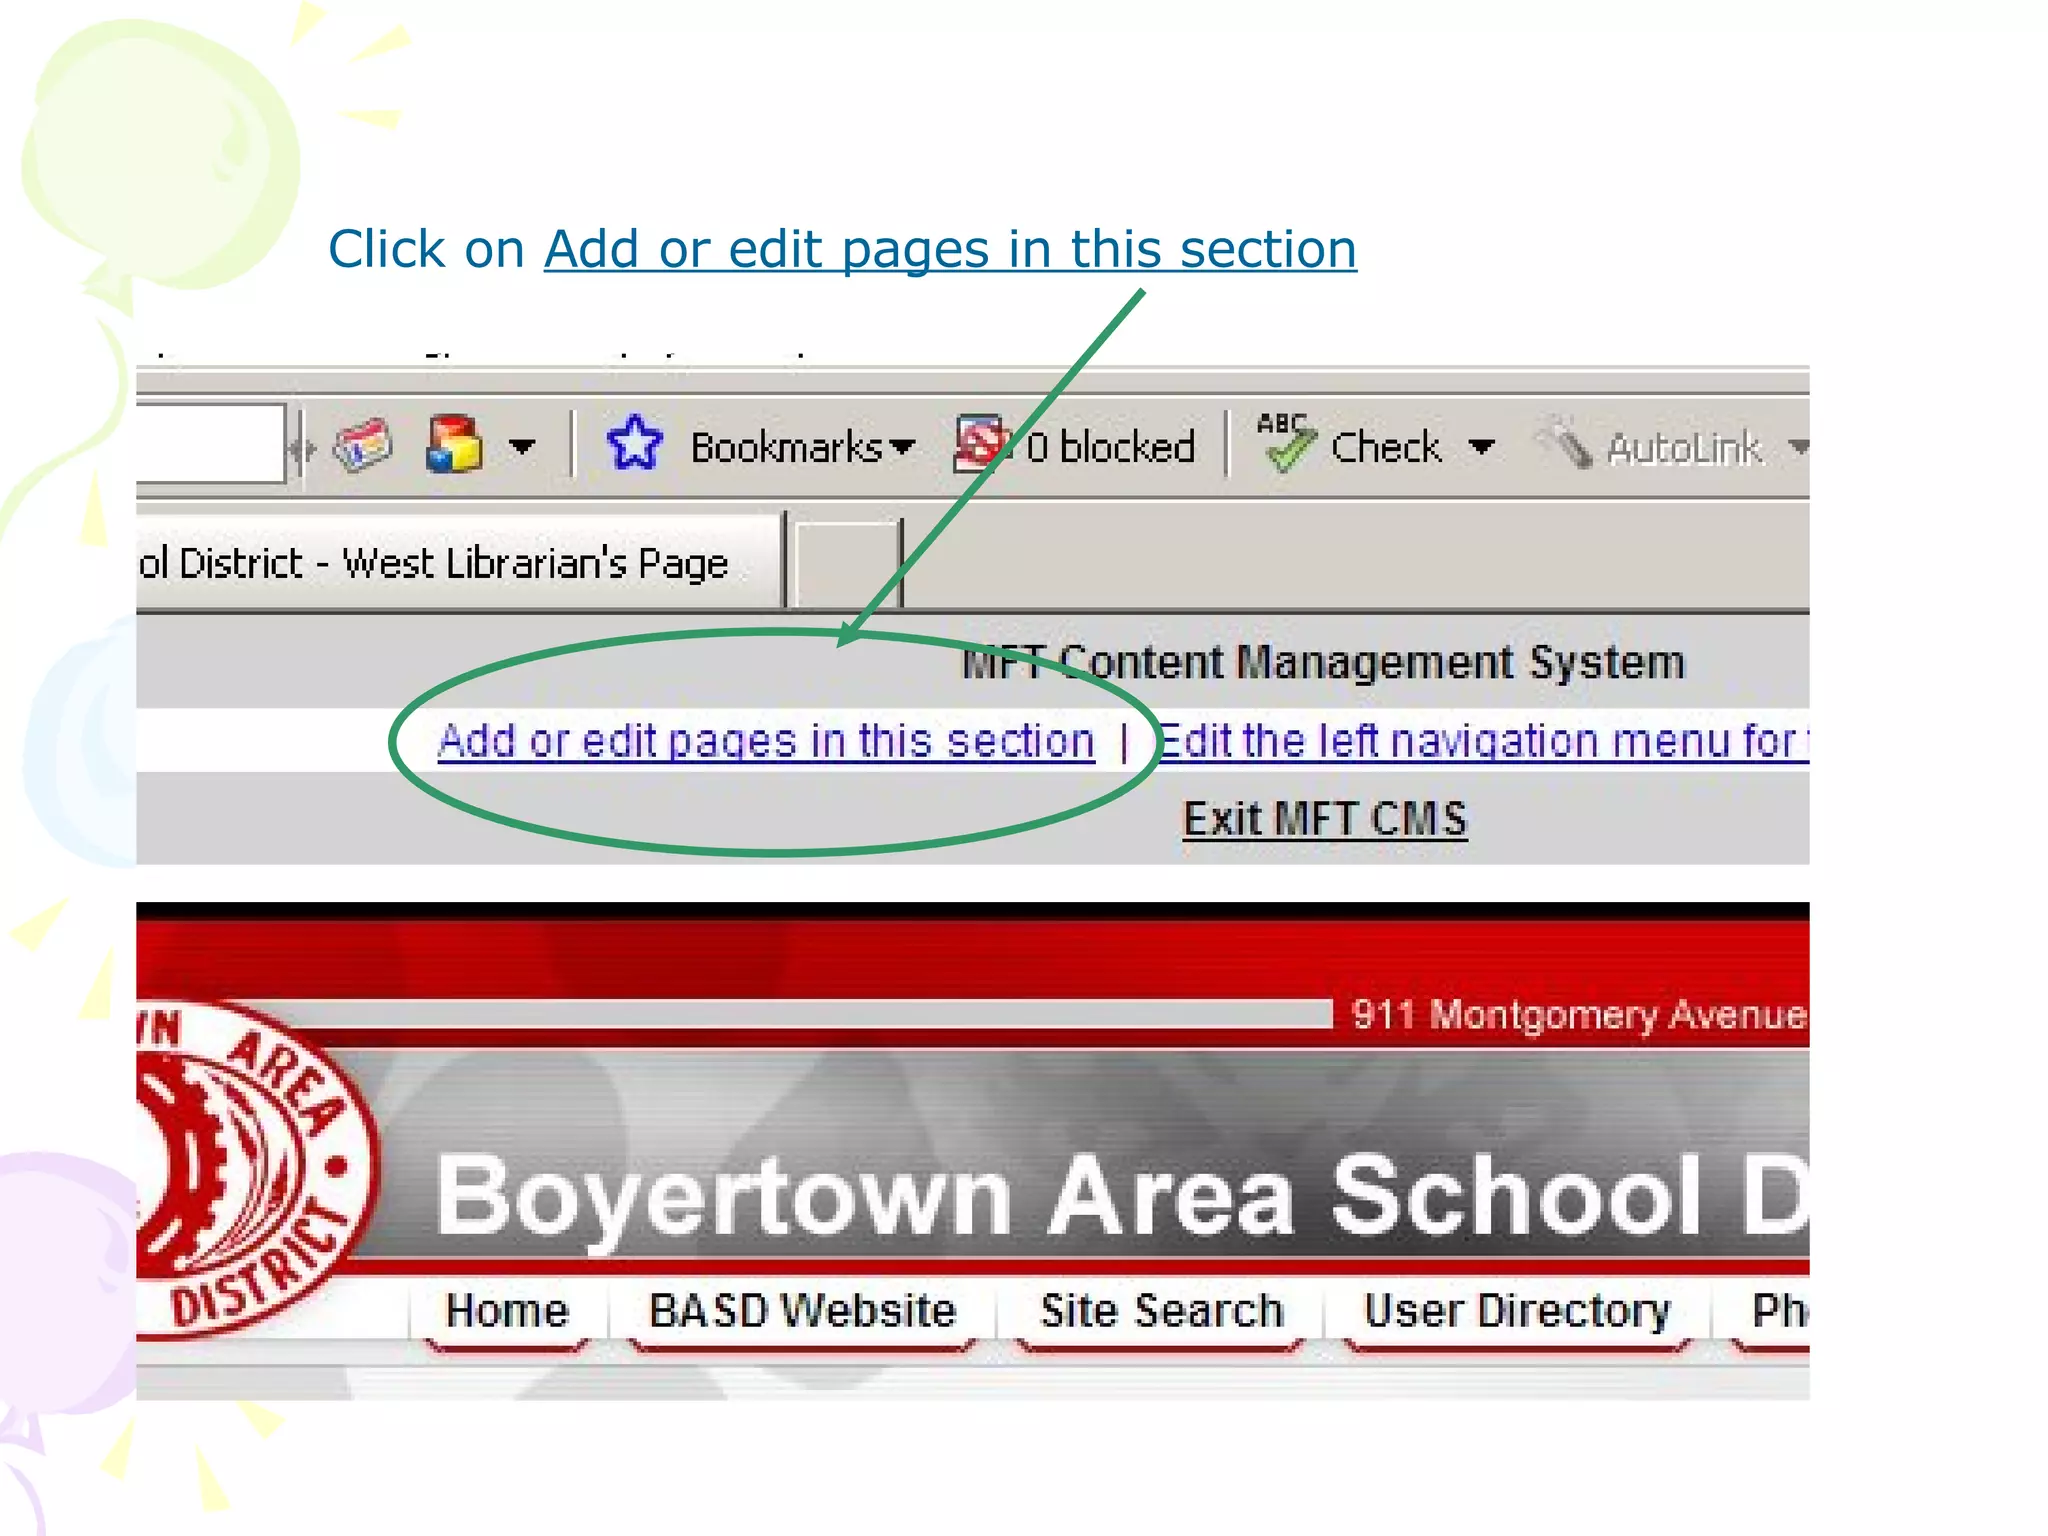
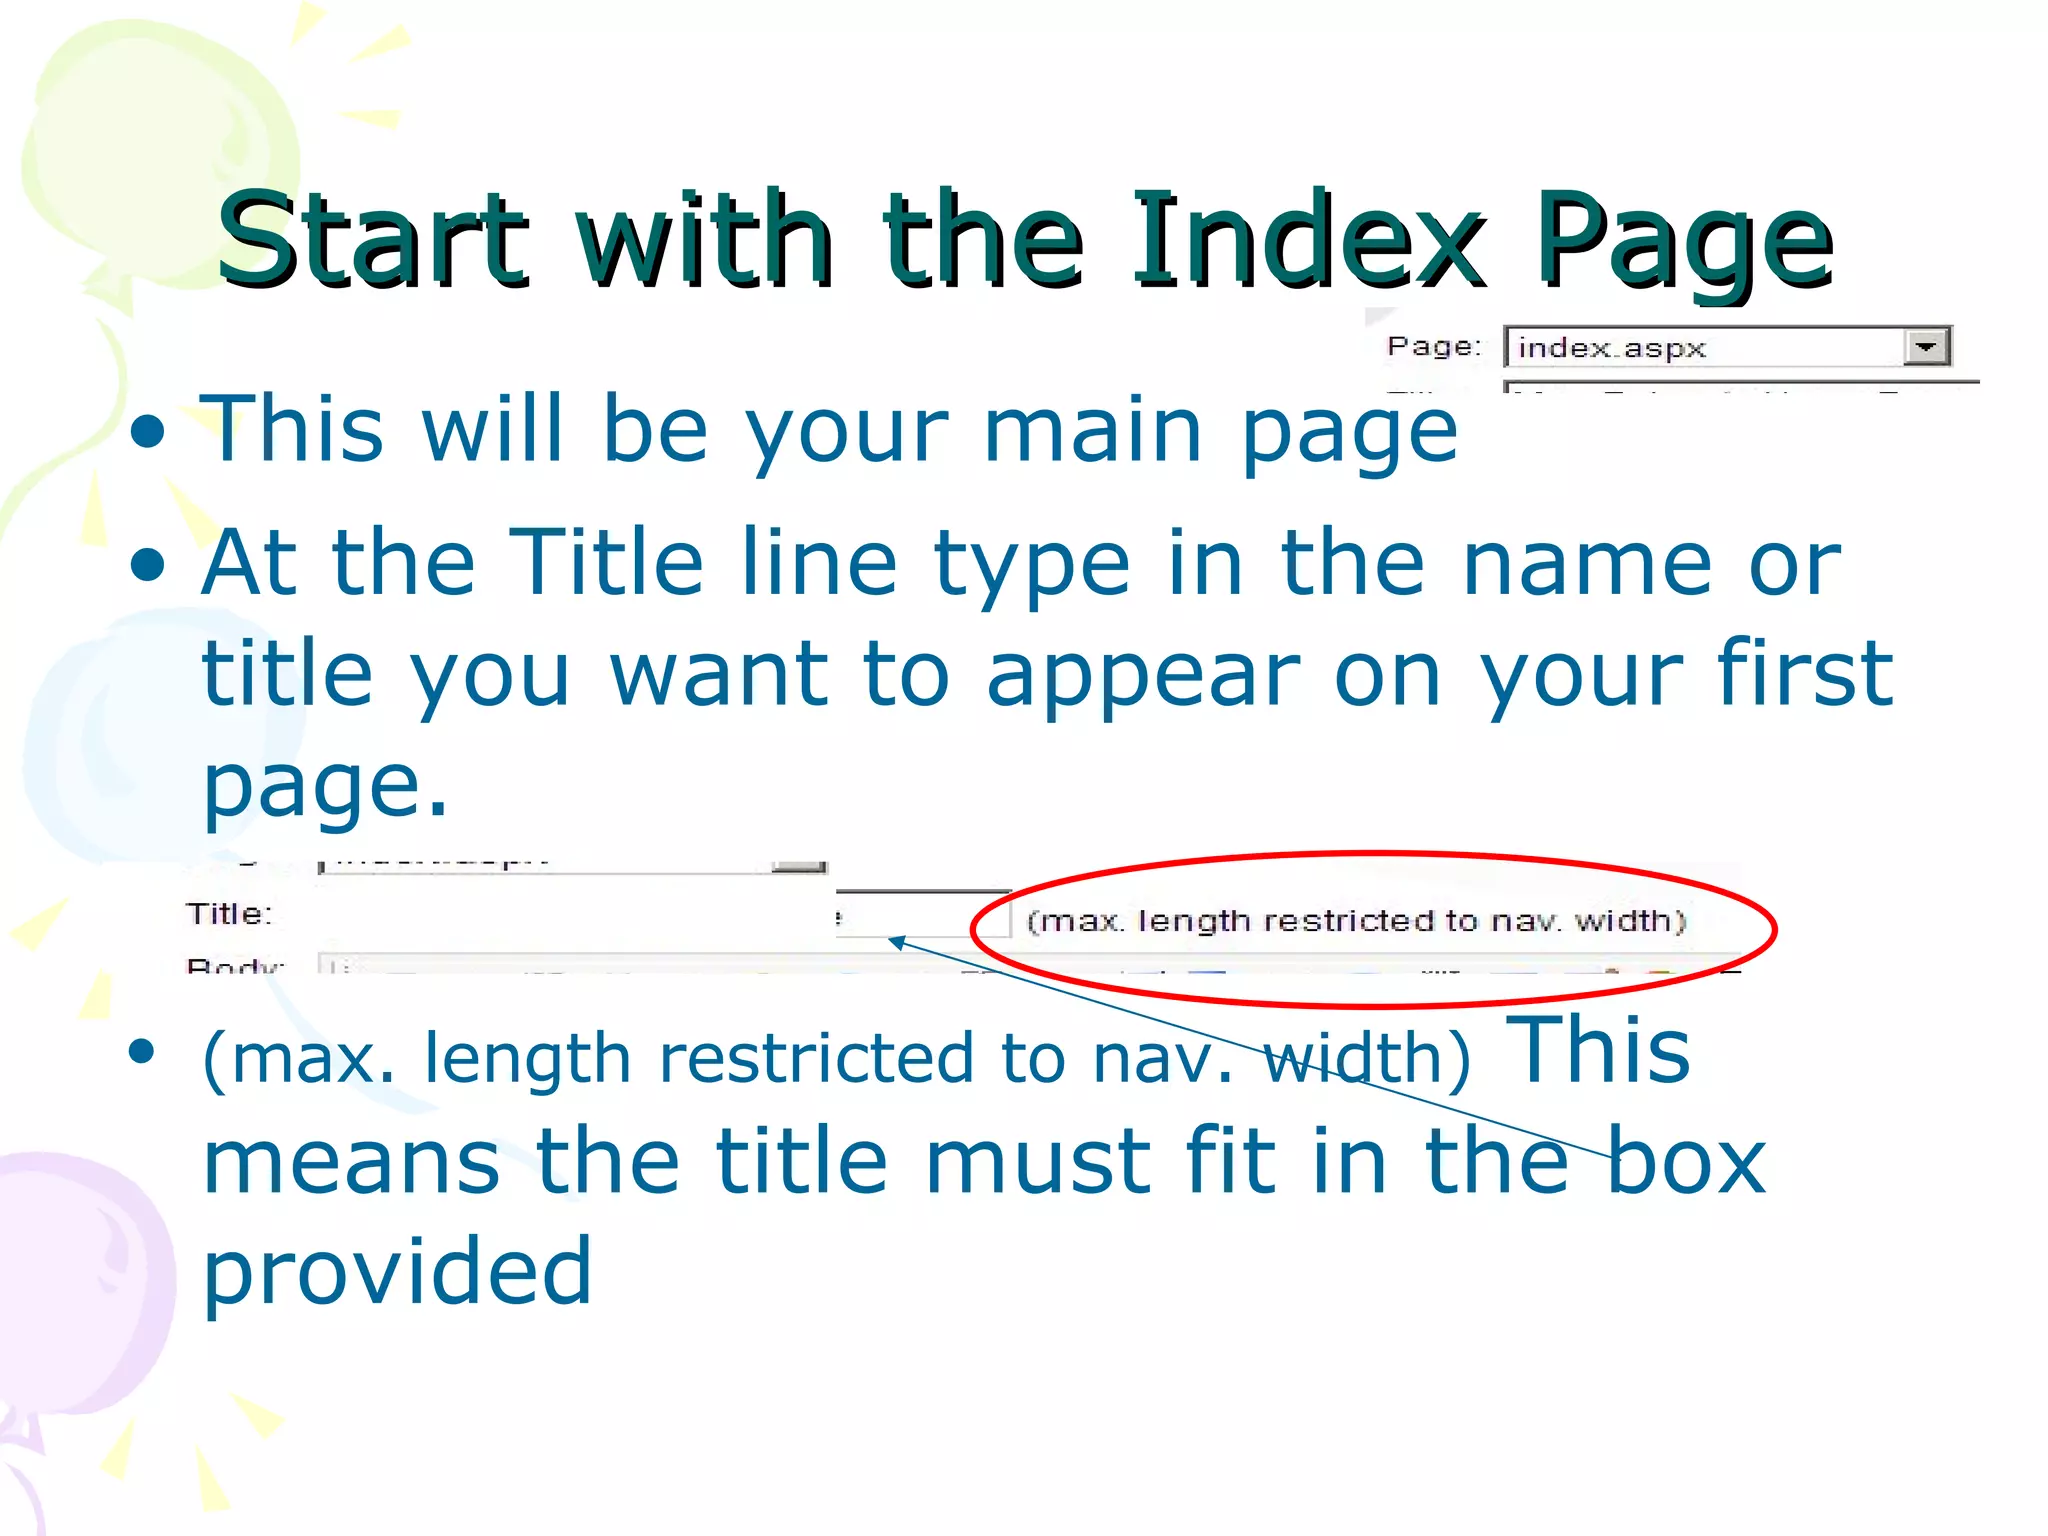
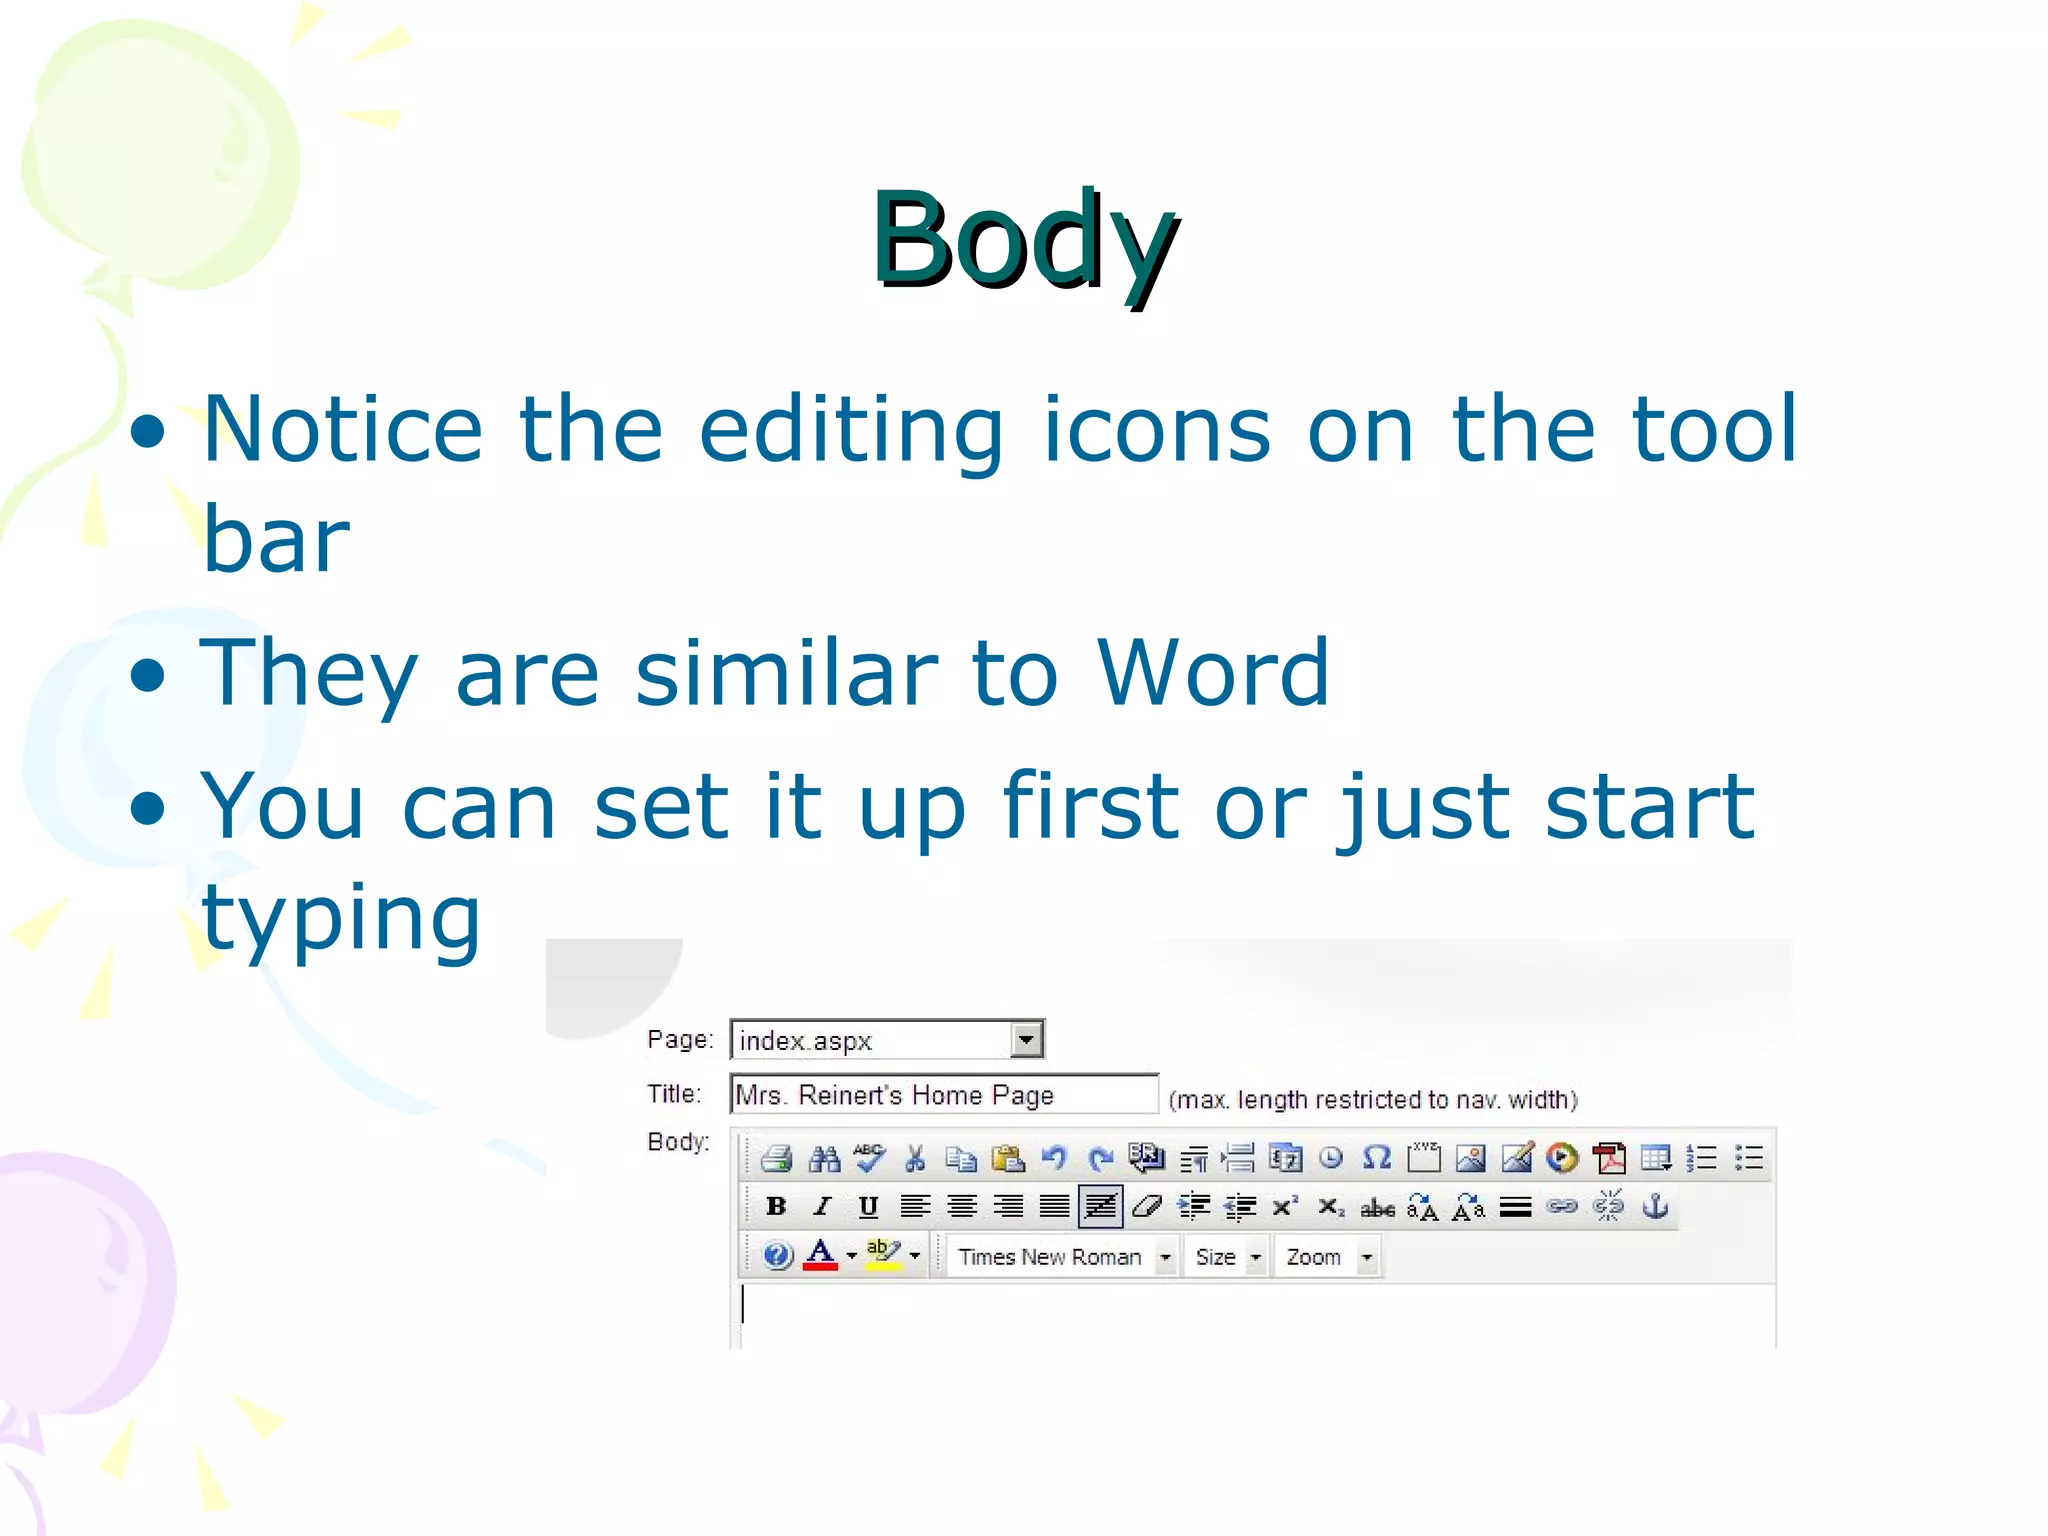
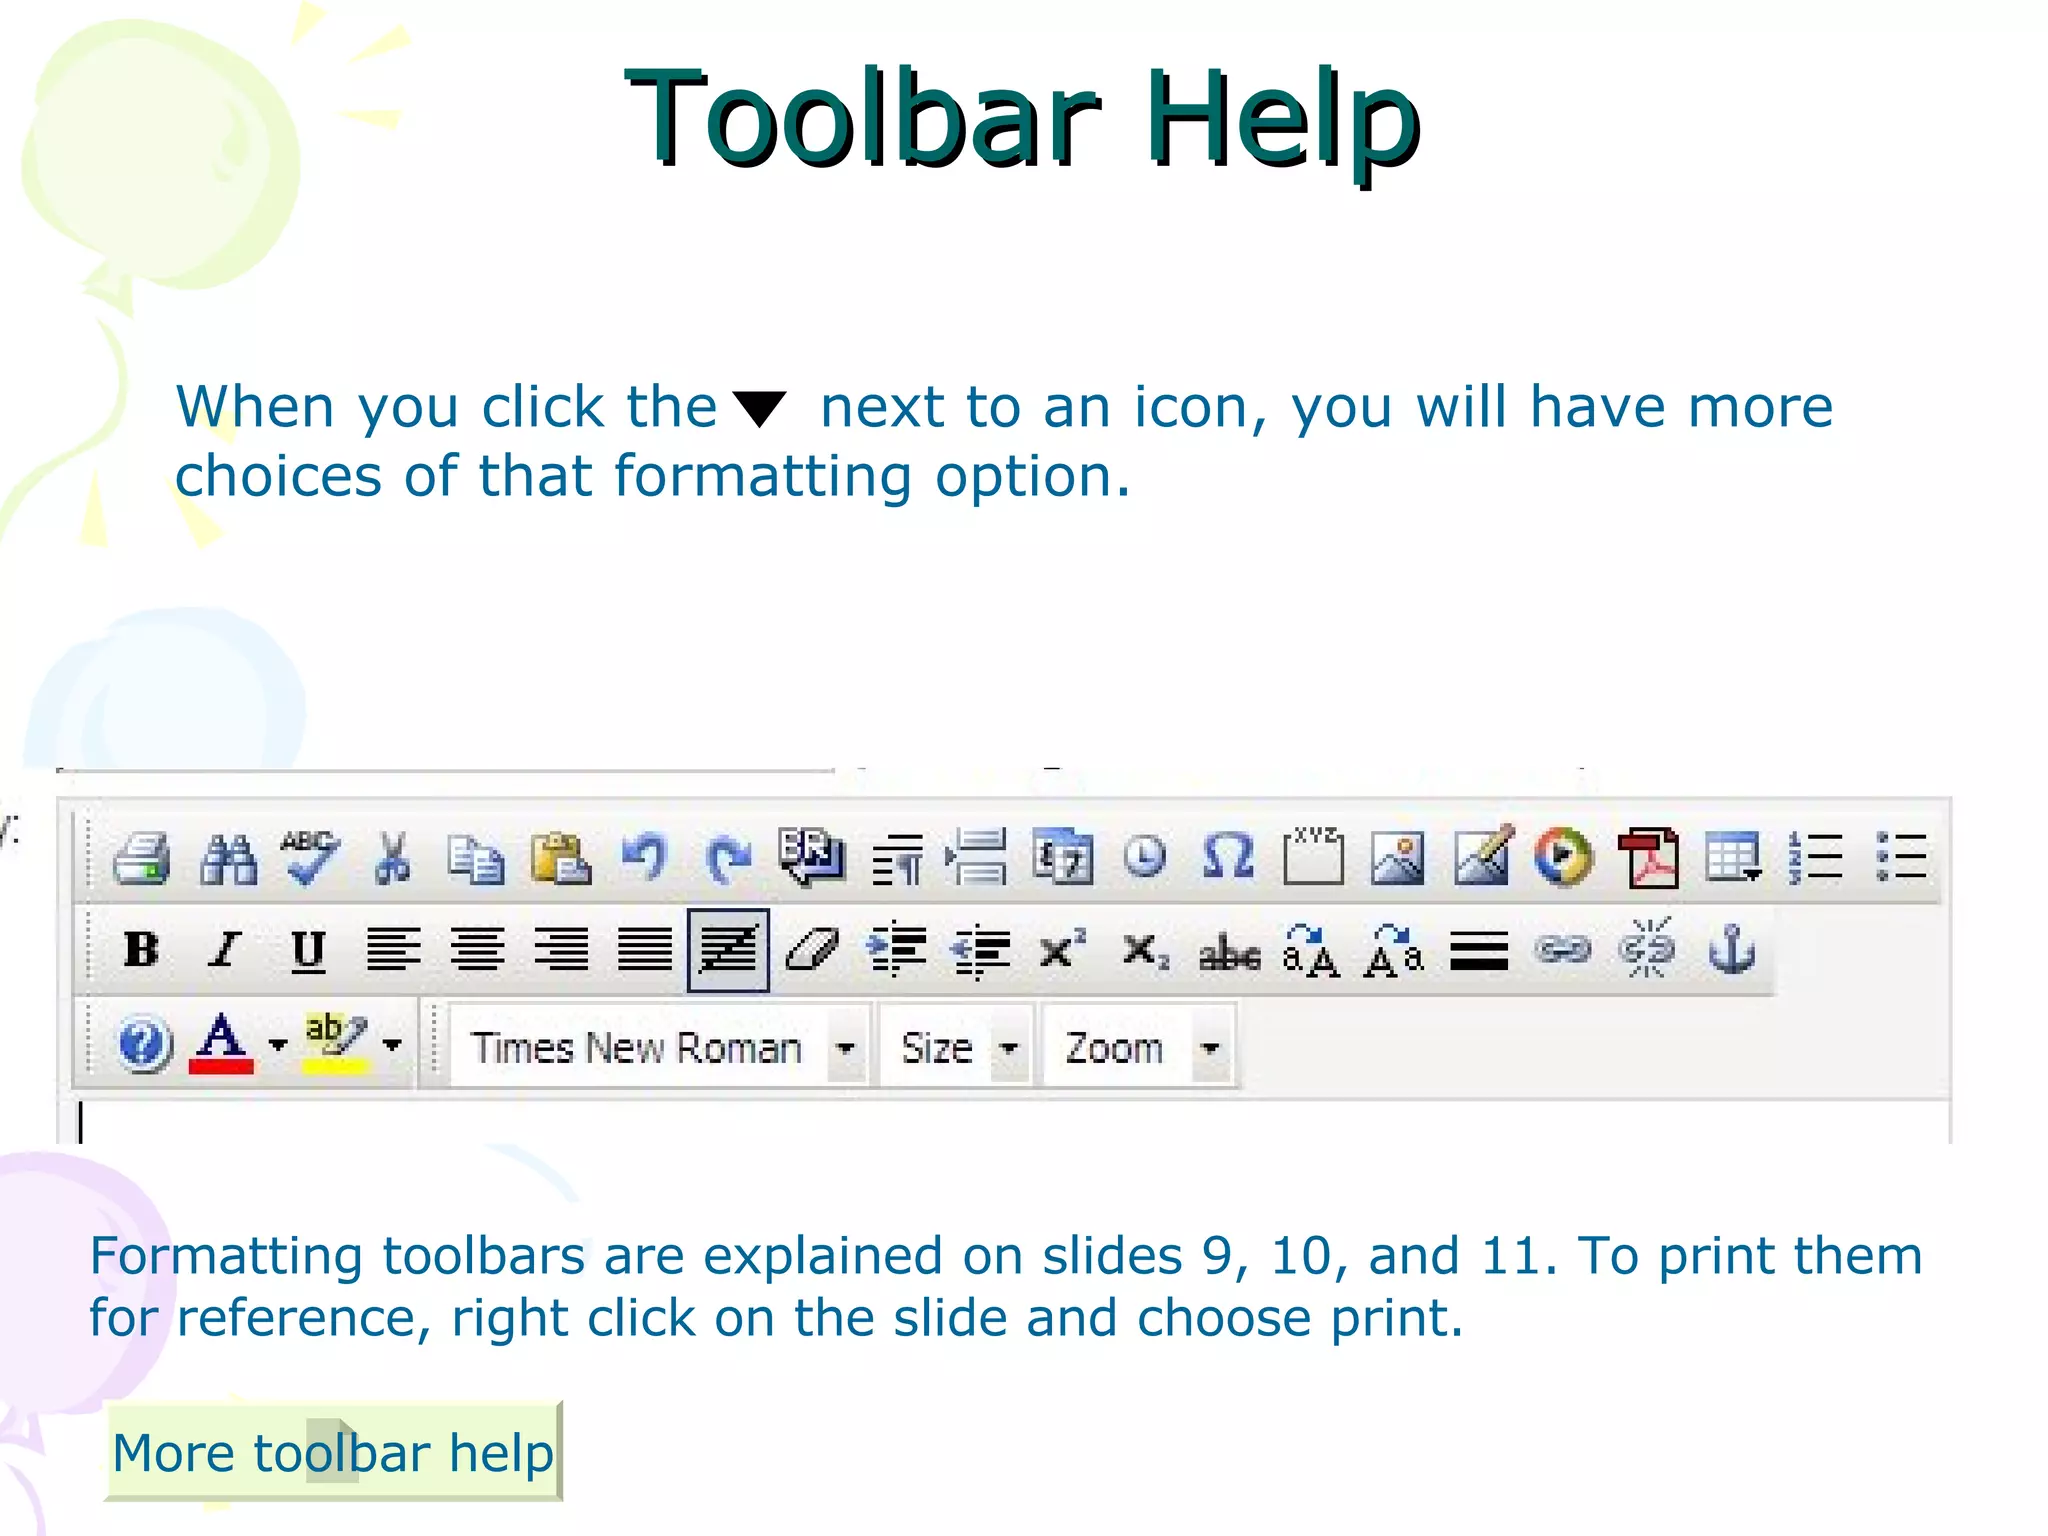
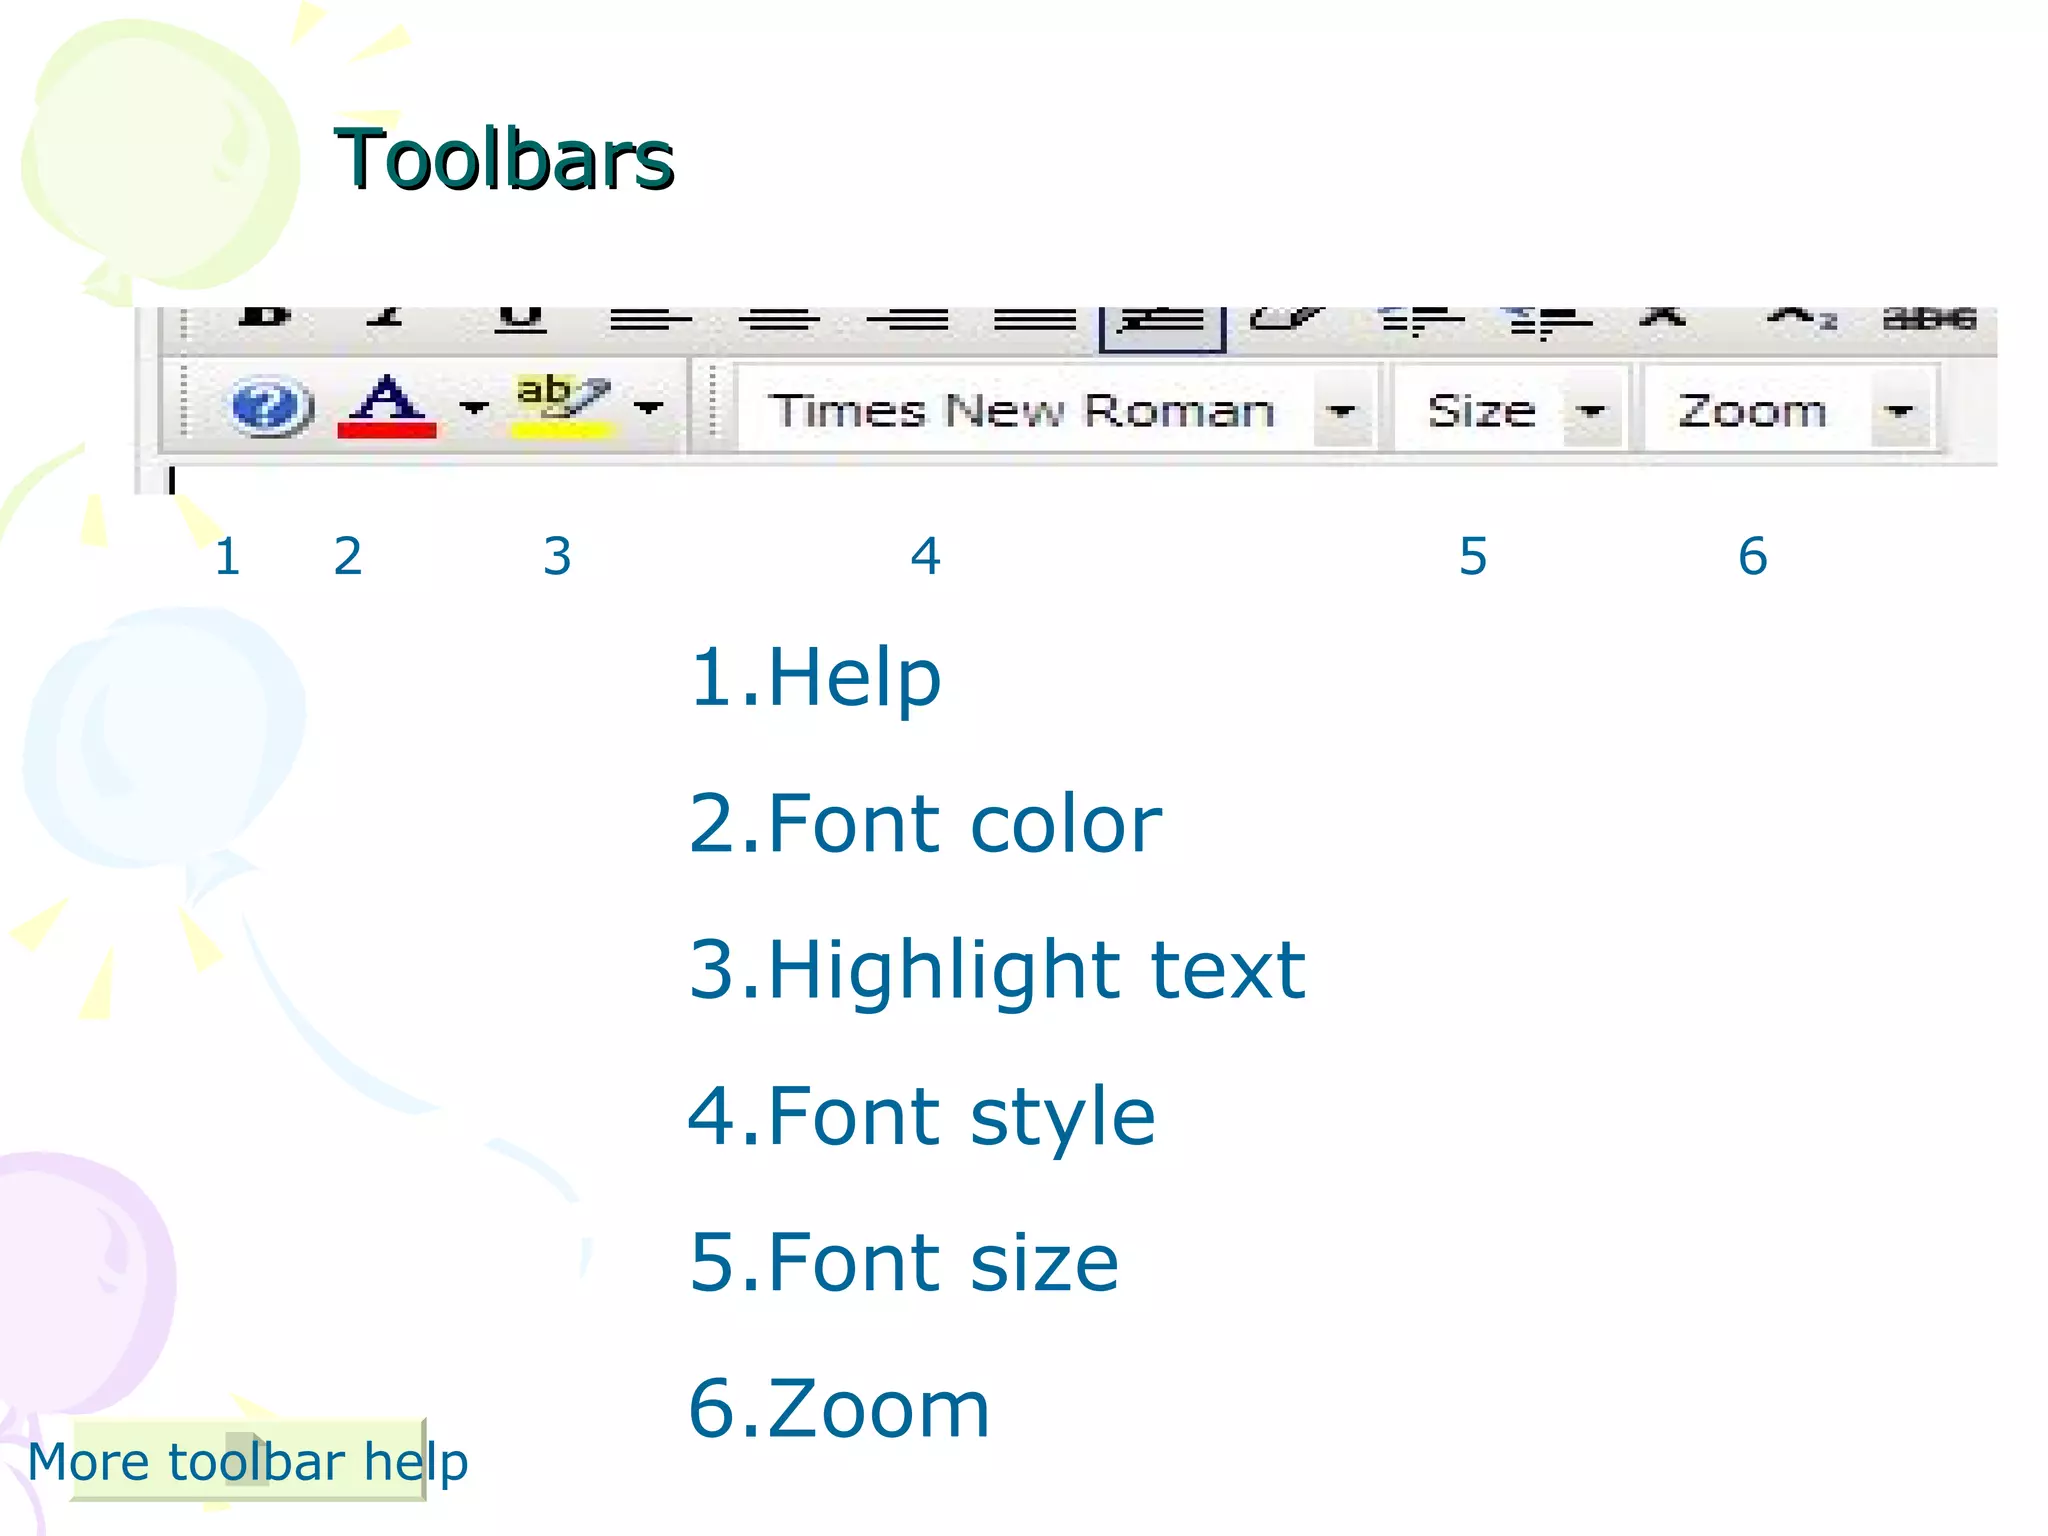
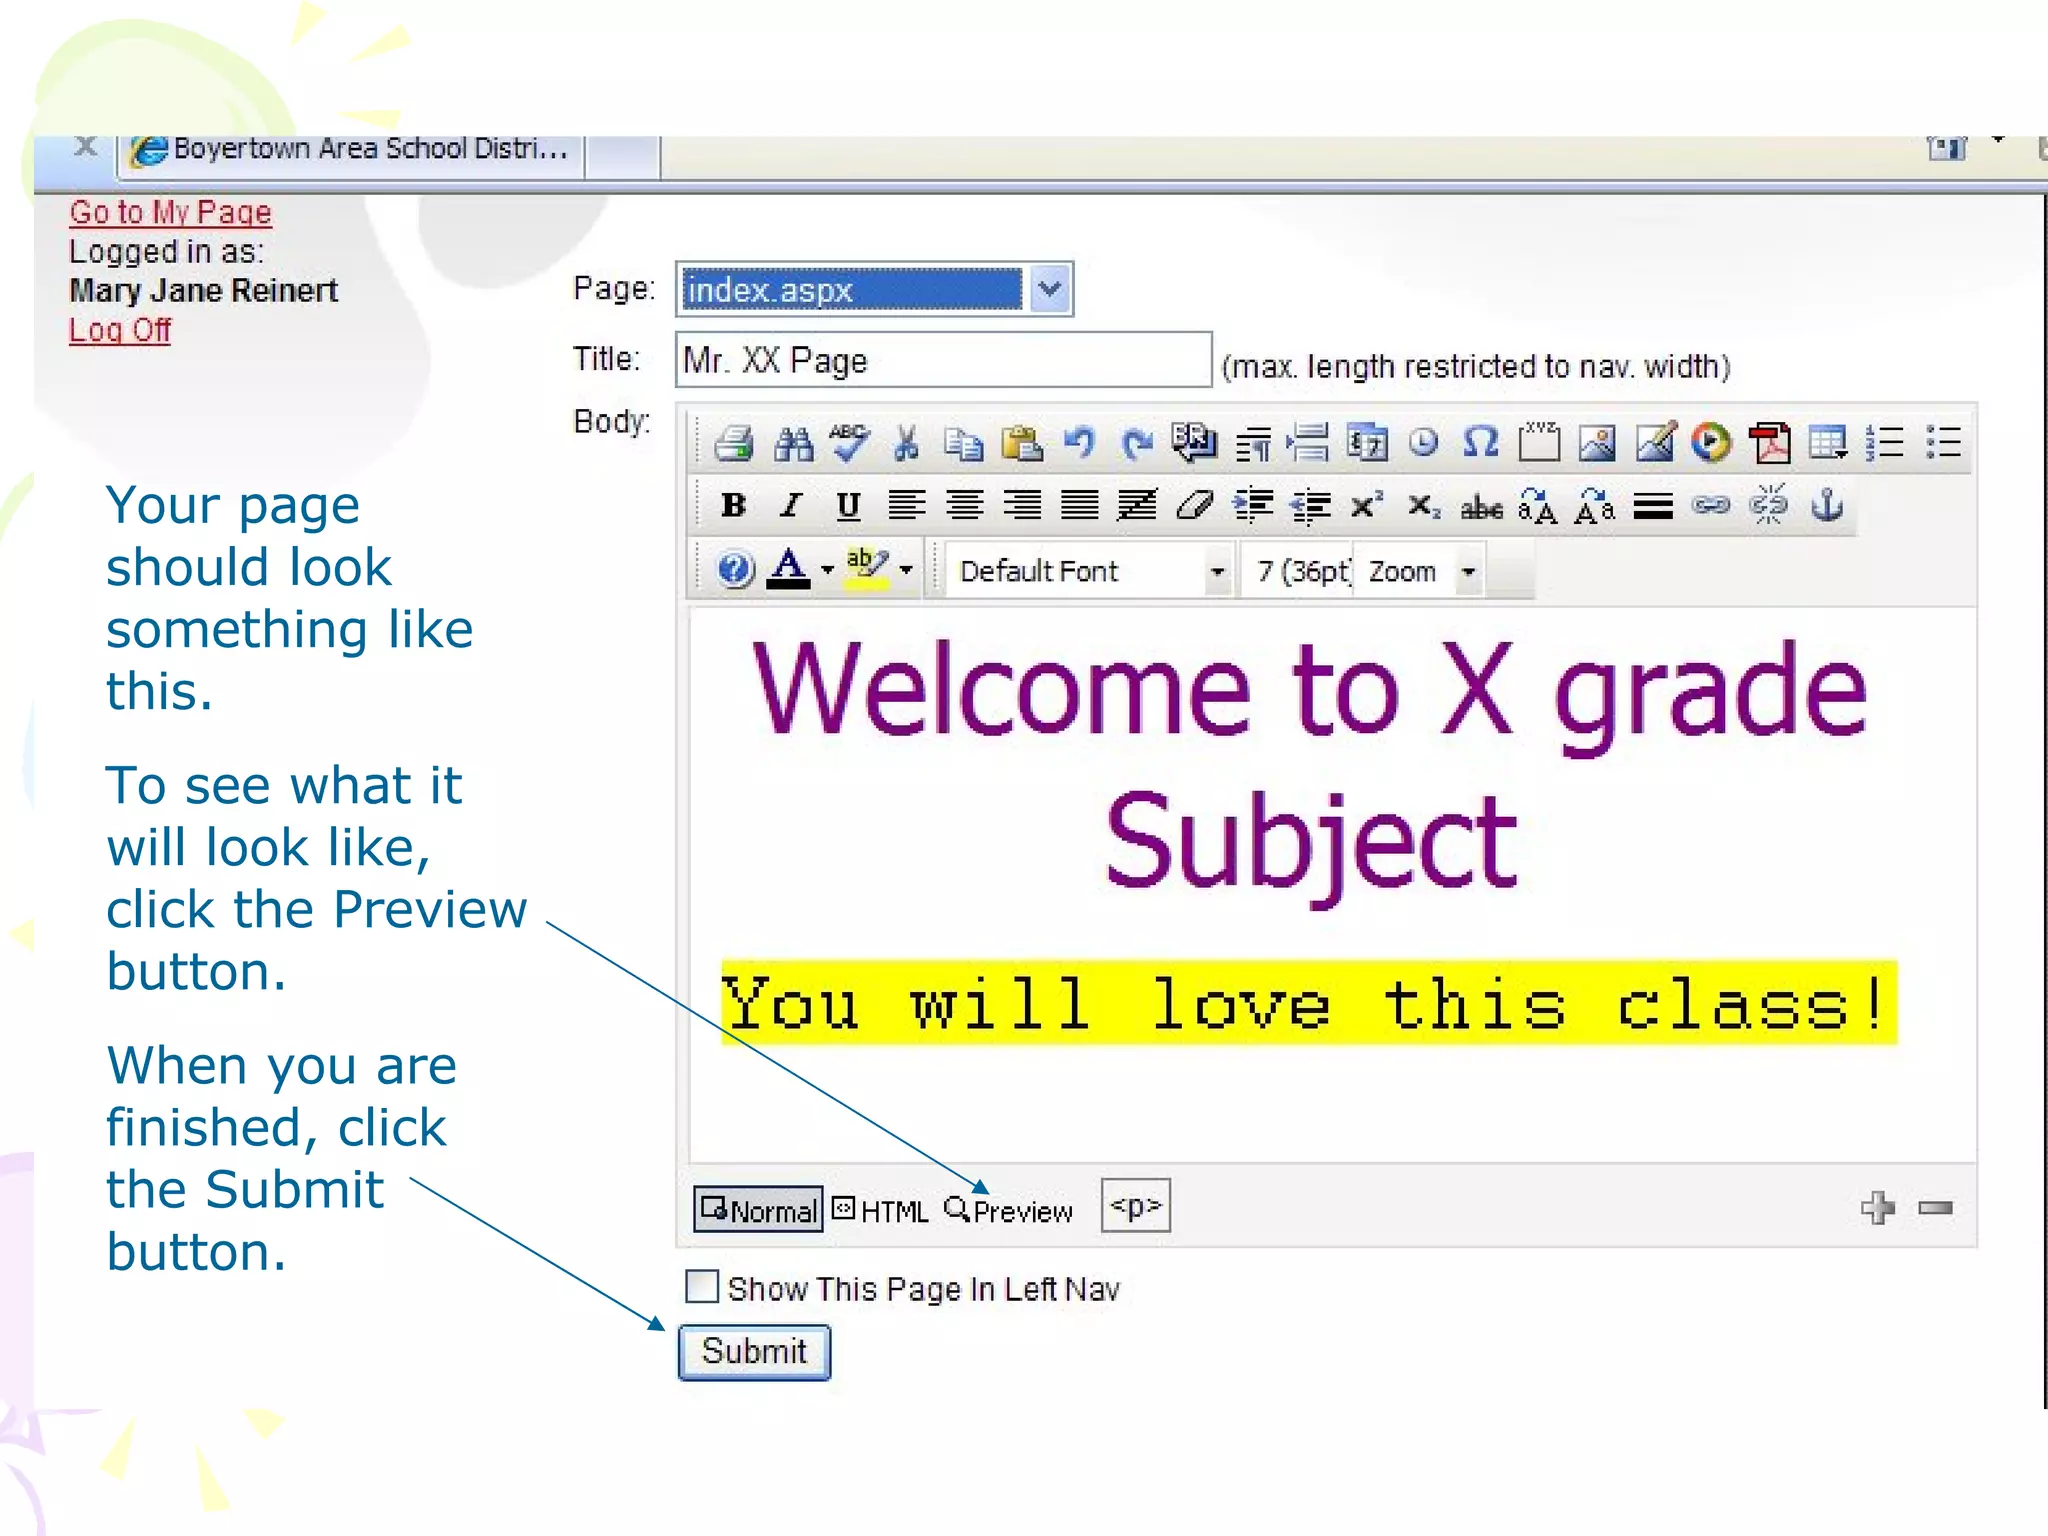
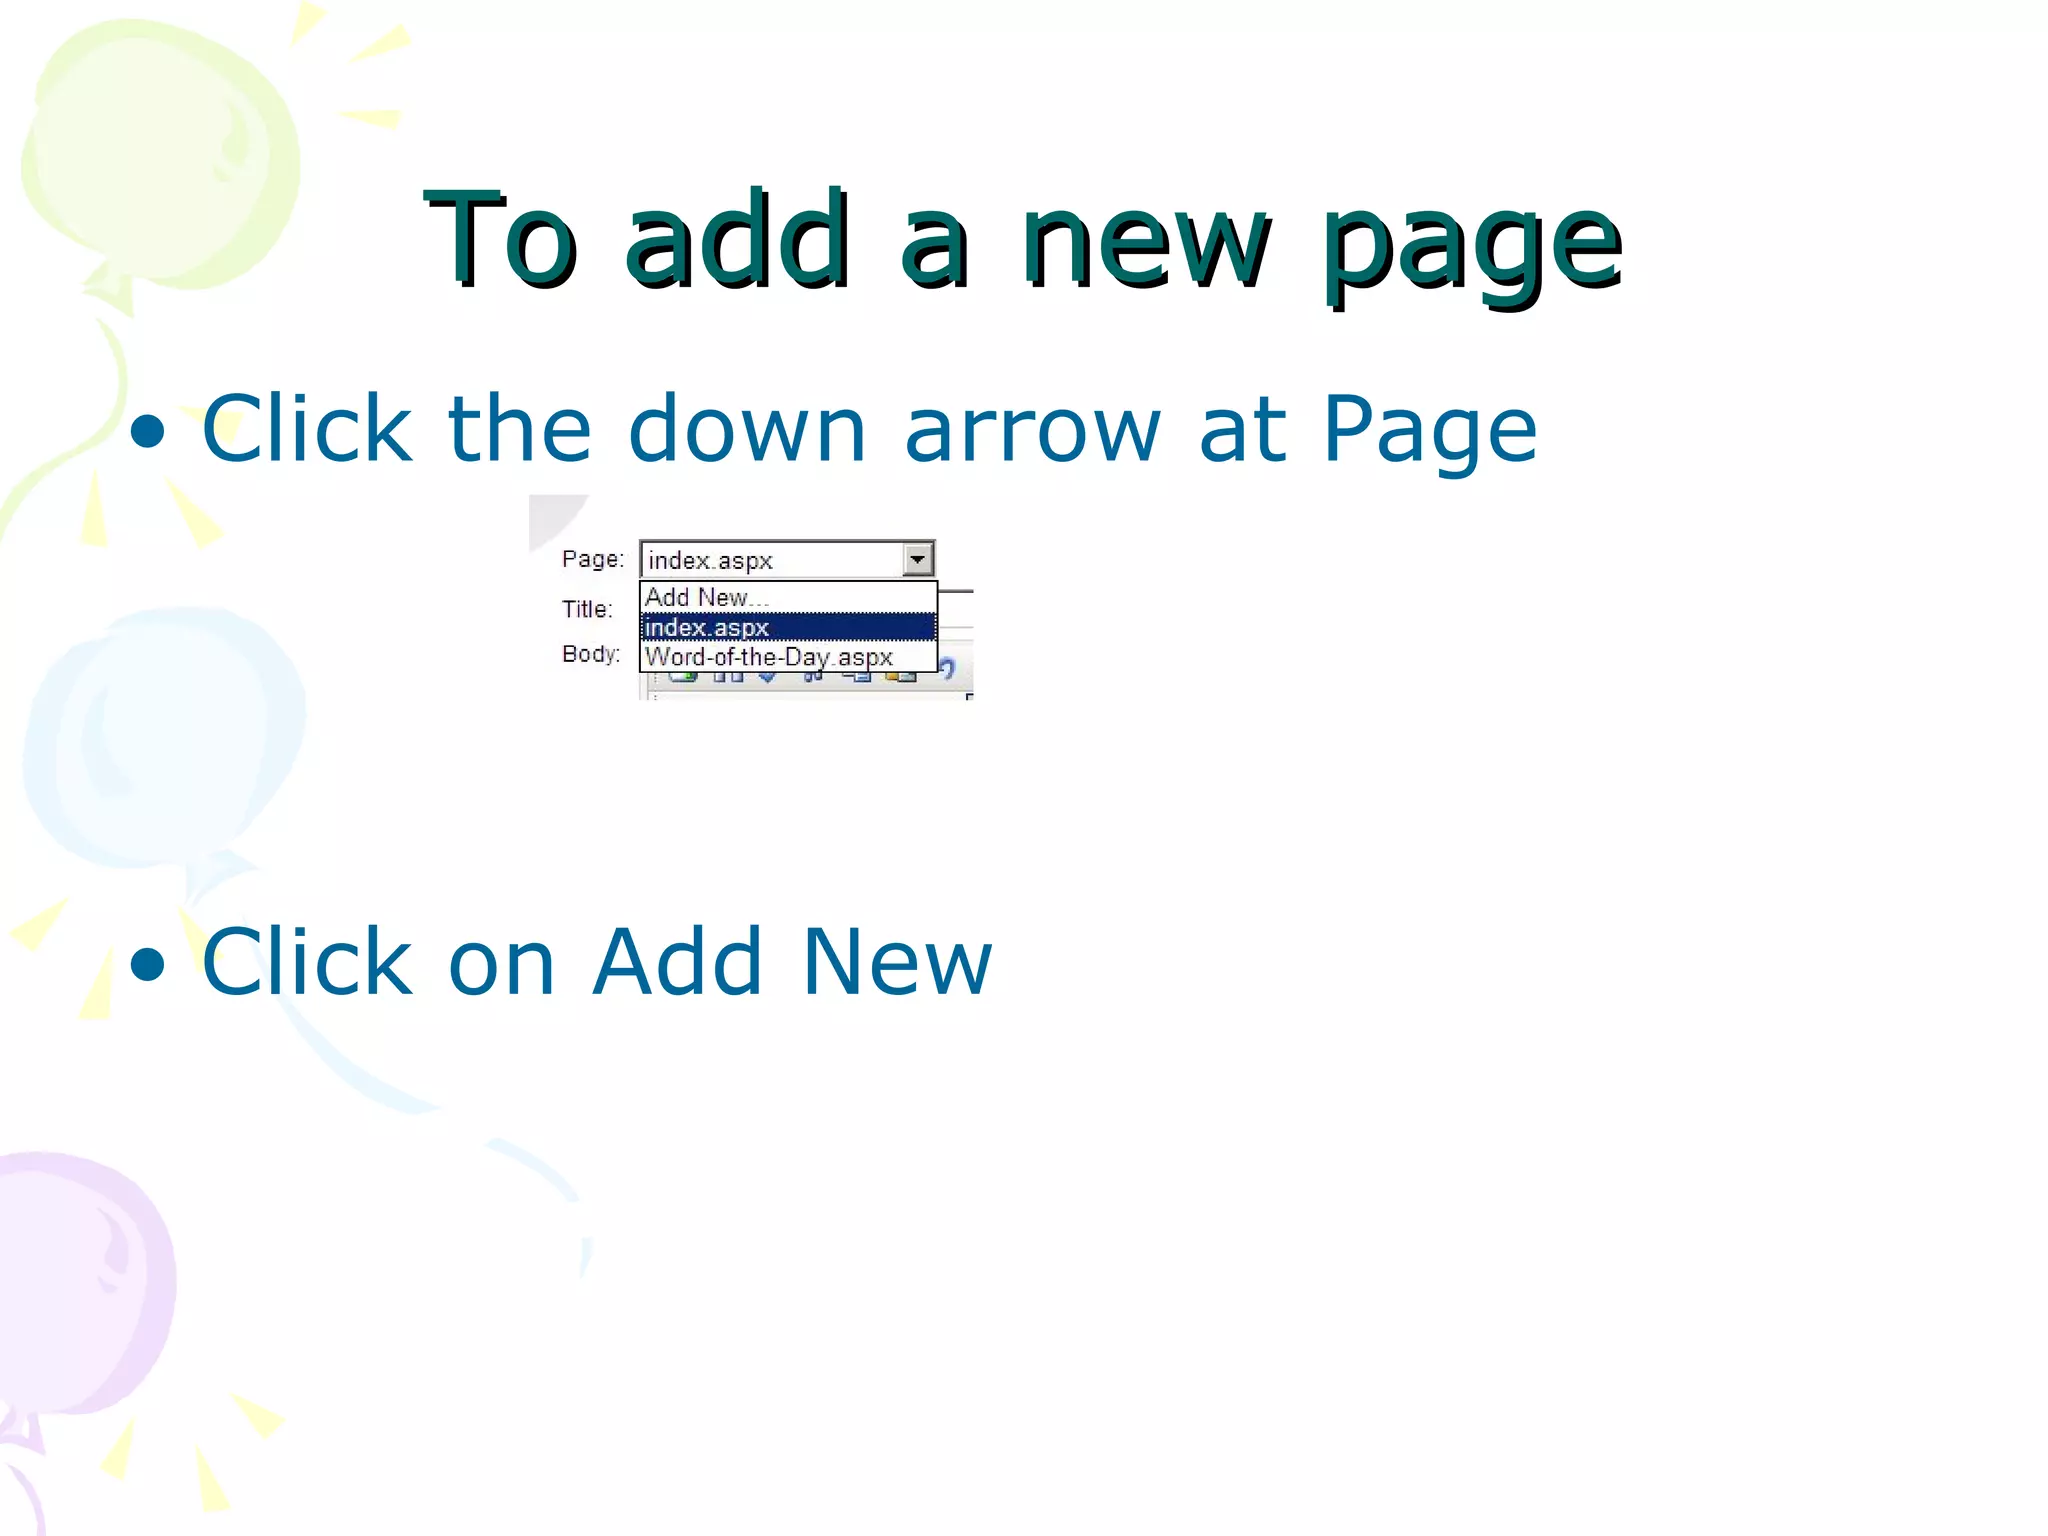
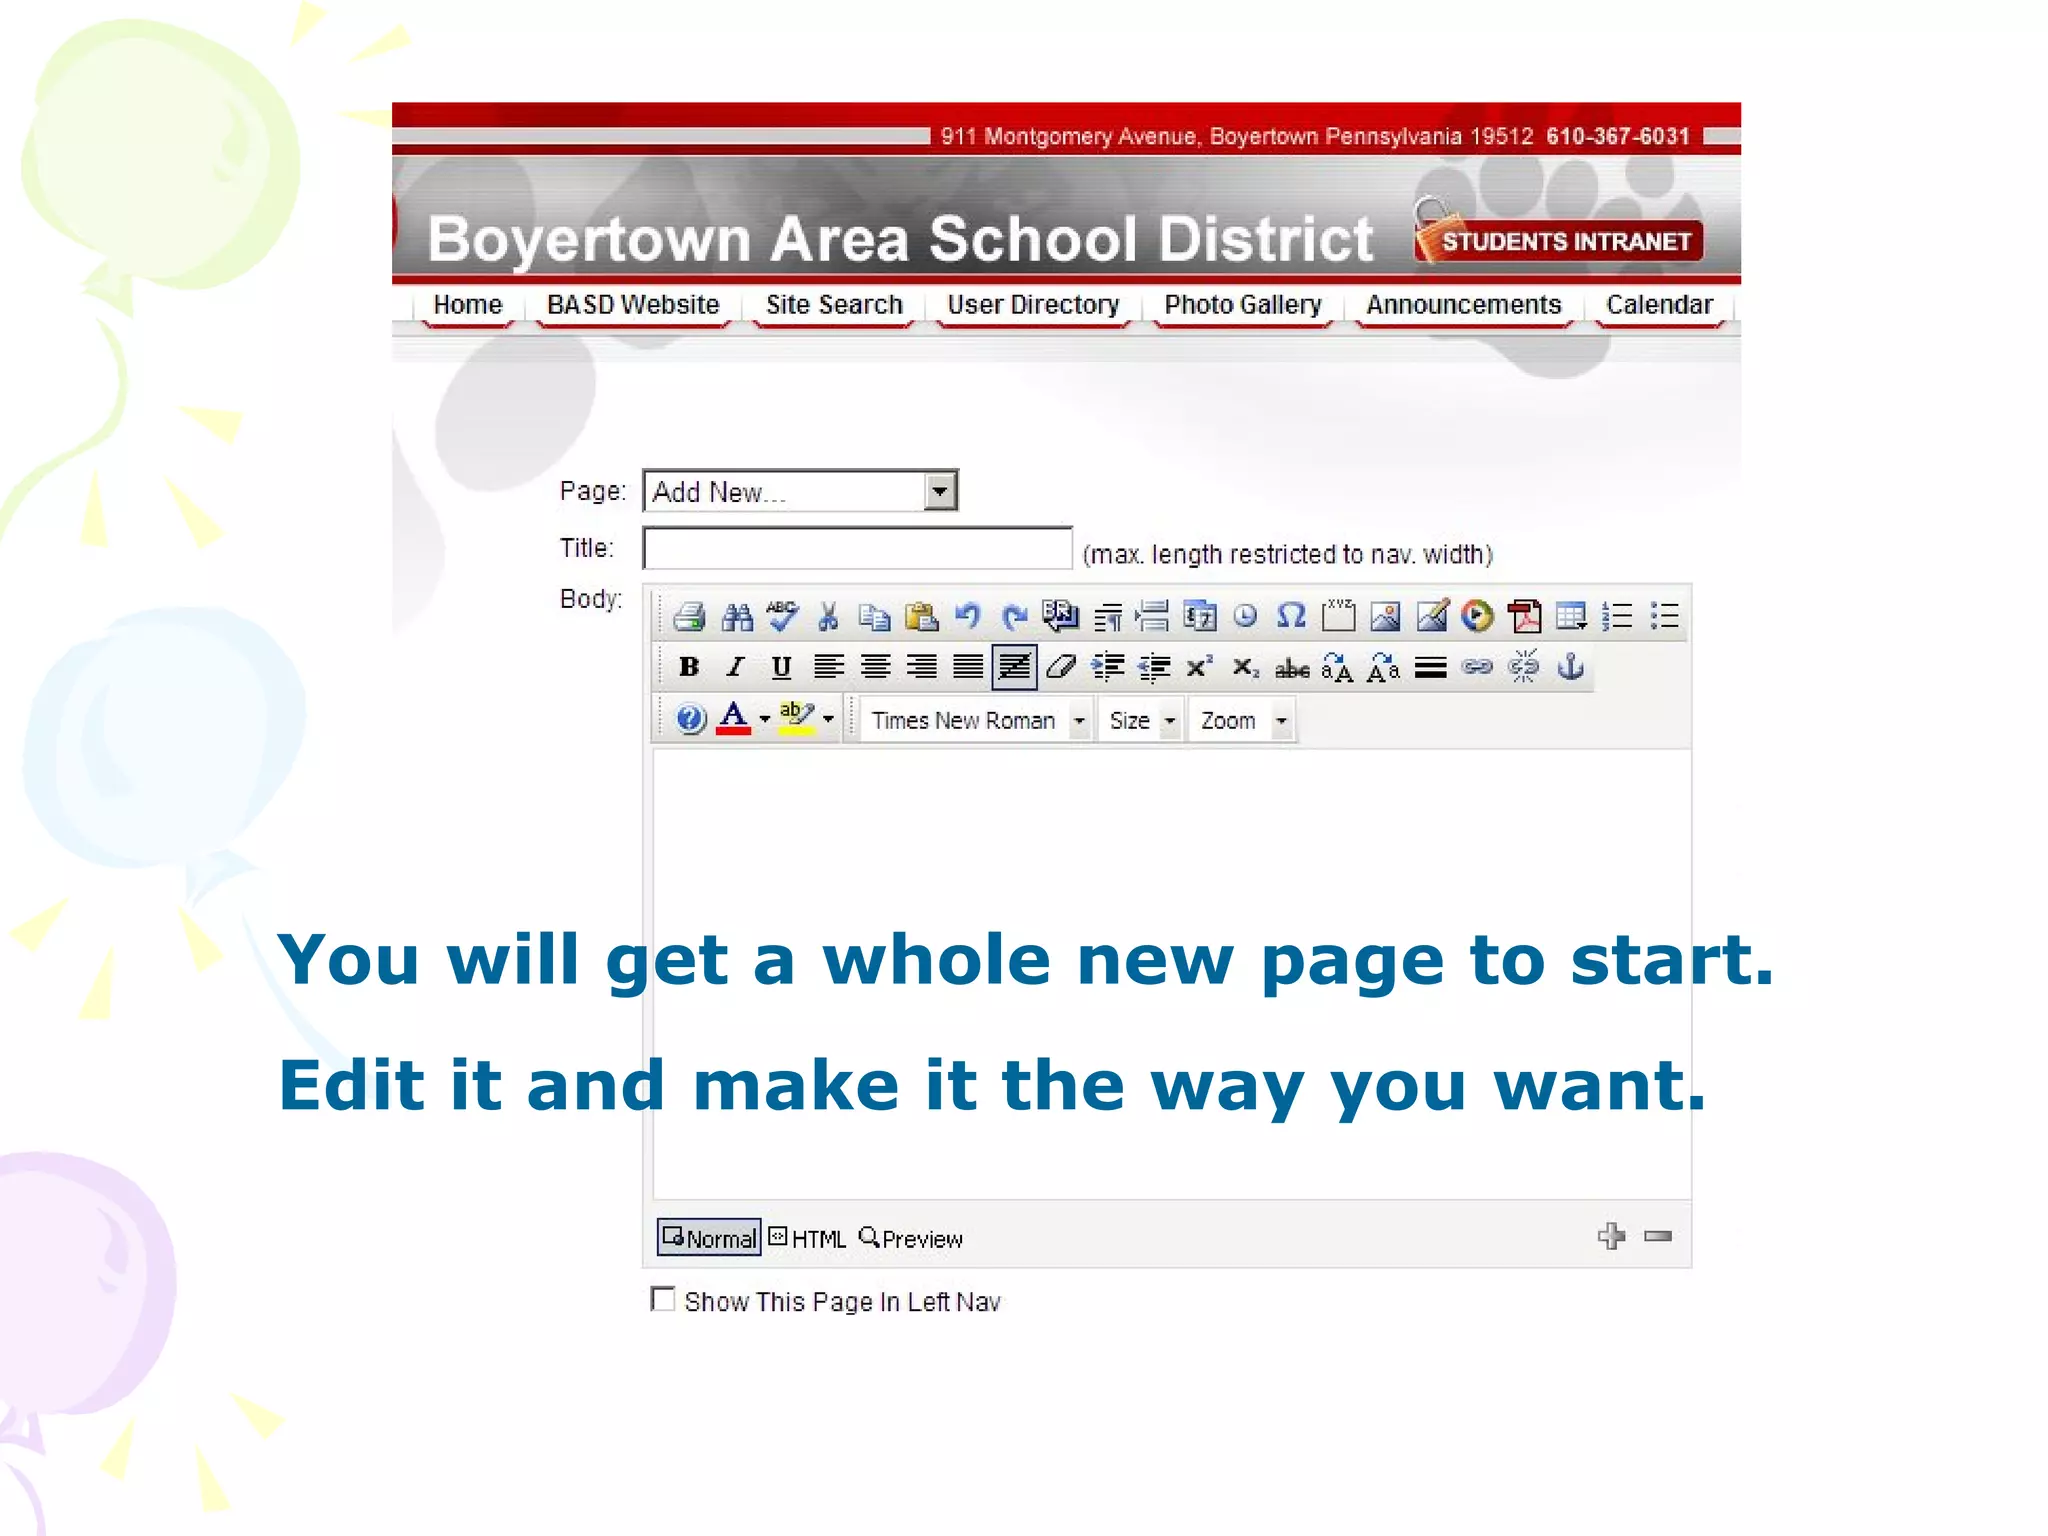
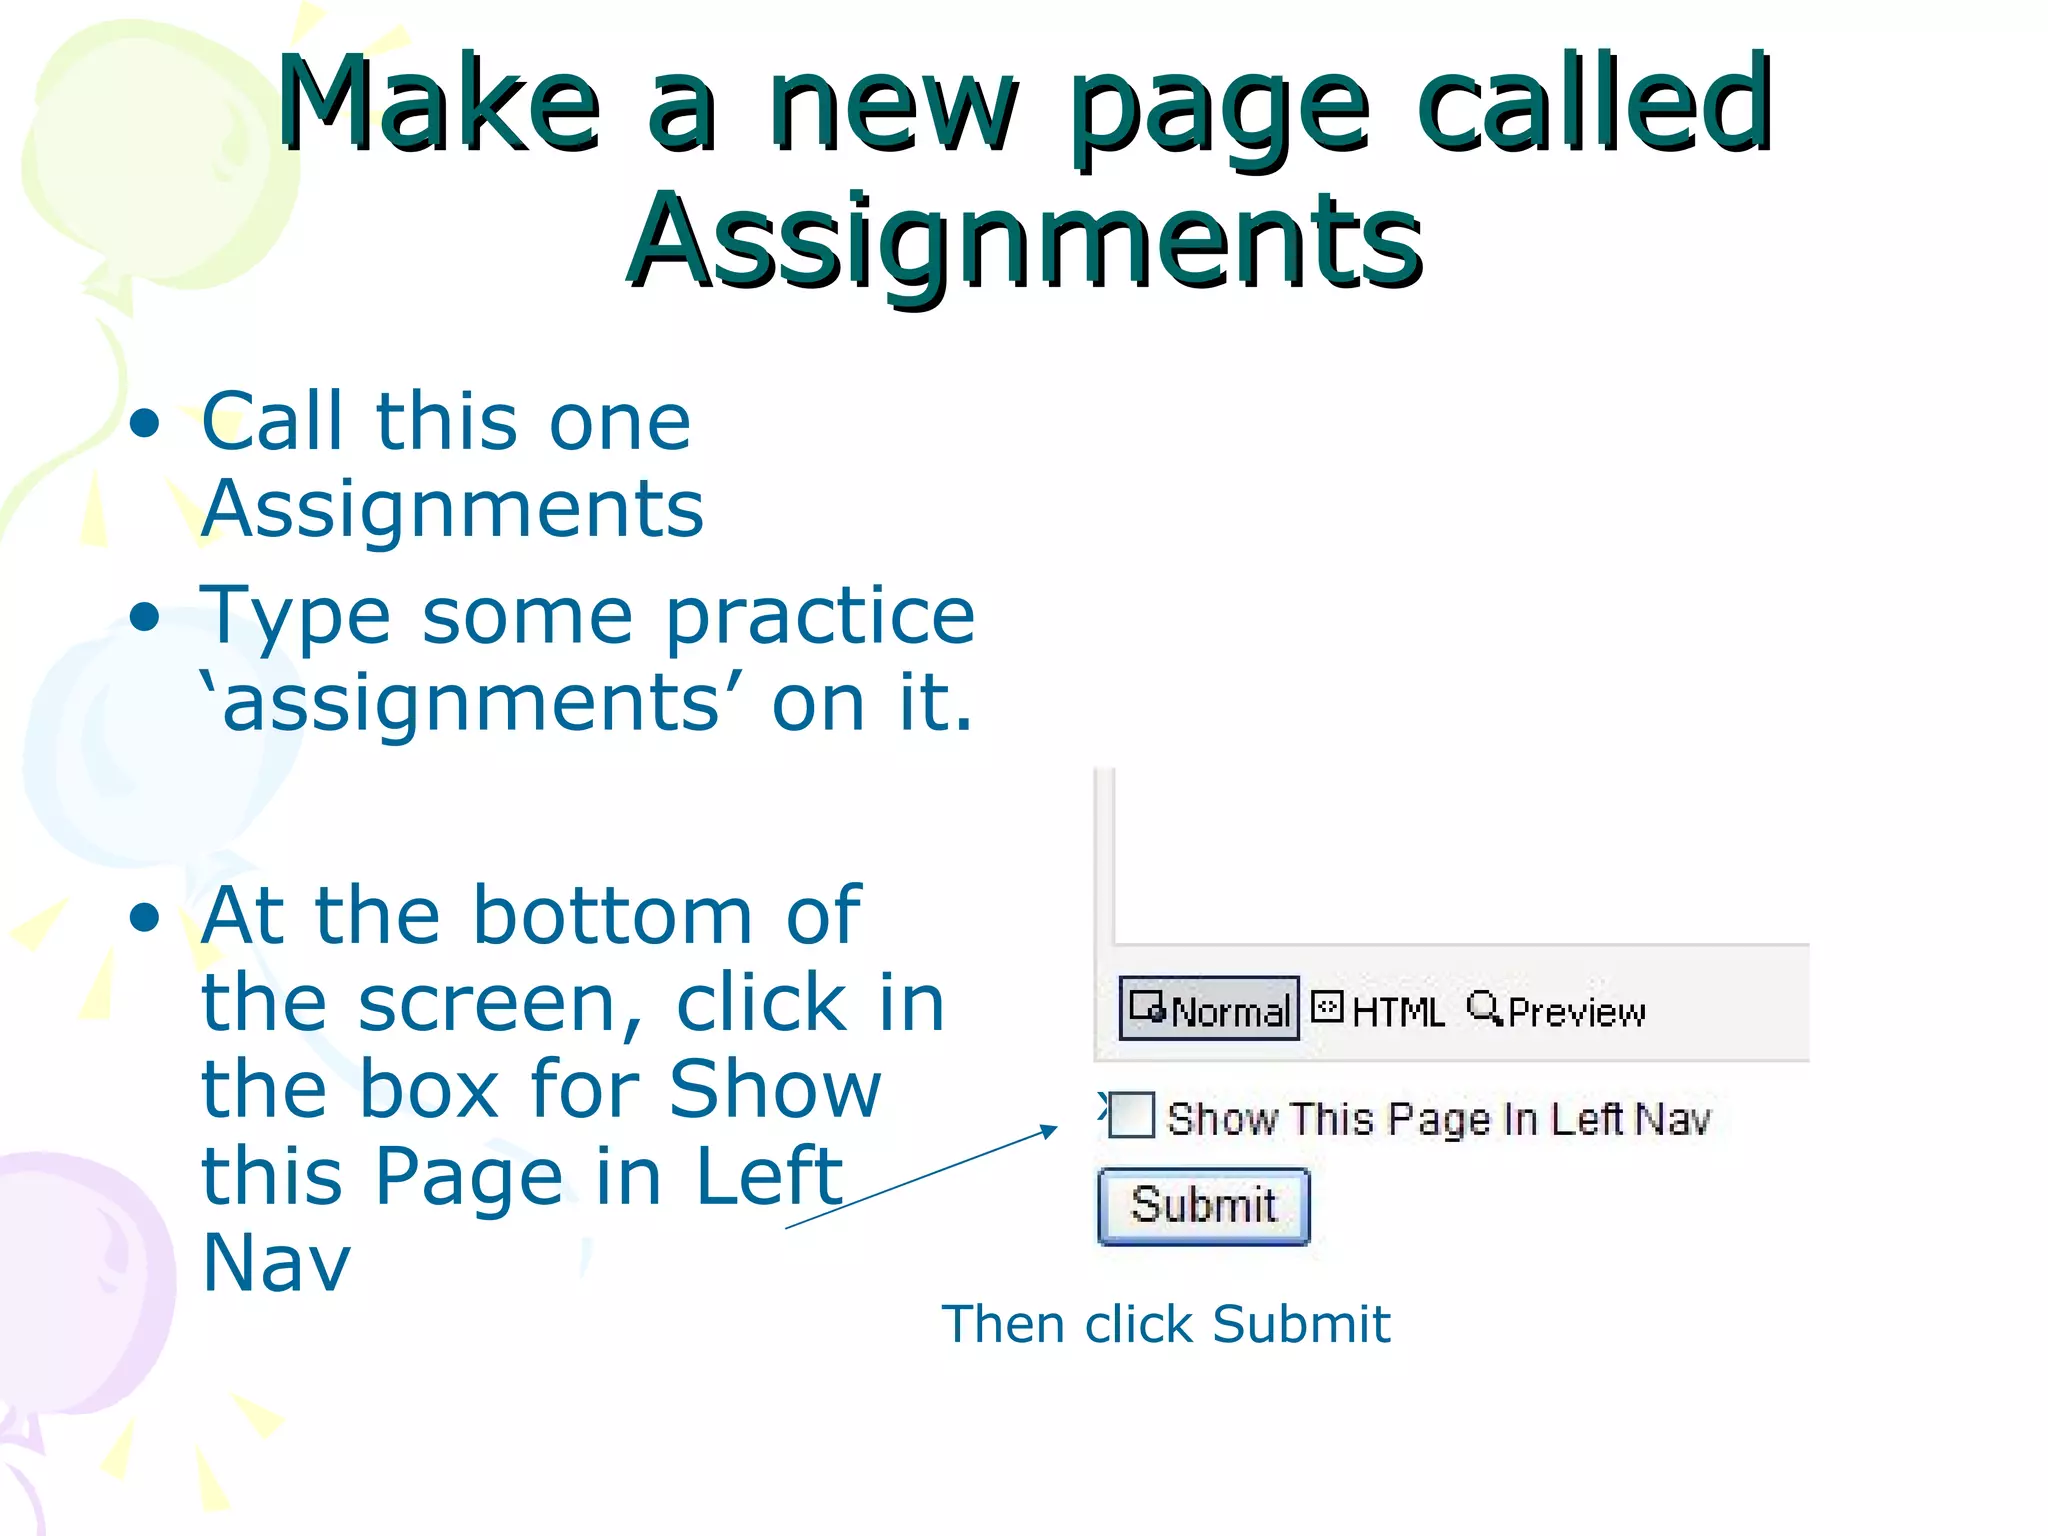
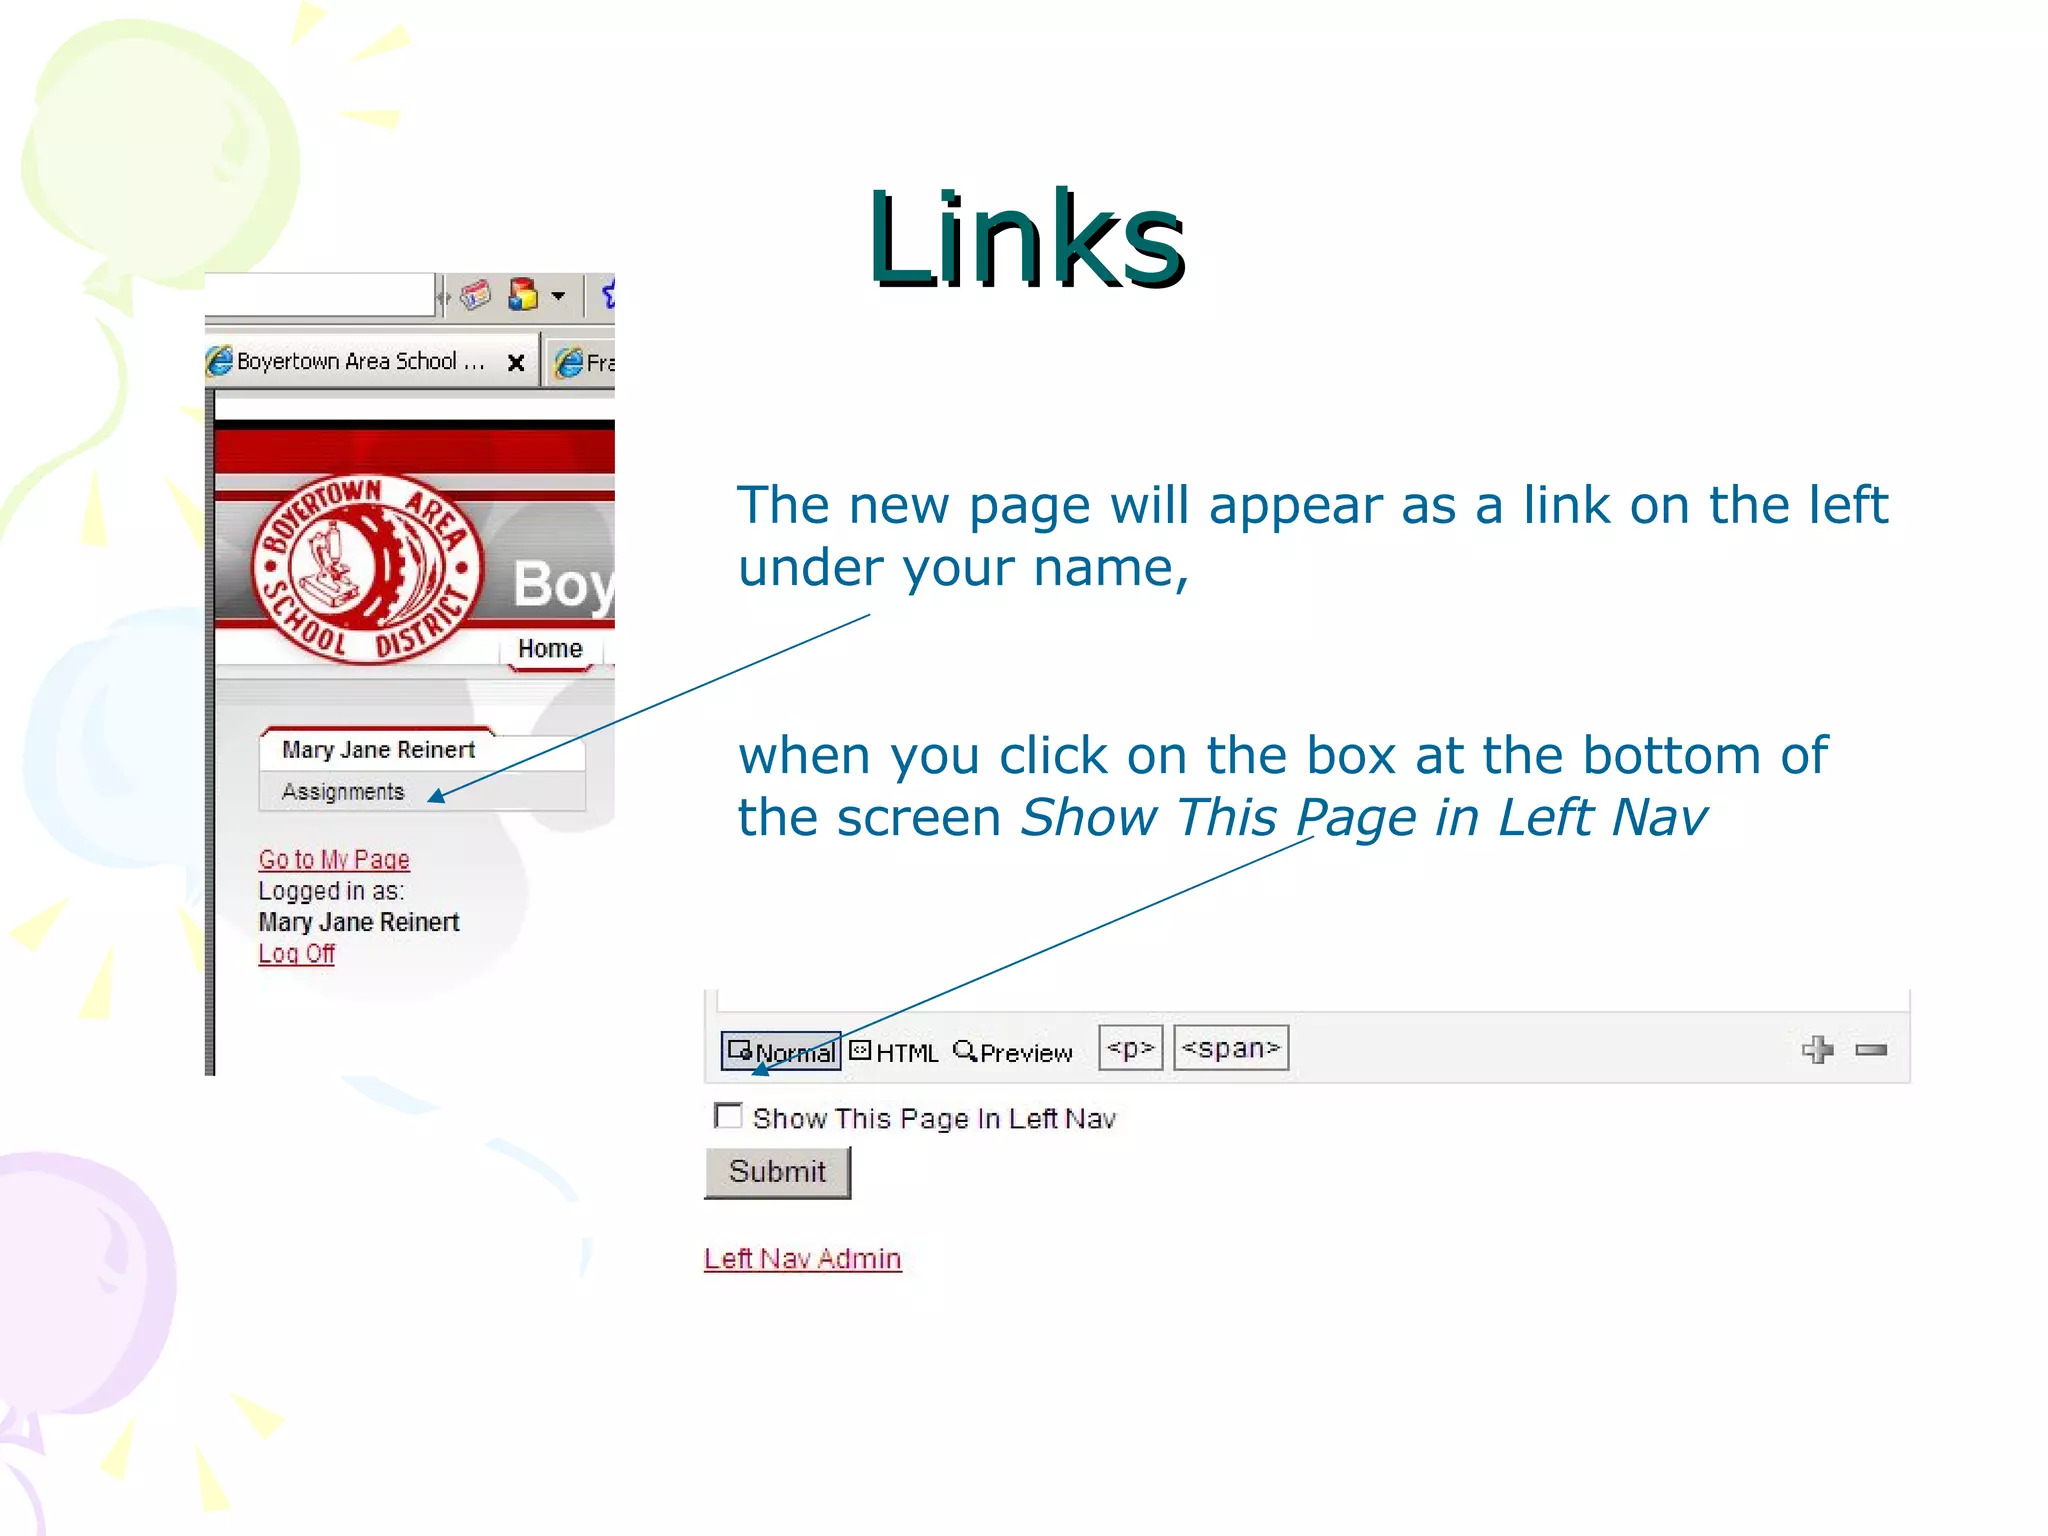
Create your Page District Intranet – Getting Started
Tutorial Menu Logging On How to use this tutorial Starting your page Adding/editing pages Naming your pages Toolbars Creating Links Adding Pictures Finding your pictures Creating PDF documents Adding worksheets HELP
Logon to the Intranet website http:// student.boyertownasd.org/admin/admin.aspx   Use the same username and password that you use for email
To use this tutorial At the bottom of your computer screen you will see the tutorial and the Intranet. You can click back and forth for instruction and practice. Note – you will not see the tabs if you enlarge this display
Click on  Go to My Page  in red on the left side
Click on  Add or edit pages in this section
Start with the Index Page This will be your main page At the Title line type in the name or title you want to appear on your first page. (max. length restricted to nav. width)  This means the title must fit in the box provided
Body Notice the editing icons on the tool bar They are similar to Word You can set it up first or just start typing
Toolbar Help When you click the  next to an icon, you will have more choices of that formatting option.  Formatting toolbars are explained on slides 9, 10, and 11. To print them for reference, right click on the slide and choose print. More toolbar help
Toolbars Help Font color Highlight text Font style Font size Zoom 1  2  3  4  5  6 More toolbar help
Bold Italic Underline Left Justify Center Right Justify Full Justify Justify None Remove Format 10. Indent text 11. Outdent text 12. Superscript text 13. Subscript text 14. Strikethrough text 15. Upper case 16. Lower case 17. Insert horizontal line 18, 19, 20 Hyperlink tools Toolbars More toolbar help 1  2  3  4  5  6  7  8  9  10  11  12  13  14  15  16  17  18  19  20
Toolbars Print Find Spell check Cut Copy Paste Go back Go forward Insert break Insert paragraph Insert page break 12. Insert date 13. Insert time 14. Special characters 15. Insert group box 16. Image gallery 17. Insert image 18. Insert video 19. Downloadable files 20. Insert table 21, 22. Bullets   1  2  3  4  5  6  7  8  9  10  11  12  13  14  15 16  17  18  19  20  21  22
Let’s make a sample index page Start at the top of the BODY Type Welcome to X grade subject (replace the x with your grade and subject with your subject) Now change the font style, color and size In smaller font below write something about your subject or class
Your page should look something like this.  To see what it will look like, click the Preview button. When you are finished, click the Submit button.
To add a new page Click the down arrow at Page Click on Add New
You will get a whole new page to start. Edit it and make it the way you want.
Make a new page called Assignments Call this one Assignments  Type some practice ‘assignments’ on it. At the bottom of the screen, click in the box for Show this Page in Left Nav x Then click Submit
Links The new page will appear as a link on the left under your name,  when you click on the box at the bottom of the screen  Show This Page in Left Nav
To add pictures Click on the Insert Image icon If you have images or clip art in a file you can use those. You may not use pictures of students.  If you need an image for practice, use this bookworm picture. Right click on the picture; choose Save As and save it to My Pictures. When you have the picture saved, click the Insert Image icon.
Click on the UPLOAD button
Find My Pictures and the bookworm image Hint: to see the images, click on the down arrow next to the View Menu and select Thumbnails
Click on the bookworm once and then click Open. Or click on it twice to open automatically. You will get a message that the file uploaded successfully. From this screen you can edit the placement and size of the image.
To add your own worksheets You can add your own documents to the website It is best to convert your documents to PDF files to upload. See directions for saving as PDF files
Creating PDF documents Save any document as a PDF file Open it on your computer Go to File > Print Under printer choices, select PDF Creator > then click OKAY When this screen appears Click Save
PDF files, cont. The next screen will let you choose your location  Follow the directions for inserting a picture, but select the PDF icon

Intranet Online Tutorial

  • 1.
    Create your PageDistrict Intranet – Getting Started
  • 2.
    Tutorial Menu LoggingOn How to use this tutorial Starting your page Adding/editing pages Naming your pages Toolbars Creating Links Adding Pictures Finding your pictures Creating PDF documents Adding worksheets HELP
  • 3.
    Logon to theIntranet website http:// student.boyertownasd.org/admin/admin.aspx Use the same username and password that you use for email
  • 4.
    To use thistutorial At the bottom of your computer screen you will see the tutorial and the Intranet. You can click back and forth for instruction and practice. Note – you will not see the tabs if you enlarge this display
  • 5.
    Click on Go to My Page in red on the left side
  • 6.
    Click on Add or edit pages in this section
  • 7.
    Start with theIndex Page This will be your main page At the Title line type in the name or title you want to appear on your first page. (max. length restricted to nav. width) This means the title must fit in the box provided
  • 8.
    Body Notice theediting icons on the tool bar They are similar to Word You can set it up first or just start typing
  • 9.
    Toolbar Help Whenyou click the next to an icon, you will have more choices of that formatting option. Formatting toolbars are explained on slides 9, 10, and 11. To print them for reference, right click on the slide and choose print. More toolbar help
  • 10.
    Toolbars Help Fontcolor Highlight text Font style Font size Zoom 1 2 3 4 5 6 More toolbar help
  • 11.
    Bold Italic UnderlineLeft Justify Center Right Justify Full Justify Justify None Remove Format 10. Indent text 11. Outdent text 12. Superscript text 13. Subscript text 14. Strikethrough text 15. Upper case 16. Lower case 17. Insert horizontal line 18, 19, 20 Hyperlink tools Toolbars More toolbar help 1 2 3 4 5 6 7 8 9 10 11 12 13 14 15 16 17 18 19 20
  • 12.
    Toolbars Print FindSpell check Cut Copy Paste Go back Go forward Insert break Insert paragraph Insert page break 12. Insert date 13. Insert time 14. Special characters 15. Insert group box 16. Image gallery 17. Insert image 18. Insert video 19. Downloadable files 20. Insert table 21, 22. Bullets 1 2 3 4 5 6 7 8 9 10 11 12 13 14 15 16 17 18 19 20 21 22
  • 13.
    Let’s make asample index page Start at the top of the BODY Type Welcome to X grade subject (replace the x with your grade and subject with your subject) Now change the font style, color and size In smaller font below write something about your subject or class
  • 14.
    Your page shouldlook something like this. To see what it will look like, click the Preview button. When you are finished, click the Submit button.
  • 15.
    To add anew page Click the down arrow at Page Click on Add New
  • 16.
    You will geta whole new page to start. Edit it and make it the way you want.
  • 17.
    Make a newpage called Assignments Call this one Assignments Type some practice ‘assignments’ on it. At the bottom of the screen, click in the box for Show this Page in Left Nav x Then click Submit
  • 18.
    Links The newpage will appear as a link on the left under your name, when you click on the box at the bottom of the screen Show This Page in Left Nav
  • 19.
    To add picturesClick on the Insert Image icon If you have images or clip art in a file you can use those. You may not use pictures of students. If you need an image for practice, use this bookworm picture. Right click on the picture; choose Save As and save it to My Pictures. When you have the picture saved, click the Insert Image icon.
  • 20.
    Click on theUPLOAD button
  • 21.
    Find My Picturesand the bookworm image Hint: to see the images, click on the down arrow next to the View Menu and select Thumbnails
  • 22.
    Click on thebookworm once and then click Open. Or click on it twice to open automatically. You will get a message that the file uploaded successfully. From this screen you can edit the placement and size of the image.
  • 23.
    To add yourown worksheets You can add your own documents to the website It is best to convert your documents to PDF files to upload. See directions for saving as PDF files
  • 24.
    Creating PDF documentsSave any document as a PDF file Open it on your computer Go to File > Print Under printer choices, select PDF Creator > then click OKAY When this screen appears Click Save
  • 25.
    PDF files, cont.The next screen will let you choose your location Follow the directions for inserting a picture, but select the PDF icon