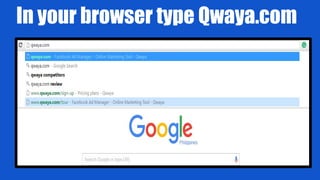
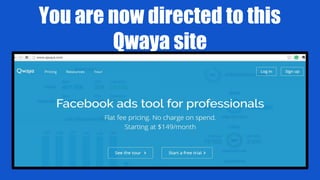
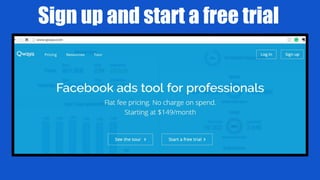
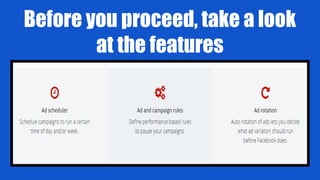
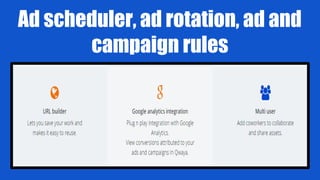
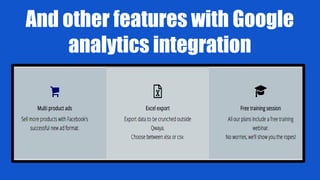
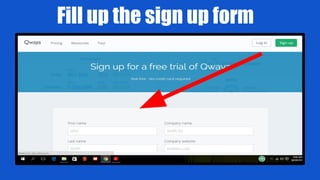
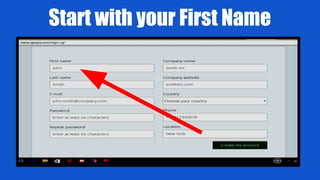
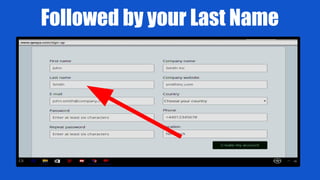
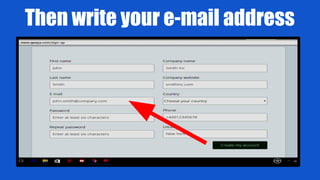
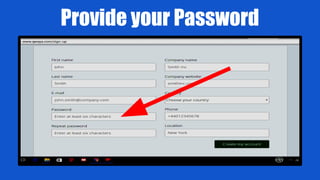
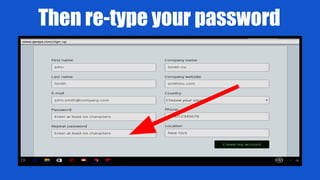
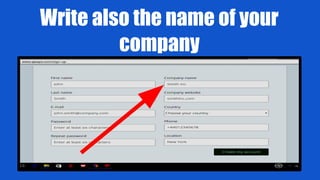
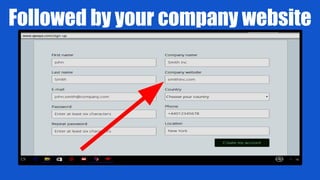
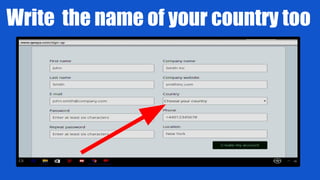
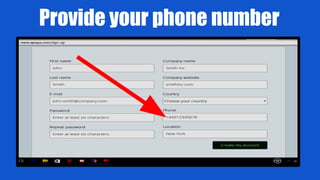
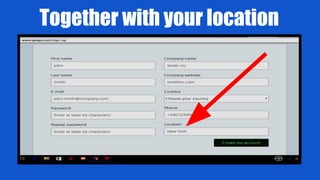
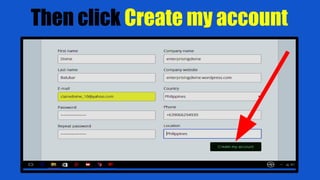
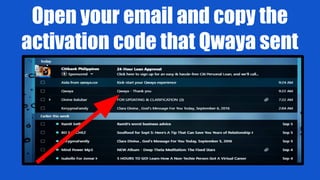
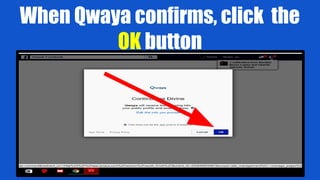
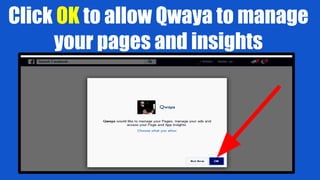
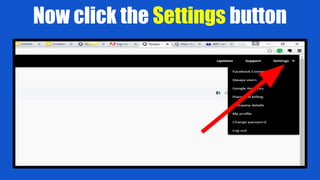
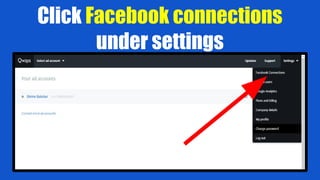
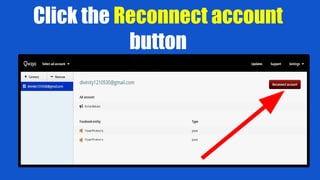
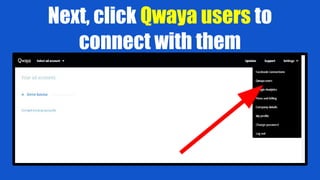
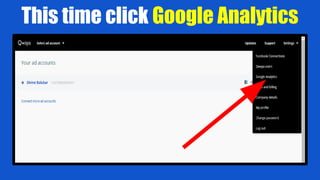
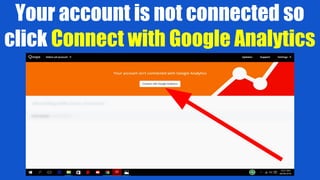
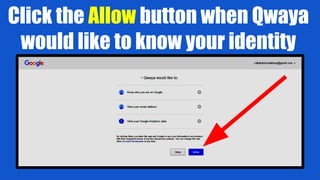
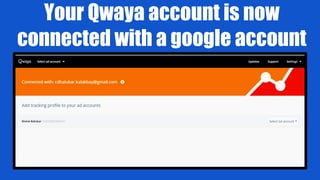
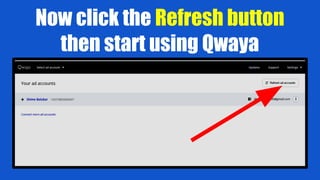
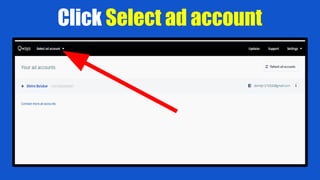
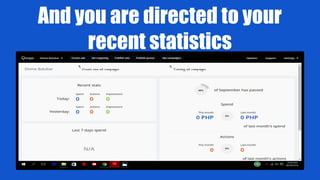
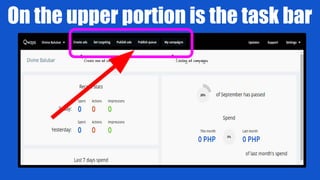
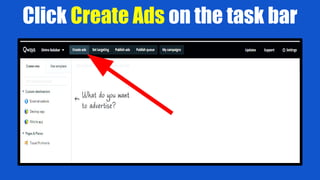
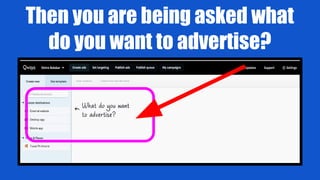
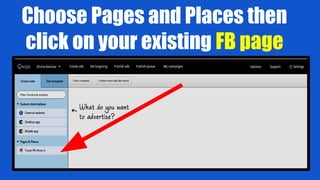
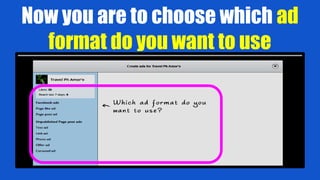
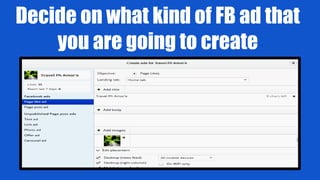
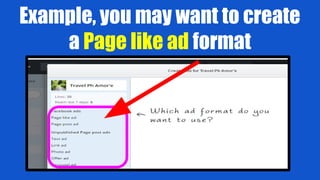
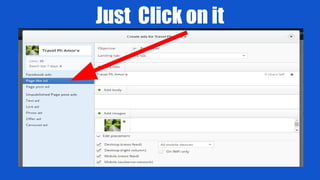
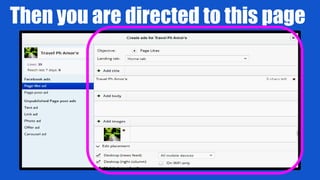
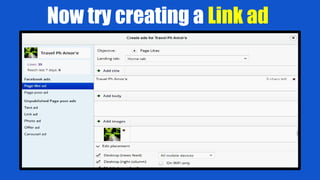
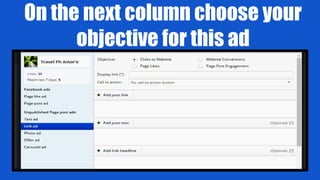
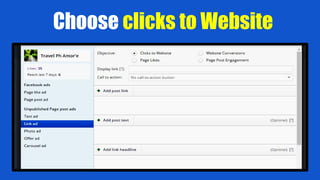
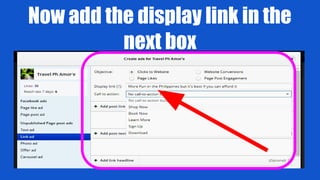
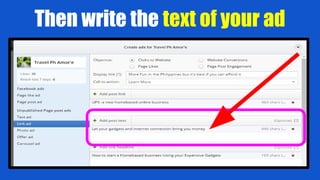
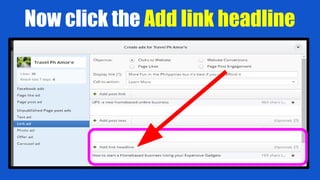
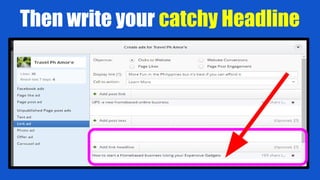
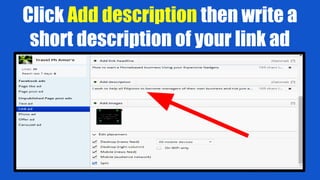
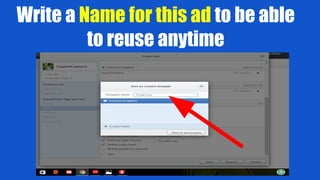
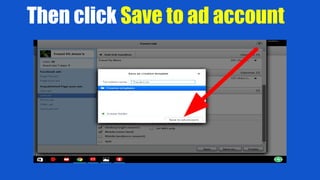
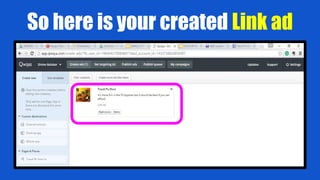
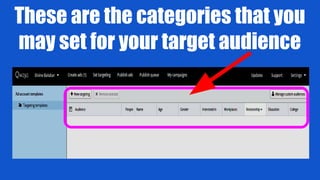
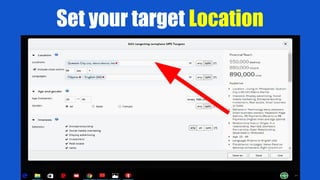
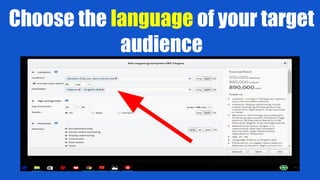
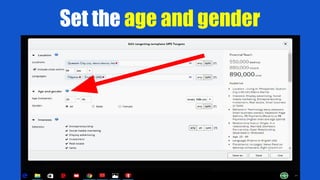
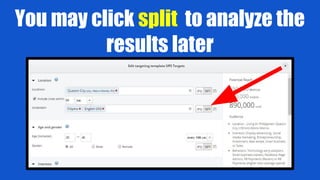
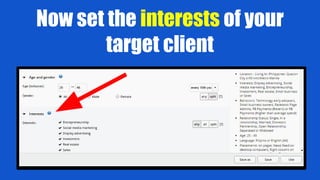
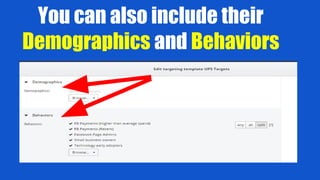
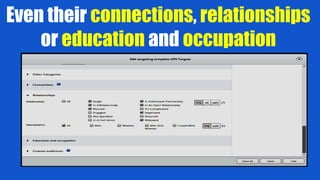
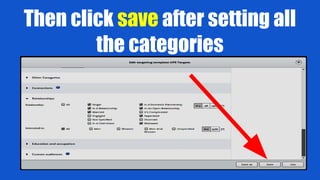
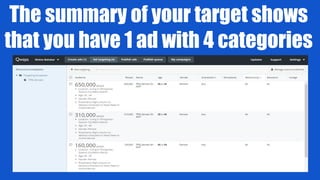
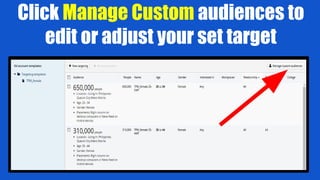
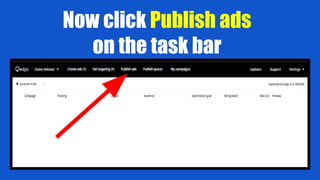
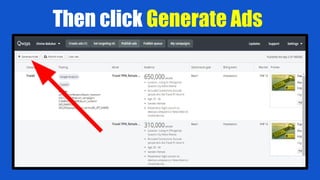
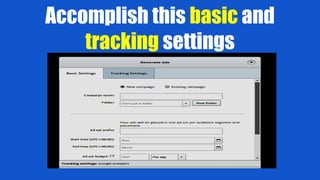
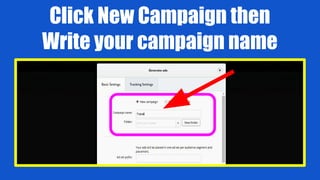
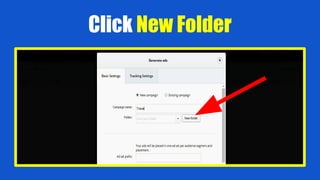
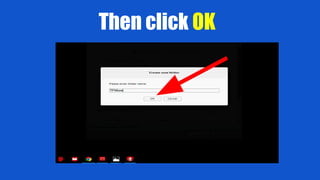
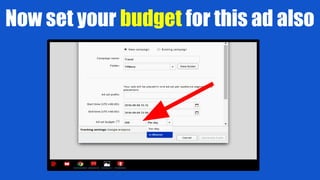
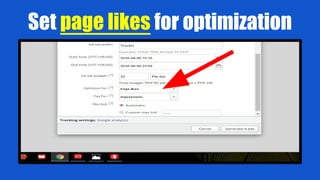
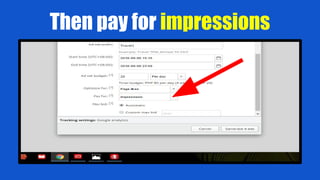
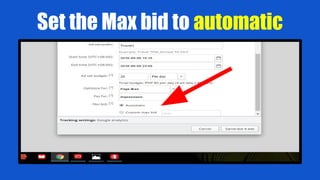
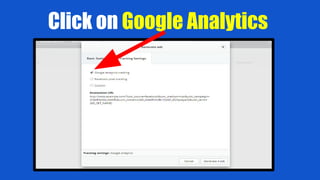
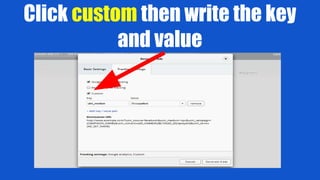
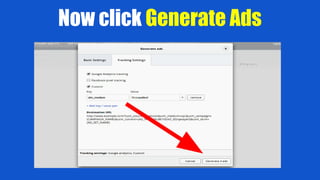
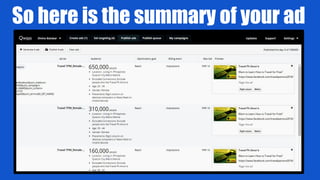
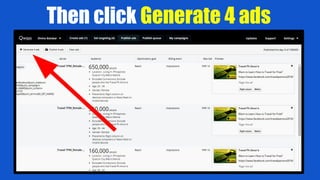
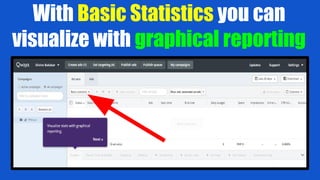
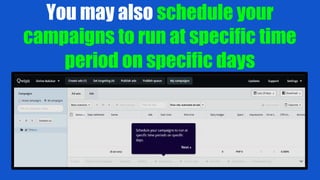
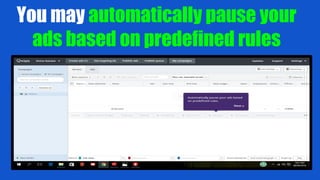
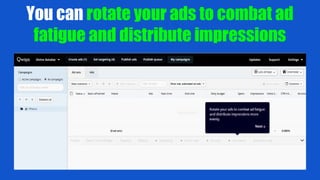
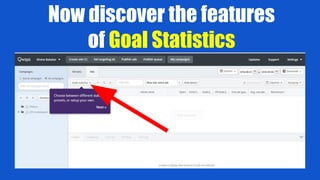
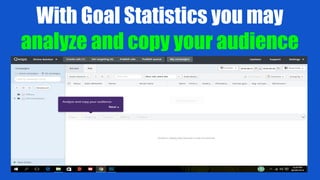
Qwaya
TUTORIAL
Qwaya?
Who, where, what... is that?
Qwaya is a powerful self-service
tool for any business!
It is a tool for any business who
seeks to save time and increase
performance when working with
Facebook ad campaigns.
With Qwaya you can create,
publish, track, optimize and
organize any Facebook ad types
with sophistication and
usability
To start, go to your browser
For today, let us use Chrome and
Google
In your browser type Qwaya.com
Then click the ENTER key in your
keyboard
You are now directed to this
Qwaya site
Sign up and start a free trial
Before you proceed, take a look
at the features
Ad scheduler, ad rotation, ad and
campaign rules
Targeting, campaign organizer
and split testing
And other features with Google
analytics integration
Now click the Sign Up button
Fill up the sign up form
Start with your First Name
Followed by your Last Name
Then write your e-mail address
Provide your Password
Then re-type your password
Write also the name of your
company
Followed by your company website
Write the name of your country too
Provide your phone number
Together with your location
Your Sign up form should be
filled like this
Then click Create my account
Qwaya will now confirm if your
sign up was a success
Open your email and copy the
activation code that Qwaya sent
Paste the activation code that you
copied from your e-mail into the box
Then click the Activate button
First thing, you are asked to connect
to Facebook to get an account
Click the Connect Facebook
account button
When Qwaya confirms, click the
OK button
Click OK to allow Qwaya to manage
your pages and insights
Then you will be directed to this
dashboard
On the upper right corner you may
check Updates anytime
Click Support as well if you need
help
Now click the Settings button
Click Facebook connections
under settings
Click the Reconnect account
button
Next, click Qwaya users to
connect with them
Hit the add button to start inviting
your team
This time click Google Analytics
Your account is not connected so
click Connect with Google Analytics
Click the Allow button when Qwaya
would like to know your identity
Your Qwaya account is now
connected with a google account
The rest are no longer urgent :
plans & billing, company & profile
Incase you need to change
password , go to the settings!
When done using Qwaya just click
Log Out
Now click the Refresh button
then start using Qwaya
Click Select ad account
And you are directed to your
recent statistics
On the upper portion is the task bar
Click Create Ads on the task bar
Then you are being asked what
do you want to advertise?
Choose Pages and Places then
click on your existing FB page
Now you are to choose which ad
format do you want to use
Choose one on the left side menu:
you can
Decide on what kind of FB ad that
you are going to create
Example, you may want to create
a Page like ad format
Just Click on it
Then you are directed to this page
Now try creating a Link ad
On the next column choose your
objective for this ad
Choose clicks to Website
Now add the display link in the
next box
Next click the dropdown arrow in
the call to action box
Choose Learn More as a Call to Action
Click Add post link to add a URL
Then Click Add post text
Then write the text of your ad
Now click the Add link headline
Then write your catchy Headline
Click Add description then write a
short description of your link ad
Now click the Add images button
Then you will be directed to this
blank page
Click the Choose File button
Now it’s time to edit placement of
your ad
Click on the boxes for the
preferred placement of your ad
Then click the Save as button
Write a Name for this ad to be able
to reuse anytime
Then click Save to ad account
So here is your created Link ad
Now Click Set Targeting in the
task bar
These are the categories that you
may set for your target audience
Set your target Location
Choose the language of your target
audience
Set the age and gender
You may click split to analyze the
results later
For the age you may split it every
?th year
Now set the interests of your
target client
You can also include their
Demographics and Behaviors
Even their connections, relationships
or education and occupation
Then click save after setting all
the categories
Come up with a Template name
so you may reuse or revise later
The summary of your target shows
that you have 1 ad with 4 categories
Click Manage Custom audiences to
edit or adjust your set target
Now click Publish ads
on the task bar
Then click Generate Ads
Accomplish this basic and
tracking settings
Click New Campaign then
Write your campaign name
Click New Folder
Write the name for this folder
Then click OK
Set the time and date when you
want your ad to start
Set also the time and date when
you want to end it
Now set your budget for this ad also
Set page likes for optimization
Then pay for impressions
Set the Max bid to automatic
Now Click Tracking Settings
Click on Google Analytics
Click custom then write the key
and value
Now click Generate Ads
So here is the summary of your ad
Then click Generate 4 ads
Just click OK when
you see this message
With Basic Statistics you can
visualize with graphical reporting
You may also schedule your
campaigns to run at specific time
period on specific days
You may automatically pause your
ads based on predefined rules
You can rotate your ads to combat ad
fatigue and distribute impressions
Now discover the features
of Goal Statistics
With Goal Statistics you may
analyze and copy your audience
You may edit and copy your
ad content
You may edit your ad bidding too
And you can configure view
through tracking
Do you want to advertise another
ad? Just follow the same process
Then do the necessary
adjustments based on your ad
results and analysis!
Need someone to assist you on this?
Contact me and I will gladly help you
grow your business.

How to use Qwaya for a beginner