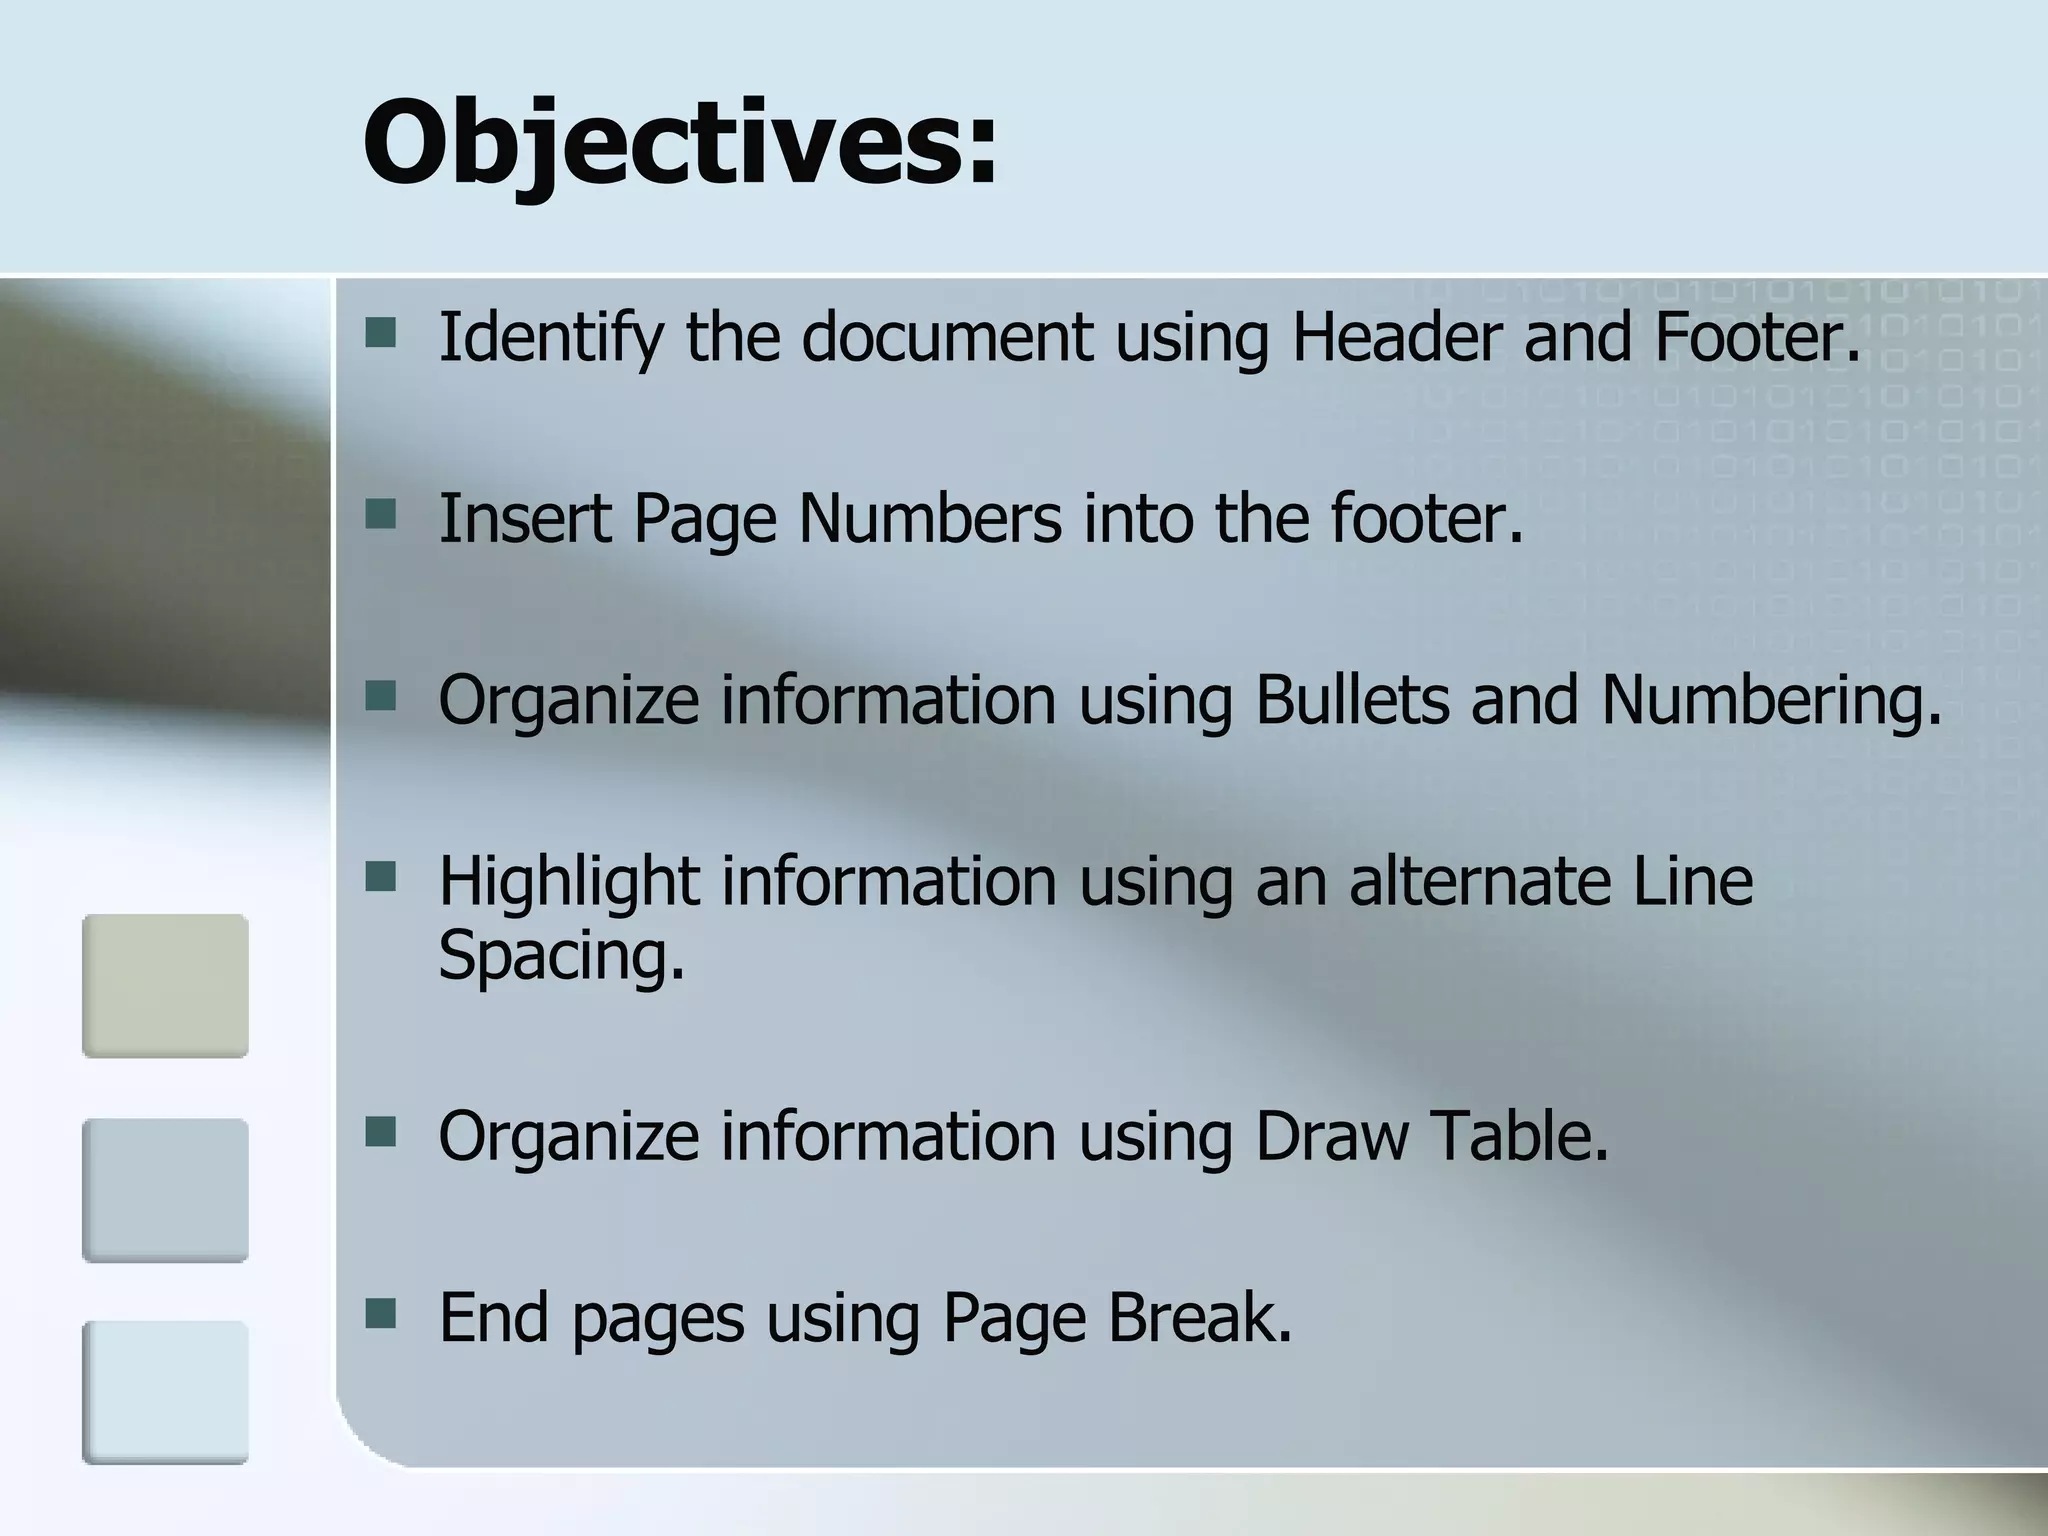
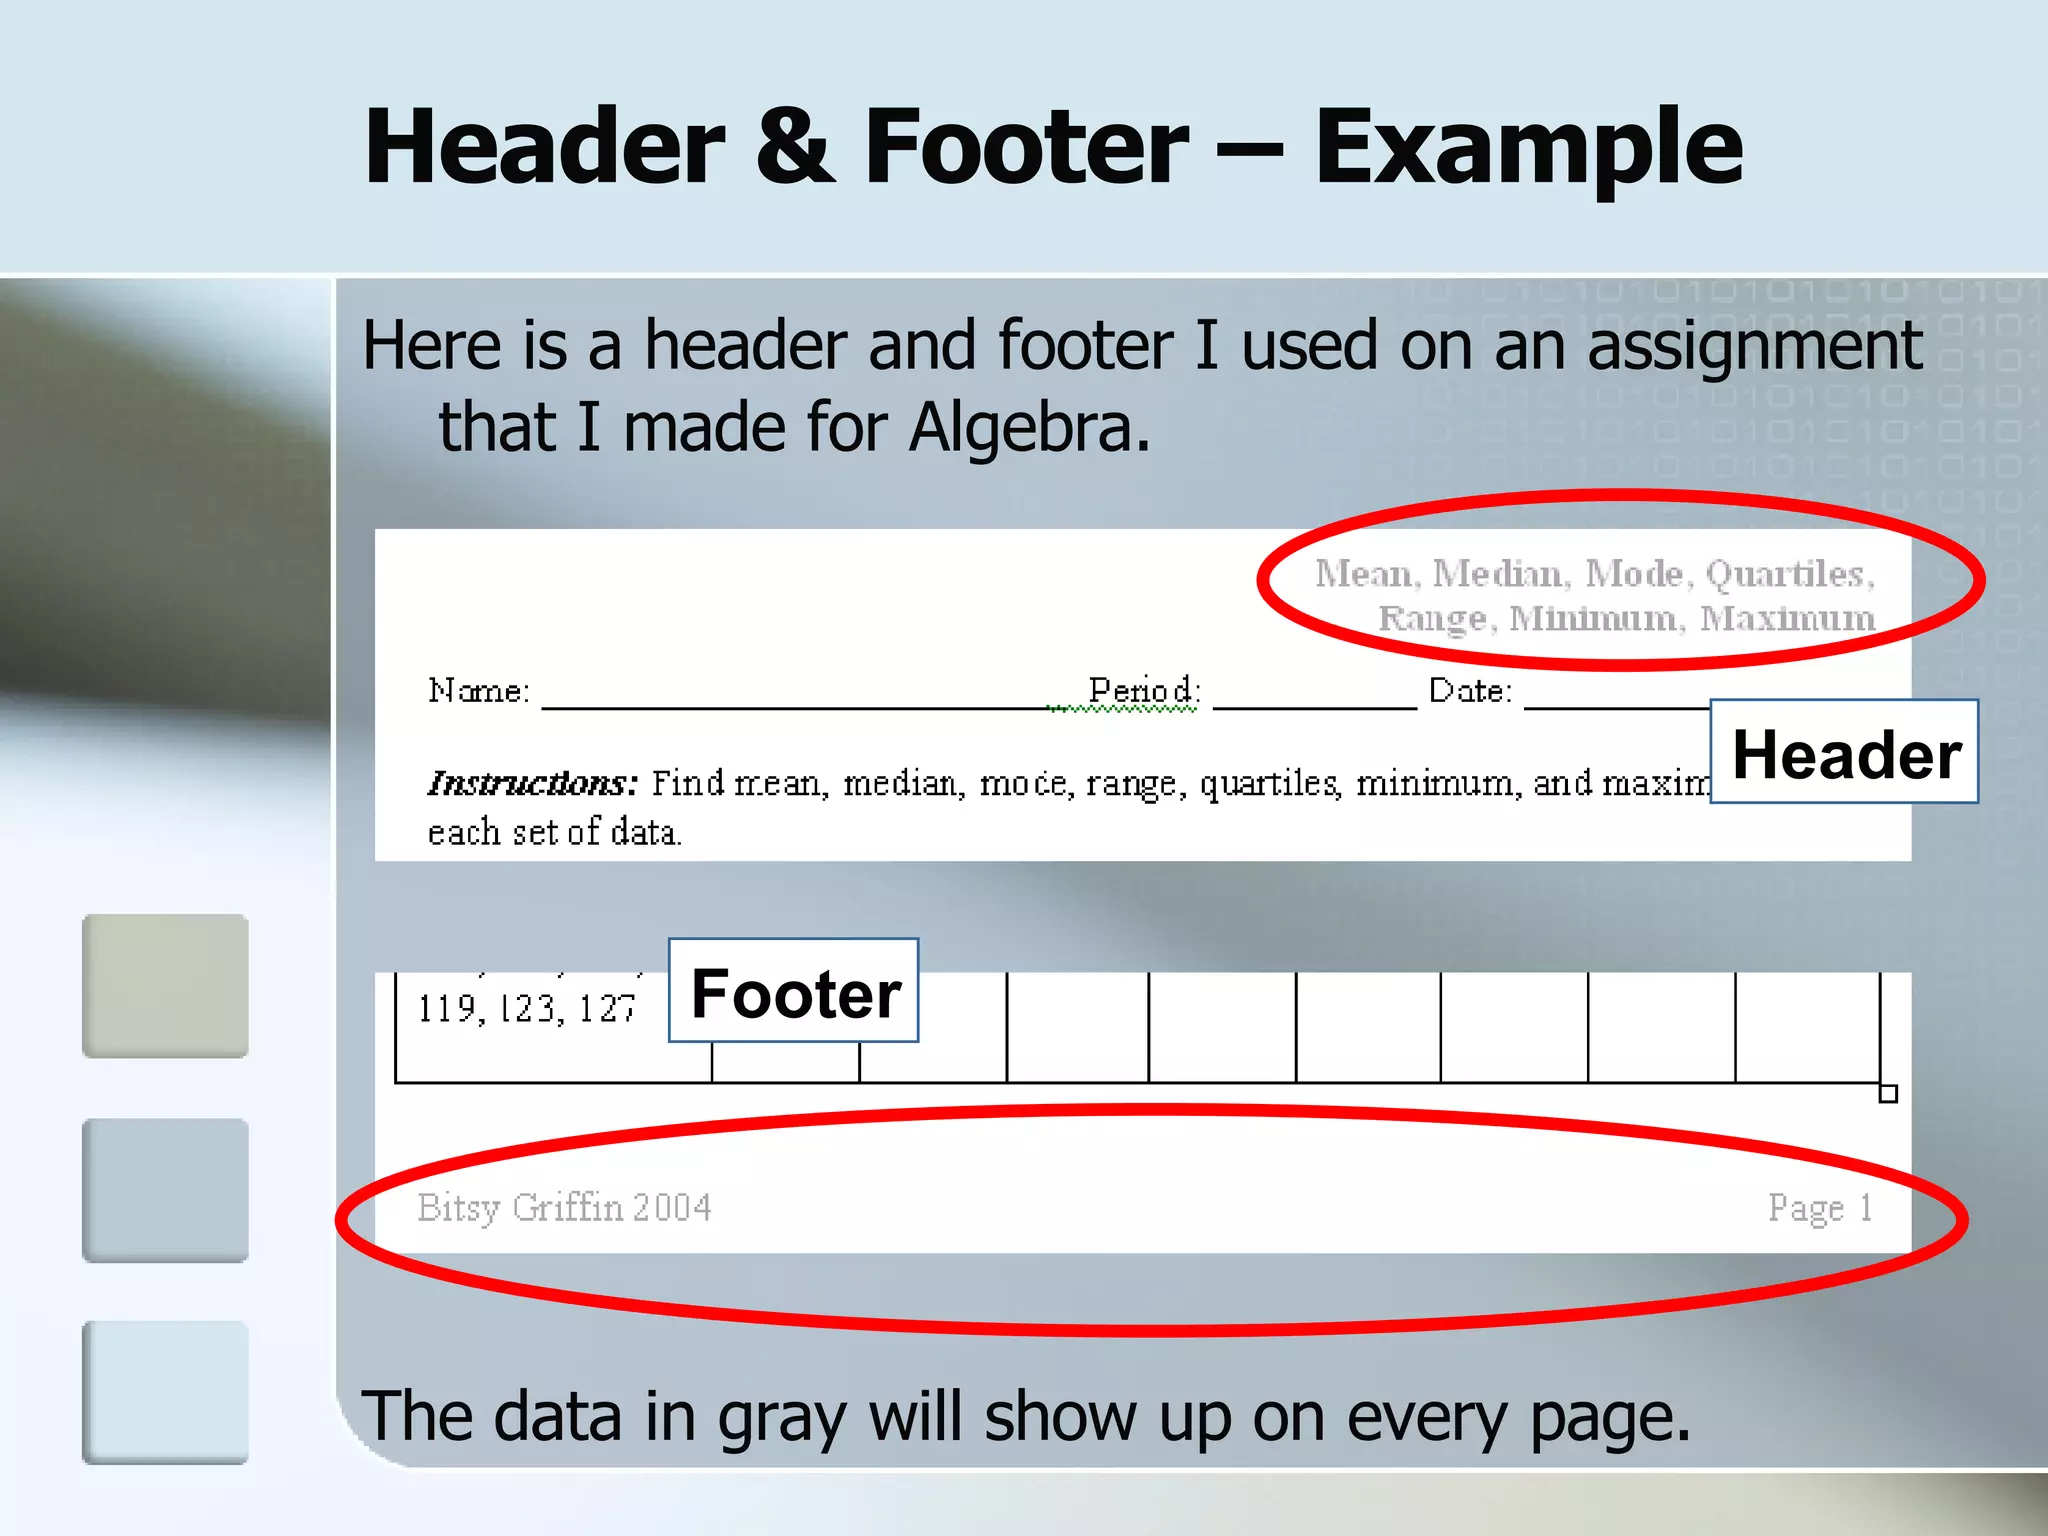
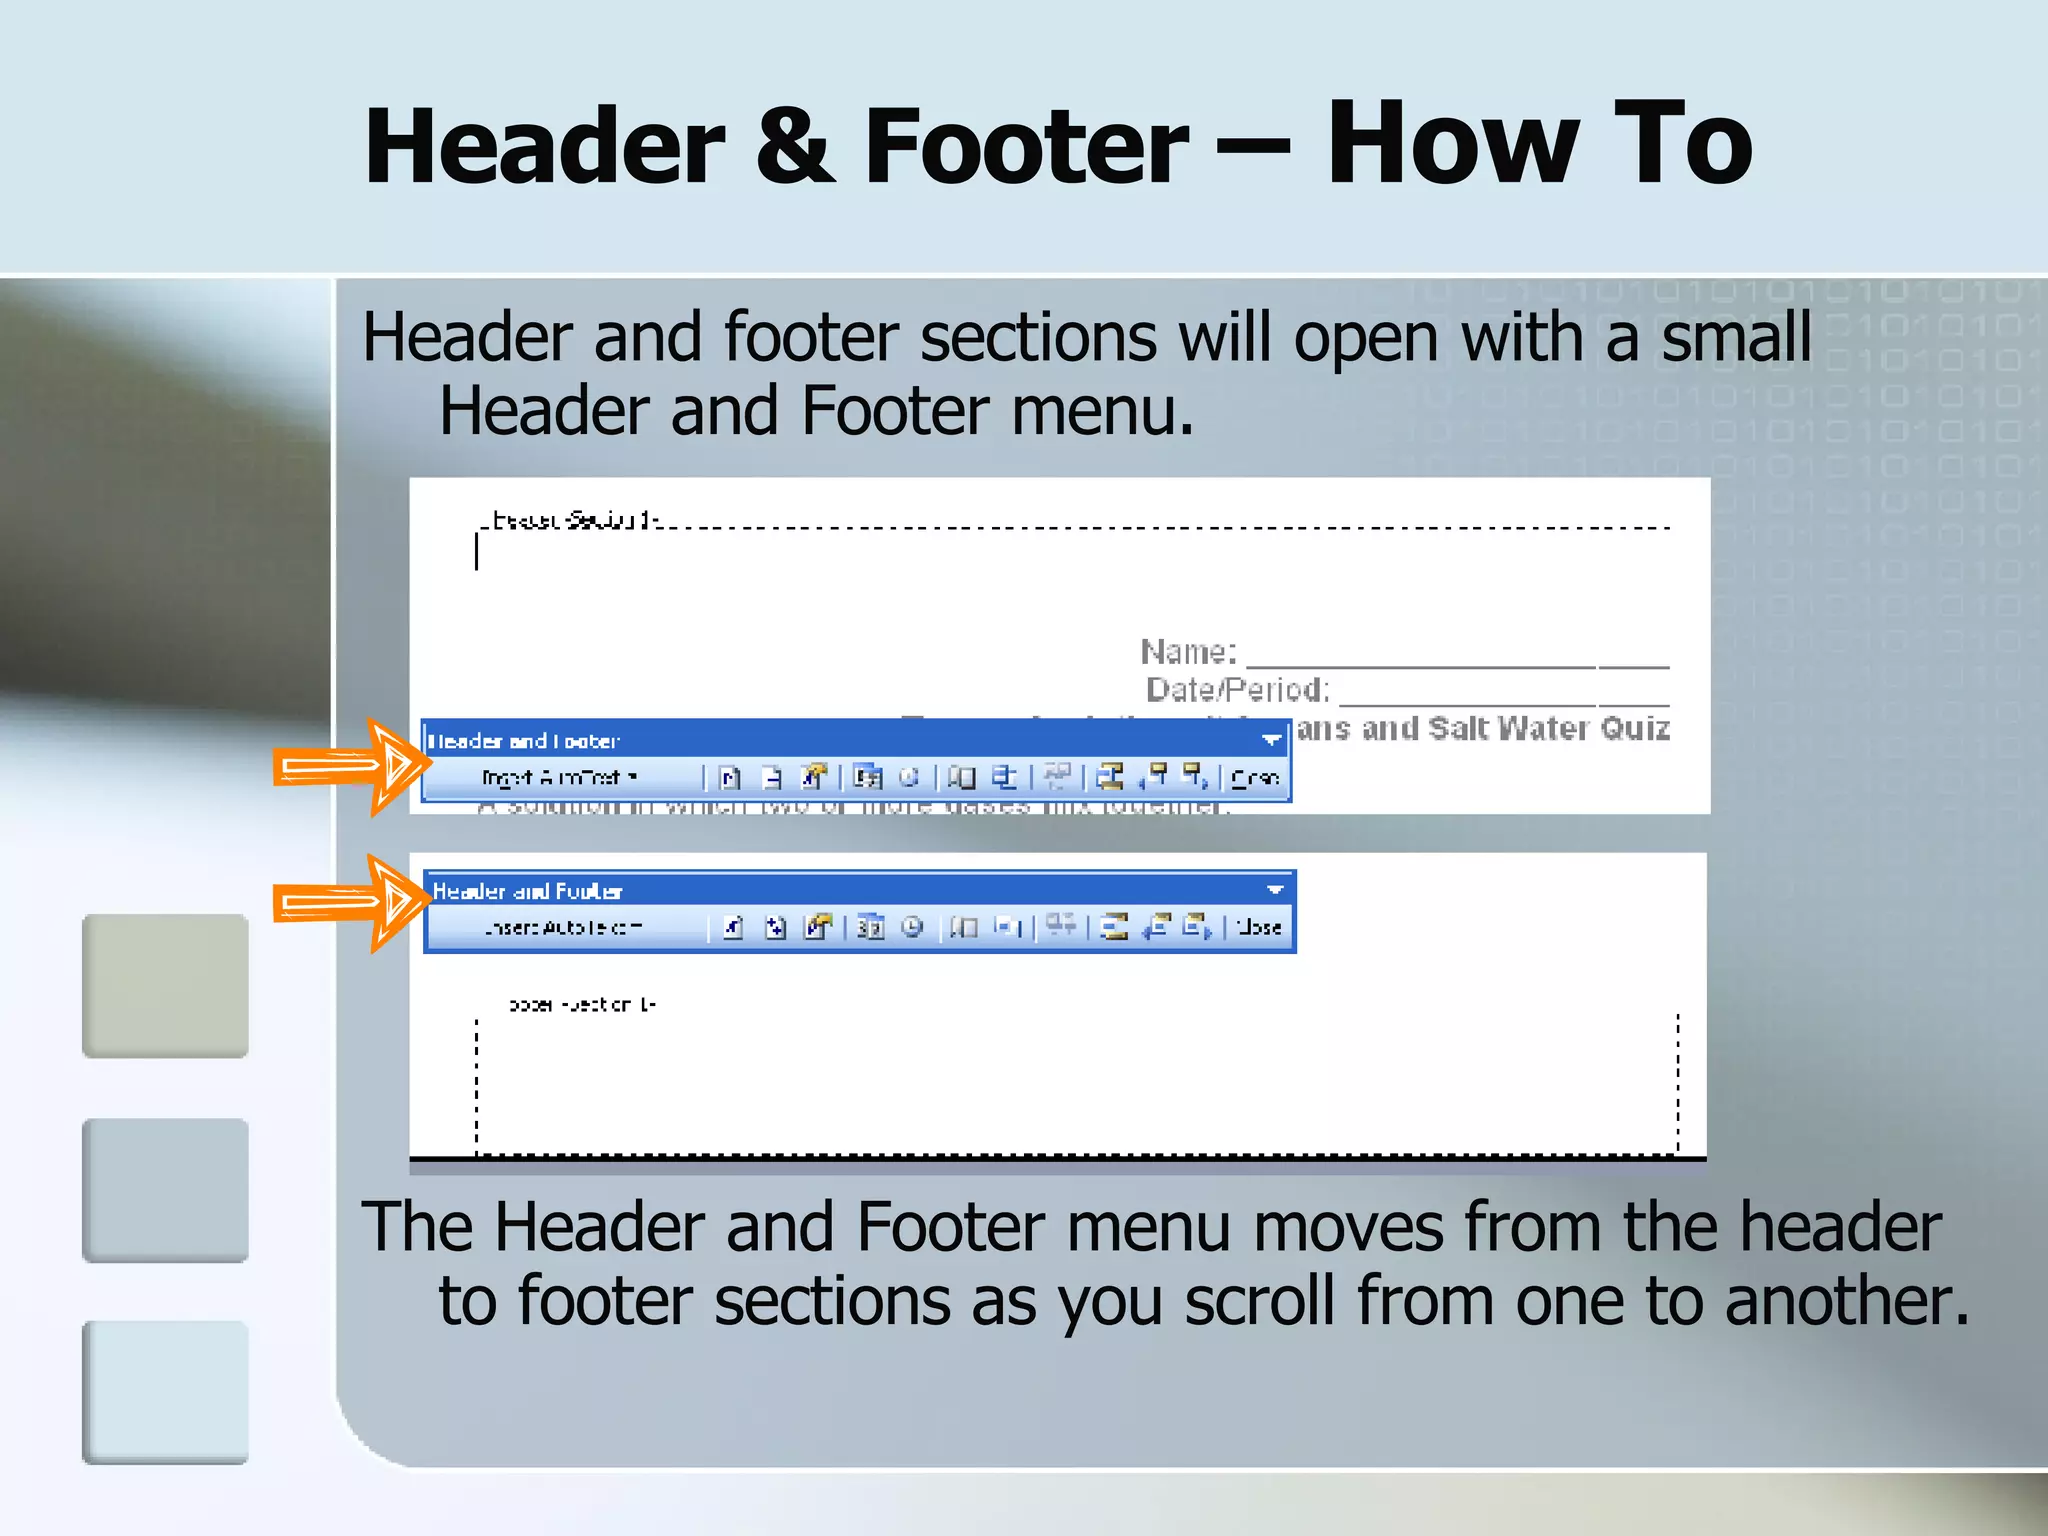
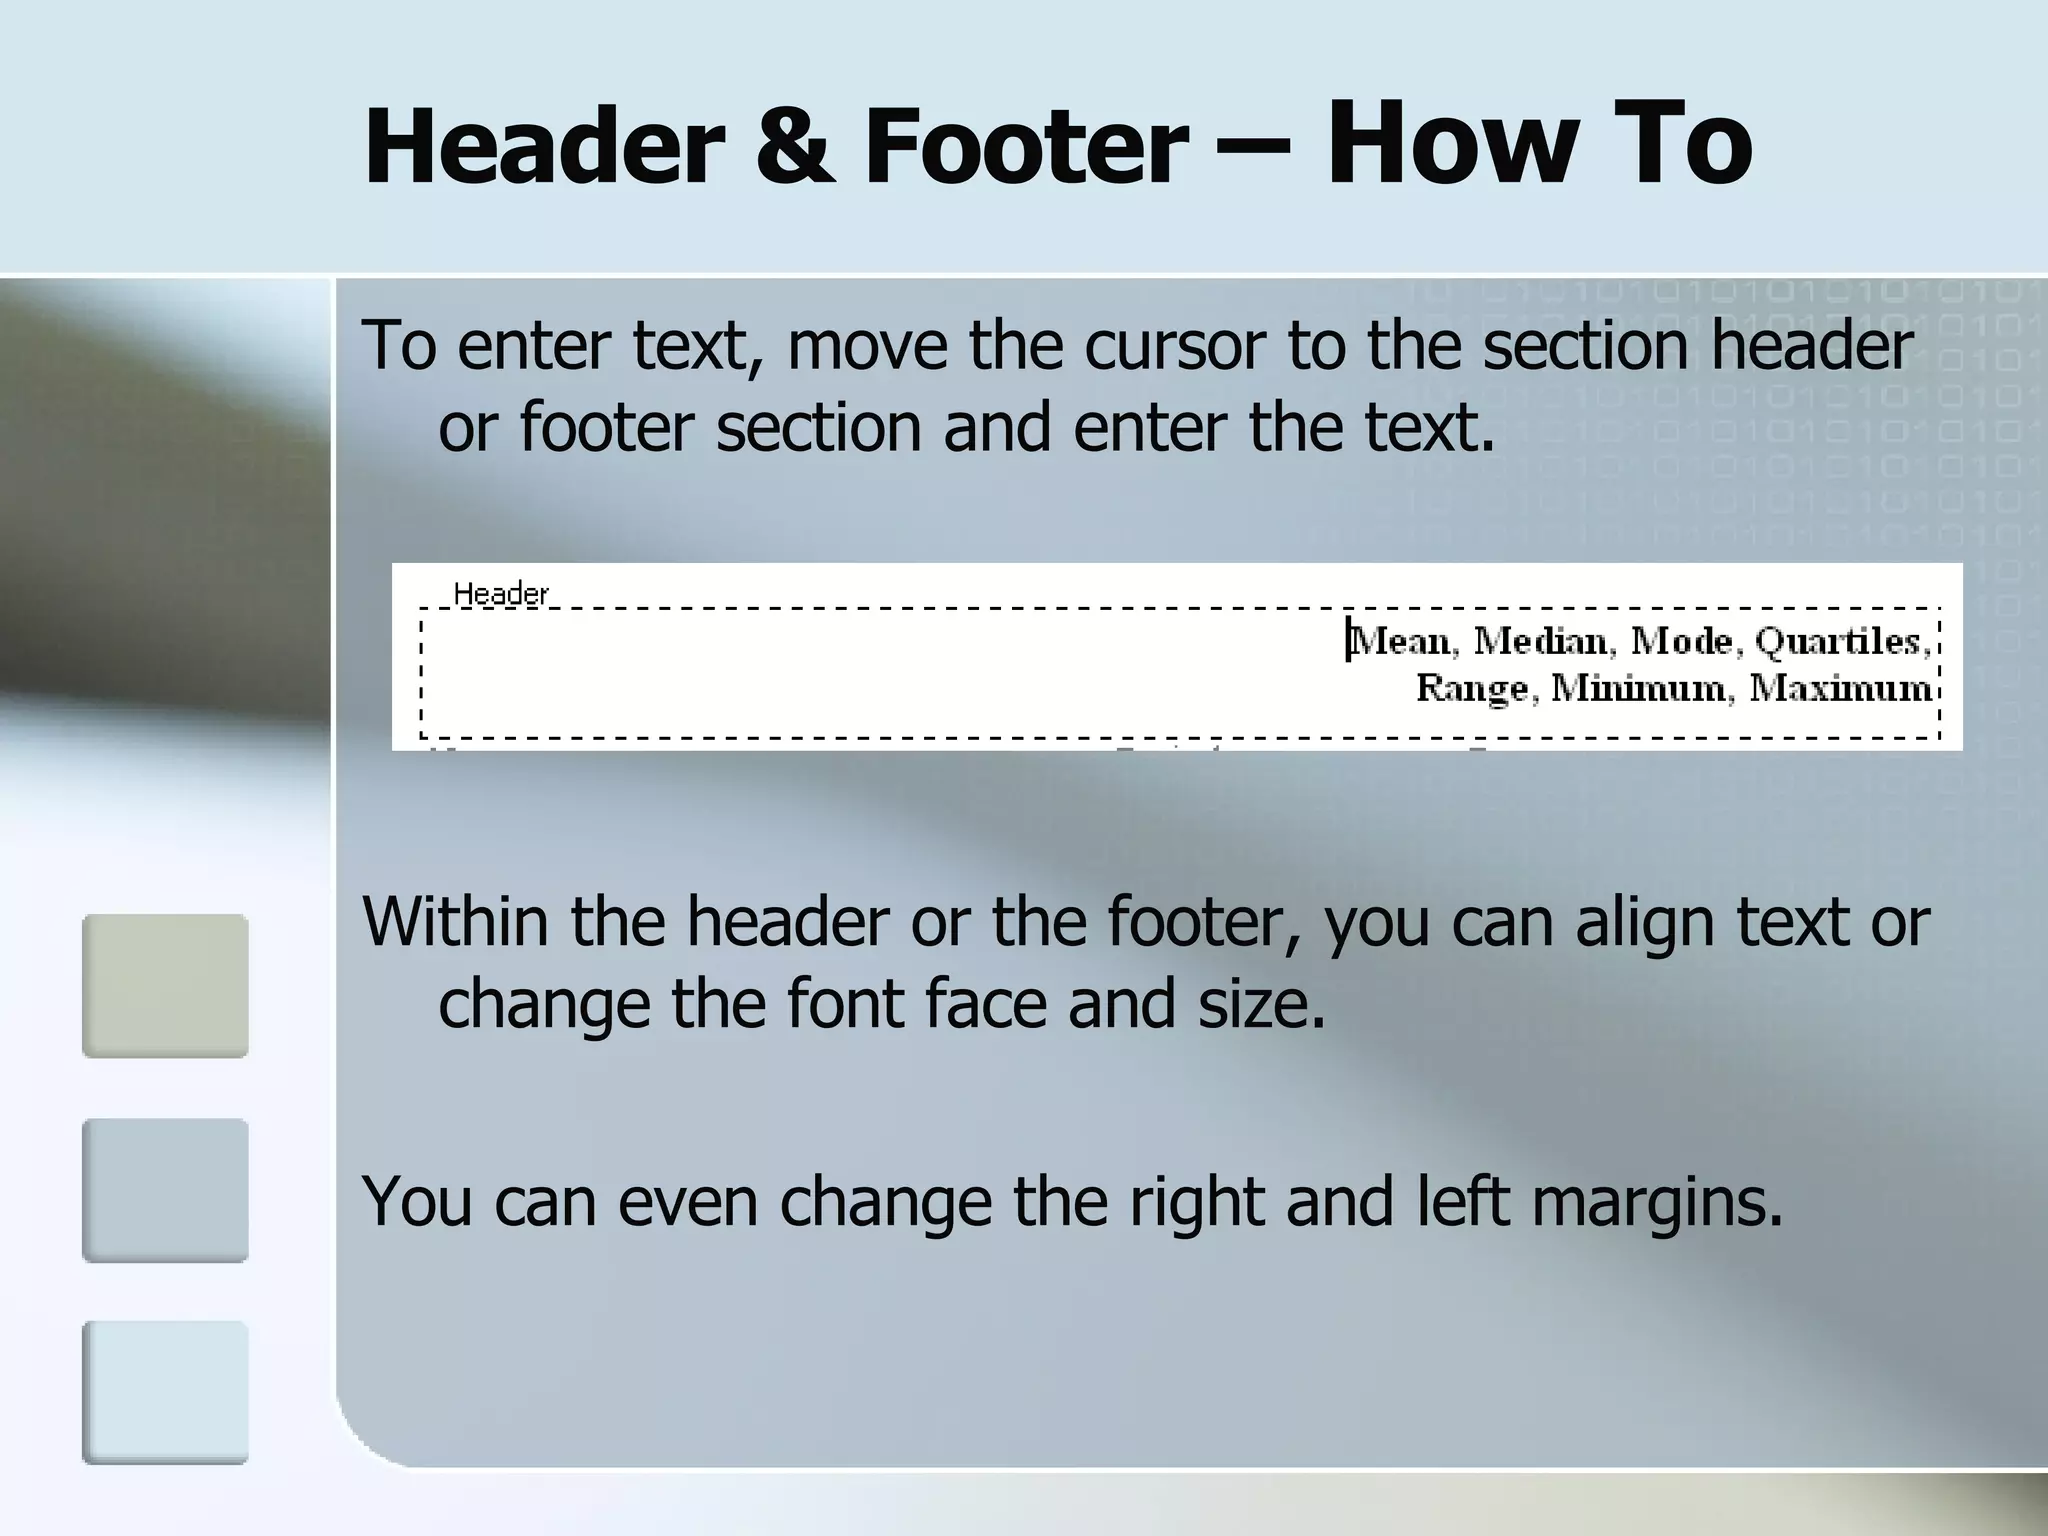
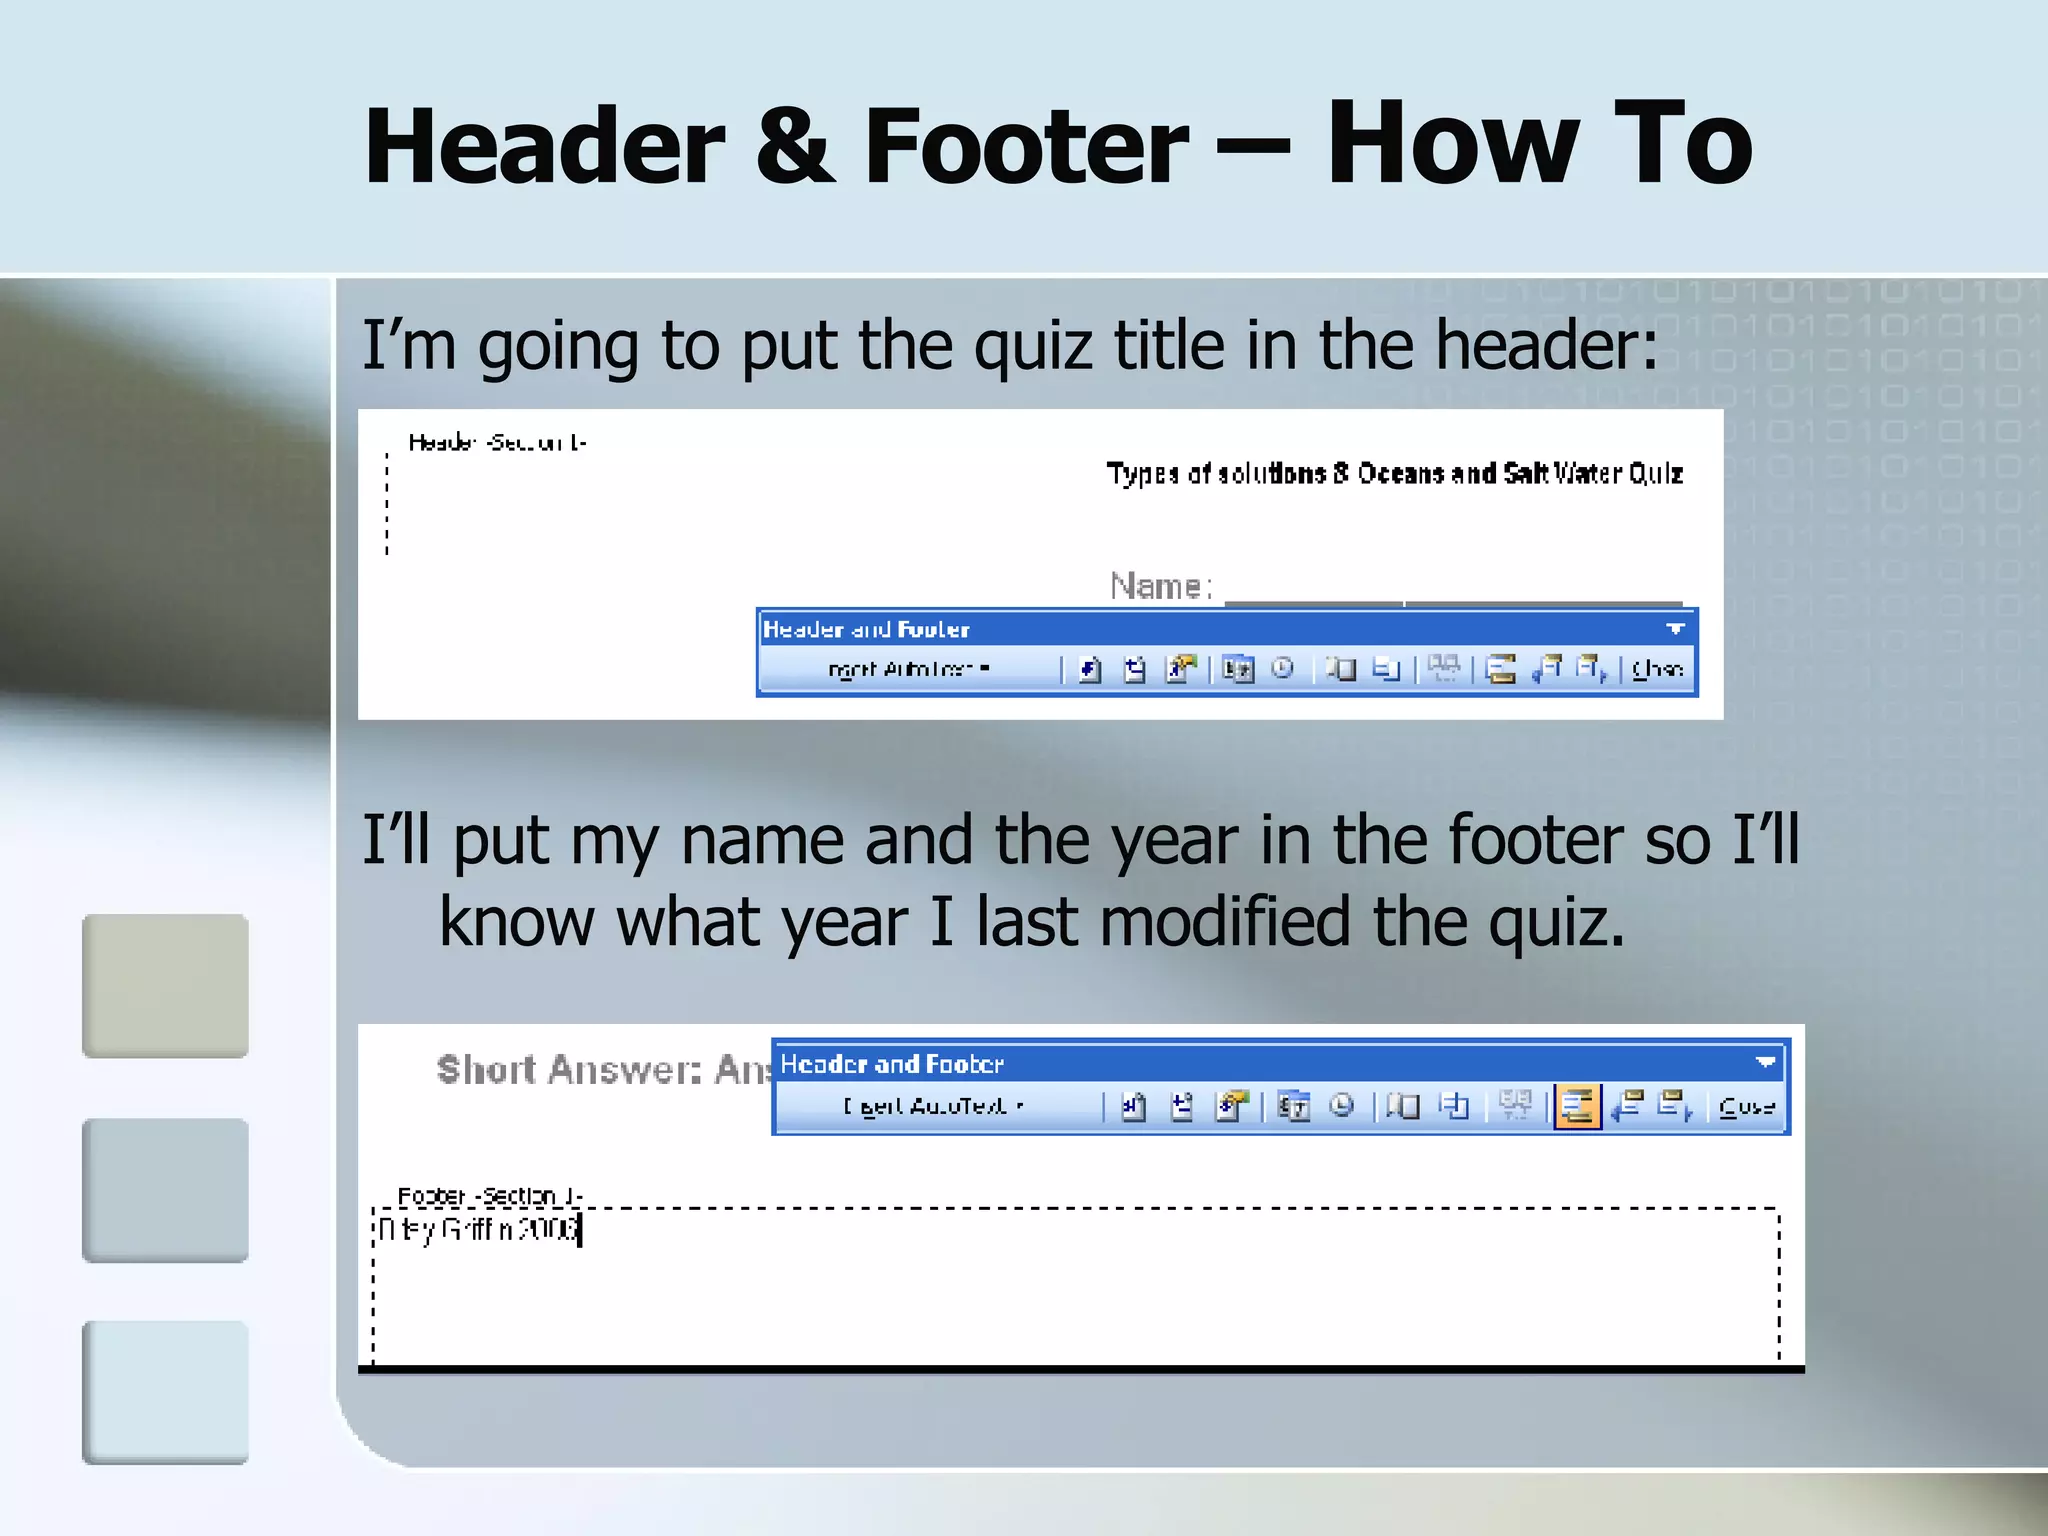
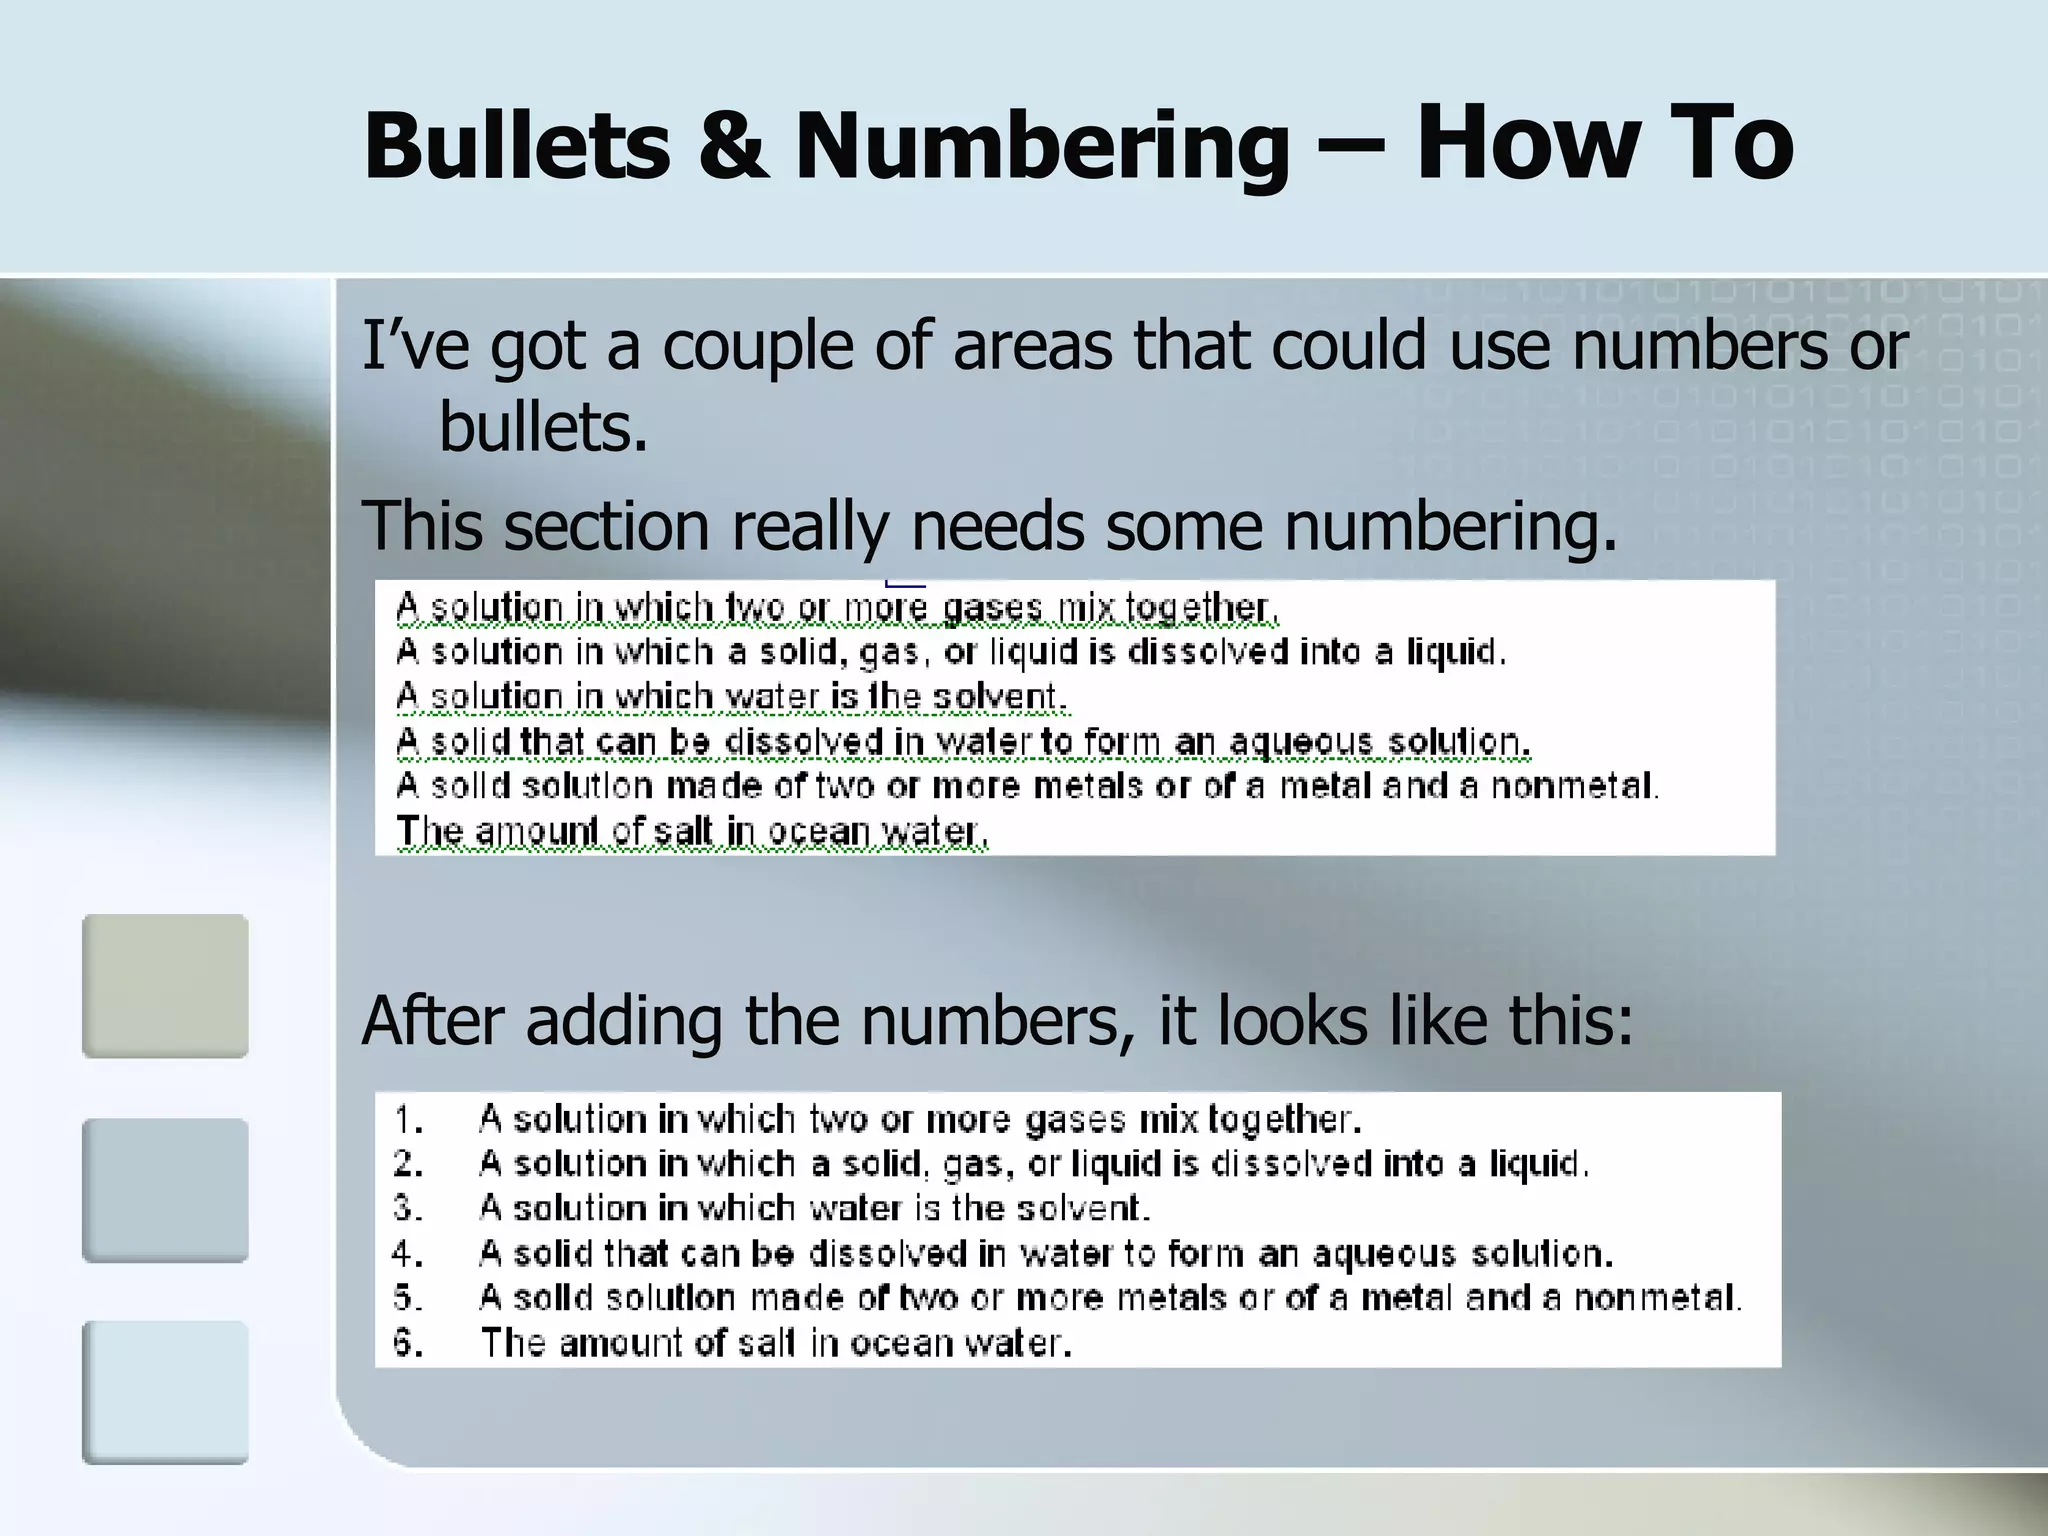
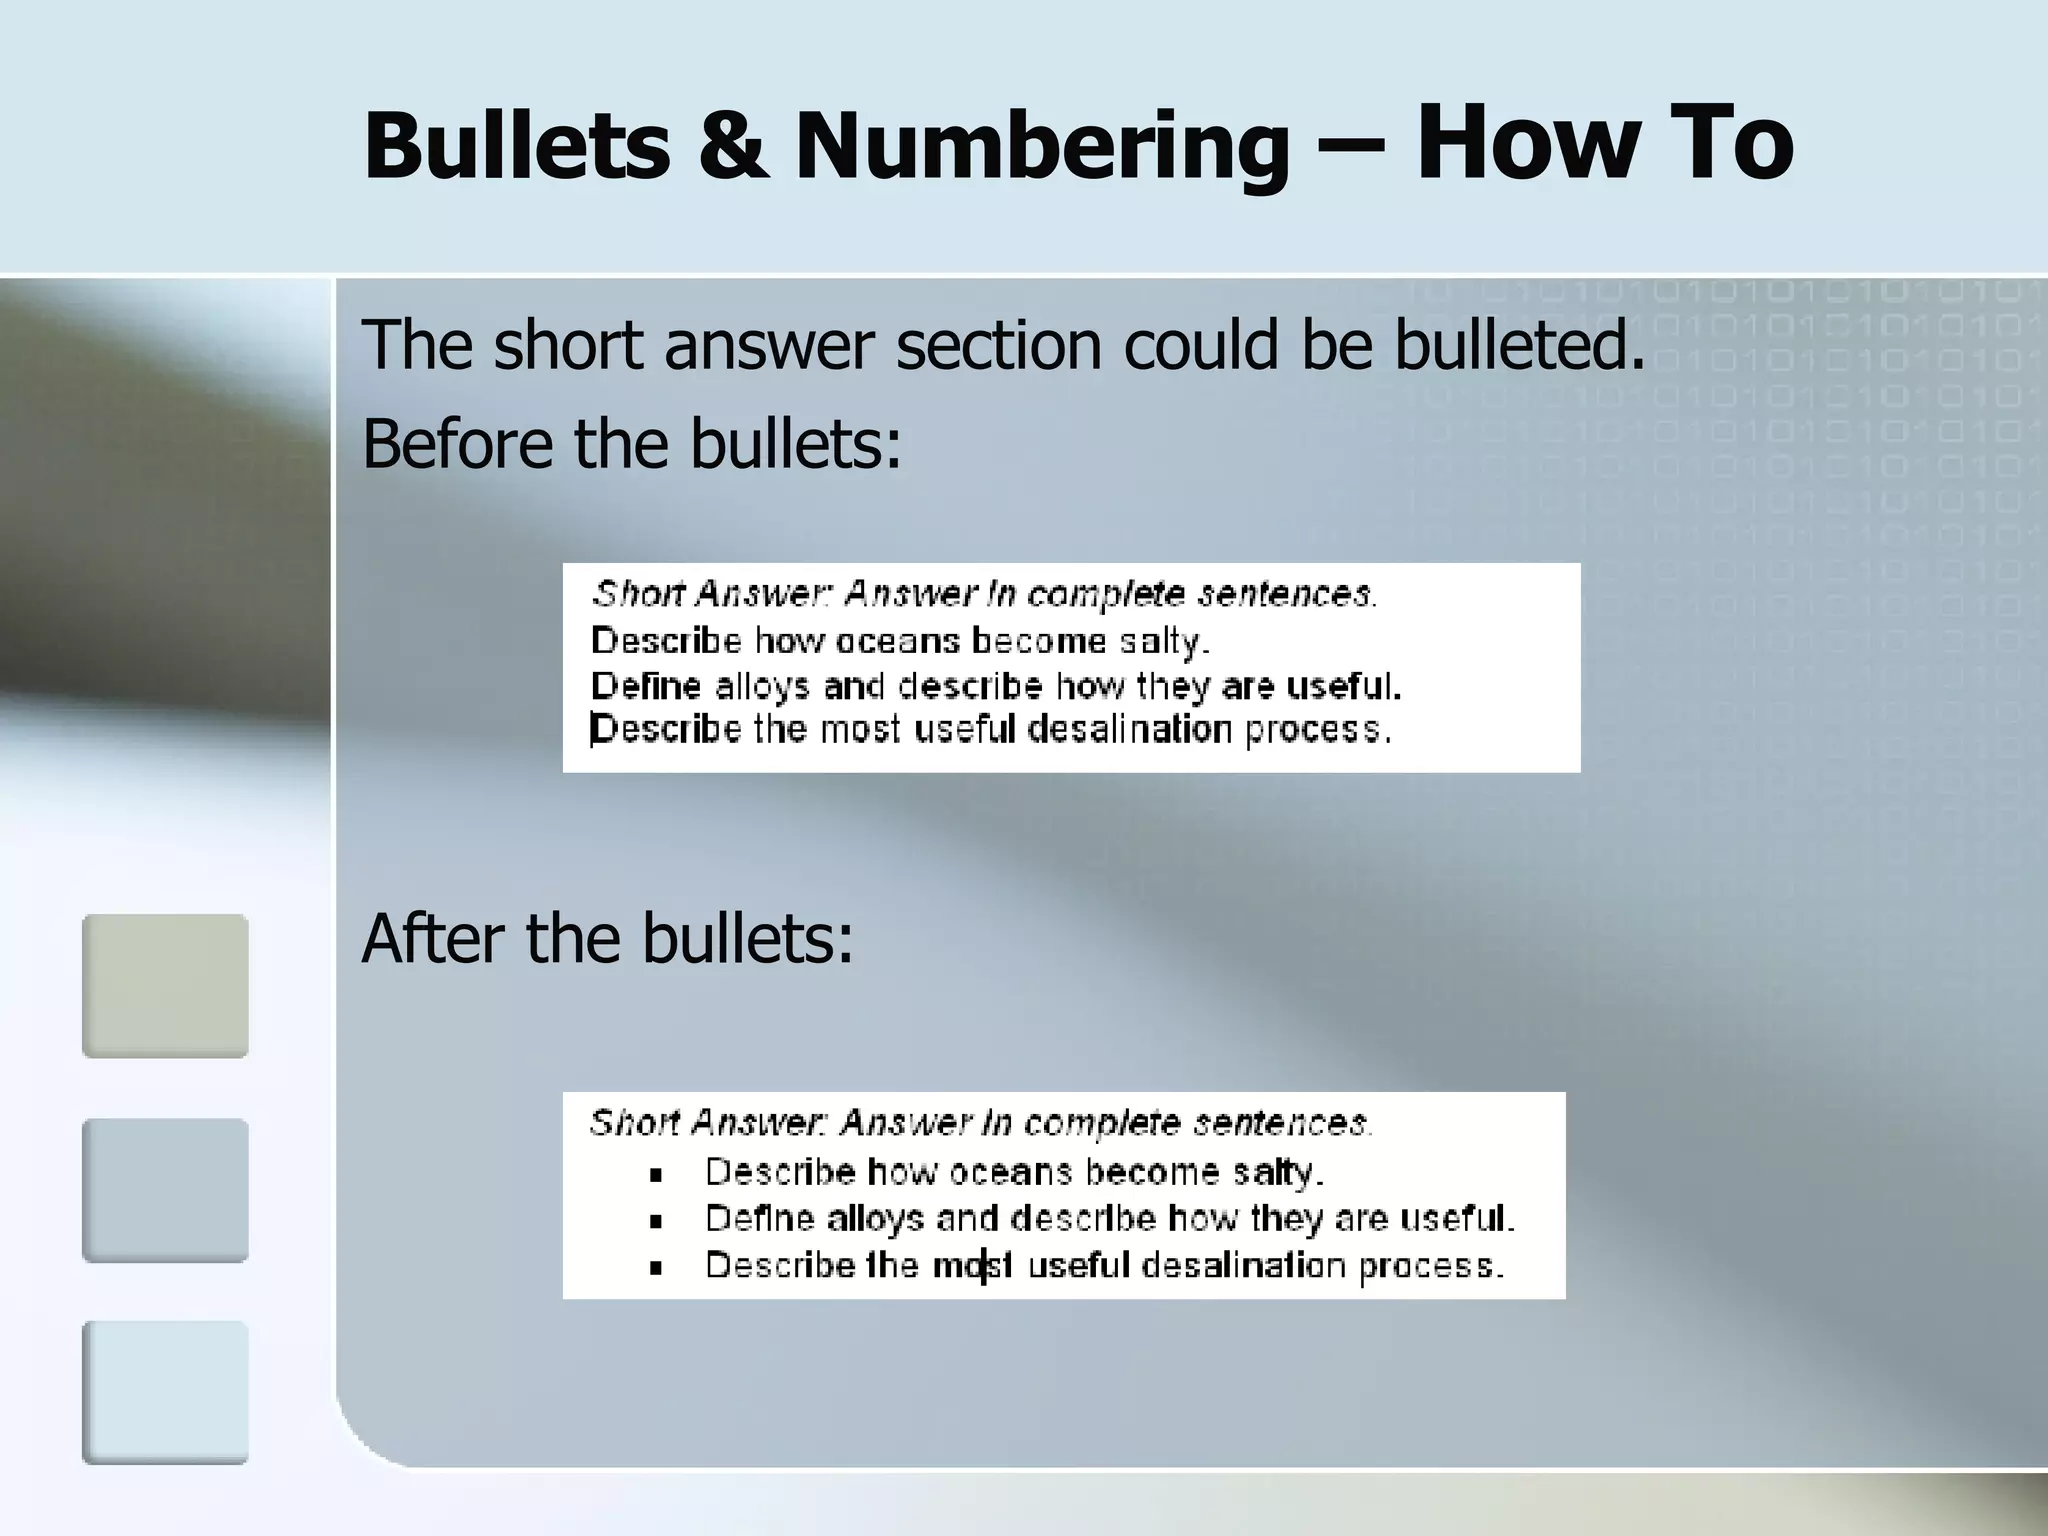
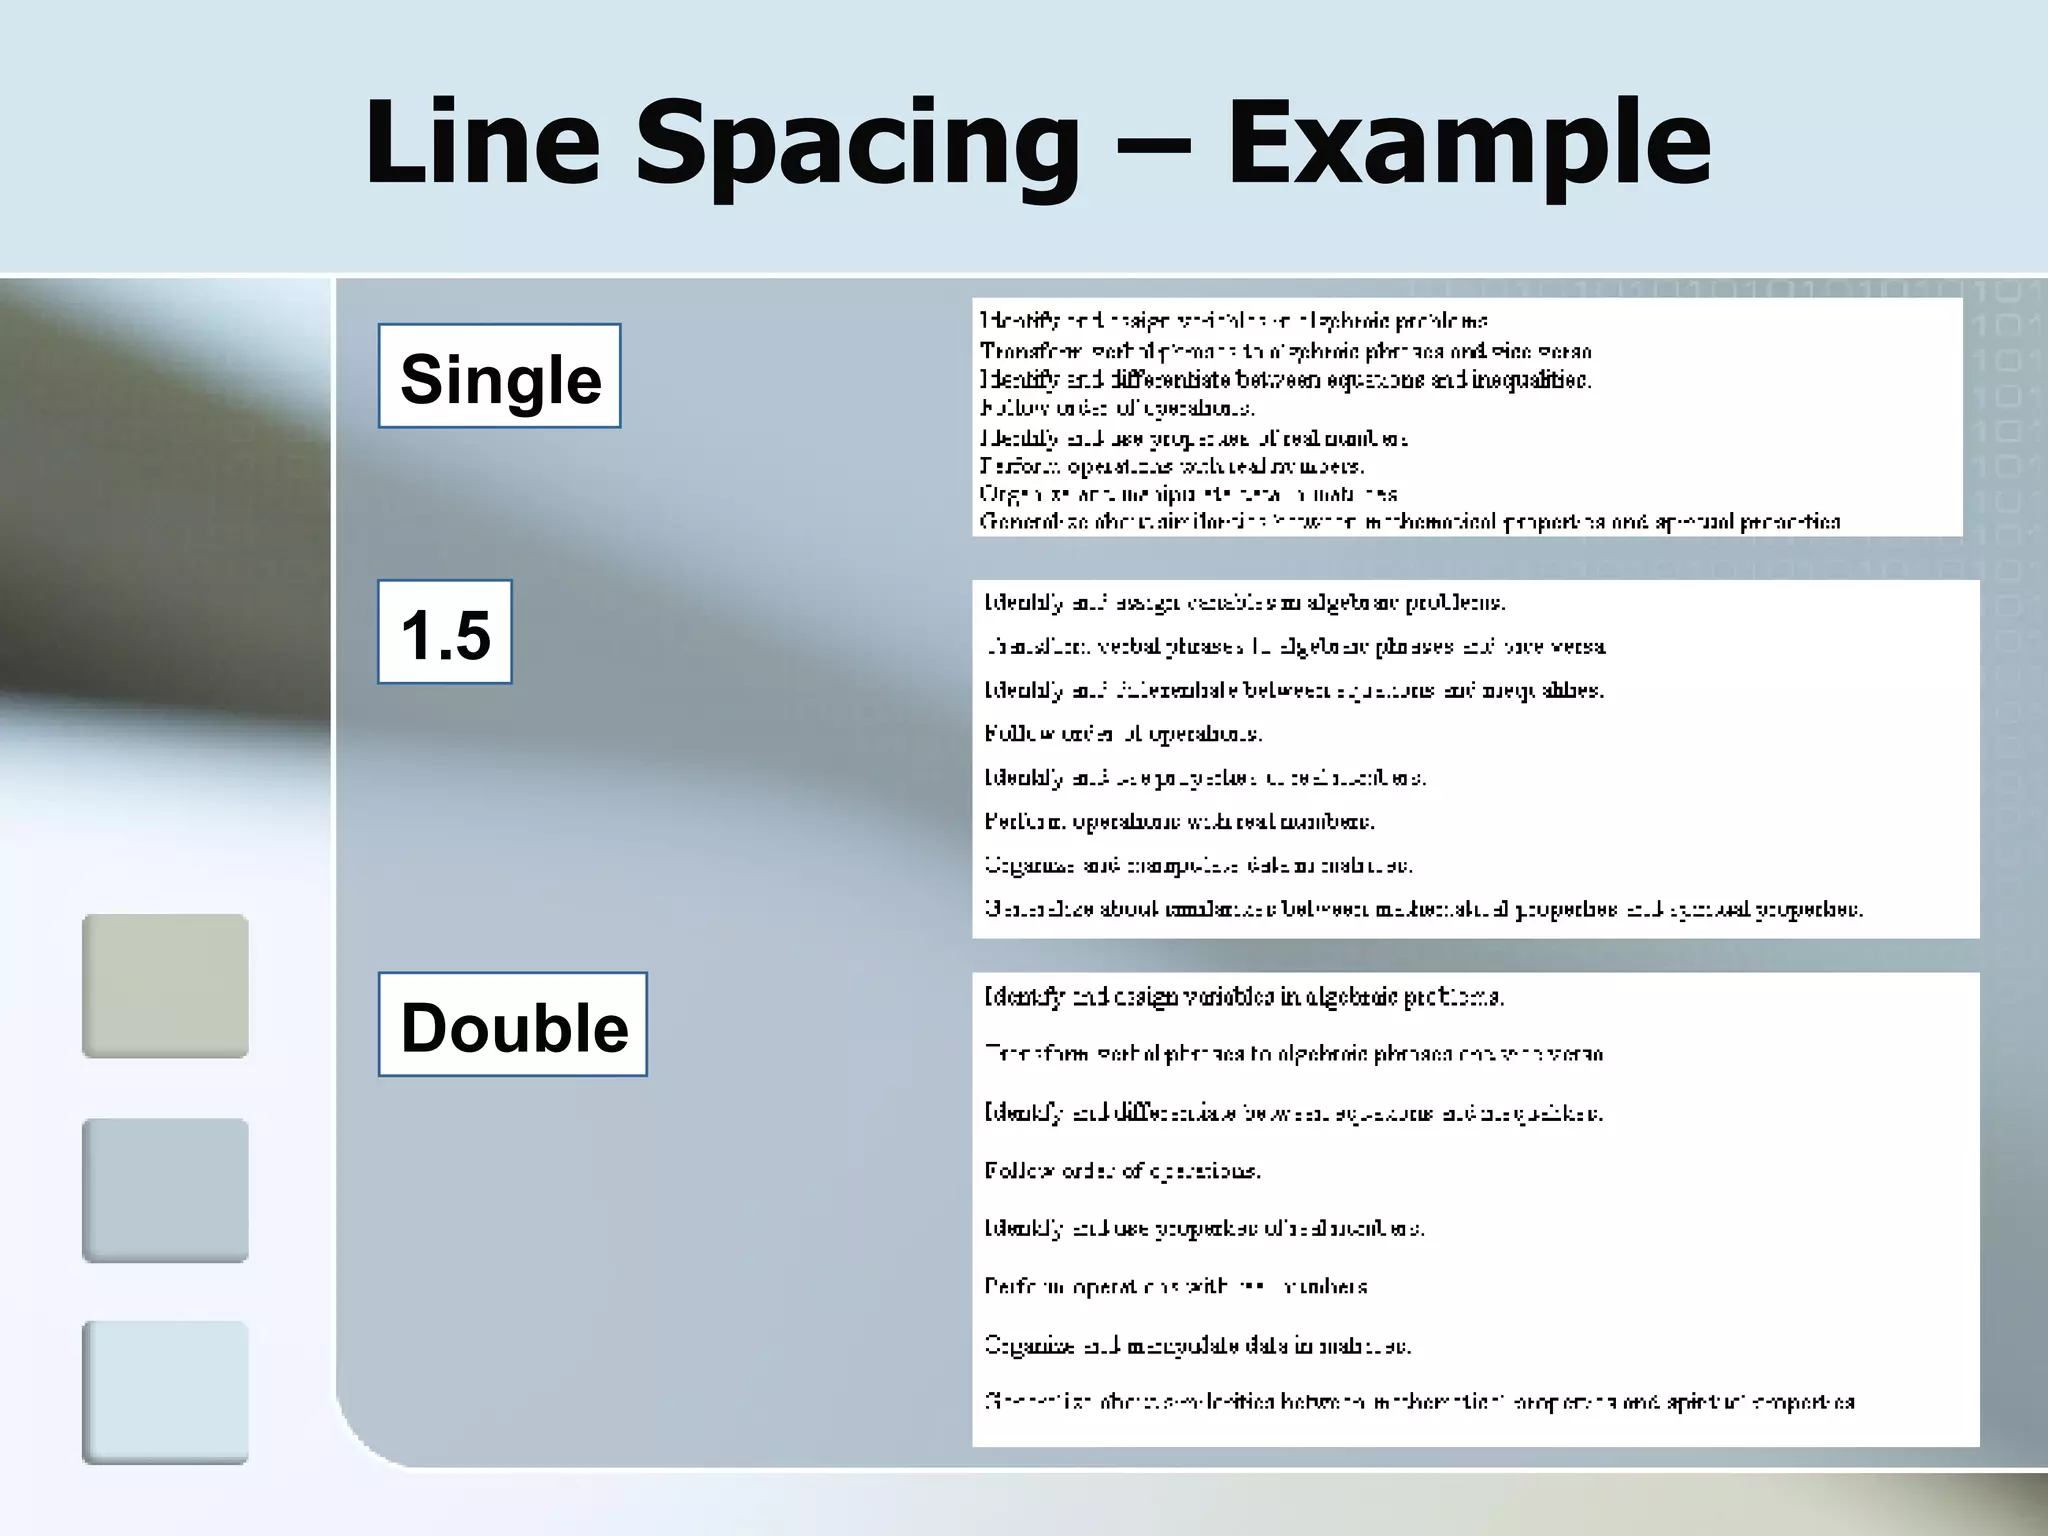
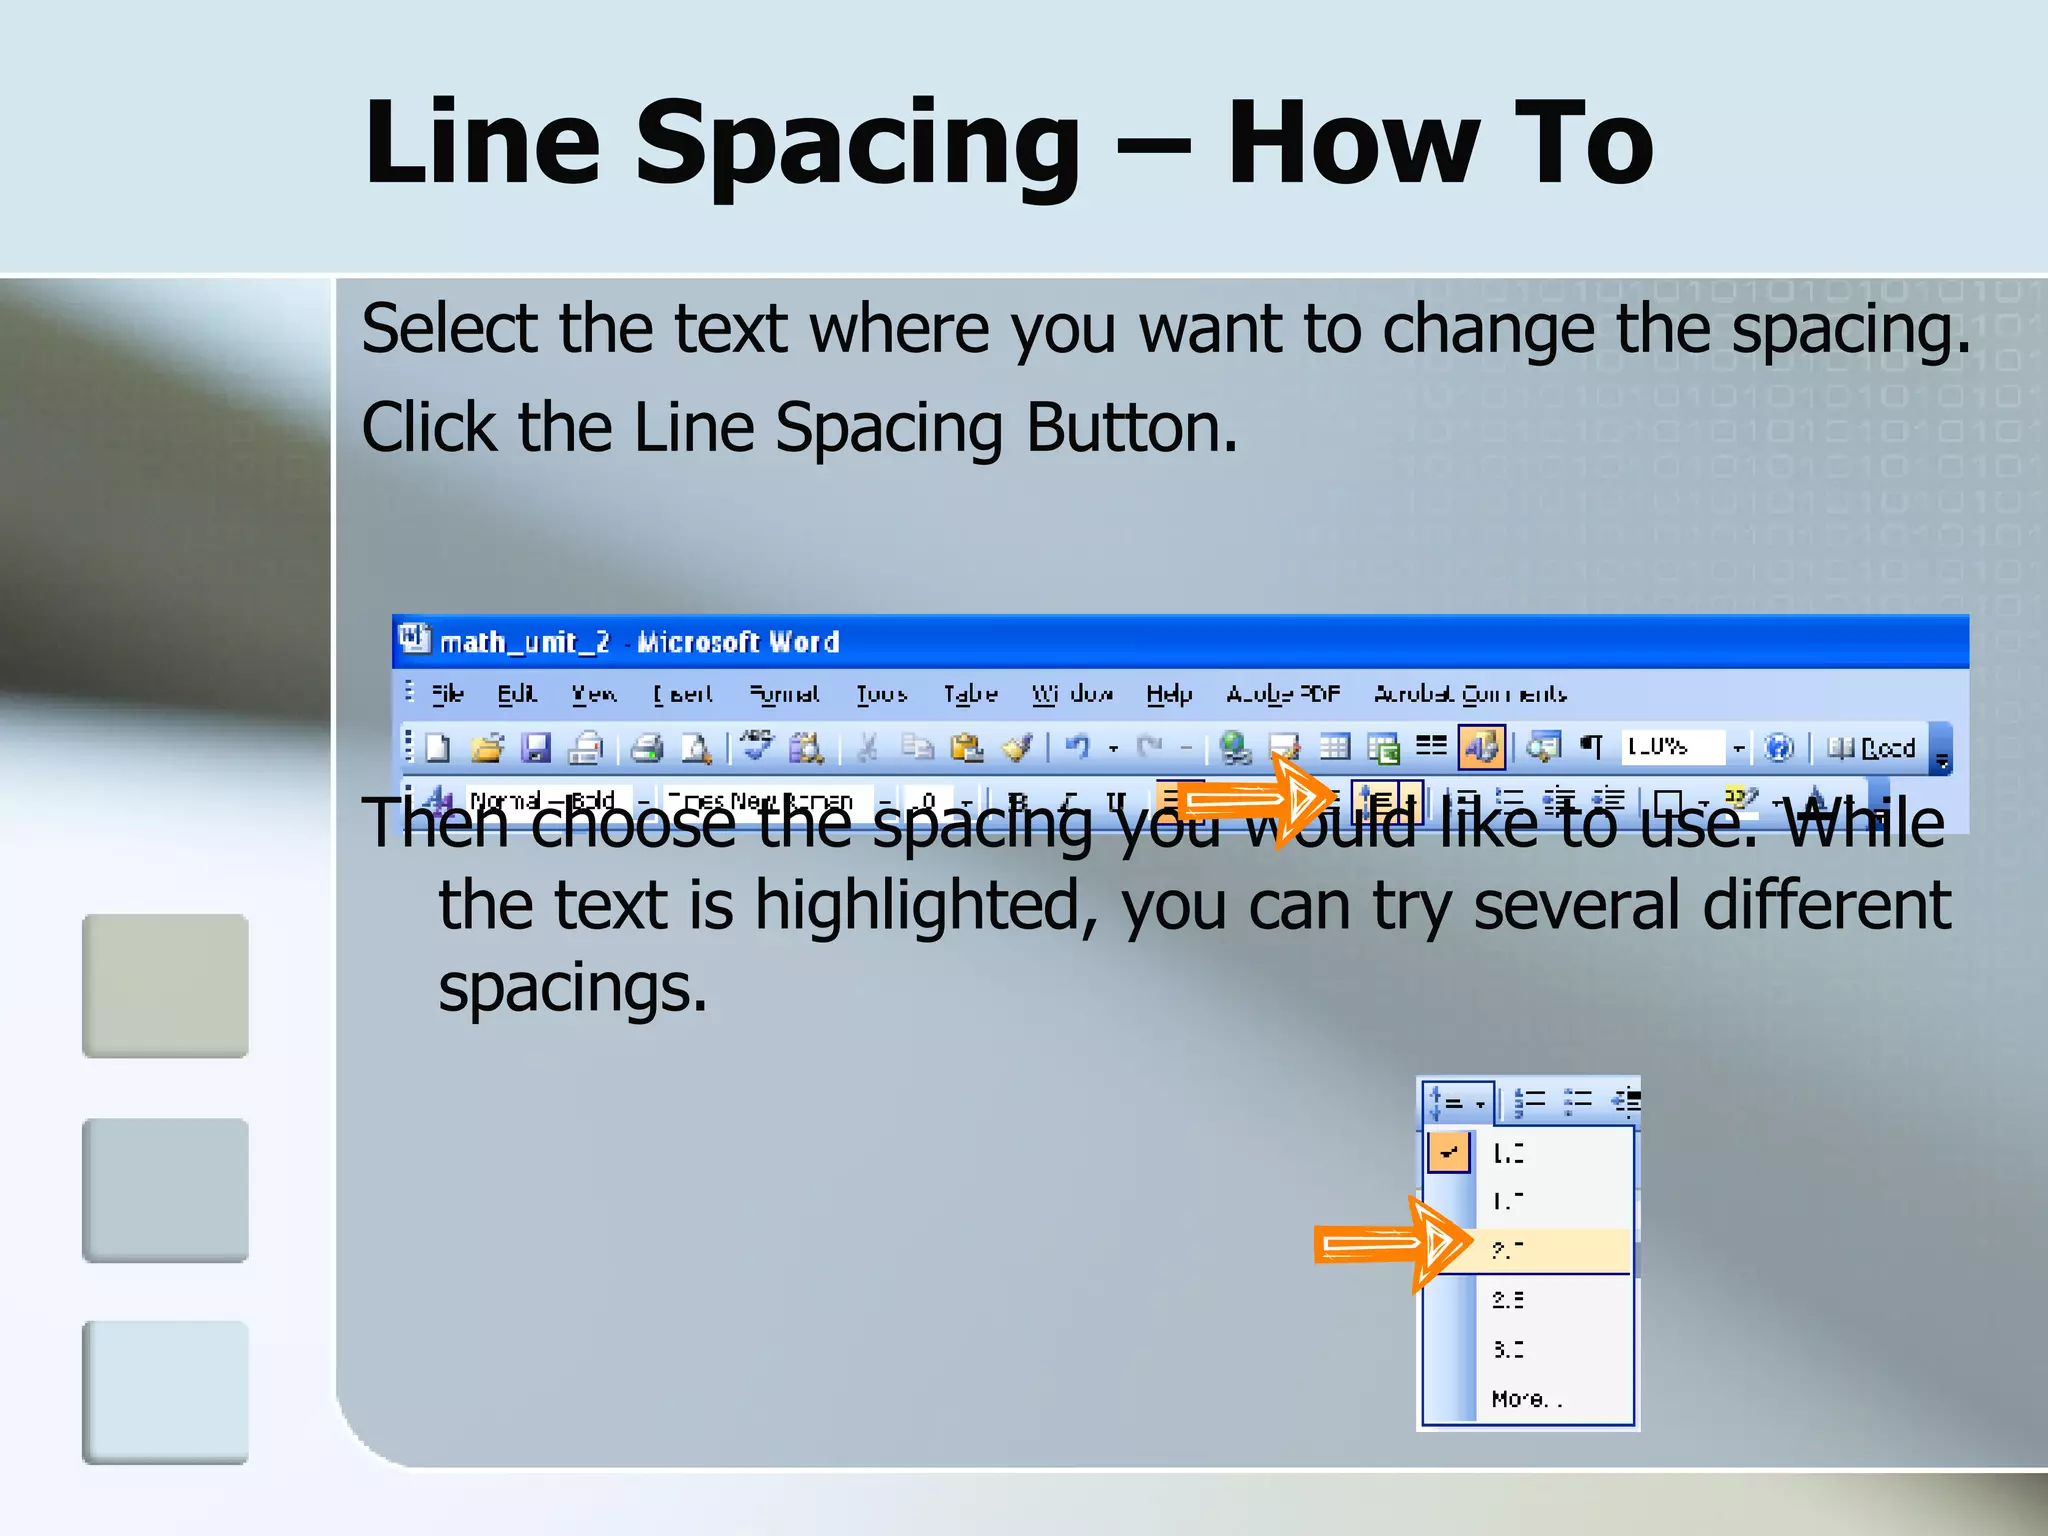
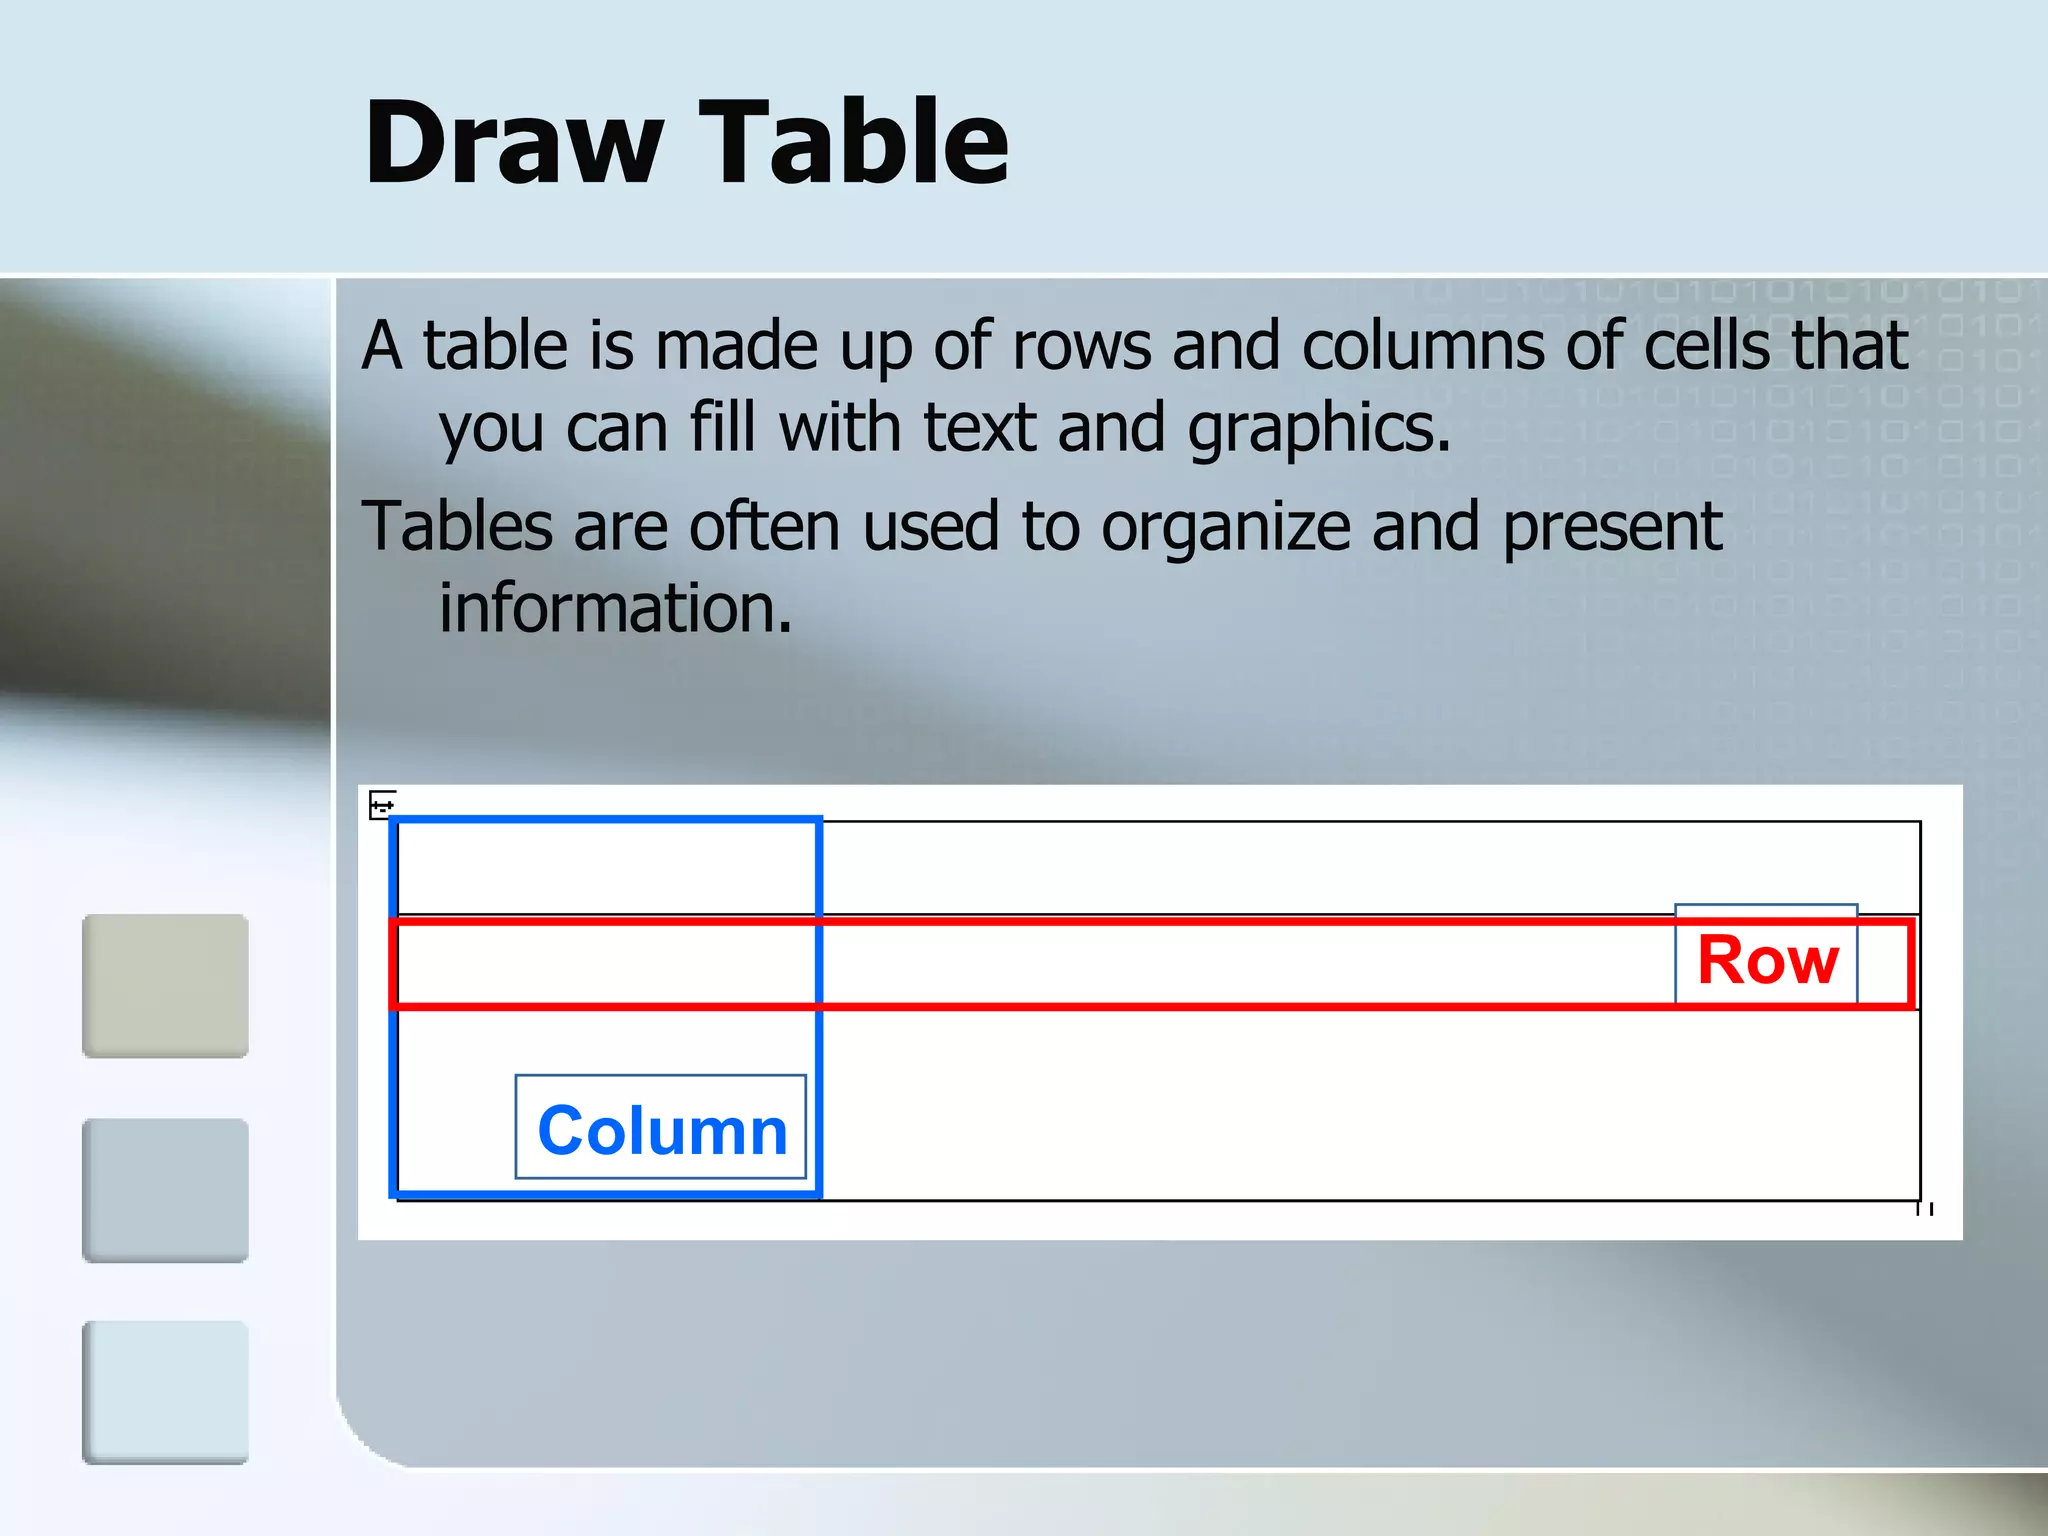
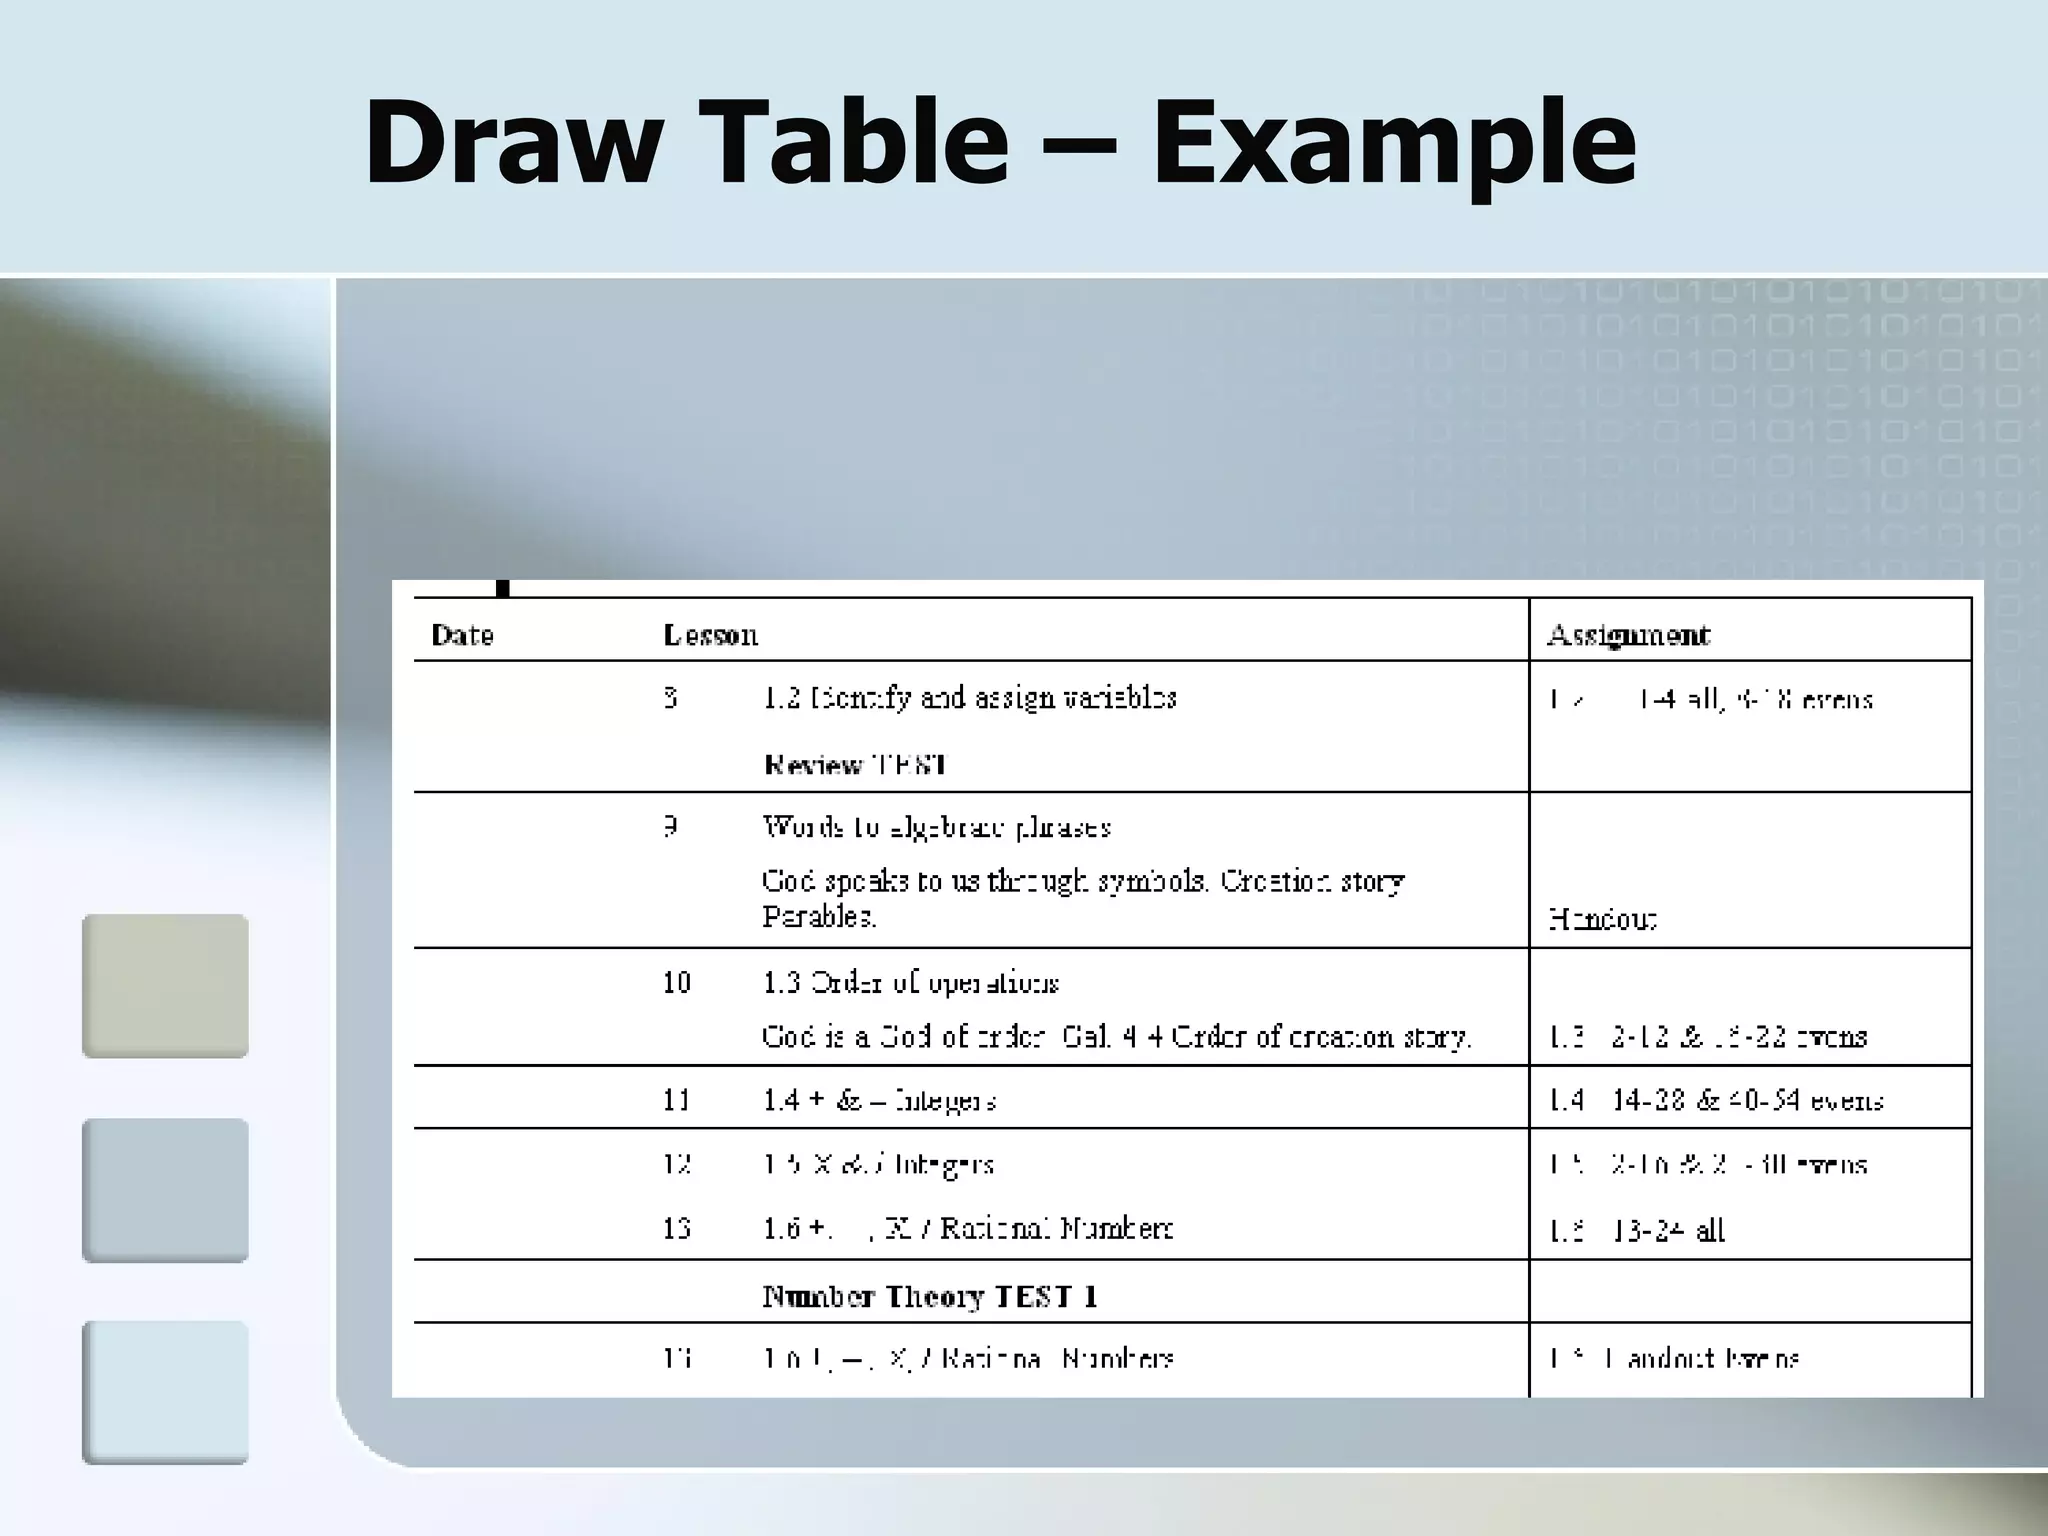
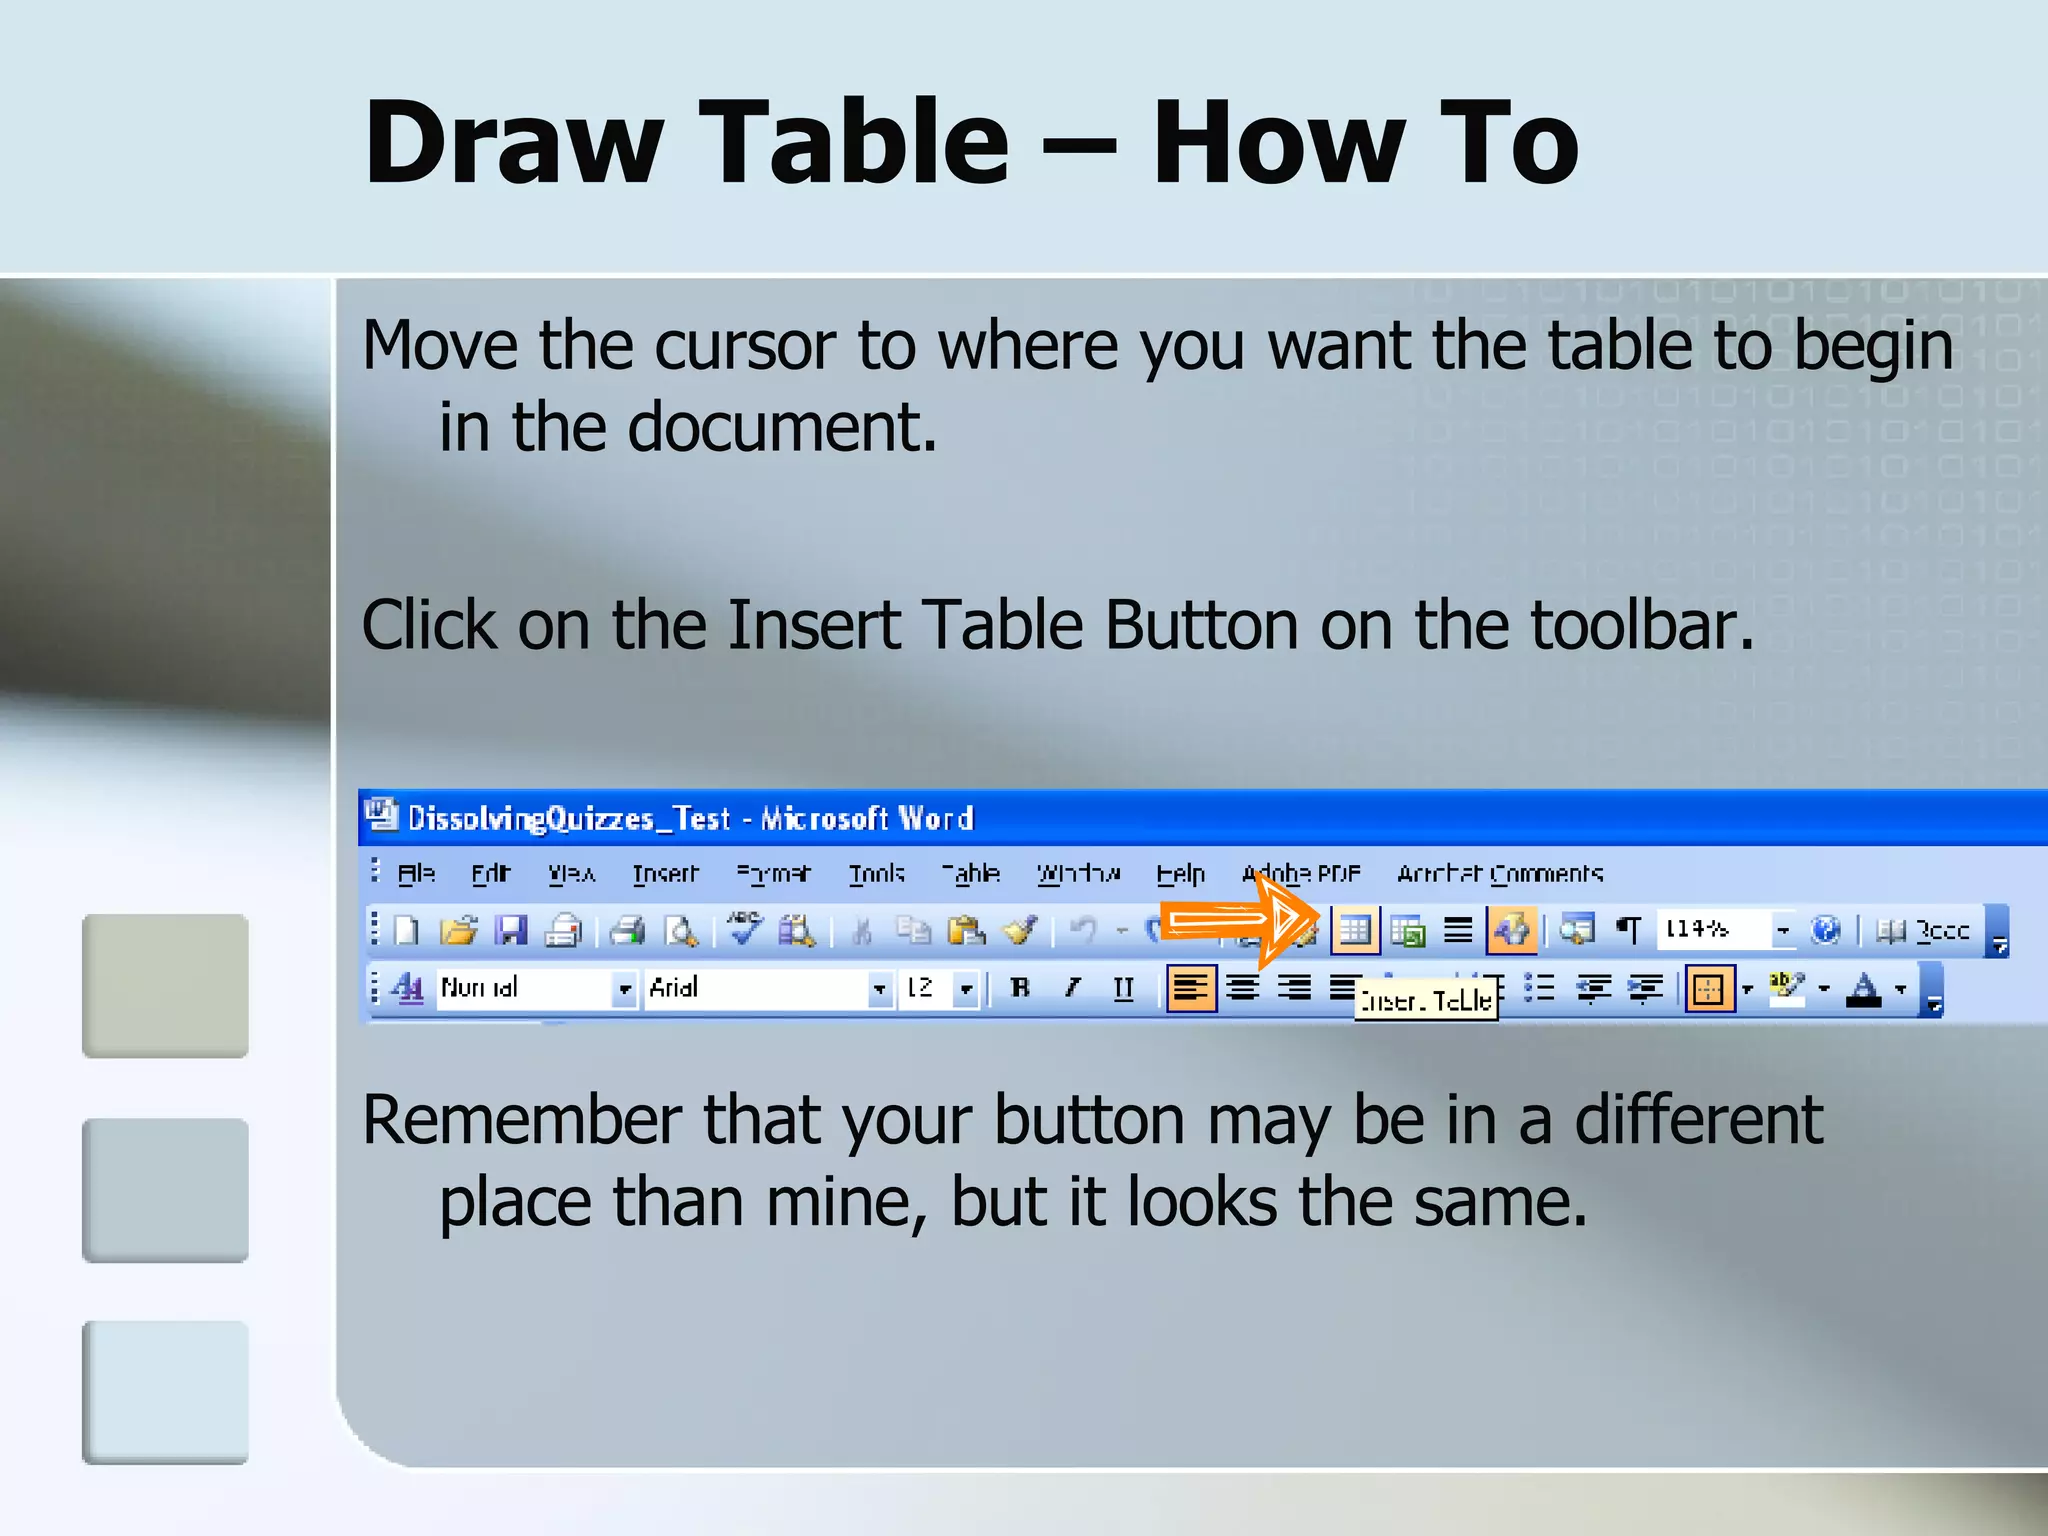
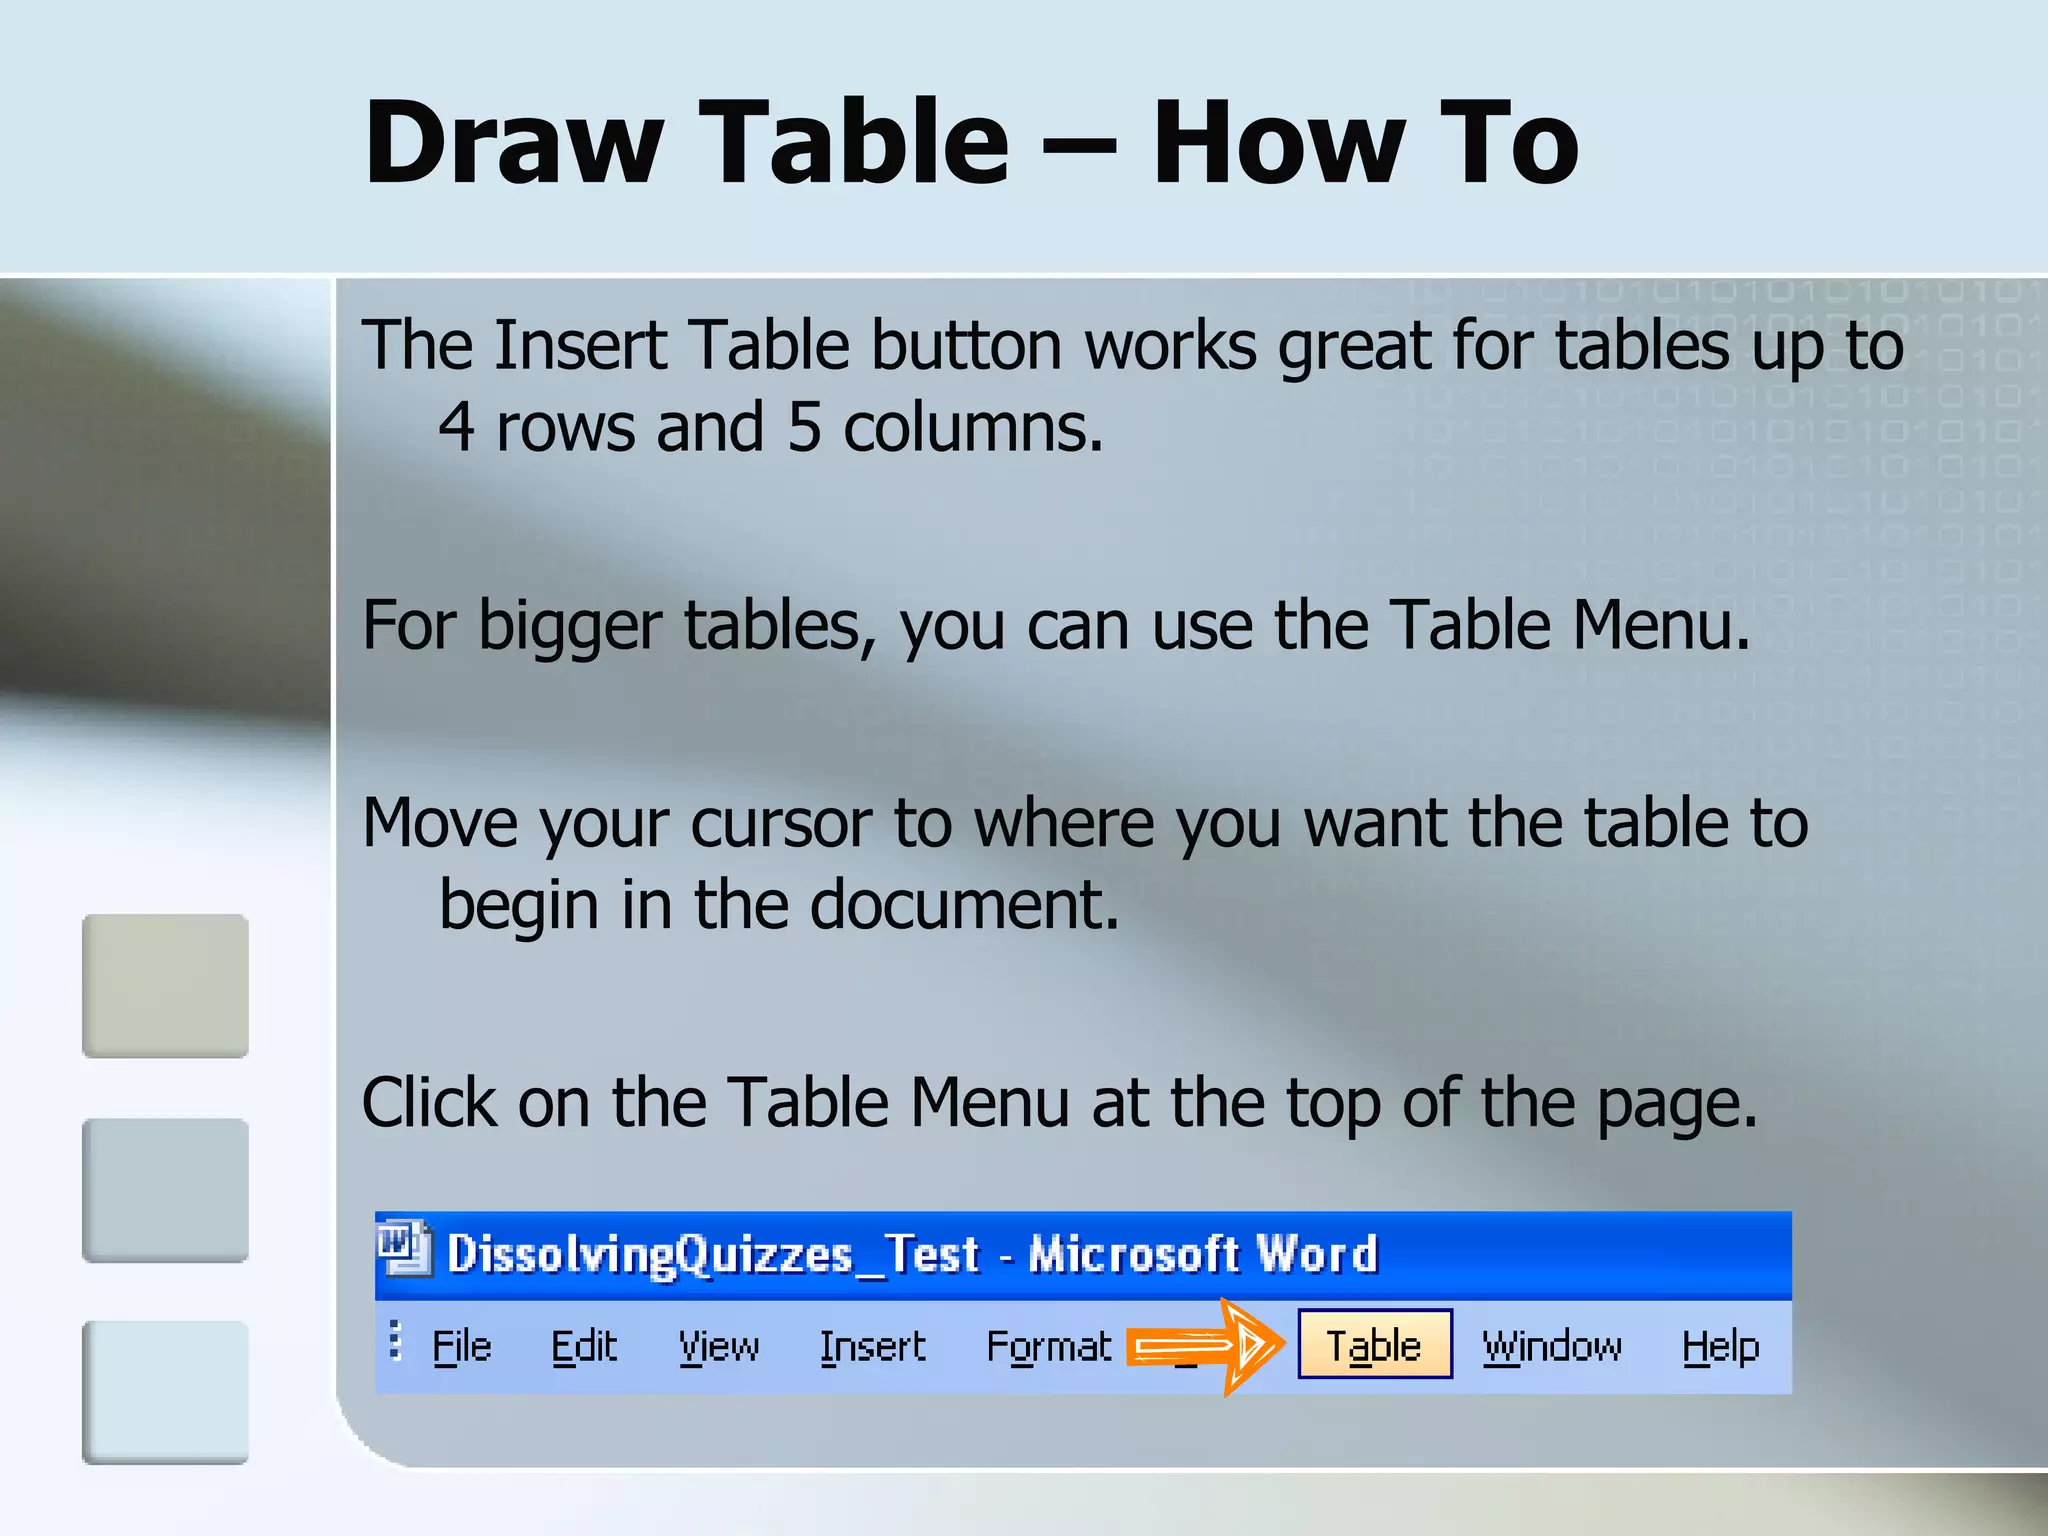
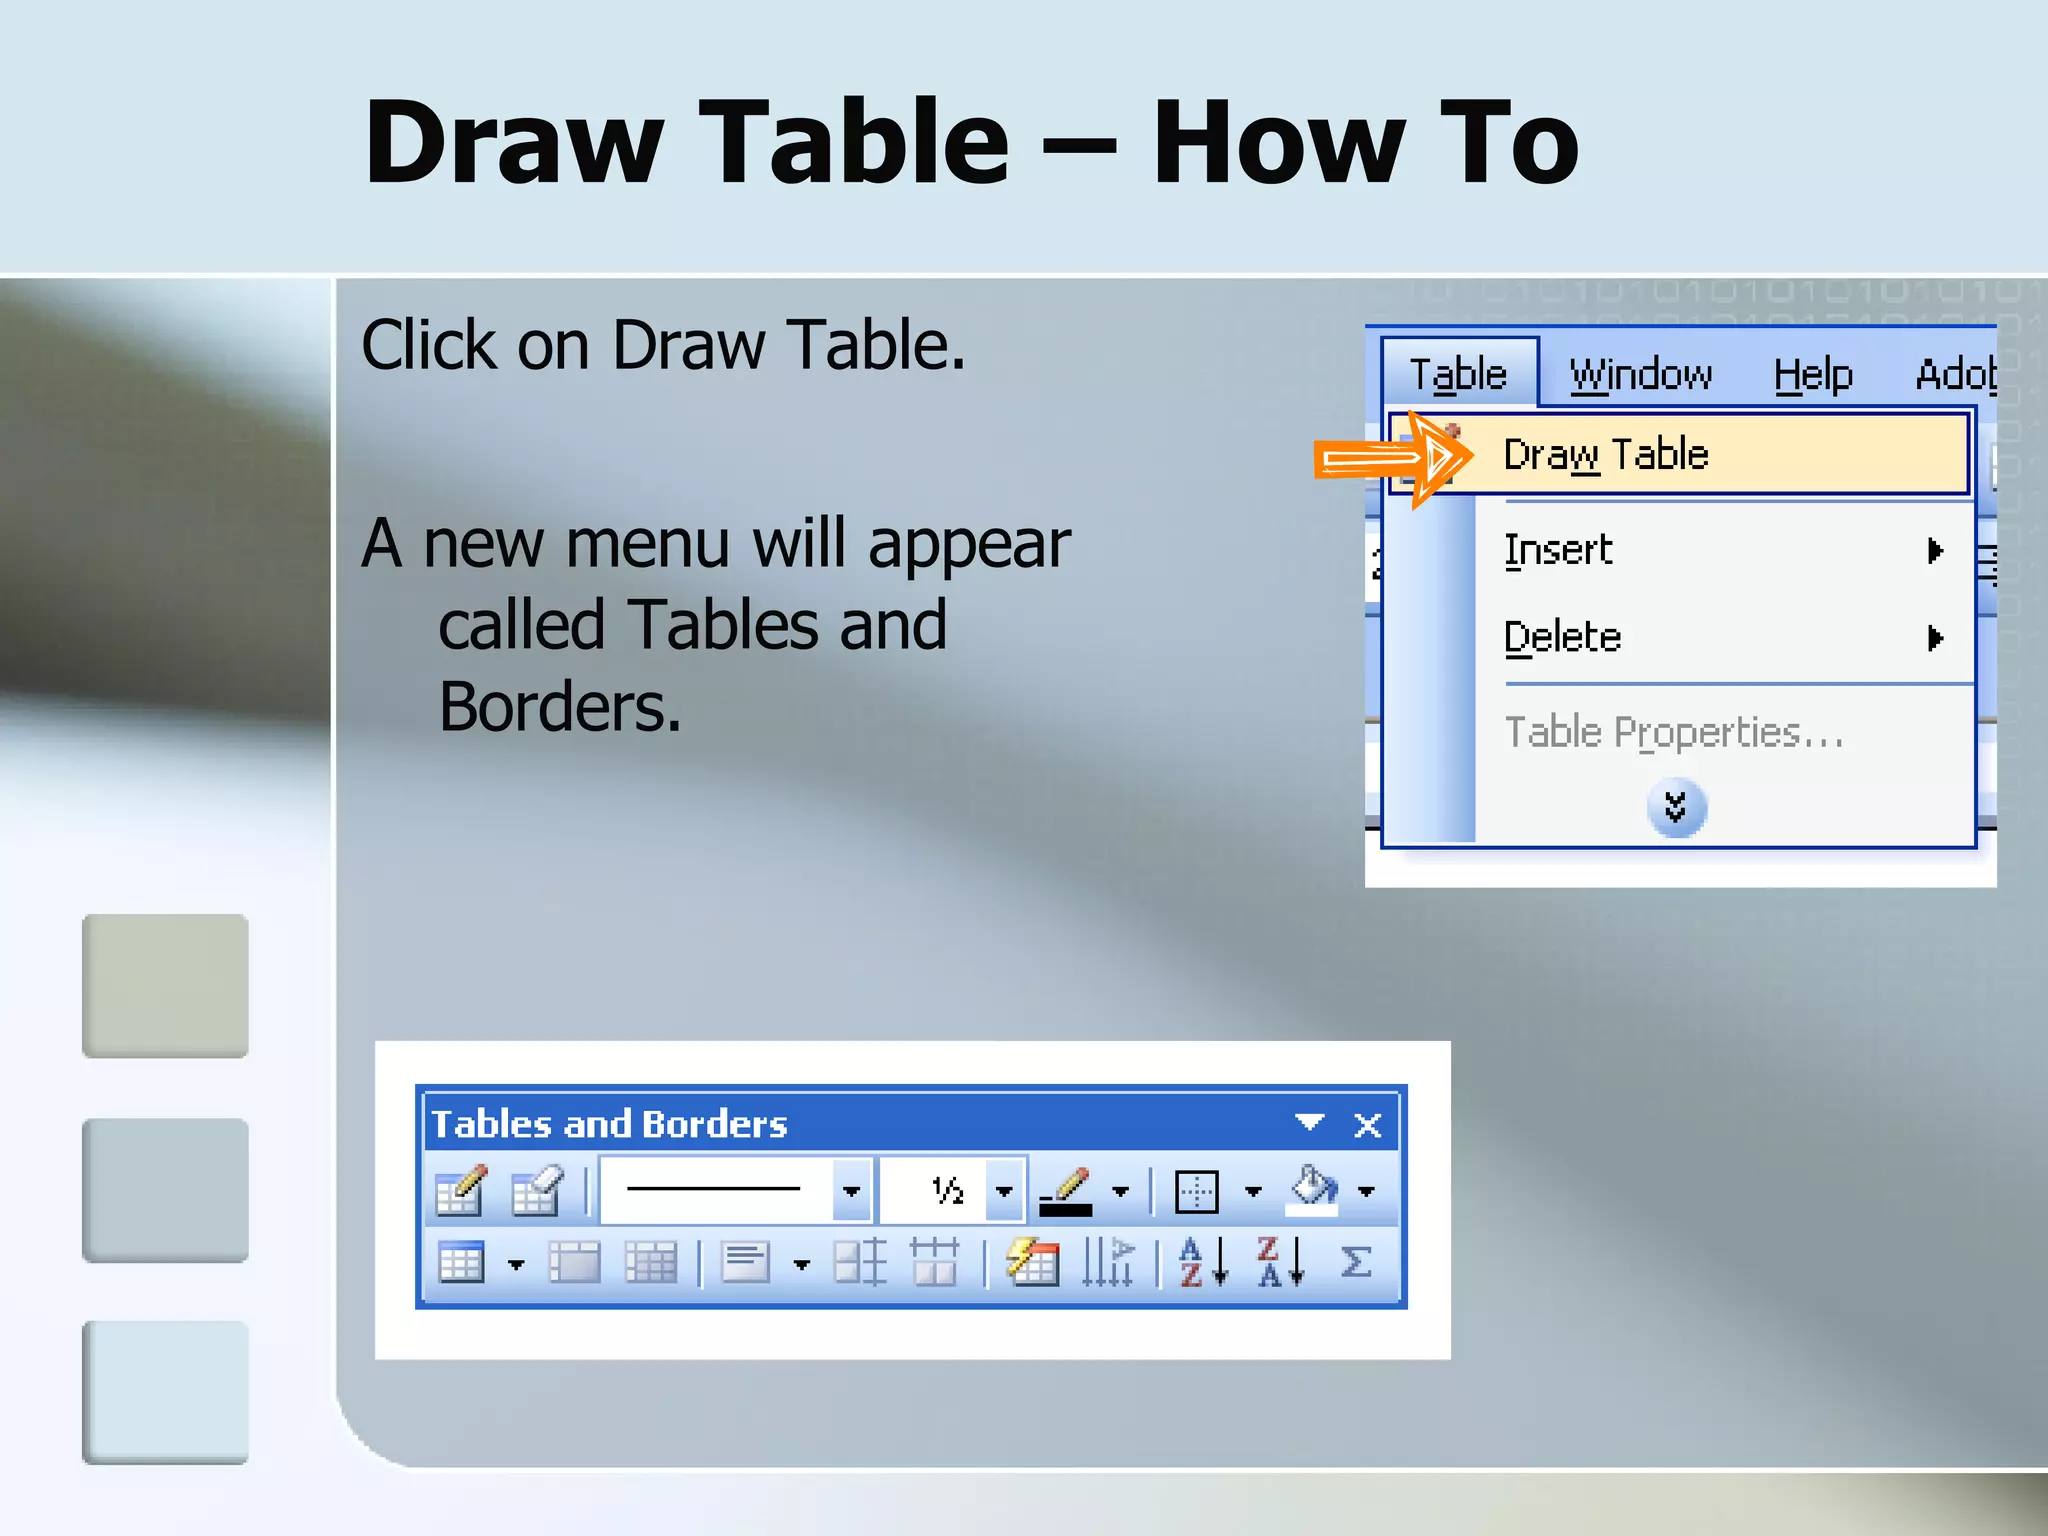
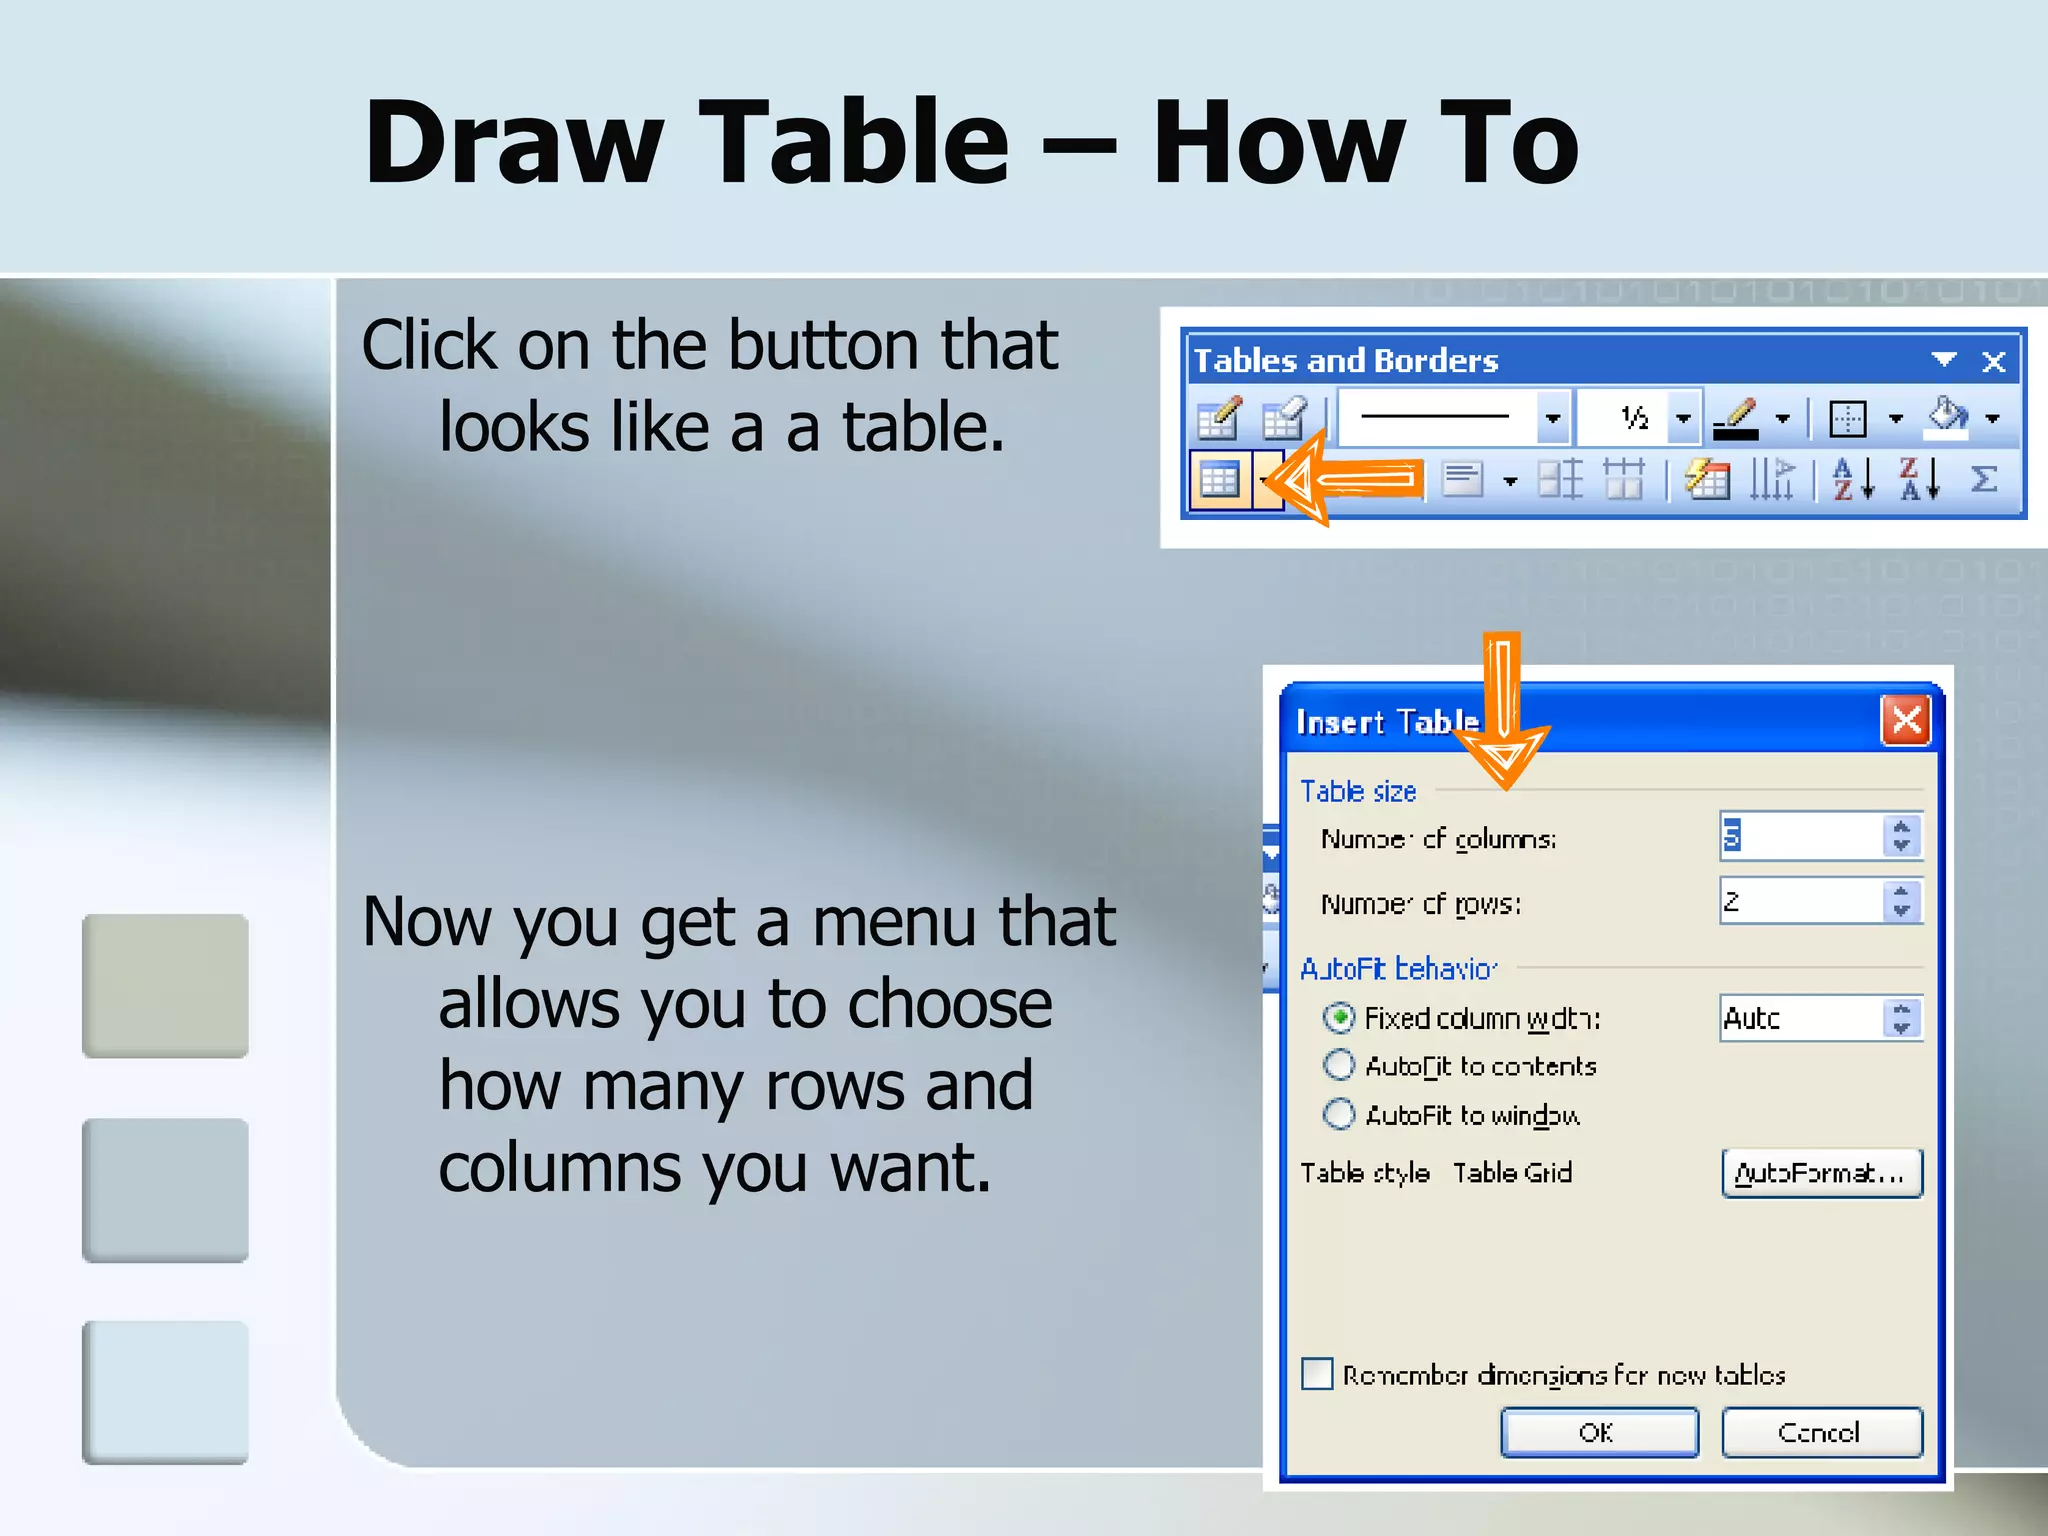
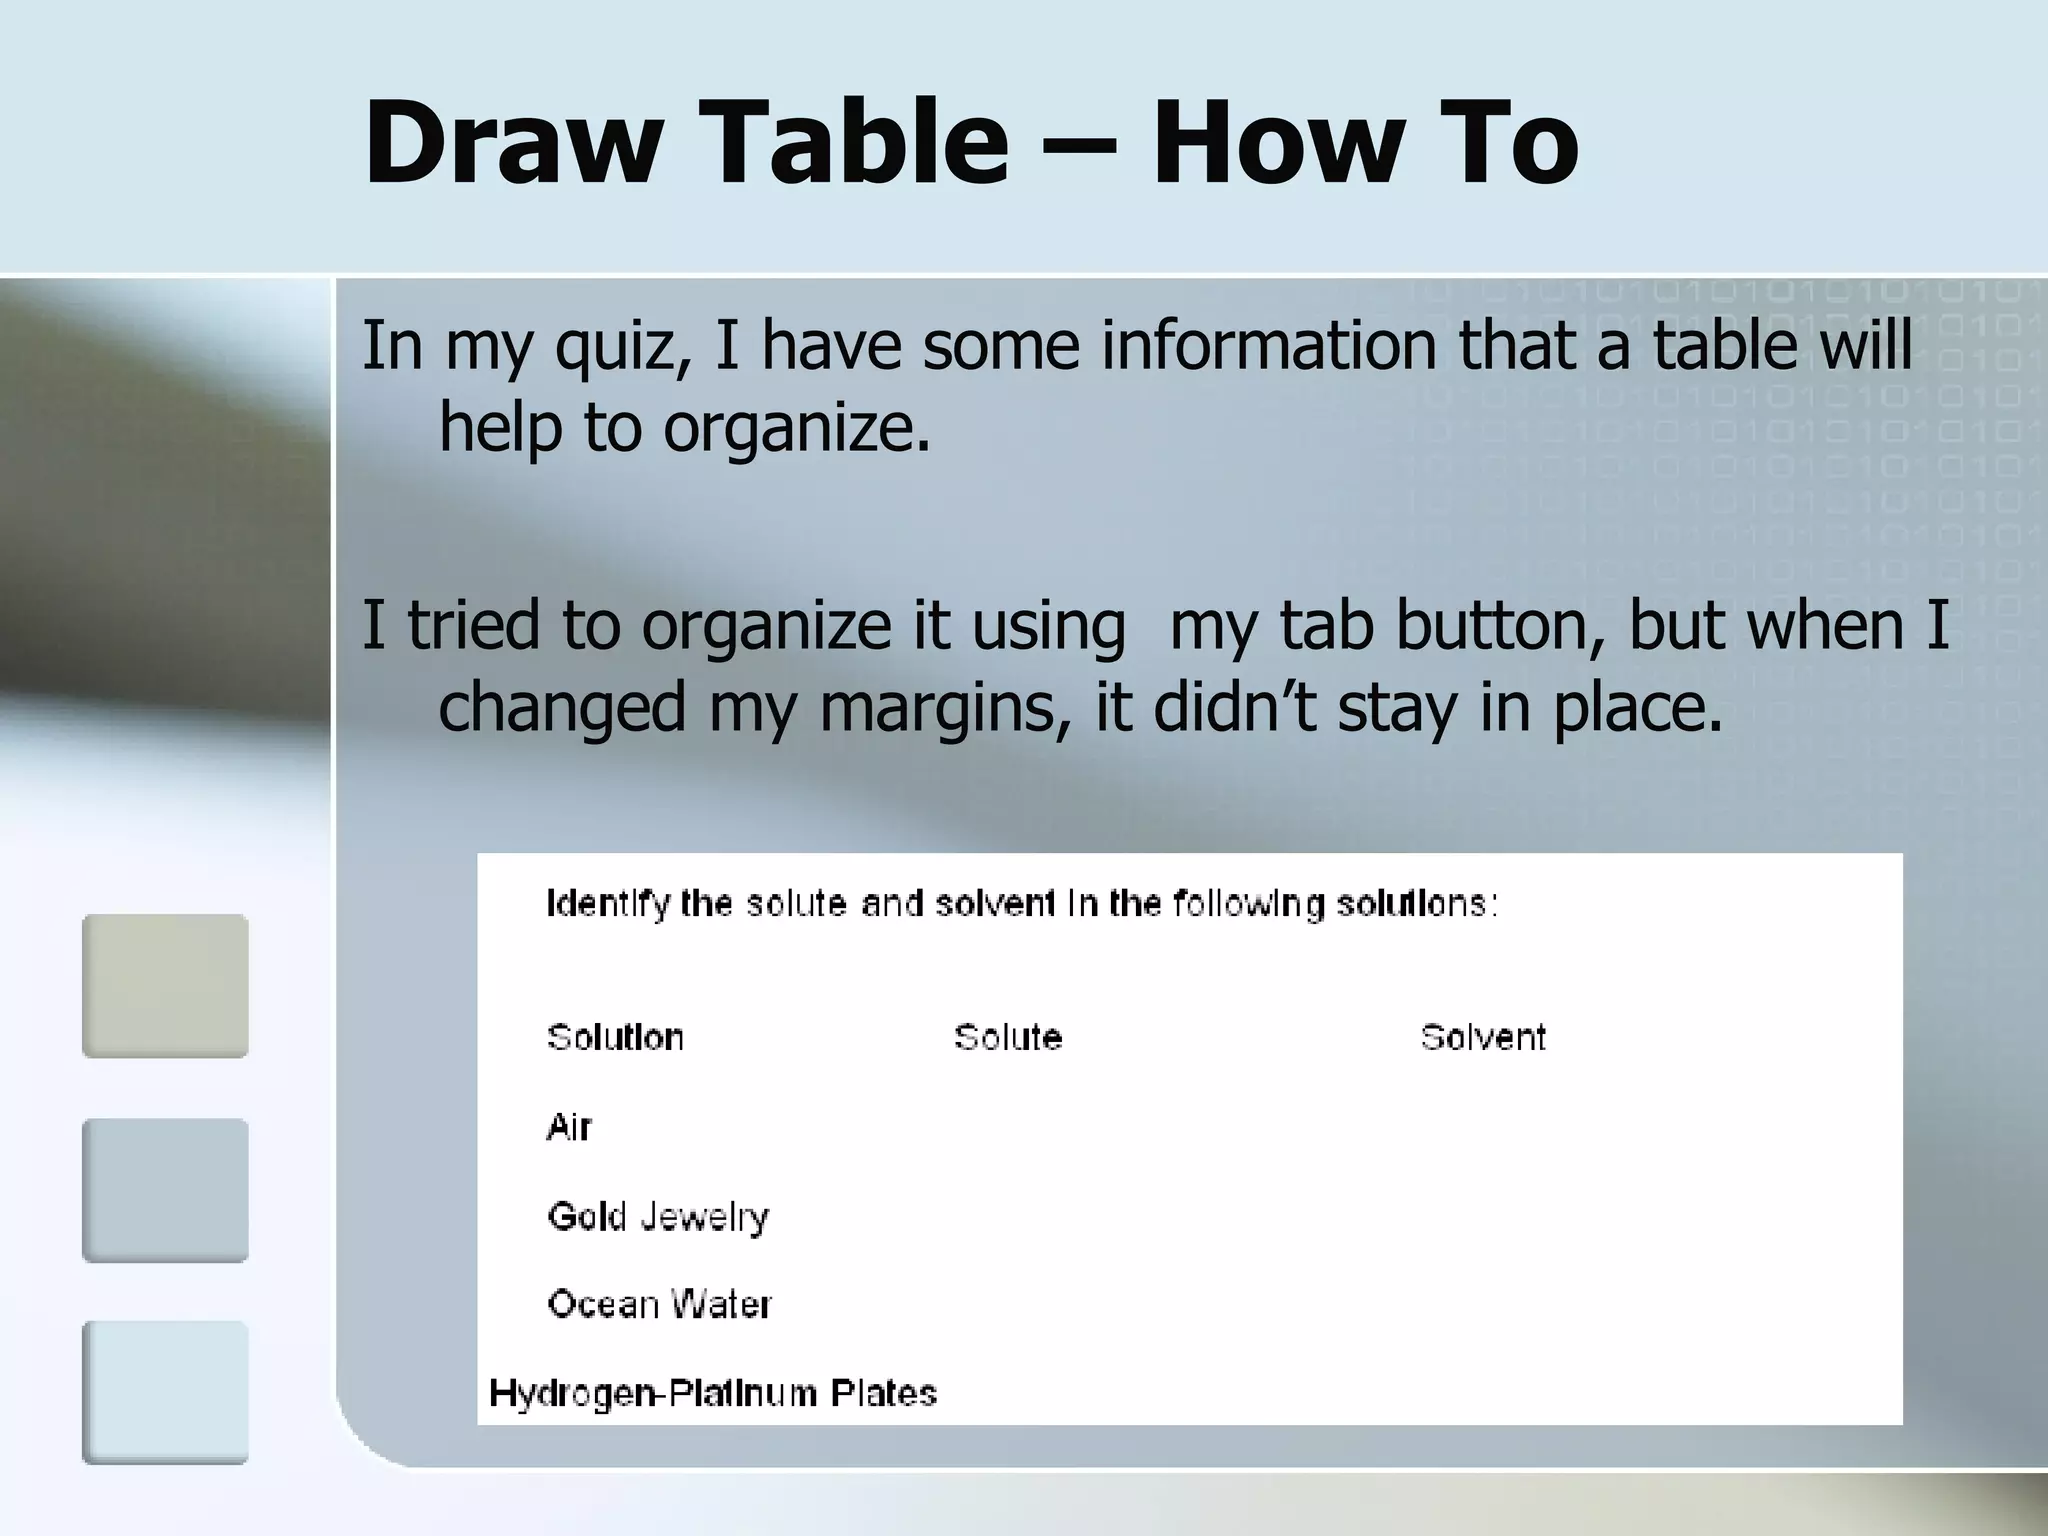
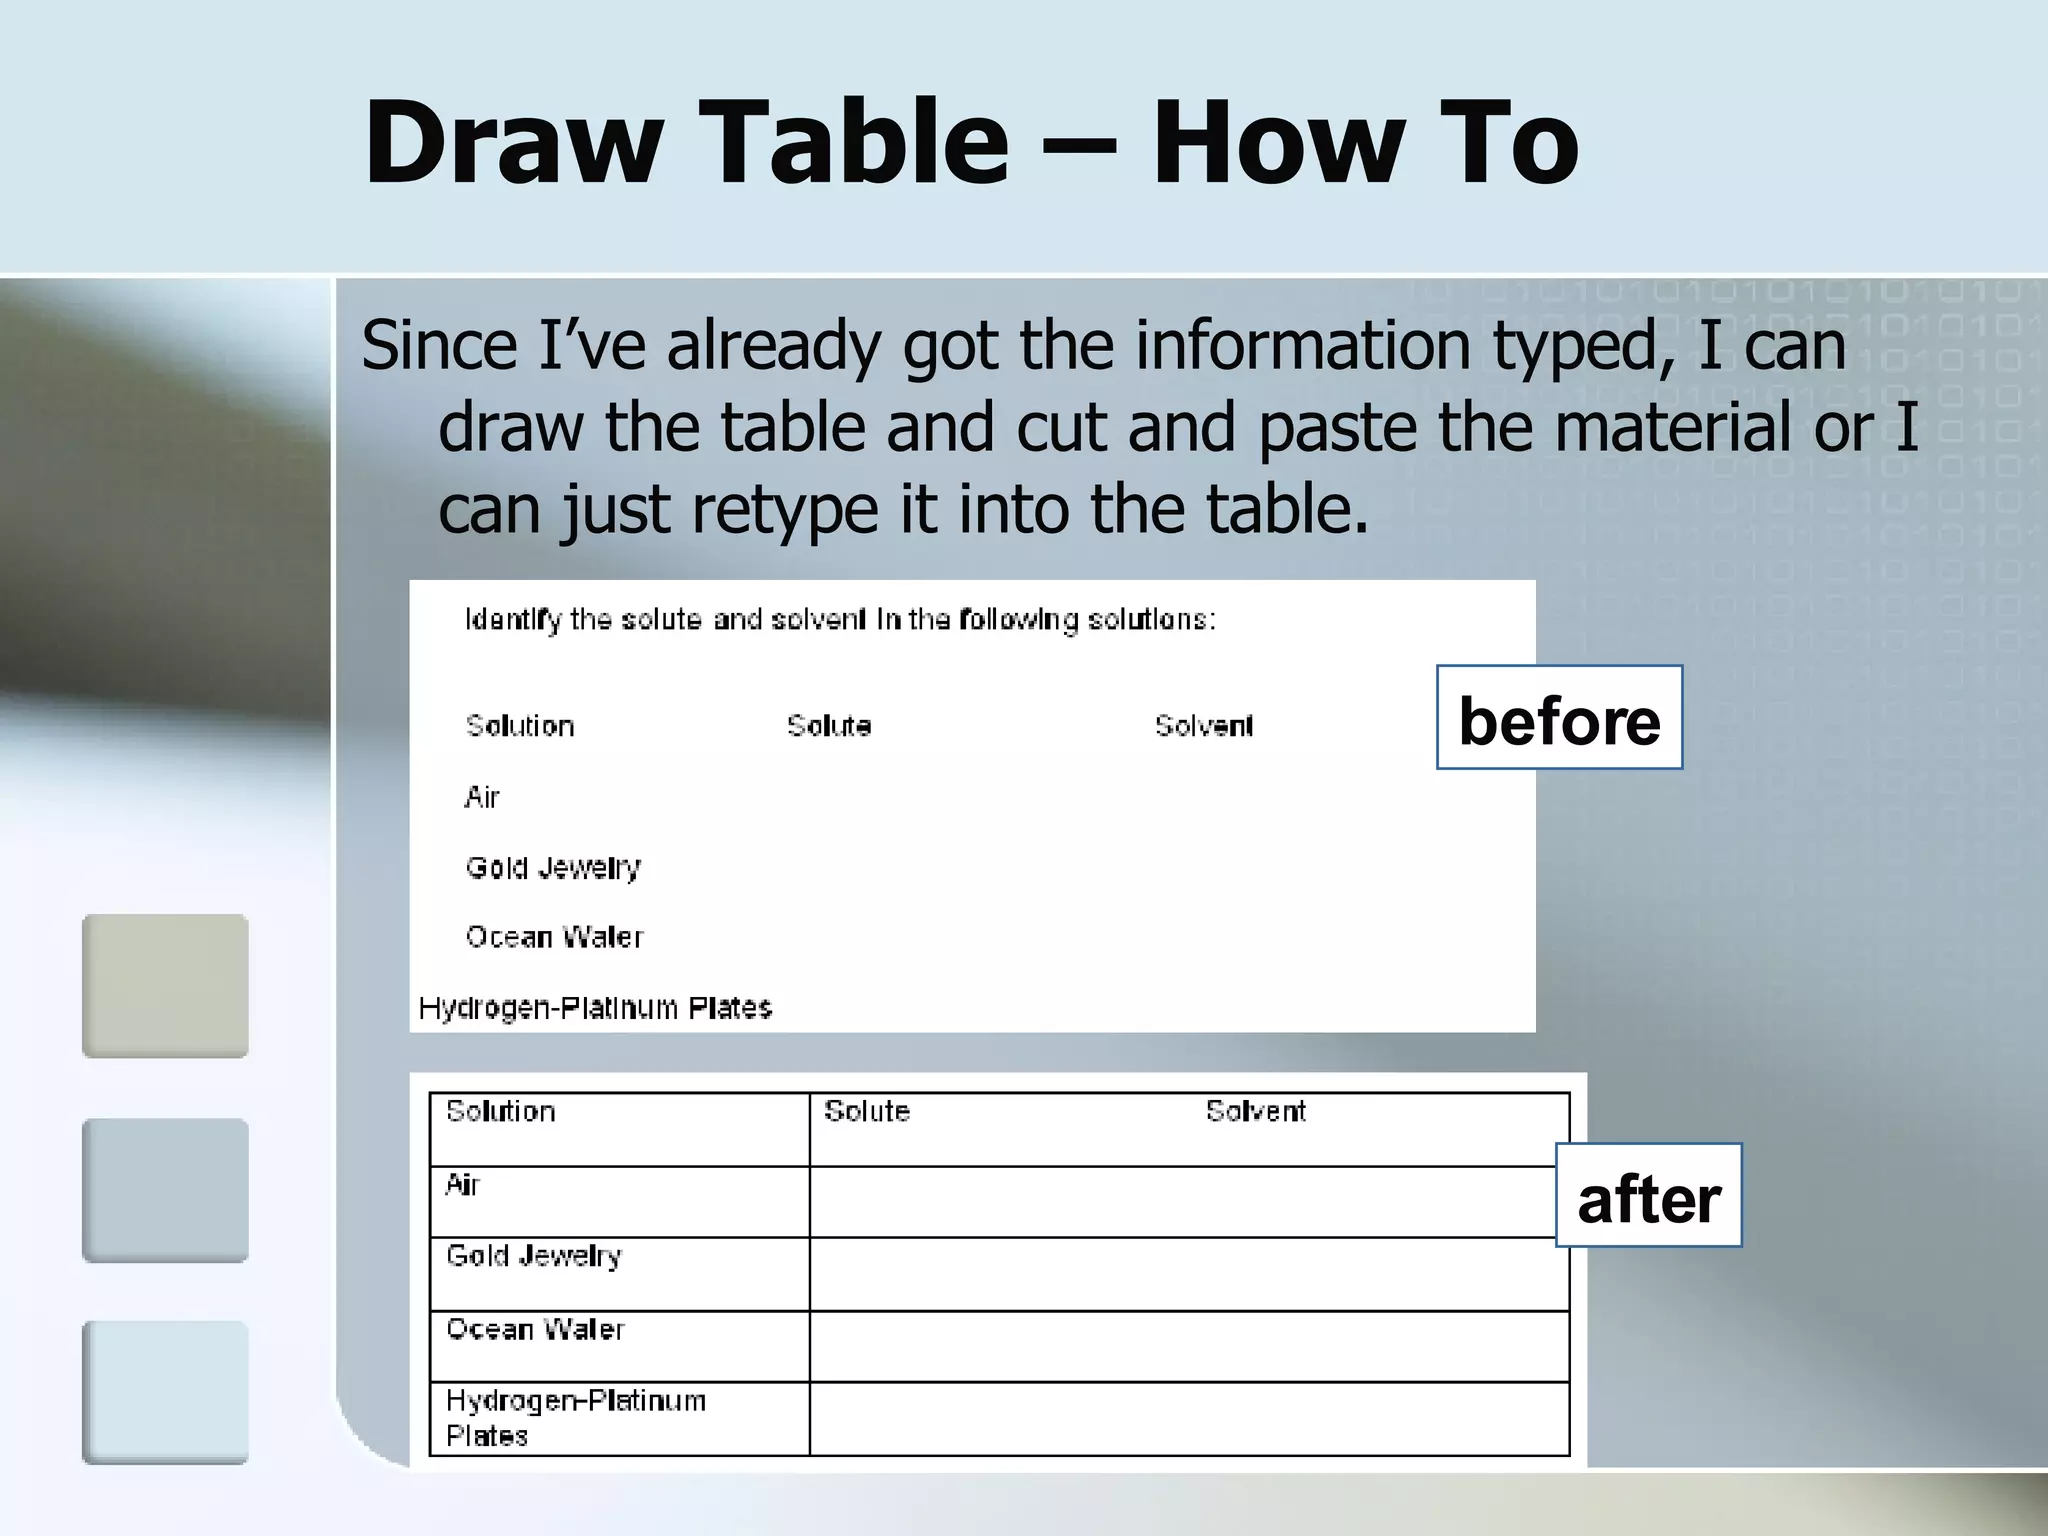
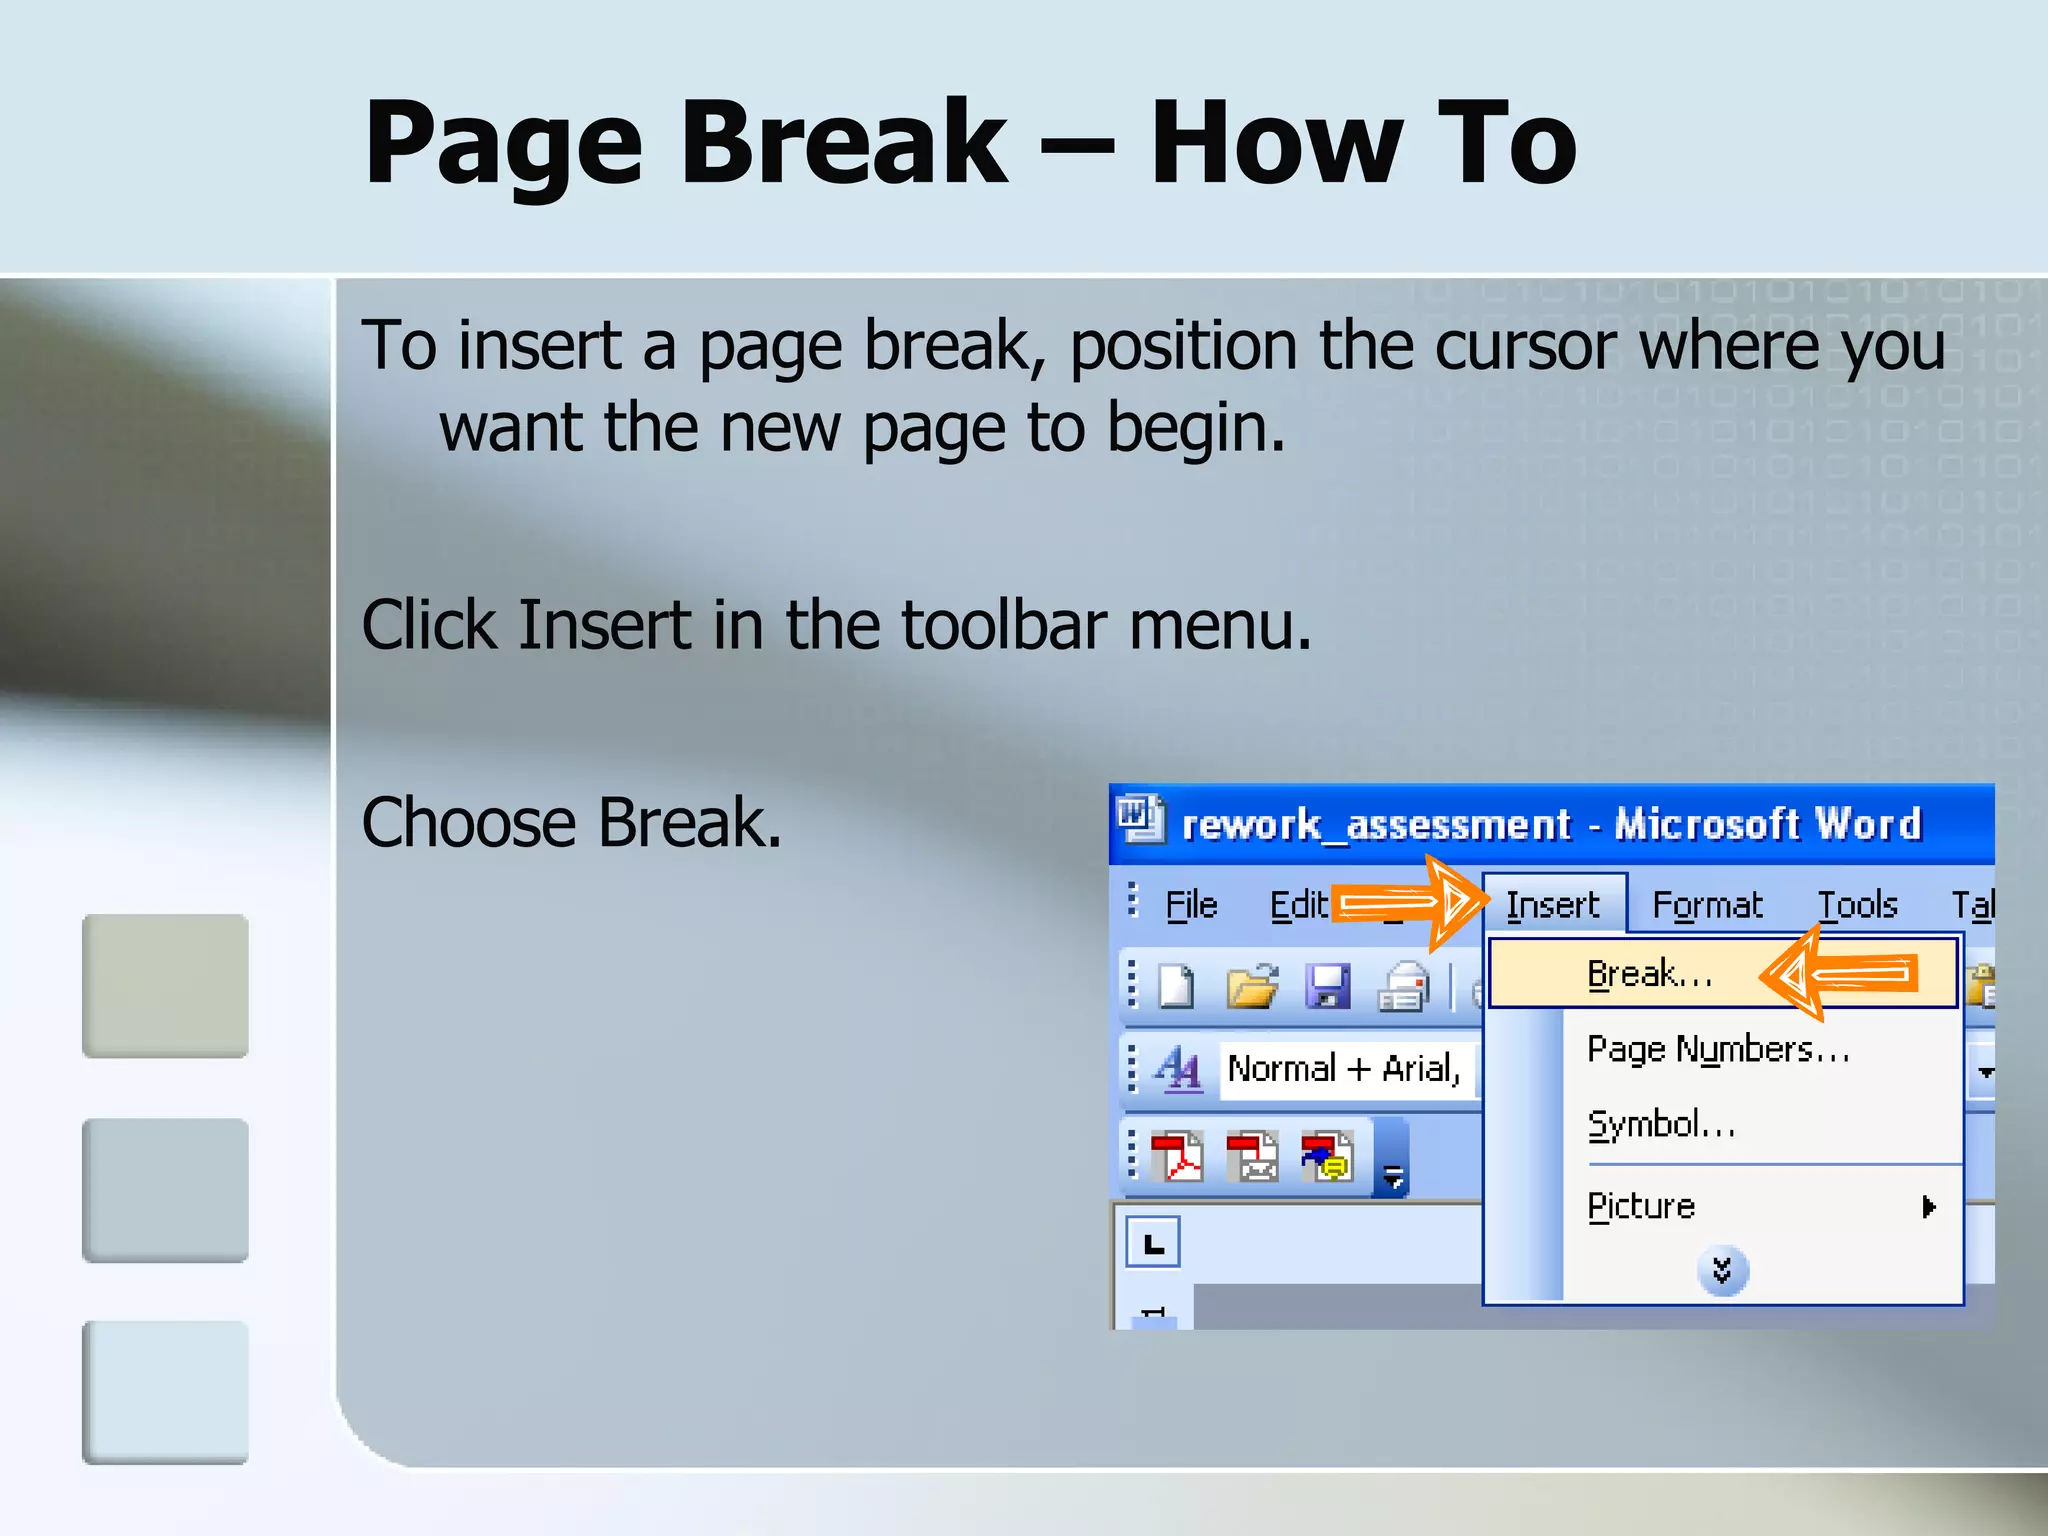
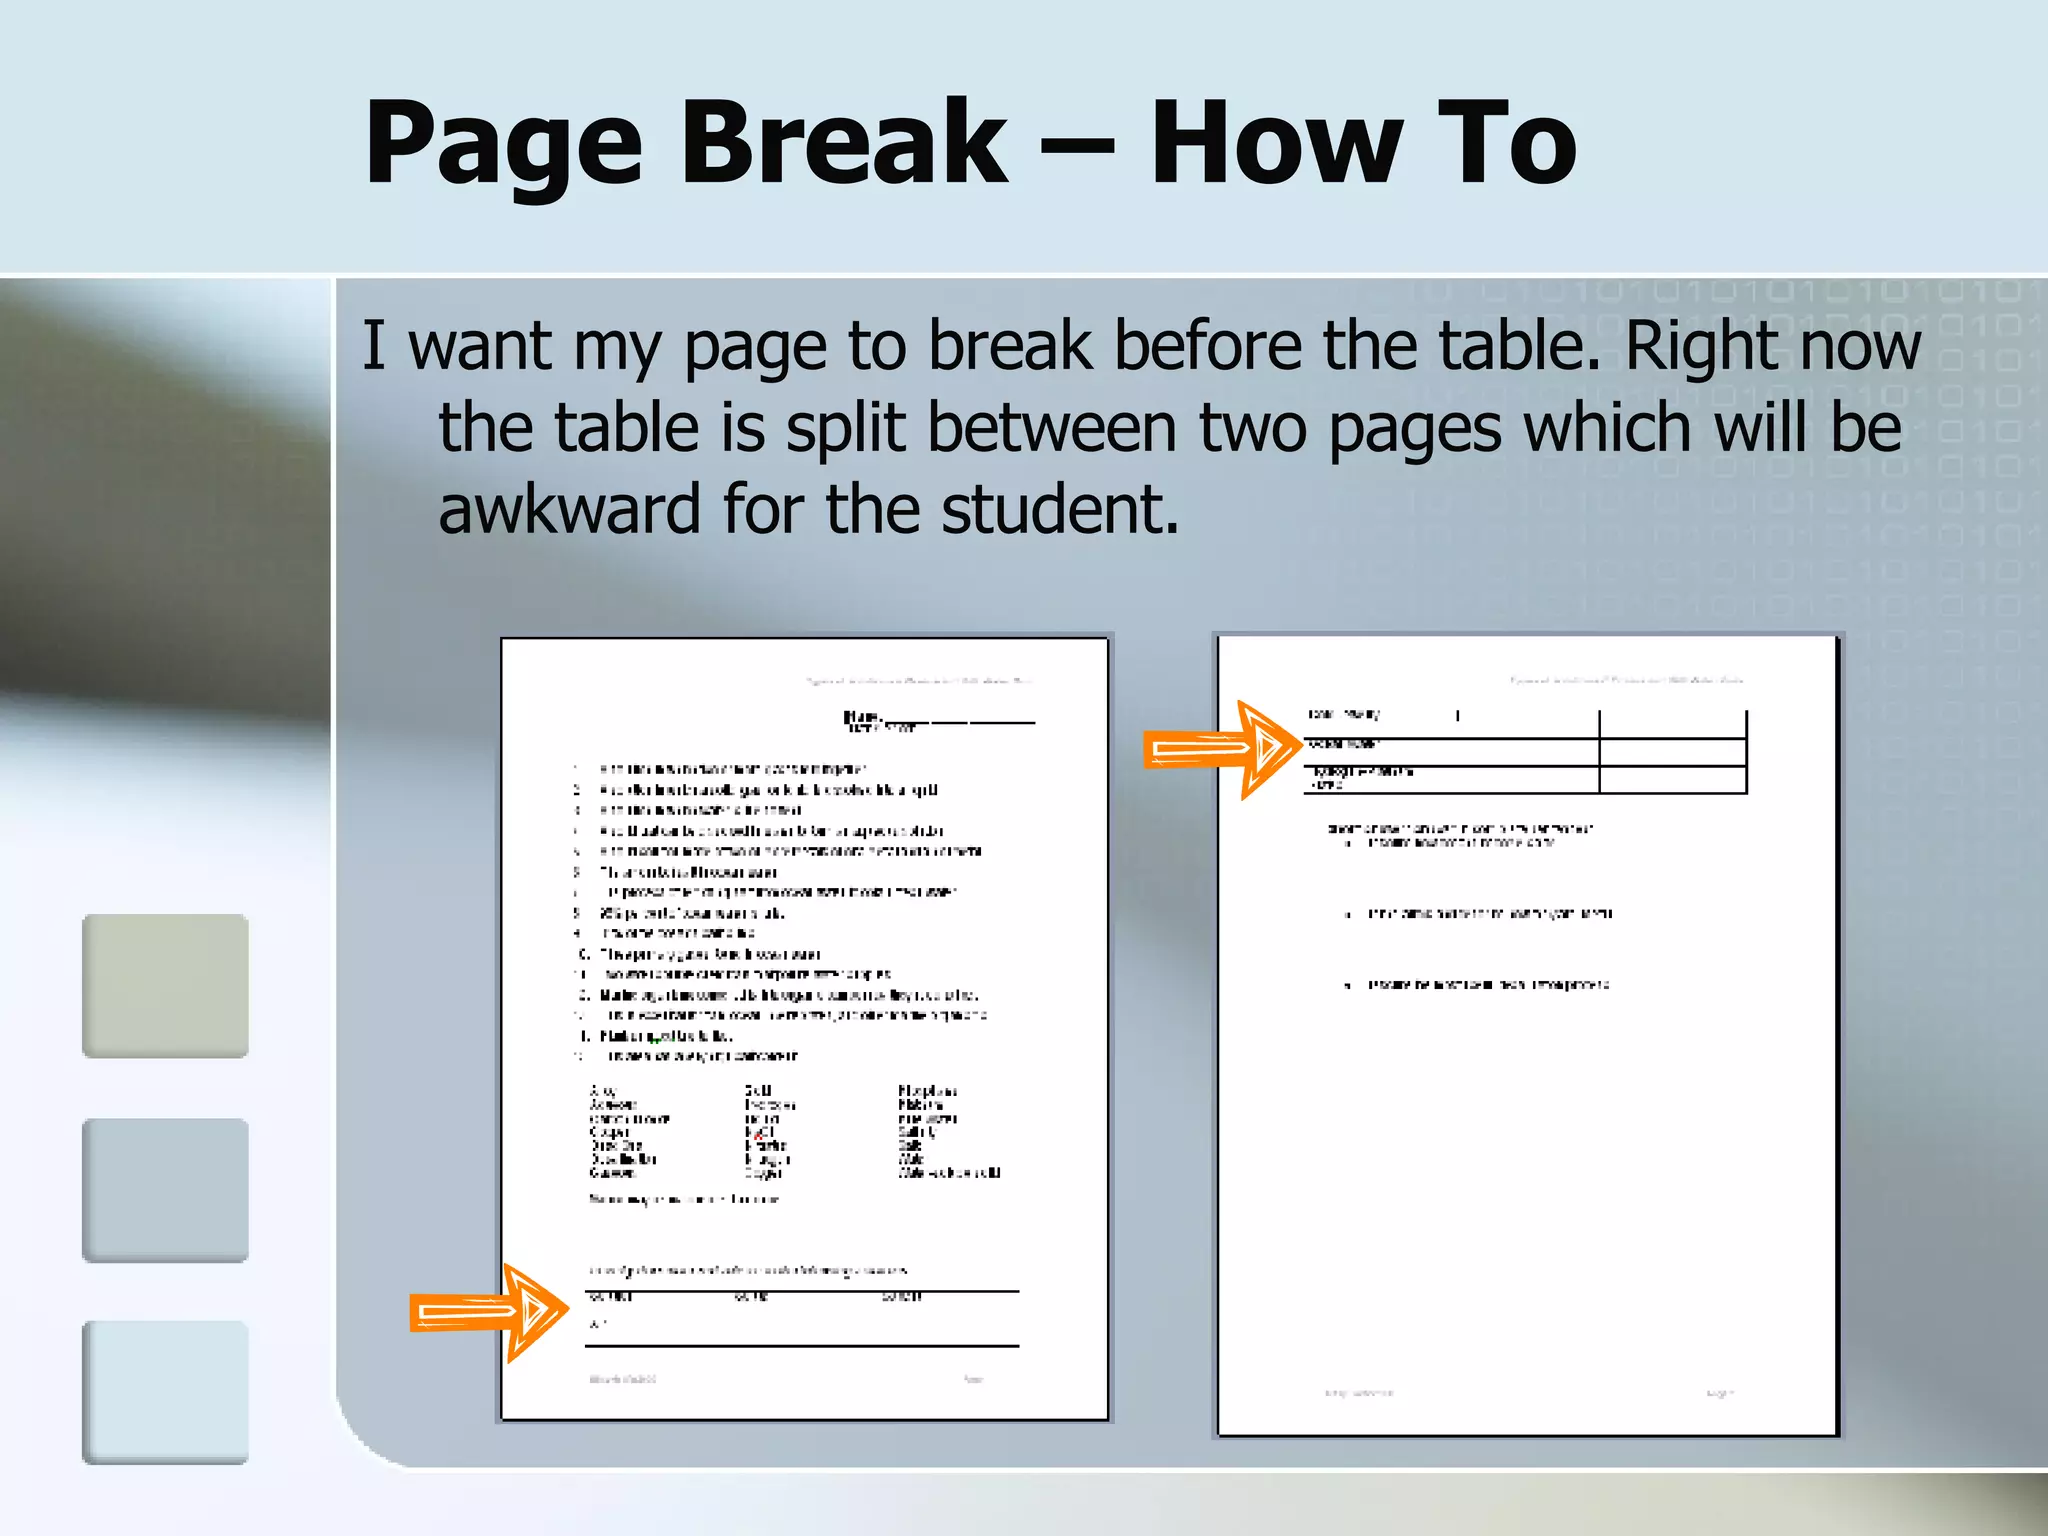
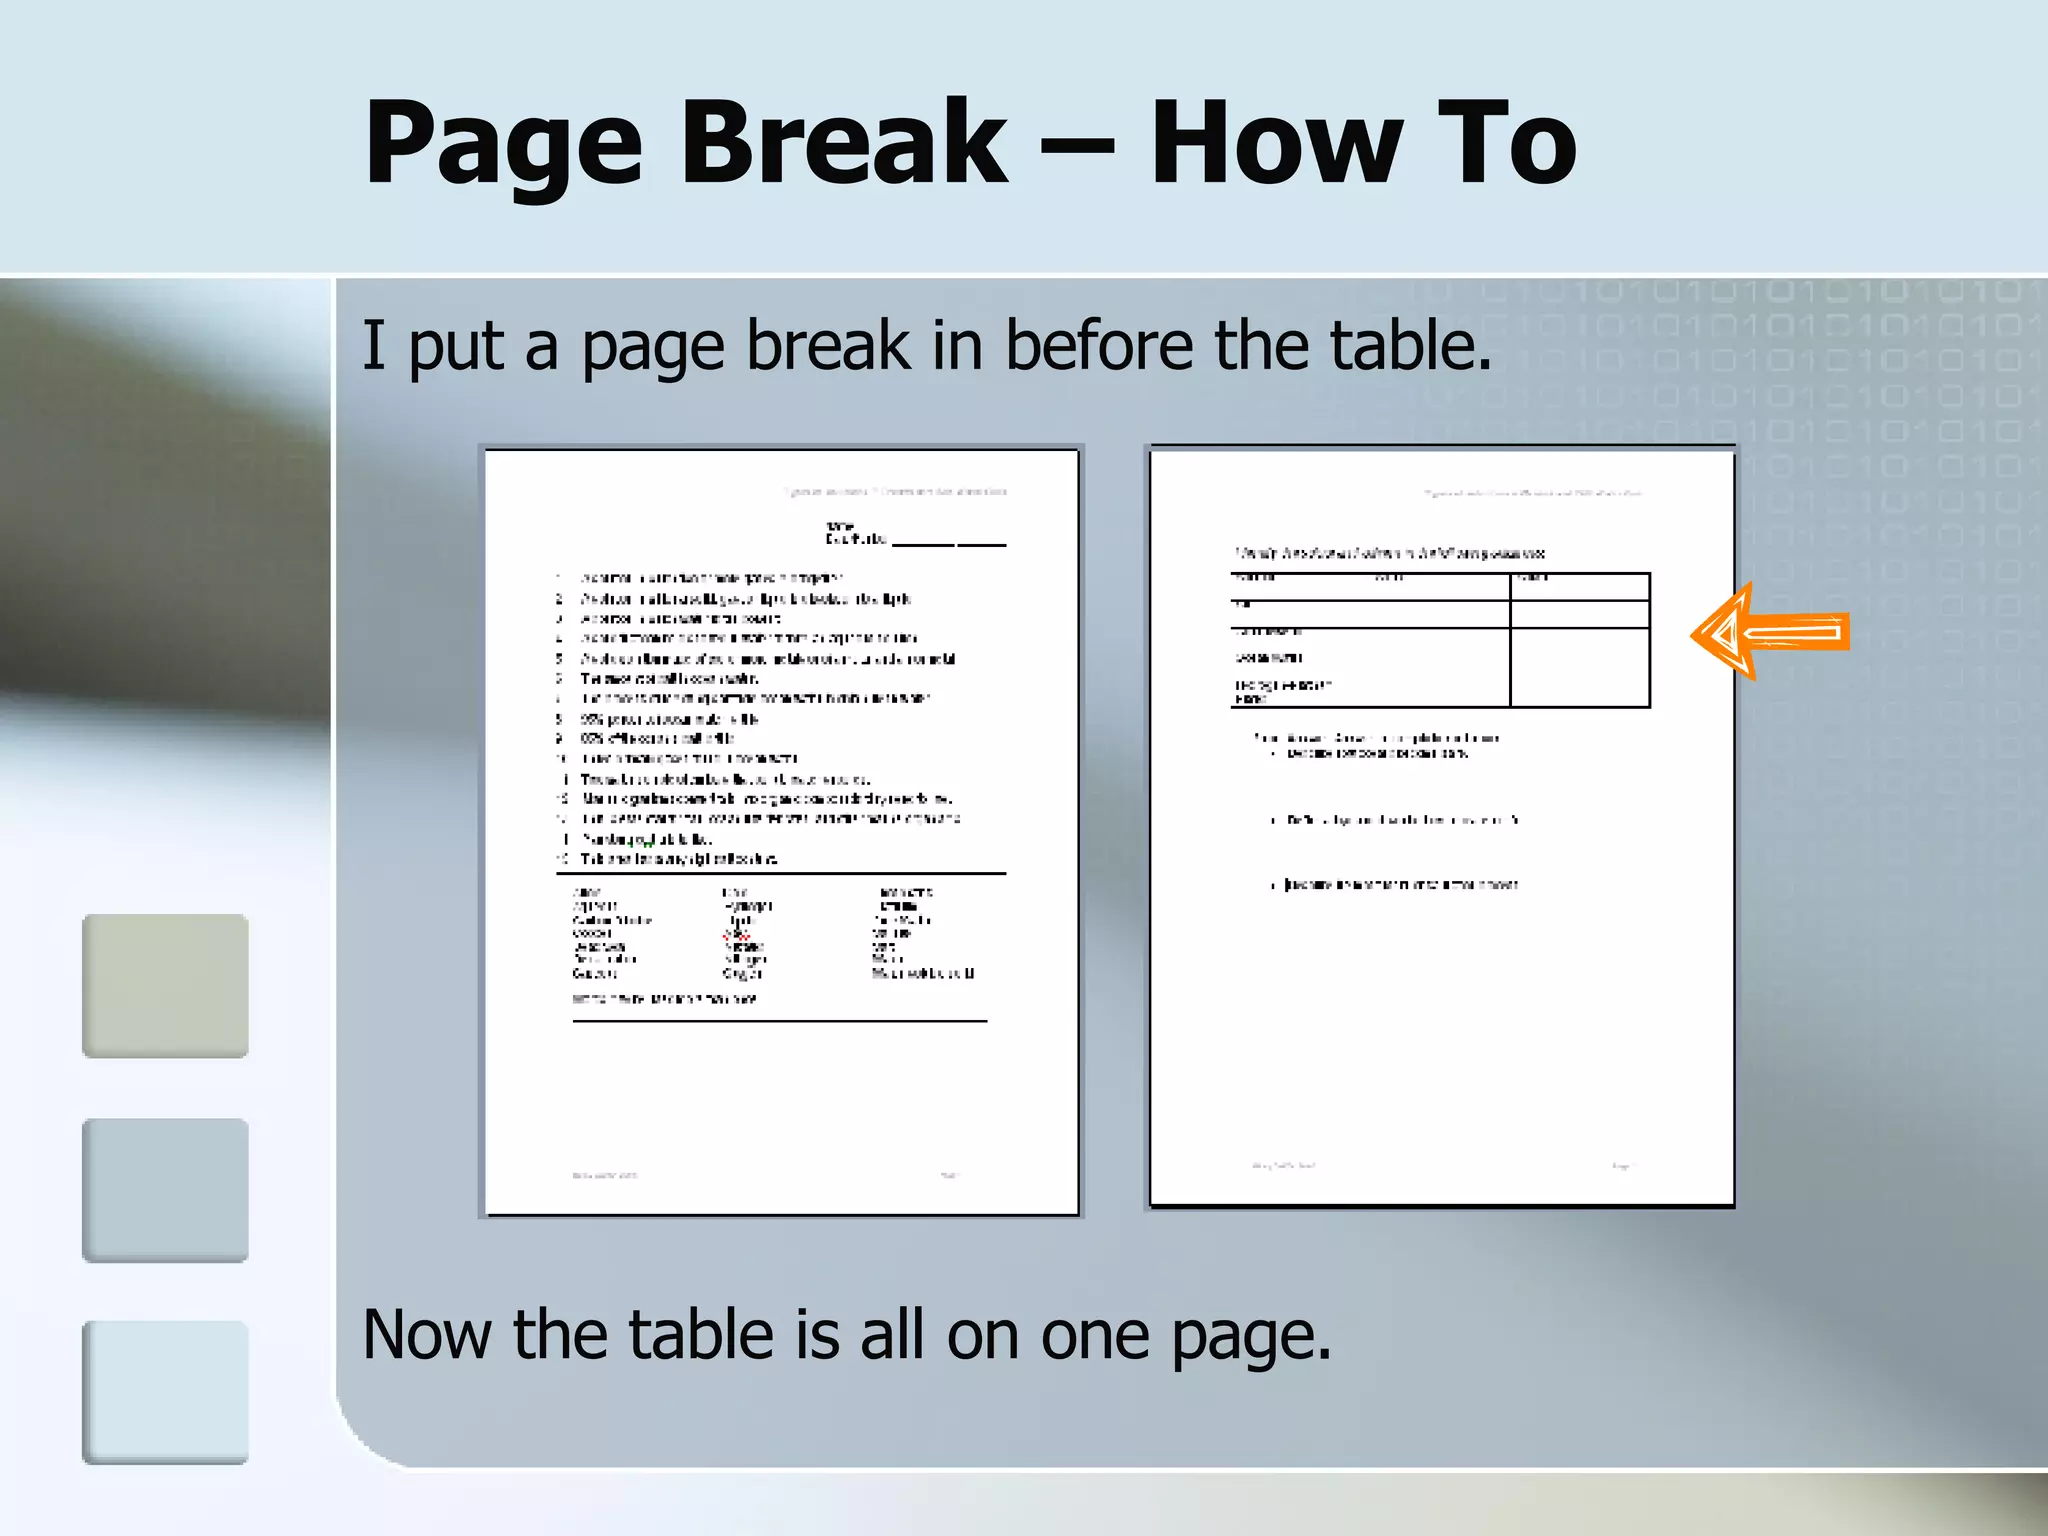
MSWord for Teachers Module 3
Module 3 Tutorial Welcome to the tutorial for module 3. The purpose of this tutorial is to help you create assessments for use in your classroom. This project is a little more complicated than the two before it. Creating and saving assessments is a great timesaver, so learning these Word components will be well worth your time and efforts!
Before we get started . . . Remember that the toolbar pictured may look different from yours, but the functions are still the same.  In Module 1, we covered basic document formatting. In Module 2 we:  Changed the page orientation to landscape. Chose an appropriate text size. Inserted borders.  Aligned text vertically .
Objectives: Identify the document using Header and Footer. Insert Page Numbers into the footer.  Organize information using Bullets and Numbering. Highlight information using an alternate Line Spacing. Organize information using Draw Table. End pages using Page Break.
My Document I’ve got a science quiz that only looks OK. I’d like to clean it up so that it is more user friendly for the student.
Header & Footer
Header & Footer Headers and footers provide information that shows up on every page in a document.  Headers and footers can be used together, but one can be used independently of the other.  You can use headers and footers to identify the document, the writer, the date, page numbers. Whatever you would like to show up on every page can be put into a header or footer.
Header & Footer – Example   Here is a header and footer I used on an assignment that I made for Algebra. The data in gray will show up on every page. Header Footer
Header & Footer  – How To Click on the View menu found at the top of the screen. Click on Header and Footer.
Header & Footer  – How To Header and footer sections will open with a small Header and Footer menu. The Header and Footer menu moves from the header to footer sections as you scroll from one to another.
Header & Footer  – How To To enter text, move the cursor to the section header or footer section and enter the text.  Within the header or the footer, you can align text or change the font face and size.  You can even change the right and left margins.
Header & Footer  – How To I’m going to put the quiz title in the header: I’ll put my name and the year in the footer so I’ll know what year I last modified the quiz.
Page Numbers
Page Numbers Page numbers can be inserted into the headers or the footers.
Page Numbers – Example
Page Numbers – How To To insert a page number in a header or footer, move the cursor to the spot where you want the page number.  On the Header and Footer menu, click on the white button that has a # sign. This inserts the page number.
Page Numbers – How To When you are finished with the header and footer, click on the close button on the menu. The menu will close and your cursor will be back in the body of your text.  Now my document’s pages will all be numbered within the footer.
Bullets & Numbering
Bullets & Numbering Bulleted or numbered lists make your documents more readable and visually interesting.  You can quickly add bullets or numbers to existing lines of text, or Word can automatically create lists as you type.
Bullets & Numbering –  Example
Bullets & Numbering  – Example The Bullets and Numbering Menu offers several choices.  Bullets or numbering will work for your needs most of the time.
Bullets & Numbering  – How To To insert bullets or numbers after you have typed the text: Highlight the text you want to bullet or number. Click on the Format menu found at the top of the page. Choose Bullets and Numbering.
Bullets & Numbering  – How To When the Bullets and Numbers menu pops up,  choose one.  Then click on a box that best fits your material. Then click OK.
Bullets & Numbering  – How To I’ve got a couple of areas that could use numbers or bullets.  This section really needs some numbering. After adding the numbers, it looks like this:
Bullets & Numbering  – How To The short answer section could be bulleted. Before the bullets: After the bullets:
Line Spacing
Line Spacing You can change the spacing between the lines or the spacing before or after each paragraph.
Line Spacing – Example  Single Double 1.5
Line Spacing – How To Select the text where you want to change the spacing.  Click the Line Spacing Button. Then choose the spacing you would like to use. While the text is highlighted, you can try several different spacings.
Line Spacing – How To These section needs more room between the numbered items.  Double spacing gives the student more room to write answers.
Draw Table
Draw Table A table is made up of rows and columns of cells that you can fill with text and graphics.  Tables are often used to organize and present information. Row Column
Draw Table – Example
Draw Table – How To Move the cursor to where you want the table to begin in the document. Click on the Insert Table Button on the toolbar. Remember that your button may be in a different place than mine, but it looks the same.
Draw table  – How To A grid will appear when you click on the Insert Table button. You can drag your cursor to select the number of rows and columns you want.
Draw Table – How To The Insert Table button works great for tables up to 4 rows and 5 columns. For bigger tables, you can use the Table Menu. Move your cursor to where you want the table to begin in the document. Click on the Table Menu at the top of the page.
Draw Table – How To Click on Draw Table. A new menu will appear called Tables and Borders.
Draw Table – How To Click on the button that looks like a a table. Now you get a menu that allows you to choose how many rows and columns you want.
Draw Table – How To In my quiz, I have some information that a table will help to organize.  I tried to organize it using  my tab button, but when I changed my margins, it didn’t stay in place.
Draw Table – How To Since I’ve already got the information typed, I can draw the table and cut and paste the material or I can just retype it into the table.  before after
Page Break
Page Break When you fill a page with text, Word inserts an automatic page break and starts a new page. To force a page break at a specific location, you can insert a manual page break. You may want to do this to ensure that certain information stays together.
Page Break – Example  This is a sub plan I left. These pages run together.  This is the same sub plan with page breaks, and it’s much easier for the sub to read.
Page Break – How To To insert a page break, position the cursor where you want the new page to begin.  Click Insert in the toolbar menu. Choose Break.
Page Break – How To A Break Menu will appear. Choose Page Break. Click OK. The pages separate at the proper place.
Page Break – How To I want my page to break before the table. Right now the table is split between two pages which will be awkward for the student.
Page Break – How To I put a page break in before the table. Now the table is all on one page.
Review
Review In Module 3, you learned how to: Add repeating information to the  Header and Footer . Insert  Page Numbers  into the footer .   Use  Bullets and Numbering  to organize information. Change the  Line Spacing Put data into a table  Draw Table. End pages where you want using  Page Break .

Word Module 3 Sept 28, 2007

  • 1.
  • 2.
    Module 3 TutorialWelcome to the tutorial for module 3. The purpose of this tutorial is to help you create assessments for use in your classroom. This project is a little more complicated than the two before it. Creating and saving assessments is a great timesaver, so learning these Word components will be well worth your time and efforts!
  • 3.
    Before we getstarted . . . Remember that the toolbar pictured may look different from yours, but the functions are still the same. In Module 1, we covered basic document formatting. In Module 2 we: Changed the page orientation to landscape. Chose an appropriate text size. Inserted borders. Aligned text vertically .
  • 4.
    Objectives: Identify thedocument using Header and Footer. Insert Page Numbers into the footer. Organize information using Bullets and Numbering. Highlight information using an alternate Line Spacing. Organize information using Draw Table. End pages using Page Break.
  • 5.
    My Document I’vegot a science quiz that only looks OK. I’d like to clean it up so that it is more user friendly for the student.
  • 6.
  • 7.
    Header & FooterHeaders and footers provide information that shows up on every page in a document. Headers and footers can be used together, but one can be used independently of the other. You can use headers and footers to identify the document, the writer, the date, page numbers. Whatever you would like to show up on every page can be put into a header or footer.
  • 8.
    Header & Footer– Example Here is a header and footer I used on an assignment that I made for Algebra. The data in gray will show up on every page. Header Footer
  • 9.
    Header & Footer – How To Click on the View menu found at the top of the screen. Click on Header and Footer.
  • 10.
    Header & Footer – How To Header and footer sections will open with a small Header and Footer menu. The Header and Footer menu moves from the header to footer sections as you scroll from one to another.
  • 11.
    Header & Footer – How To To enter text, move the cursor to the section header or footer section and enter the text. Within the header or the footer, you can align text or change the font face and size. You can even change the right and left margins.
  • 12.
    Header & Footer – How To I’m going to put the quiz title in the header: I’ll put my name and the year in the footer so I’ll know what year I last modified the quiz.
  • 13.
  • 14.
    Page Numbers Pagenumbers can be inserted into the headers or the footers.
  • 15.
  • 16.
    Page Numbers –How To To insert a page number in a header or footer, move the cursor to the spot where you want the page number. On the Header and Footer menu, click on the white button that has a # sign. This inserts the page number.
  • 17.
    Page Numbers –How To When you are finished with the header and footer, click on the close button on the menu. The menu will close and your cursor will be back in the body of your text. Now my document’s pages will all be numbered within the footer.
  • 18.
  • 19.
    Bullets & NumberingBulleted or numbered lists make your documents more readable and visually interesting. You can quickly add bullets or numbers to existing lines of text, or Word can automatically create lists as you type.
  • 20.
  • 21.
    Bullets & Numbering – Example The Bullets and Numbering Menu offers several choices. Bullets or numbering will work for your needs most of the time.
  • 22.
    Bullets & Numbering – How To To insert bullets or numbers after you have typed the text: Highlight the text you want to bullet or number. Click on the Format menu found at the top of the page. Choose Bullets and Numbering.
  • 23.
    Bullets & Numbering – How To When the Bullets and Numbers menu pops up, choose one. Then click on a box that best fits your material. Then click OK.
  • 24.
    Bullets & Numbering – How To I’ve got a couple of areas that could use numbers or bullets. This section really needs some numbering. After adding the numbers, it looks like this:
  • 25.
    Bullets & Numbering – How To The short answer section could be bulleted. Before the bullets: After the bullets:
  • 26.
  • 27.
    Line Spacing Youcan change the spacing between the lines or the spacing before or after each paragraph.
  • 28.
    Line Spacing –Example Single Double 1.5
  • 29.
    Line Spacing –How To Select the text where you want to change the spacing. Click the Line Spacing Button. Then choose the spacing you would like to use. While the text is highlighted, you can try several different spacings.
  • 30.
    Line Spacing –How To These section needs more room between the numbered items. Double spacing gives the student more room to write answers.
  • 31.
  • 32.
    Draw Table Atable is made up of rows and columns of cells that you can fill with text and graphics. Tables are often used to organize and present information. Row Column
  • 33.
  • 34.
    Draw Table –How To Move the cursor to where you want the table to begin in the document. Click on the Insert Table Button on the toolbar. Remember that your button may be in a different place than mine, but it looks the same.
  • 35.
    Draw table – How To A grid will appear when you click on the Insert Table button. You can drag your cursor to select the number of rows and columns you want.
  • 36.
    Draw Table –How To The Insert Table button works great for tables up to 4 rows and 5 columns. For bigger tables, you can use the Table Menu. Move your cursor to where you want the table to begin in the document. Click on the Table Menu at the top of the page.
  • 37.
    Draw Table –How To Click on Draw Table. A new menu will appear called Tables and Borders.
  • 38.
    Draw Table –How To Click on the button that looks like a a table. Now you get a menu that allows you to choose how many rows and columns you want.
  • 39.
    Draw Table –How To In my quiz, I have some information that a table will help to organize. I tried to organize it using my tab button, but when I changed my margins, it didn’t stay in place.
  • 40.
    Draw Table –How To Since I’ve already got the information typed, I can draw the table and cut and paste the material or I can just retype it into the table. before after
  • 41.
  • 42.
    Page Break Whenyou fill a page with text, Word inserts an automatic page break and starts a new page. To force a page break at a specific location, you can insert a manual page break. You may want to do this to ensure that certain information stays together.
  • 43.
    Page Break –Example This is a sub plan I left. These pages run together. This is the same sub plan with page breaks, and it’s much easier for the sub to read.
  • 44.
    Page Break –How To To insert a page break, position the cursor where you want the new page to begin. Click Insert in the toolbar menu. Choose Break.
  • 45.
    Page Break –How To A Break Menu will appear. Choose Page Break. Click OK. The pages separate at the proper place.
  • 46.
    Page Break –How To I want my page to break before the table. Right now the table is split between two pages which will be awkward for the student.
  • 47.
    Page Break –How To I put a page break in before the table. Now the table is all on one page.
  • 48.
  • 49.
    Review In Module3, you learned how to: Add repeating information to the Header and Footer . Insert Page Numbers into the footer . Use Bullets and Numbering to organize information. Change the Line Spacing Put data into a table Draw Table. End pages where you want using Page Break .