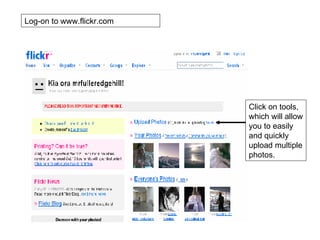
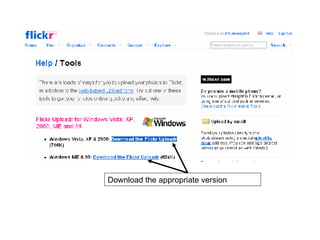
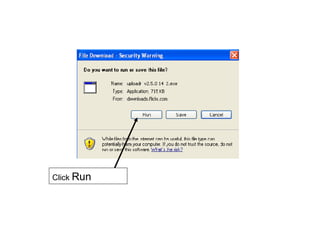
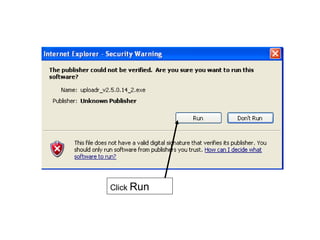
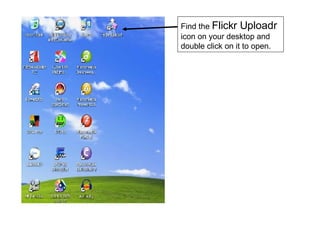
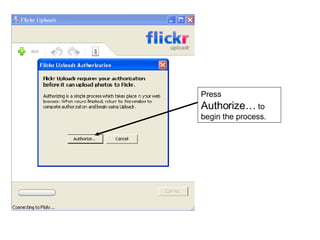
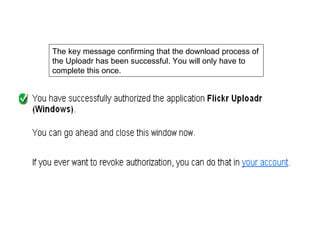
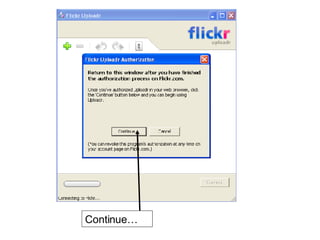
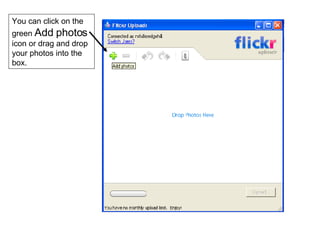
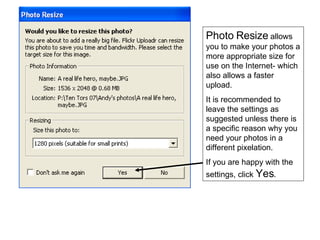
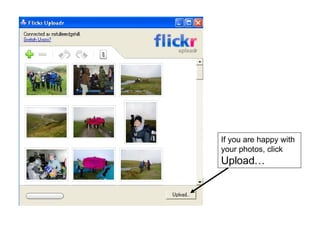
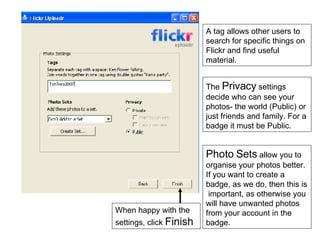
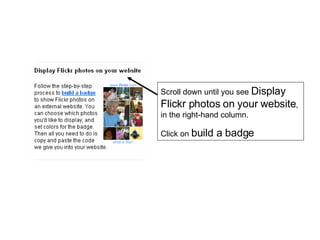
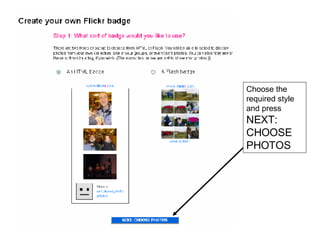
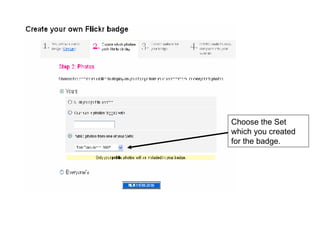
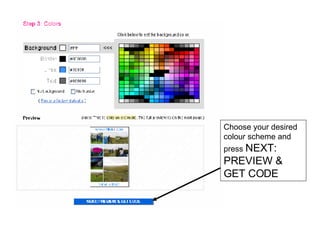
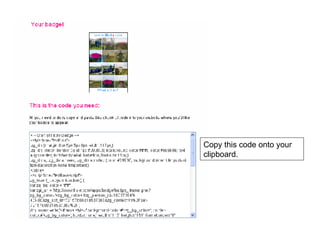
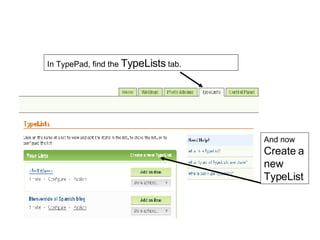
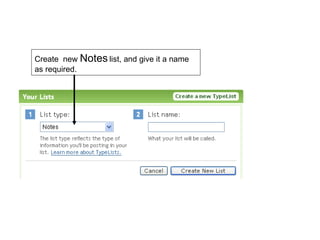
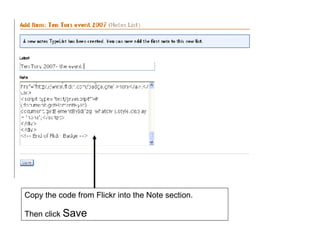
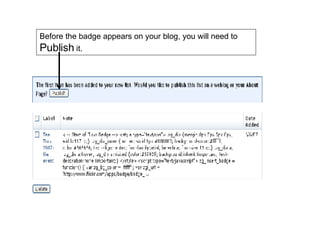
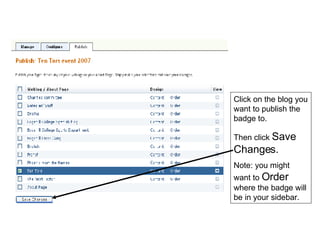
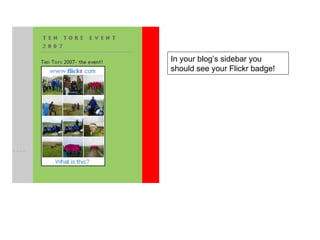
How to create a Notes TypeList using Flickr
Log-on to www.flickr.com Click on tools, which will allow you to easily and quickly upload multiple photos.
Download the appropriate version
Click  Run
Click  Run
Click  Next >
Choose an appropriate destination in your files, and then click  Next >
If you are happy with the recommended settings, click  Install .
Installation complete, press  Finish
Find the  Flickr Uploadr  icon on your desktop and double click on it to open.
Press  Authorize…  to begin the process.
The key message confirming that the download process of the Uploadr has been successful. You will only have to complete this once.
Continue…
You can click on the green  Add photos  icon or drag and drop your photos into the box.
Photo Resize  allows you to make your photos a more appropriate size for use on the Internet- which also allows a faster upload. It is recommended to leave the settings as suggested unless there is a specific reason why you need your photos in a different pixelation. If you are happy with the settings, click  Yes .
If you are happy with your photos, click  Upload…
A tag allows other users to search for specific things on Flickr and find useful material. The  Privacy  settings decide who can see your photos- the world (Public) or just friends and family. For a badge it must be Public. Photo Sets  allow you to organise your photos better. If you want to create a badge, as we do, then this is  important, as otherwise you will have unwanted photos from your account in the badge. When happy with the settings, click  Finish
Indicates progress in the Upload.
Indicates a successful upload. Click  Done
Back in the main Flickr page, click on  tools  again.
Scroll down until you see  Display Flickr photos on your website , in the right-hand column. Click on  build a badge
Choose the  required style and press  NEXT: CHOOSE PHOTOS
Choose the Set which you created for the badge.
Choose your desired colour scheme and press  NEXT: PREVIEW & GET CODE
Copy this code onto your clipboard.
In TypePad, find the  TypeLists  tab. And now  Create a new TypeList
Create  new  Notes  list, and give it a name as required.
Copy the code from Flickr into the Note section. Then click  Save
Before the badge appears on your blog, you will need to  Publish  it.
Click on the blog you want to publish the badge to. Then click  Save Changes. Note: you might want to  Order  where the badge will be in your sidebar.
In your blog’s sidebar you should see your Flickr badge!

Flickr

  • 1.
    How to createa Notes TypeList using Flickr
  • 2.
    Log-on to www.flickr.comClick on tools, which will allow you to easily and quickly upload multiple photos.
  • 3.
  • 4.
  • 5.
  • 6.
  • 7.
    Choose an appropriatedestination in your files, and then click Next >
  • 8.
    If you arehappy with the recommended settings, click Install .
  • 9.
  • 10.
    Find the Flickr Uploadr icon on your desktop and double click on it to open.
  • 11.
    Press Authorize… to begin the process.
  • 12.
    The key messageconfirming that the download process of the Uploadr has been successful. You will only have to complete this once.
  • 13.
  • 14.
    You can clickon the green Add photos icon or drag and drop your photos into the box.
  • 15.
    Photo Resize allows you to make your photos a more appropriate size for use on the Internet- which also allows a faster upload. It is recommended to leave the settings as suggested unless there is a specific reason why you need your photos in a different pixelation. If you are happy with the settings, click Yes .
  • 16.
    If you arehappy with your photos, click Upload…
  • 17.
    A tag allowsother users to search for specific things on Flickr and find useful material. The Privacy settings decide who can see your photos- the world (Public) or just friends and family. For a badge it must be Public. Photo Sets allow you to organise your photos better. If you want to create a badge, as we do, then this is important, as otherwise you will have unwanted photos from your account in the badge. When happy with the settings, click Finish
  • 18.
  • 19.
    Indicates a successfulupload. Click Done
  • 20.
    Back in themain Flickr page, click on tools again.
  • 21.
    Scroll down untilyou see Display Flickr photos on your website , in the right-hand column. Click on build a badge
  • 22.
    Choose the required style and press NEXT: CHOOSE PHOTOS
  • 23.
    Choose the Setwhich you created for the badge.
  • 24.
    Choose your desiredcolour scheme and press NEXT: PREVIEW & GET CODE
  • 25.
    Copy this codeonto your clipboard.
  • 26.
    In TypePad, findthe TypeLists tab. And now Create a new TypeList
  • 27.
    Create new Notes list, and give it a name as required.
  • 28.
    Copy the codefrom Flickr into the Note section. Then click Save
  • 29.
    Before the badgeappears on your blog, you will need to Publish it.
  • 30.
    Click on theblog you want to publish the badge to. Then click Save Changes. Note: you might want to Order where the badge will be in your sidebar.
  • 31.
    In your blog’ssidebar you should see your Flickr badge!