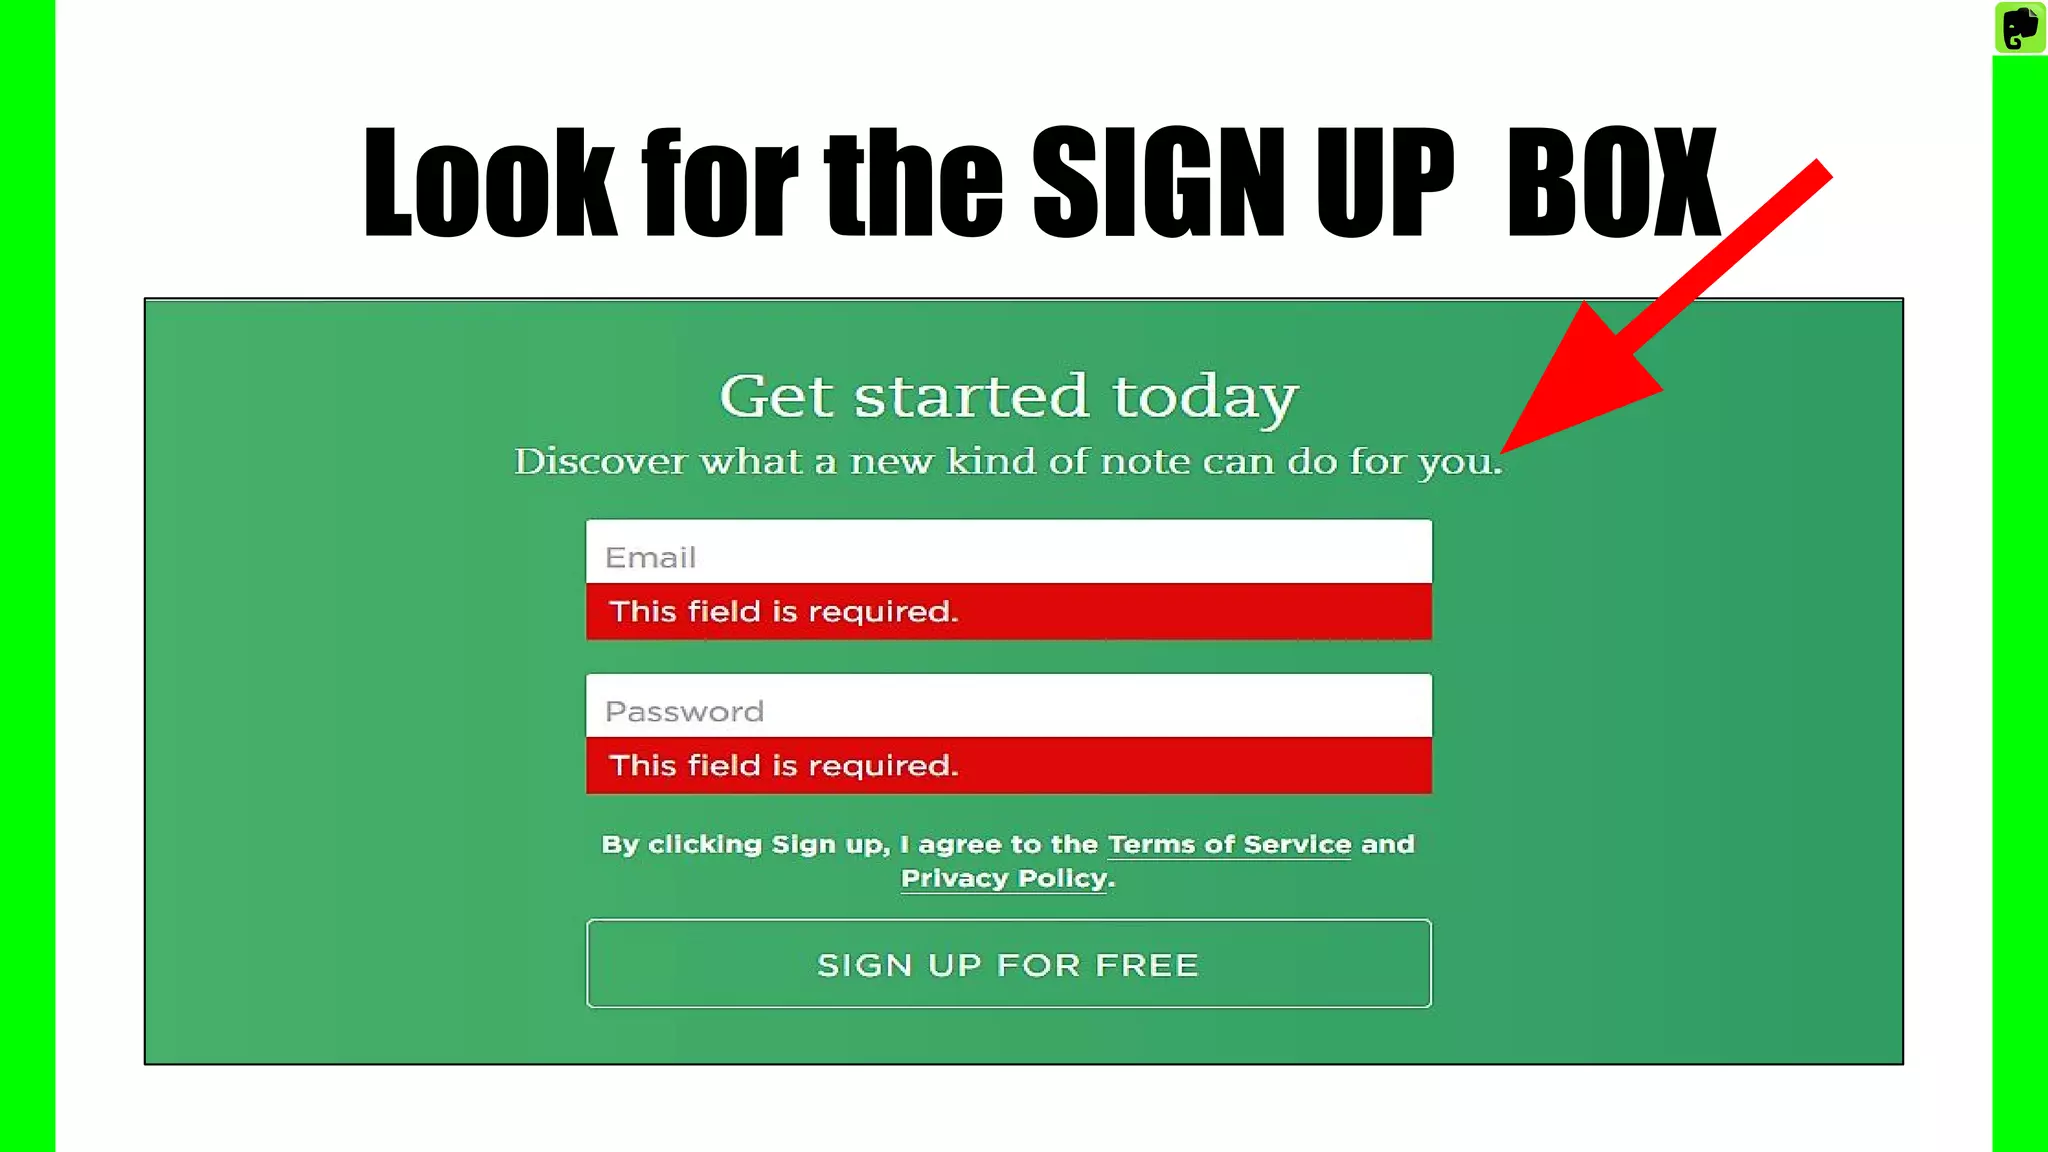
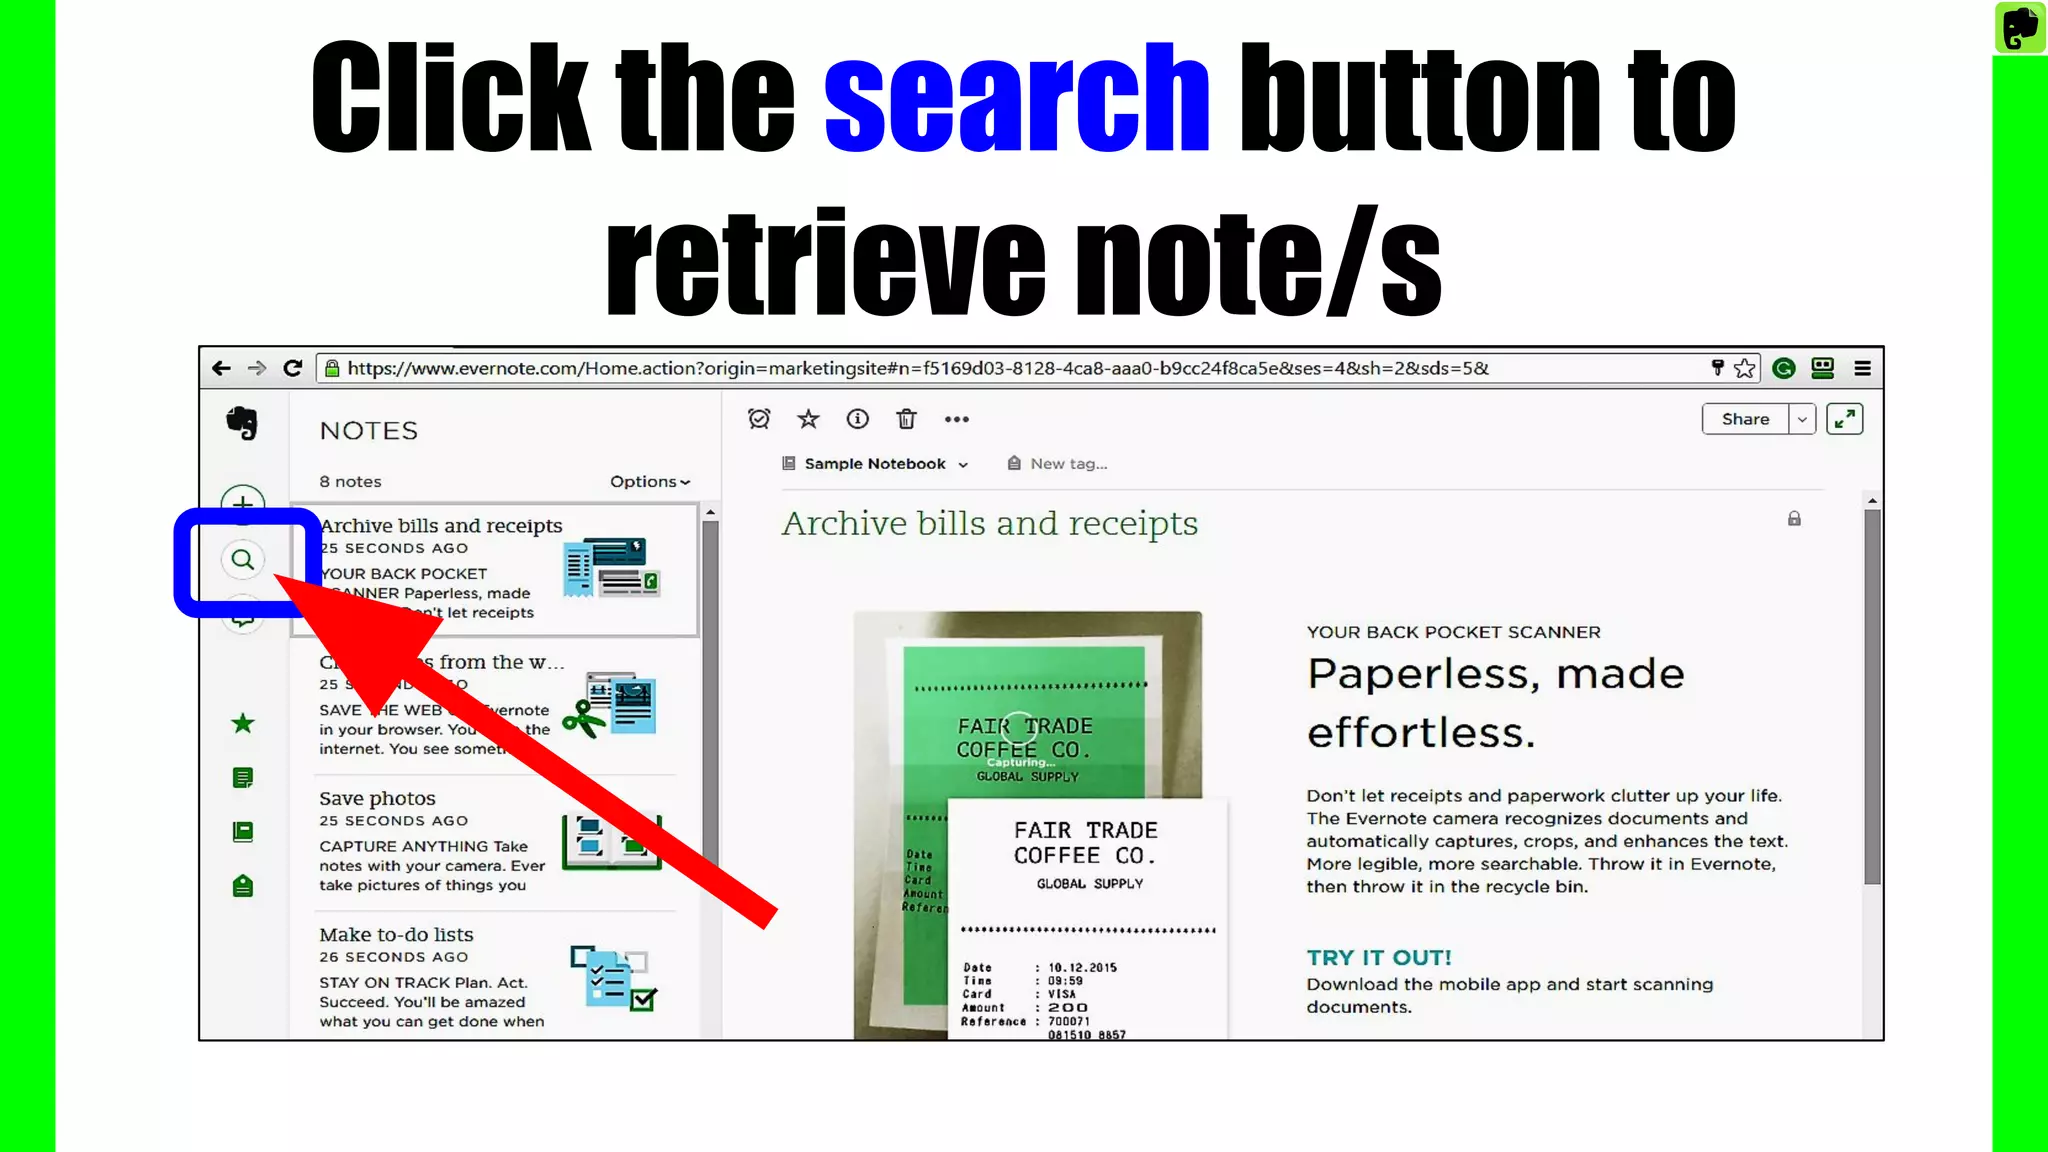
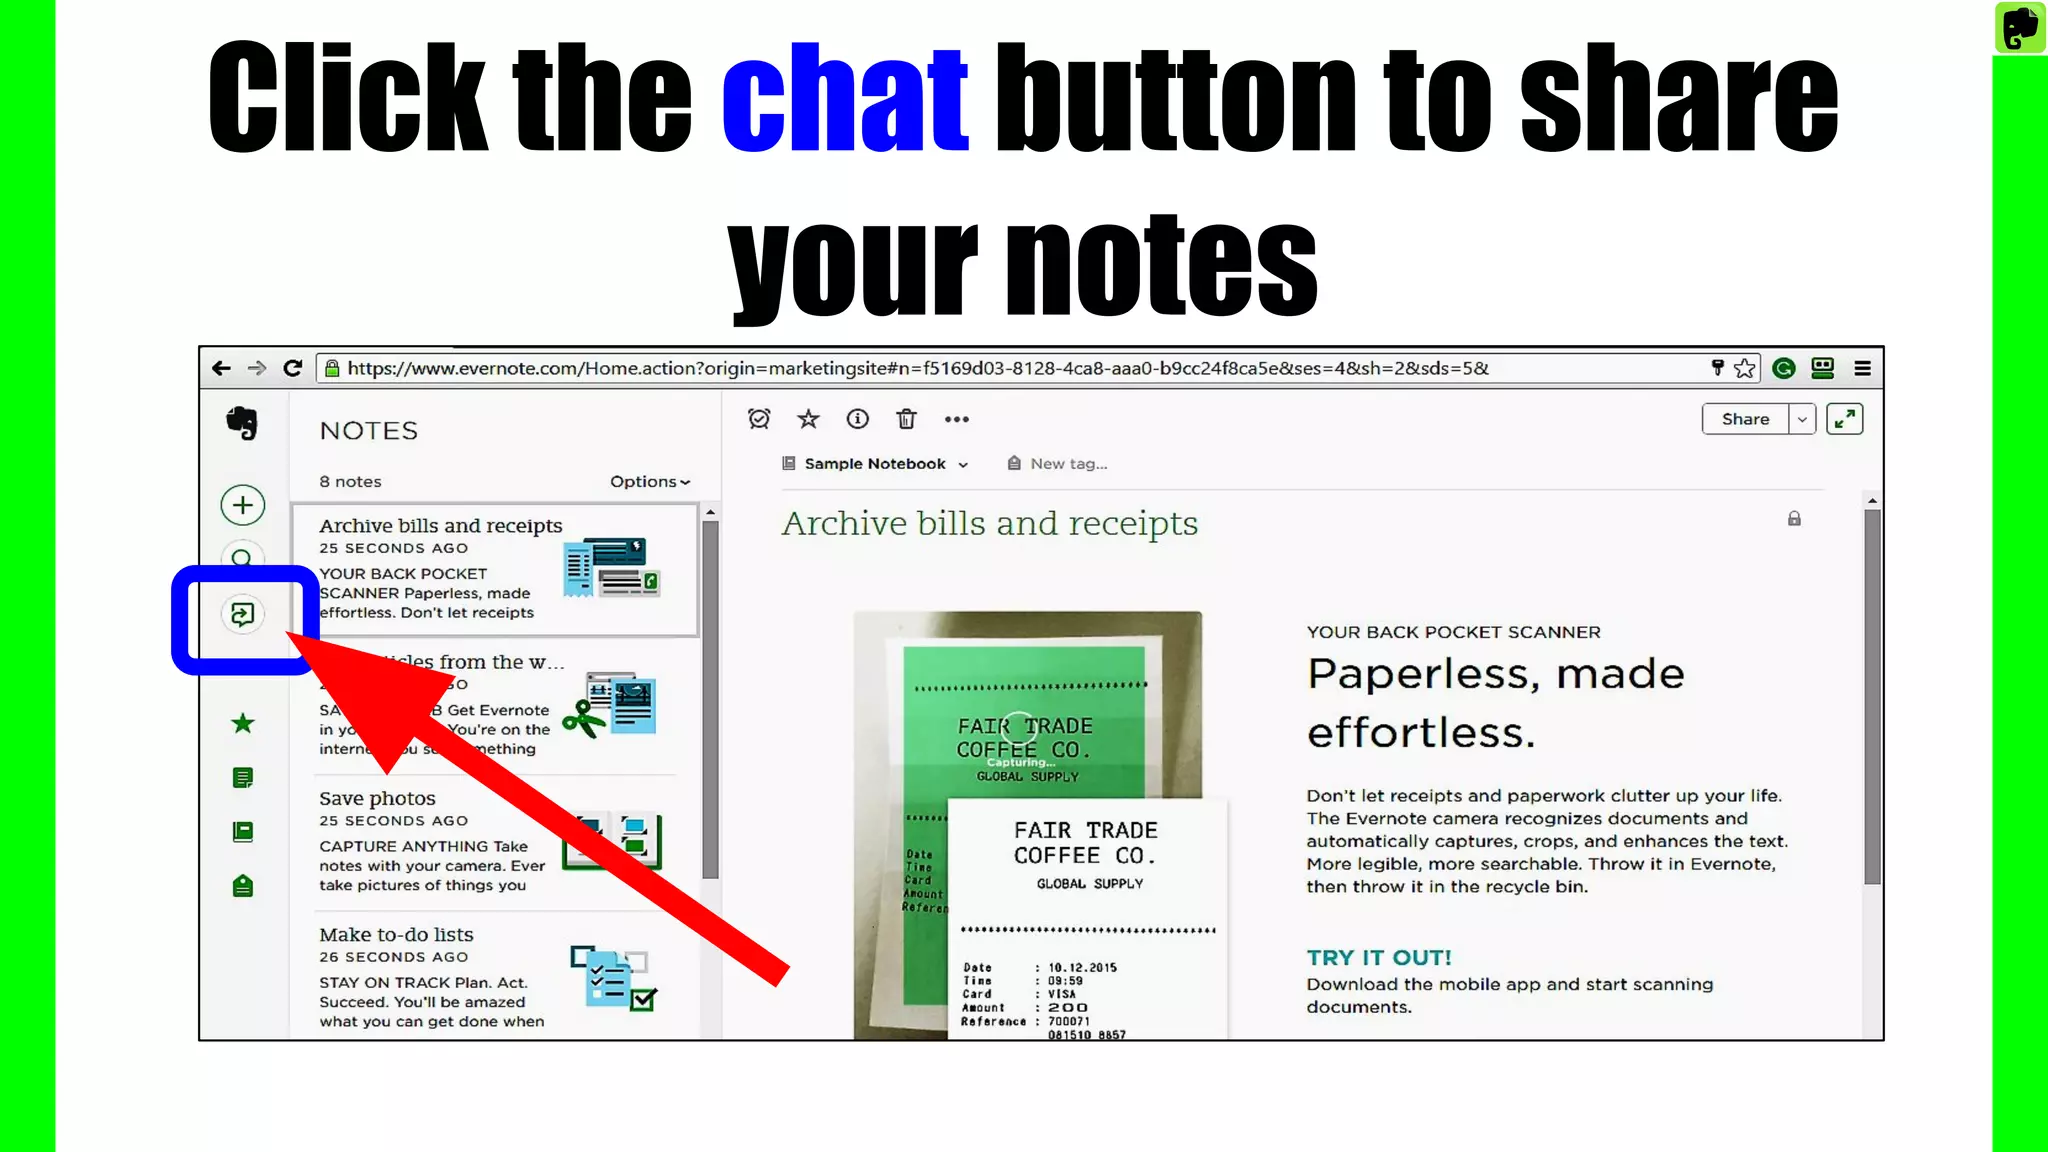
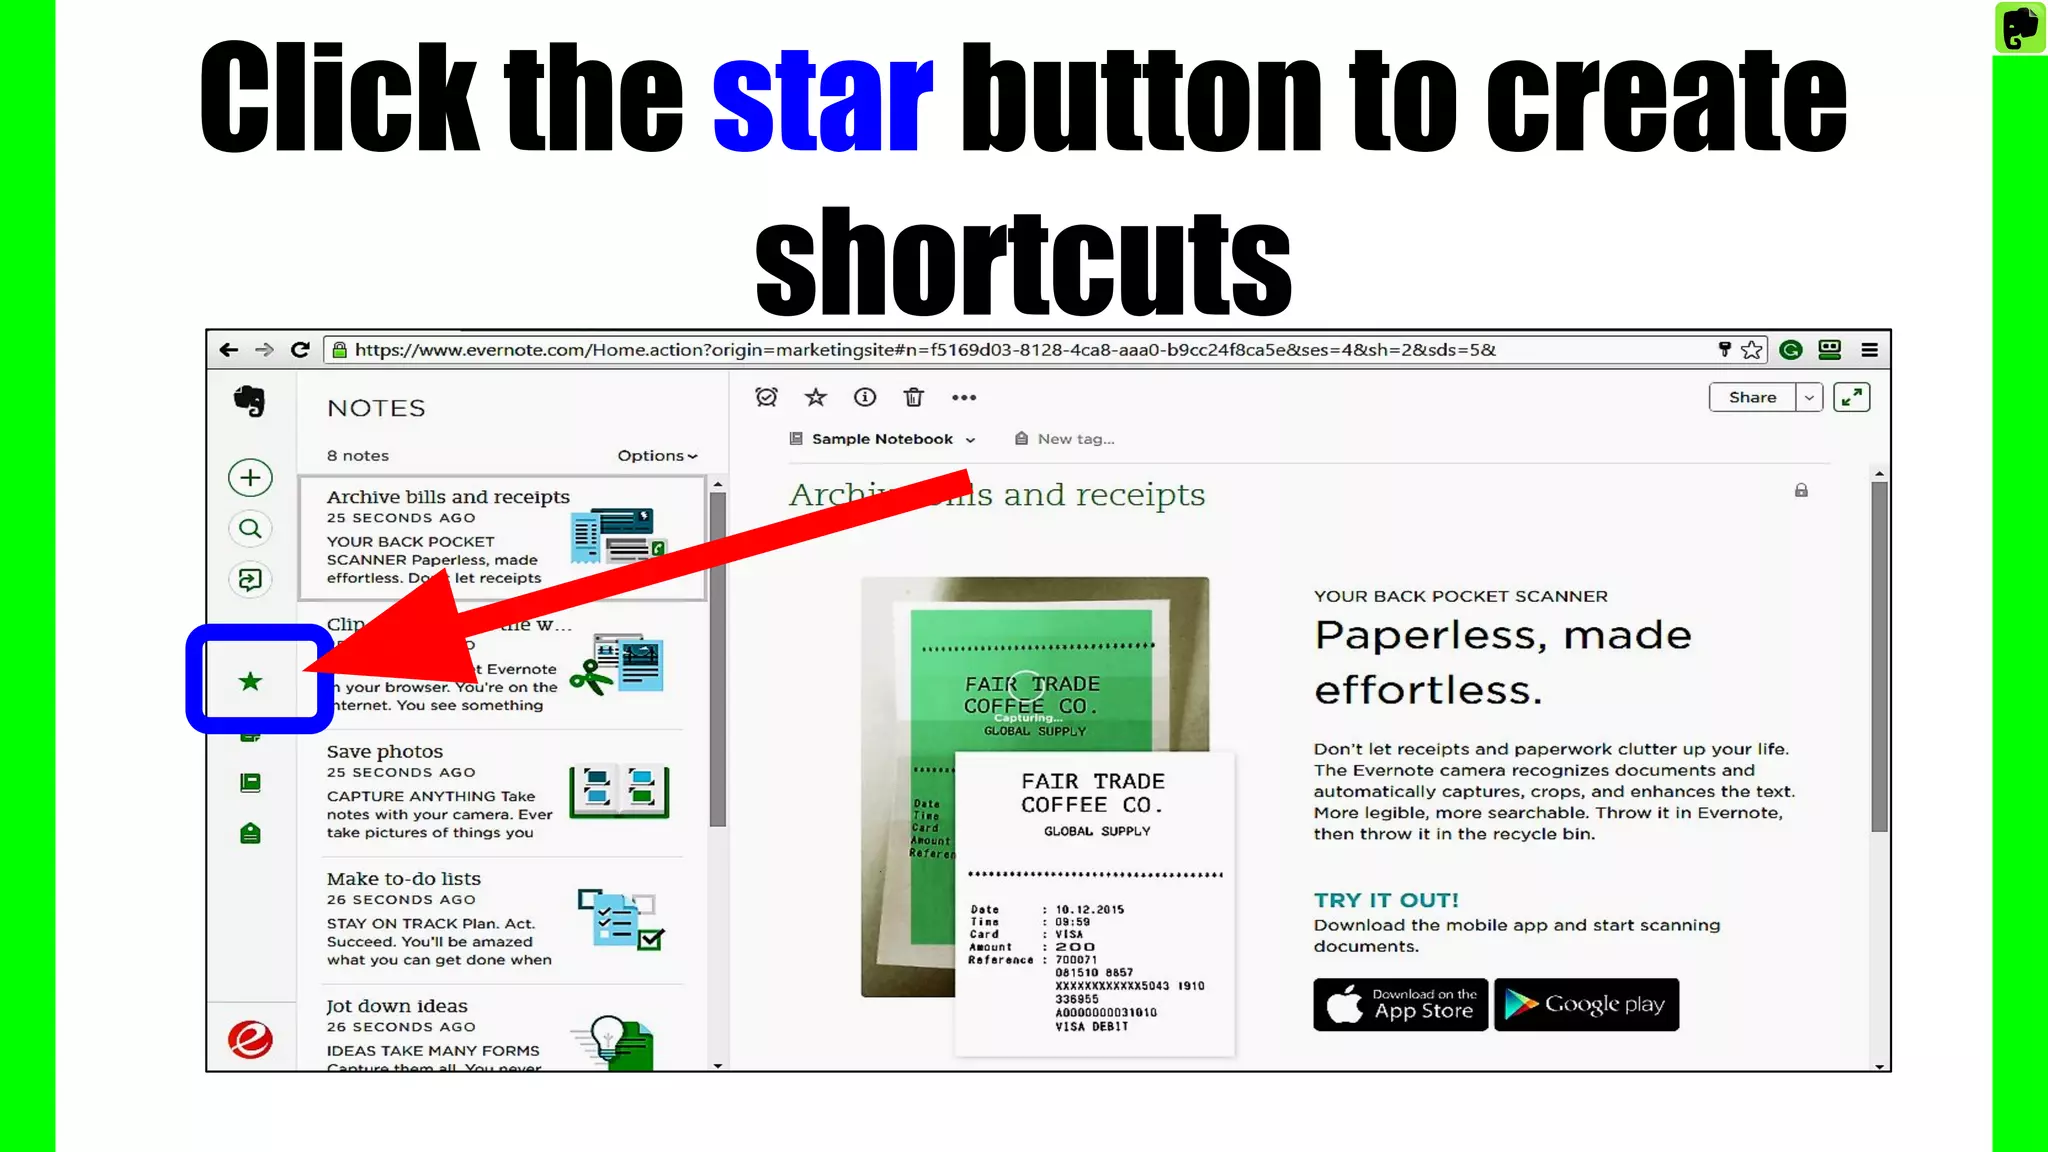
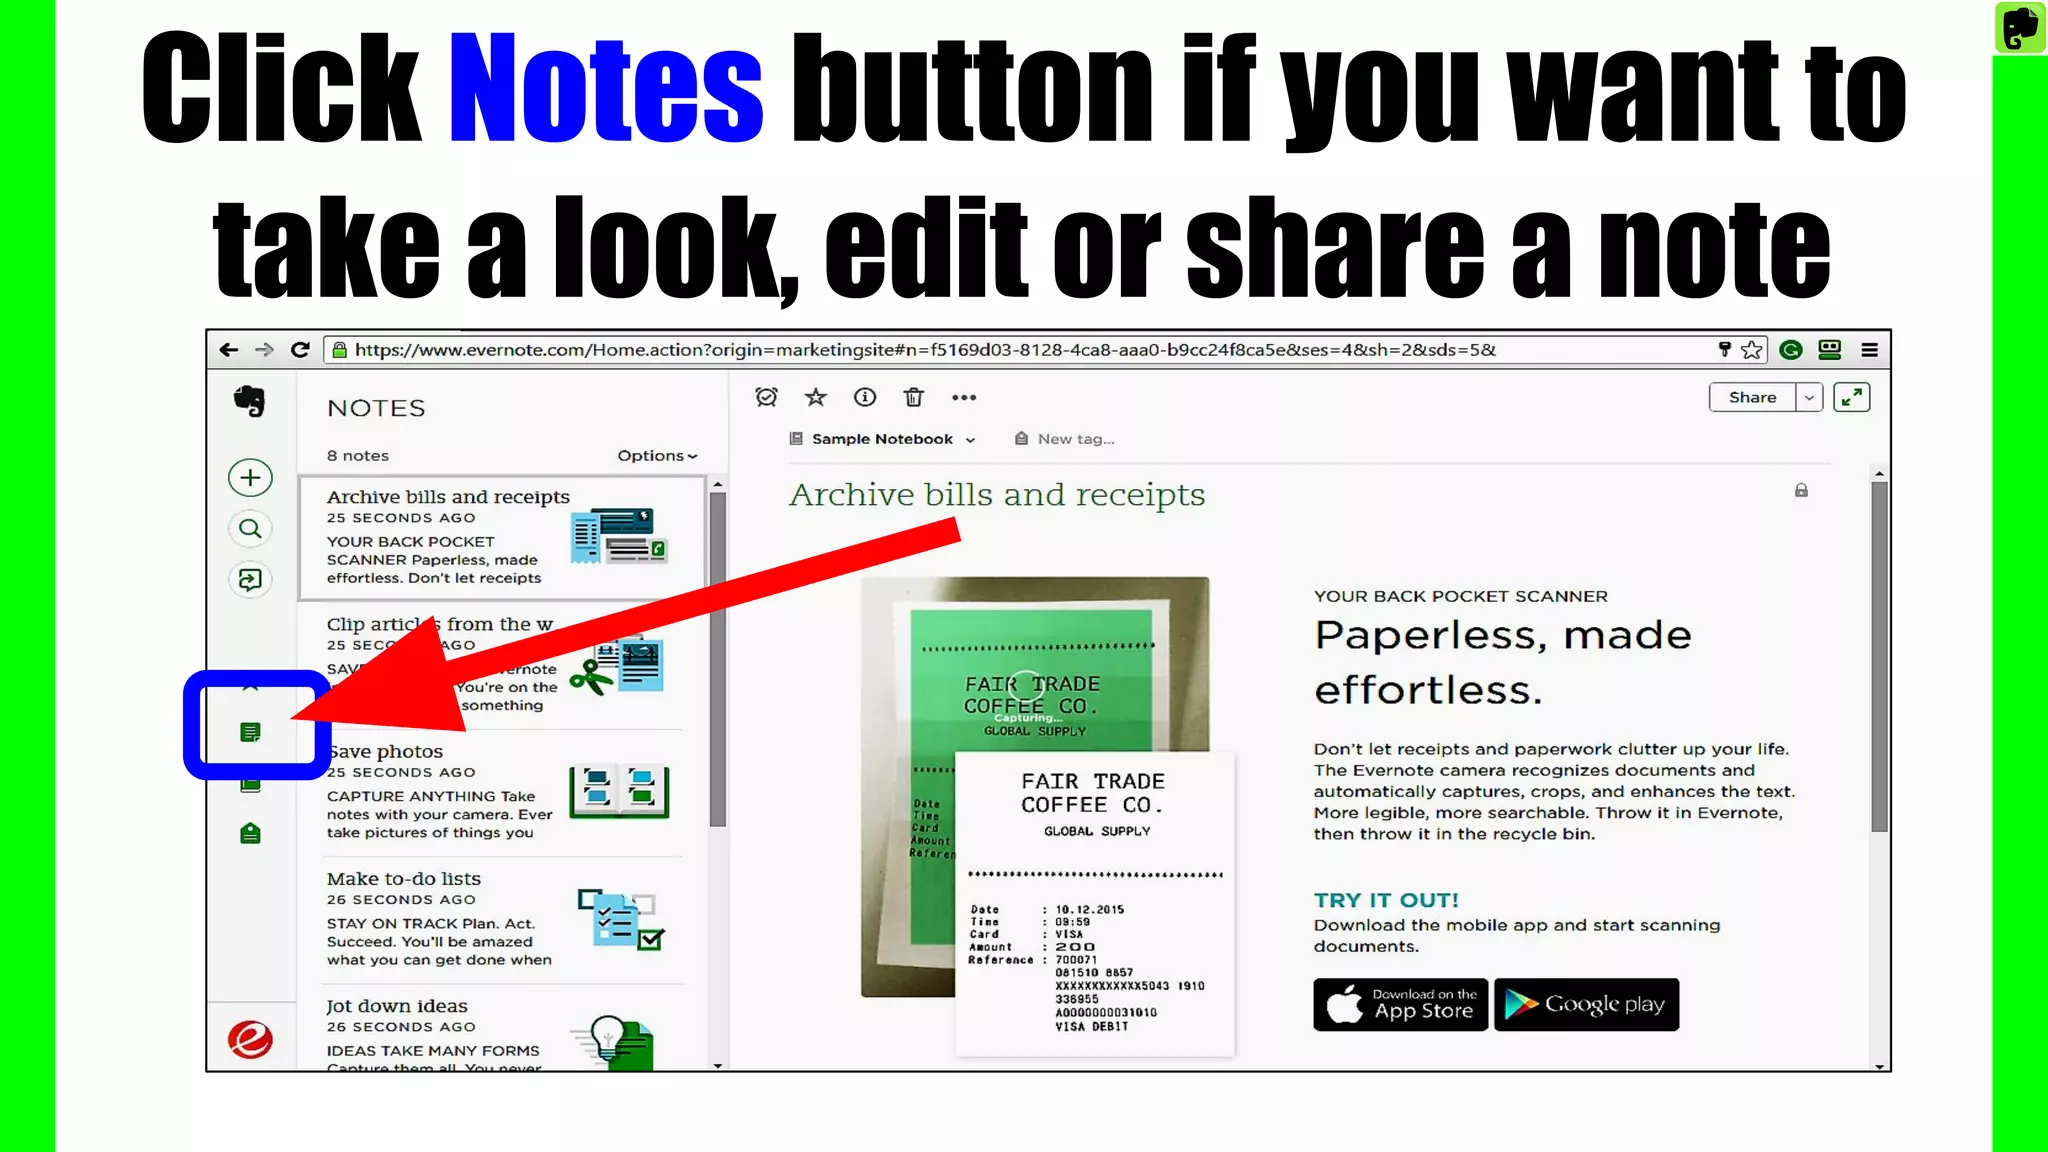
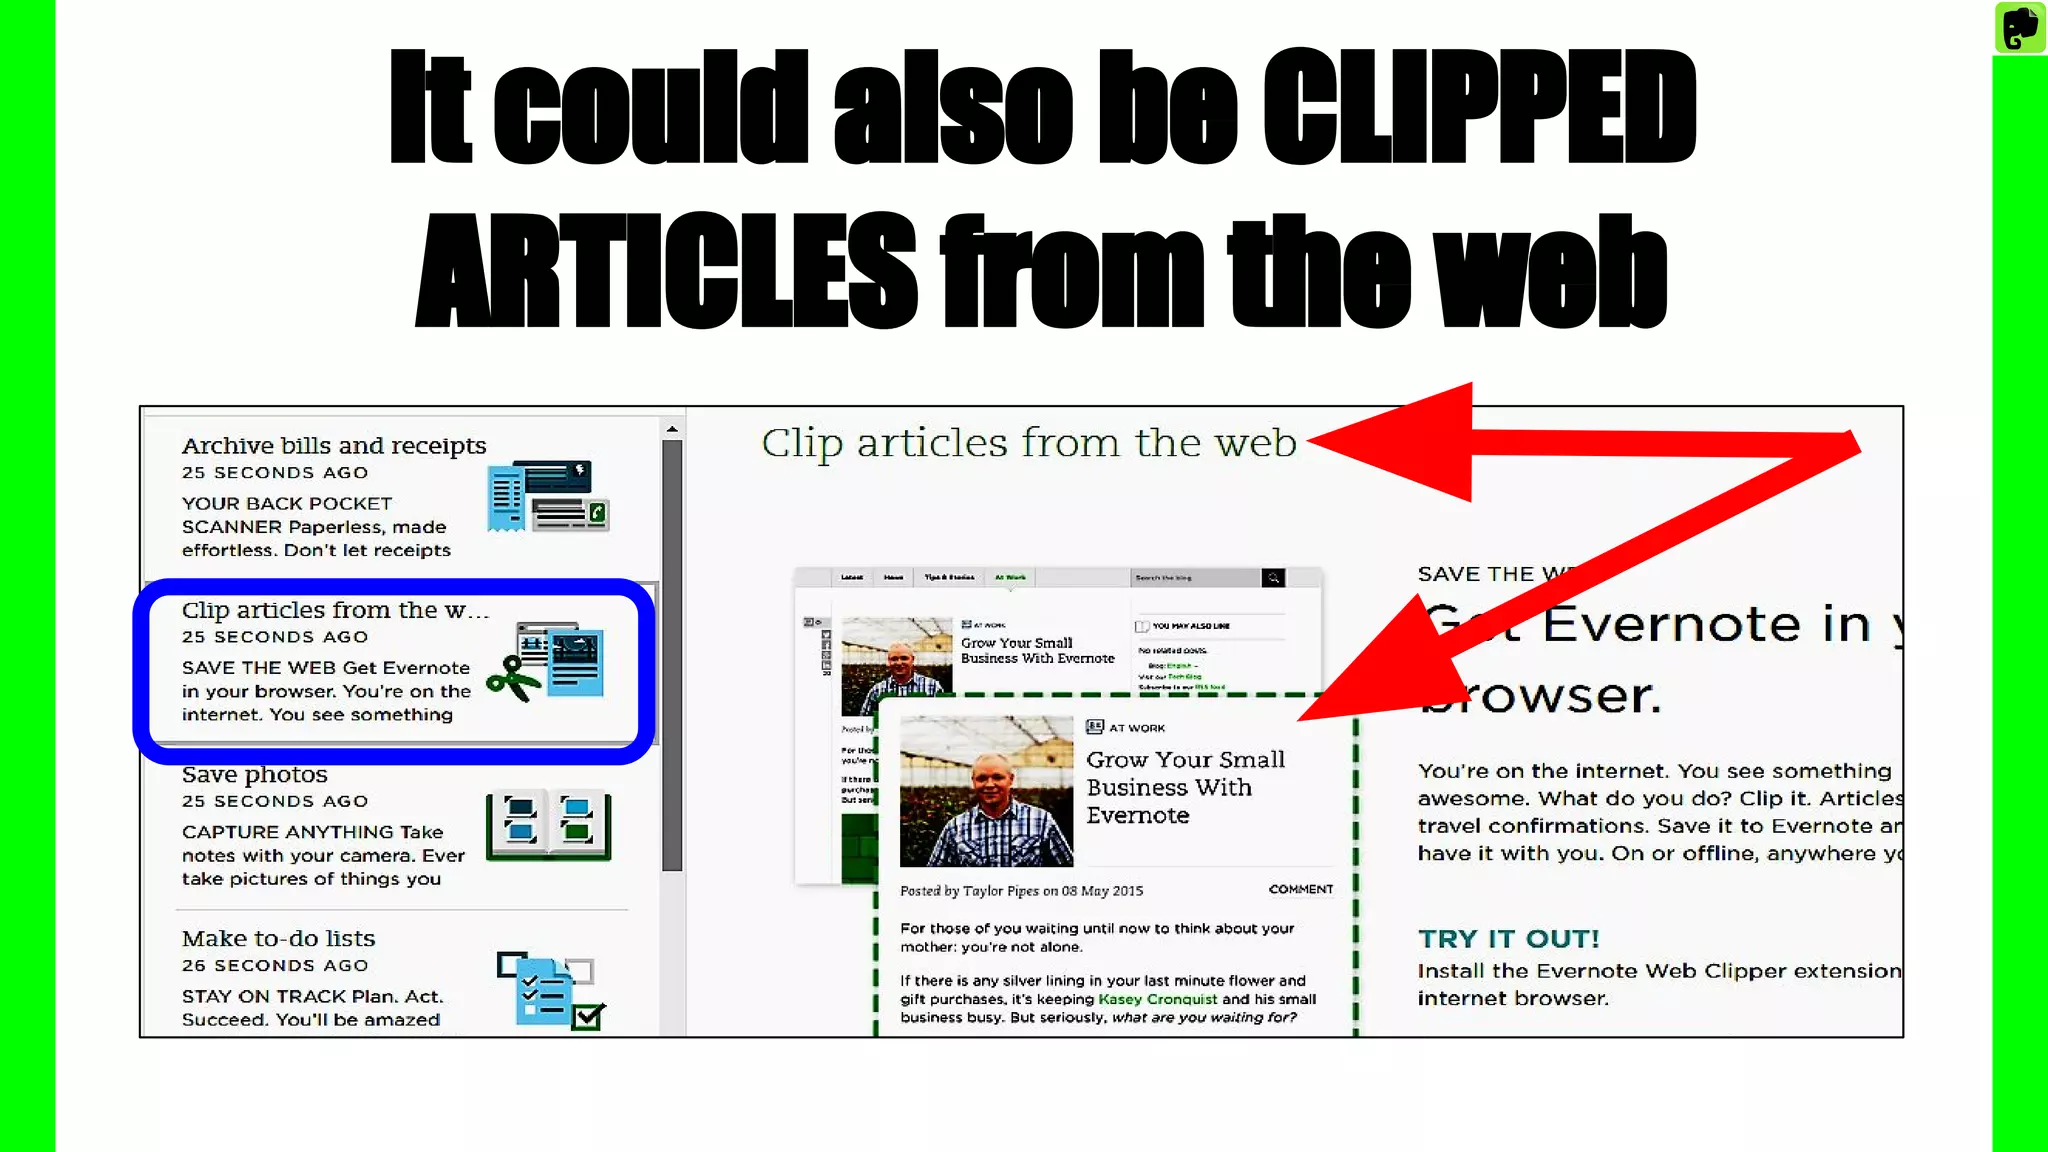
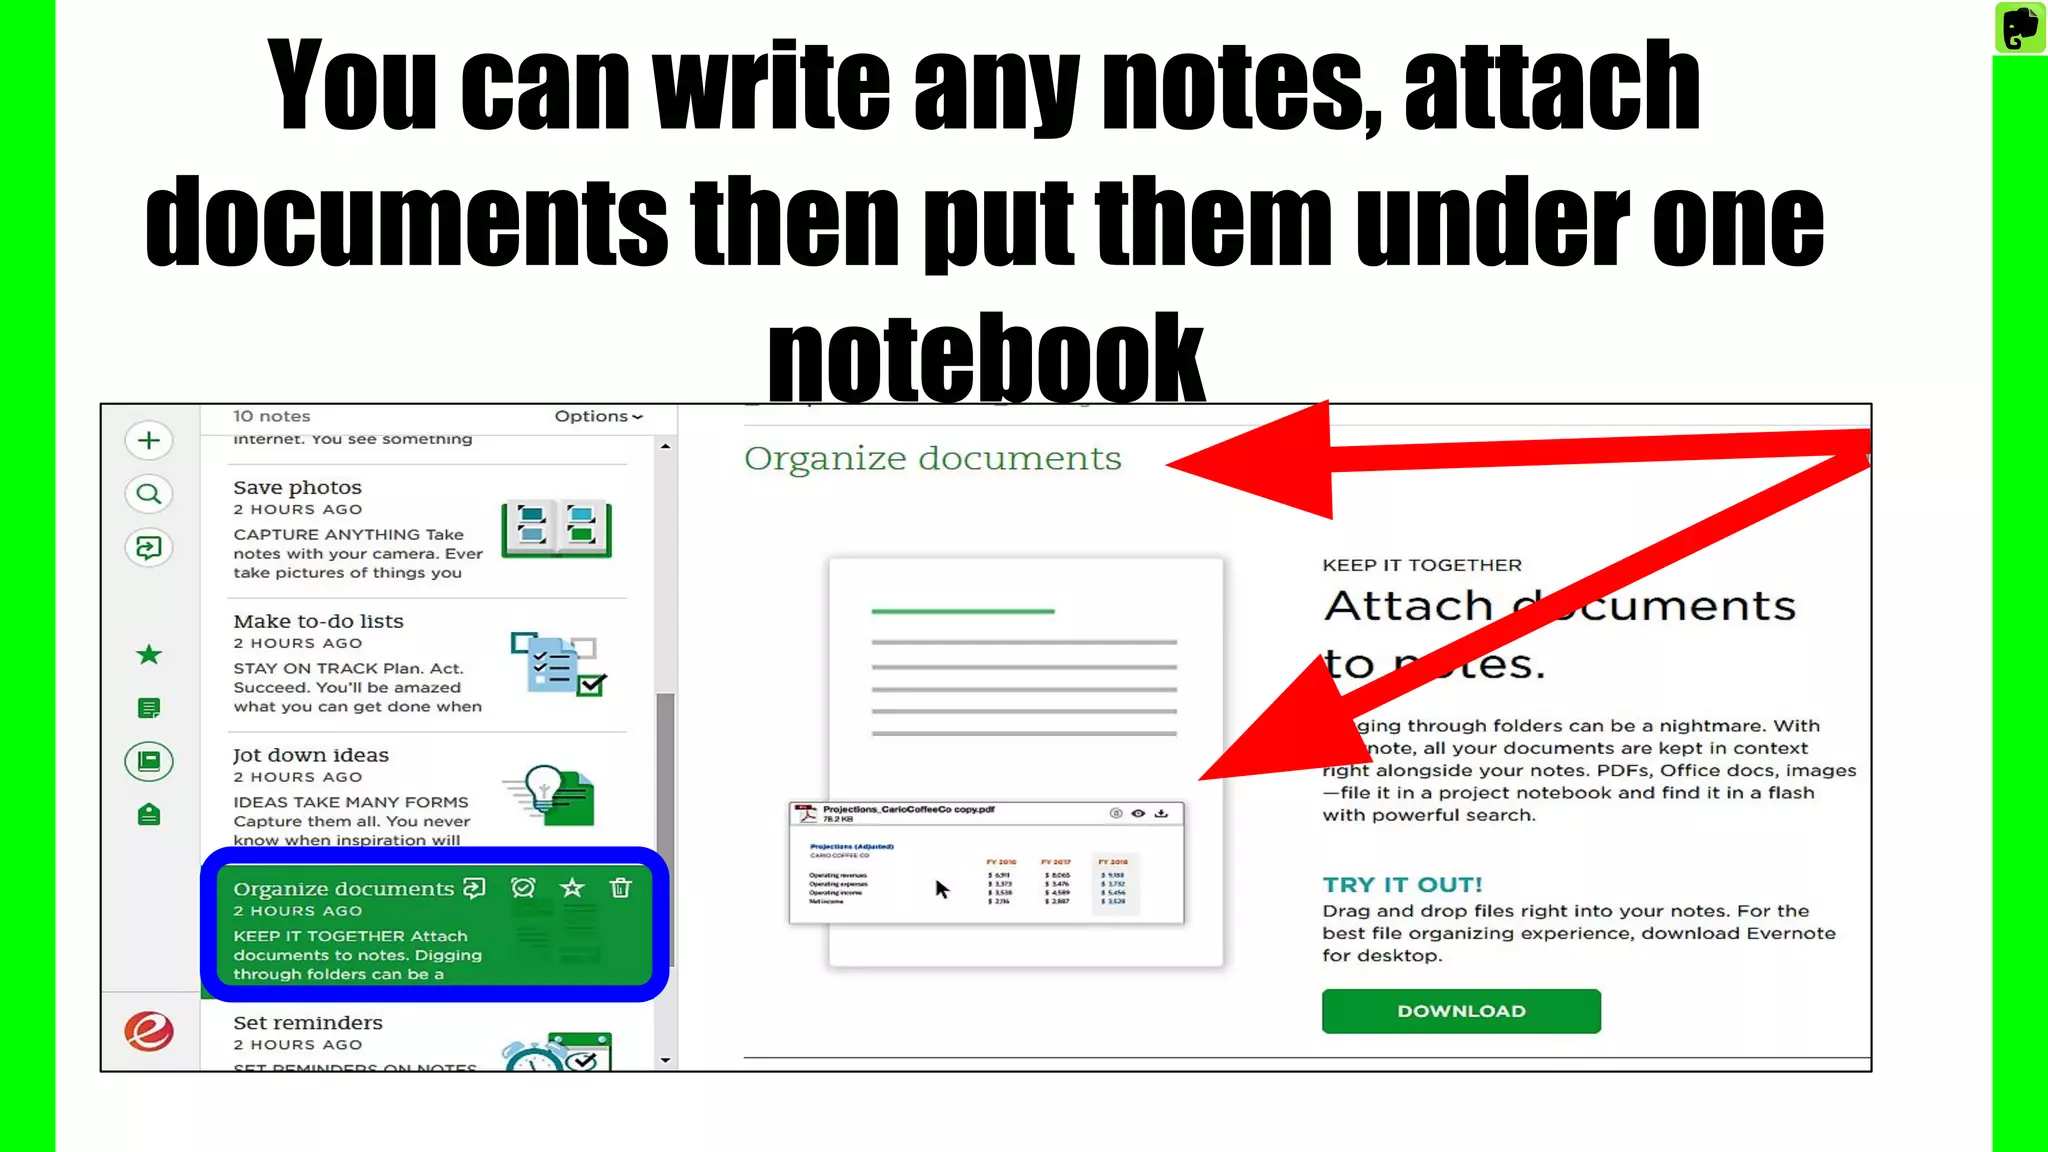
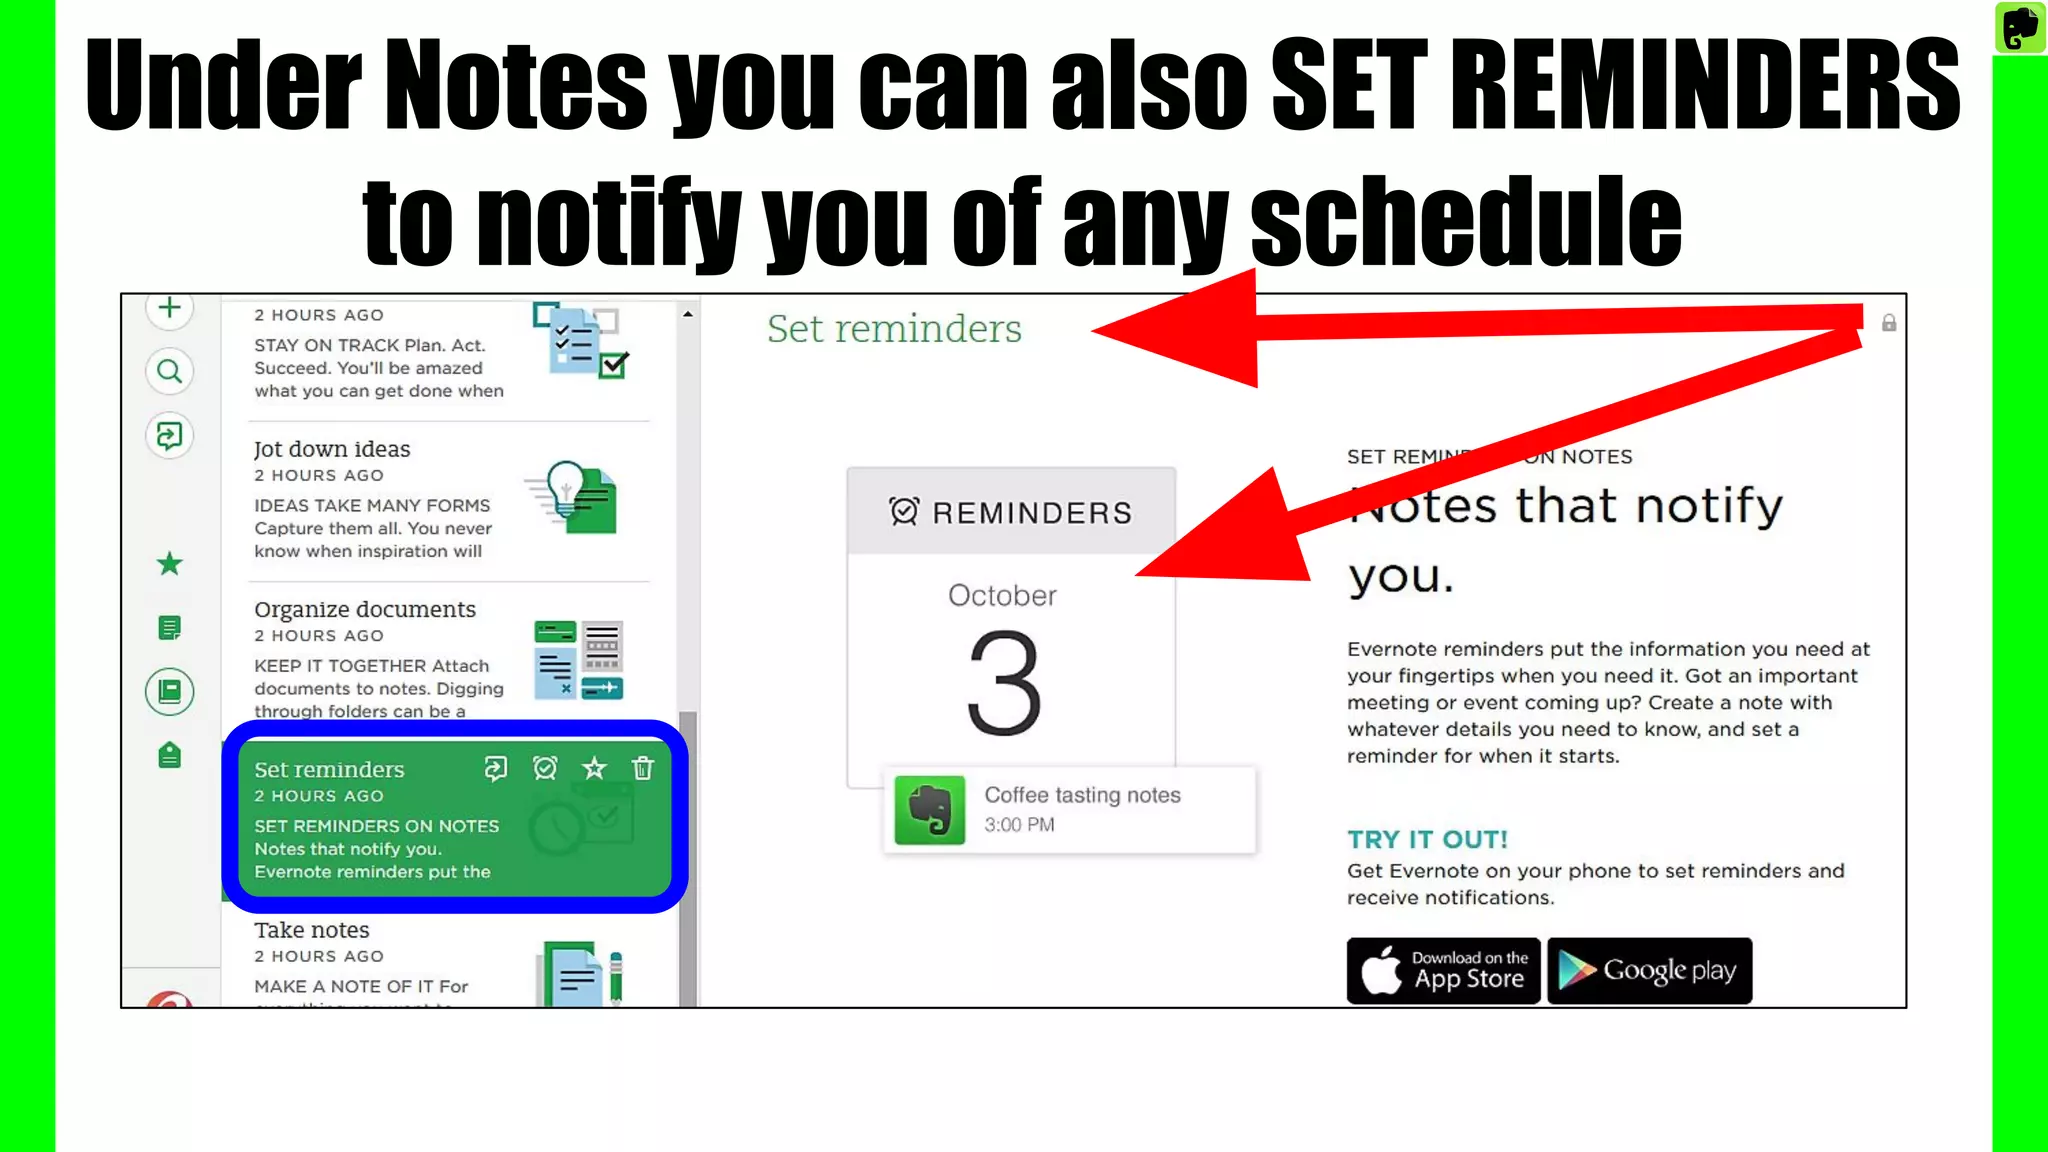
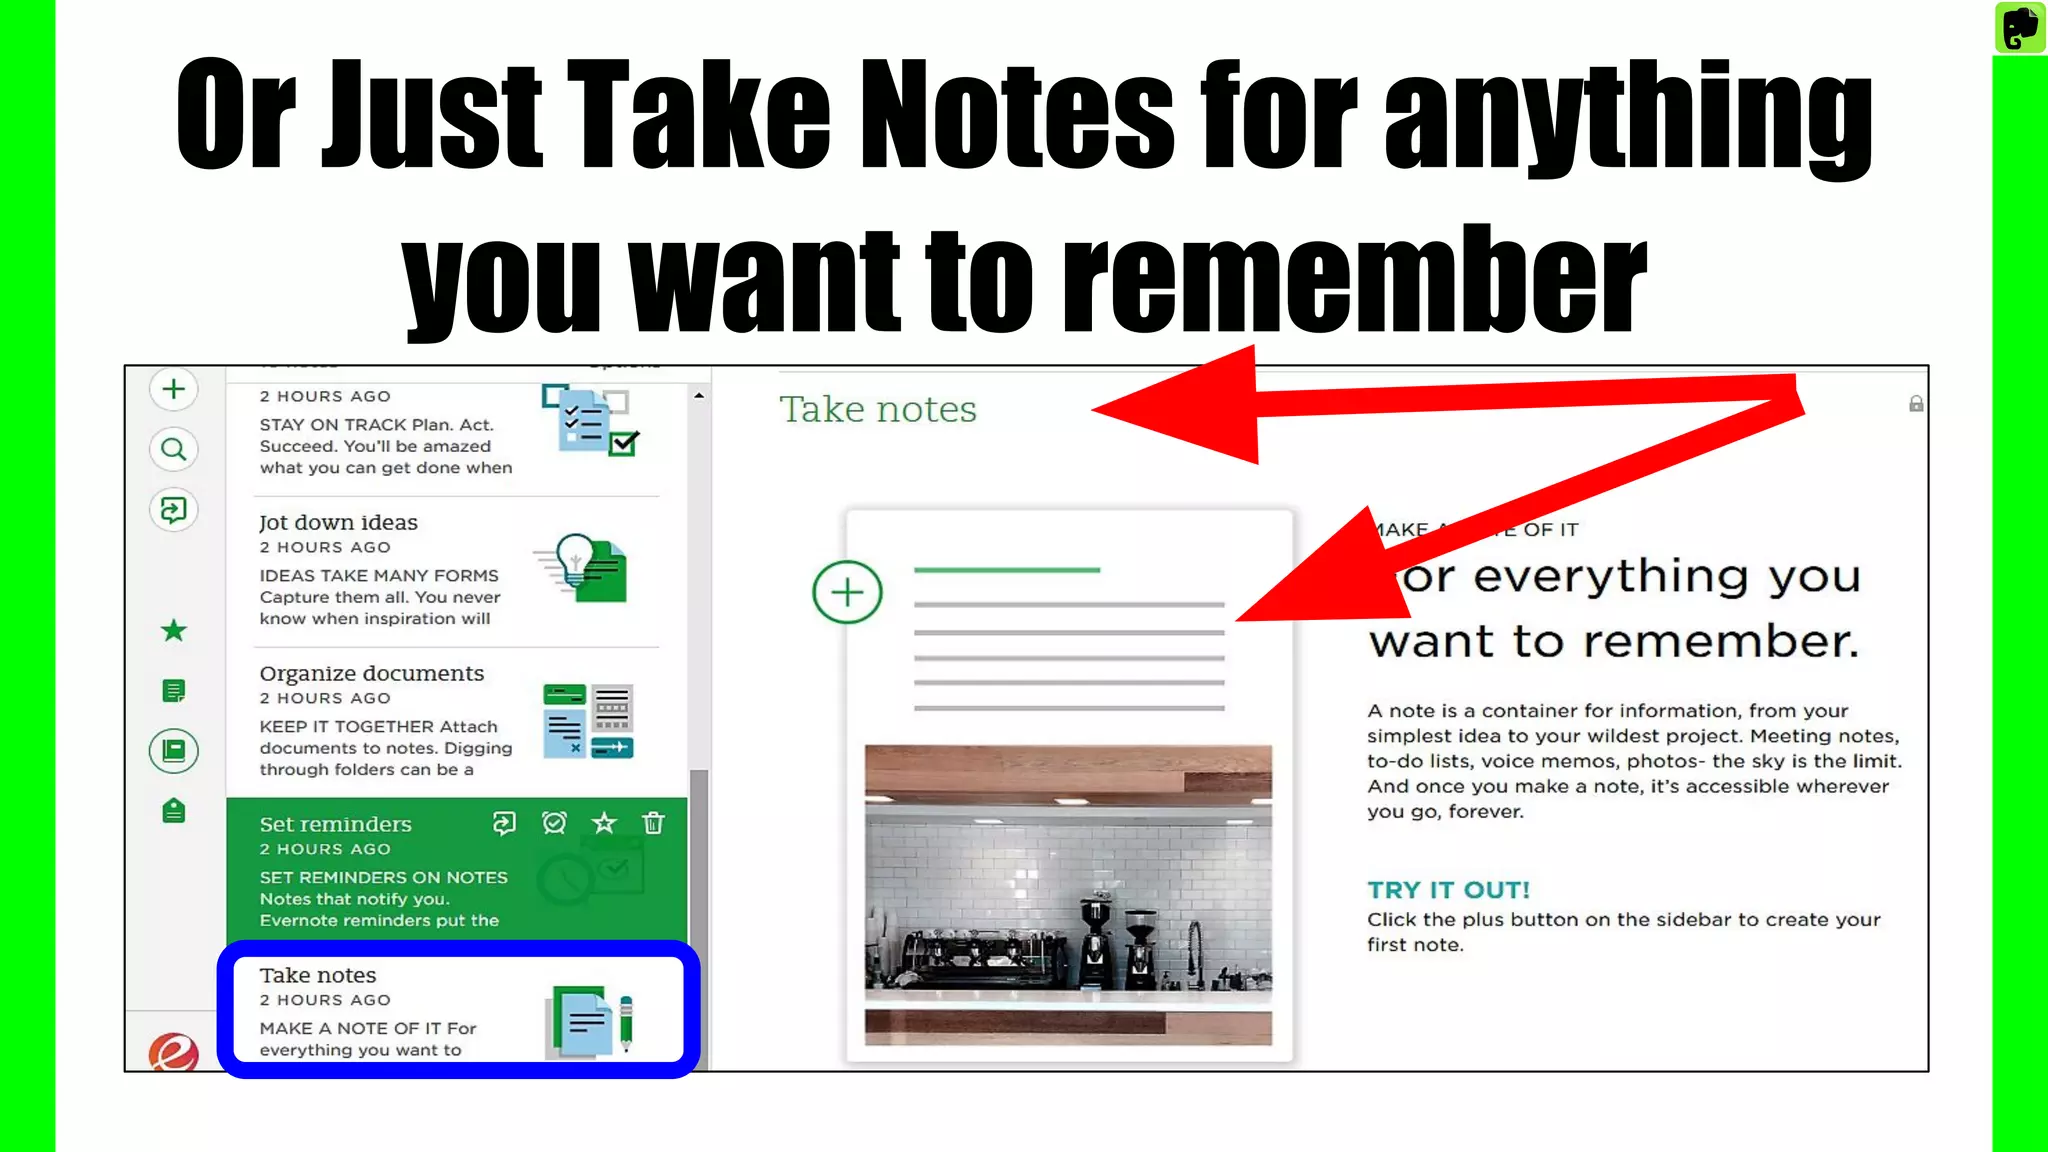
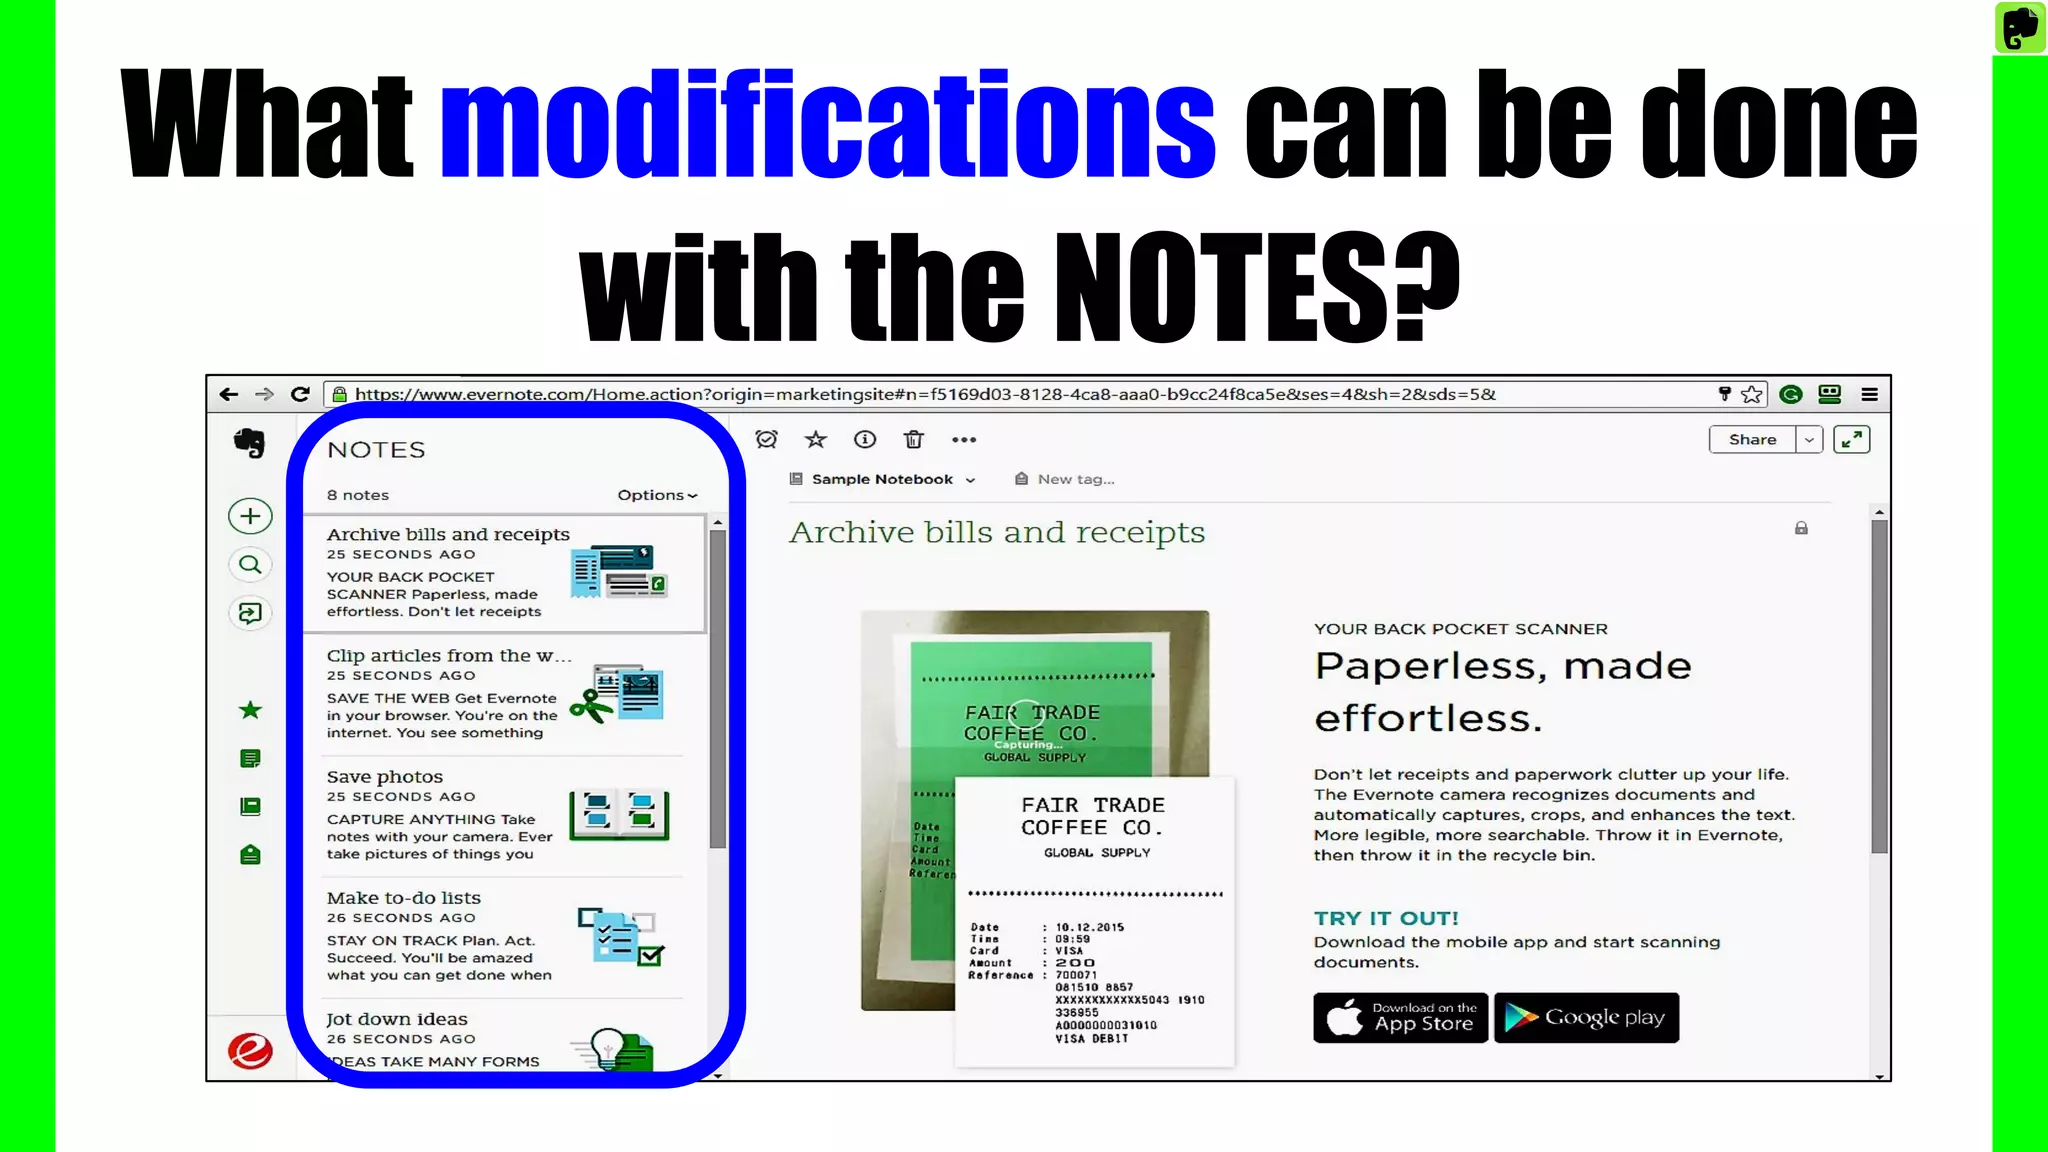
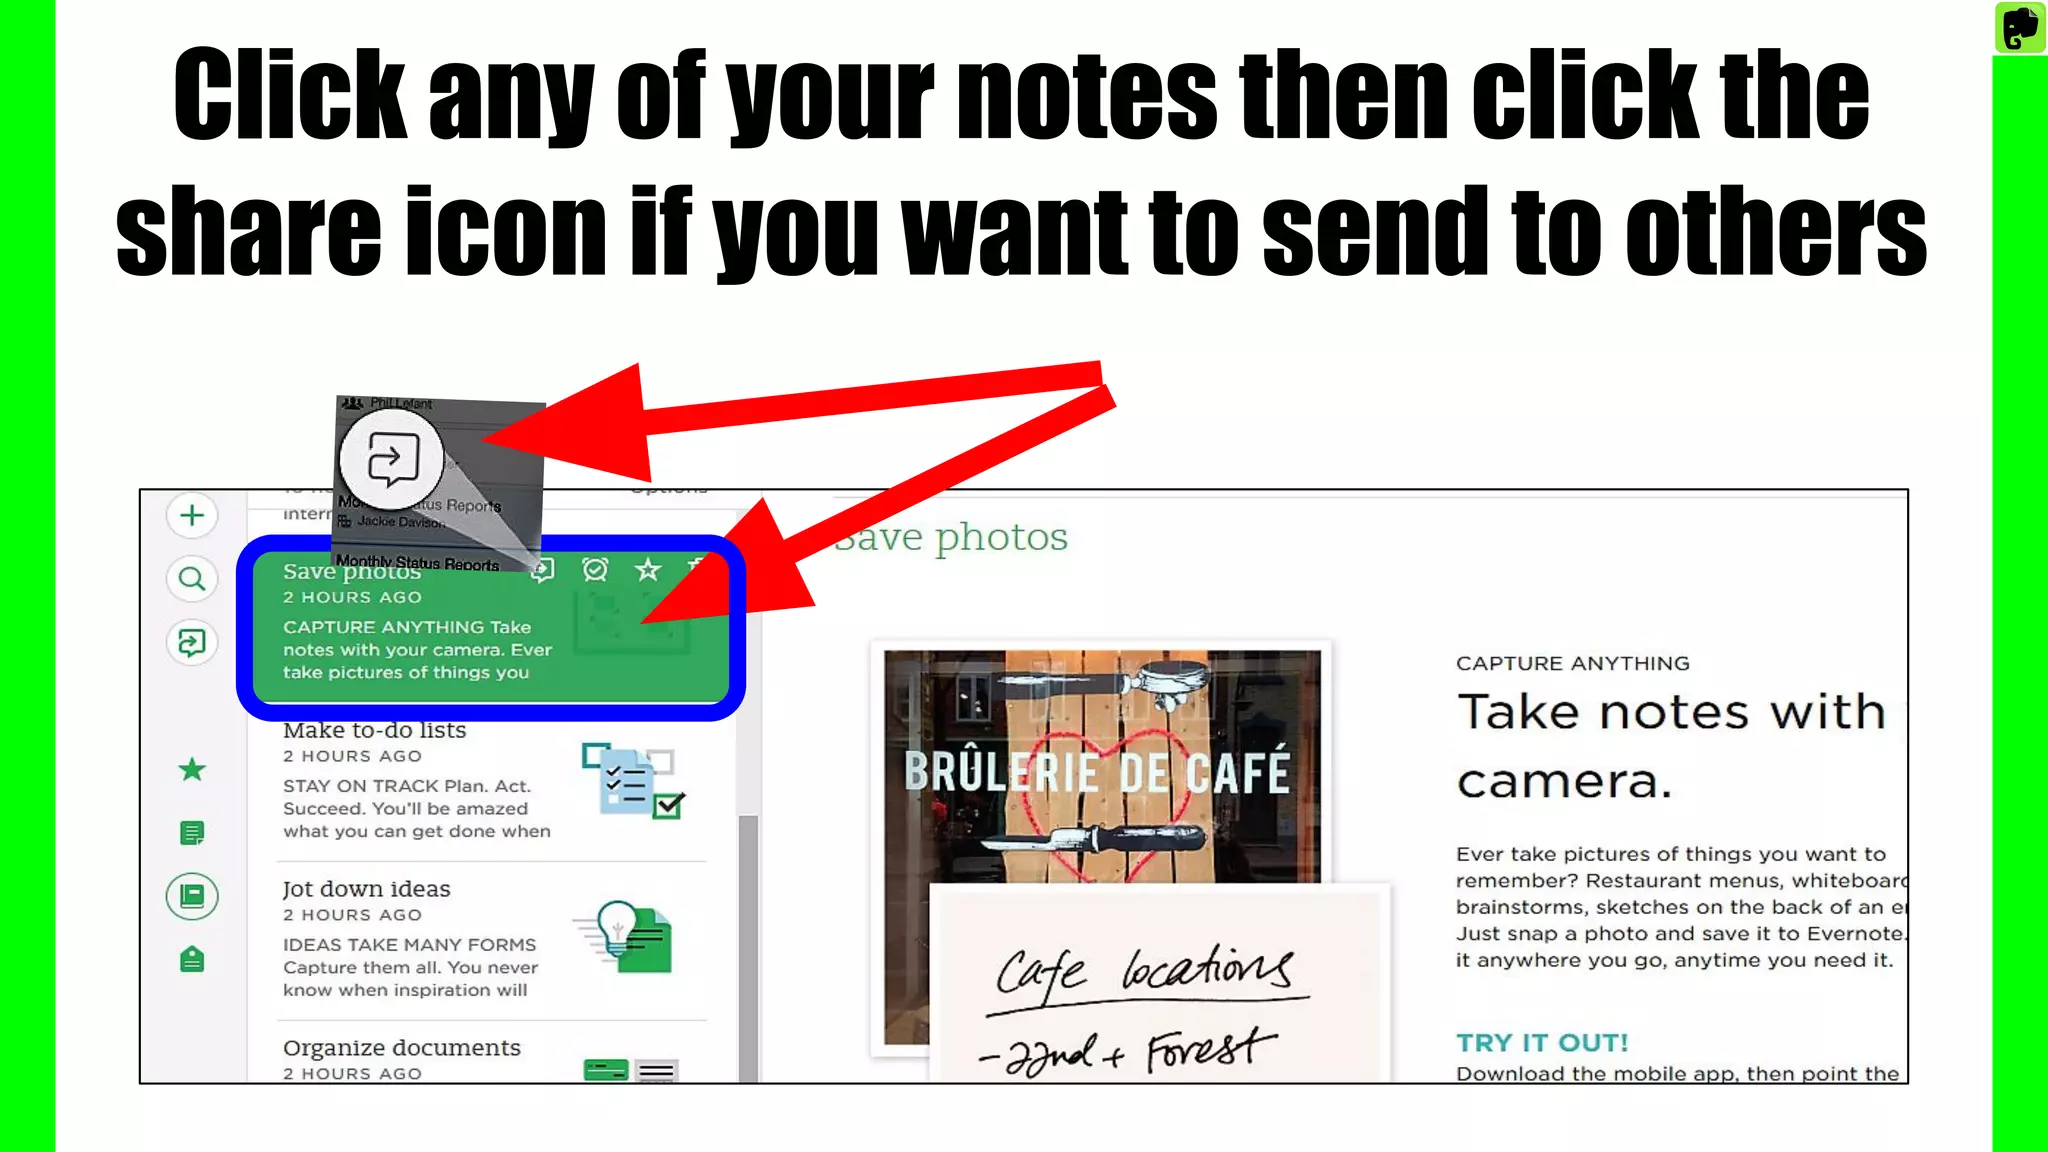
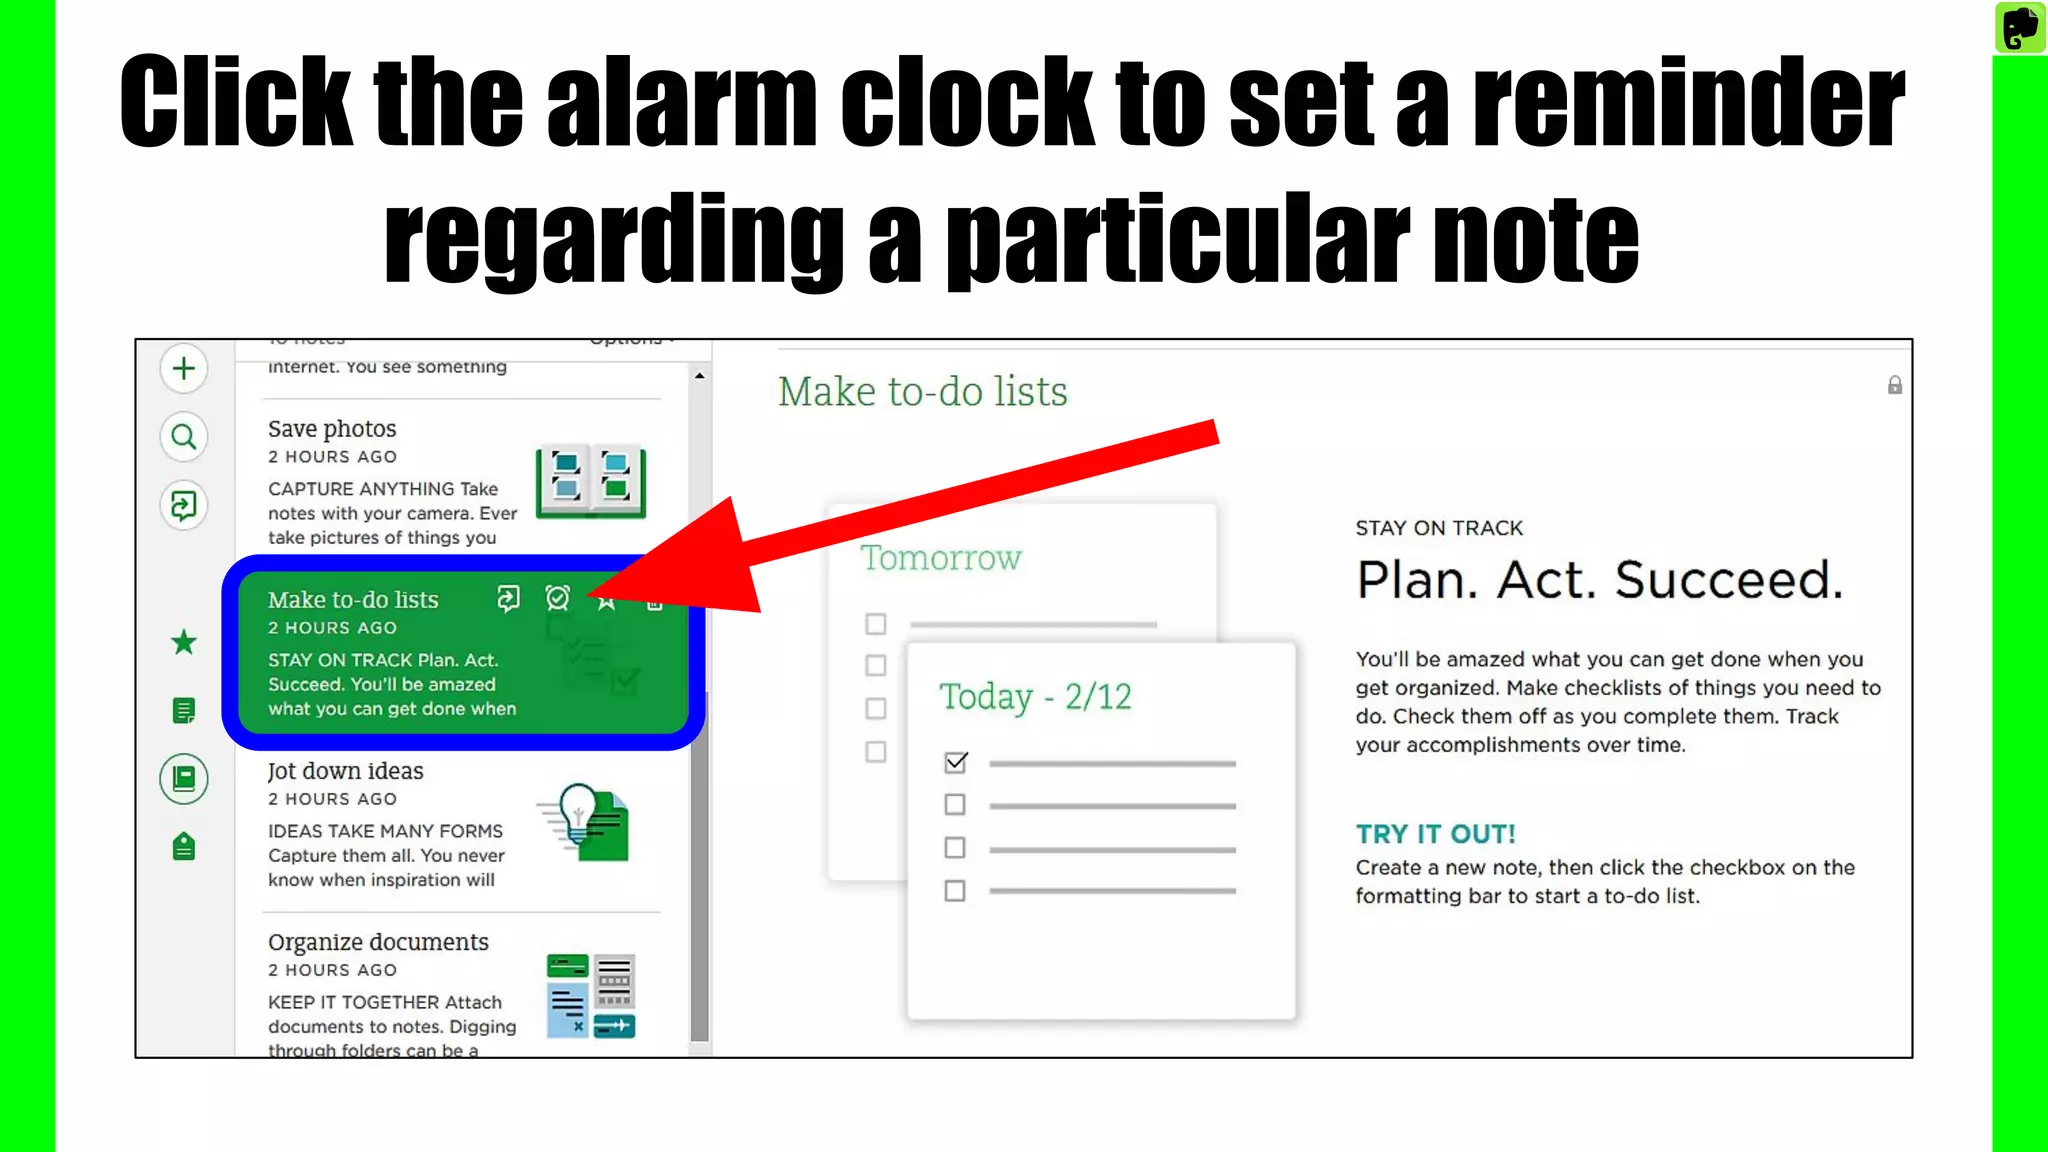
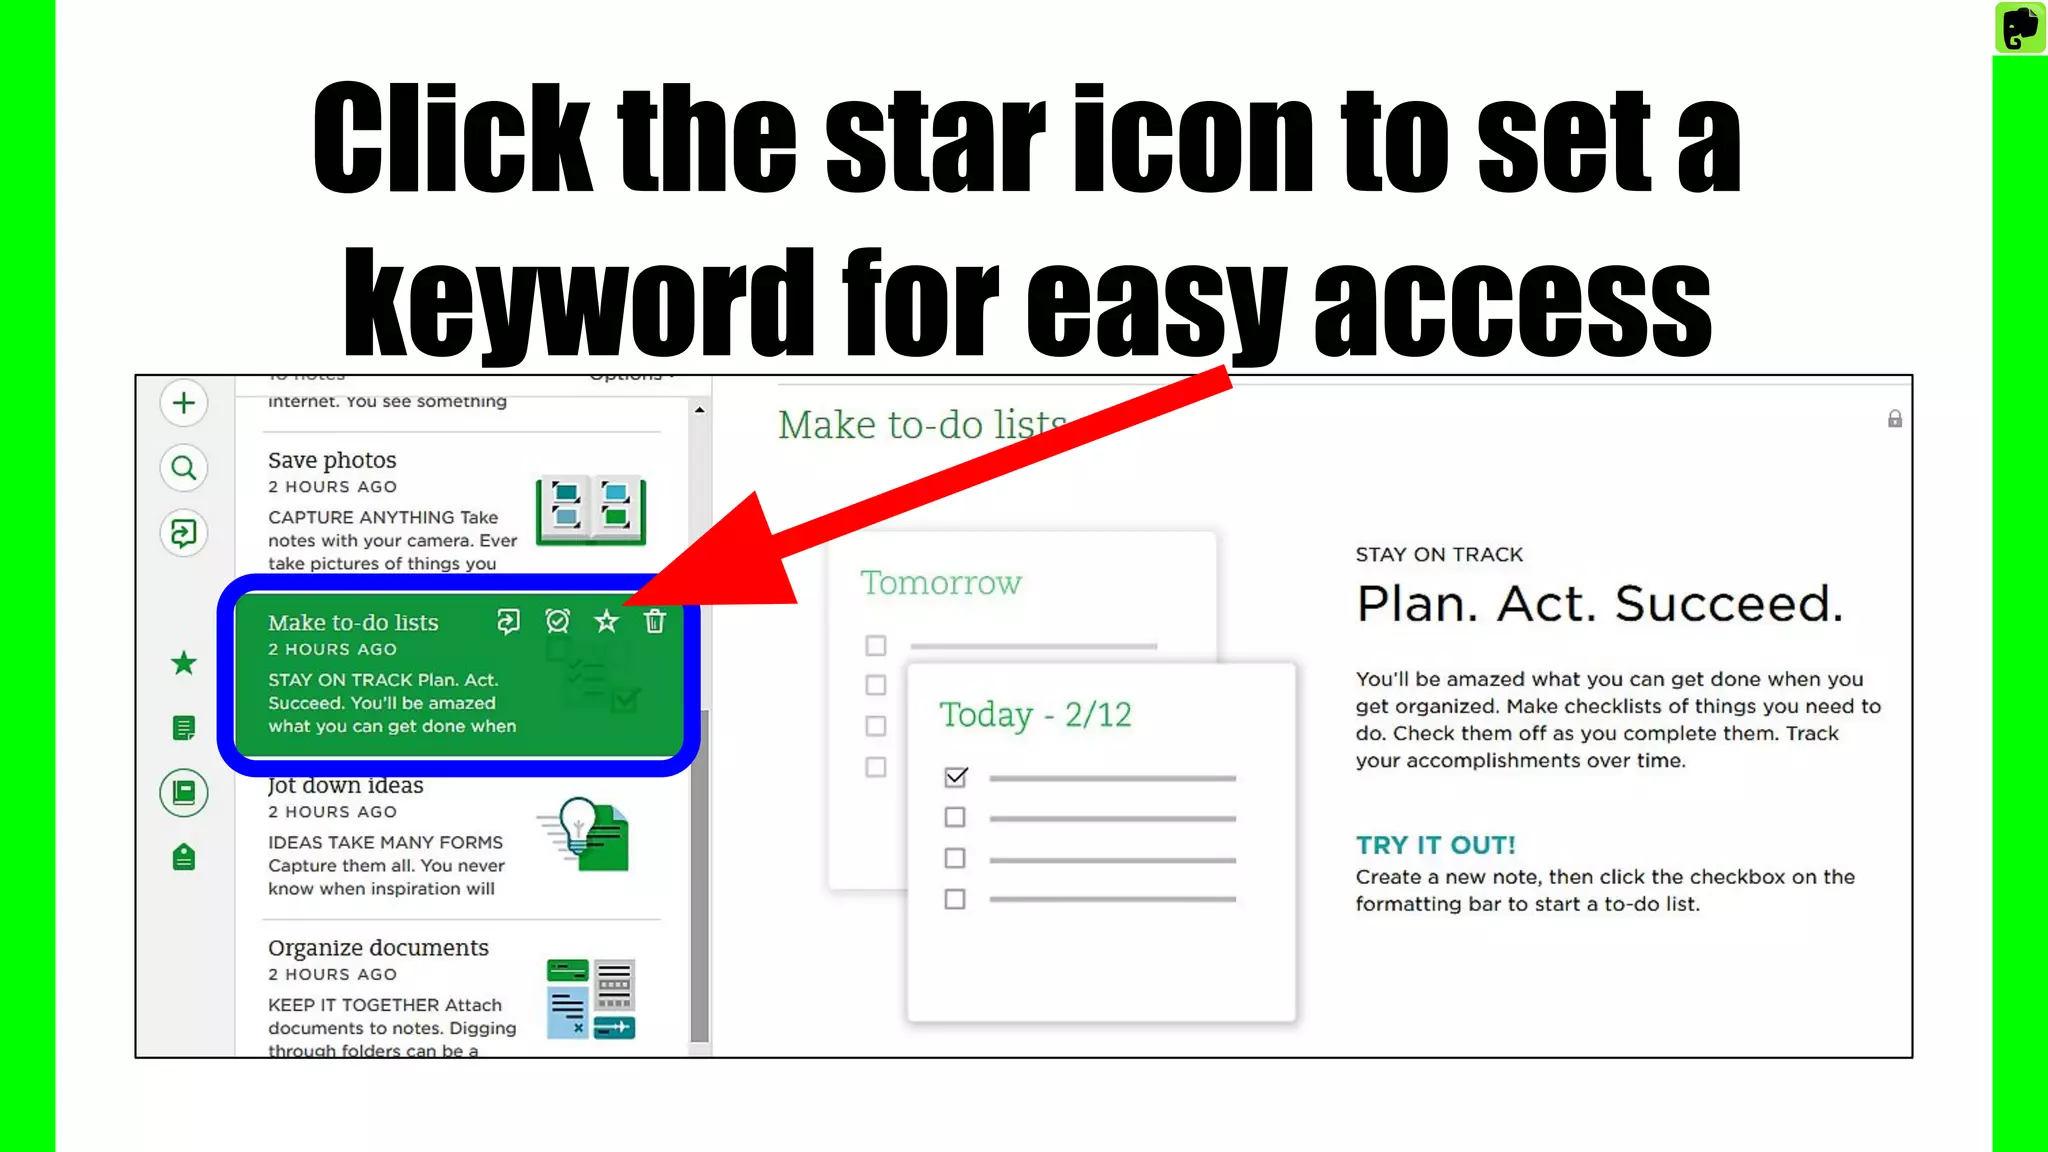
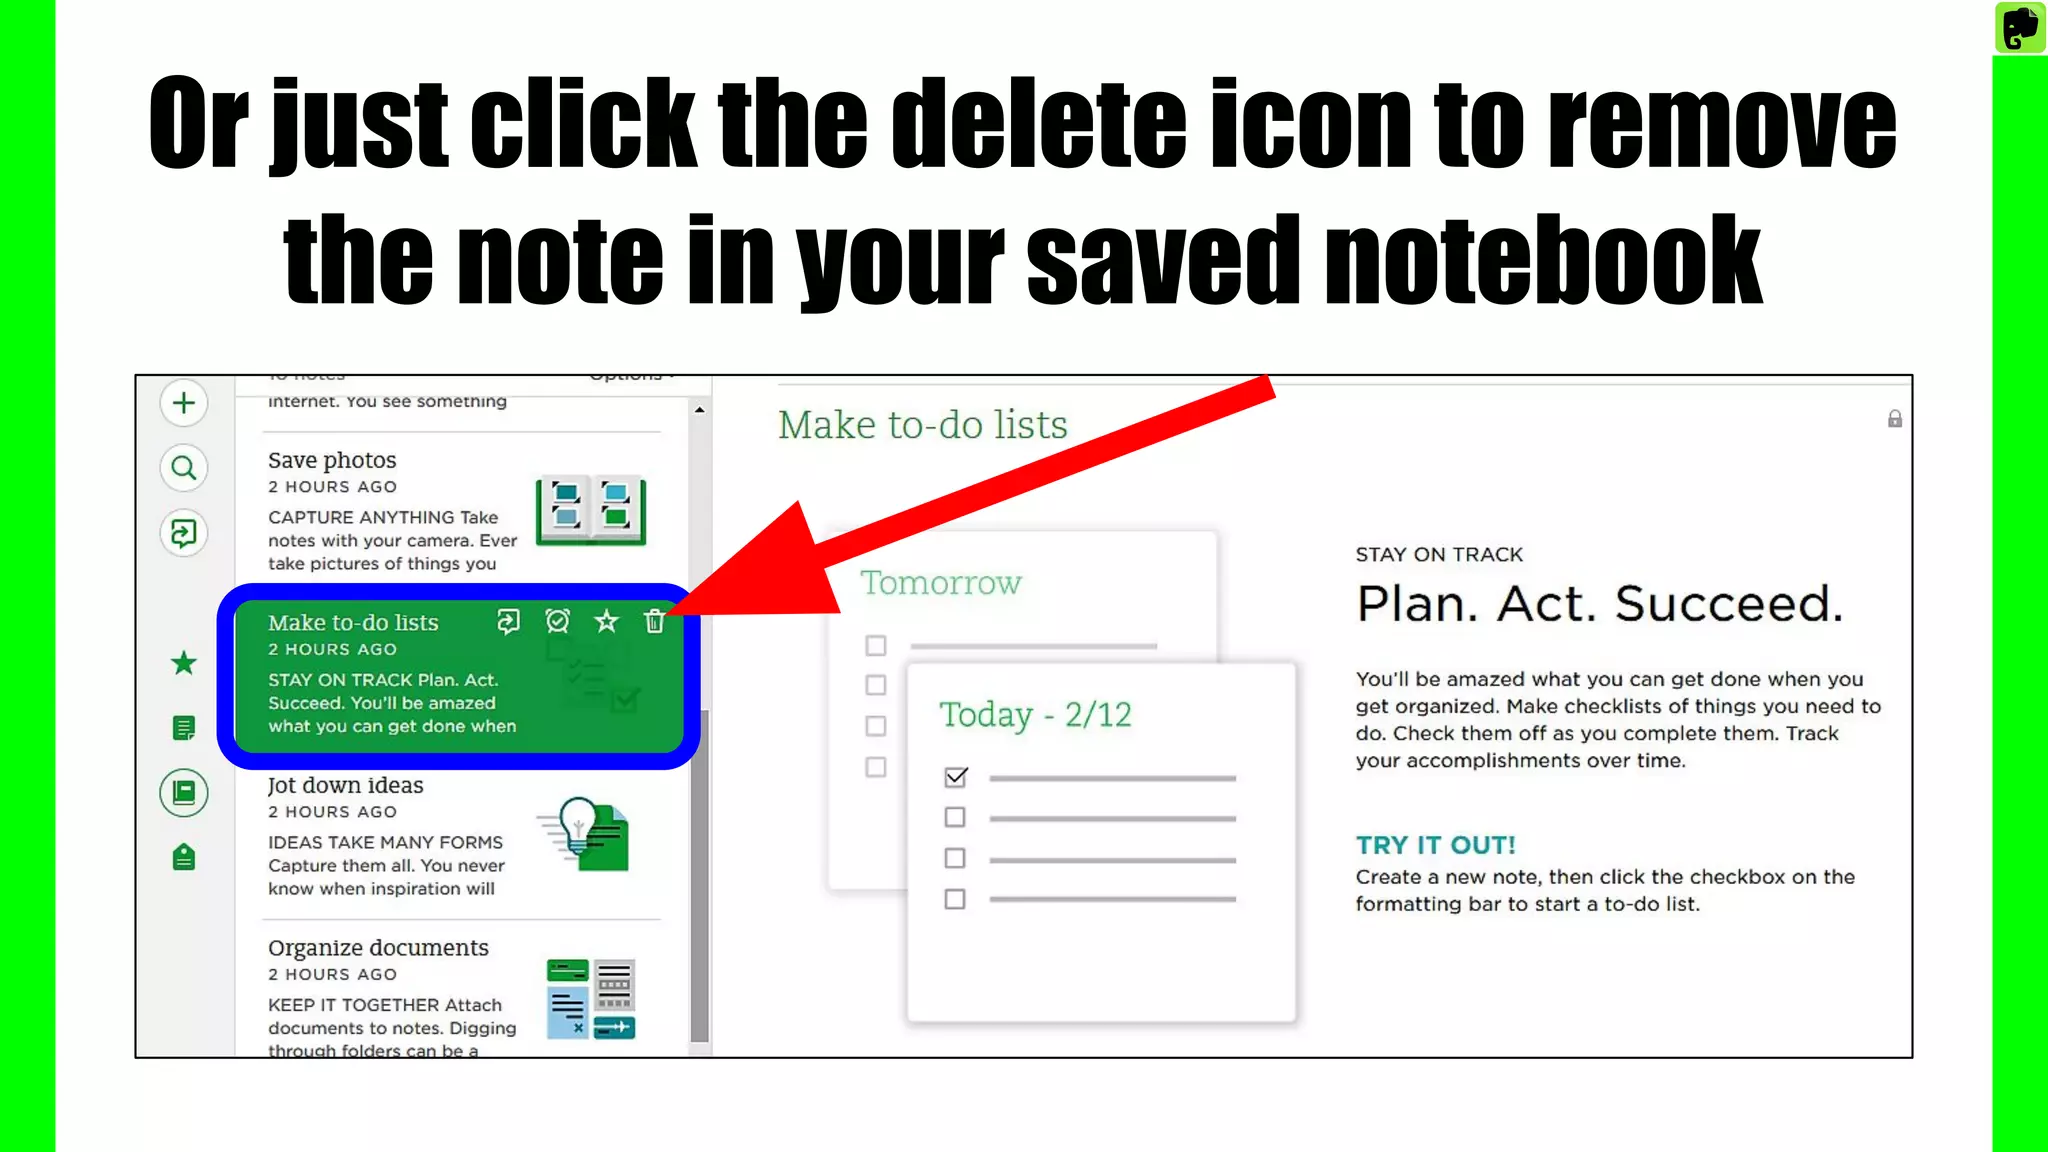
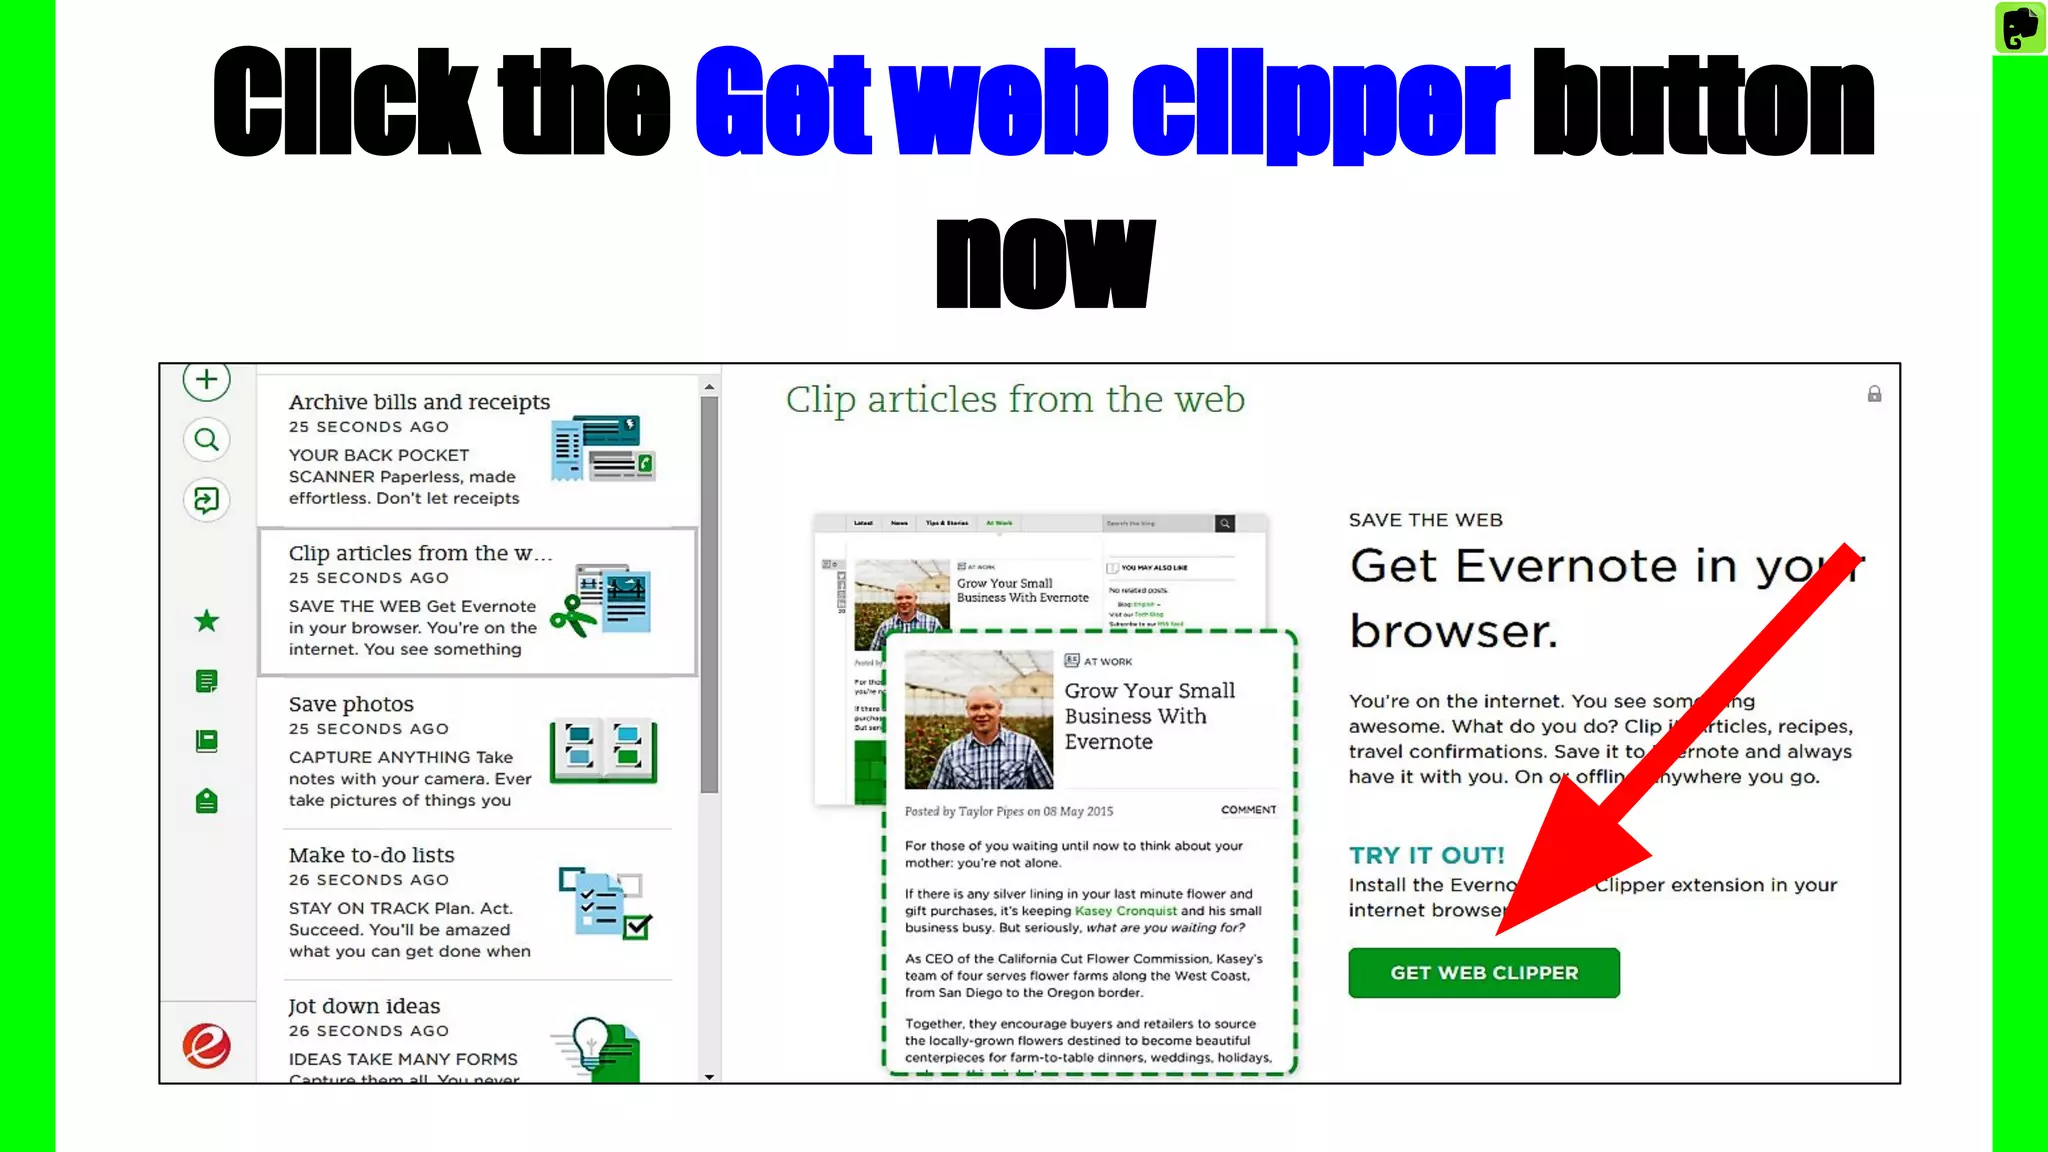
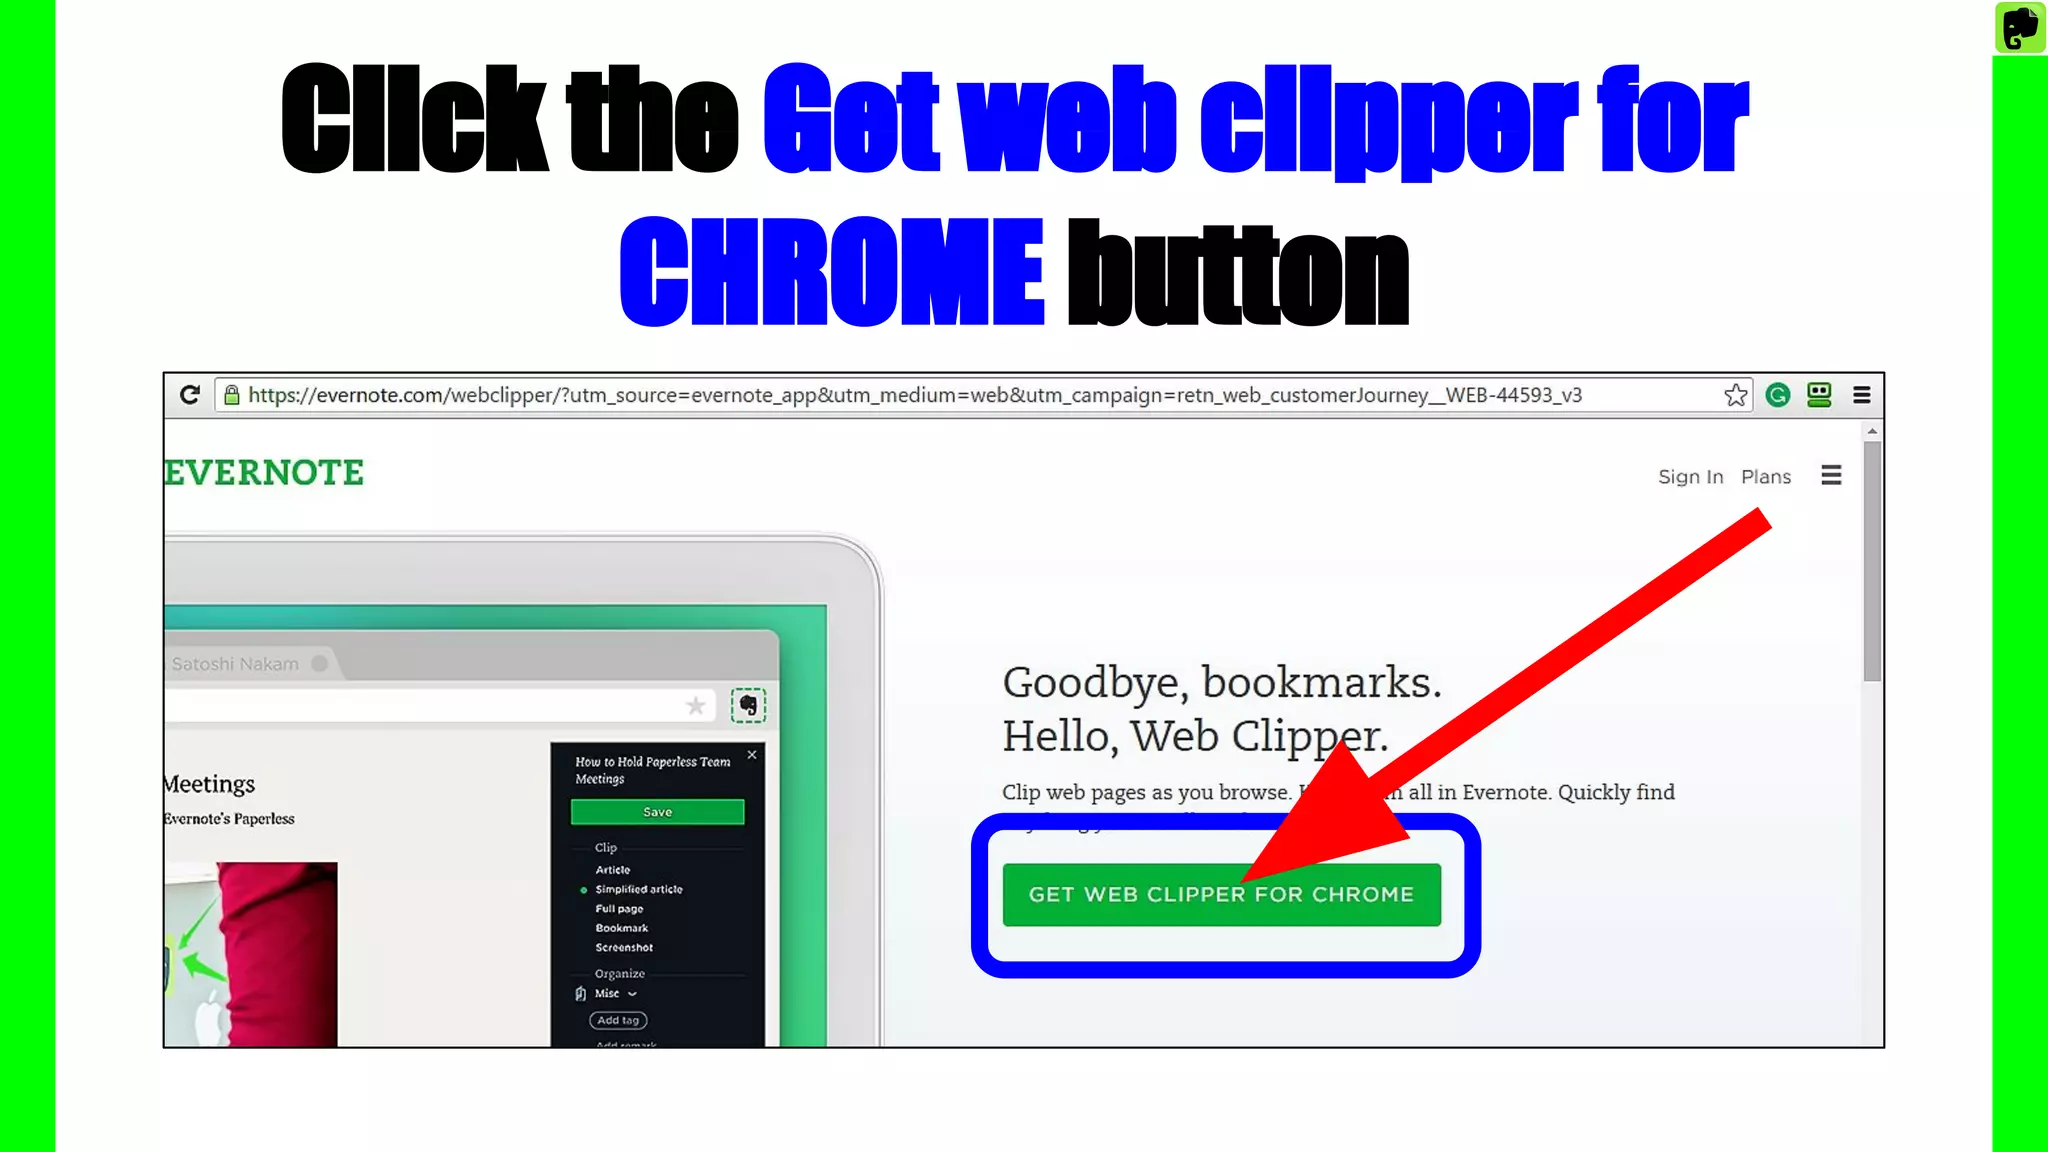
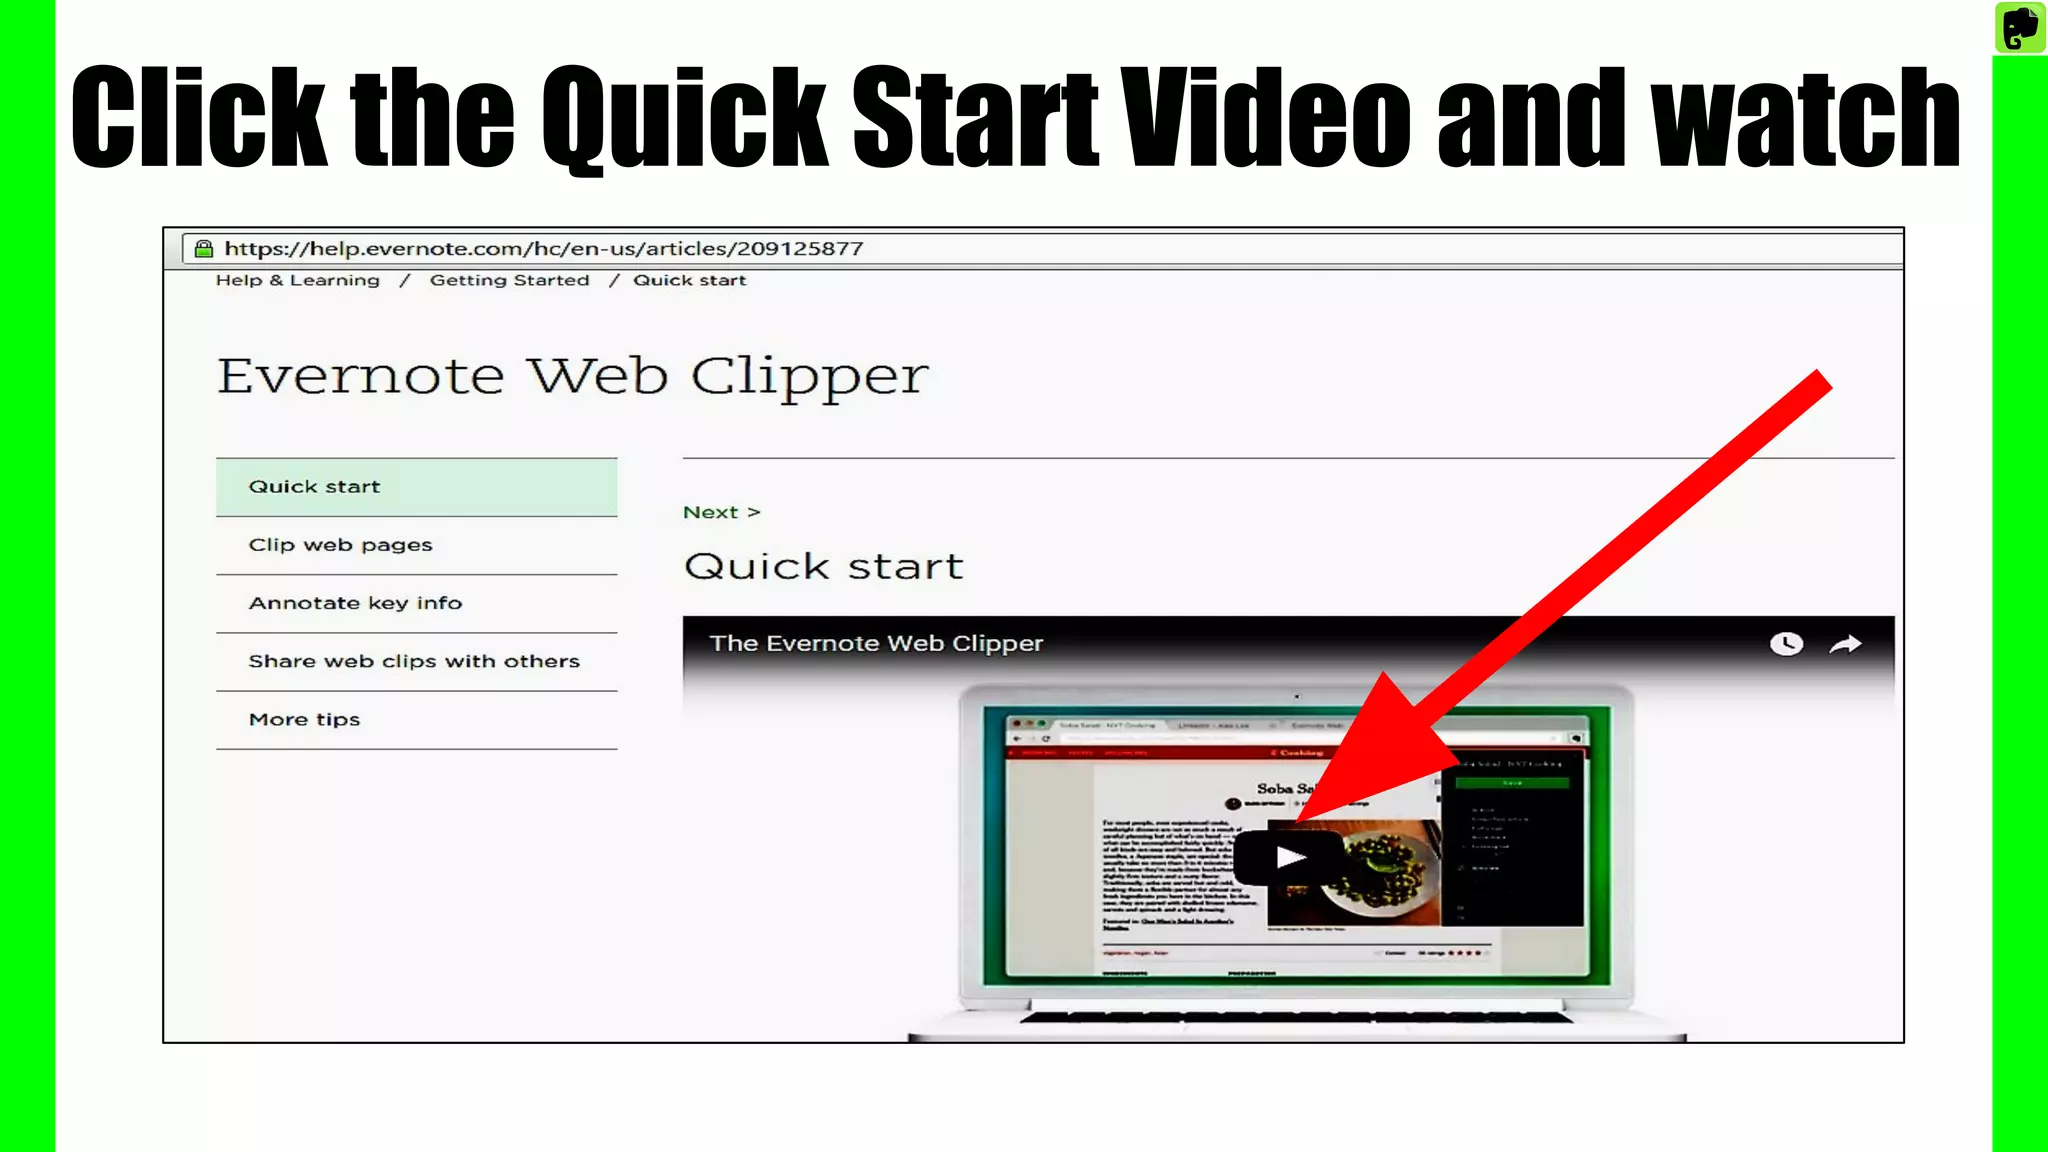
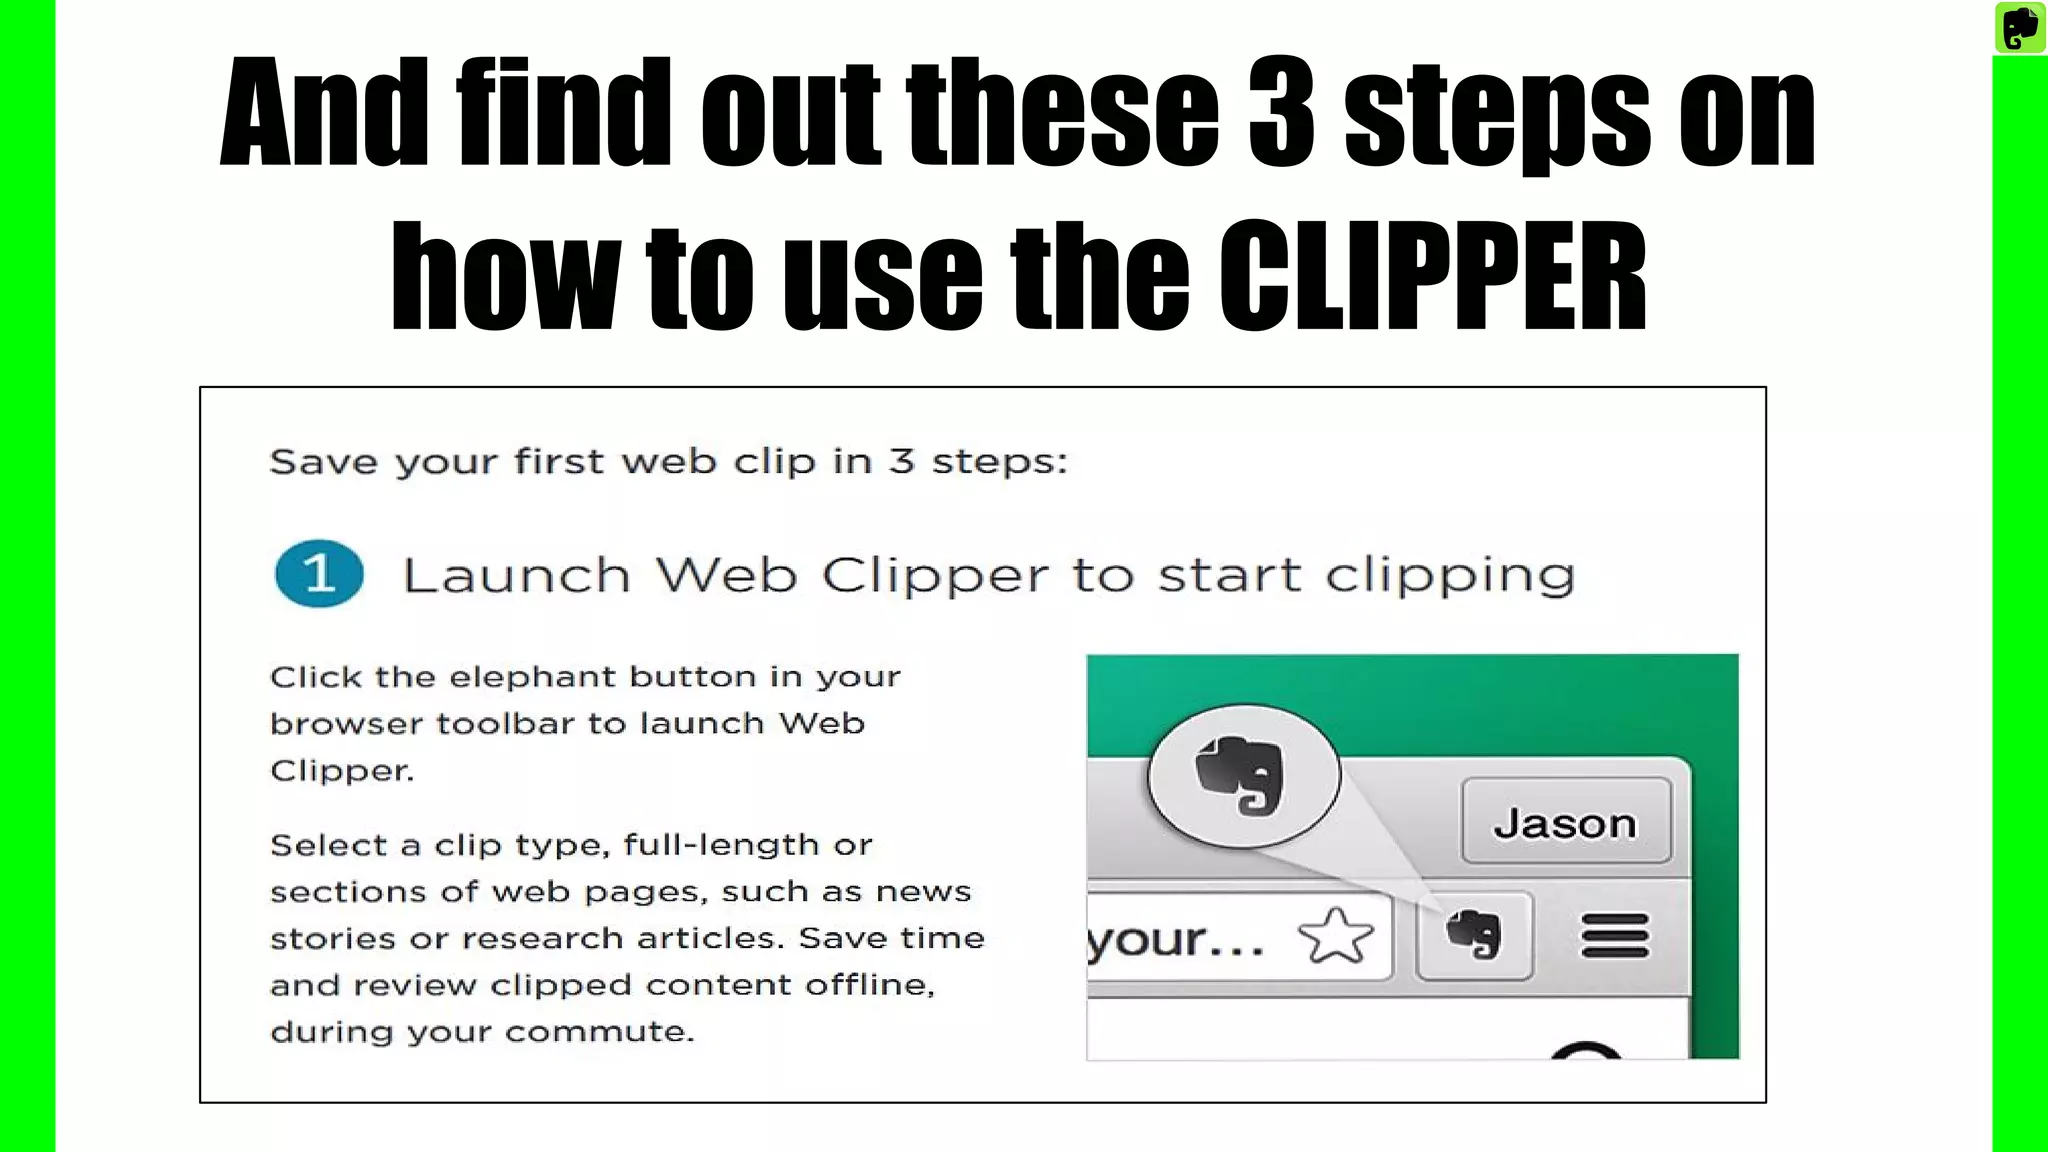
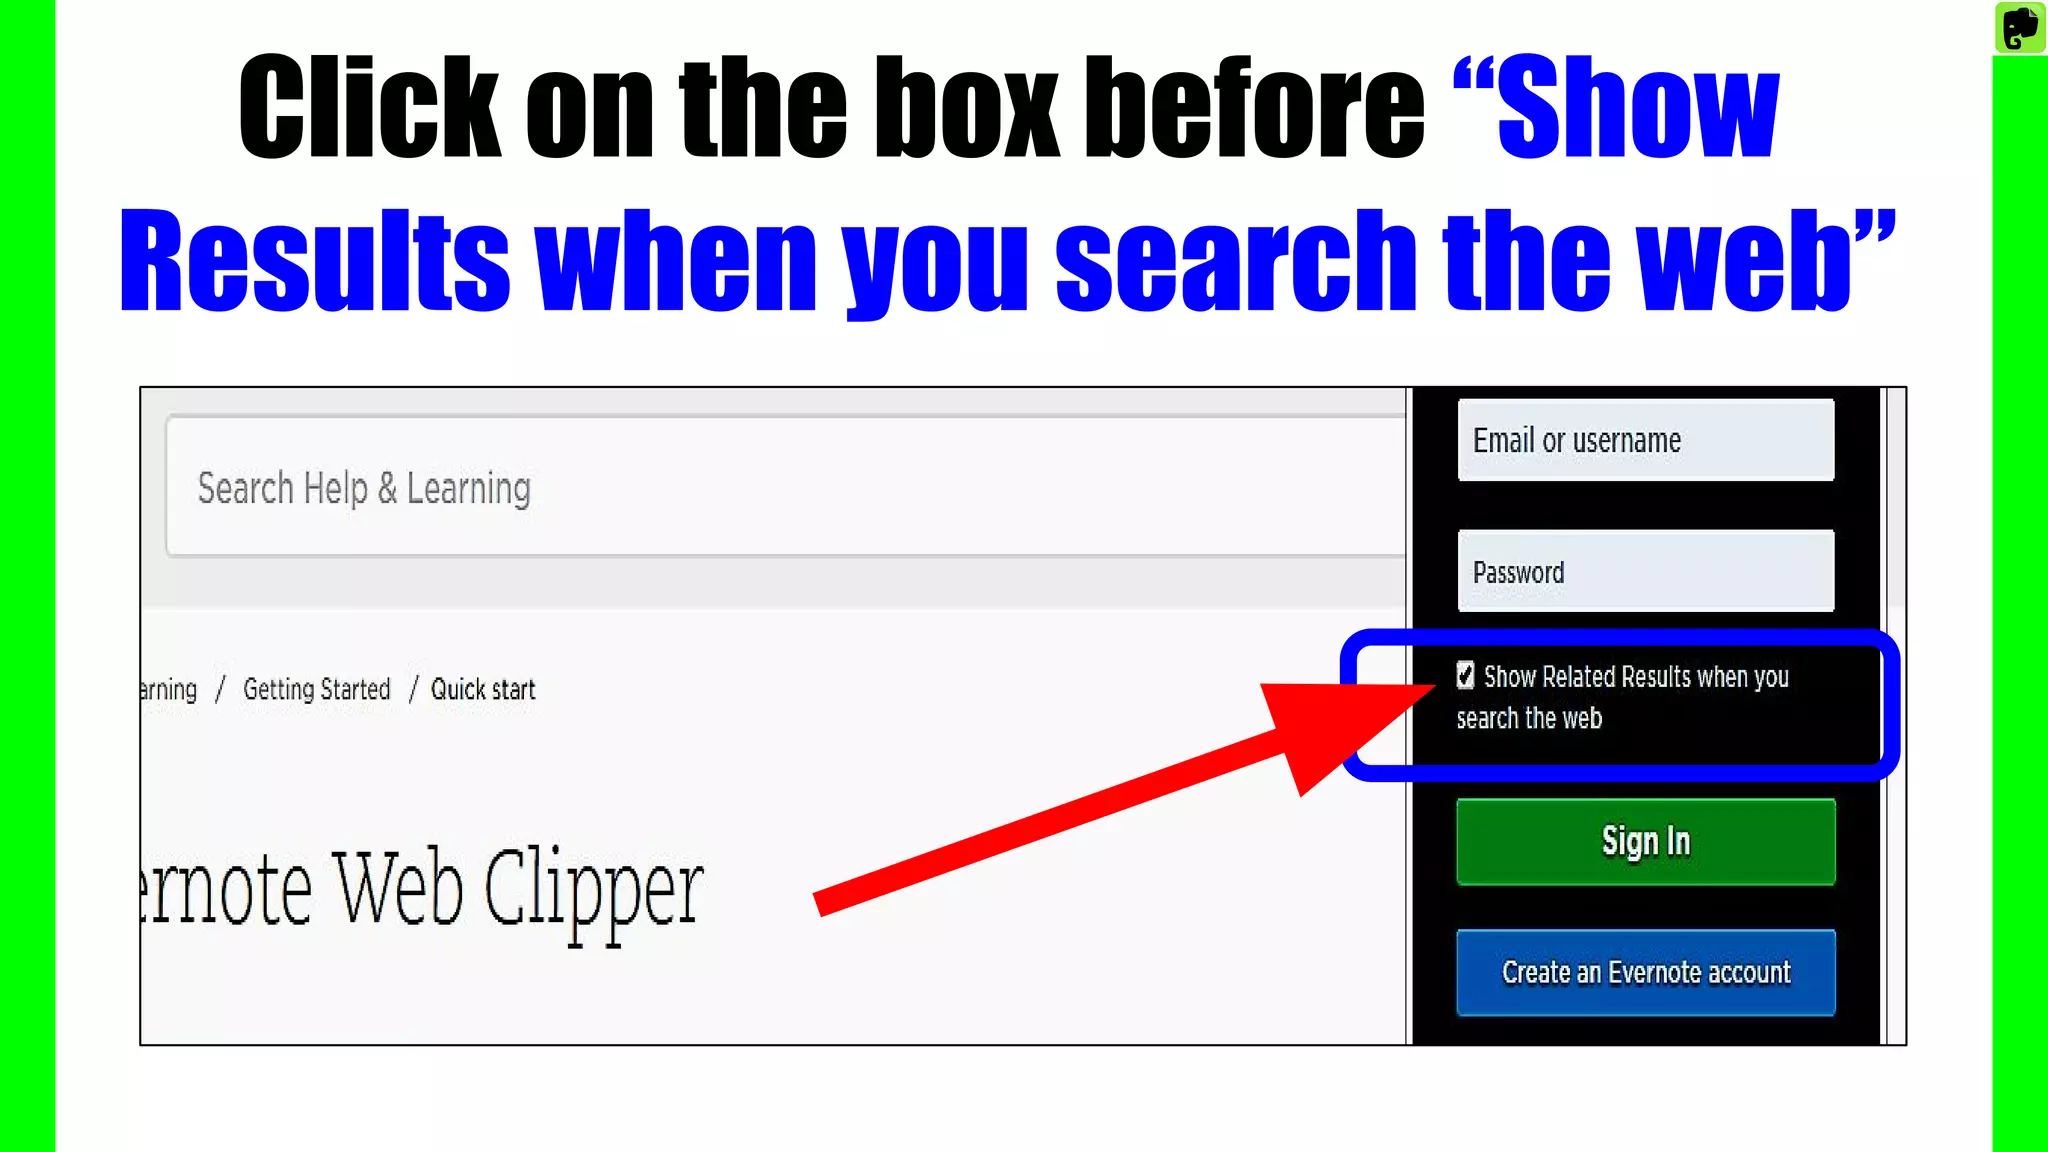
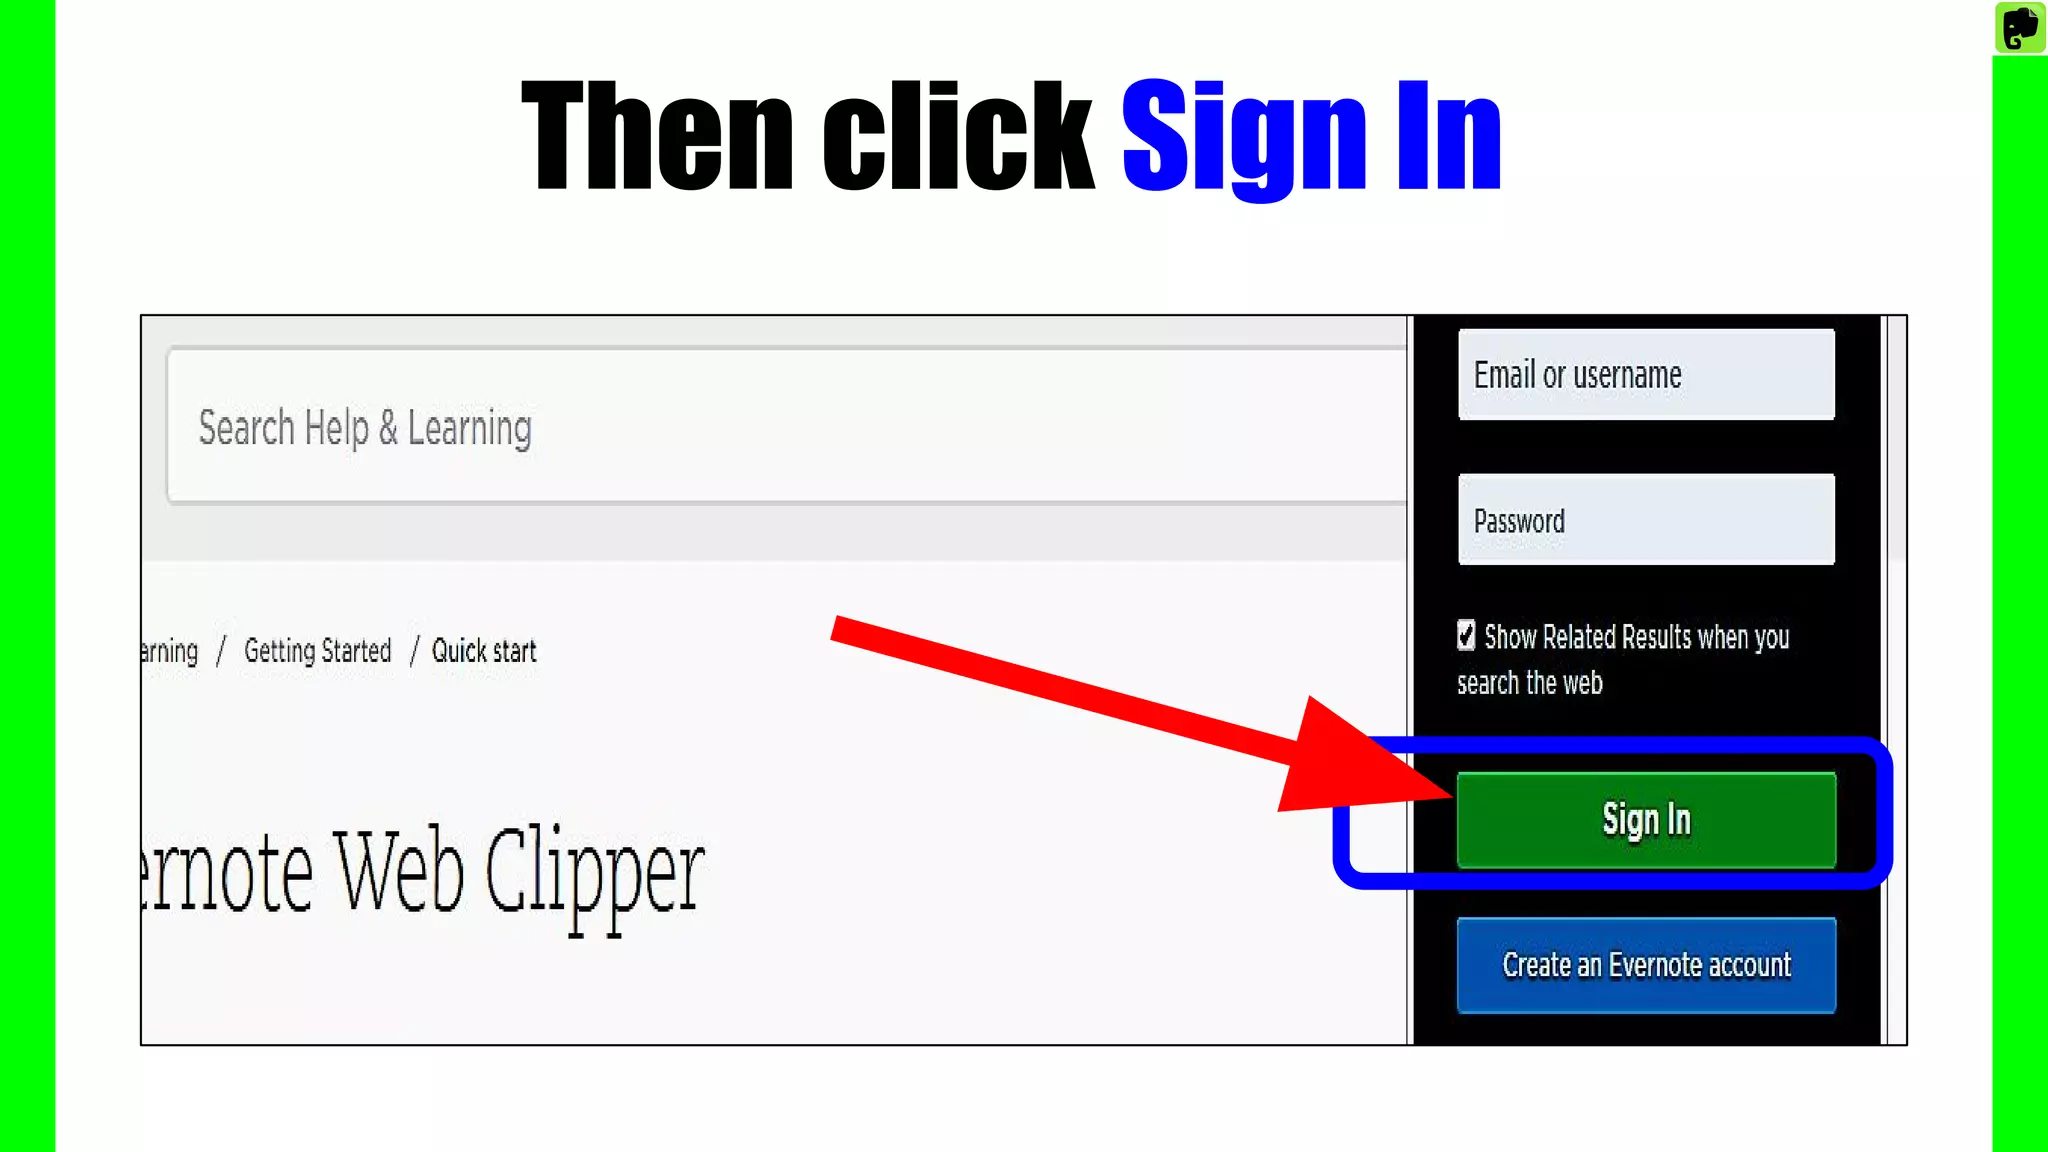
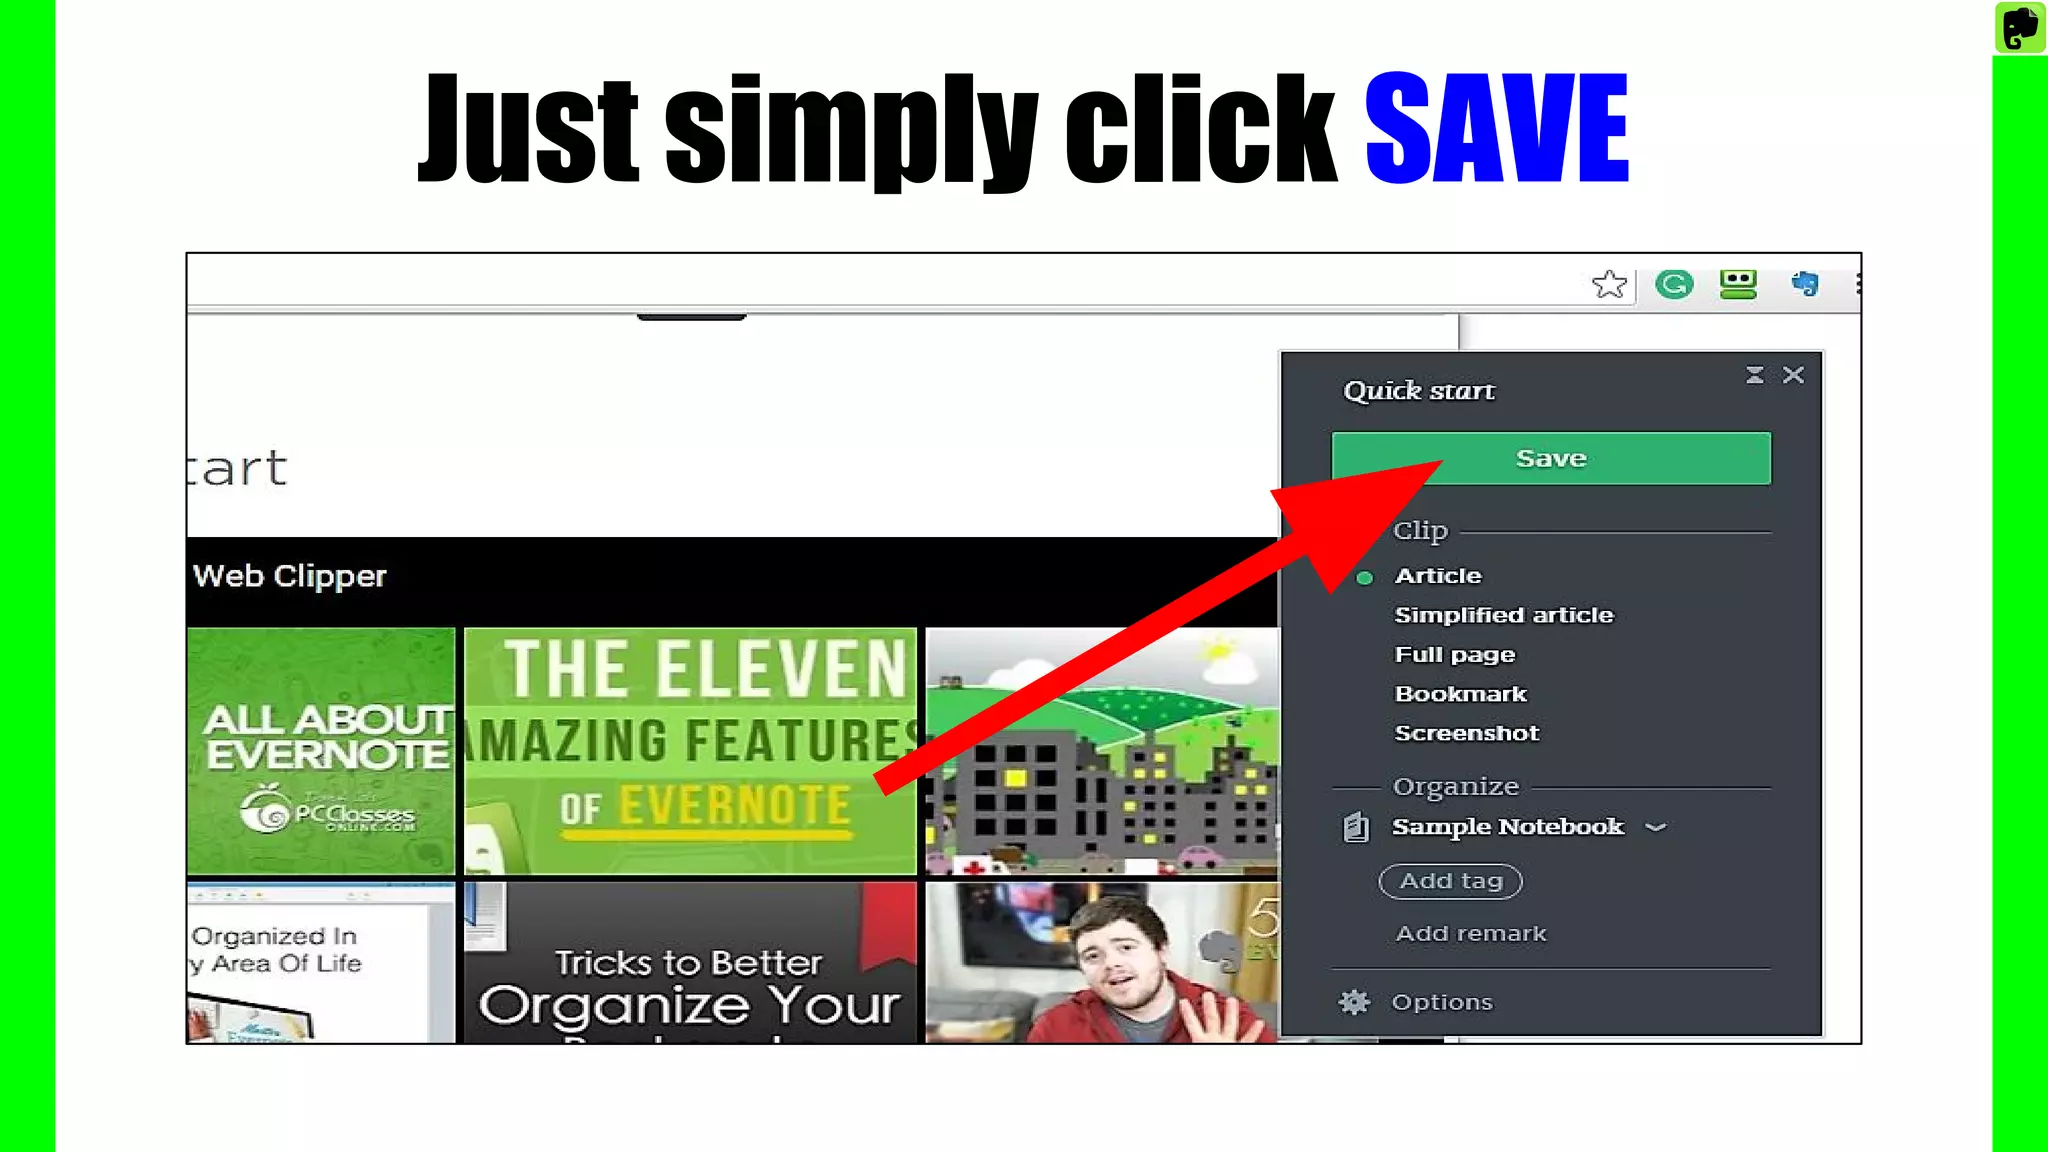
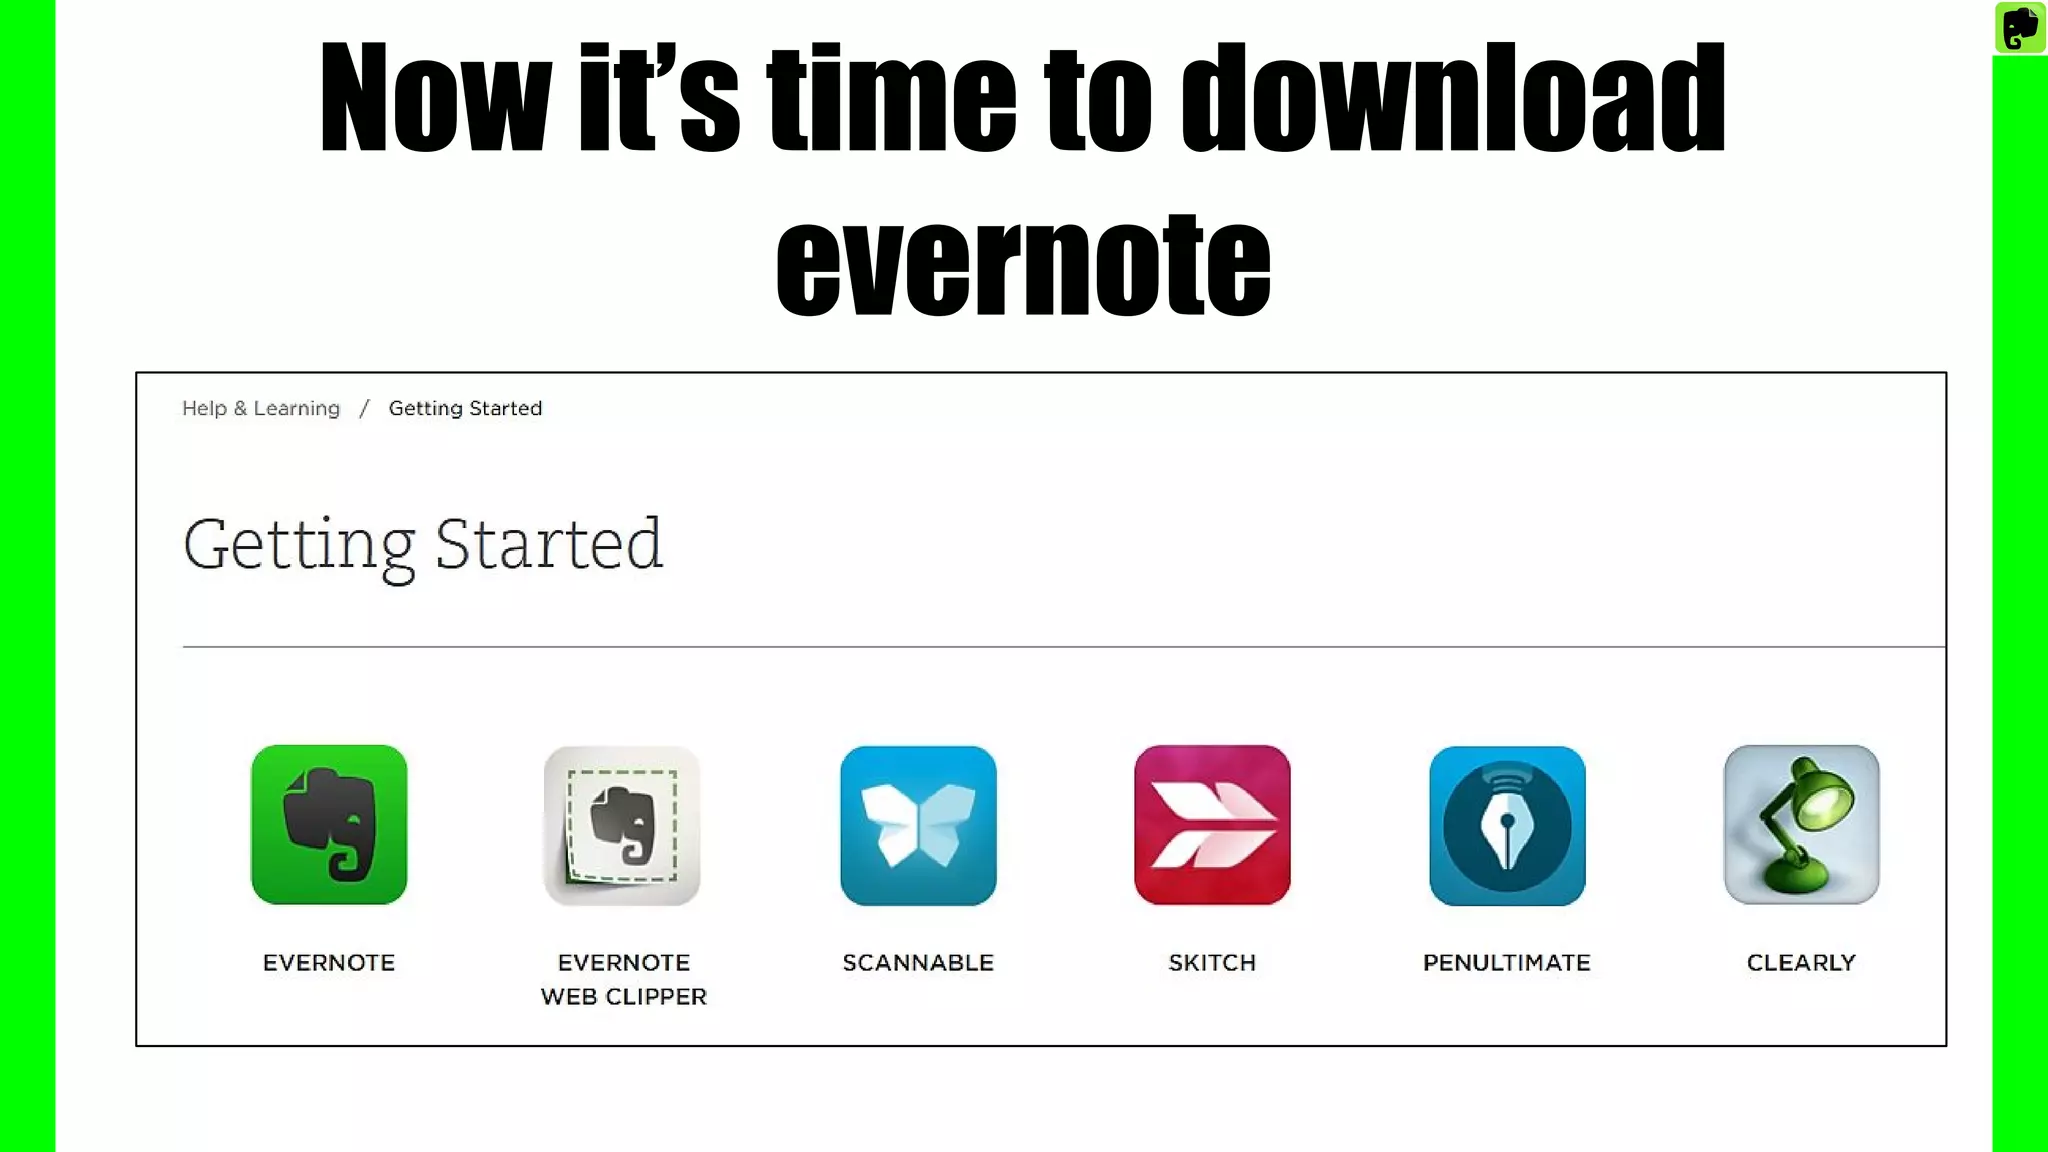
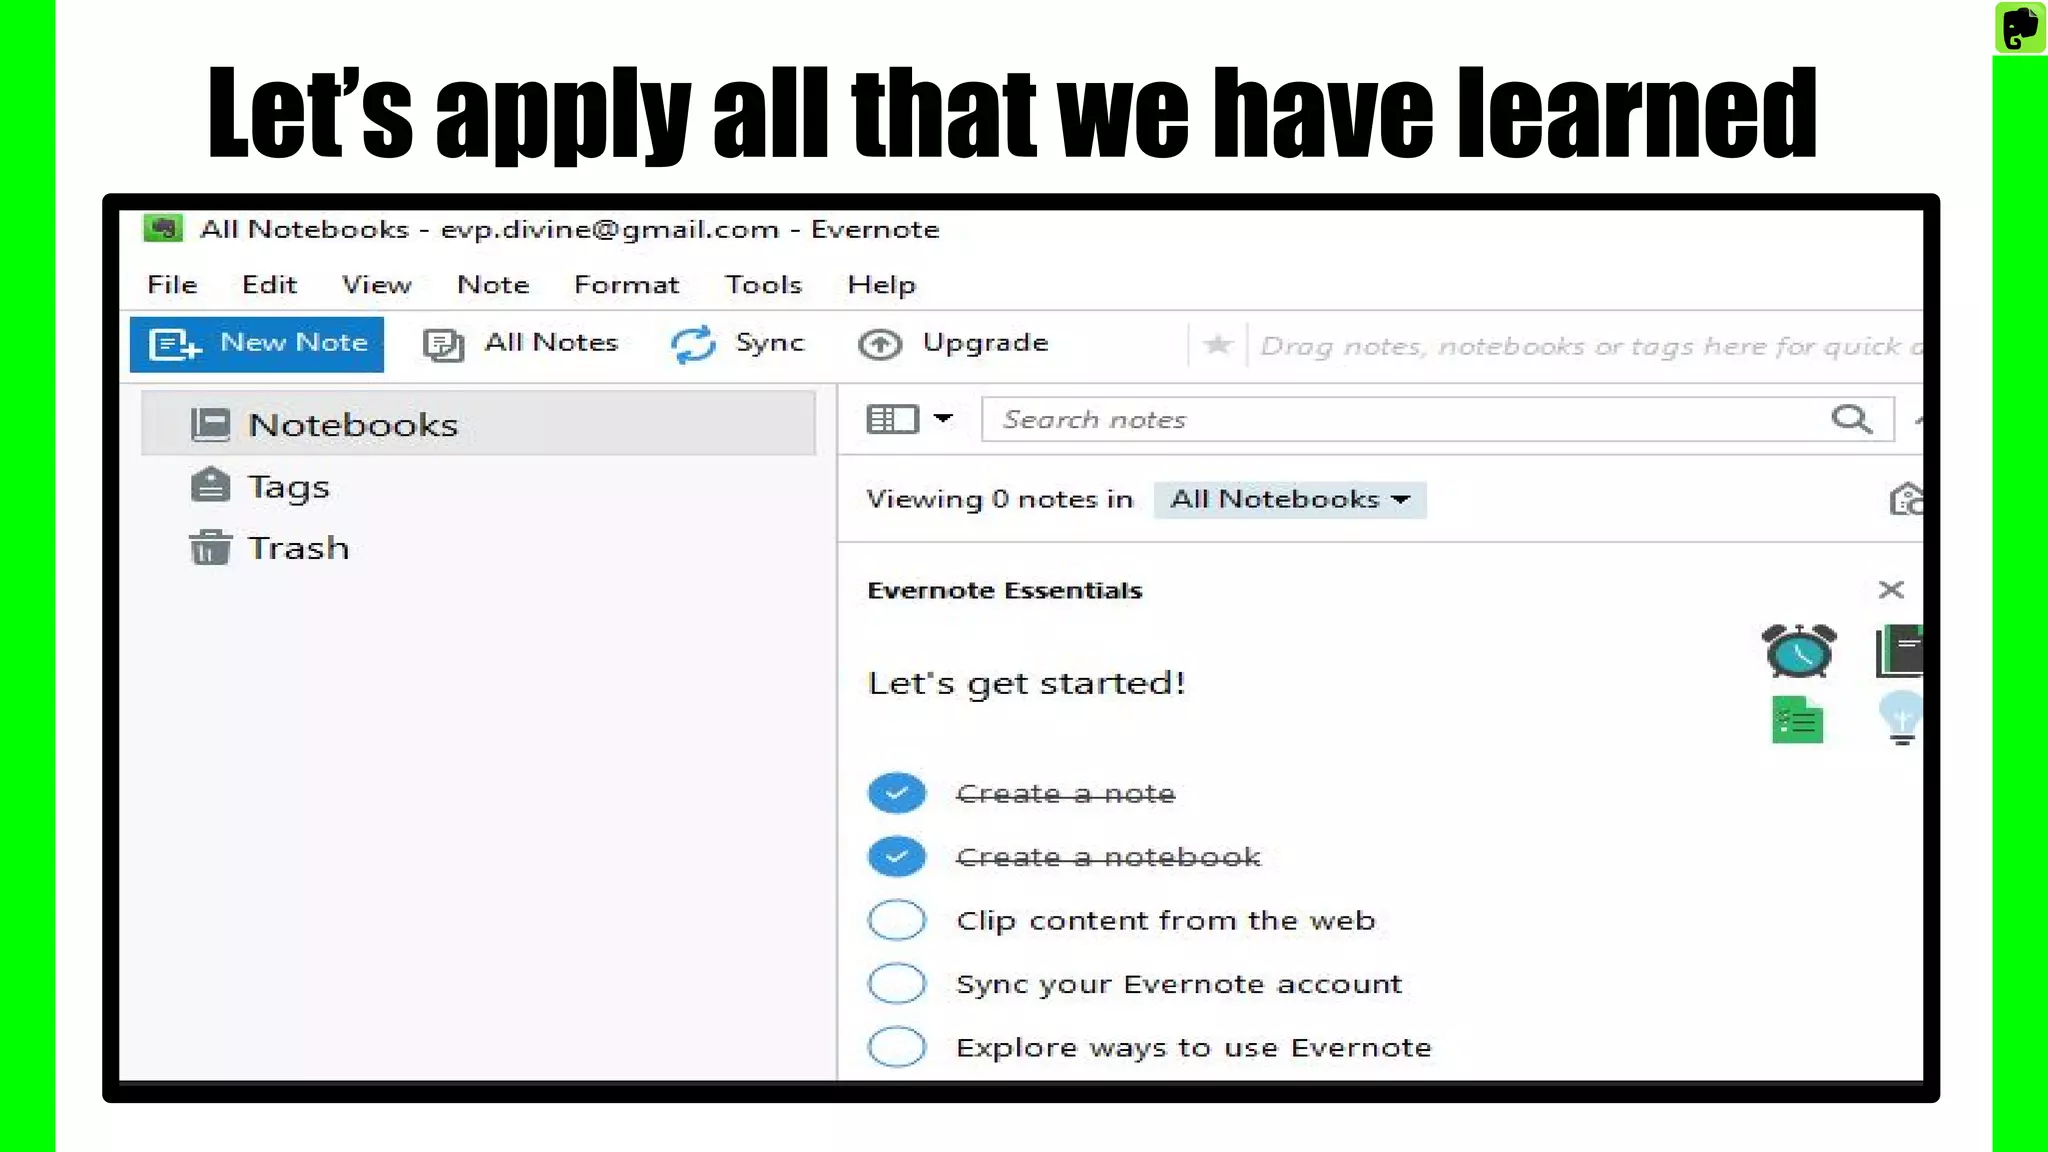
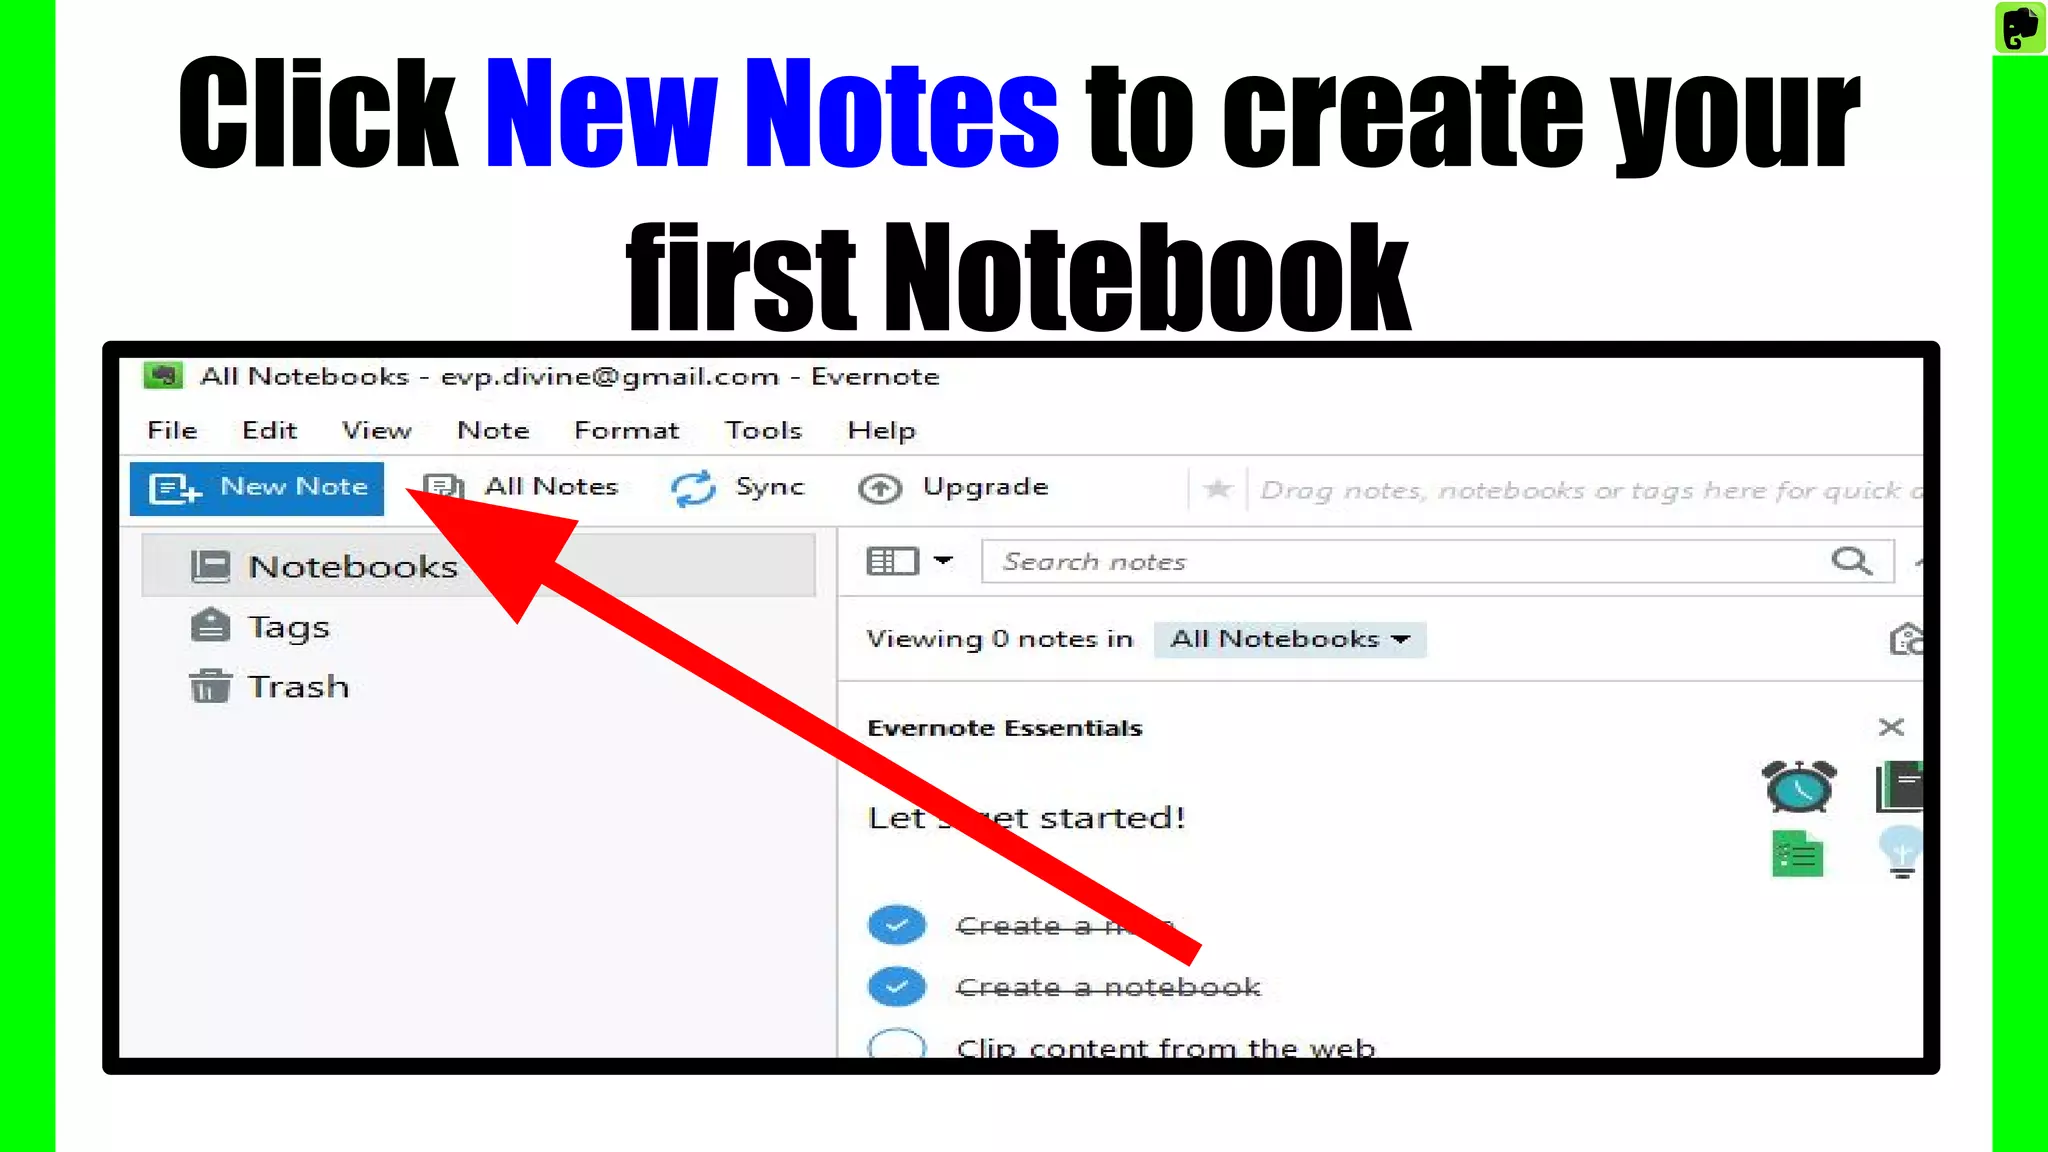
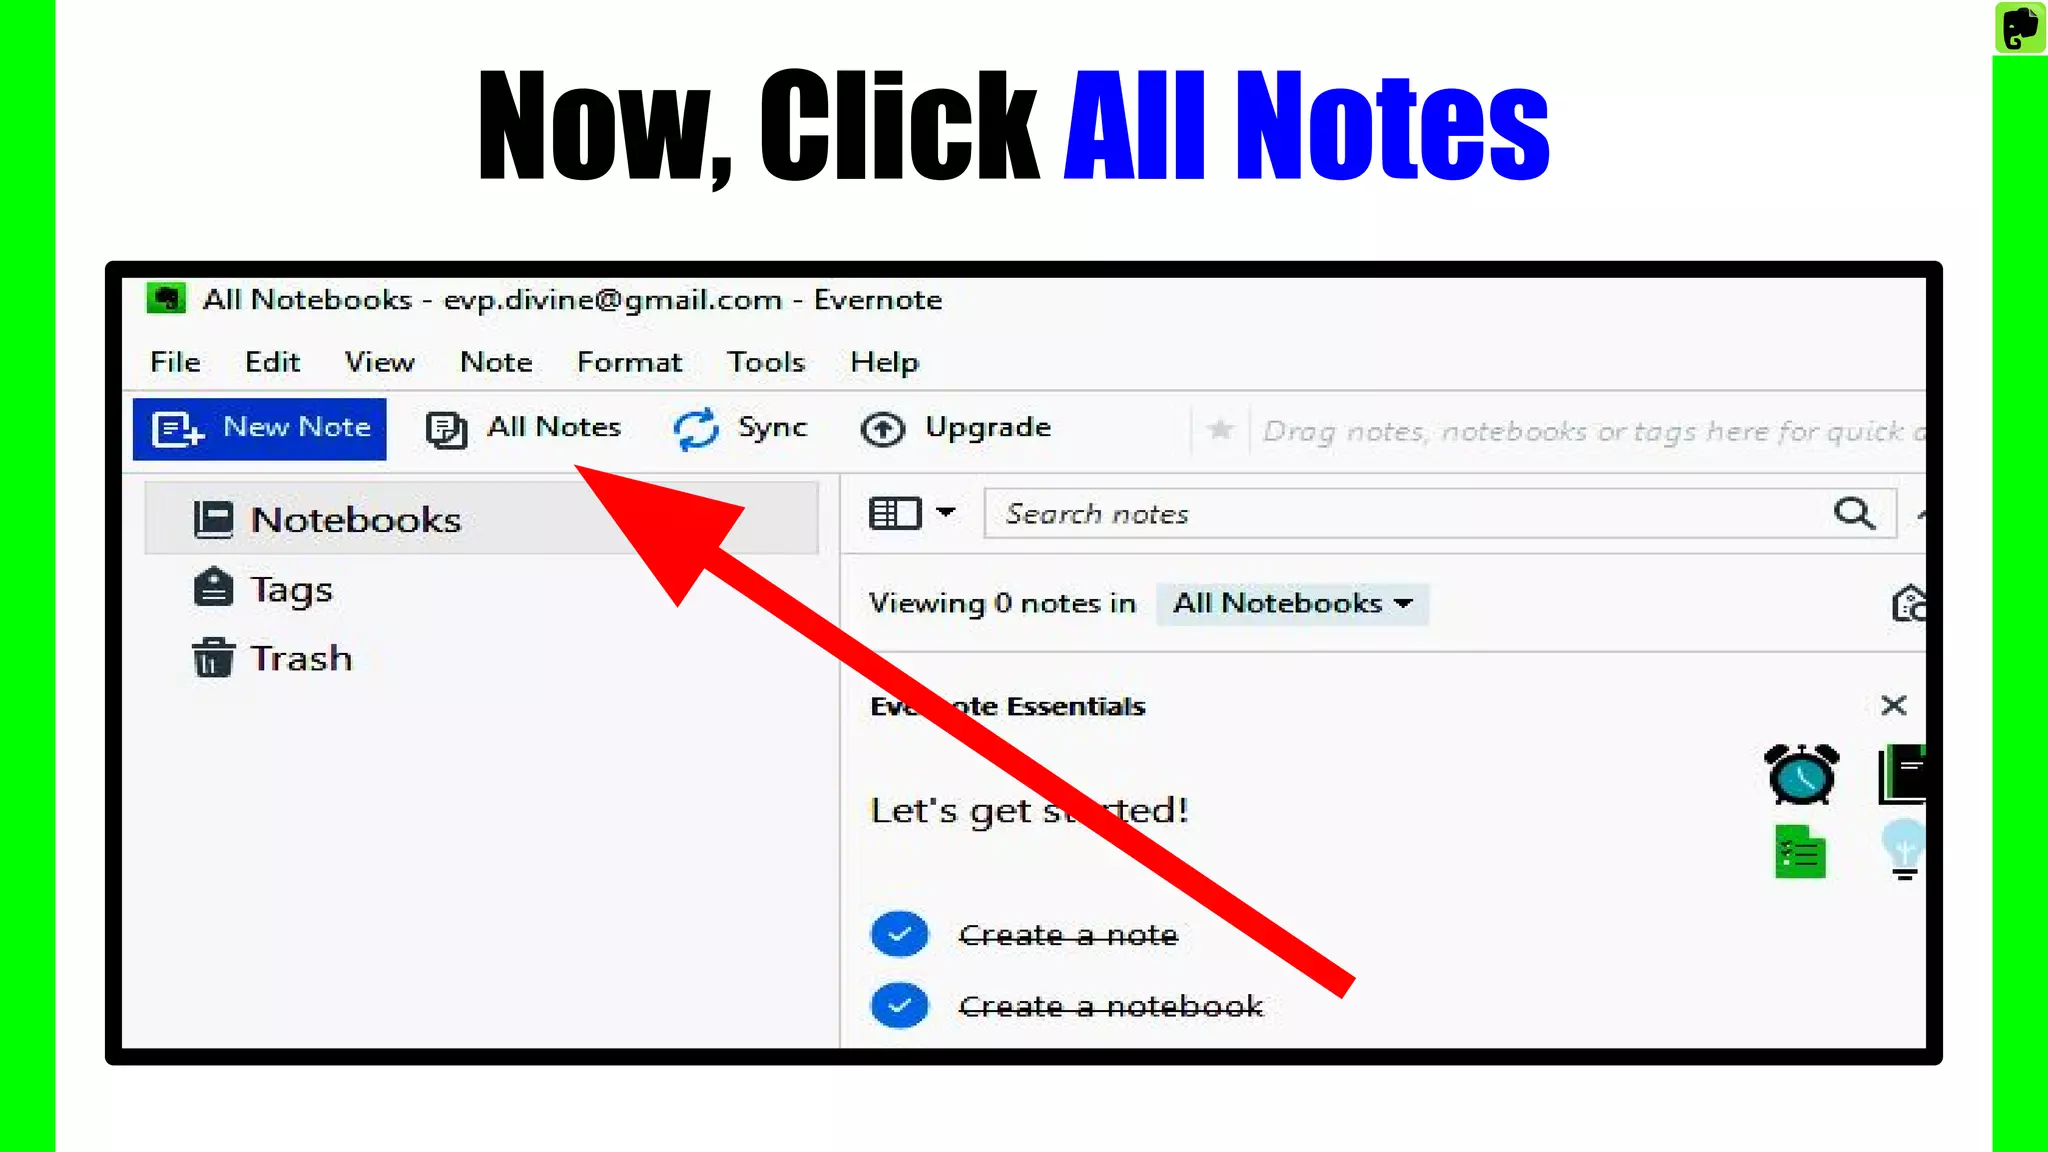
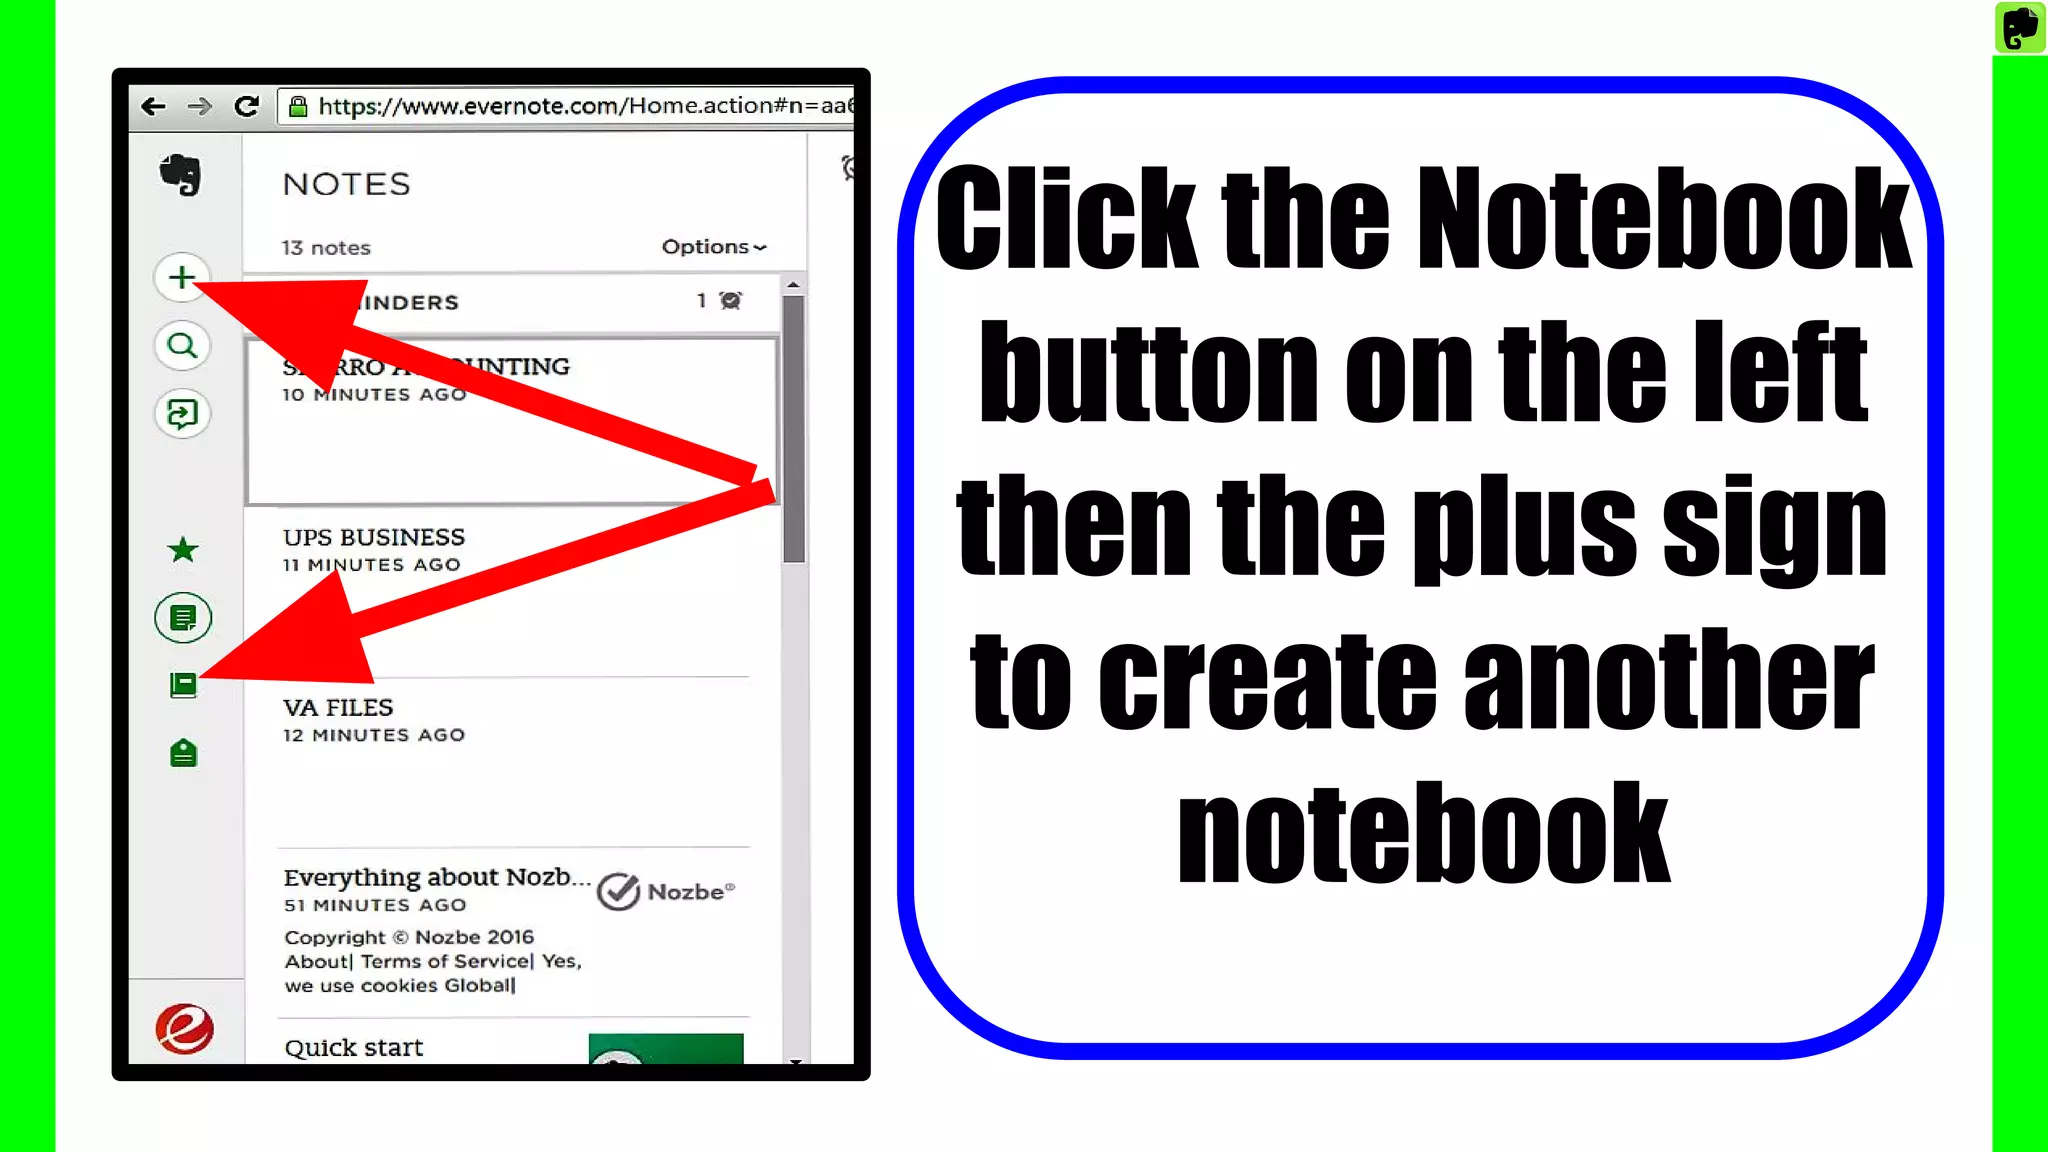
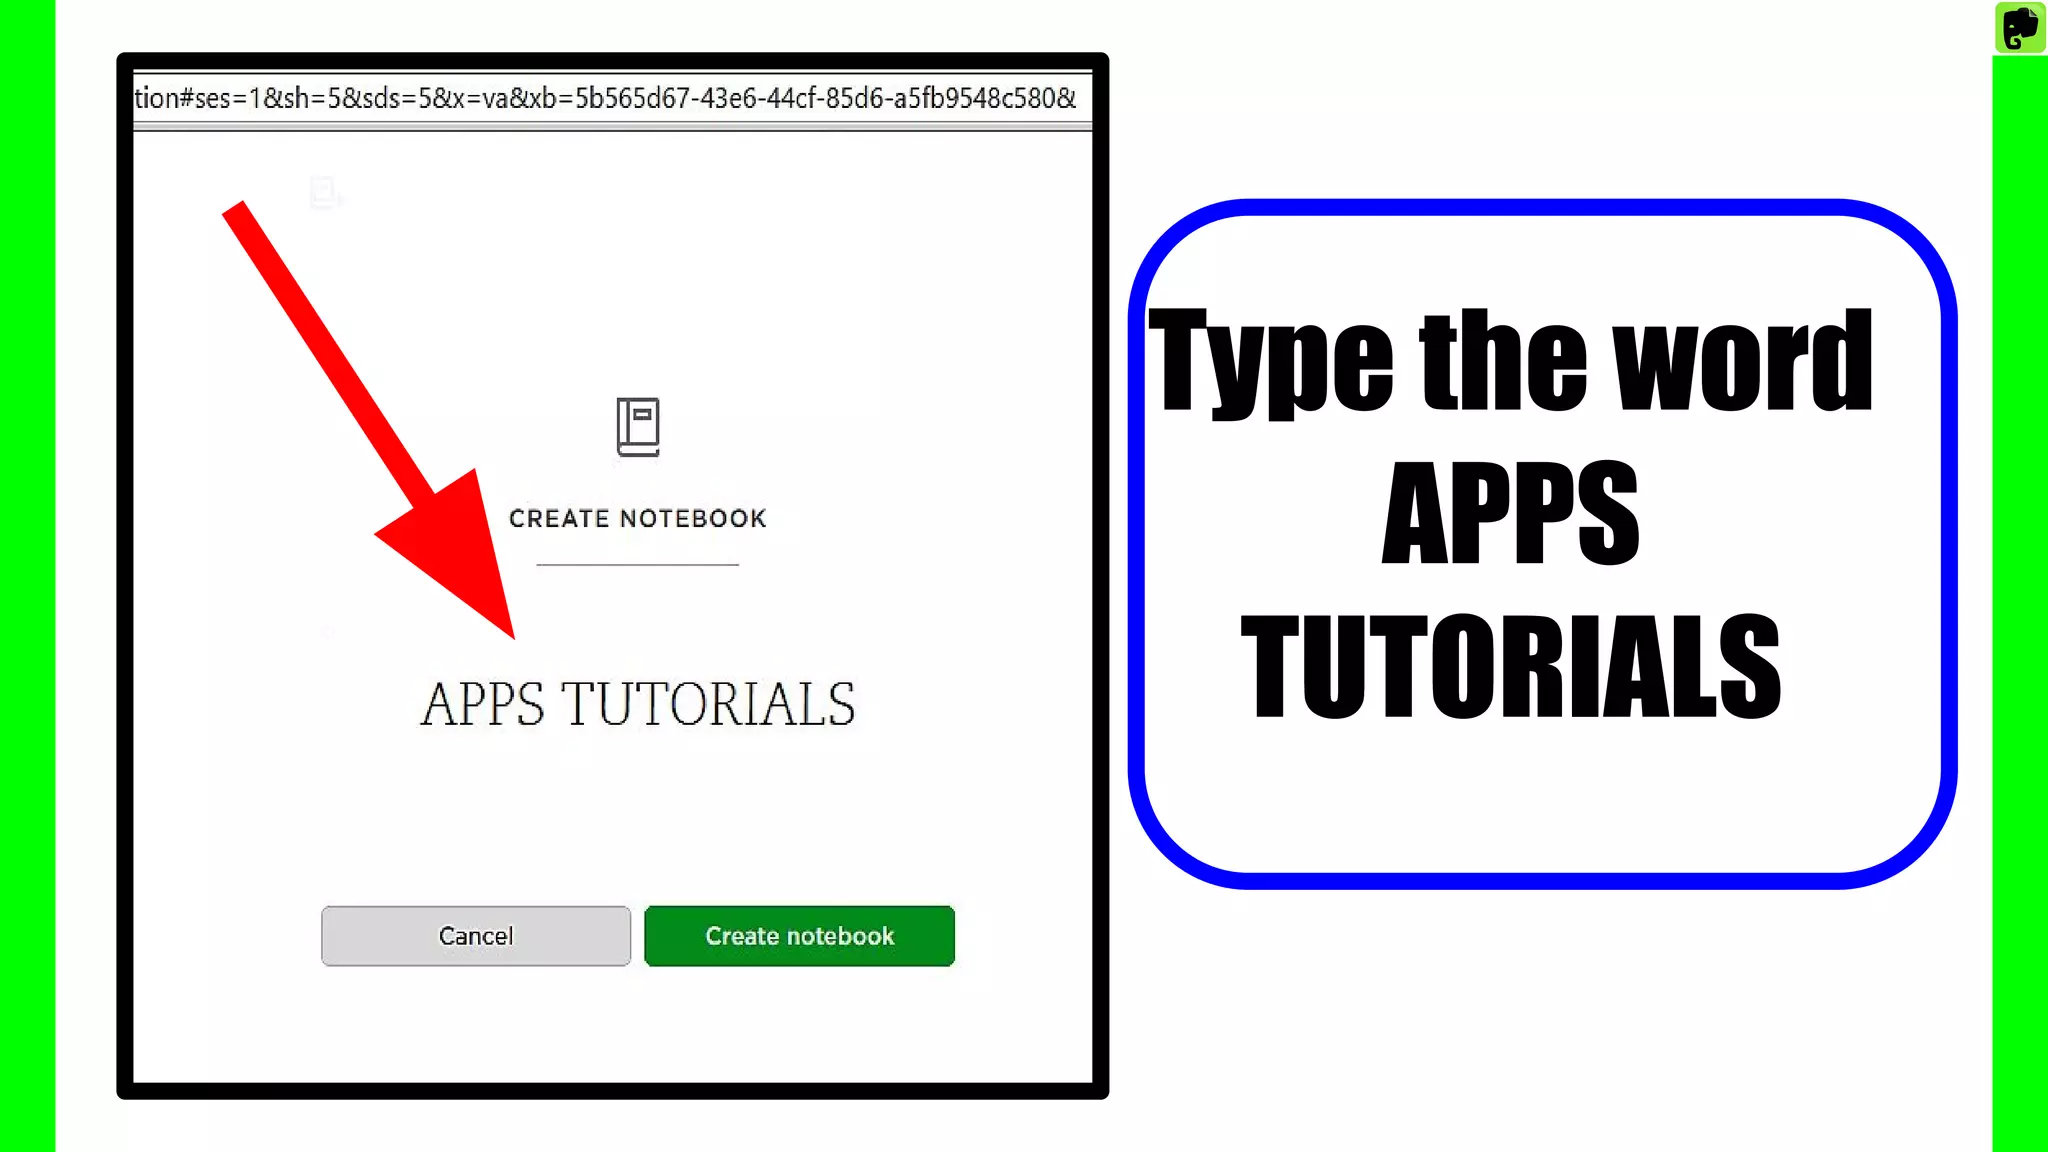
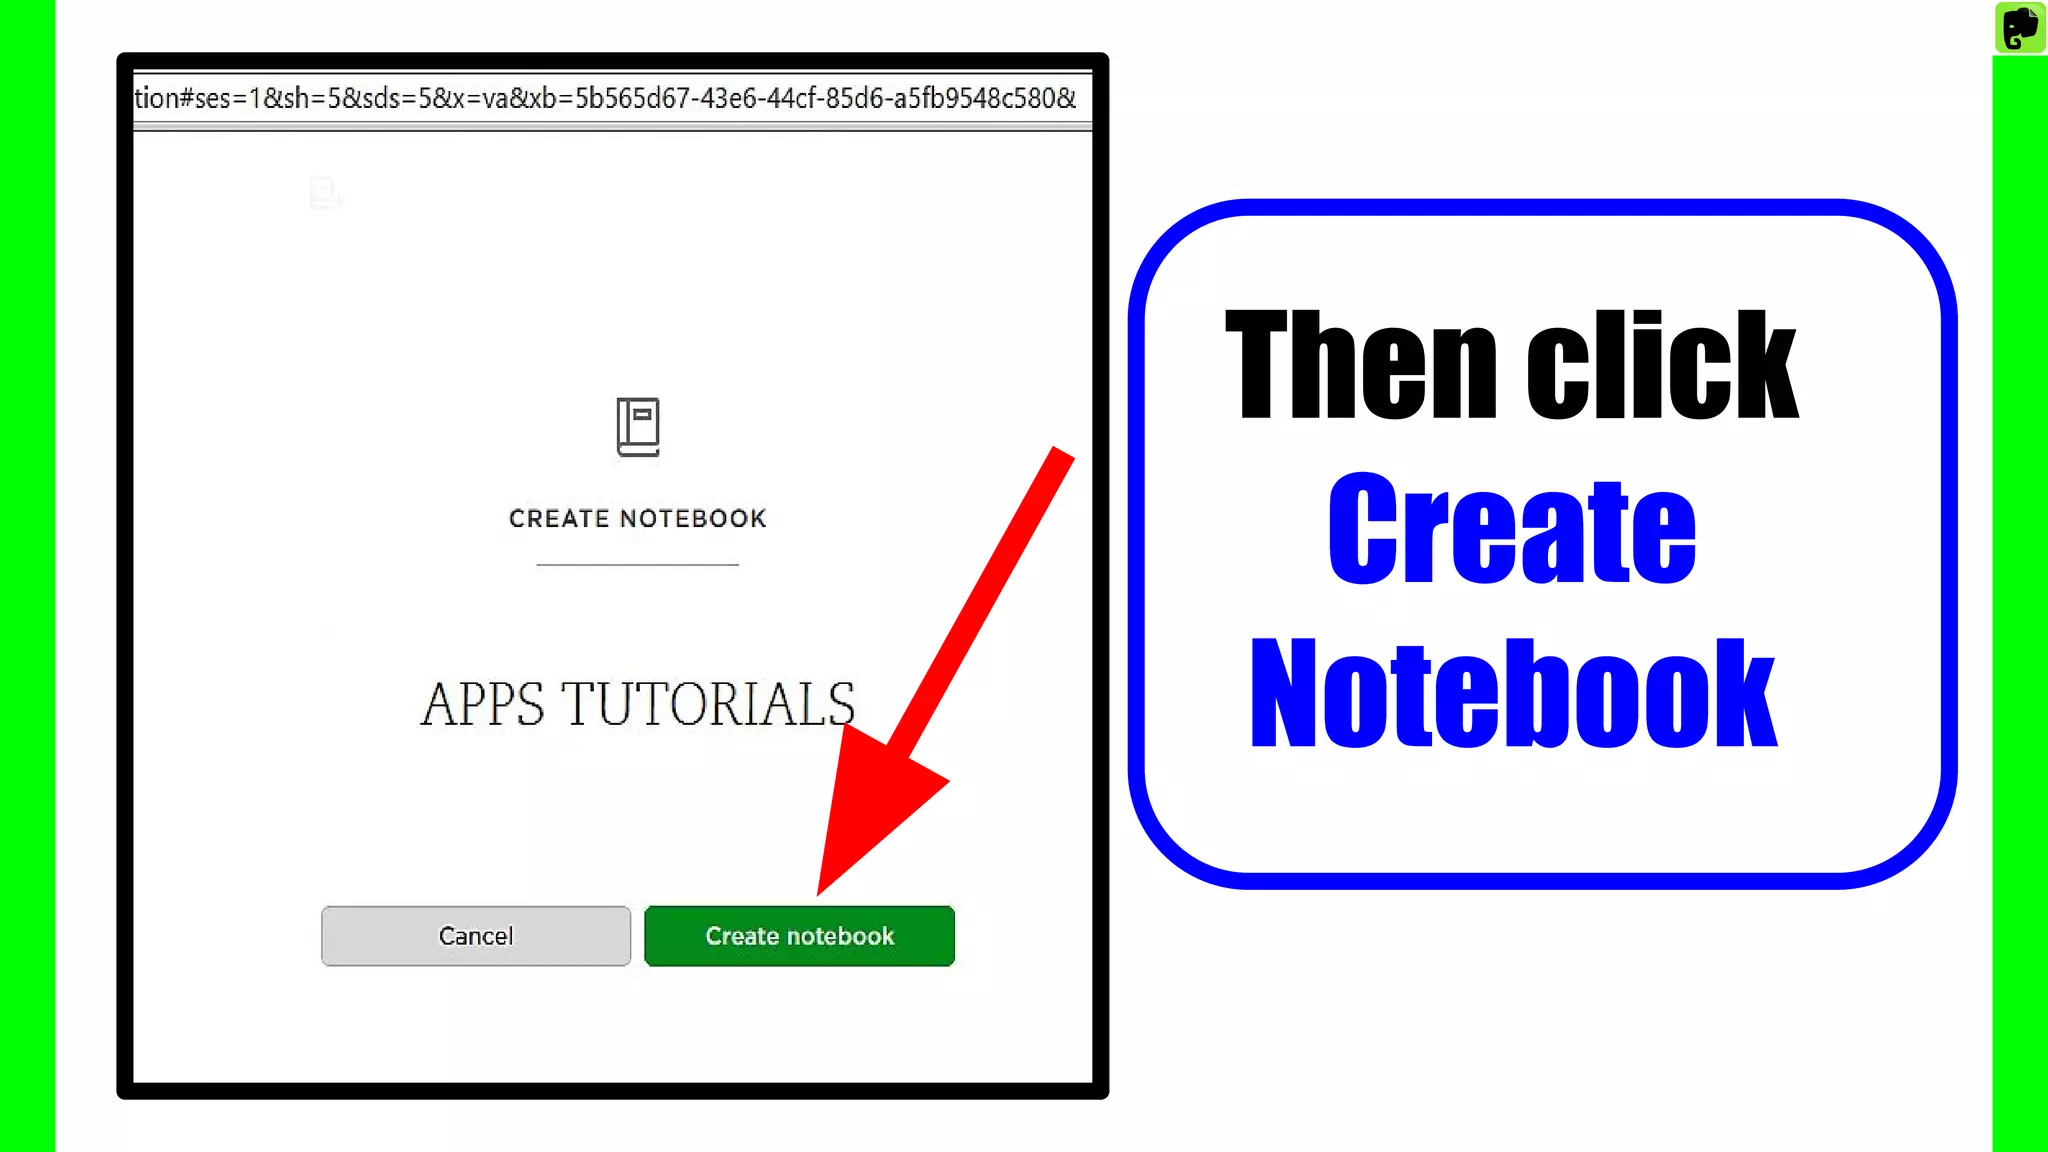
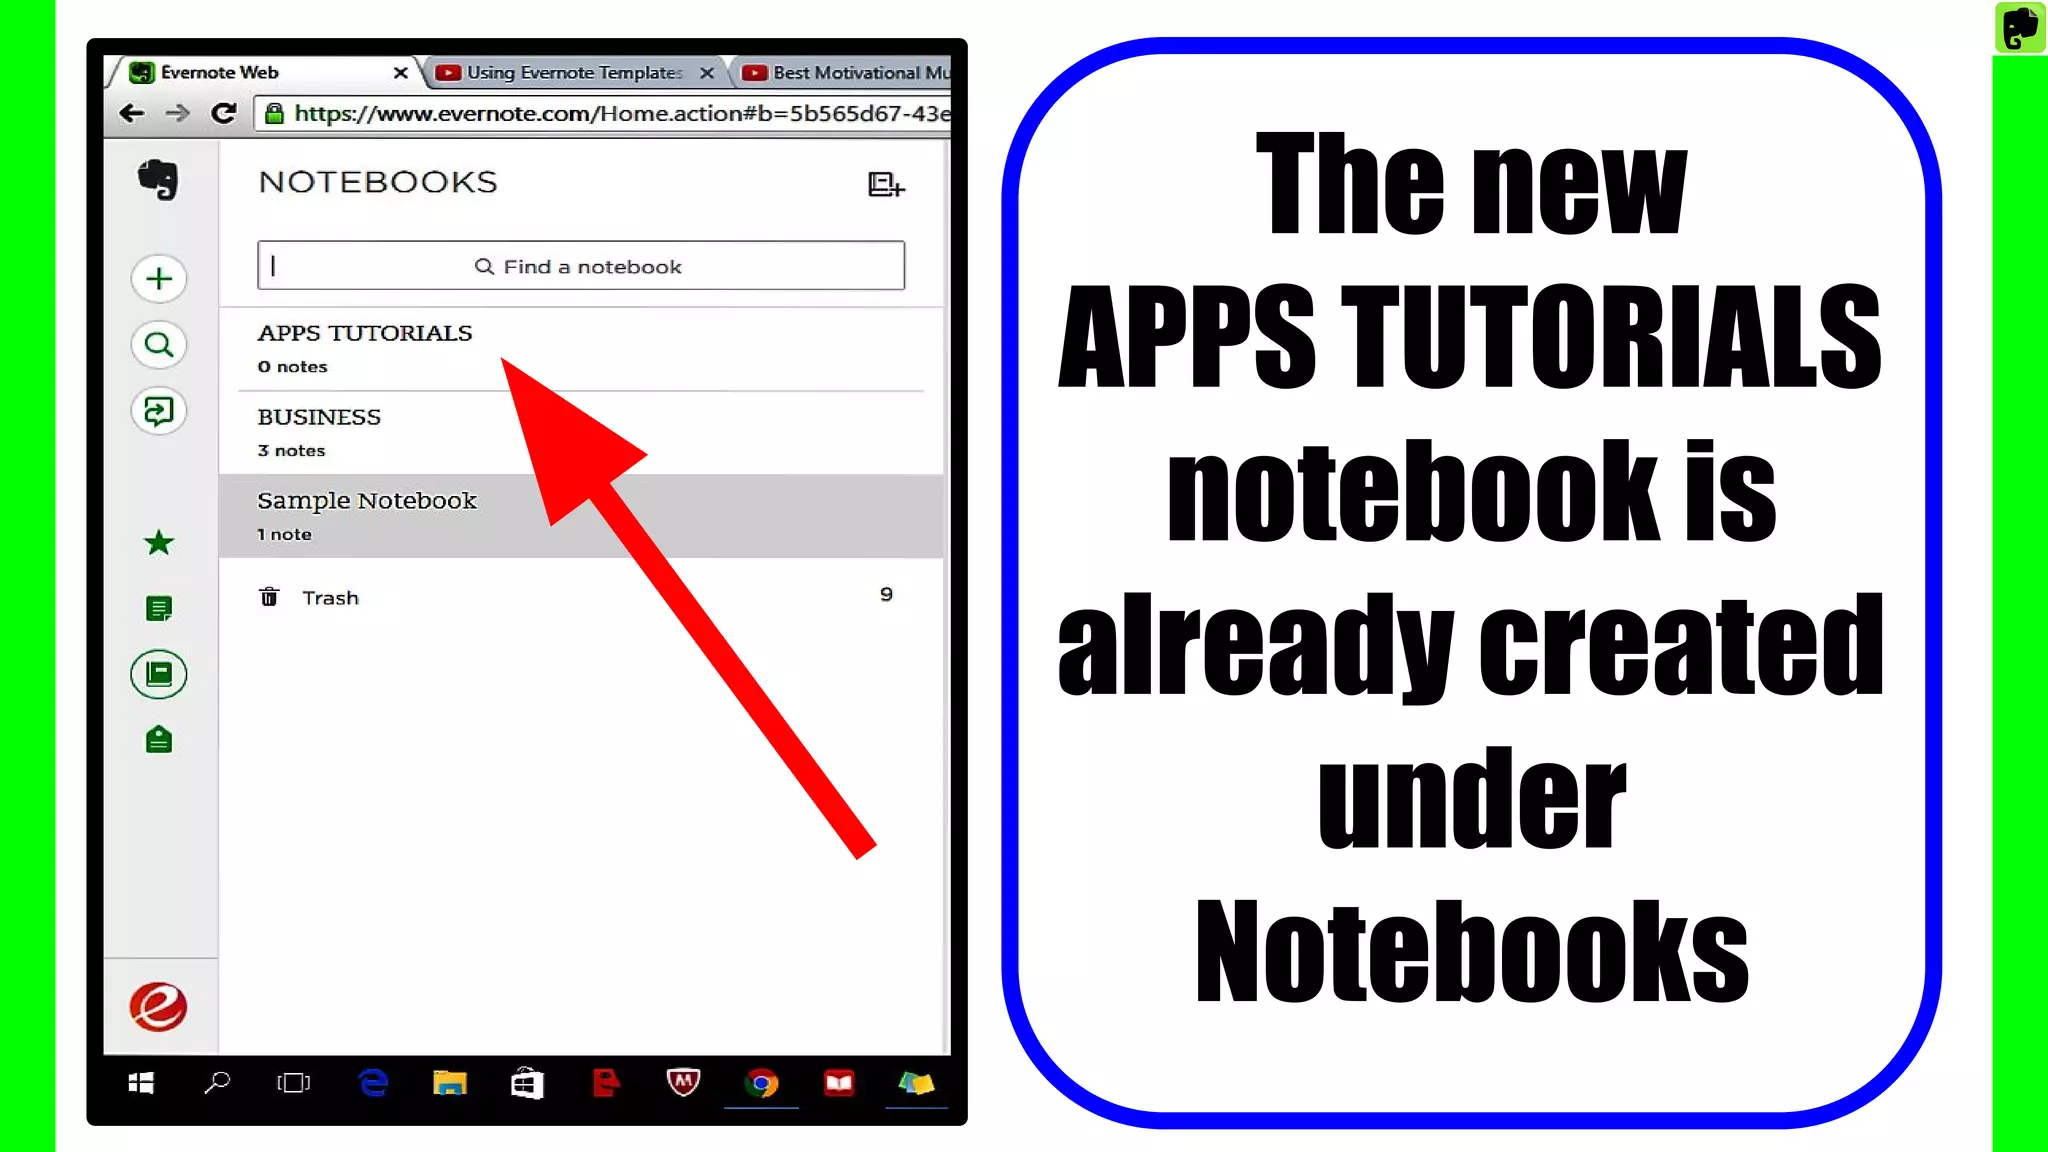
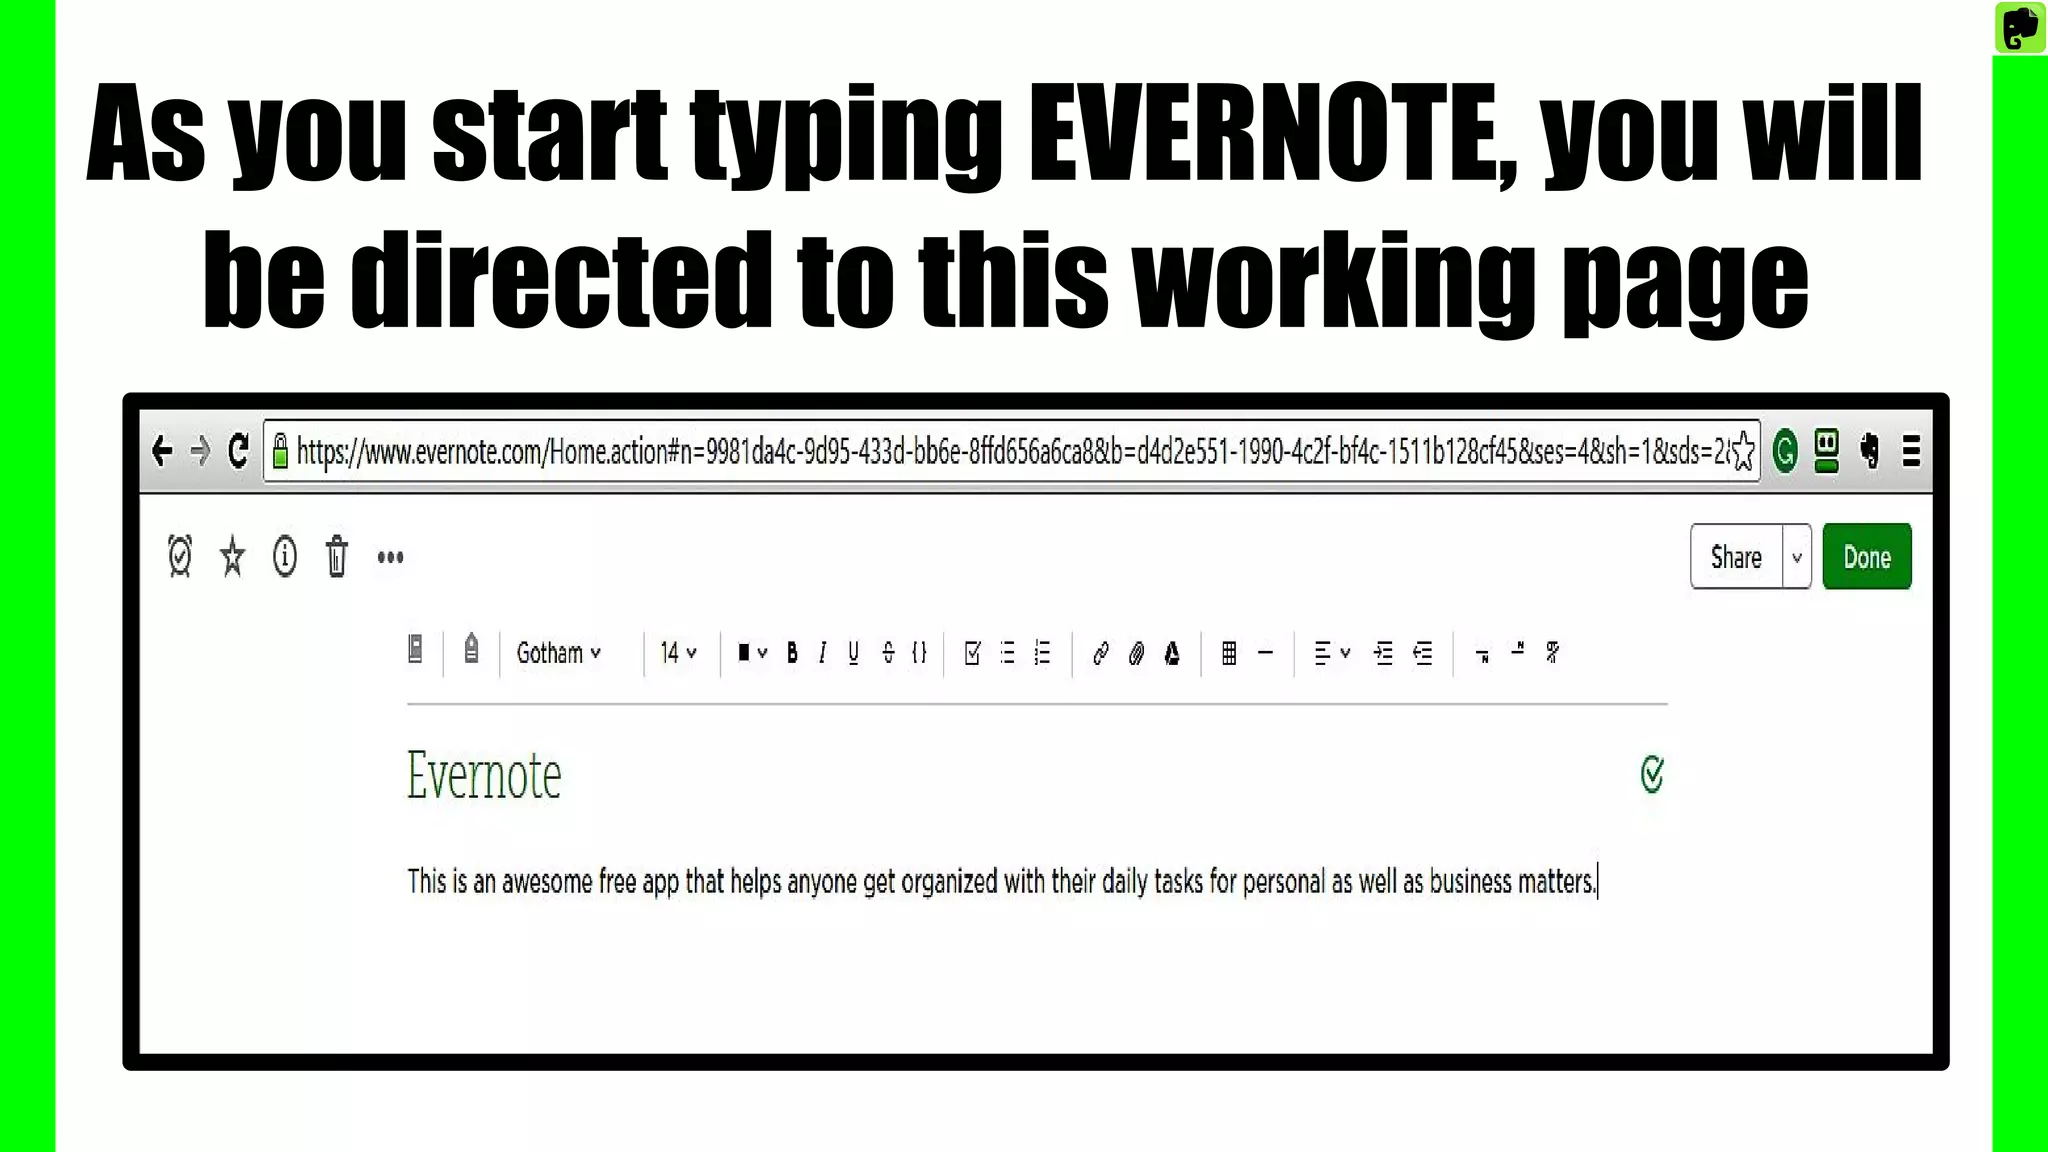
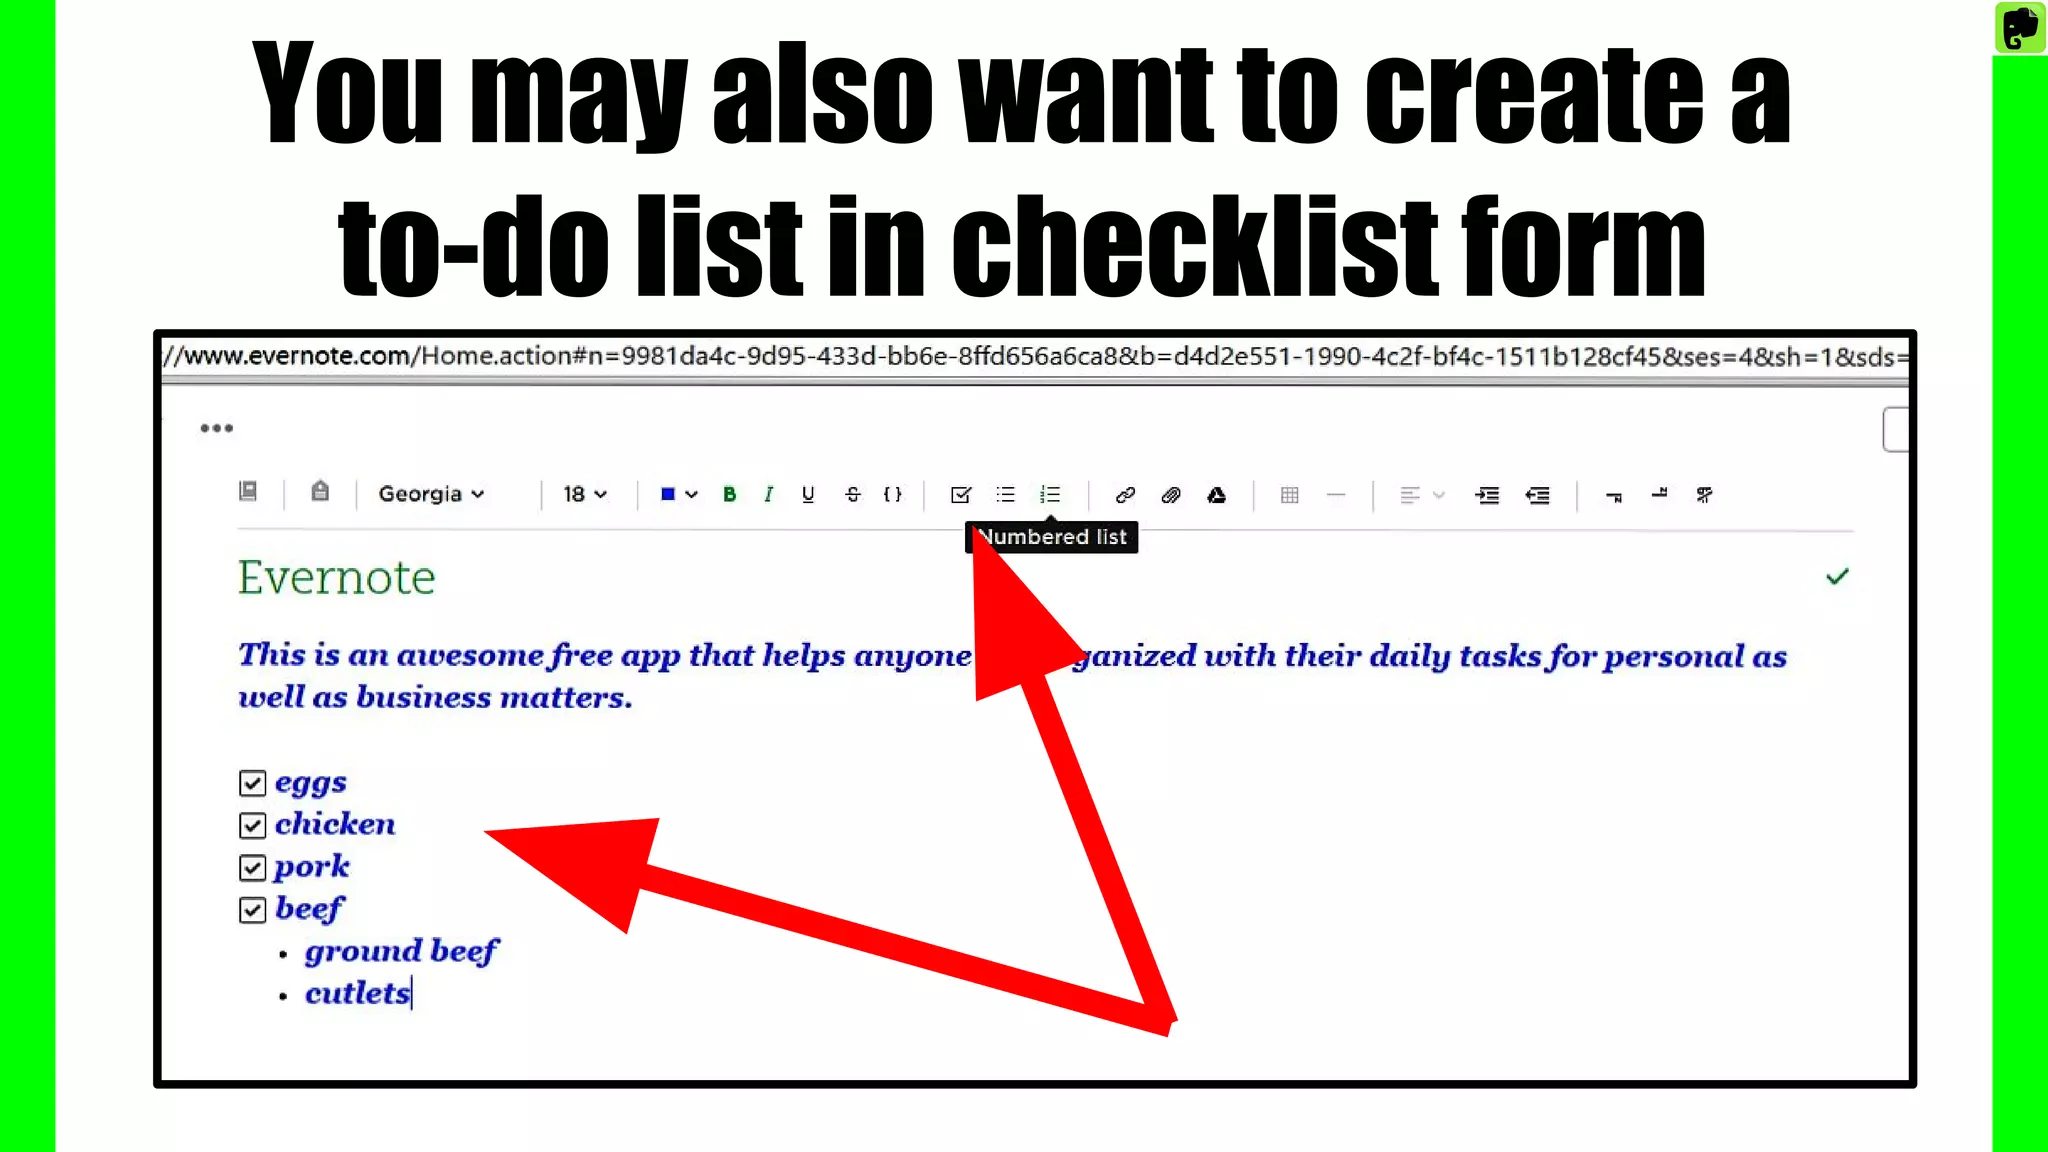
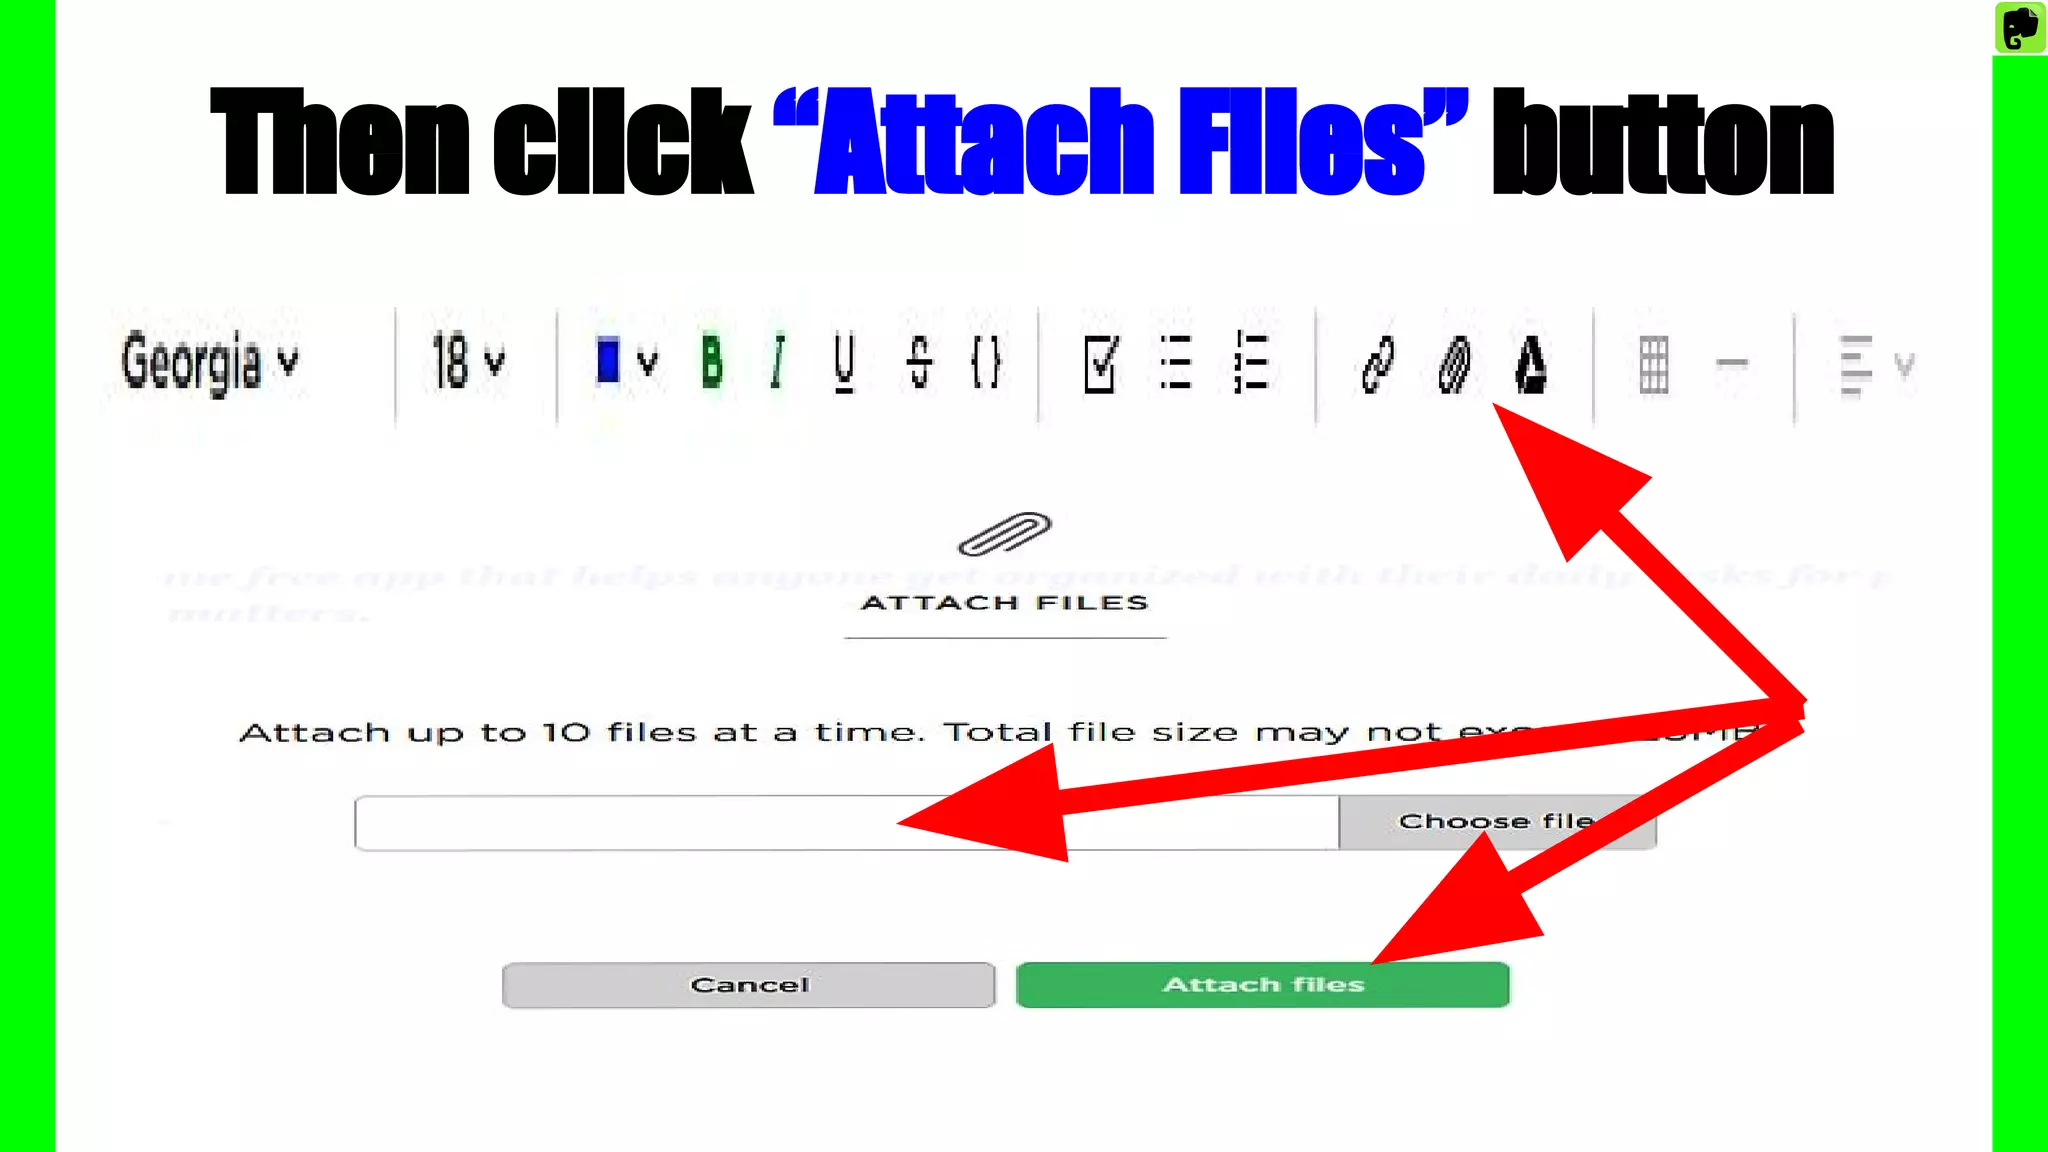
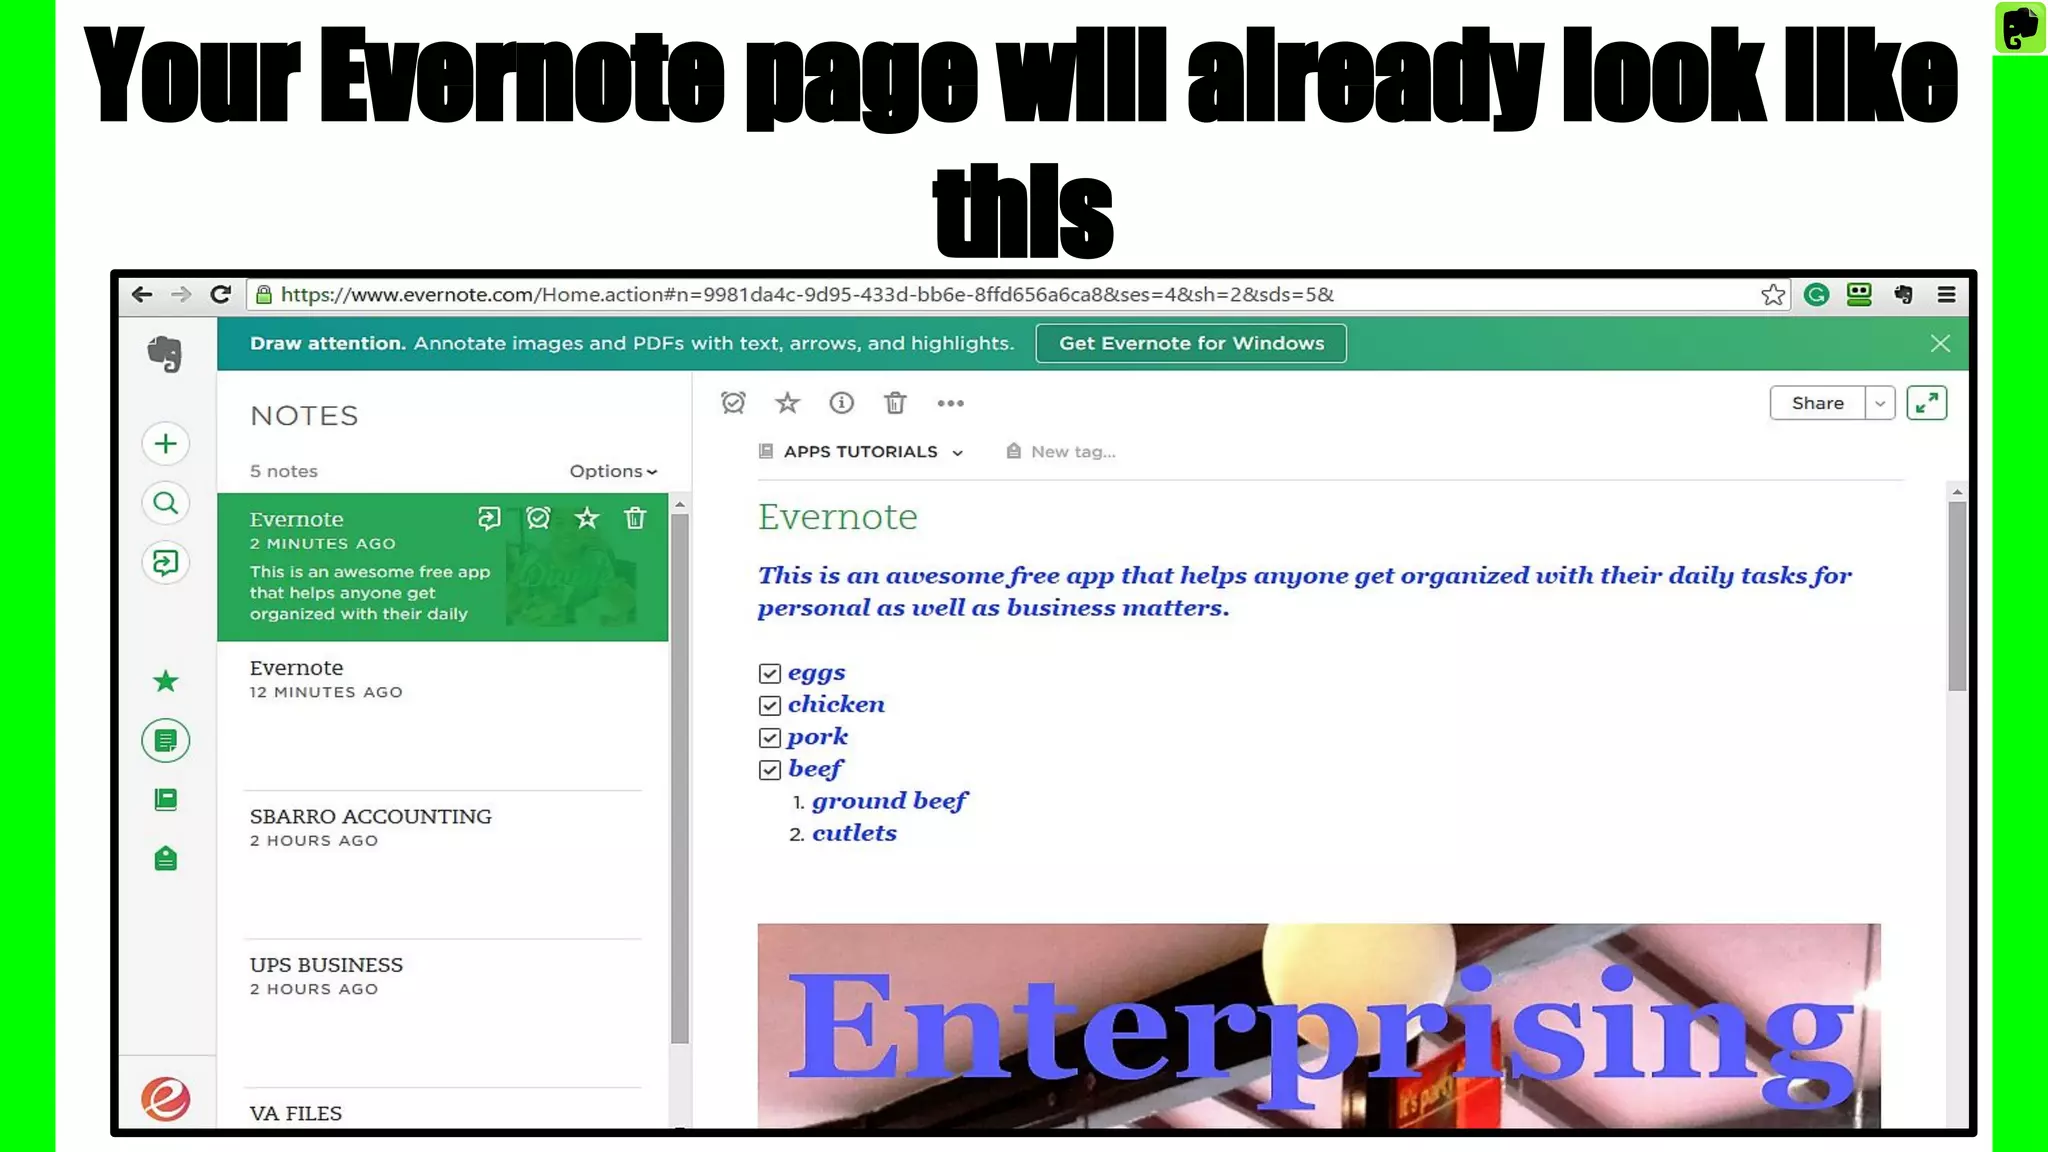
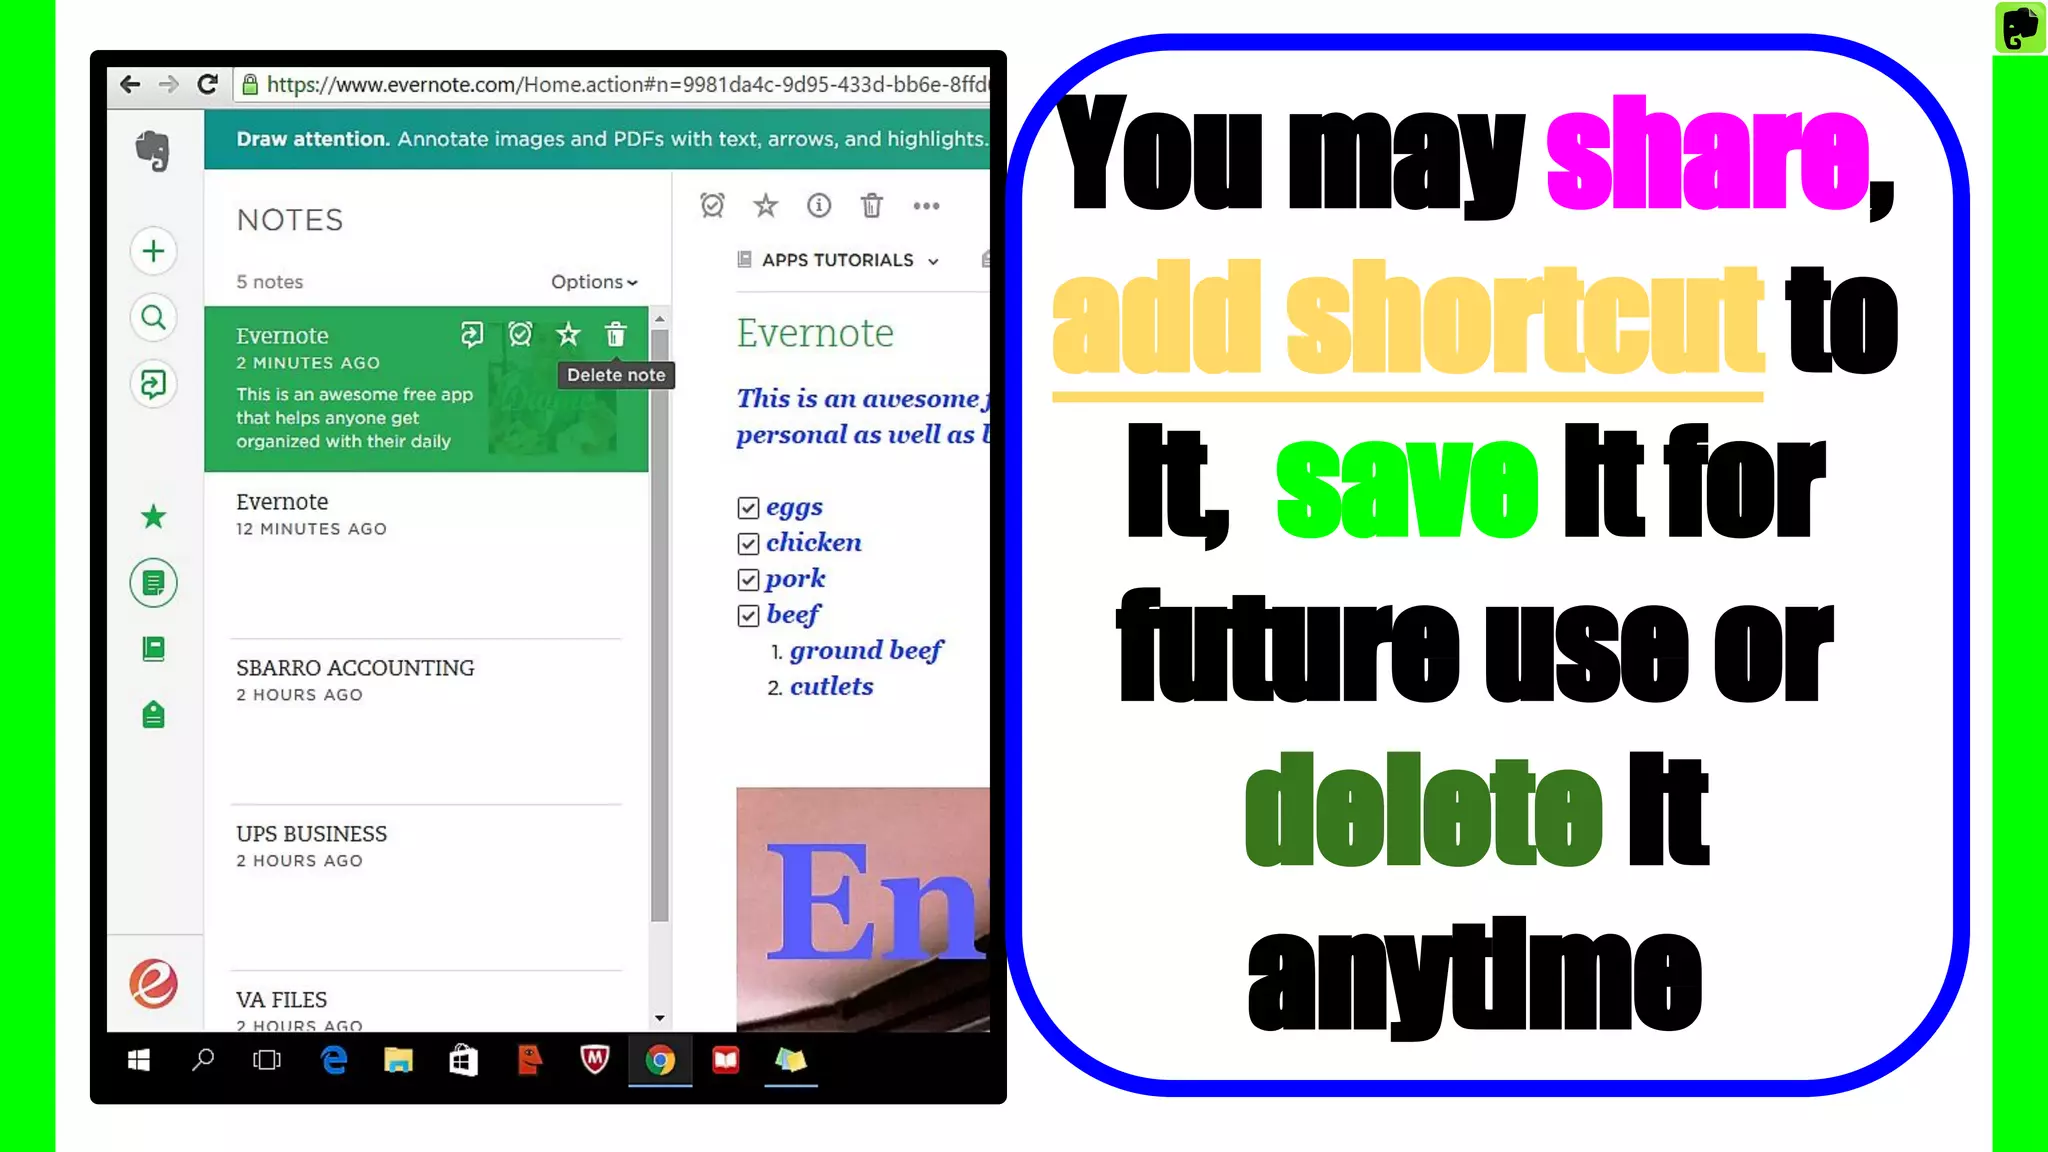
EVERNOTE TUTORIAL
IS
That is a huge elephant that
symbolizes how huge EVERNOTE
is in terms of its features and
capacity
CAPACITY
1. MAKE A NOTE OF IT:
Create a Project
Jot Down a Reminder
Snap a picture of a sketch
Anything you want it to be and it’s accessible
wherever you go, forever!
CAPACITY
2. FIND ANYTHING FAST
Whether it’s text
images, documents
or handwritten words
burried deep within your notes
Evernote makes it sure that everything saved are
easy to find.
CAPACITY
3. SHARE WITH ANYONE
Capture life’s moments and share
what matters with the people who matter to you.
Share BIG IDEAS by collaborating
with co-workers in a group notebook.
INSPIRED?
GETS YOU ORGANIZED!
Let’s get started and find out how
this elephant works!
First, go to your browser.
Today let’s use google chrome!
Type Evernote. Com on your
browser
Then click enter on your
keyboard
You should be directed to this
evernote page
Scroll your mouse down the page
Look for the SIGN UP BOX
Write your existing e-mail
Provide your password
Then click SIGN UP FOR FREE
You should be directed to this
Evernote Welcome Page
Click the Create your first note
button below
You will be directed to this
SAMPLE PAGE
Let’s Get Familiar with the
Features / Parts First
On the left side are the
FUNCTION BUTTONS
On the Second Column are the
NOTES you have created or clipped
The third column shows your
current working area
FUNCTION BUTTONS:
Click the + sign button to add
NOTES
Click the search button to
retrieve note/s
Click the chat button to share
your notes
Click the star button to create
shortcuts
Click Notes button if you want to
take a look, edit or share a note
This is the Notebook button that
contains your notes
This is the Tag button used for
an easy access to your notes
Under your function buttons is
your account
Under the NOTES column are
your NOTEBOOKS
It could be a notebook
containing the screenshots of
your bills & receipts
It could also be CLIPPED
ARTICLES from the web
A notebook containing your
SAVED PHOTOS / IMAGES
A TO-DO LIST notebook to help
you manage your time
Or a notebook containing all your
IDEAS / INSPIRATION you have jotted down
You can write any notes, attach
documents then put them under one
notebook
Under Notes you can also SET REMINDERS
to notify you of any schedule
Or Just Take Notes for anything
you want to remember
What modifications can be done
with the NOTES?
Click any of your notes then click the
share icon if you want to send to others
Click the alarm clock to set a reminder
regarding a particular note
Click the star icon to set a
keyword for easy access
Or just click the delete icon to remove
the note in your saved notebook
To be able to clip articles from the
web you need to get the web clipper
Click the Get web clipper button
now
Then you will be directed to this site
Click the Get web clipper for
CHROME button
You are now directed to the
Evernote Web Clipper Quick Guide
Click the Quick Start Video and watch
And find out these 3 steps on
how to use the CLIPPER
Just click on the web clipper icon if you find
news stories, research articles etc on the
web that you want to review later
Capture a screenshots of web pages
then select “annotate” tool to add
visual callouts
Click the web clipper to share and
discuss ideas with others or with
your team
At the end of the page, Click the
Get Evernote Web Clipper button
You are now directed to this page
Then Click verify email button
And you should see the black
elephant or web clipper icon on the
upper right corner of your browser
So these are the main functions
of an Evernote Web Clipper
Web Clipper is now asking you
to sign in
Write your e-mail and your
password
Click on the box before “Show
Results when you search the web”
Then click Sign In
Click on the Web Clipper to try saving
the web page you are currently in
Just simply click SAVE
Now it’s time to download
evernote
From the Getting Started page,
Click the green elephant
You should be directed to this page
If it did not start to download click ...
Wait a minute while downloading
Double Click the file when it’s done
Click Finish when Setup Wizard
has completed
You may read and print a copy of
this License Agreement
Click the box to accept the terms
in the License Agreement
Then click Install
Wait while Evernote is installing
Click Finish when done
FINISH
Check the Evernote icon on your
desktop
Double click the Evernote Icon
Fill up the boxes with your
email and password
Then click SIGN IN
You are now directed to this page
Choose what do you want to do
with evernote
From these choices, click for
Personal Organization
So, here is your Evernote page
Let’s apply all that we have learned
Click New Notes to create your
first Notebook
Hover your
mouse over the
Title your note
then write the
Title of your First
Notebook
Write
SBARRO
ACCOUNTING
as the title of
your First
Notebook
Automatically
it is already
saved under
NOTES column
Now, Click All Notes
Under the
NOTES column
you see that
there already
13 Notes
created
This time,
remove the
Sample
Notebook from
the NOTES
column
Click Sample
Notebook then
click the delete
icon to remove
from your file
When Evernote confirms, just
click the “delete” button
Click the Notebook
button on the left
then the plus sign
to create another
notebook
Type the word
APPS
TUTORIALS
Then click
Create
Notebook
The new
APPS TUTORIALS
notebook is
already created
under
Notebooks
Click on APPS
TUTORIALS
then click the
+ sign to add a
note within it
APPS TUTORIALS
will now appear on
top, while you may
start typing EVERNOTE
as the title of your
new note under it
As you start typing EVERNOTE, you will
be directed to this working page
On your status bar, you may modify
or edit your notes
Evernote is the title of
your new note
Then you may write your research
or blog ideas about it
Highlight any part of your note
then click the drop down menus
on top to modify or edit notes
Just click the drop down menu to
change font
Click the dropdown menu to
change the font size
Click the dropdown menu
to change the font color
You may also want to create a
to-do list in checklist form
Or you may opt to use a numbered list
If you are going to share a note and
want to add a file or image, just click the
paper clip icon
Click the file that you have chosen
Then click “Attach Files” button
In case you want to change the file you
have attached, simply click Remove
Then repeat the process, Click choose
file then Attach Files.
In your notes you may attach a file or
image like this
Then click DONE when finished
Your Evernote page will already look like
this
You may share,
add shortcut to
it, save it for
future use or
delete it
anytime
That is indeed huge!
With Evernote everything is made
possible…
There are a lot of possibilities that you
can do with it to make your work, your
business or just your personal life
ORGANIZED.

How to Use Evernote