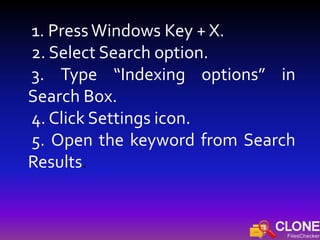
This strategy involves some risk of
accidentally deleting important
image files. There may be tons of
duplicate files on your PC so it won’t
be that easy to review each image
individually.
In order to manually remove
duplicate images from your PC it is
important to ensure drive indexing
is turned on. Drive indexing service
automatically indexes all files stored
on selected drives.
It thereby improves your experience
with Windows Search. You get
relevant and quick search results
whenever drive indexing is
periodically conducted. On the other
hand, if this feature is turned off you
may not be able to search relevant
files.
1. PressWindows Key + X.
2. Select Search option.
3. Type “Indexing options” in
Search Box.
4. Click Settings icon.
5. Open the keyword from Search
Results.
6. Indexing Options dialog will
open.
7. Click Modify button.
8. Click “Show all locations” button.
9. Make sure all drives are already
checked under “Change selected
locations” group.
10. Click OK | Close.
1. Double click Computer icon on
your Desktop.
2. Open a drive that contains
duplicate pictures. For example:
drive D:
3. Press F3 key to initialize Search.
4.Type the following keywords one
by one in to Search Box located on
top right corner:
.jpg
.jpeg
.png
.gif
5. After typing a keyword, you’ll get
Search Results.
6. Press Ctrl + F1 keys simultaneously
to expand the Ribbon, if it is
minimized.
7. ClickView tab.
8. Click “Preview Pane” icon under
“Panes” category.
9. Click “Group by” icon under
“Current view” category.
10. Select “Name” option from drop
down menu of “Group by” icon.
11. Also make sure that “Ascending”
option is selected in the same drop
down box.
12. Click “Details” icon under
“Layout” category in the same tab.
13. Now you’ll get all search
results sorted and grouped
name-wise in an ascending order
along with file details such as
name, date modified, type, size
and parent folder.
14. Duplicate image files will
appear side by side original
image files.
15. Compare all image file previews
to identify duplicates.
16. Select duplicate files:
Ctrl + Click: Select any files in non-
sequential manner.
Shift + Click: Select files in
sequence
17. Press Delete key of your
keyboard to move them to Recycle
Bin. Otherwise, move those files to
a new folder to review them again
and delete.
The tool named Clone Files Checker
automatically searches for duplicate
images on your PC.You’ve to specify
whether you want it to automatically
delete them or you would review
them and delete on your own.This is
the safest and quickest option due to
following reasons:
Duplicate image files are backed-
up automatically before deleting.
You can restore them anytime, if
you wish to do so. The scan process
is quick and instant. It searches
entire hard drive and removable
media such as USB Flash Drive
speedily. You won’t lose any file by
accident.
Advanced software algorithm
ensures only duplicate images are
deleted. If you’re hesitant to delete
duplicate files, you can move them
to a separate folder, or simply
move them to the Recycle Bin. Scan
history is recorded. You can export
the same in a Text File (.txt). It
supports variety of image files
including .jpg, .jpeg, .png, .gif, and
many more.
1. Download and install Clone Files
Checker.
2. Add directories to scan.
3. Set filter options, choose which
file types you want to be scanned.
If you want only image files
to be scanned, select “Custom”
option and check-up the “Images”
checkbox. If you want to scan all
sorts of files, select “All Files” option.
4. In the same filter options, specify
whether you want to exclude files
smaller/ larger than certain sizes.
5. Start the scan process.

How to remove duplicate files pictures

  • 2.
    This strategy involvessome risk of accidentally deleting important image files. There may be tons of duplicate files on your PC so it won’t be that easy to review each image individually.
  • 3.
    In order tomanually remove duplicate images from your PC it is important to ensure drive indexing is turned on. Drive indexing service automatically indexes all files stored on selected drives.
  • 4.
    It thereby improvesyour experience with Windows Search. You get relevant and quick search results whenever drive indexing is periodically conducted. On the other hand, if this feature is turned off you may not be able to search relevant files.
  • 5.
    1. PressWindows Key+ X. 2. Select Search option. 3. Type “Indexing options” in Search Box. 4. Click Settings icon. 5. Open the keyword from Search Results.
  • 6.
    6. Indexing Optionsdialog will open. 7. Click Modify button. 8. Click “Show all locations” button. 9. Make sure all drives are already checked under “Change selected locations” group. 10. Click OK | Close.
  • 7.
    1. Double clickComputer icon on your Desktop. 2. Open a drive that contains duplicate pictures. For example: drive D:
  • 8.
    3. Press F3key to initialize Search. 4.Type the following keywords one by one in to Search Box located on top right corner: .jpg .jpeg .png .gif
  • 9.
    5. After typinga keyword, you’ll get Search Results. 6. Press Ctrl + F1 keys simultaneously to expand the Ribbon, if it is minimized. 7. ClickView tab. 8. Click “Preview Pane” icon under “Panes” category.
  • 10.
    9. Click “Groupby” icon under “Current view” category. 10. Select “Name” option from drop down menu of “Group by” icon. 11. Also make sure that “Ascending” option is selected in the same drop down box. 12. Click “Details” icon under “Layout” category in the same tab.
  • 11.
    13. Now you’llget all search results sorted and grouped name-wise in an ascending order along with file details such as name, date modified, type, size and parent folder. 14. Duplicate image files will appear side by side original image files.
  • 12.
    15. Compare allimage file previews to identify duplicates. 16. Select duplicate files: Ctrl + Click: Select any files in non- sequential manner. Shift + Click: Select files in sequence
  • 13.
    17. Press Deletekey of your keyboard to move them to Recycle Bin. Otherwise, move those files to a new folder to review them again and delete.
  • 14.
    The tool namedClone Files Checker automatically searches for duplicate images on your PC.You’ve to specify whether you want it to automatically delete them or you would review them and delete on your own.This is the safest and quickest option due to following reasons:
  • 15.
    Duplicate image filesare backed- up automatically before deleting. You can restore them anytime, if you wish to do so. The scan process is quick and instant. It searches entire hard drive and removable media such as USB Flash Drive speedily. You won’t lose any file by accident.
  • 16.
    Advanced software algorithm ensuresonly duplicate images are deleted. If you’re hesitant to delete duplicate files, you can move them to a separate folder, or simply move them to the Recycle Bin. Scan history is recorded. You can export the same in a Text File (.txt). It supports variety of image files including .jpg, .jpeg, .png, .gif, and many more.
  • 17.
    1. Download andinstall Clone Files Checker. 2. Add directories to scan. 3. Set filter options, choose which file types you want to be scanned. If you want only image files
  • 18.
    to be scanned,select “Custom” option and check-up the “Images” checkbox. If you want to scan all sorts of files, select “All Files” option. 4. In the same filter options, specify whether you want to exclude files smaller/ larger than certain sizes. 5. Start the scan process.